Leaderboard


Popular Content
Showing content with the highest reputation since 06/11/26 in all areas
-
Love the way this is coming out. its been a challenging balance to thread between making everything neat and tidy and making sure I remember its a race car and needs to be functional. decided to polish the intake manifold and turbo, which looks great but upkeep is gonna be a challenge. exhaust is mostly done and welded. need to make a fancy tip for the back. wrapped the downpipe and mid pipe. need to pull the manifold and wrap that too. originally made a open dump wastegate but then changed it up to recirc it because we have a couple tracks with some noise restrictions. I'll order another v band and wastegate outlet so i can cap the exhaust and run it open if the track doesn't have a dB restriction. Fuel system is done. bulkheaded thru the floor. 3d printed some mounts and have it mounted along the floor. injectors are in. got most of the turbo lines made up. opted for the turbosmart oil pressure regulator for the turbo. i've never dealt with a turbo this small and man its a challenge to fit everything. drain is really tight. hits v band and clamp but think i may have the puzzle solved to make it work. fuel fill is welded up. went with stainless to mitigate the risk of corrosion with ethanol.
 3 points
 -
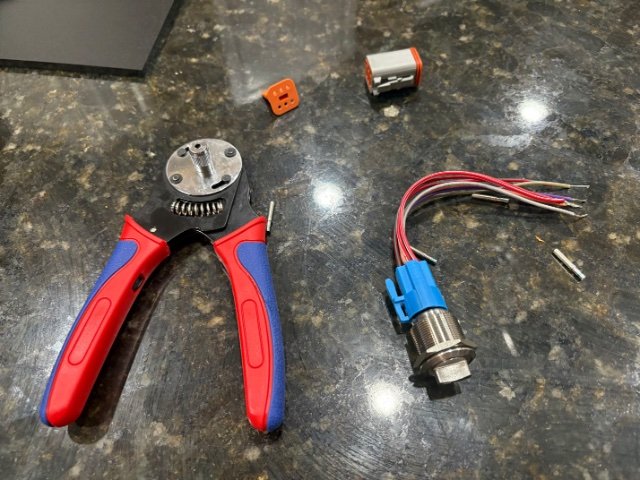
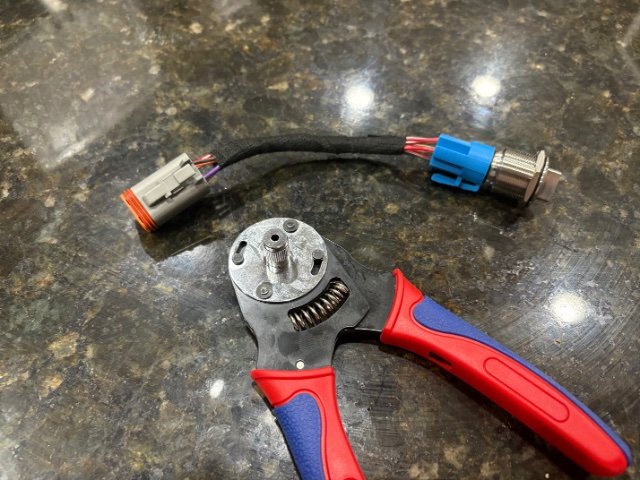
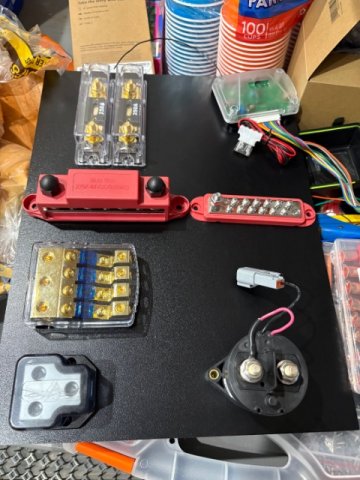
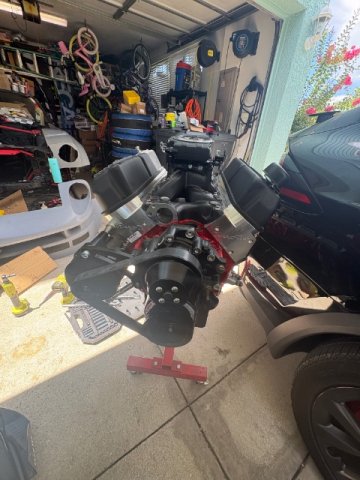
I got the correct rotation, just by luck. I bought the water pump last year, before I got the pulley kit, didn’t really understand the difference at the time. Got the belt/pulley kit and since no other accessories, standard rotation was what I needed 😅. 100% of old wiring is gone, using sniper for EFI, got a lights/blinker kit/harness and I’m making/piecing together everything else. I discovered deutsch connectors the other week and bought a kit. These are great for wiring switches and other small wiring. This is a switch for my Wilwood electronic parking brake. I’m not ready to full on wire the car yet, just evaluating what I have and making a big picture plan so when I’m ready it should be a lot easier.
2 points
-
06-14-2026 ATLAS Z UPDATE: I started the day by cutting and prepping a new throttle to be welded up, keeping the angles for leverage, but removing and bends to make it straight. the one I did before did not work. It needs the bends to create leverage, and a spring mounted throttle foot pad to work correctly. the factory one is bent, so pie cuts were used to straighten it, then chopping and shortening it was required. It now heads to Wagner Fabrication to be welded up and then I will paint and install later. Then I Mounted my dual catch cans. I then mounted up my front blinkers and then went back to the catch cans....tying all the lines in, One line is black braided, and as you can see, I masked off a portion of it and painted it with silver engine block paint to help it match the others. Better than not at all! I also wiped down my forward metal dash piece and set it in then and then touched up some fittings in silver to get away from too much black. I then took my blinker surrounds that have been repaired and sitting in primer forever and sanded them up smooth with some 320 grit sandpaper, and painted them with gloss black rustoleum 2X, and then a few coats of Krylon clear. Also of note, I did cut and place a PCV valve in the breather line coming from the intake back to the catch can. So....a lot of little things today, to include tying it all up and cleand up under there. Definite steps forward today! PICS:
2 points
-
UPDATE: I had great luck with the distributor offered by ZCARDEPOT. Super simple to install and it worked first time, right out of the box. Fun was had by all! While it is more expensive it does not require any change to the current wiring or ballast resistor. The one I posted from ebay above required several changes that I did not care to do.2 points
-
I am working on a 1972 240z (build date 11/71) with my son and we have hit a small snag with the combination switch. Everything about the switch is working well except the washer motor wiring. I press the button and nothing happens. Now, I know the pump works as it is new and I have tested it with a 12v battery. I have also tested the all wires on the switch, both on the connector and an additional blue/white wire that resides outside the connector and is currently unconnected. As it turns out, this blue/white wire that is outside the connector is the one that goes to 12v when the washer button is pressed (see pics with wire circled). I have no clue where it should be connected as there is no obvious connection point. BTW, the switch is unmolested, was fully reconditioned and works well. The car came to us largely as an unassembled project and we have made excellent progress to this point. I am sure I am missing some connection point for this wire but it is not obvious where to connect it. Any help is appreciated. Thanks.
1 point
-
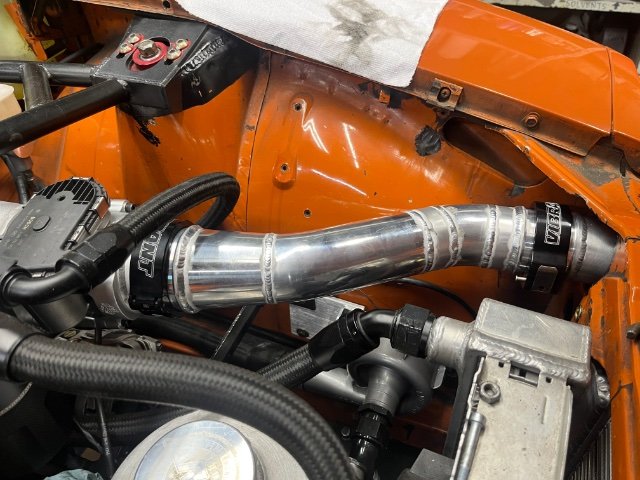
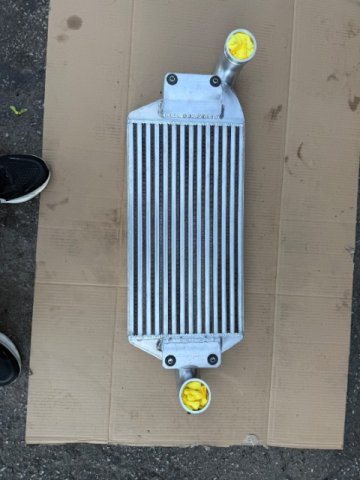
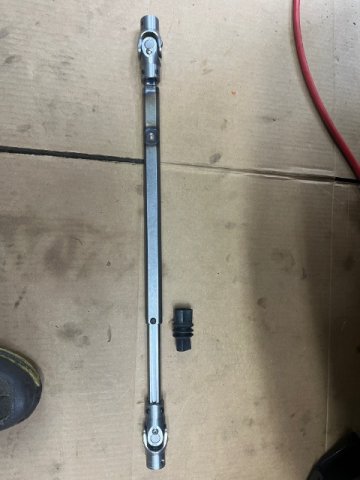
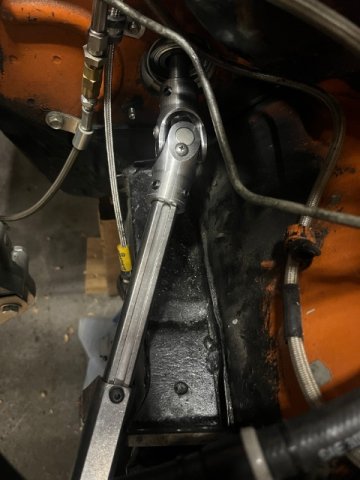
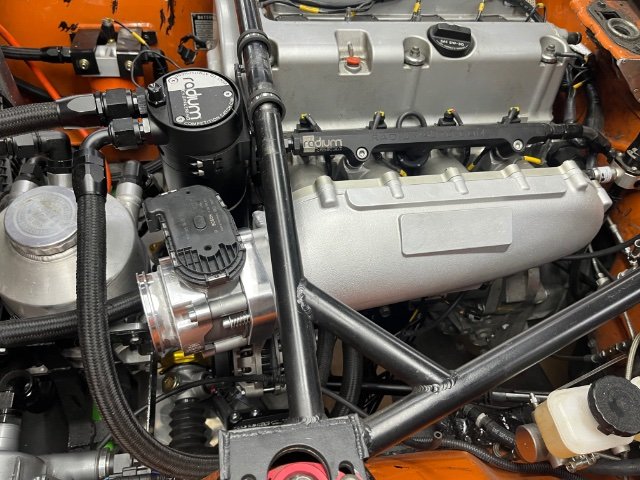
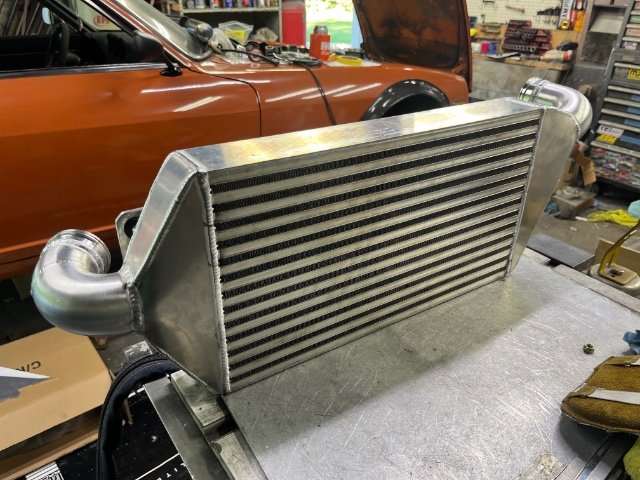
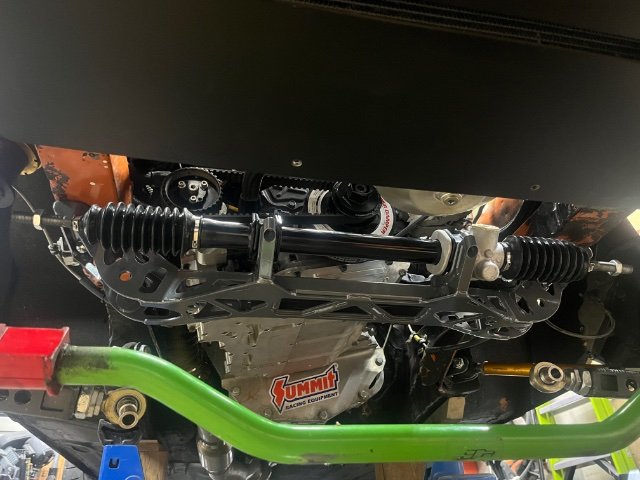
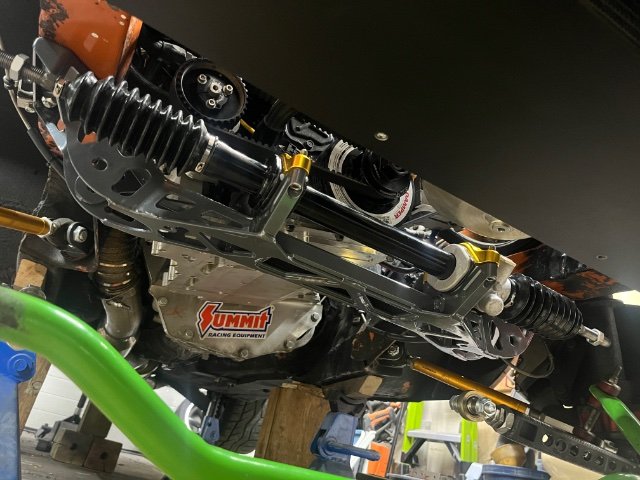
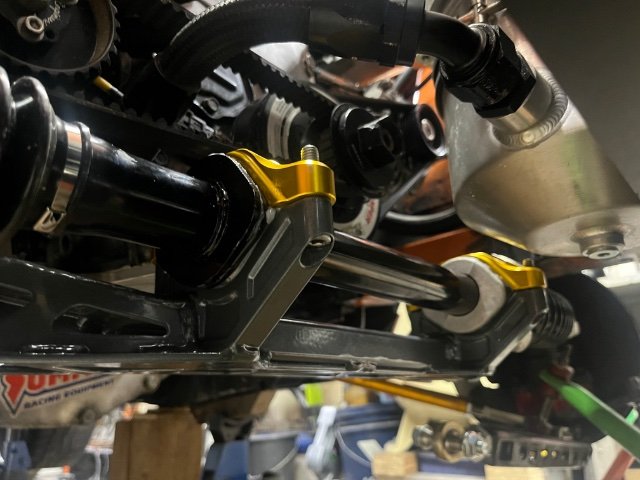
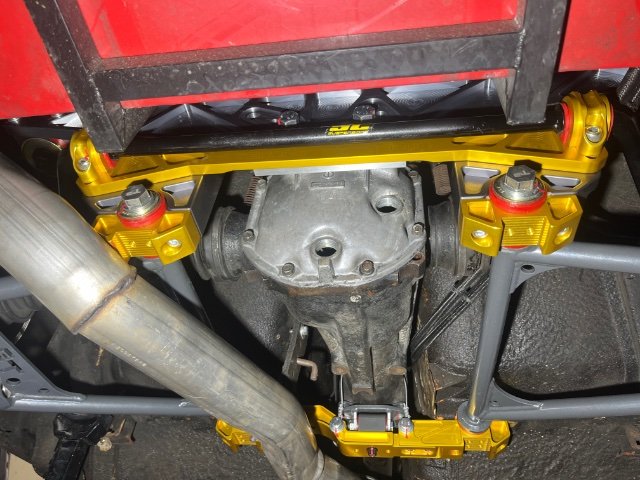
Some updates. We installed a larger clutch master that was very easy to install. It solved the gear release problem with the cd009. We redid the steering shaft and motor mounts. I didn’t like the way it was installed before. Will know if it’s better in about a week or two. Installed a new Garrett intercooler to replace the eBay special I had. We reduced the intercooler pipe size down to 2.5” to see if it will help with spool. Installing a 14psi spring in the wastegate actuator to help hold boost. Will dyno again soon. We also removed the spacer from the skunk2 intake and modified the entry angle. Replaced all the intercooler pipe couplers with the vibrant hd clamps. The old pipes kept blowing off. installed dapper led seven lights. So much brighter than the halogens I had. We installed the rest of the rear t3 suspension bits. we also installed a new t3 steering rack and crossmember, along with BRE mirrors.
1 point
-
Do you have a forward rotation water pump? Most are reverse rotation with serpentine belt. If you try to run a reverse rotation pump forward, you won't be circulating water through the engine. Also, I would start fresh with the wiring. Don't try to reuse the original fuse block or any of the under dash wiring.1 point
-
Got fluid in and bled the brake lines. Smell leak at the line lock, tightened up and everything looks good. Been playing around with the wiring, seeing what I have and how I’m going to put it all together, got some ABS sheets and going to make up some panels to organize everything. Also got the alternator and bracket on and test fitted the sniper.
1 point
-
I don't have experience with the EPS. I am interested. I do autocross with wide tire 275/35-15 on 15x10 wheels on all four corners. While moving, the effort to turn the steering wheel isn't terrible. I try not to turn the wheel while the car isn't moving because I feel that I might over stress the steering rack. The 280Z has a slower rack than the 240Z. For autocross, I would swap to am240Z rack. I measured the difference between the racks in a thread several years ago. Going from memory, the 280Z rack moves 1.59 inches per revolution of the steering wheel, and the 240Z rack moves 1.81 inches per revolution of the steering wheel. The faster rack would benefit more from the power steering, but is usable without as long as the vehicle is moving.1 point
-
06-13-2026 ATLAS Z UPDATE. Today I finished screwing down the carbon fiber and installed the front flares. Pretty much all done. Later I will tape off both sides of each edge and lay in a coat of black pure silicone....then pull the tape off leaving straight lines and let it harden up. Then some paint correction and some clear and the body will be done! I gathered up some parts I am taking to get wrapped in dry carbon fiber (front bumper, cowl, and rear spoiler). PICS:
1 point
-
The factory 2006 GM ECU, called a "P12". Jeremy Gonyou at Lime-Swap converted my engine harness into a stand alone setup and cracked my ECU and programmed it for the turbo. By using a factory setup I retain the variable valve timing and the wireless throttle. 60lb/hr Deka fuel injectors and with an 8 psi spring in my external wastegate.....around 350-400 hp at the crank. Very mild setup.........well over 300 at the wheel, which in these cars is sufficient.1 point
-
You're probably not far off the mark at that number. Used LSD R180's regularly sell for $700-800; and it seems that R200's long-nose are not so easy to get anymore (IMHO). The real challenge may be finding the buyer that wants the entire lot of parts, especially both diffs. You might have better luck if you're willing to sell pieces individually. (Shipping costs could be a bear...consider looking at discount freight shippers like Blue Lane Freight through Fastenal.) Good luck with it...you've got some nice piece-parts there.1 point
-
a project car is never "done" but we sure do love upgrades. You dont realize how small these old cars are until you park next to something modern. your bosses BMW was probably huge next to the Z1 point
-
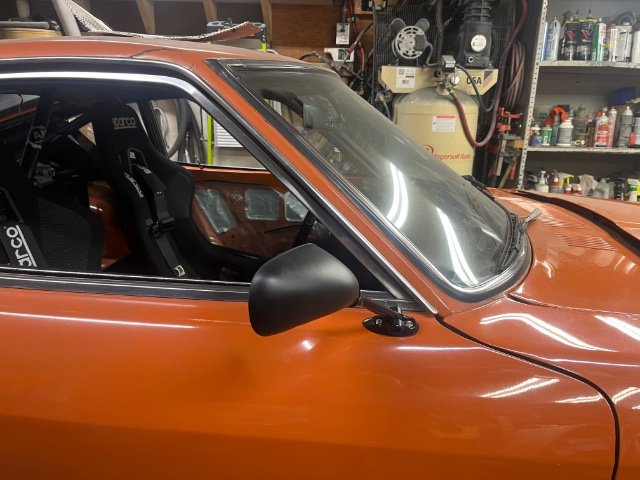
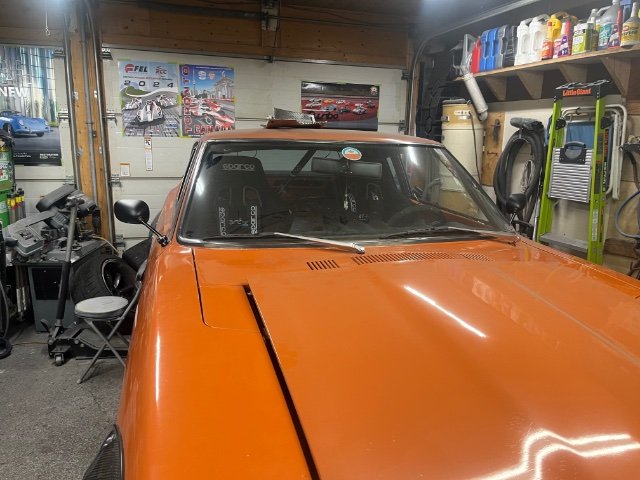
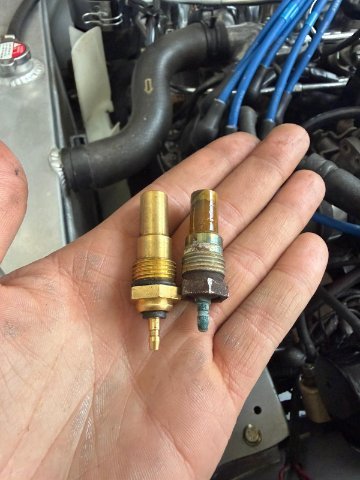
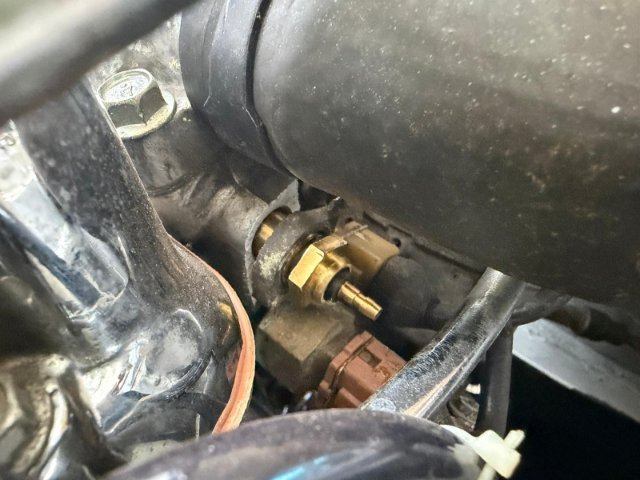
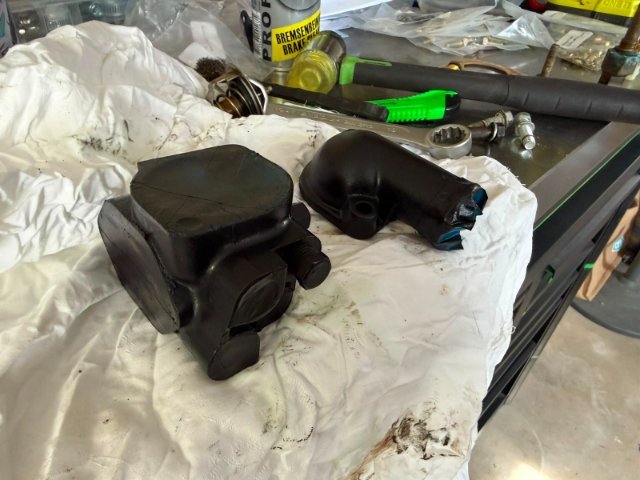
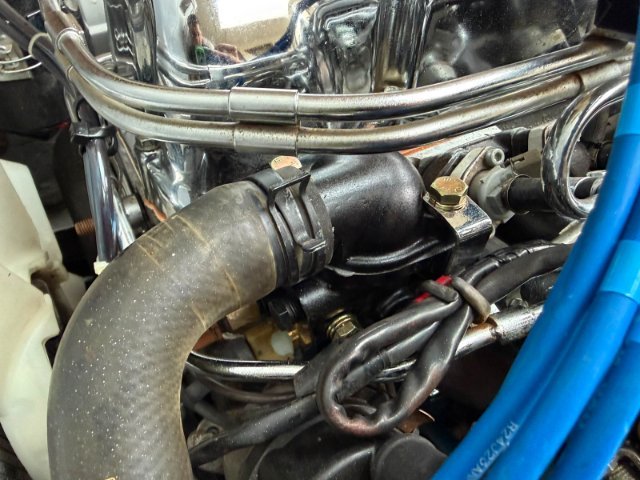
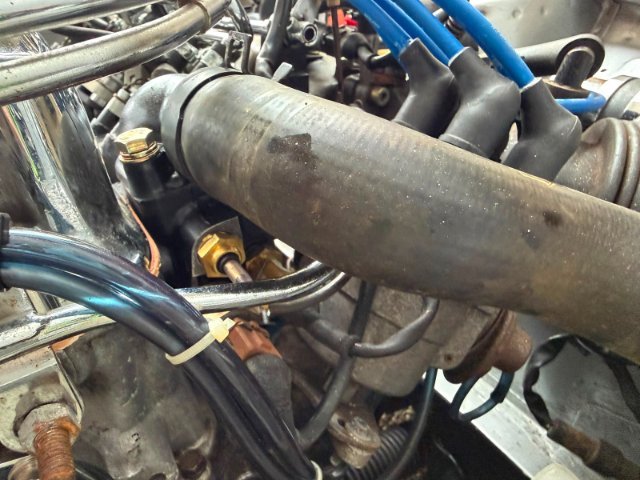
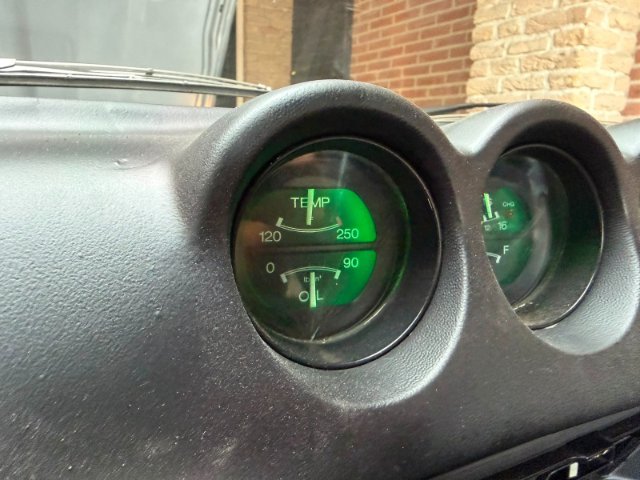
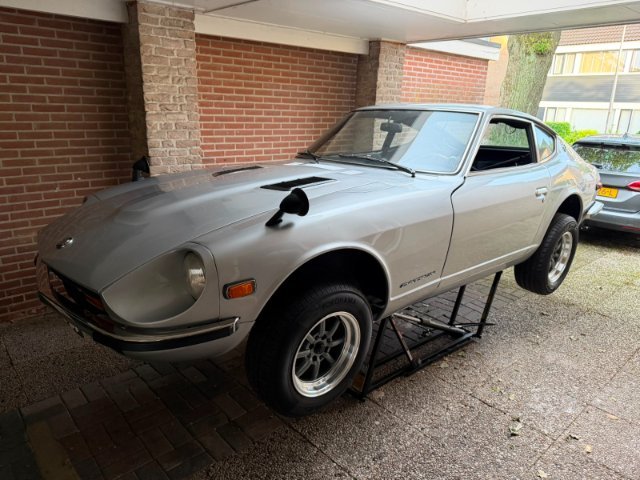
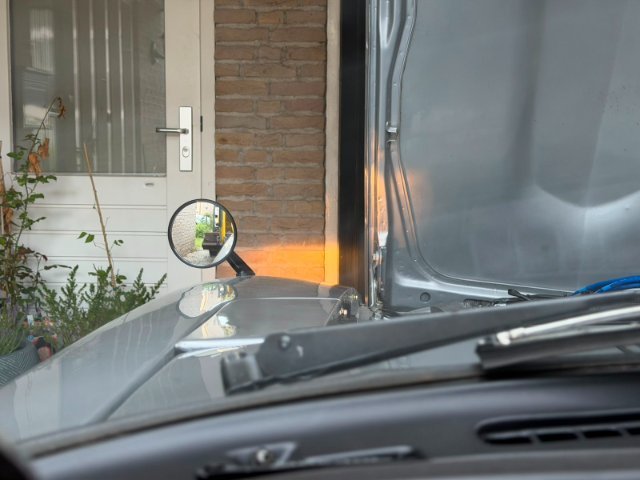
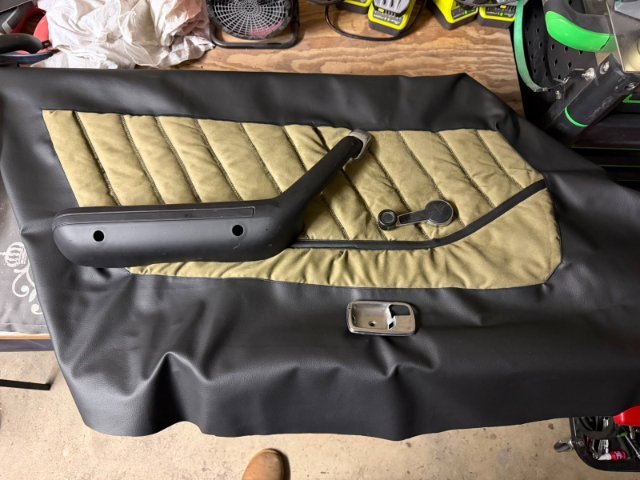
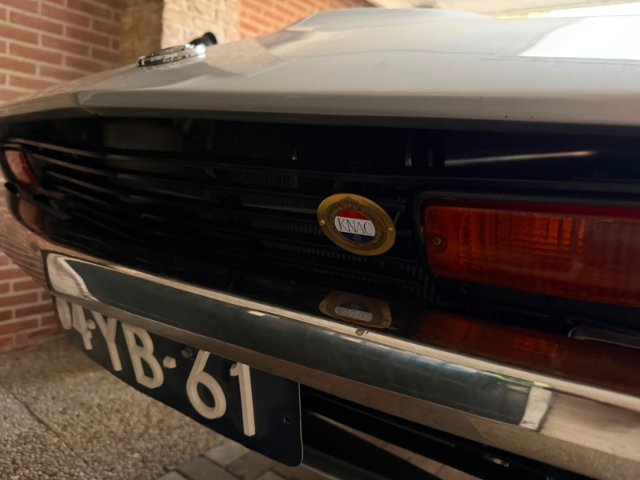
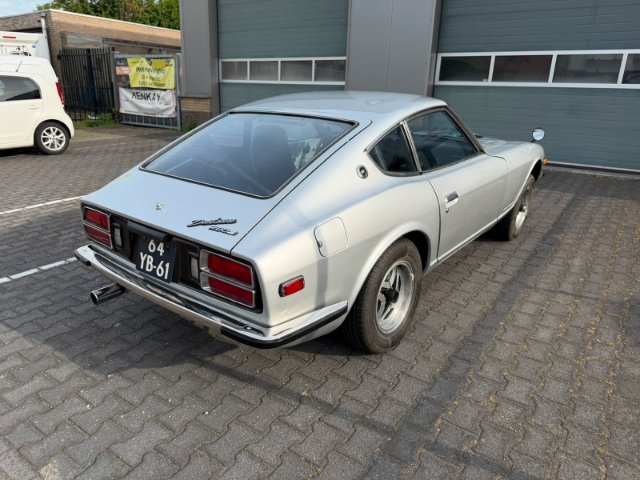
It took some time for an update but I am proud to say that I did it, the 280z is road legal again!! Aside from the car I have been very busy working in my backyard as the previous owners took out all the plants and then neglected the yard for 4-5 years. But back to the build log. One of the parts I still had lying around where the oil pressure sender and the coolant temperature sensor for the gauges in the dashboard. It really bothered me that both of them weren’t working and I had a feeling that it was just both of the sensors that were bad. So out with the old and in with the new. Or so I thought…. While installing the new temperature sensor into the thermostat housing the housing itself broke. As the break is a really weird one I suspect that the aluminum housing just became pours. Luckly one of the local Z club members had the correct version of the housing and send it to me. I gave that one a quick coat of paint and reinstalled all of the sensors. This time nothing broke and both the oil pressure and coolant temperature gauge finally worked! Now that that was fixed I started working on some of the smaller items on the list. I replaced the air filter, both exhaust gaskets, the horns, painted the front grill and installed the KNAC shield (translated: Royal Netherlands Automobile Club). As I had a bit of time left in the day I also replaced my pre fuel pump fuel lines and filter, installed the new speakers and fitted the fender mirrors. I expected the fender mirrors to be pretty useless but they actually gave me a way better field of view then my old door mounted mirrors! I believe these are the same metal reproduction mirrors as Zdepot sells. As I was in a bit of a time crunch for the inspection I unfortunately couldn’t finish the door cards and seats in time. Luckly the door cards weren’t mandatory for the inspection so I could just simply leave them off the car. As for the seats I reinstalled the covers for now and reinstalled them into the car. The aftermarket wheels the car came on where poking out a bit too much in the rear so to avoid any complications during the inspection I decided to install the stock wheels for now and switch them afterwards. I hindside this wasn’t necessary as they were allowed to stick out 3cm (1,2 inch) past the fenders. Then came the moment I had been working towards, inspection day! I dropped her of at the garage and they immediately started with the inspection and alignment. The only thing they found was they the washer fluid wasn’t spraying but the mechanic traced it back to a pinched line. Other then that the car was in great shape and both the mechanic as other customers were impressed with the car (S30 Z cars are pretty rare over here). Now I can finally enjoy the car and man she drives good! The only thing I noticed was that the rear shocks are gone but it isn’t a problem for now.
1 point
-
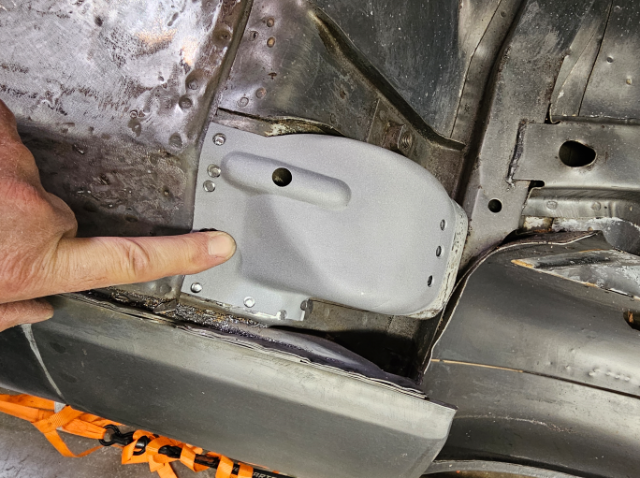
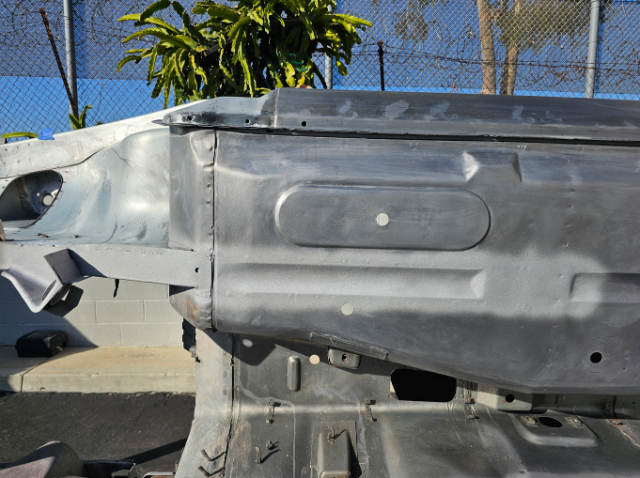
Another productive weekend. Unlike my Turbo chassis that has a late 71 build date, this car having a mid year build date has protection plates over the seat belt pockets. But of course they were used by the PO to jack the car and dented them up. I drilled out the spot welds and removed them, allowing me to straighten the dents and blast underneath them. Before: After: All sprayed with weld thru primer and ready for plug welding back on.
1 point
-
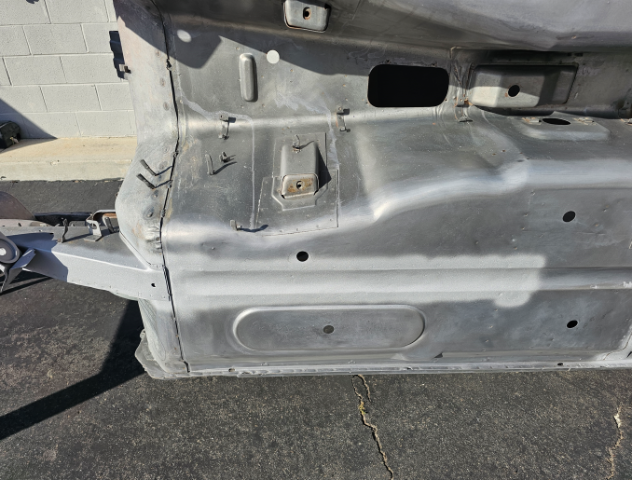
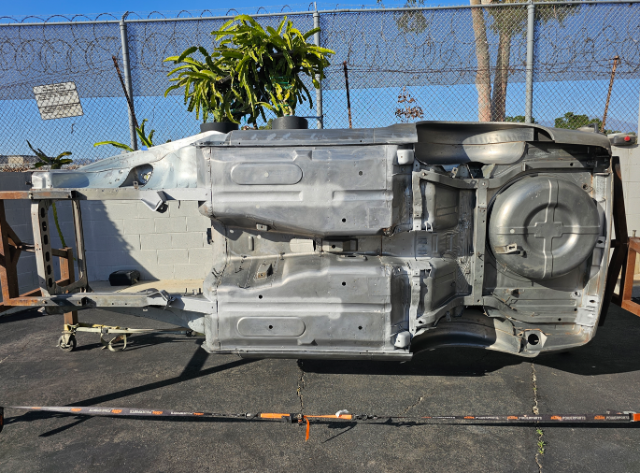
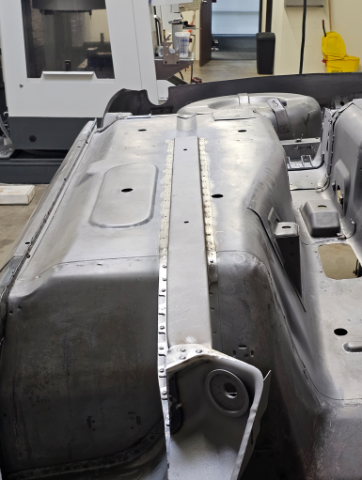
Since the frame rails were dented up pretty good from wrong floor jack positioning, I decided to replace them and this would also give me the opportunity to really get the original metal floors flat, and the metal shrunk and tight. They were surprisingly clean inside. This is the floor pan after removing the spot welds and frame rails. After some wire wheel work, and metal prep acid wash with Scotch-Brite, I worked and shrunk the metal with a shrinking rod and them smoothed it with a shrinking disk. Nice and flat getting it to what original would have looked like, leaving all spot welds and original deformations in place. I then lightly blasted the overlap areas and applied Weld-Thru paint. I then fitted the new frame rails, they took a bunch of work to get the correct shape and to match the original contour of the floor pans. I then copied all the original spot weld locations and drilled 3/16 hole to plug weld. I used several Cleco clamps to hold it in place and tight up against the floor pans. Next I used my MIG and plug welded them in place Finally I will grind smooth the plug welds More after the weekend
1 point