5thgenluder
-
Posts
298 -
Joined
-
Last visited
Content Type
Profiles
Forums
Blogs
Events
Gallery
Downloads
Store
Everything posted by 5thgenluder
-
Jake, thanks it's a speedhut revolution series gps speedo. For $20 extra dollars they added the turn signal and high beam indicators into them. They will light up cobalt blue. I'll post pics when I actually get them powered up.
-
Tomcraft. Thanks for the kind words.
-
Boostedh23a, this might help with some of your questions. http://forums.hybridz.org/index.php/topic/93438-building-a-fuel-system-for-my-rb25det/
-
I would say if u are gonna do it right it would be well over $10k. $7500 is just what it's gonna take to get my car running, I definately won't be done at $7500
-
christian, I dont have the motor and trans. But I have 90% of the other parts. I would say that when Im all done and ready to drive the car. I will be at $7500.00
-
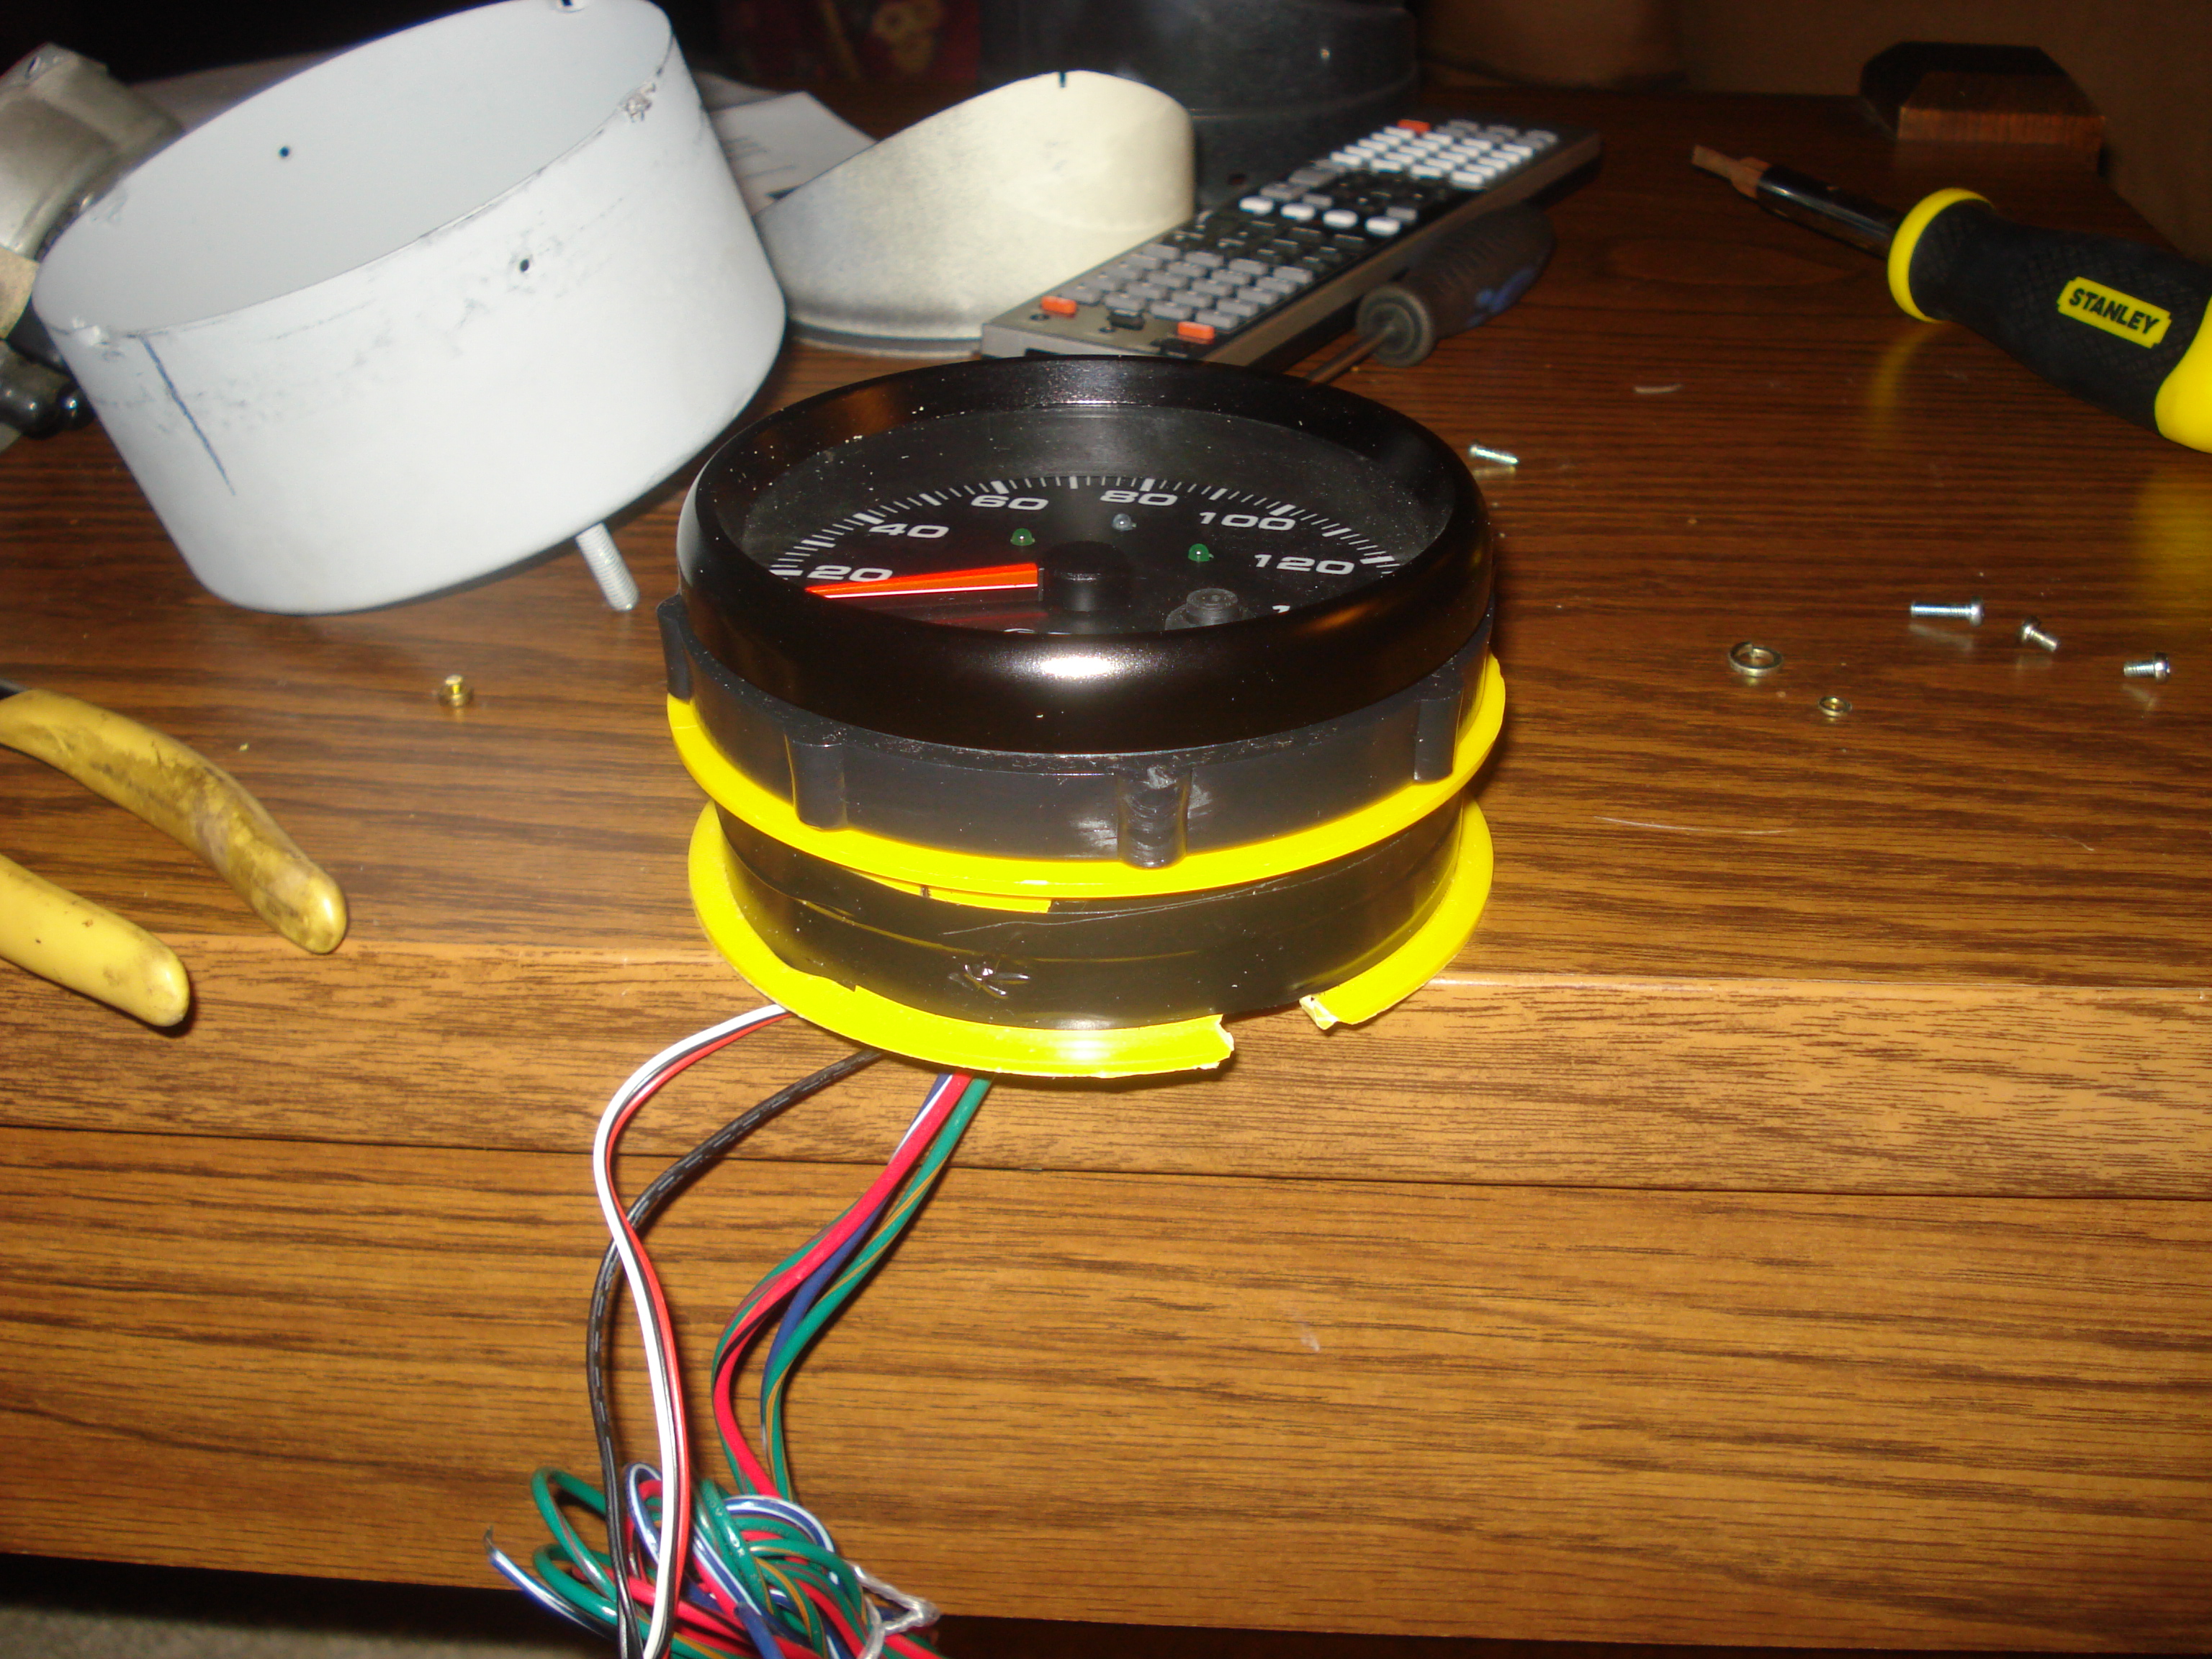
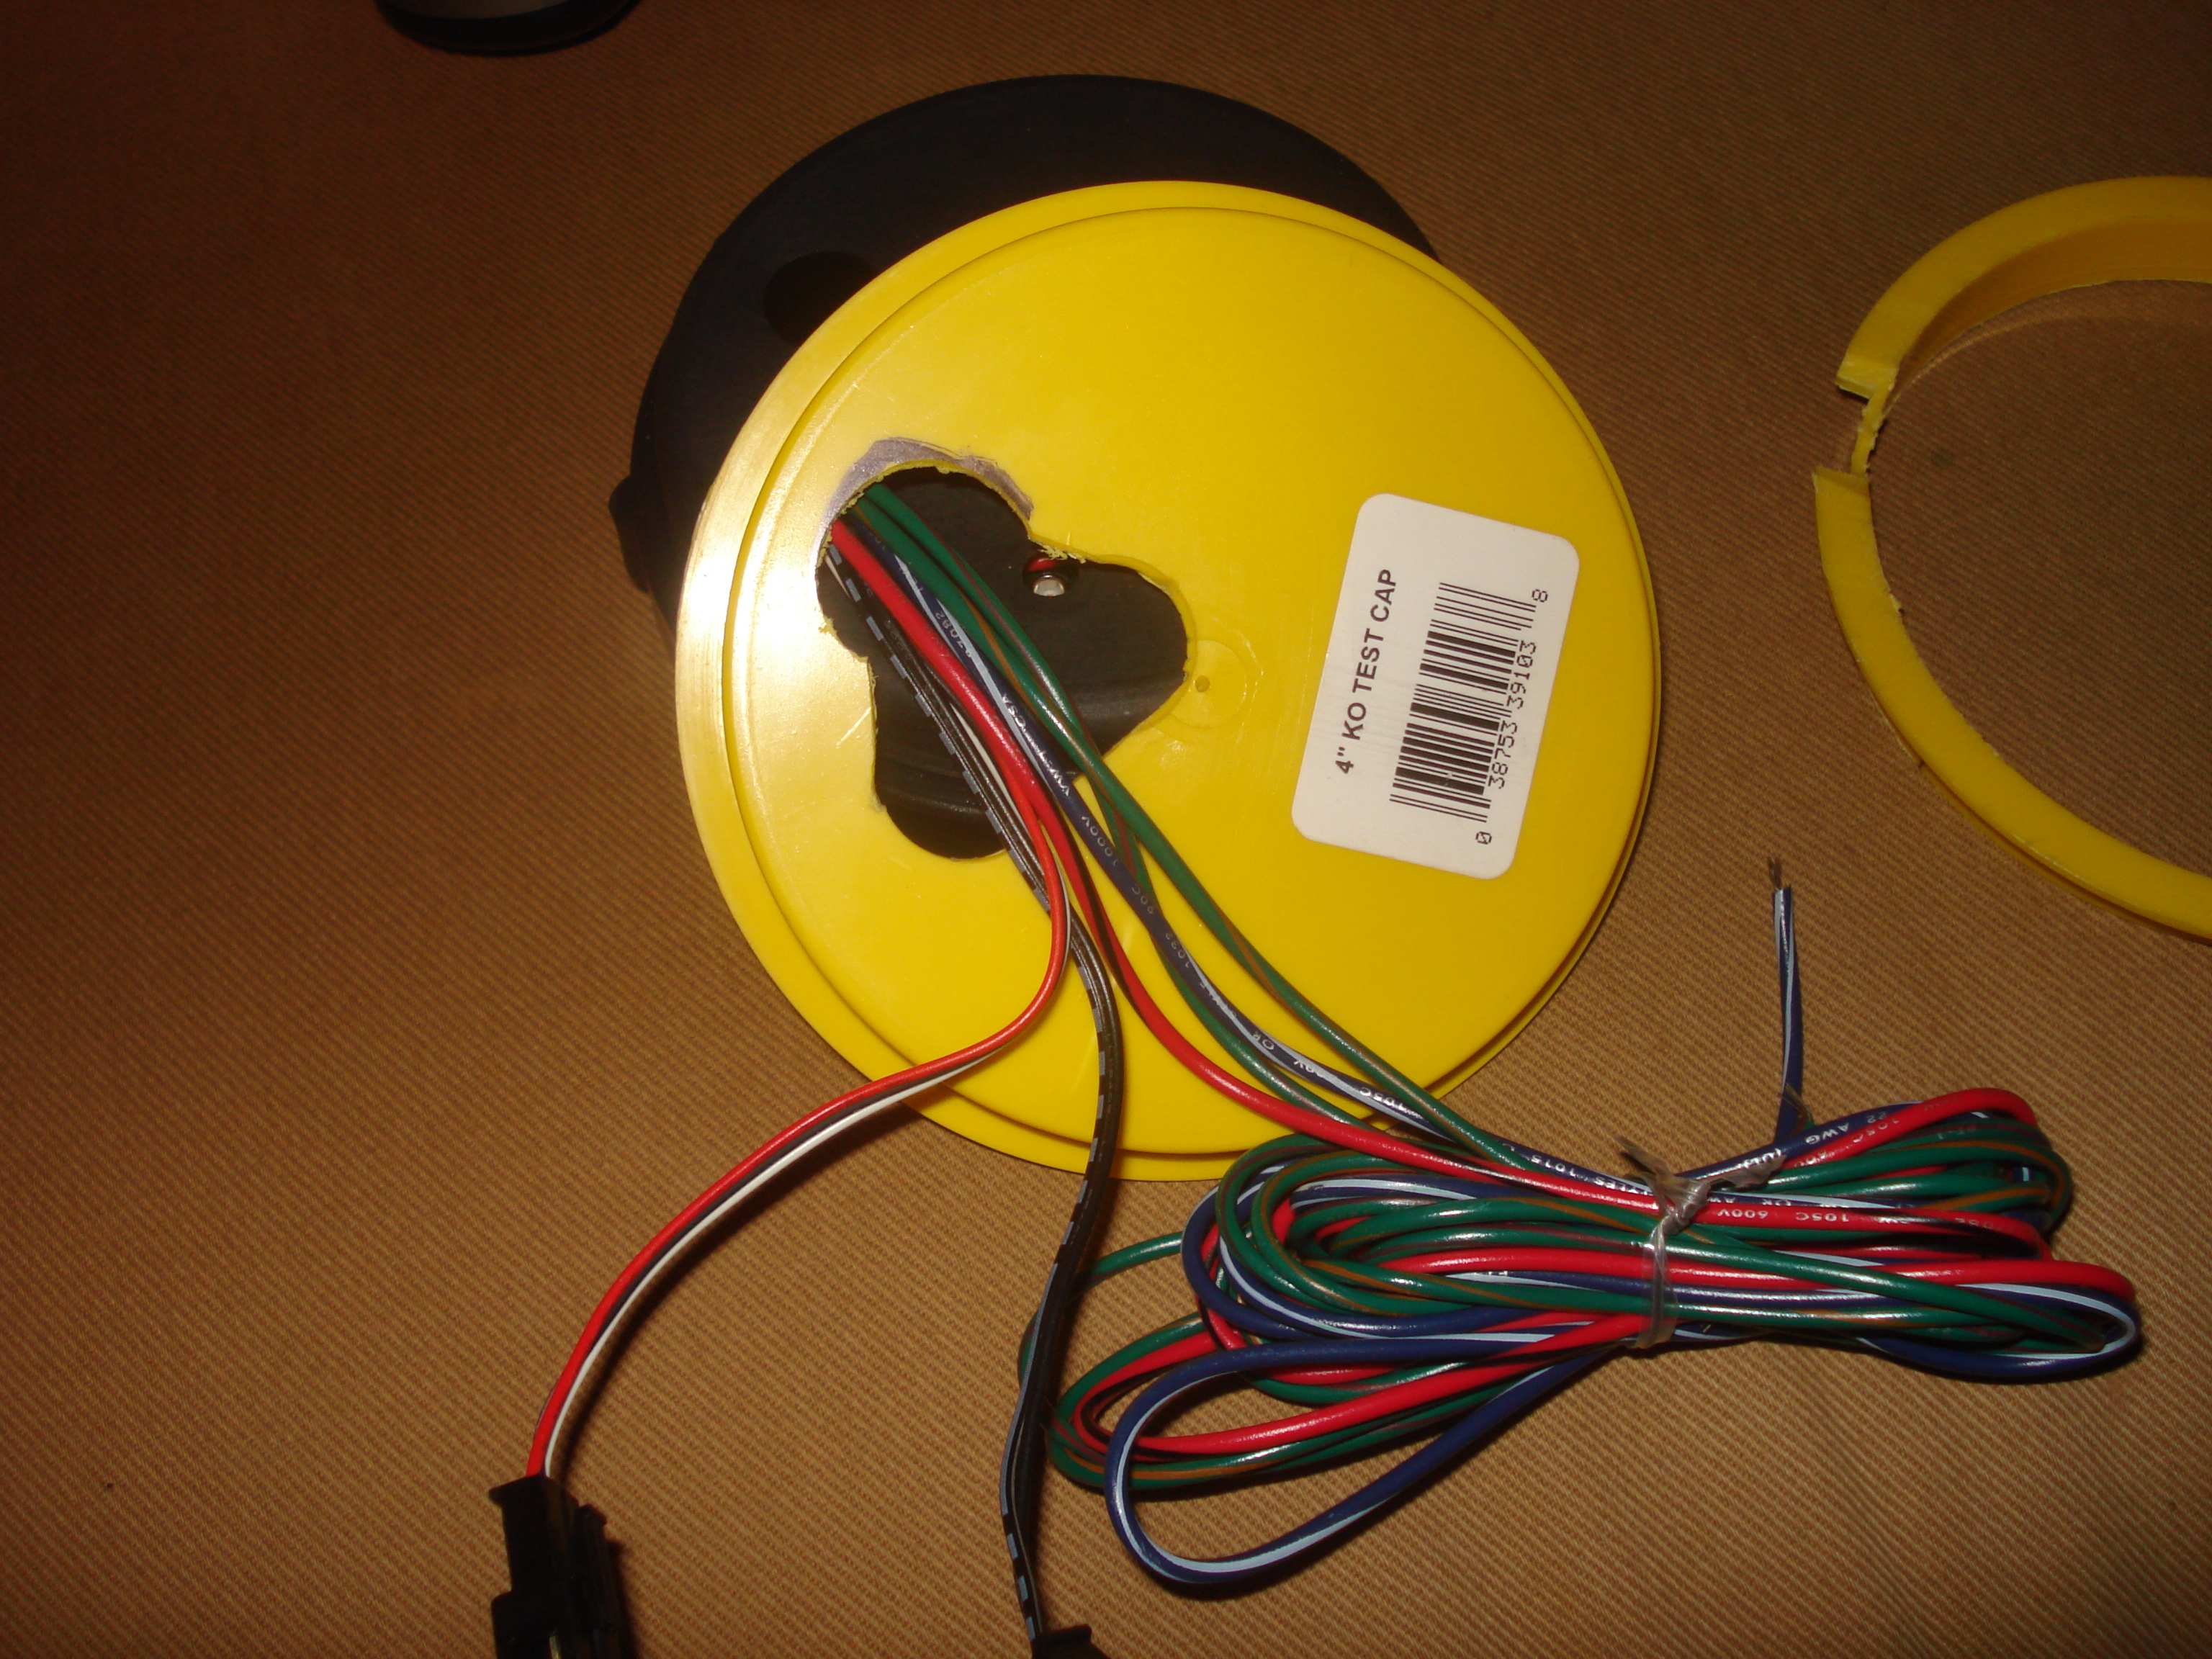
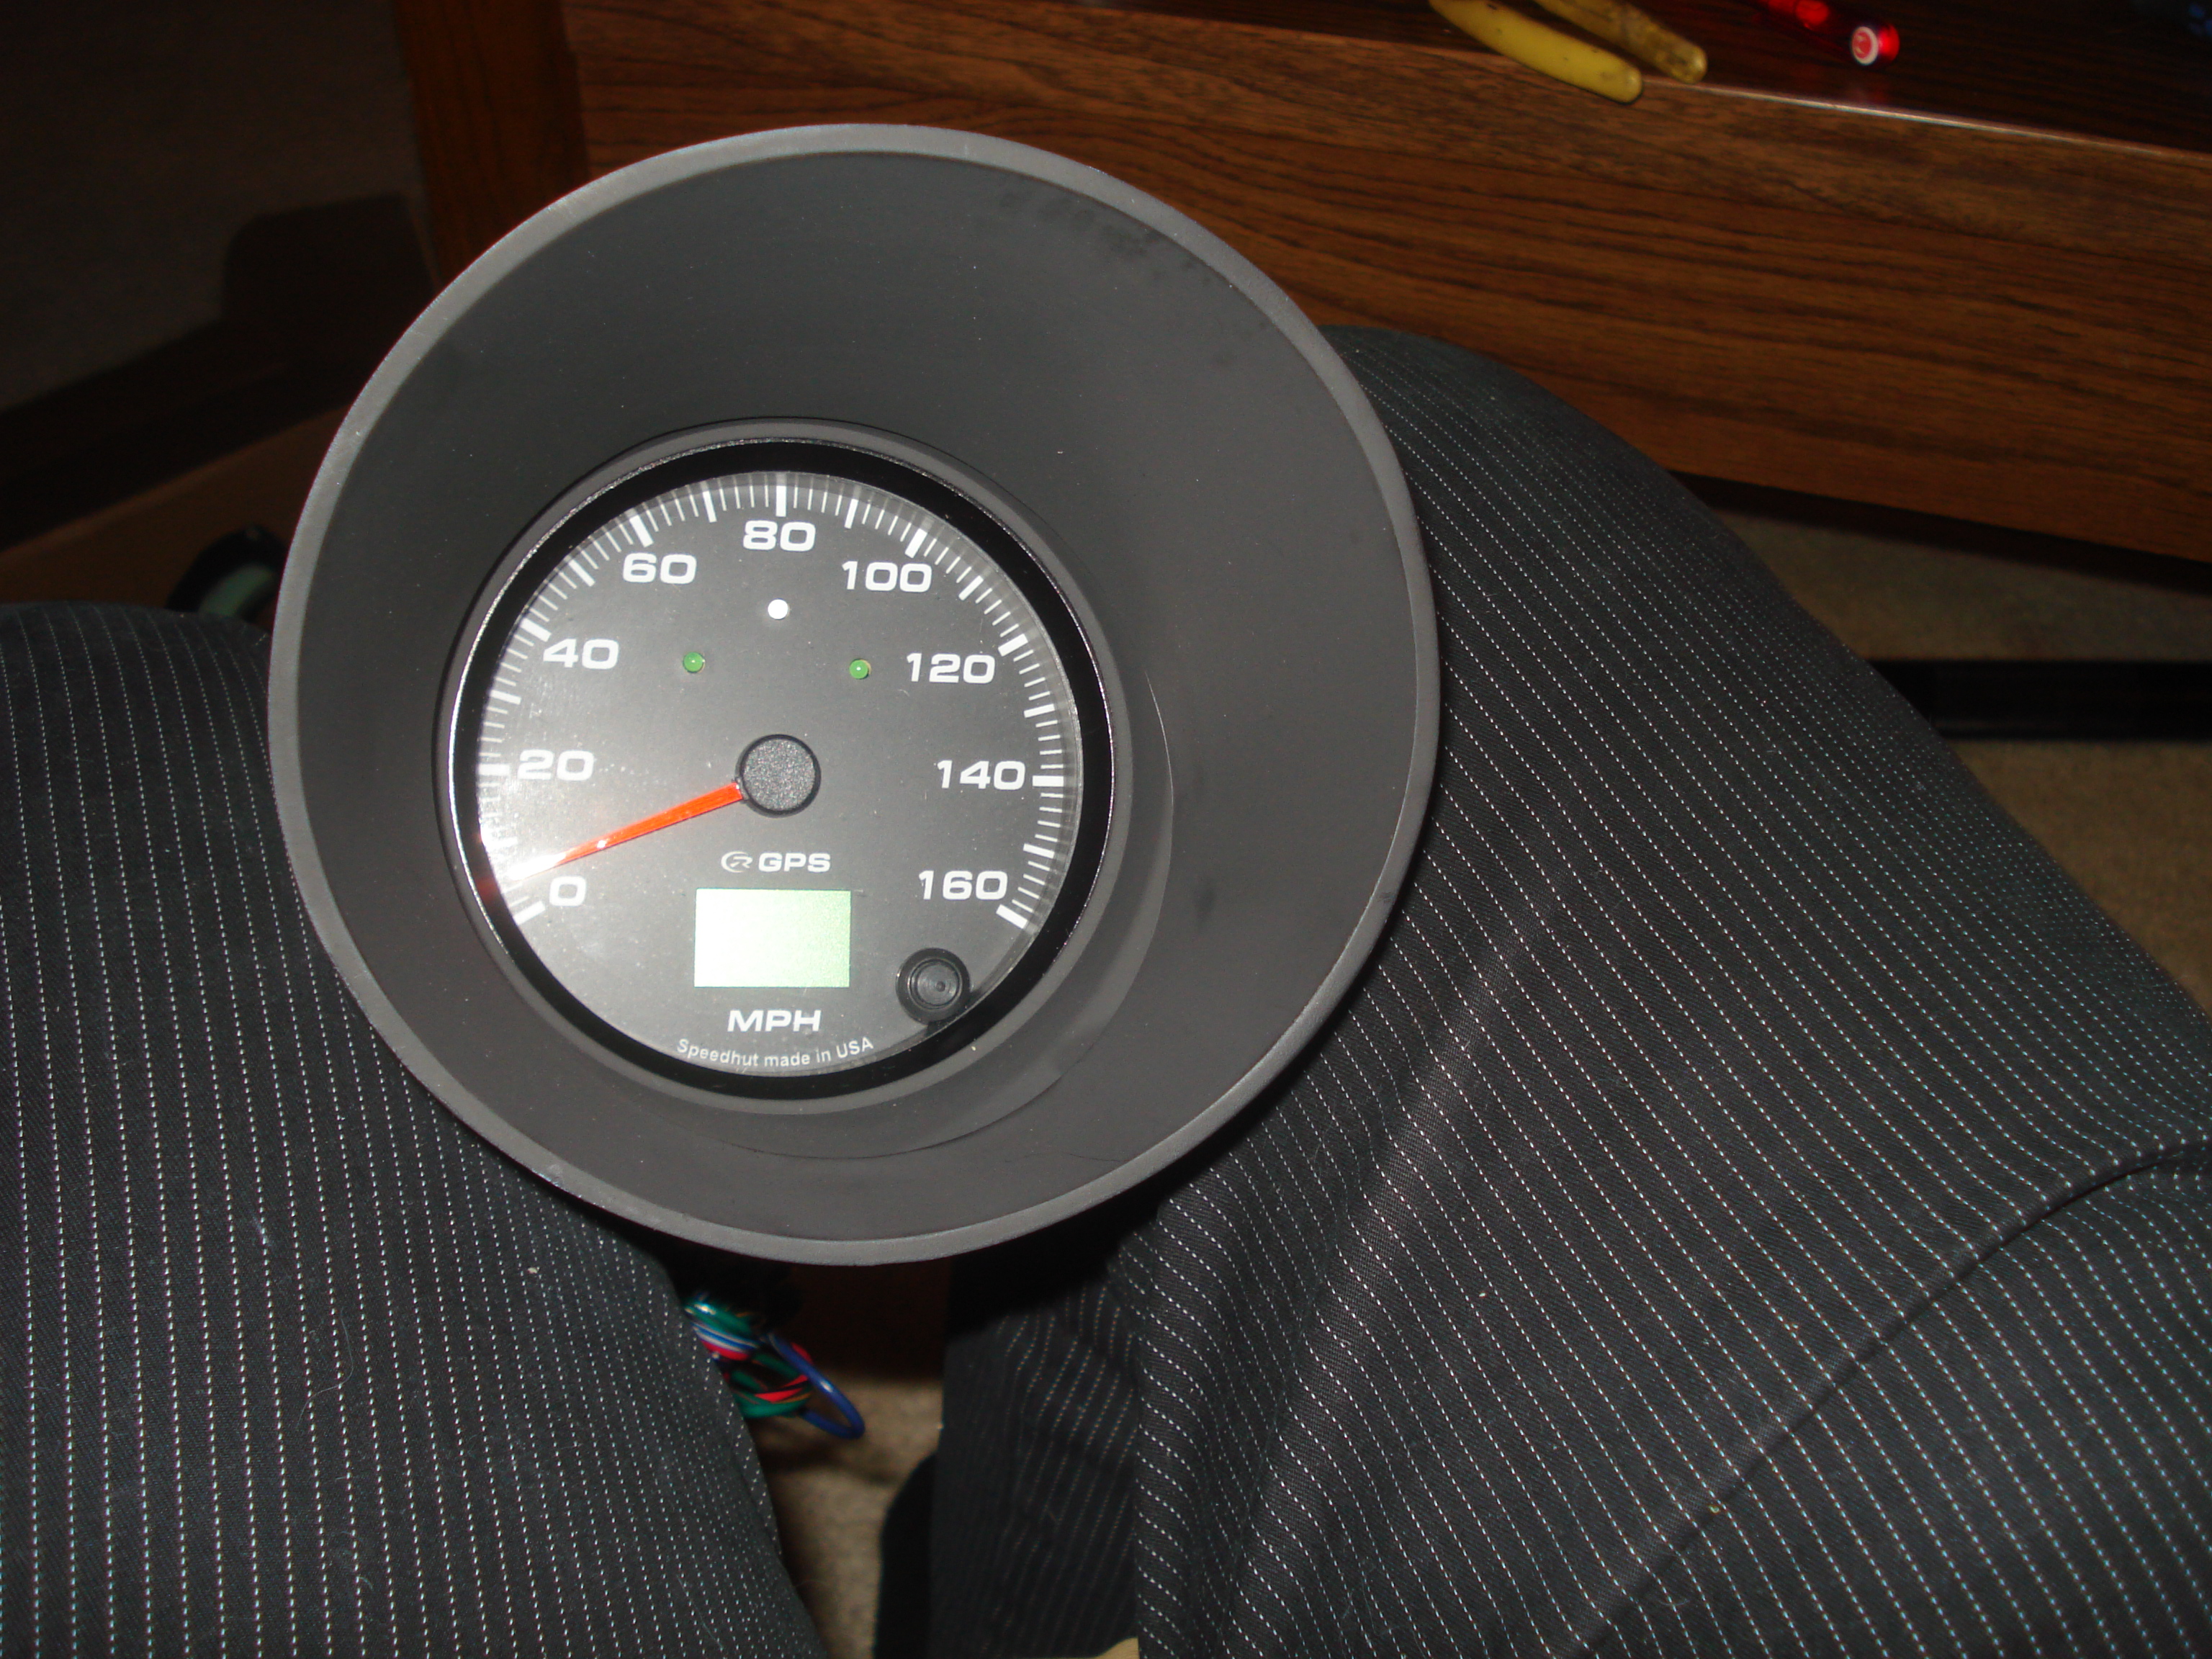
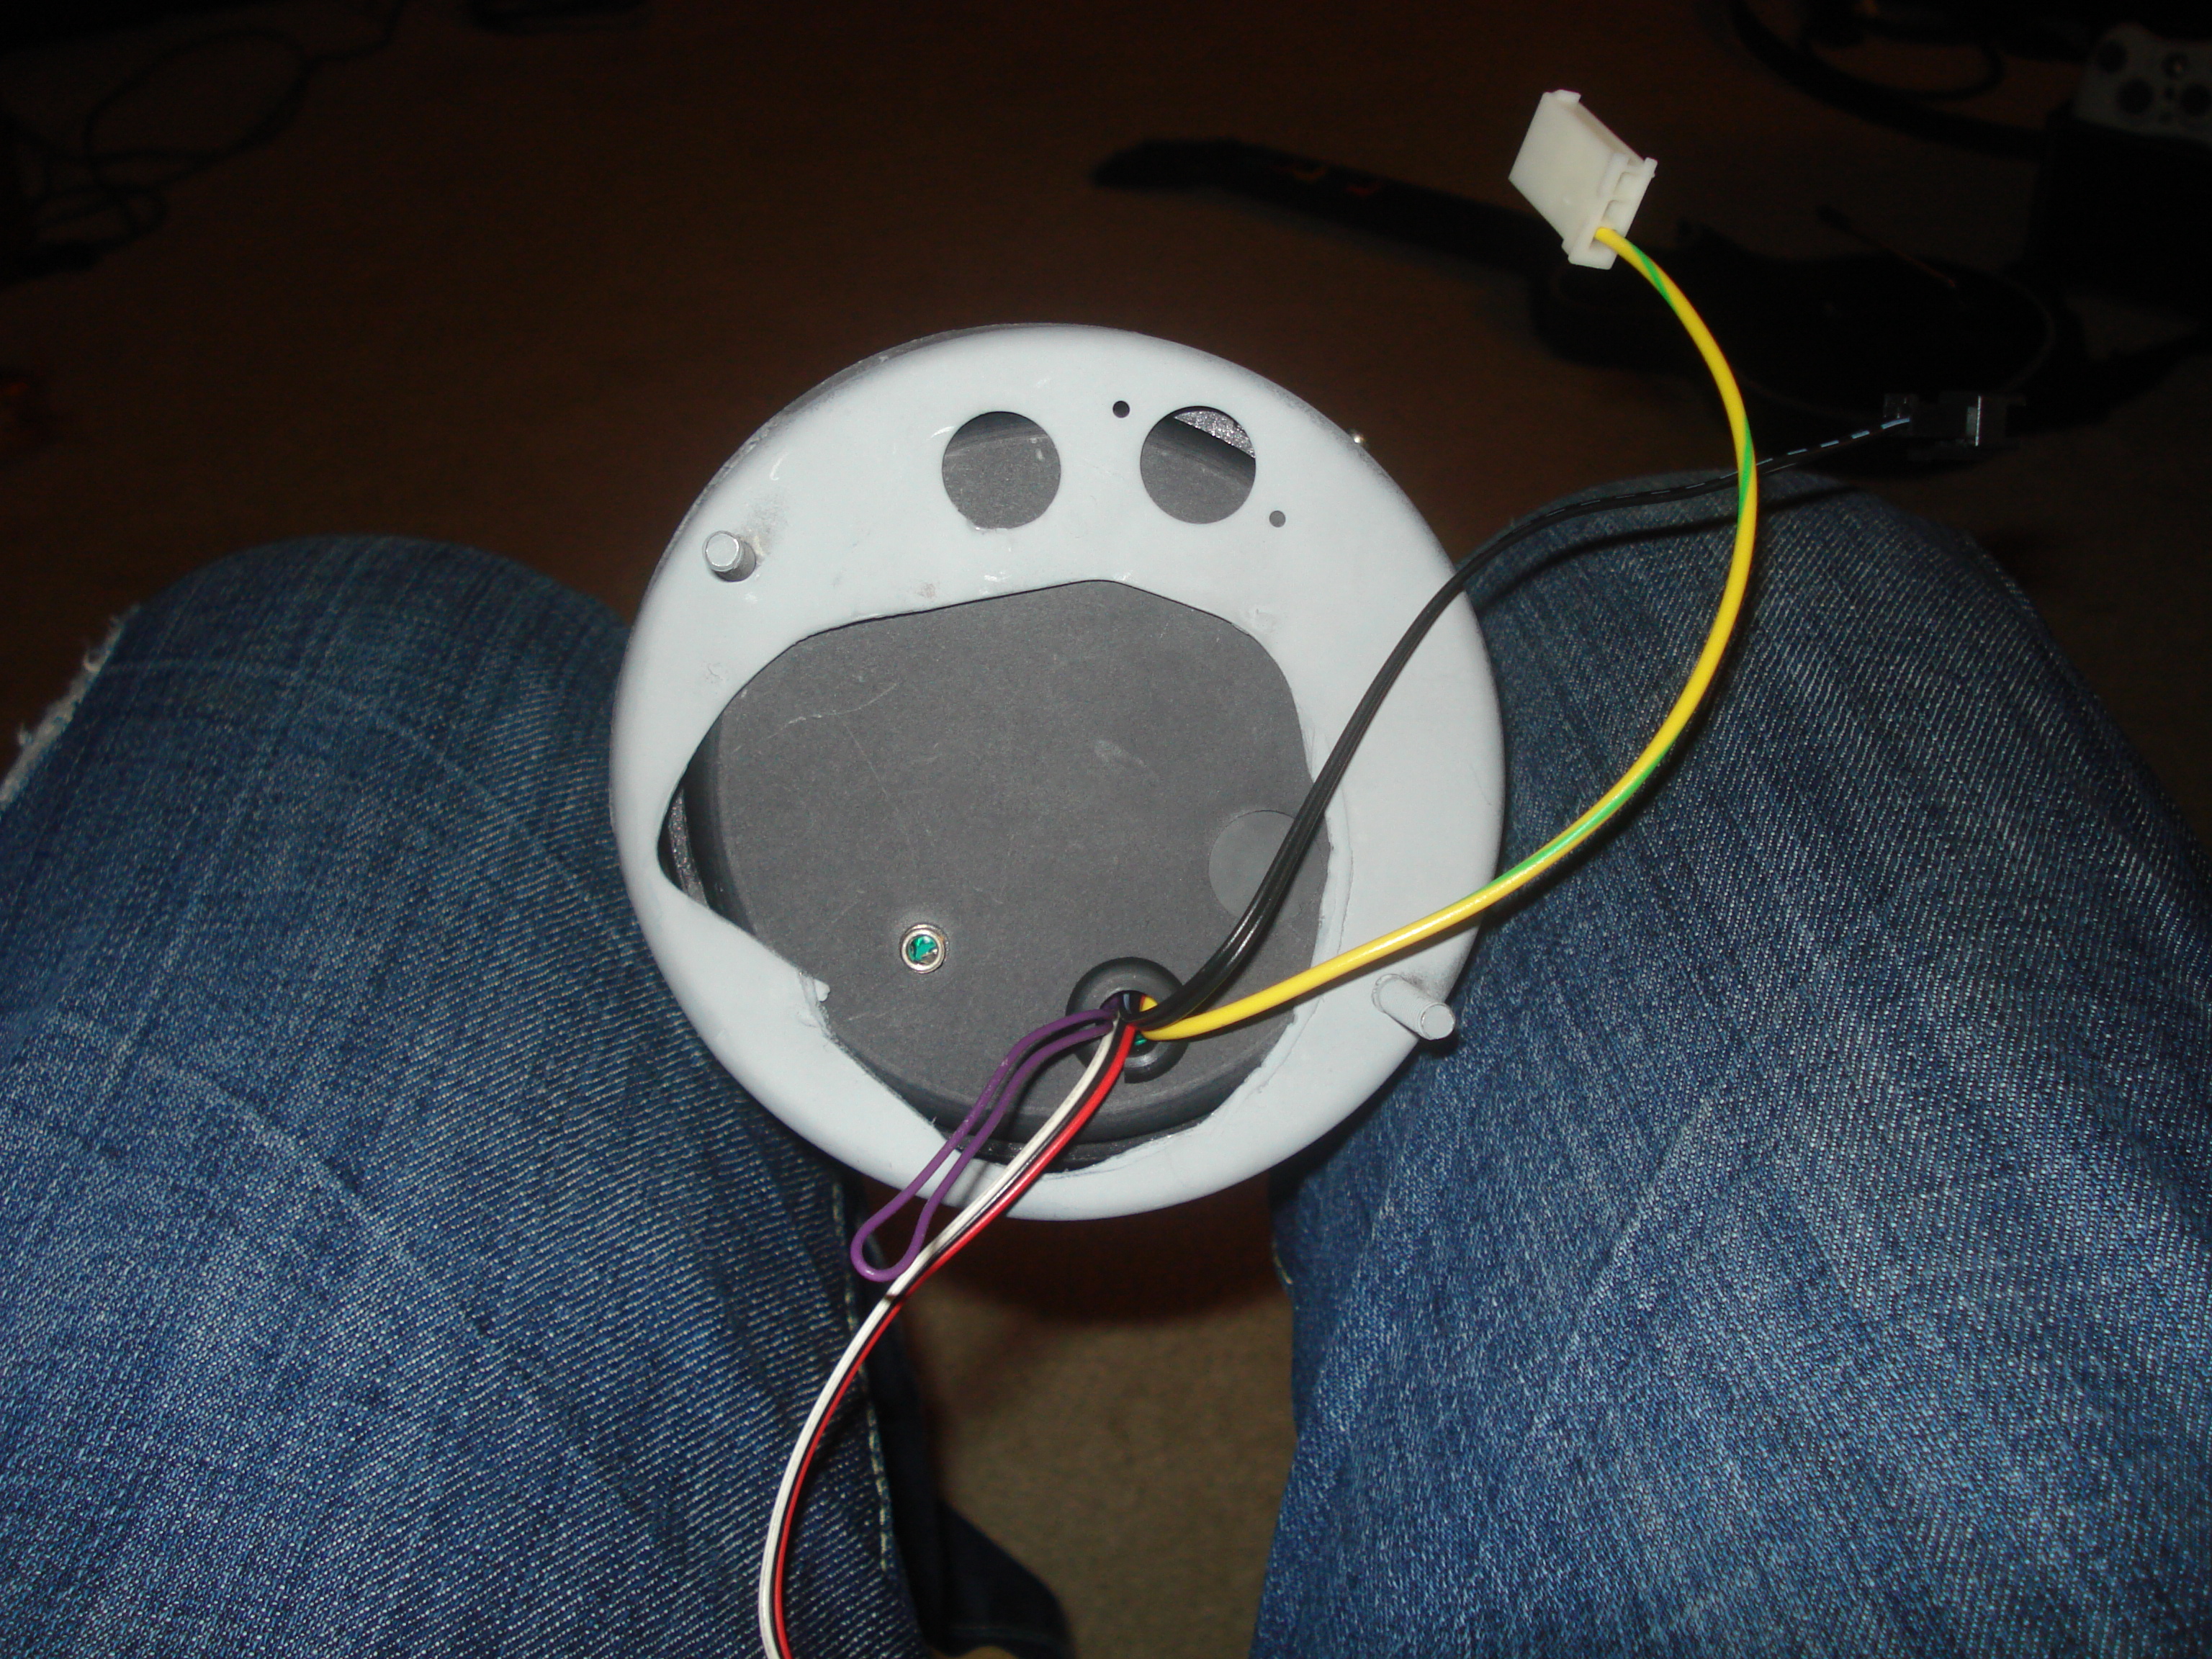
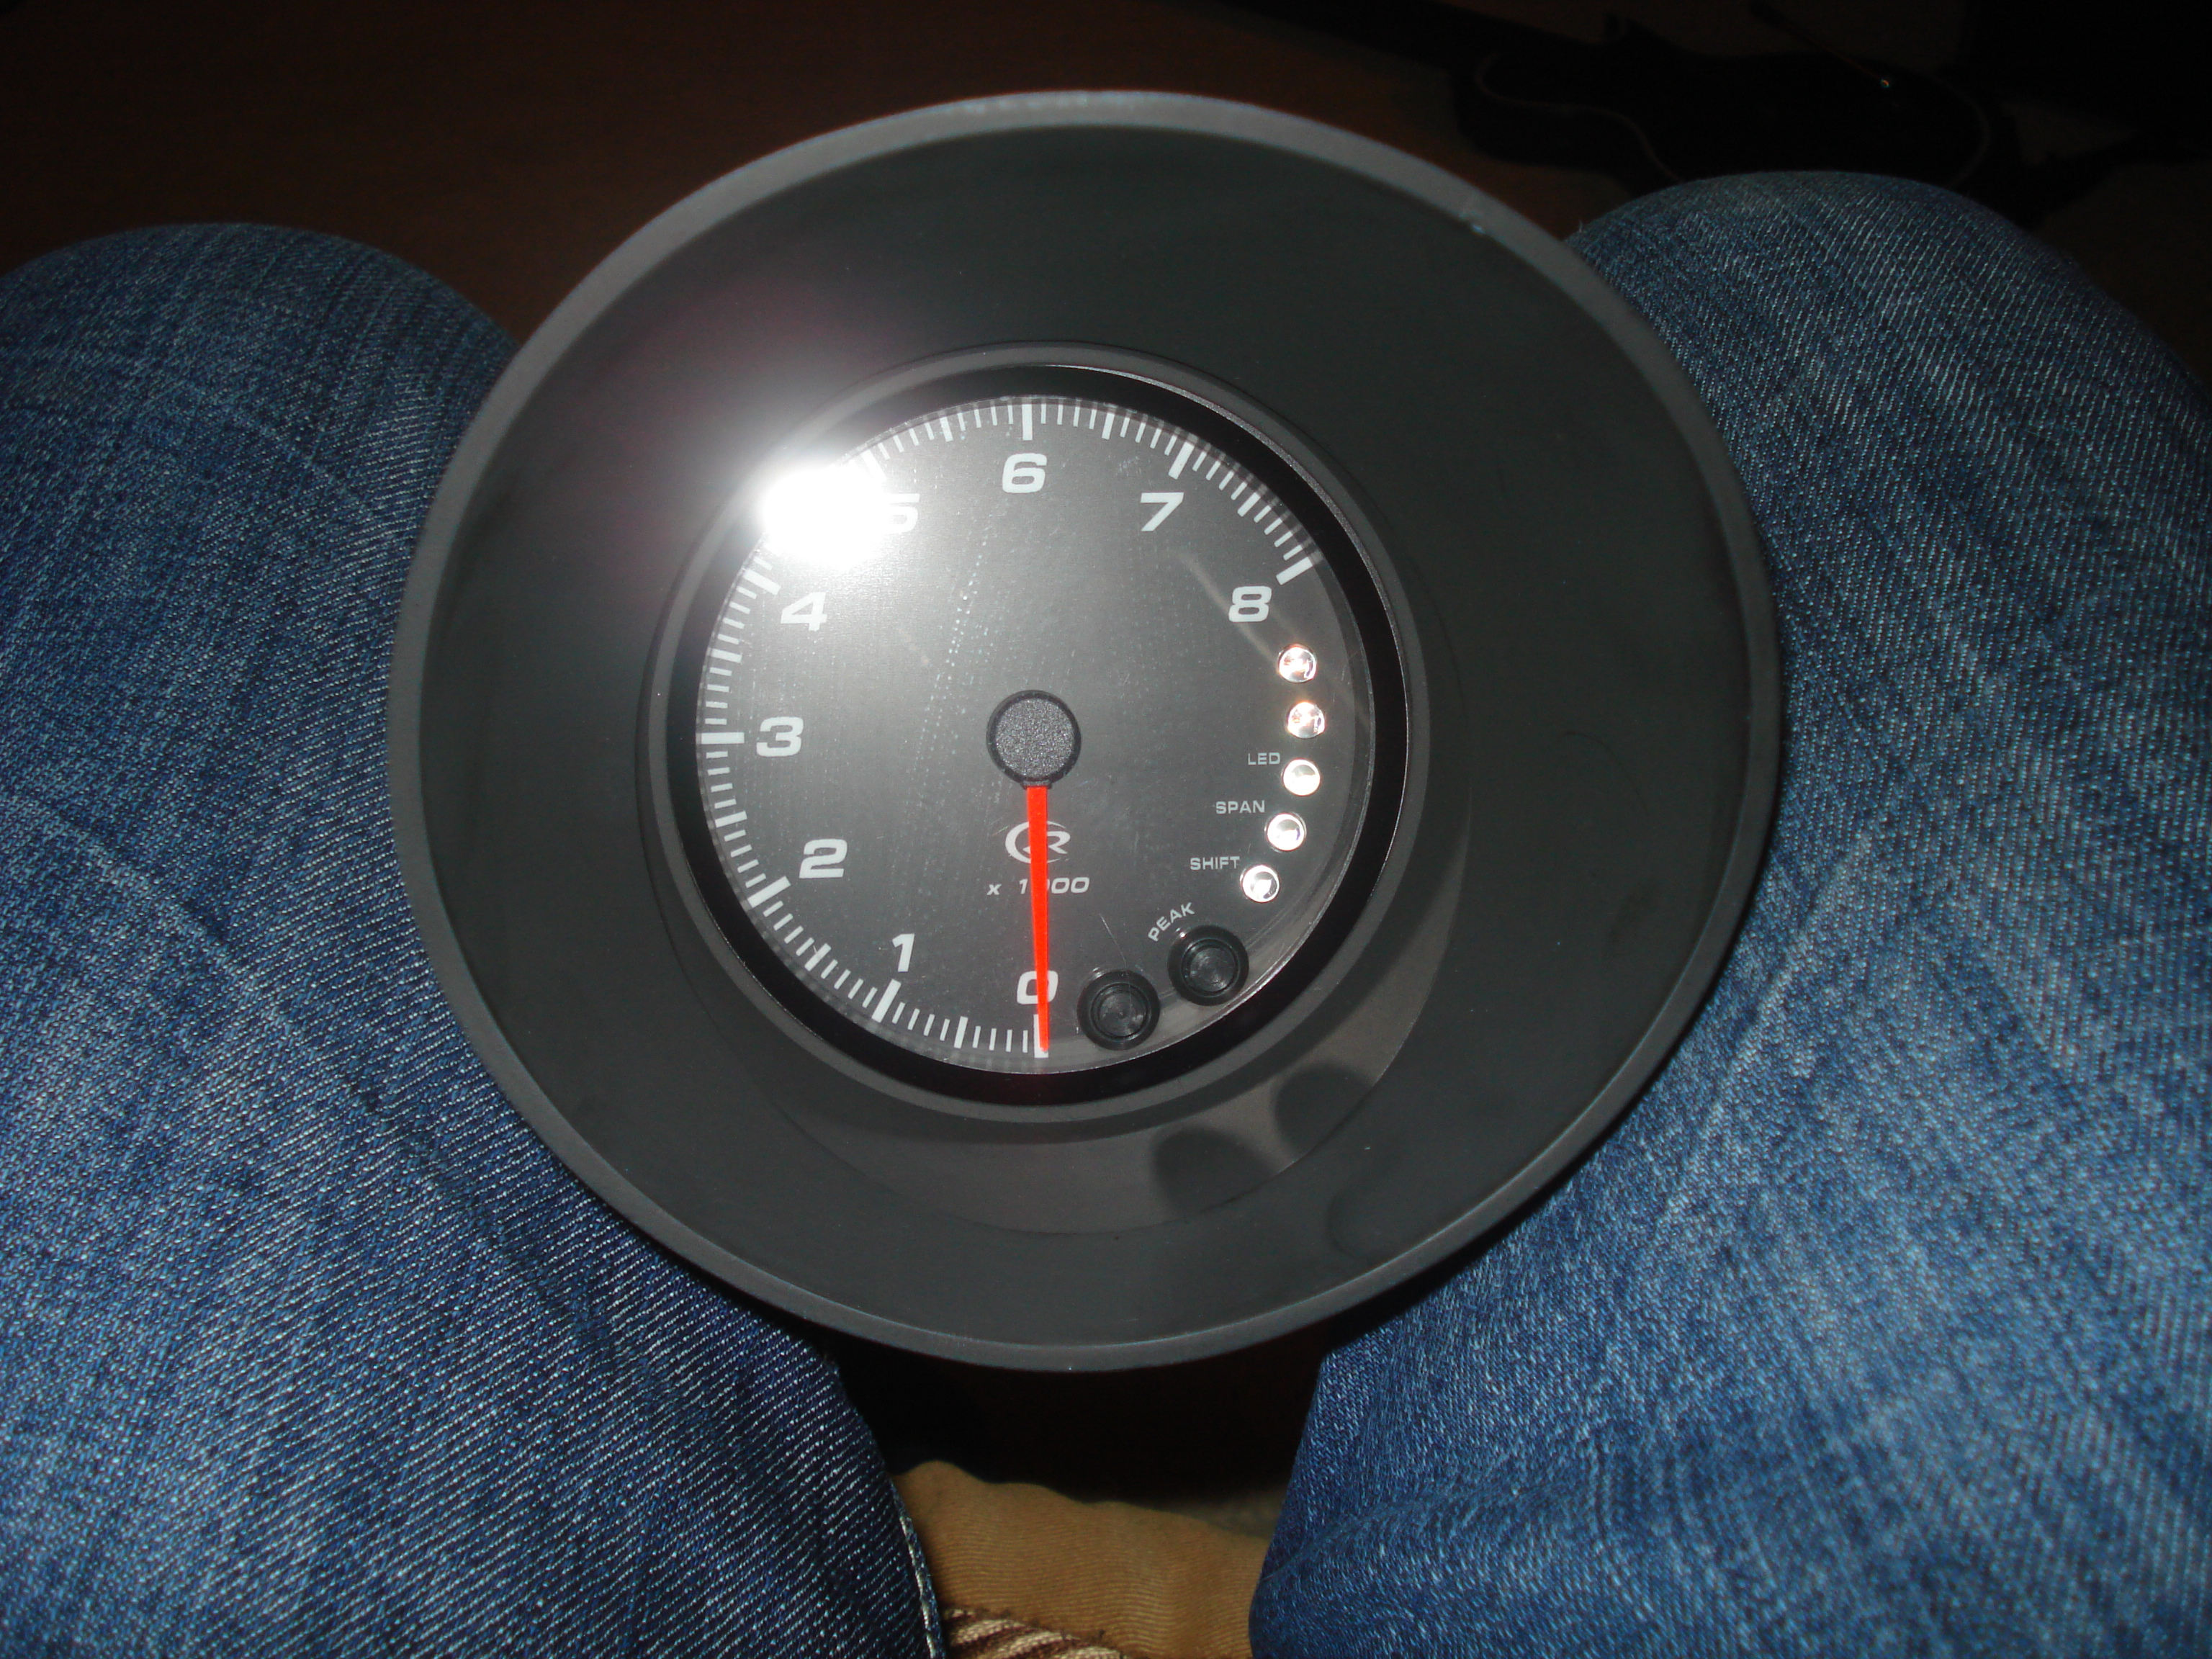
Update Speedo in housing. So I got a speedo from speedhut. It has the turn signal and bright indicators built in. It wasnt as easy as the Tach. I needed to make something to put pressure on the gauge to hold it tight against the factory ring. I went to the trusty home depot looking for a drain cap as I read in another thread. Maybe KTM? I didnt find what I saw in the other thread but I did find a 4" knock out test plug. I bought 2 of them and went on my way. I had to punch out one of them and cut a hole in the other. I also had to knotch the sides for the bolts in the housing. Heres a pic to help describe. I atatched that to the other ring with electrical tape. Then I put it all back together. I had to sand it to make it perfect but it was easy enough. Heres a pic of the back.. Here is the finished product from the front. Rings were about $2.00 ( not even gonna add that up.) Any questions?

-
I cant see the links because I am not a member. But you are correct the way you are describing it. You need to make sure that you have some sort of vent to allow the air to escape.
-
Boostedh23a. You can not completely seal off the fuel system. The fuel tank won't even allow you till fill it all the way up on a hot day without a vent. My solution was to just vent my tank to the hose in the filler neck and then get a vented gas cap to allow the fumes and vapor to escape. I did not have my stock charcoal canister. If I did have it I probably would have retained that. I have also heard of people attaching a hose on the top to vent the tank and then wrapping it in a loop under the car to vent.
-
Thanks for the kind words Pat1, Rs speed and Cristian. I know I have been slacking lately. All my free time has been spent drywalling a garage for a friend. Hopefully if the temperature gets above 30 tomorrow I can get some work done and some info posted.
-
Looks good. Nice work so far. I will definately keep an eye on your thread for updates.
-
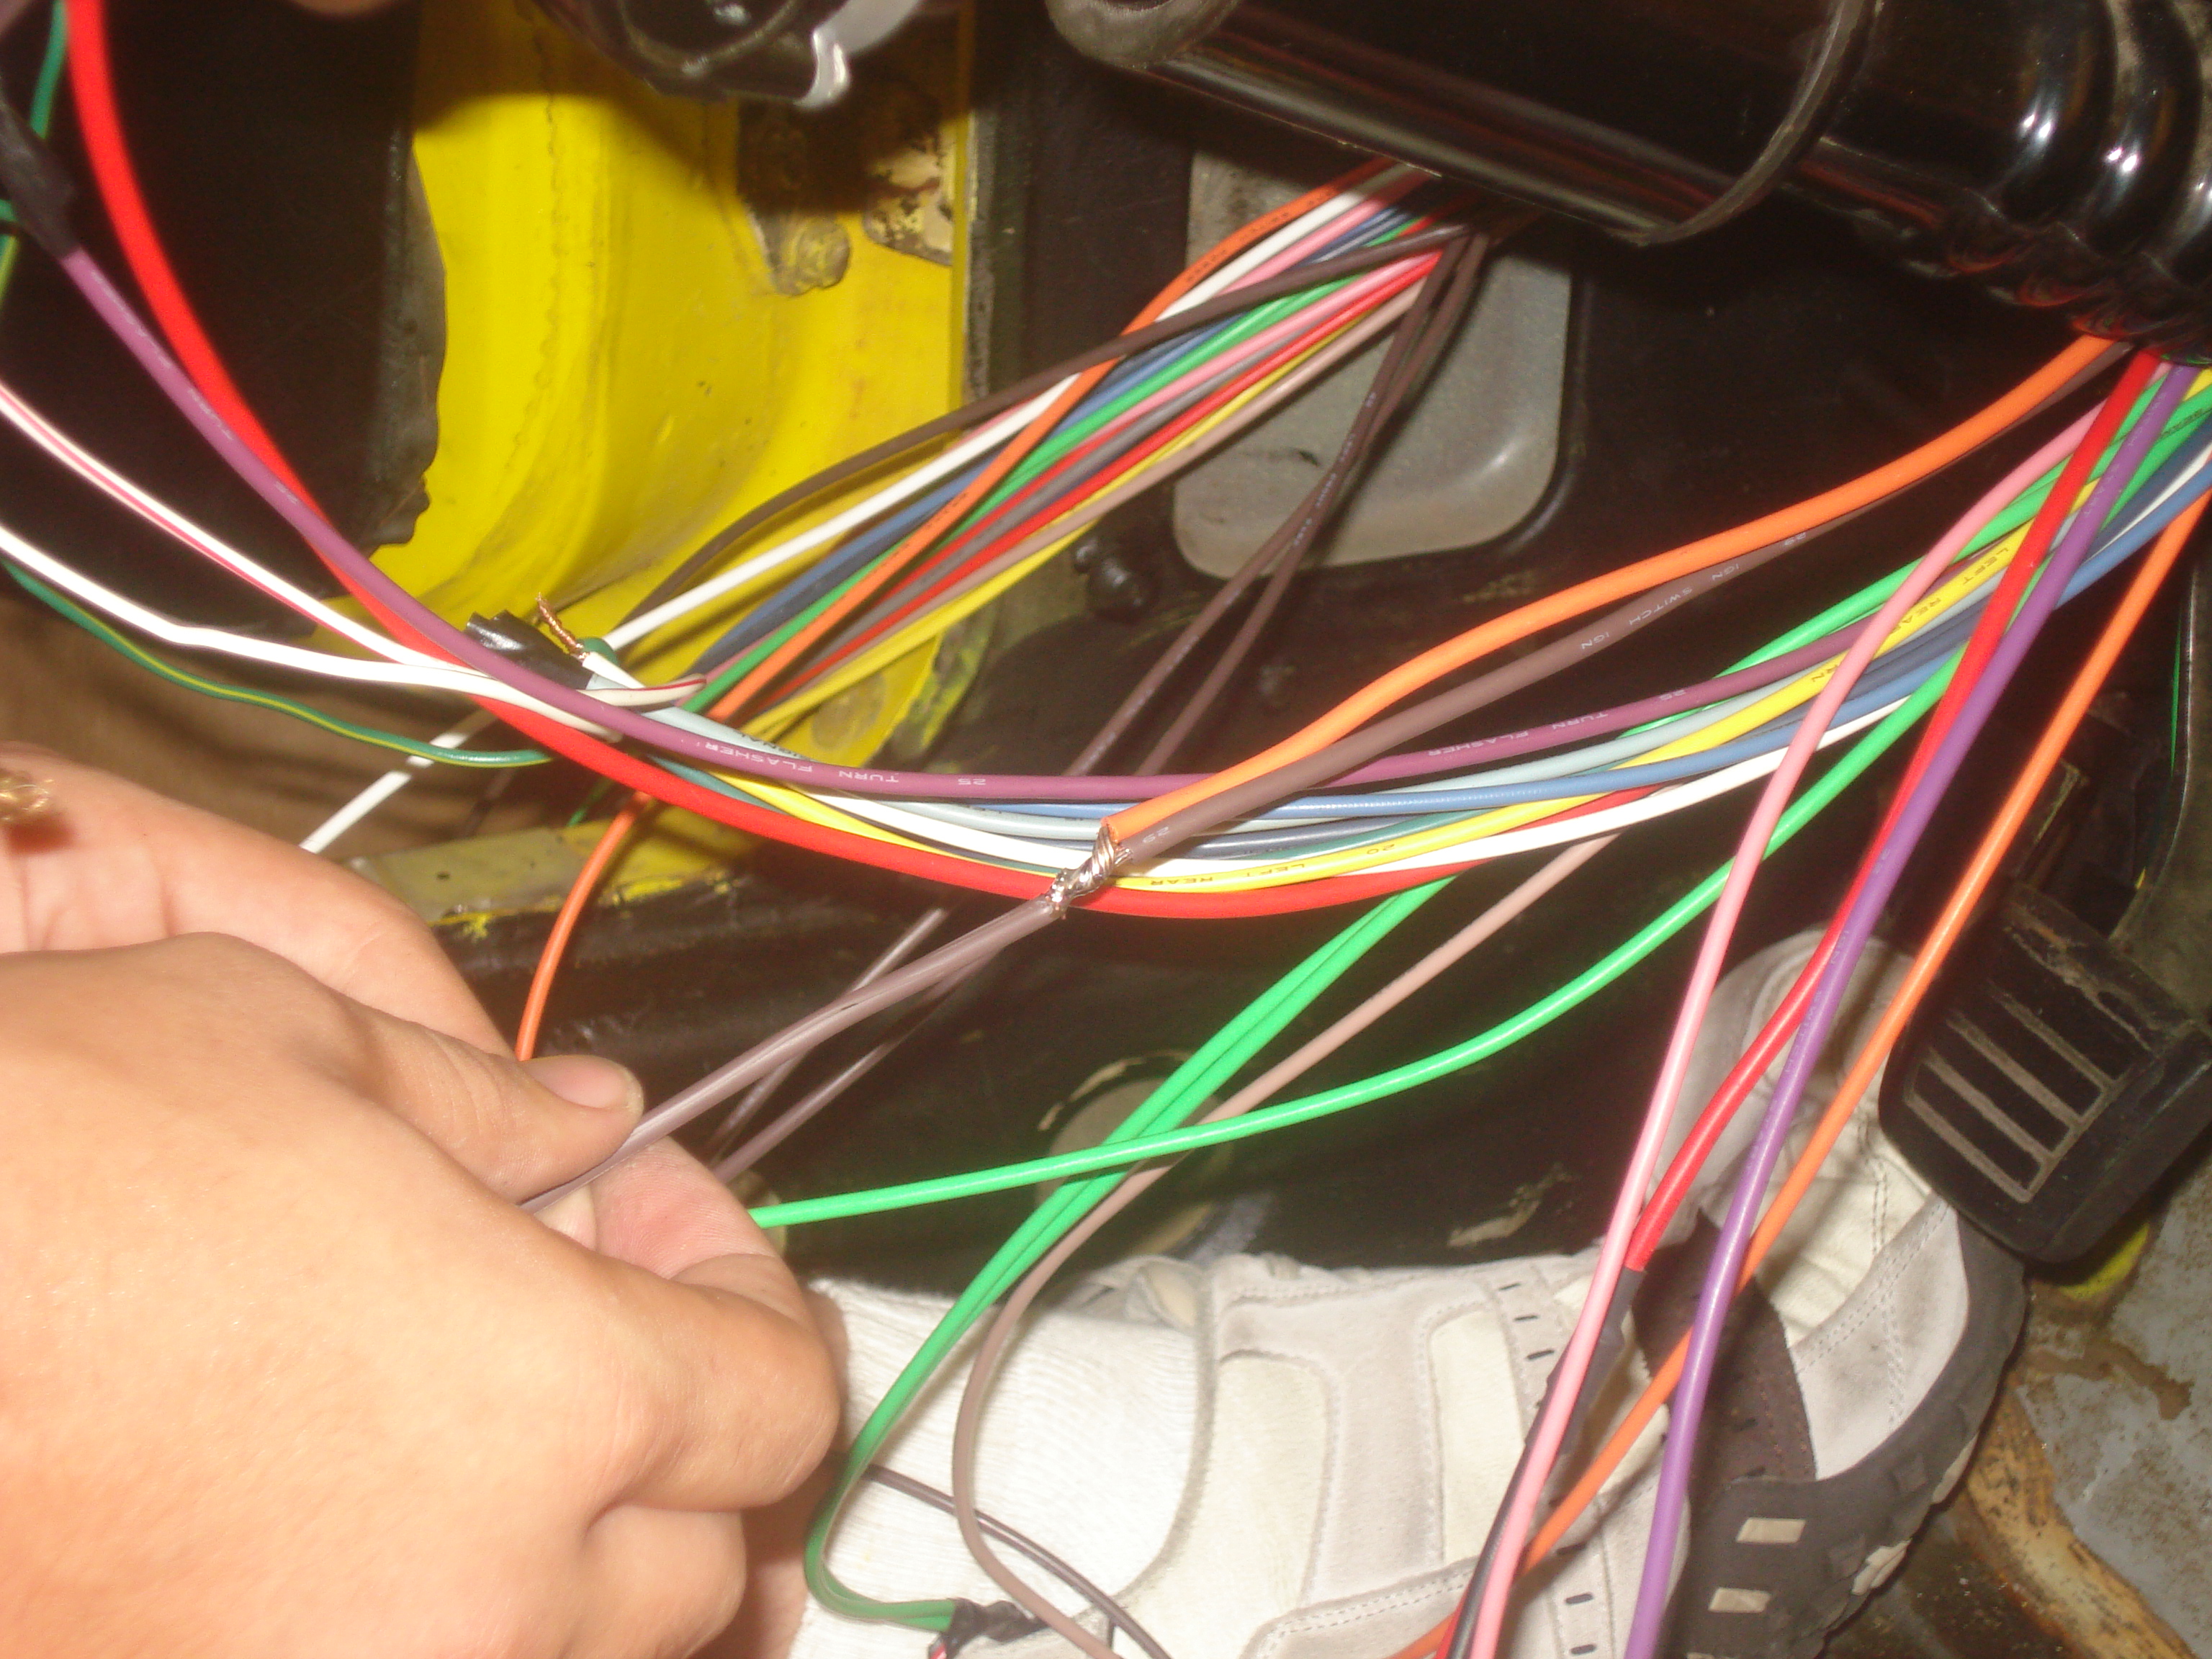
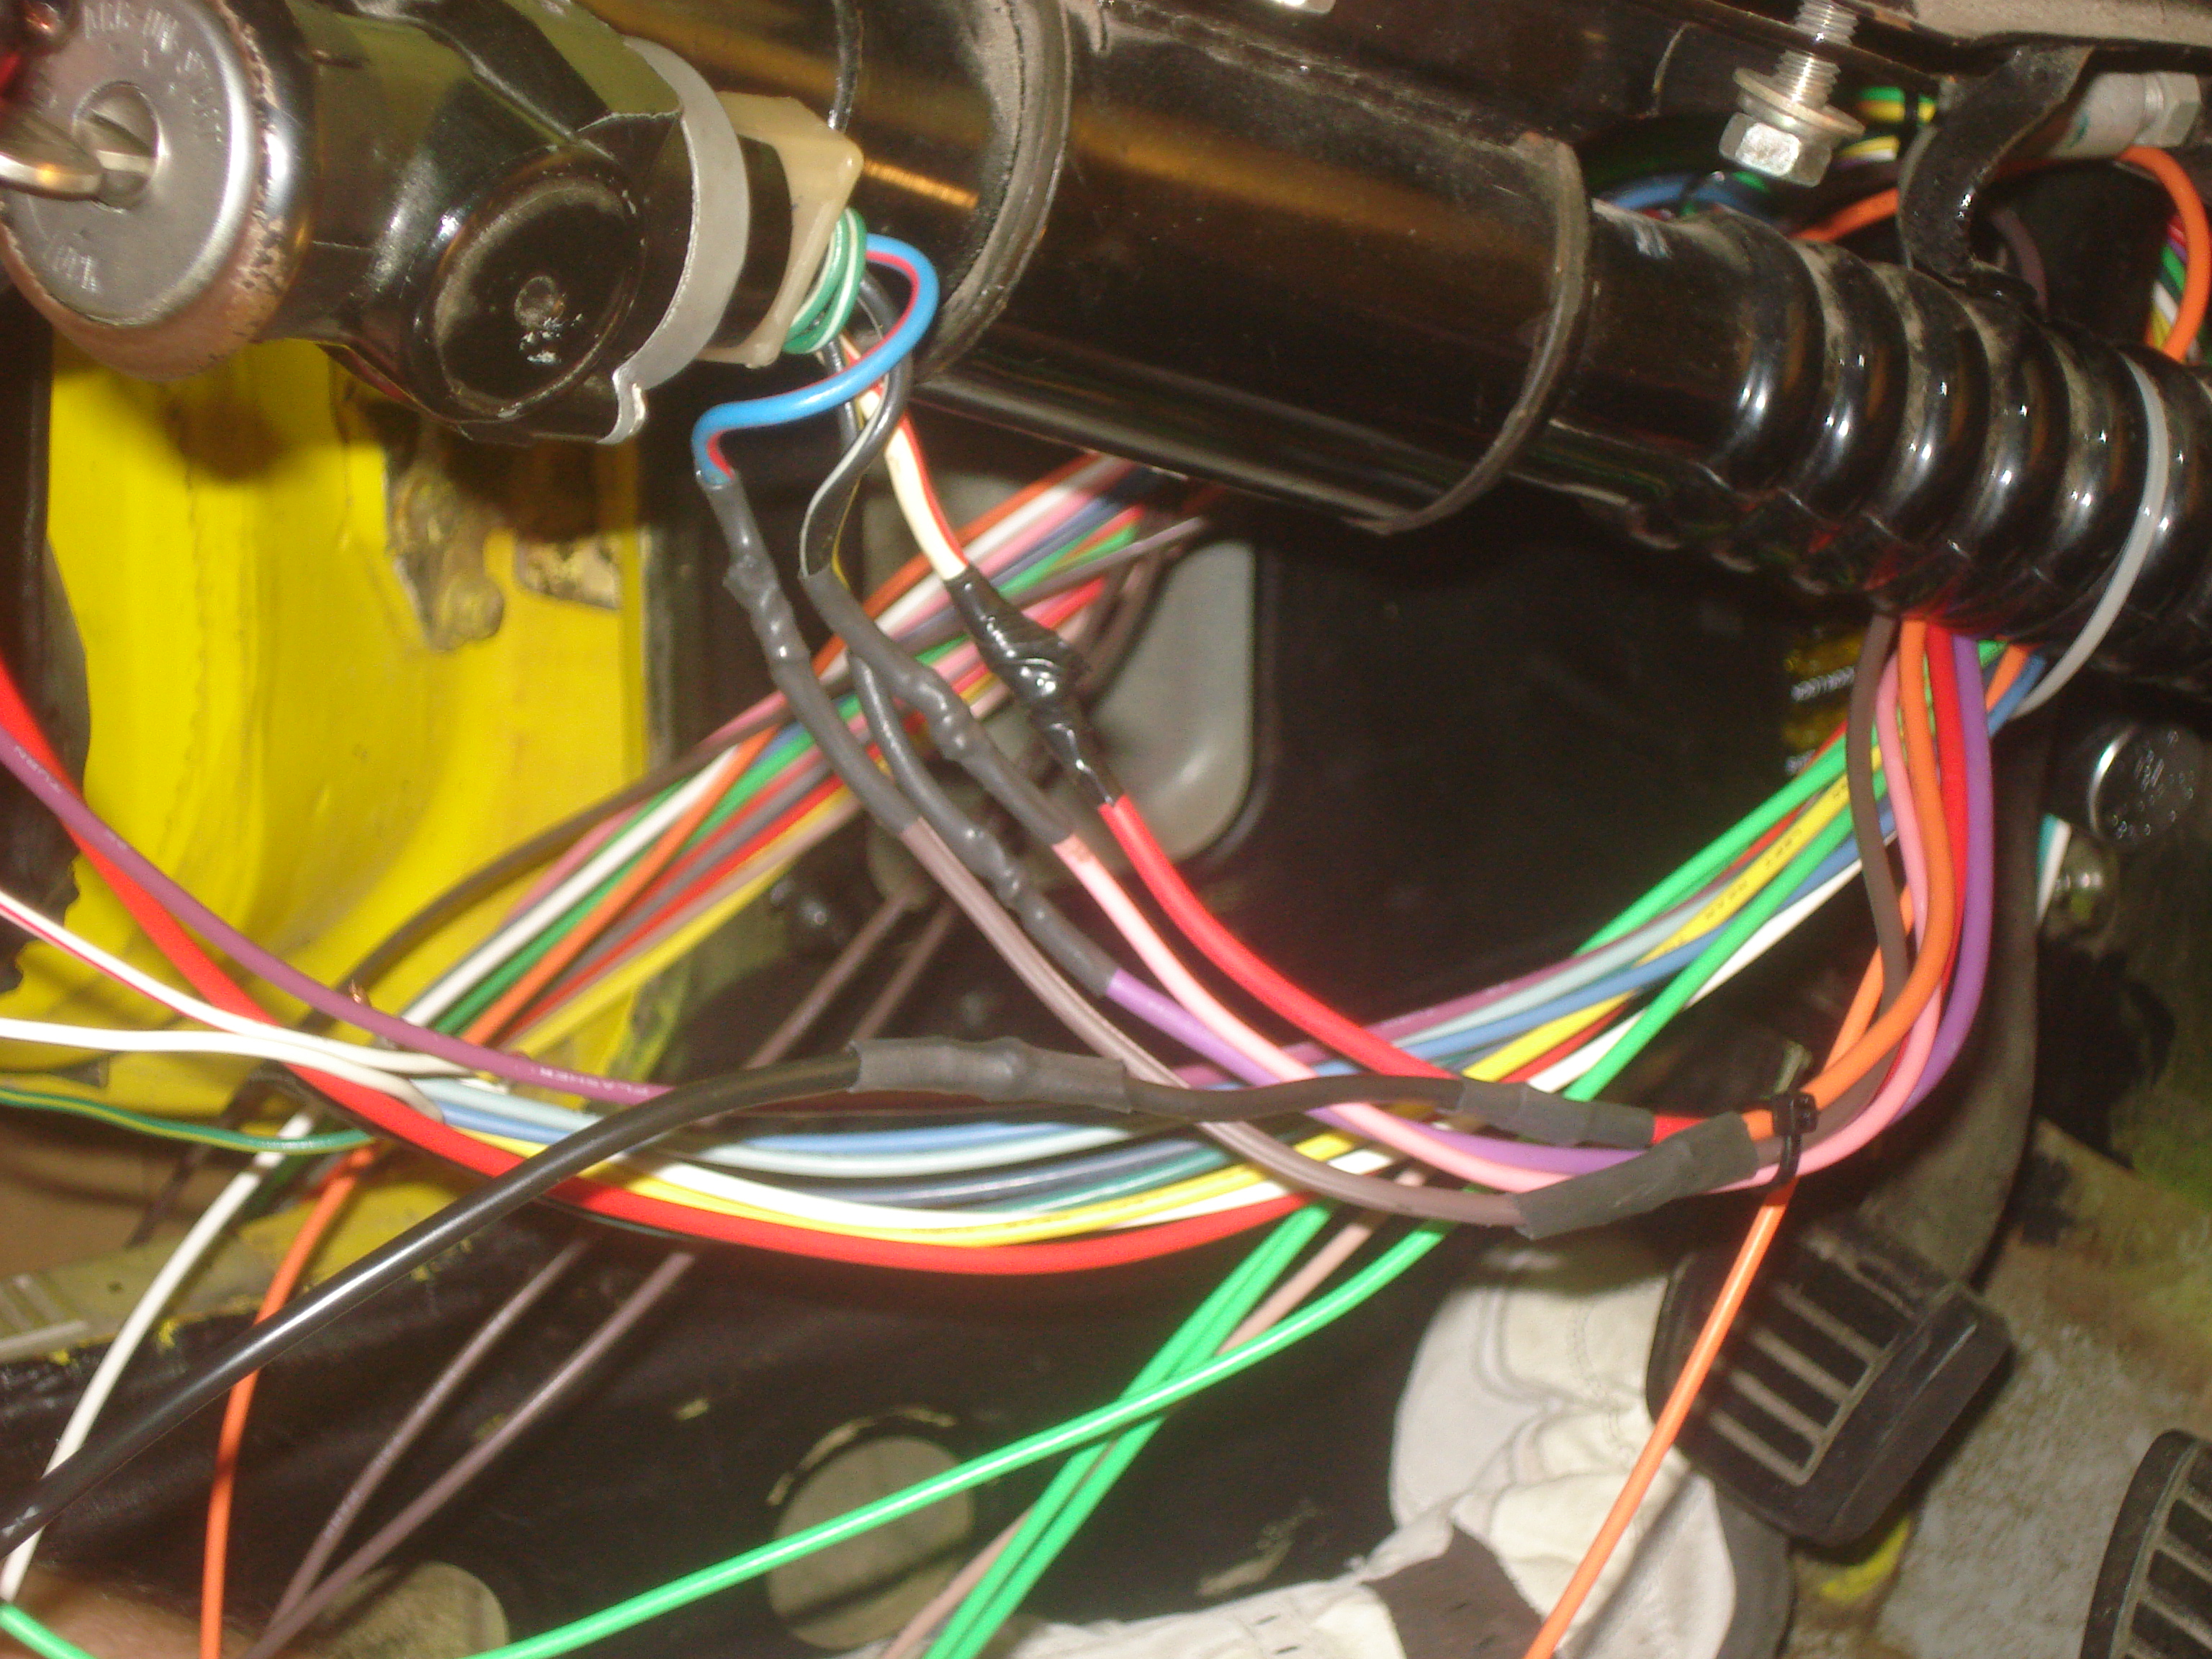
Spent a little time on the car. Got almost all of the factory sound deadening material off of the drivers side floor pan. Been using a heat gun, screw driver, scraper and wire wheel. Im trying to tidy up the steering wheel wiring so that its all set to be put back together. I wired in the horn and ran some wires for the radio. I have a semi big plan for the stereo so Im gonna get that all wired and documented. I temporarily mounted the battery back in to make sure everything was the way I want it. I have the speedo in its cup and 2 of the other gauges mountable. I will document and post most likely over thanksgiving. Anyone notice any mistakes so far? Bad wiring? Bad fuel setup? Anything?
-
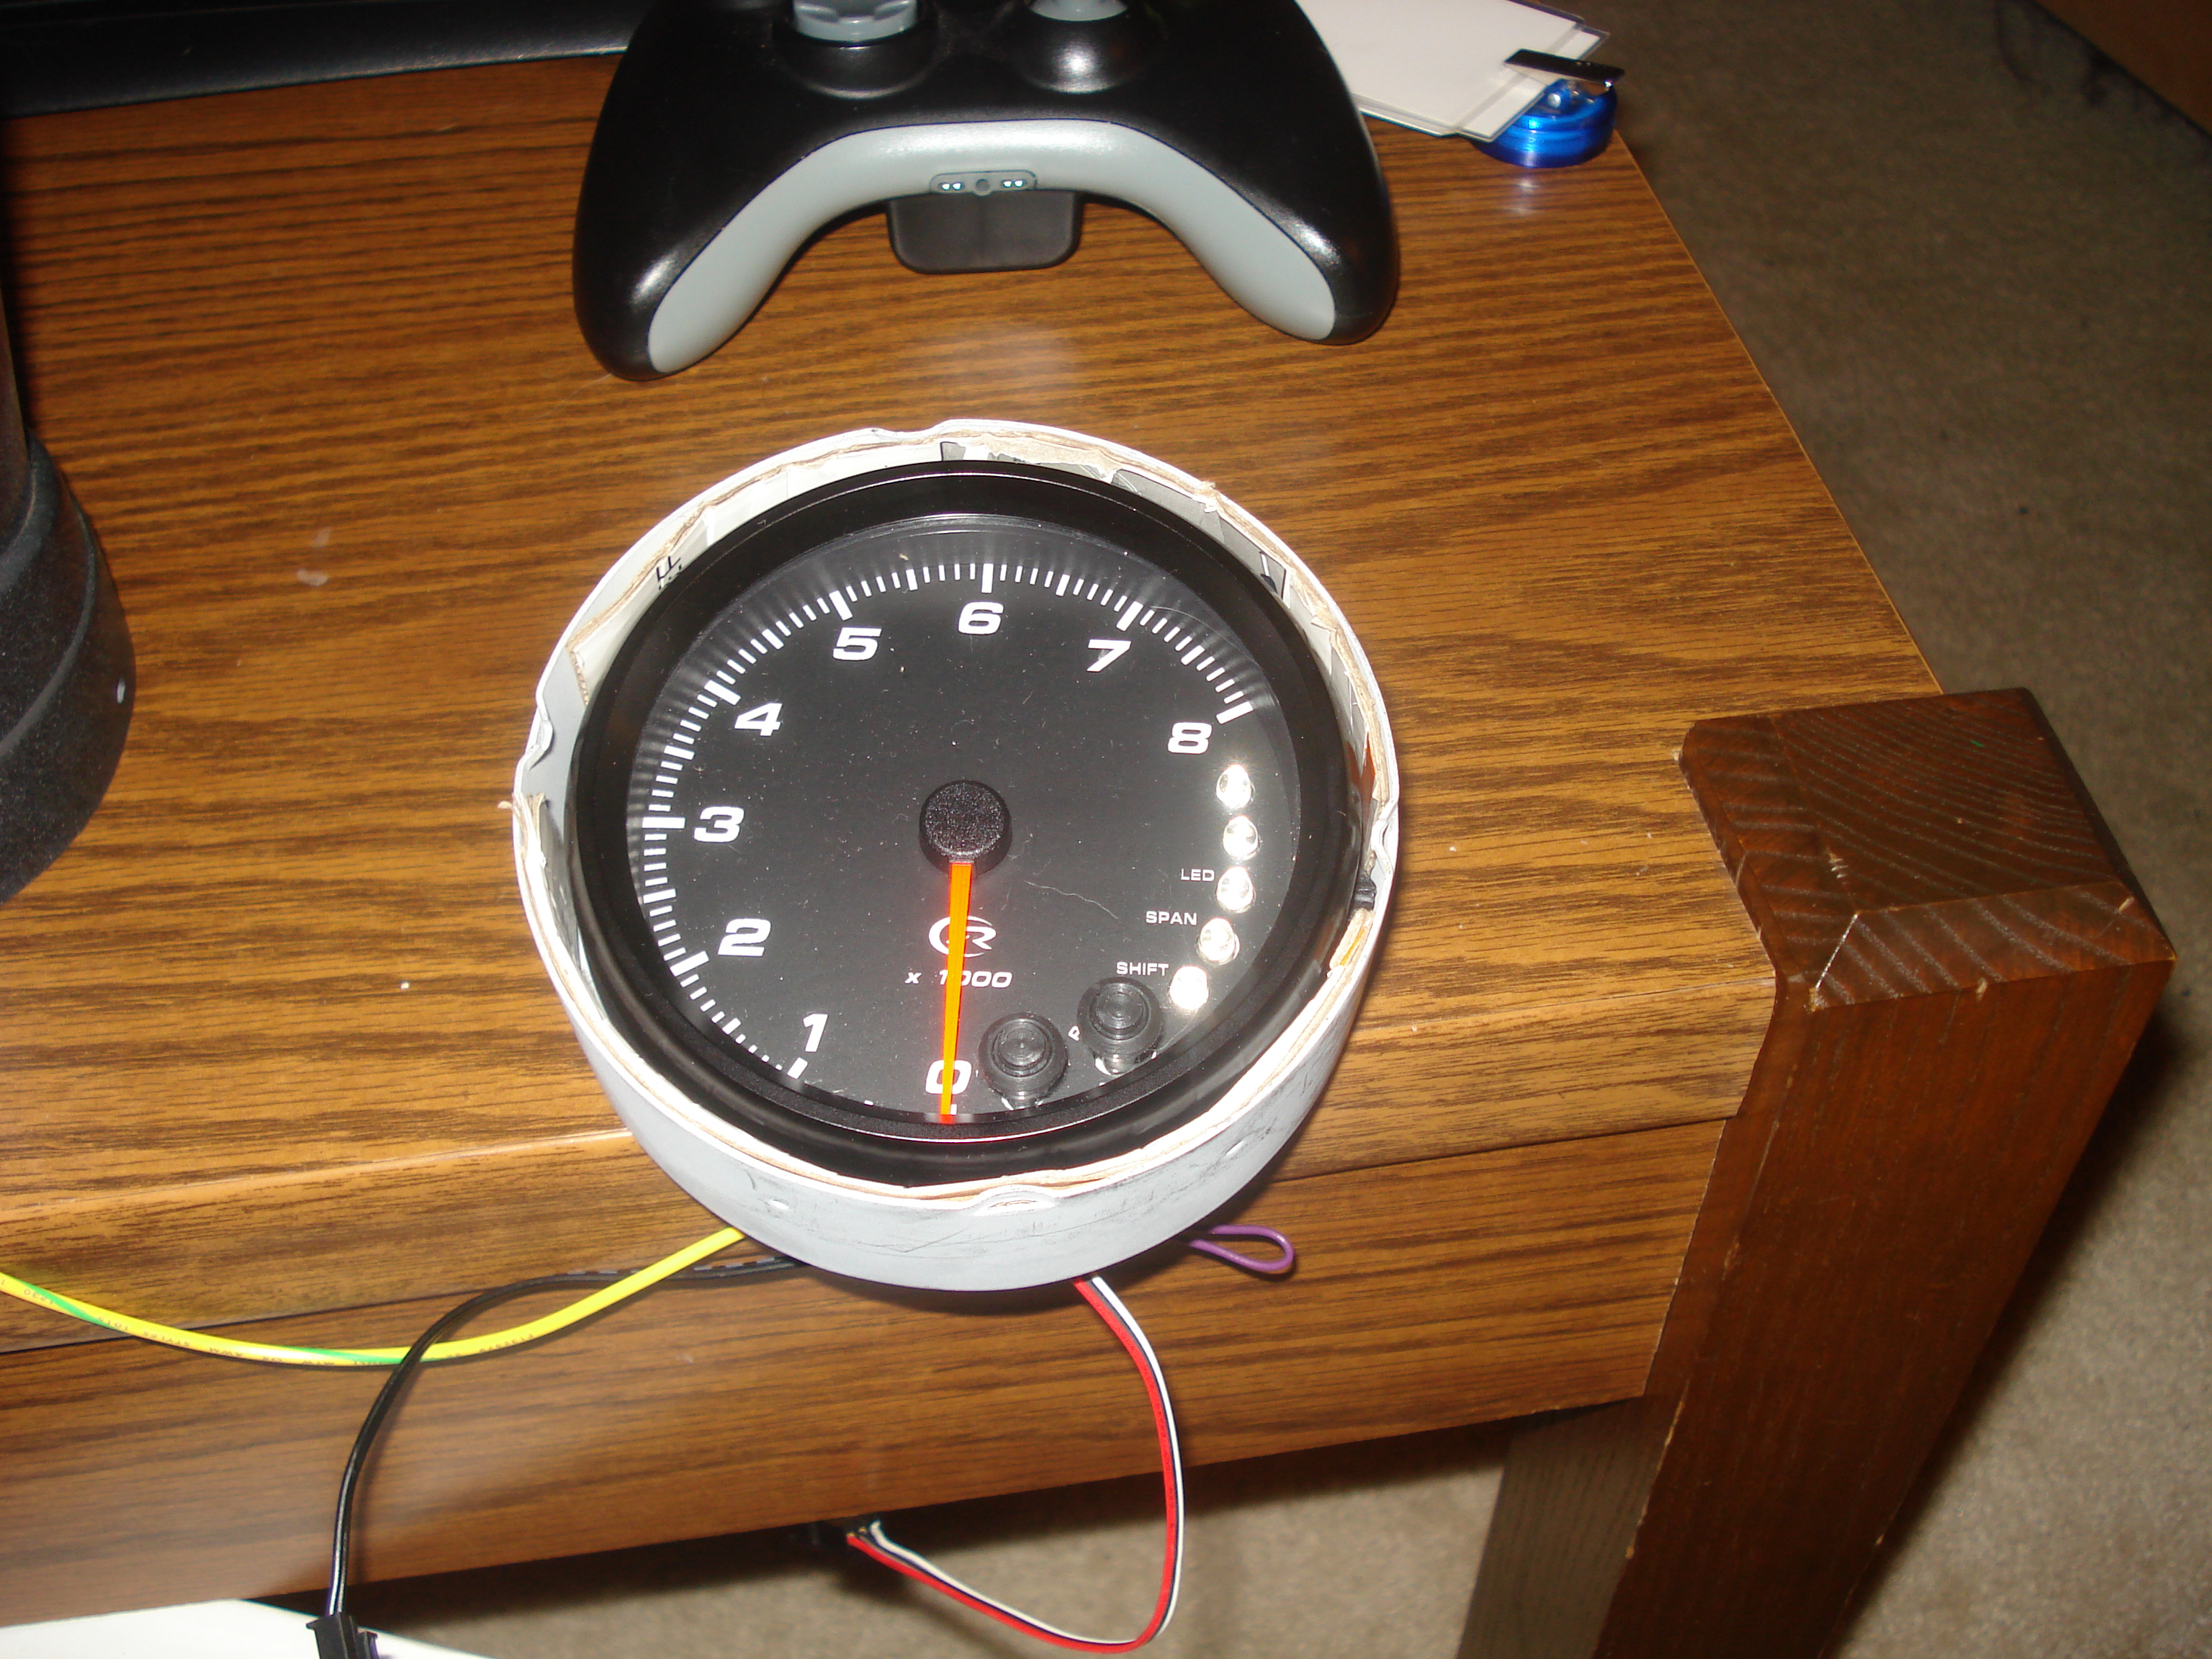
update: wipers and tachometer Ok I know I have really been slacking lately so here is a minor update. I wired in the wiper motor. It took some time to figure out the dang wiring but Ive added it to my wiring diagram. Ive also cleaned it up a bit. EZwiring Diagram wipers 3.pdf Next up is mounting the Tacho in the factory pod and location. 1st thing I did was remove the stock gauge. Cut the back of the gauge pod out. I primered mine cause I hate stuff that appears old. I also primered and painted the bezel and insert with the same primer and paint as the engine bay. Next I put the gauge in the cup with a bit of finess and some put some cardboard around it to keep it centered and insure it doesnt move around. Then the easy part just put the gauge in the cup center it and put the trim ring and bezel back on. Here are some pics. I also had the pound the back of the pod out just a bit to get it to screw on nicely. Thats it for now. Lets hope this nice weather stays.
-
I got the throttle cable from McKinney motorsports. http://mckinneymotorsports.com/prod_240+260+280Z+parts I can't speak for it's fitment because I have yet to purchase an engine. Hope that helps.
-
Gauges are here. I was going to restore the dash but when I looked under the dash cap it is far beyond repair. There are very large 1" thick cracks in the dash and they are filled with what looks like hot glue. I just got back from a vaca to mexico and hope to actually get some updates done in the next few weeks.
-
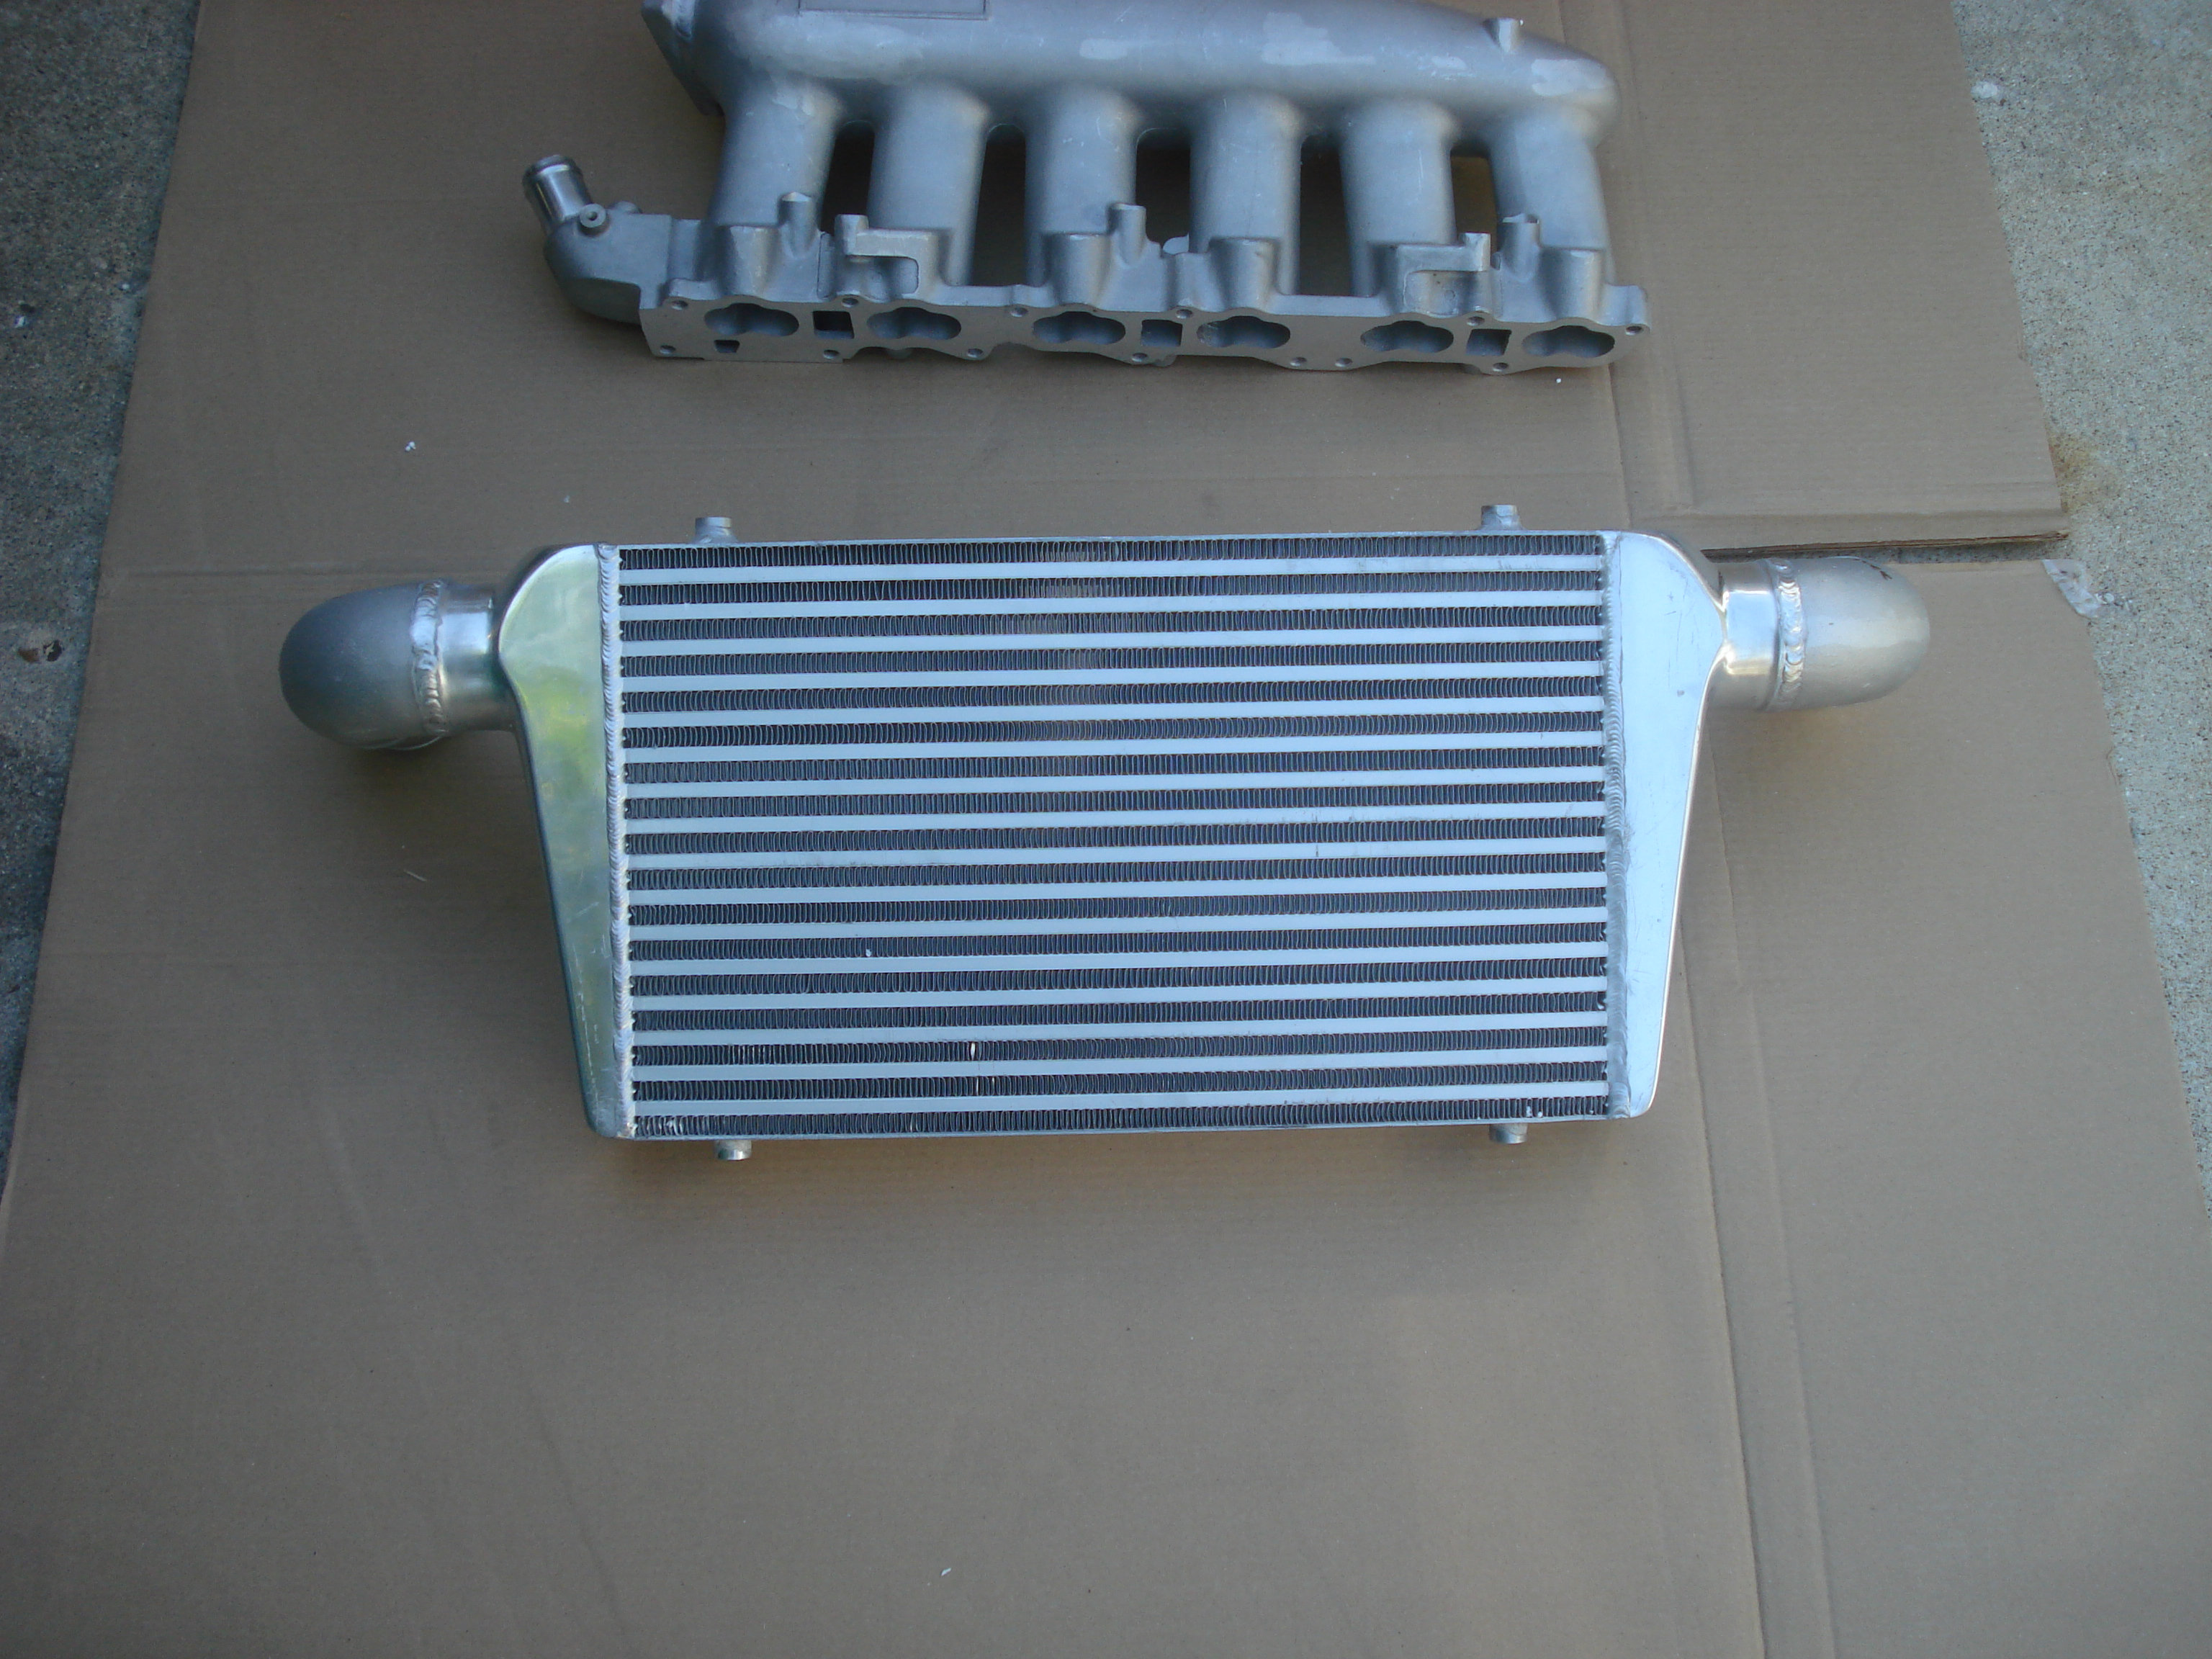
I have been slacking lately. Im sorry for anyone thats following my post. Heres an update but there isnt much to say. I got most of the parts I ordered from mckinney finally. The problem is they dont give you any instructions or even pics of how its supposed to go. I have an intercooler and a bunch of pipes and a bag of bolts and hoses. I guess ill be able to figure it out a bit better when I actually get the motor. I have hit a hard point in the car. I am stuck because in order to finish the wiring I need to put the dash back in, and in order to put the dash back in I need my gauges. I ordered a complete set from speedhut. Im waiting for those to come in. The other issue is almost everything else requires an engine. My plan is to order the engine when Im ready to just drop it in. That way I can take advantage of the 30 day startup warranty. Problem # 3. I am completely broke. I cant afford an engine right now and its getting close to winter here. I might just take my sweet a** time this winter get everything perfect and order the engine right before spring. No point in rushing to get the car ready to store for winter. So I think Im gonna spend some time cleaning up and restoring some more of the interior.
-
Pretty much the whole first page of my post is my new fuel system. Enjoy http://forums.hybridz.org/index.php/topic/93859-1971-240z-rb25det-build-thread/page__pid__890713__st__20#entry890713.
-
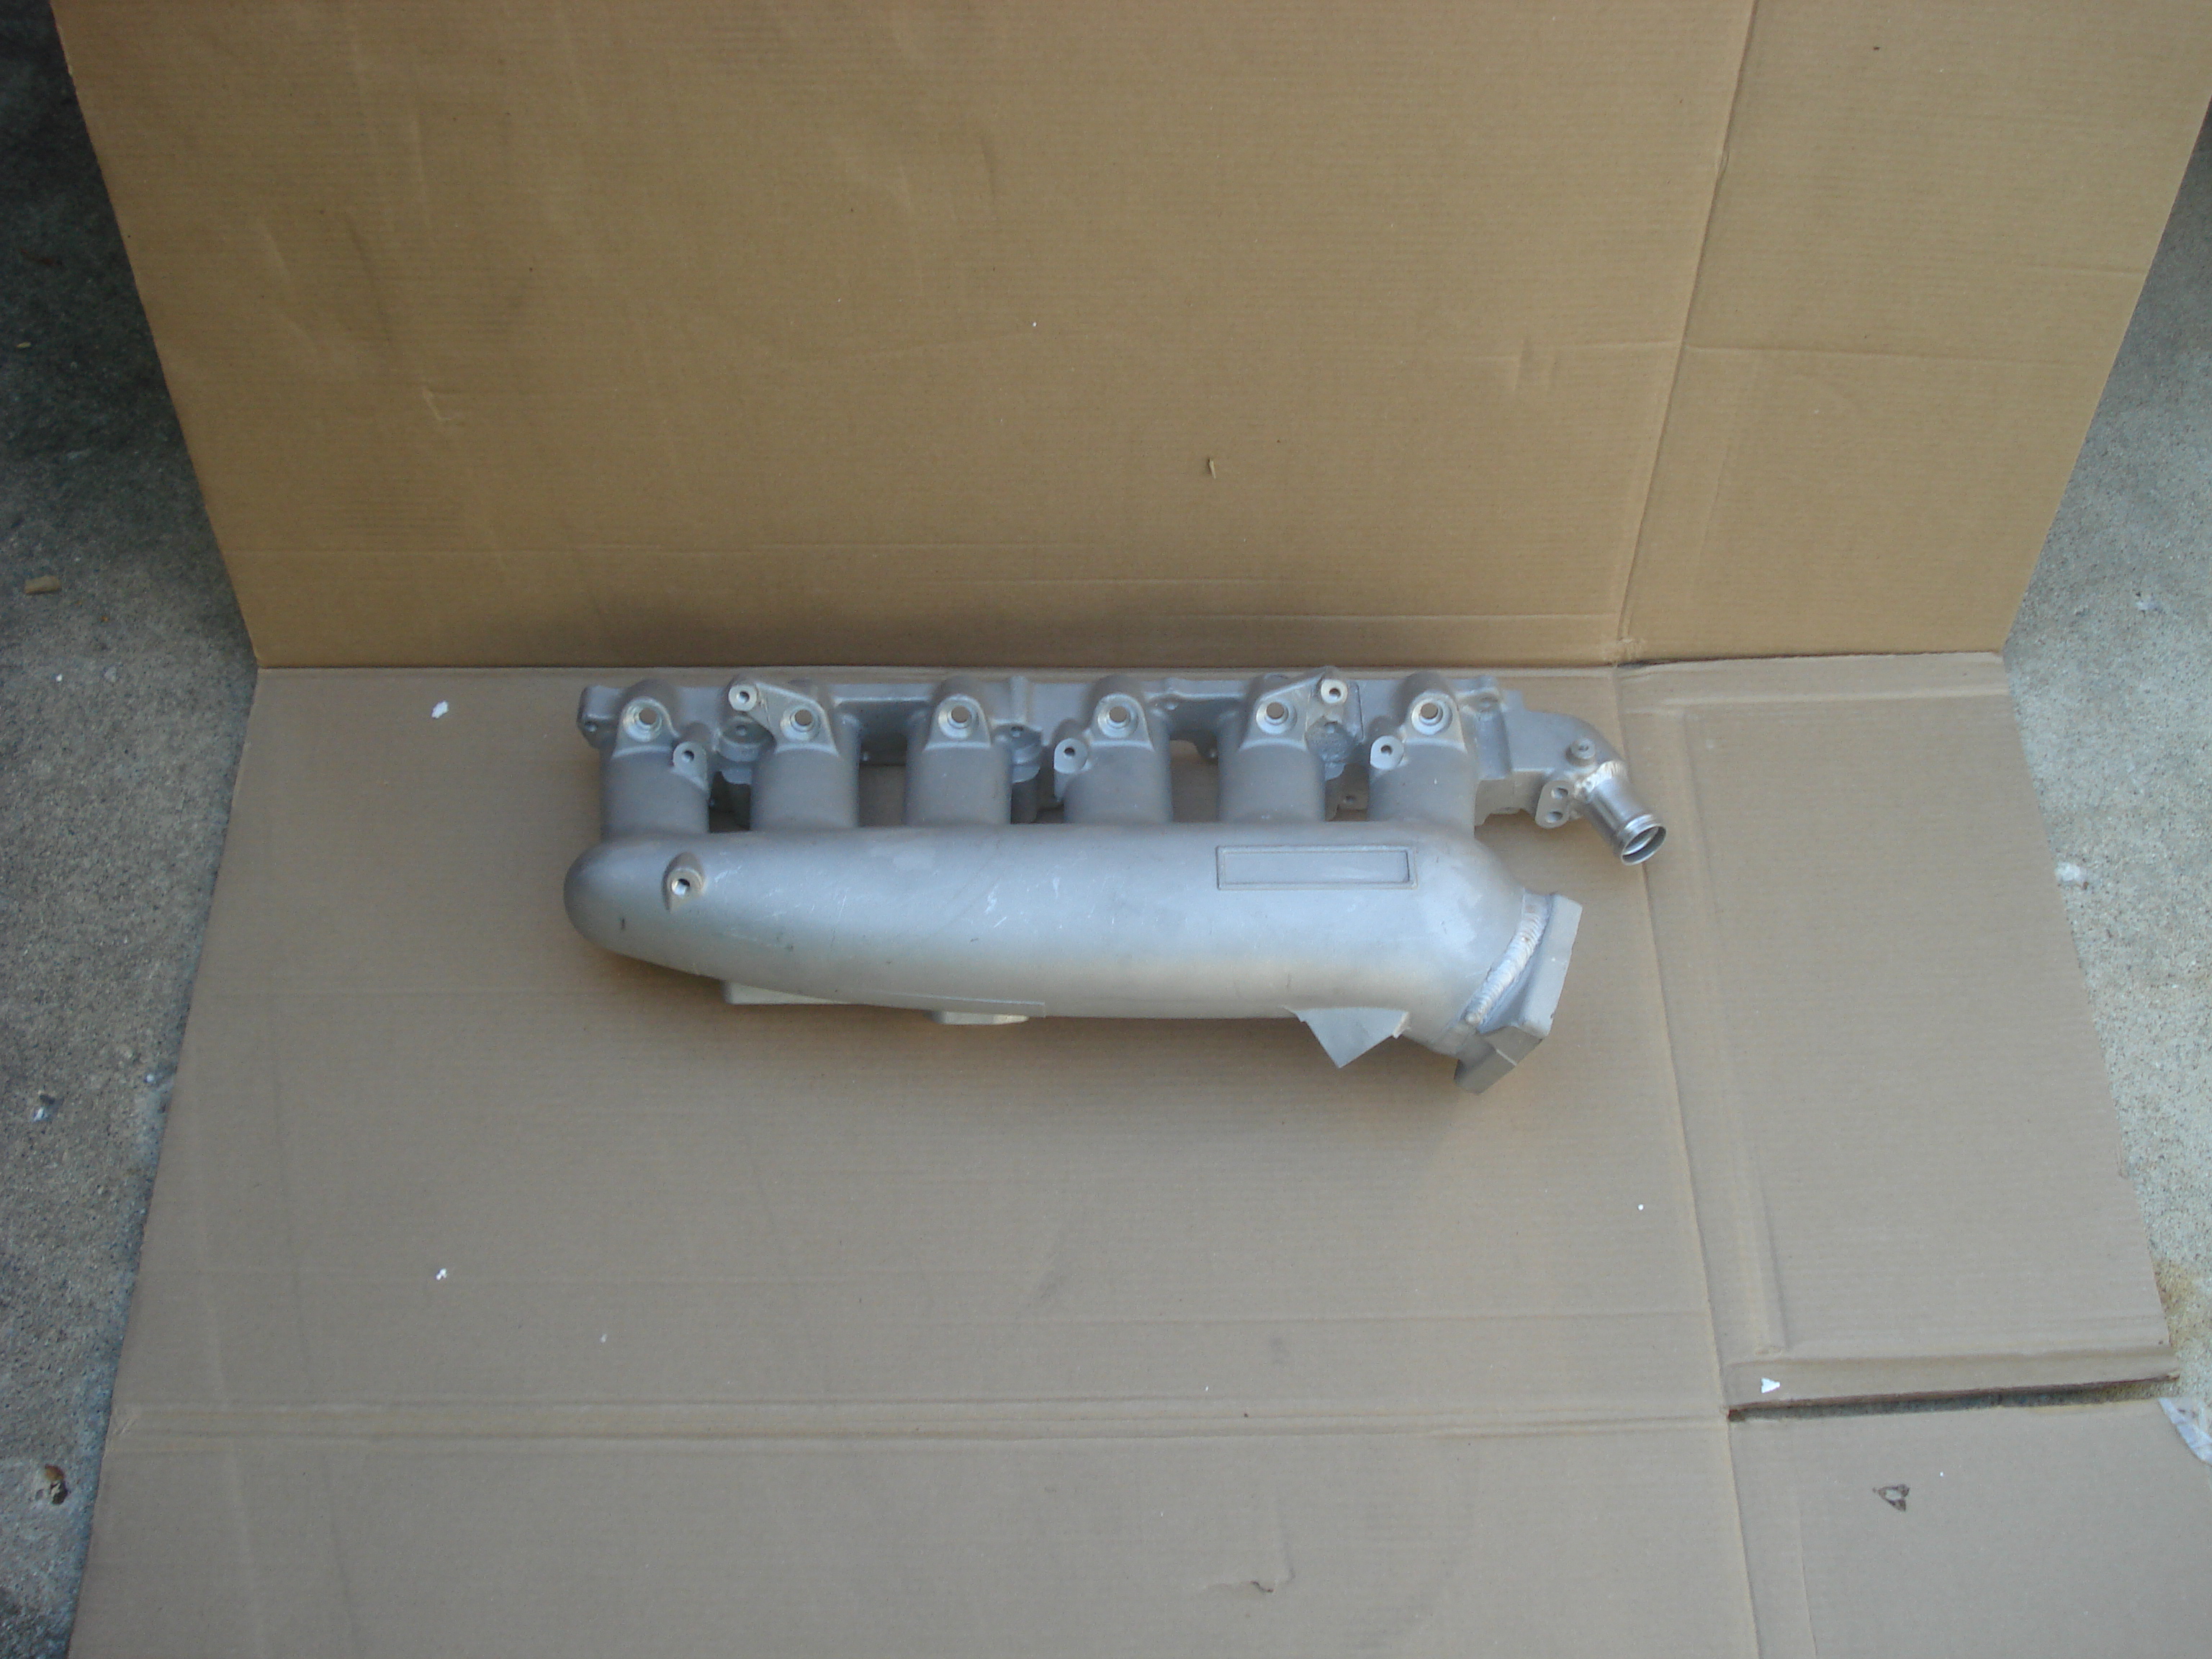
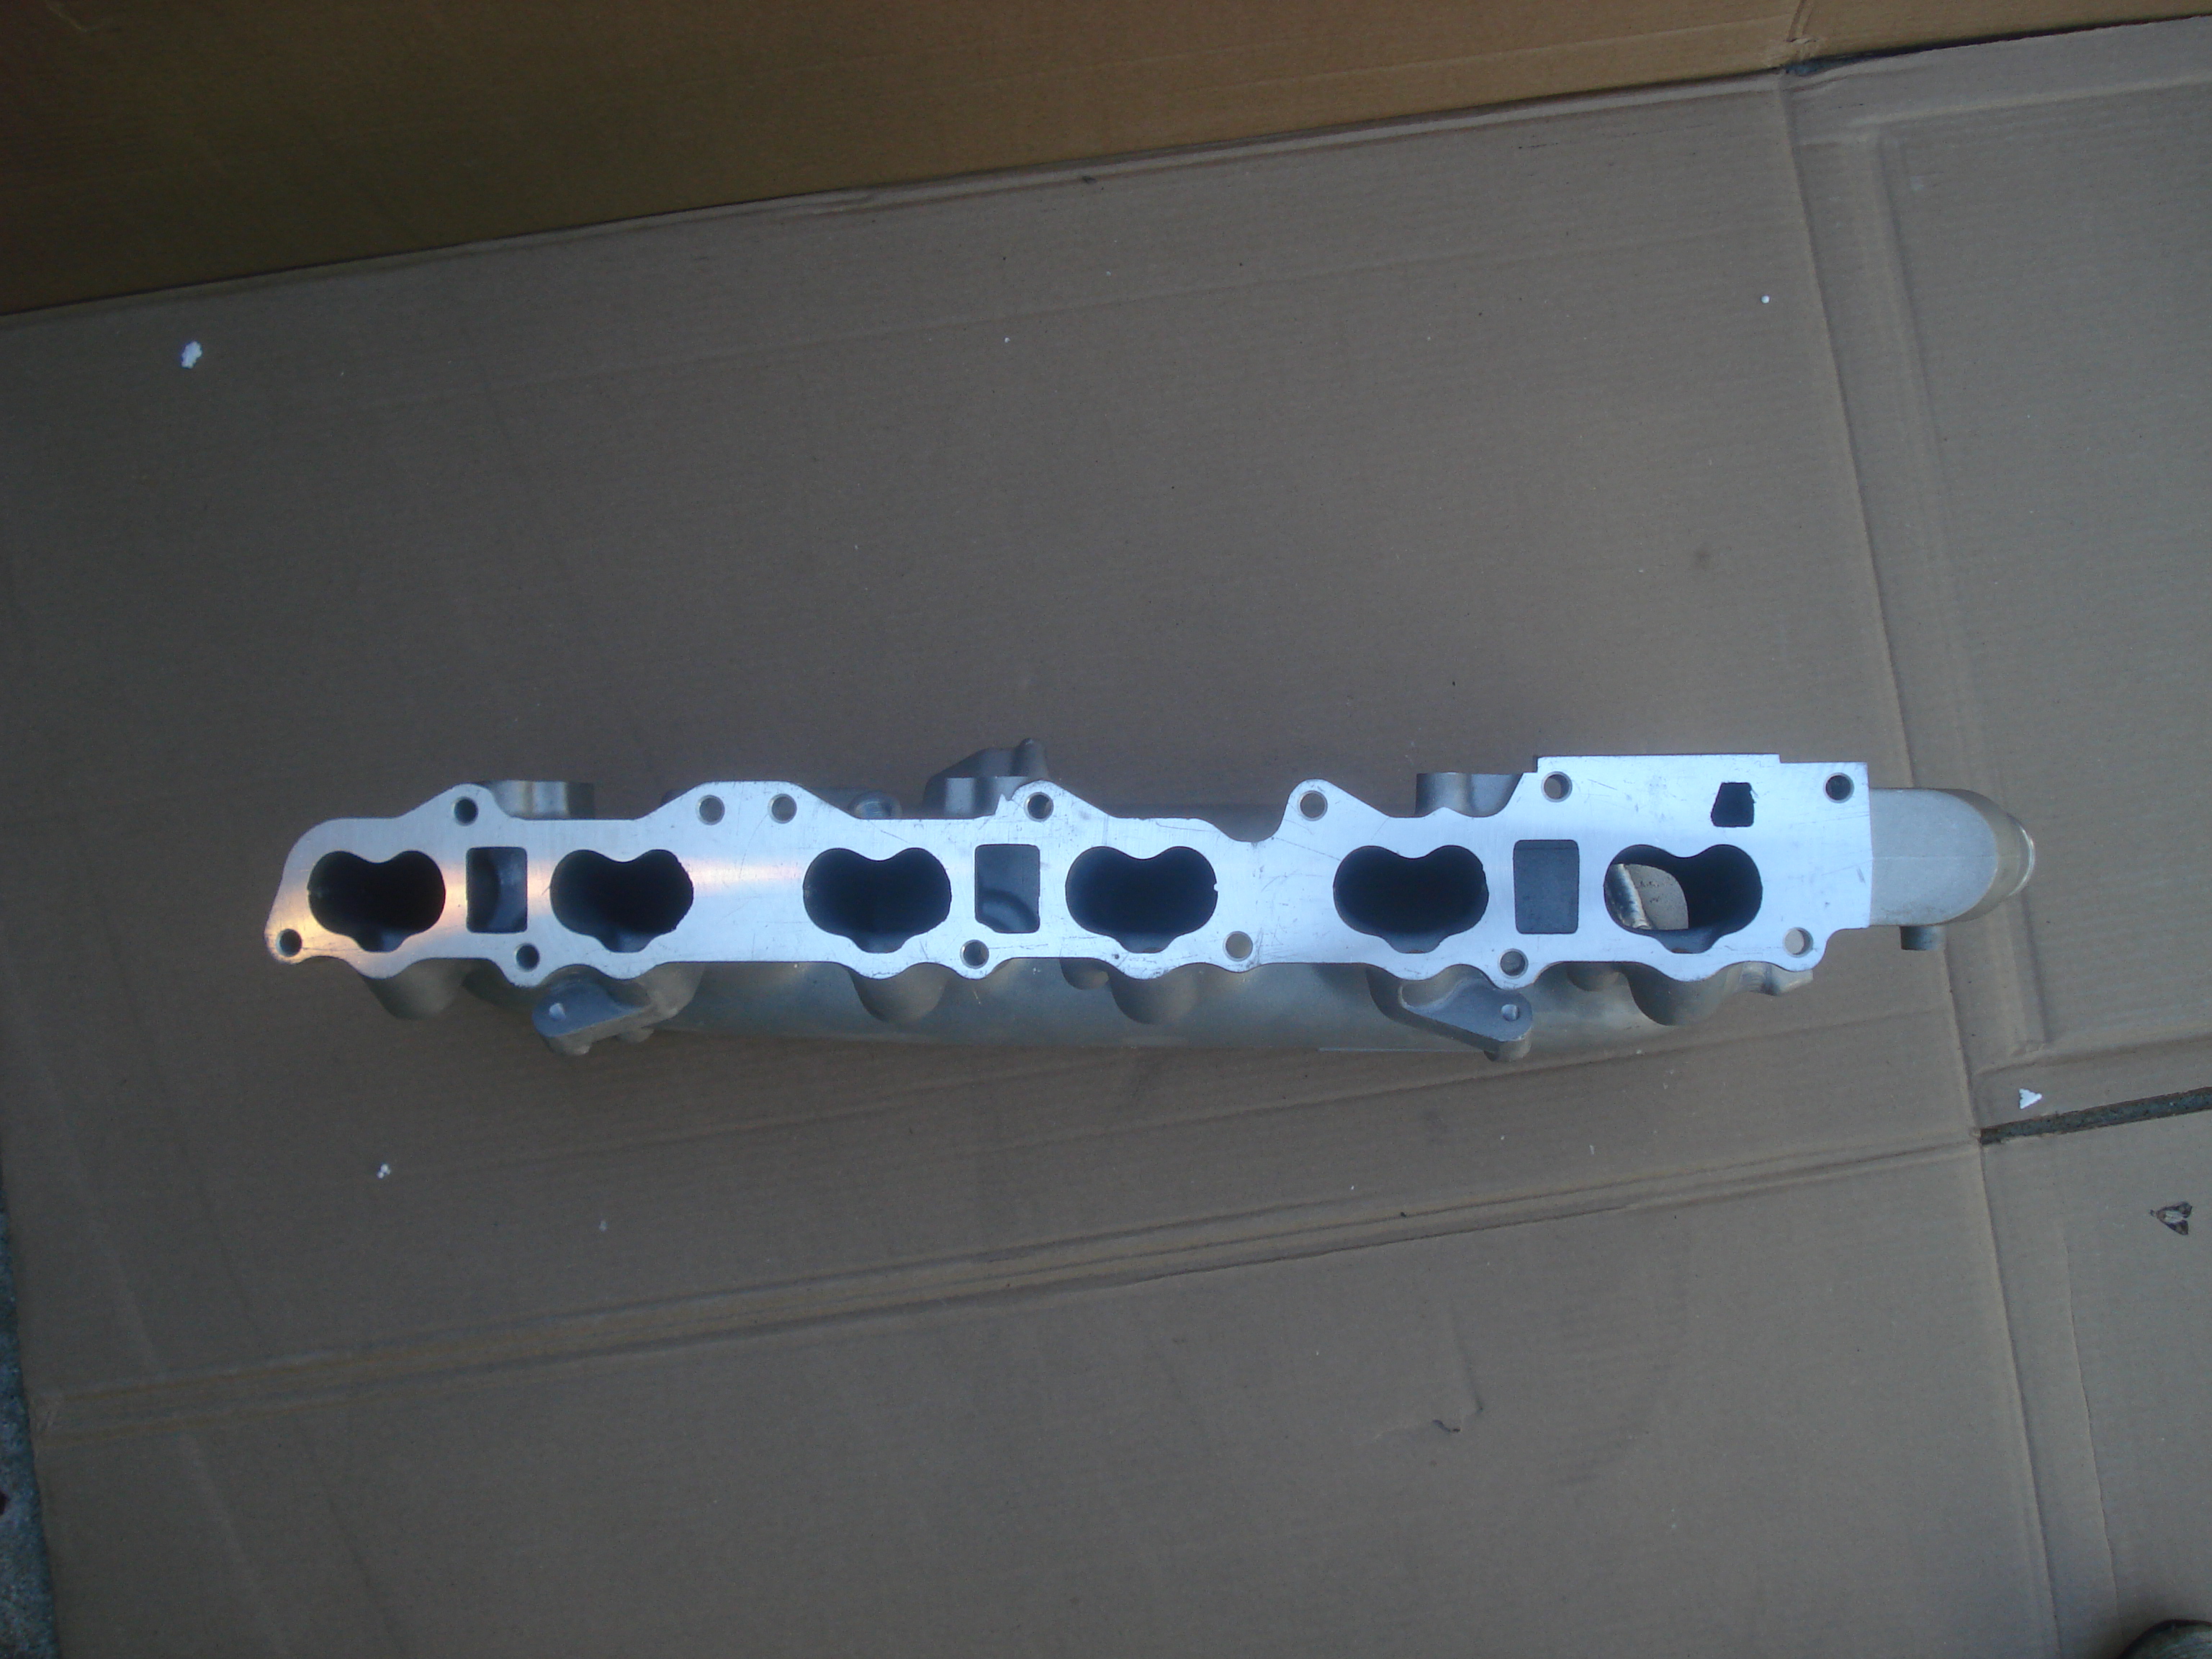
I got my greddy style manifold from mckinney. They hand picked a good knock off for me and then modified it to work for me. Just got it on weds. Heres a few pics.
-
minor update. Rewiring the car. So my factory harness was toast from water damage. The fuse box was melted and nothing worked except the speedo. Step one choose a wiring harness. I went with an Ezwiring 21 circuit harness. It was much cheaper than a painless and rated very well. Harness can be found here. http://www.ezwiring.com/wiring_harness.html I followed a few guides I found here and managed to so far wire up the Headlights, turn signals, tail lights, brake lights and rear turn signals. Here is a few pics. Not much to show here. Here is my Diagram so far. EZwiring Diagram 3.pdf please let me know if you can see this file. totals. Ezwiring 21 circuit harness - $185.00 Solder heat shrink and loom - $30.00 Total for wiring = $215.00 Total so far = $1926.00
-
Toasteroven, The Ezwiring harness has been good so far. The instructions are terrible unless you are wiring a gm or ford. The wiring guides I found on here helped a lot but were a bit hard to read. I think once im finished and I post my diagram and pics it should hopefully make a lot of peoples lives a lot easier. I am almost complete with my soldering and heat shrinking. Ive got just the headlights and wipers left to solder. I should finally have time to finish it all on Friday. It does have nice wires and they are all marked very well. It does have a fuse box which was a bit bulky and ugly. I had a hard time deciding where to mount it. I have never used a painless but to me I think it cant be beat for half the price. More to come soon. Ps woohoo over 1100 views. I feel like Im contributing to this site and Hopefully will be making peoples lives easier. You guys keep reading and Ill stay motivated. I got my long awaited shipment from Mckinney today. I also got my motor mounts, driveshaft, throttle cable, and downpipe.
-
Ahh. Finally got some work done today. The ezwiring harness arrived and I rewired the car. I got the brake lights, rear turn signals, headlights, front turn signals all prewired and working. Expect a write up and wiring guide in the near future. I am gonna write it all down when I solder all the connections. It feels good to have gotten something done on the car.
-
Sorry I havent been able to update much lately. I have builders block. Im not sure what to do next. I ordered an ezwiring harness and it should be here tomorrow. I plan to get all the lights and signals wired up. After that Im stuck. Im waiting on a large shipment of stuff from Mckinney Motorsports. Im also trying to figure out what to do about gauges. When I bought the car only the speedo worked. The wiring harness was fried so most likely that was the problem. I think Im going to change them all out anyway. I was thinking about just doing the essentials for now. Speedo, Tach, fuel gauge, oil press,and water temp. Help me out here guys. What should I do next? What Gauges should I do? I have seen a lot of threads on the speedhut and they look nice. They also dont seem that much more expensive than autometer. Please HELP me. You tell me what to do and I promise ill keep the thread going.
-
I don't see anything wrong with an intank setup. My concern would also be baffles. I ran an intank setup on my 350z and it was nice and pretty quiet. I also had a swirl lot on that car. Without baffles you will want to make sure you never run less than about 1/4 tank. I went to autozone and they sell a tank repair kit. It's a 2 part sealer that works almost exactly like mighty putty.
-
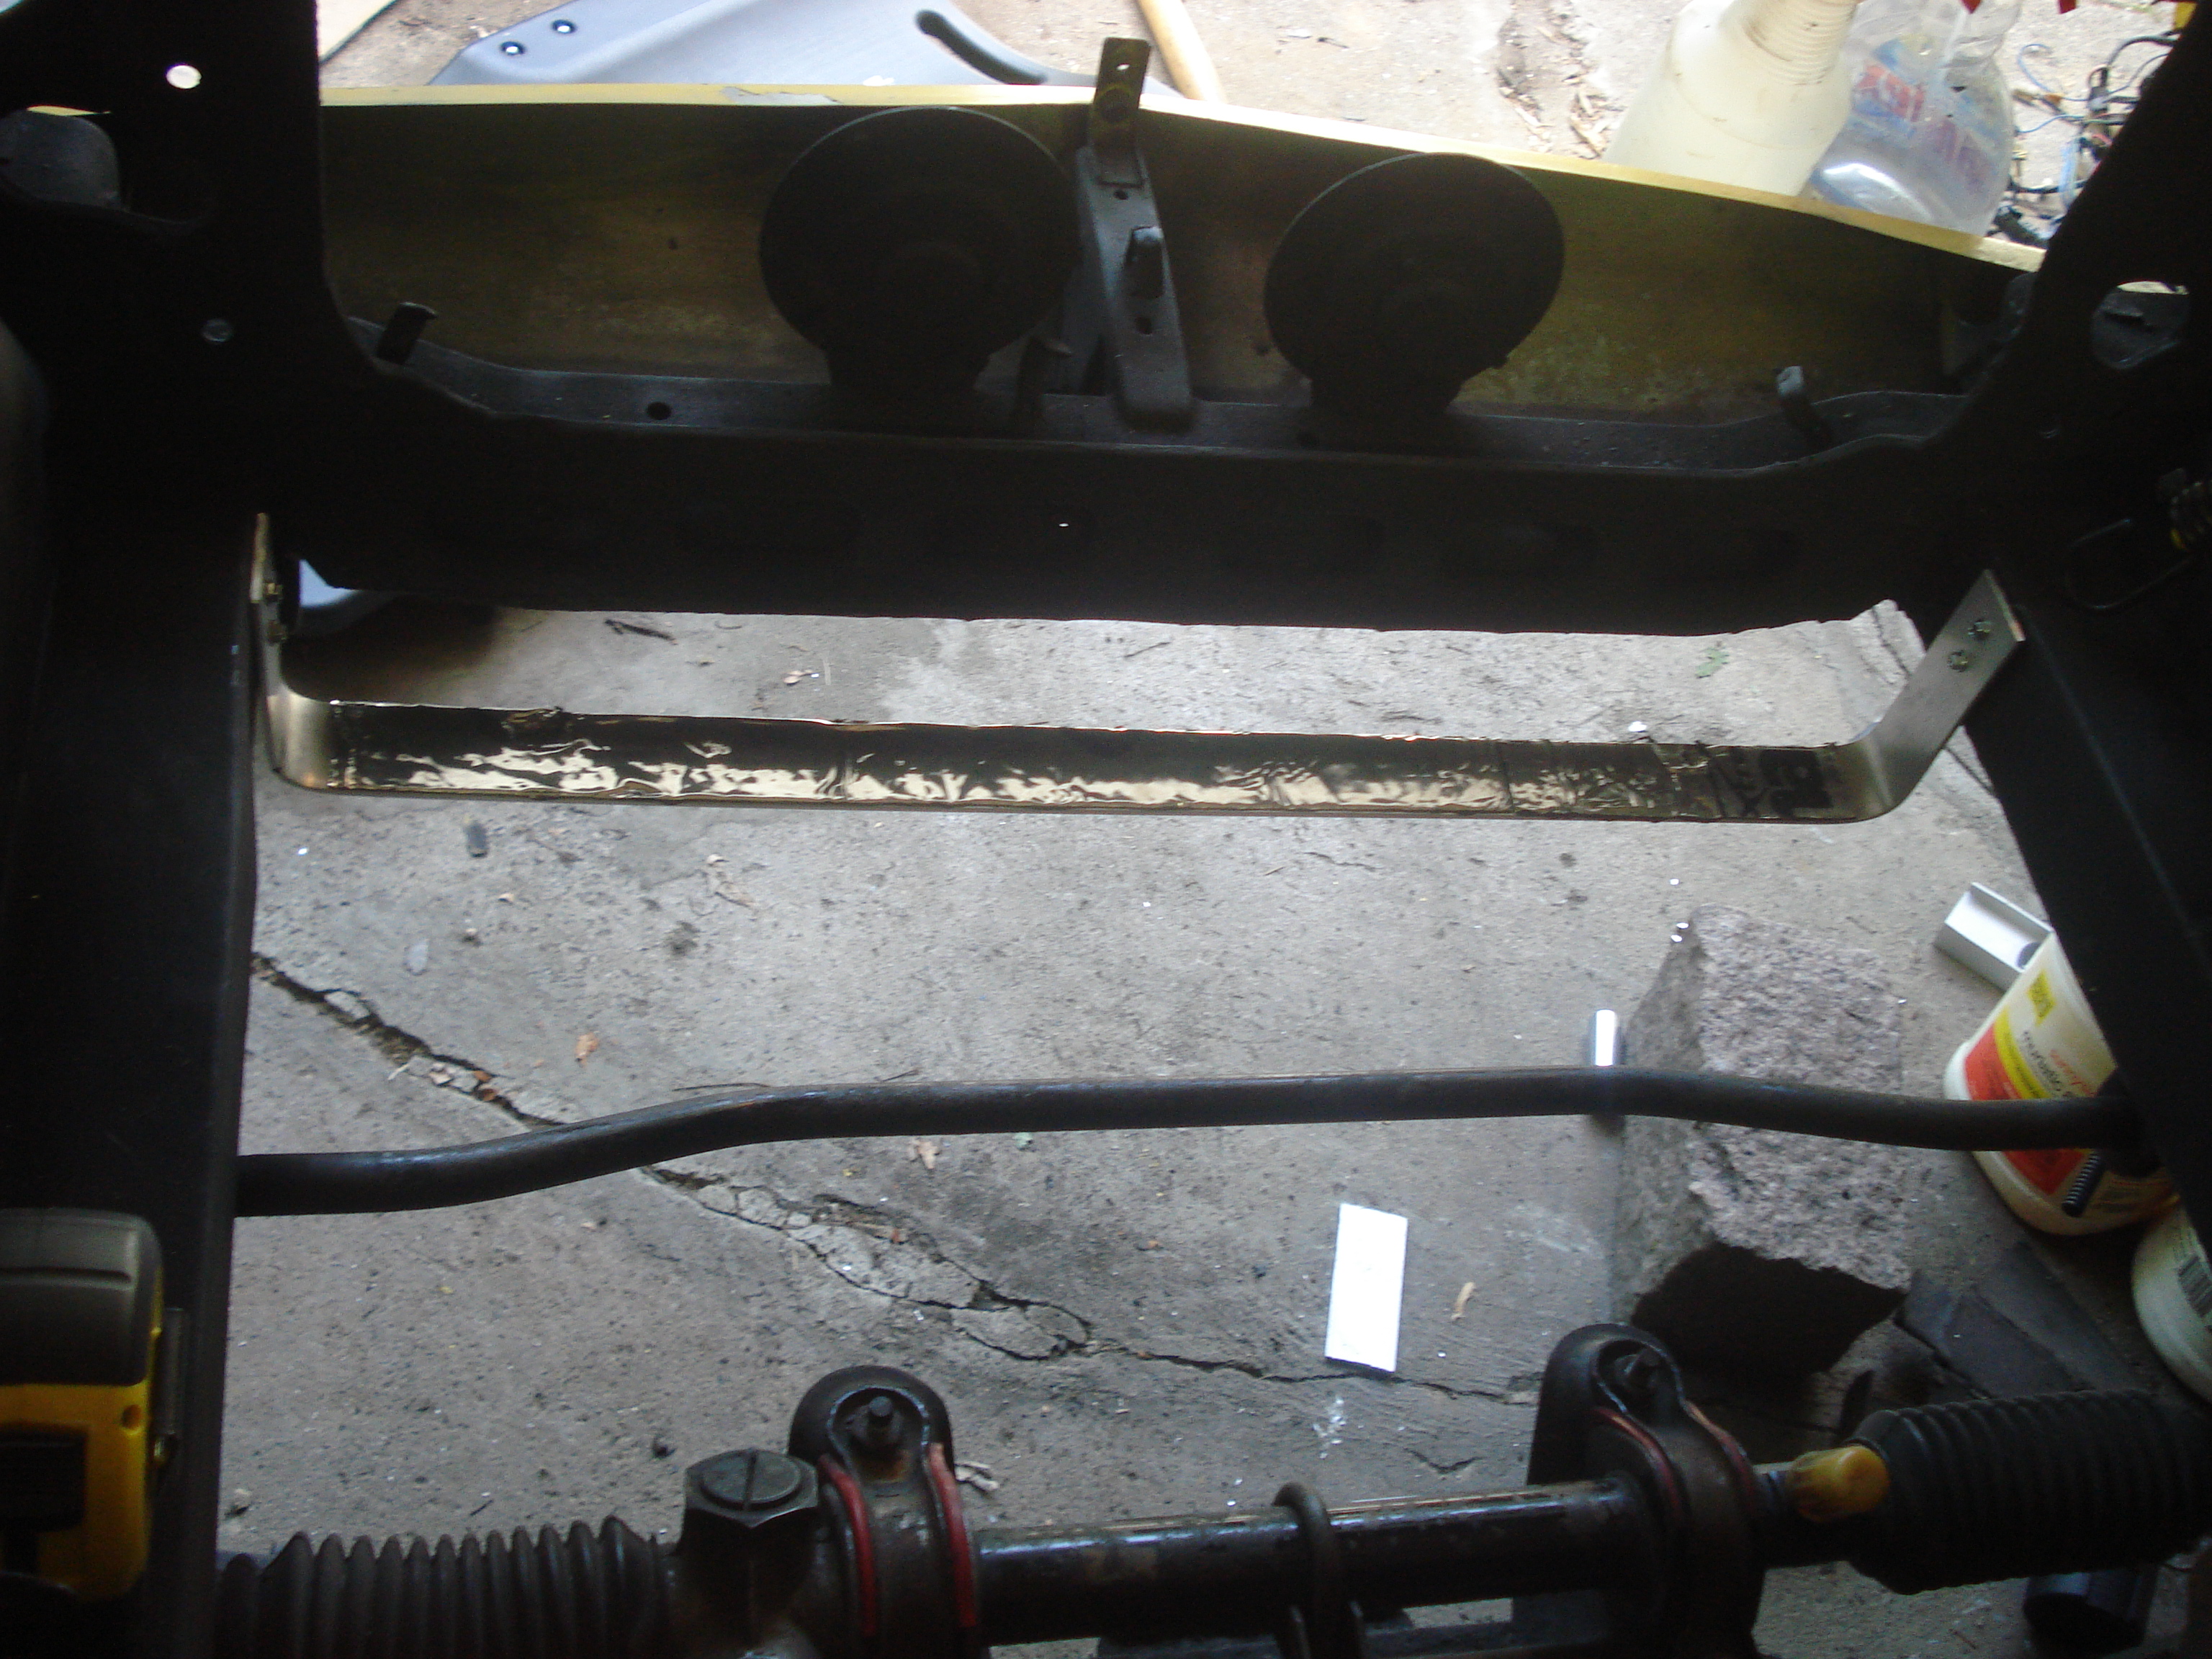
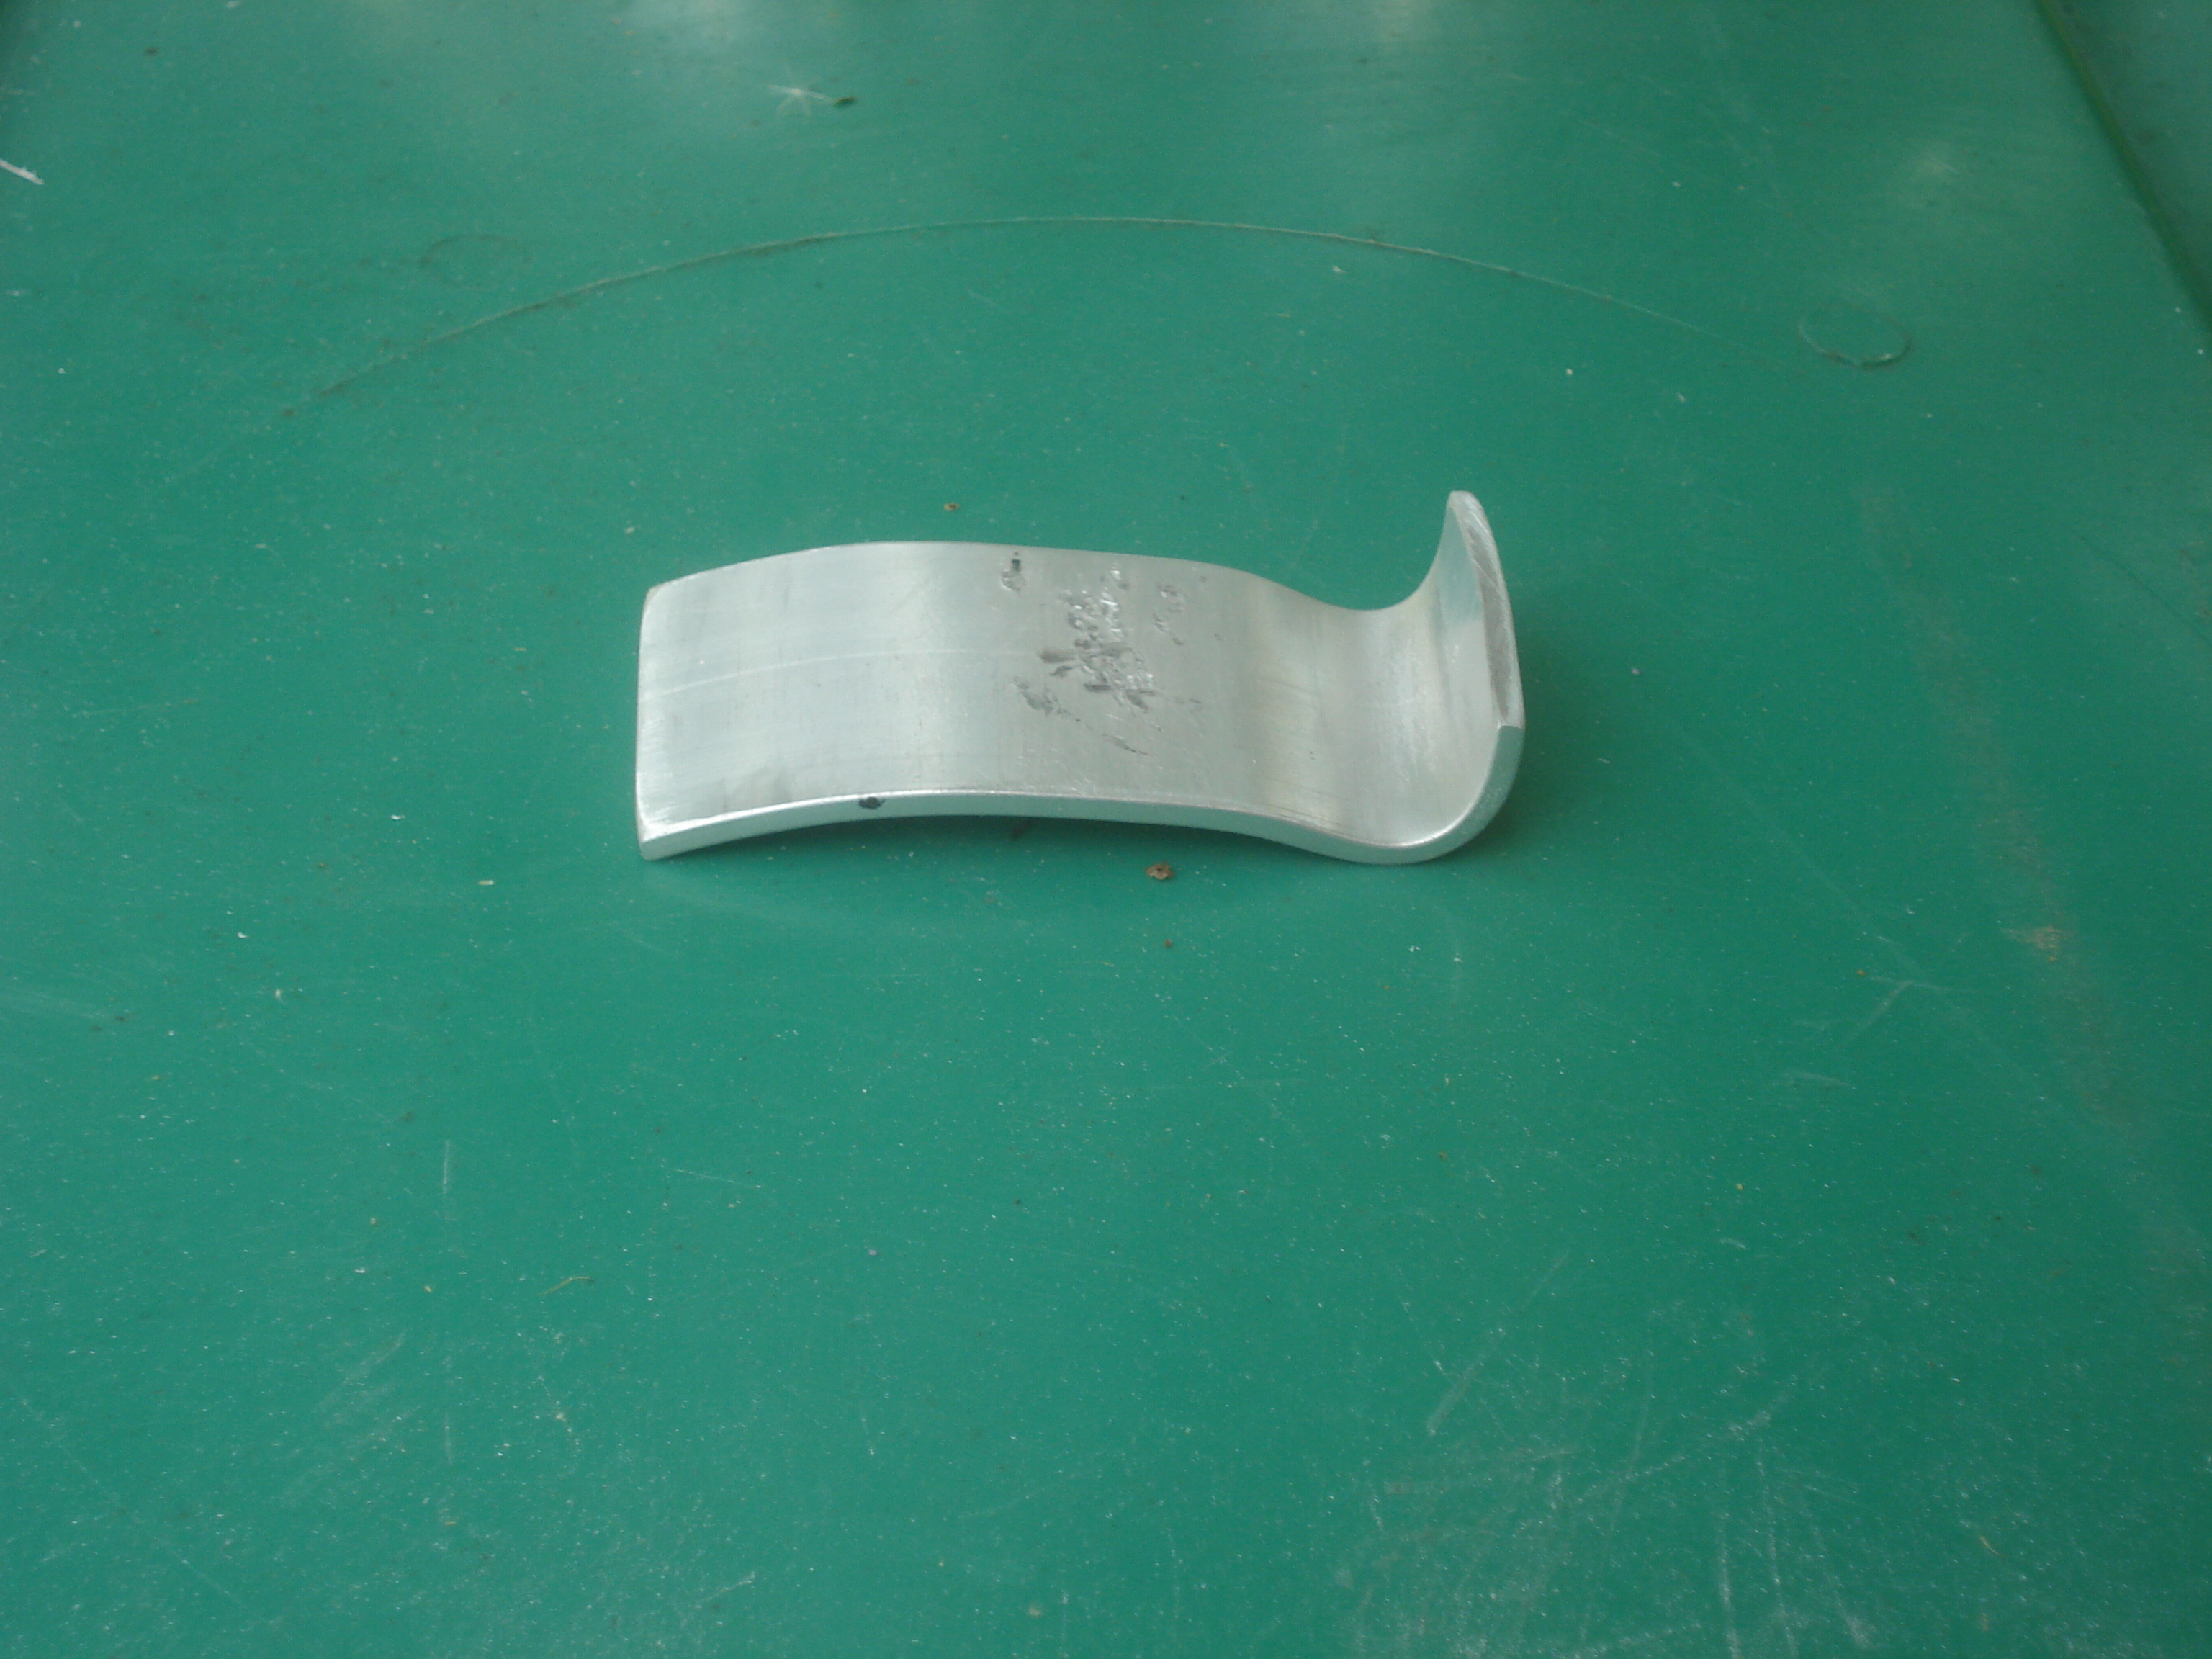
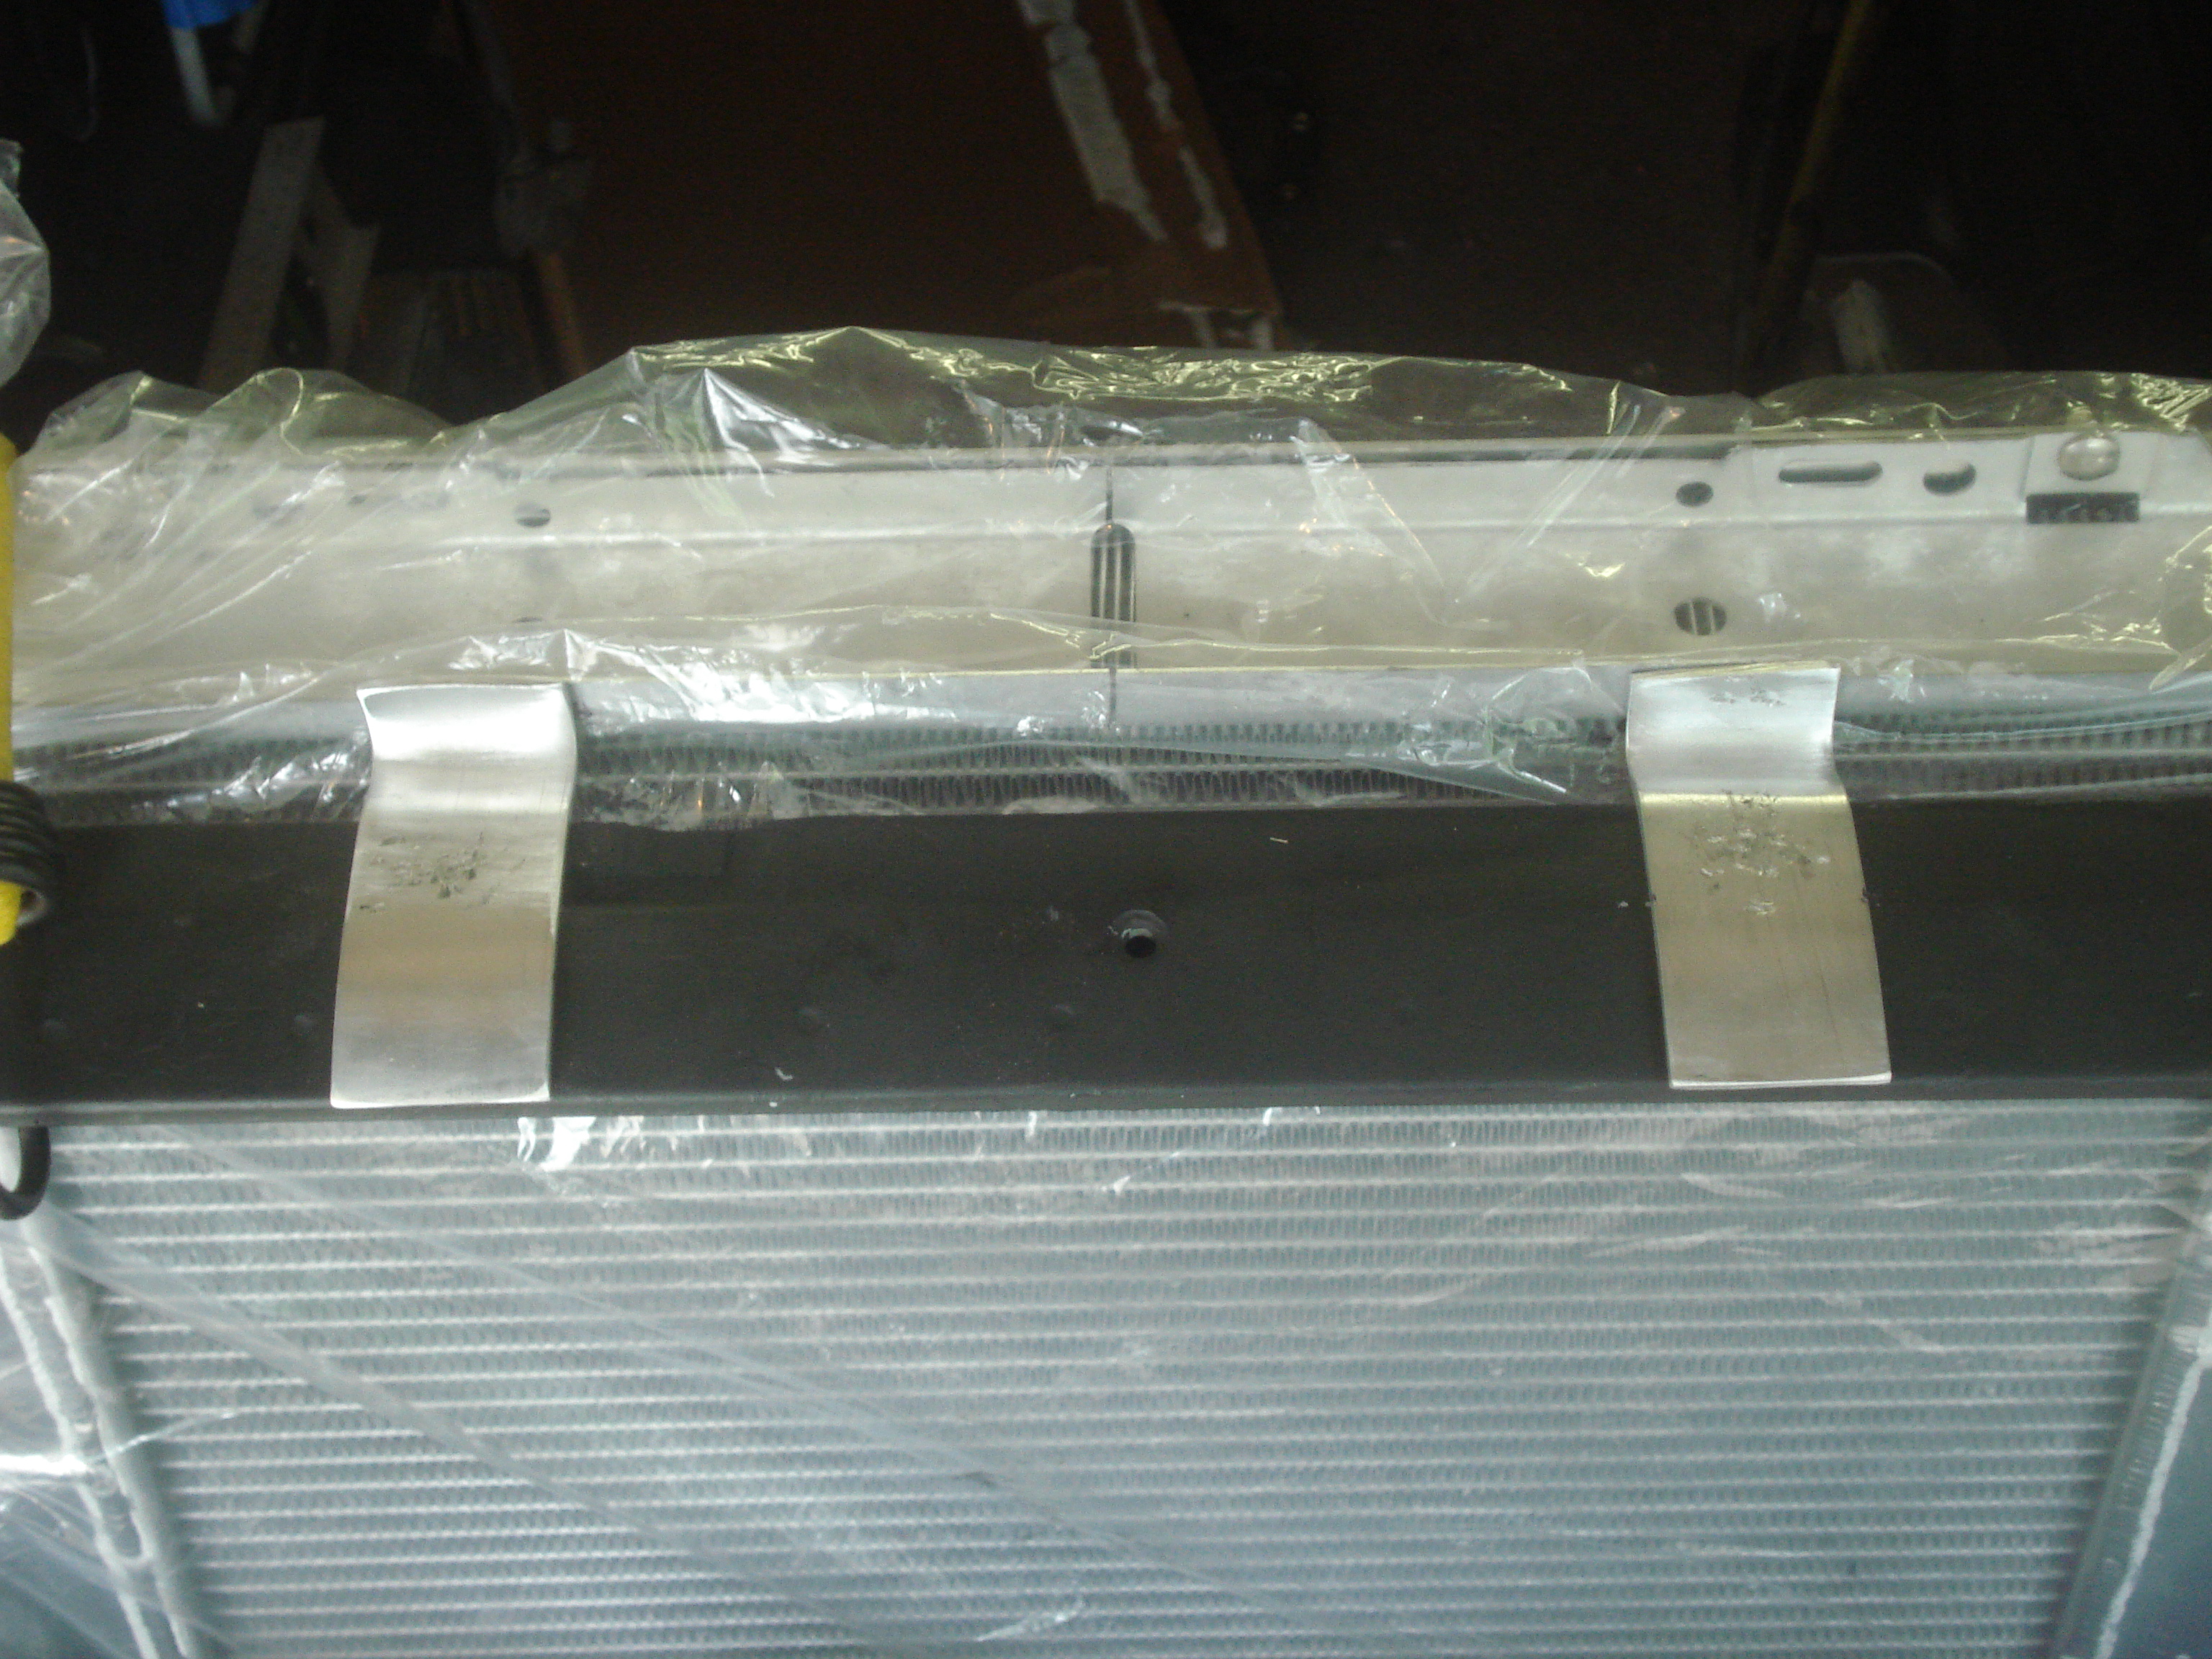
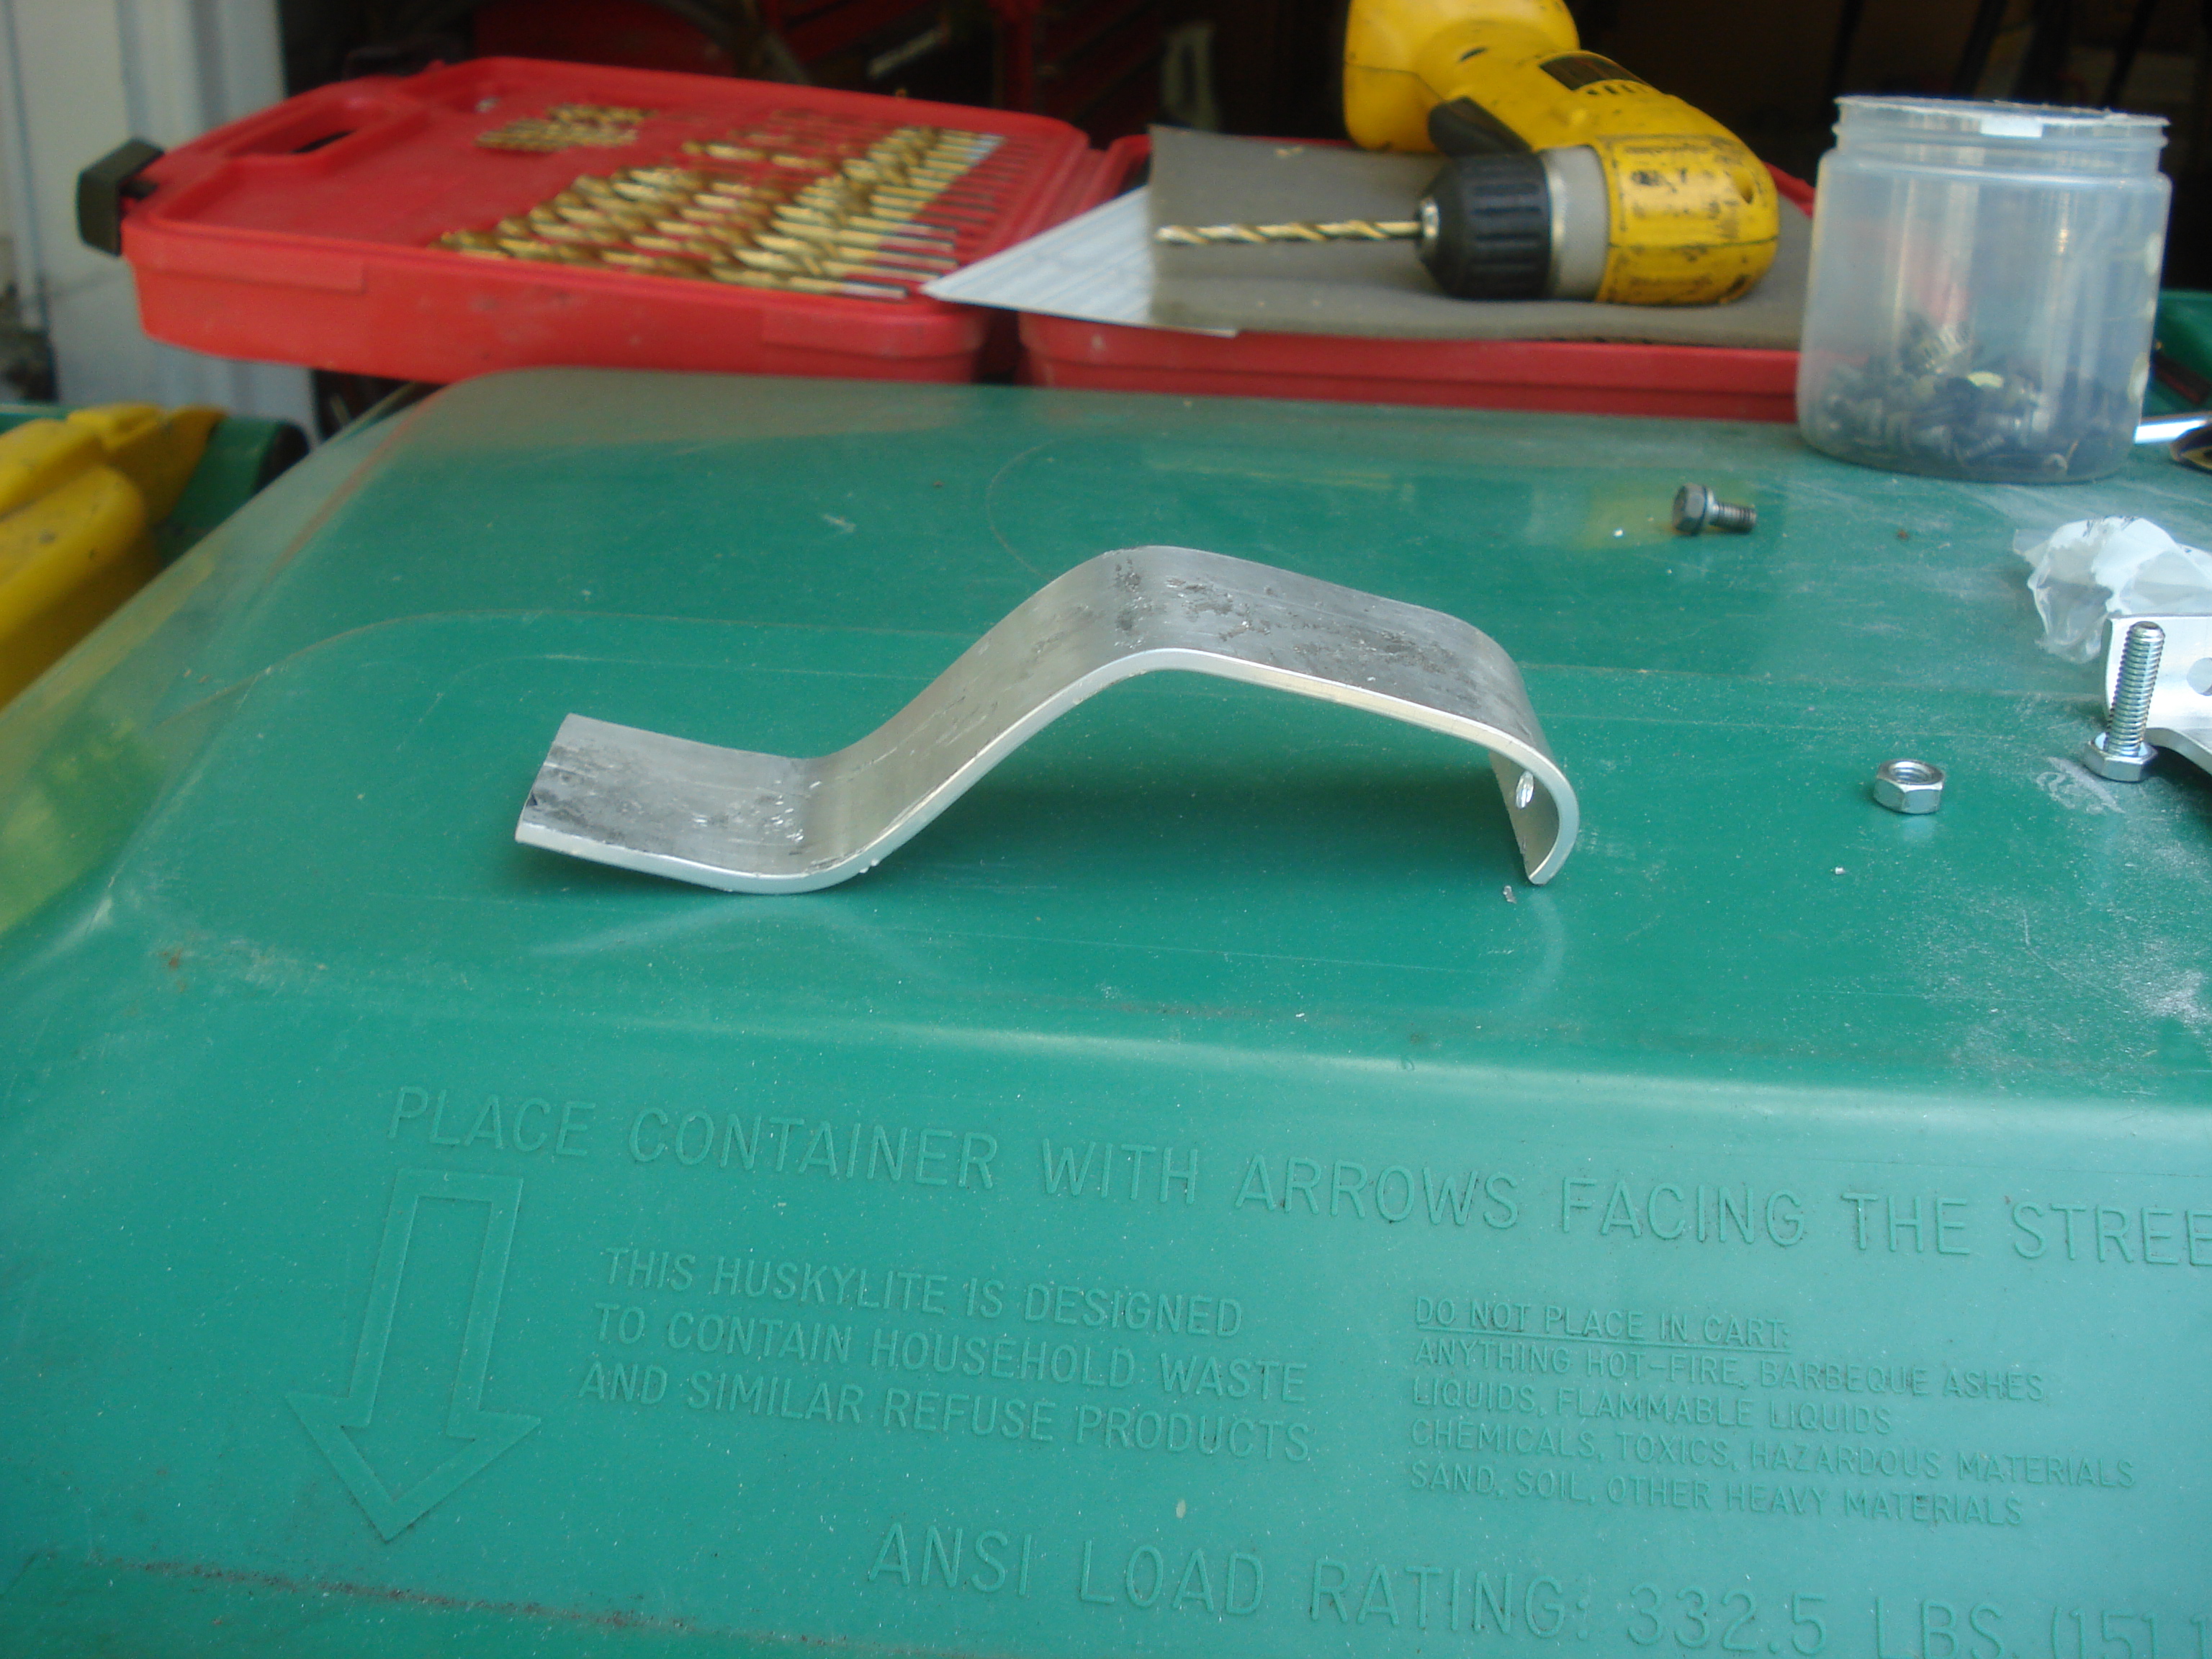
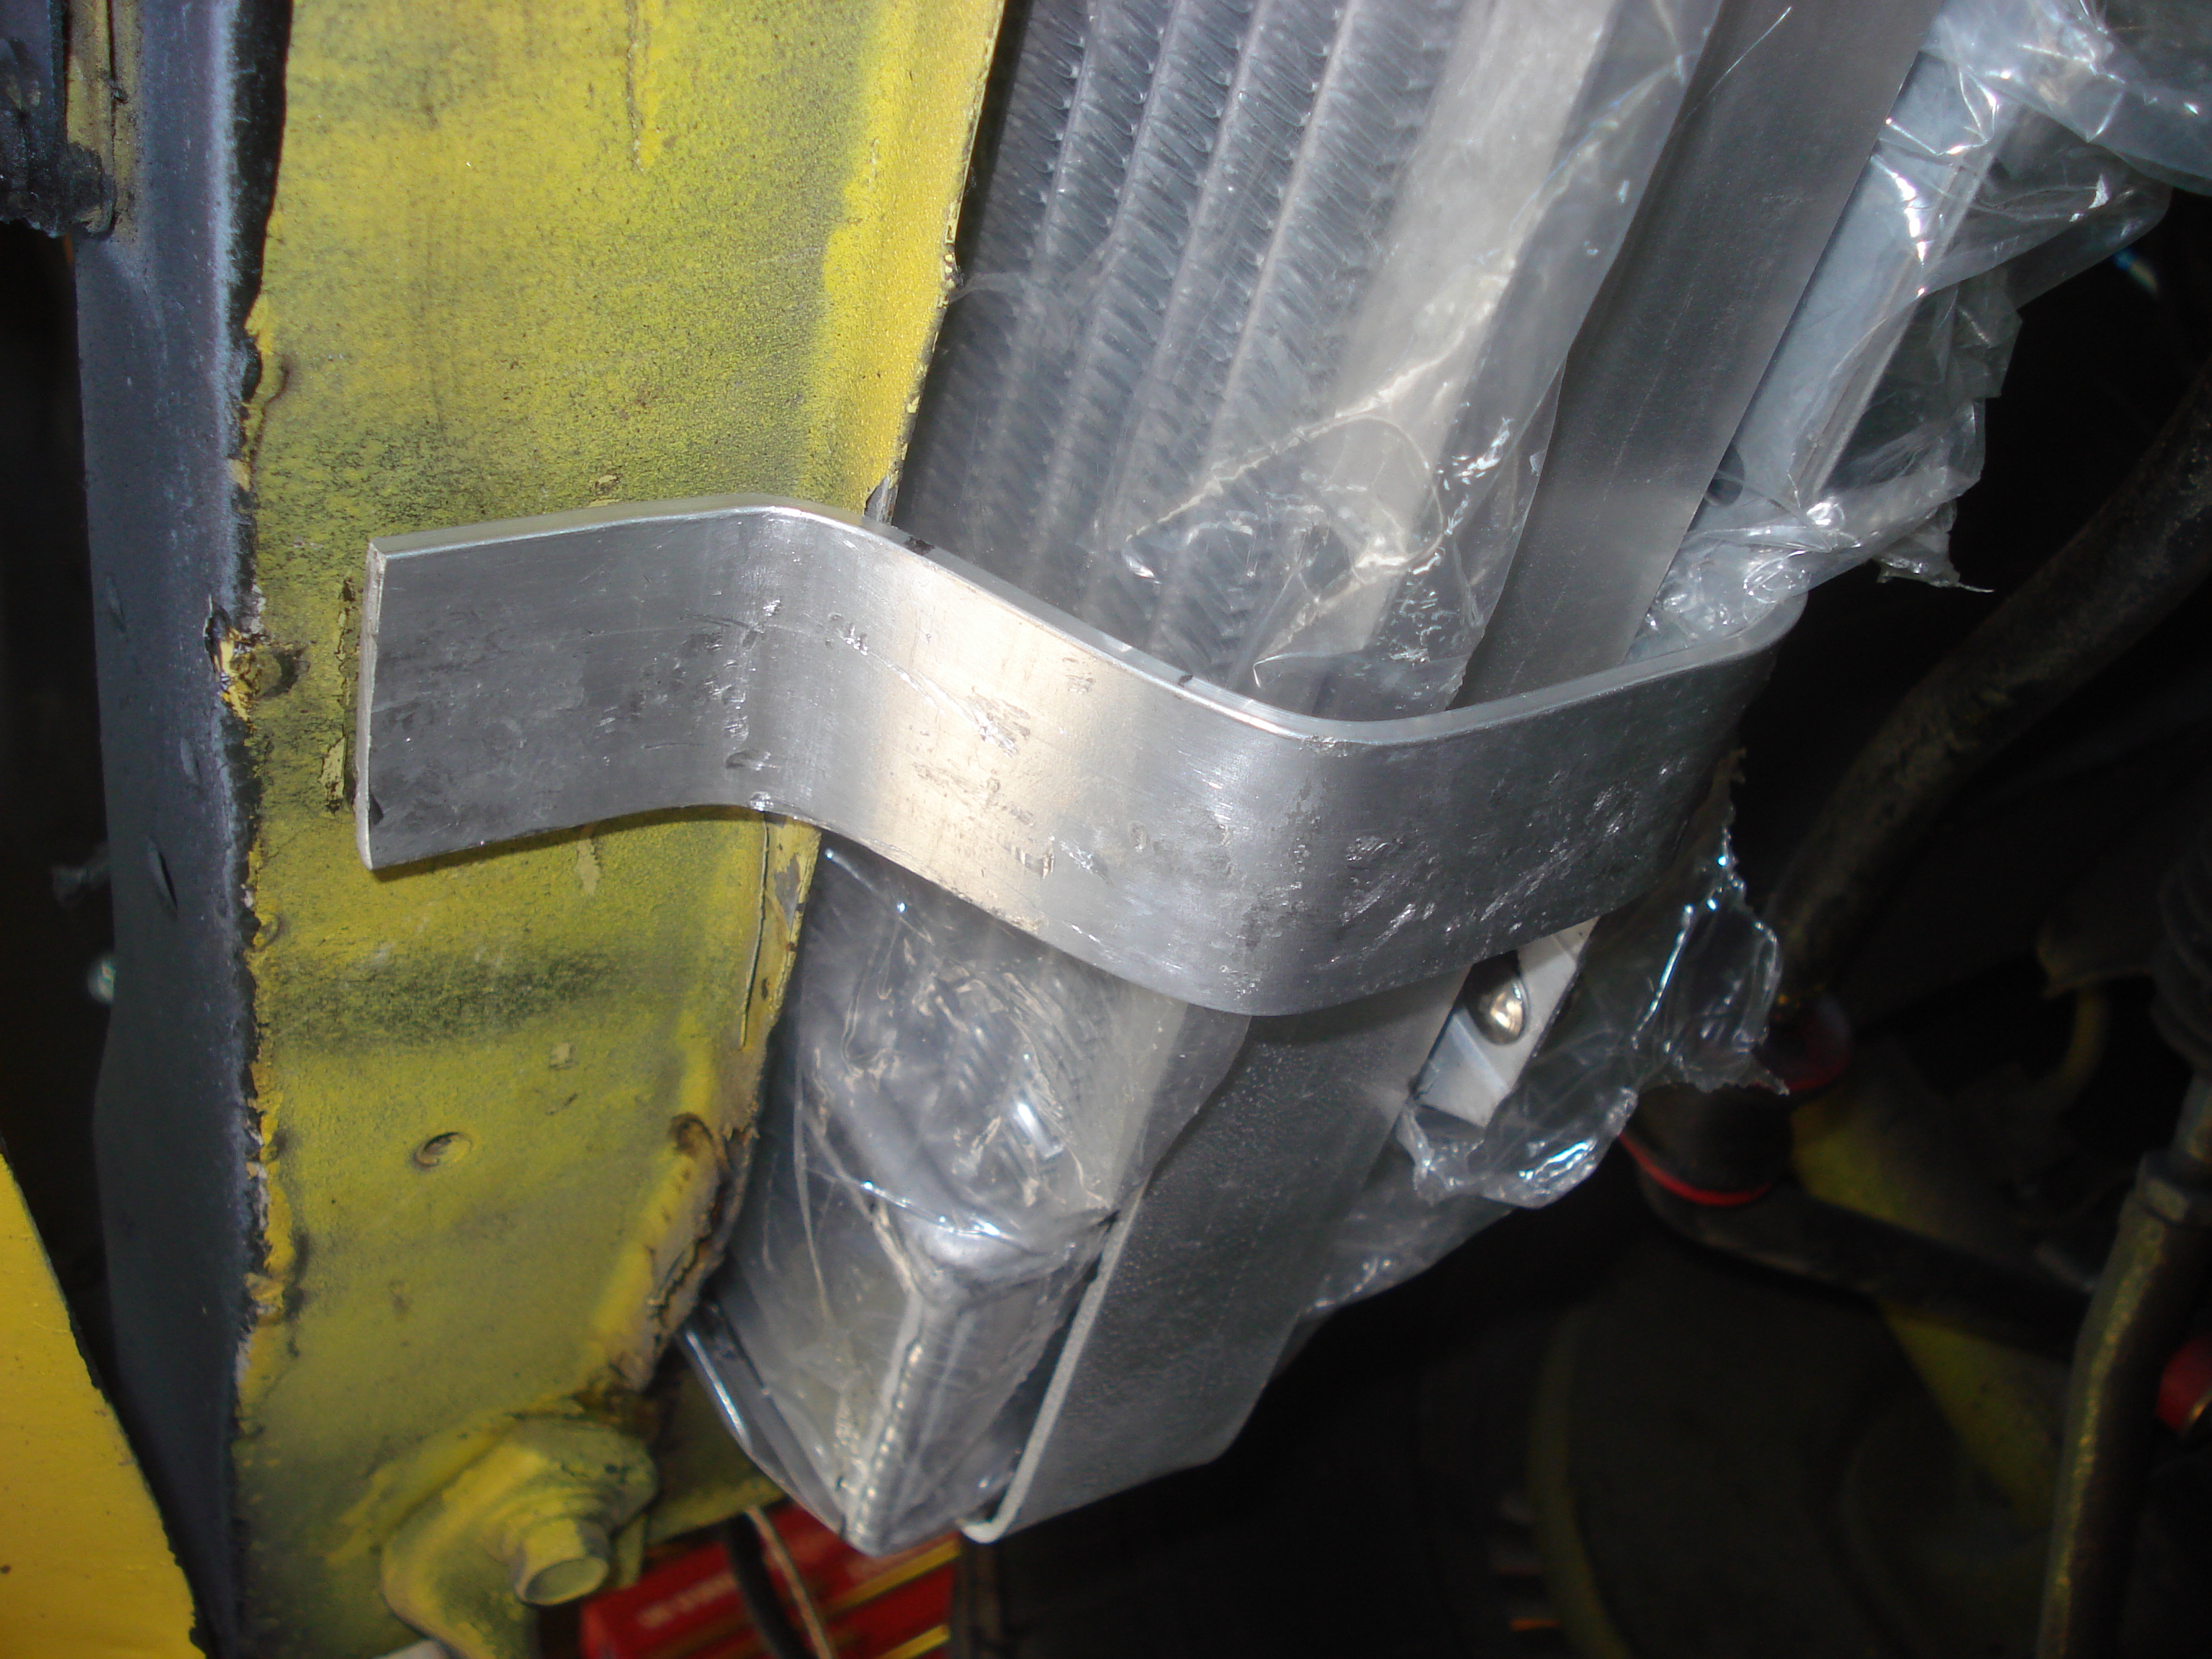
Ok sorry its been so long since an update. I had a little time to work on the car today so here we go. Radiator mounts. So once again following the advice of others and with the help of RS speed Ive moved onto making the radiator mounts. Step one. The 1st thing I did was order a new radiator. I got mine from PRC direct. Its a 2111111 19x24 gm Double pass with oil cooler. I had them add -10 an fittings to the oil cooler mounts. I also had them add a 16" spal puller fan with a custom alluminum shroud. OHH AHH its pretty. You can find PRC here. They were great to deal with and work fast. http://www.prchotrod.com/ So once I got the Radiator I made an L bracket style brace for the bottom of it to hold it in place. I mounted it to the frame rails. I used my trusty alluminum that I got for the surge tank brace. Heres the bottom support brace. I then made top braces for the rad using the same alluminum. Heres the brace. And here they both are in place I then wanted to secure the bottom so I did the same thing. I made 2 braces that hold the bottom tight against the rad support. Heres the bottom brace. Heres a pic of it in place. I will attatch all these braces using self tapping screws. I didnt fully secure them all yet because Im not actually going to mount it till I have the motor in place. I also bought some weather stripping from ace that I will put around the radiator support to prevent rubbing, noise, and create a better seal. This weeks breakdown. PRC radiator - $265.00 spal fan - $150.00 Custom shroud. - $100.00 bracket materials - already had them. Ace hardware weather stripping - $5.00 Rad and brackets total - $520.00 Total so far. - $1711.00
-
Thanks again everybody. I have been getting a little behind on working on the car lately. I know its been a while since an update. I did get the fuel stuff cleaned up a bit. I went to the Home depot and got a 2" pvc pipe coupler with a hose clamp on both sides. It fits perfect around my Bosch fuel pump. I also got some insulating foam that goes around piping and I put it around all the braided lines where they enter the spare tire well. That should hopefully keep them from rubbing and cutting up the lines. Once I finish mounting it all I will post some pics. I am also working on mounting my radiator. Rs speed has given me some insight on this one and I have half the brackets made. So there should be a radiator write up shortly. I should also get around to rewiring the car within the next week since I tore it all out. Should have lots more parts in the next 2 weeks also. So hopefully this build can get back on track.
-
thanks Rs speed and J. soileau. I hope to get a little more work done on the car tonight.