boosted300
-
Posts
302 -
Joined
-
Last visited
-
Days Won
1
Content Type
Profiles
Forums
Blogs
Events
Gallery
Downloads
Store
Everything posted by boosted300
-
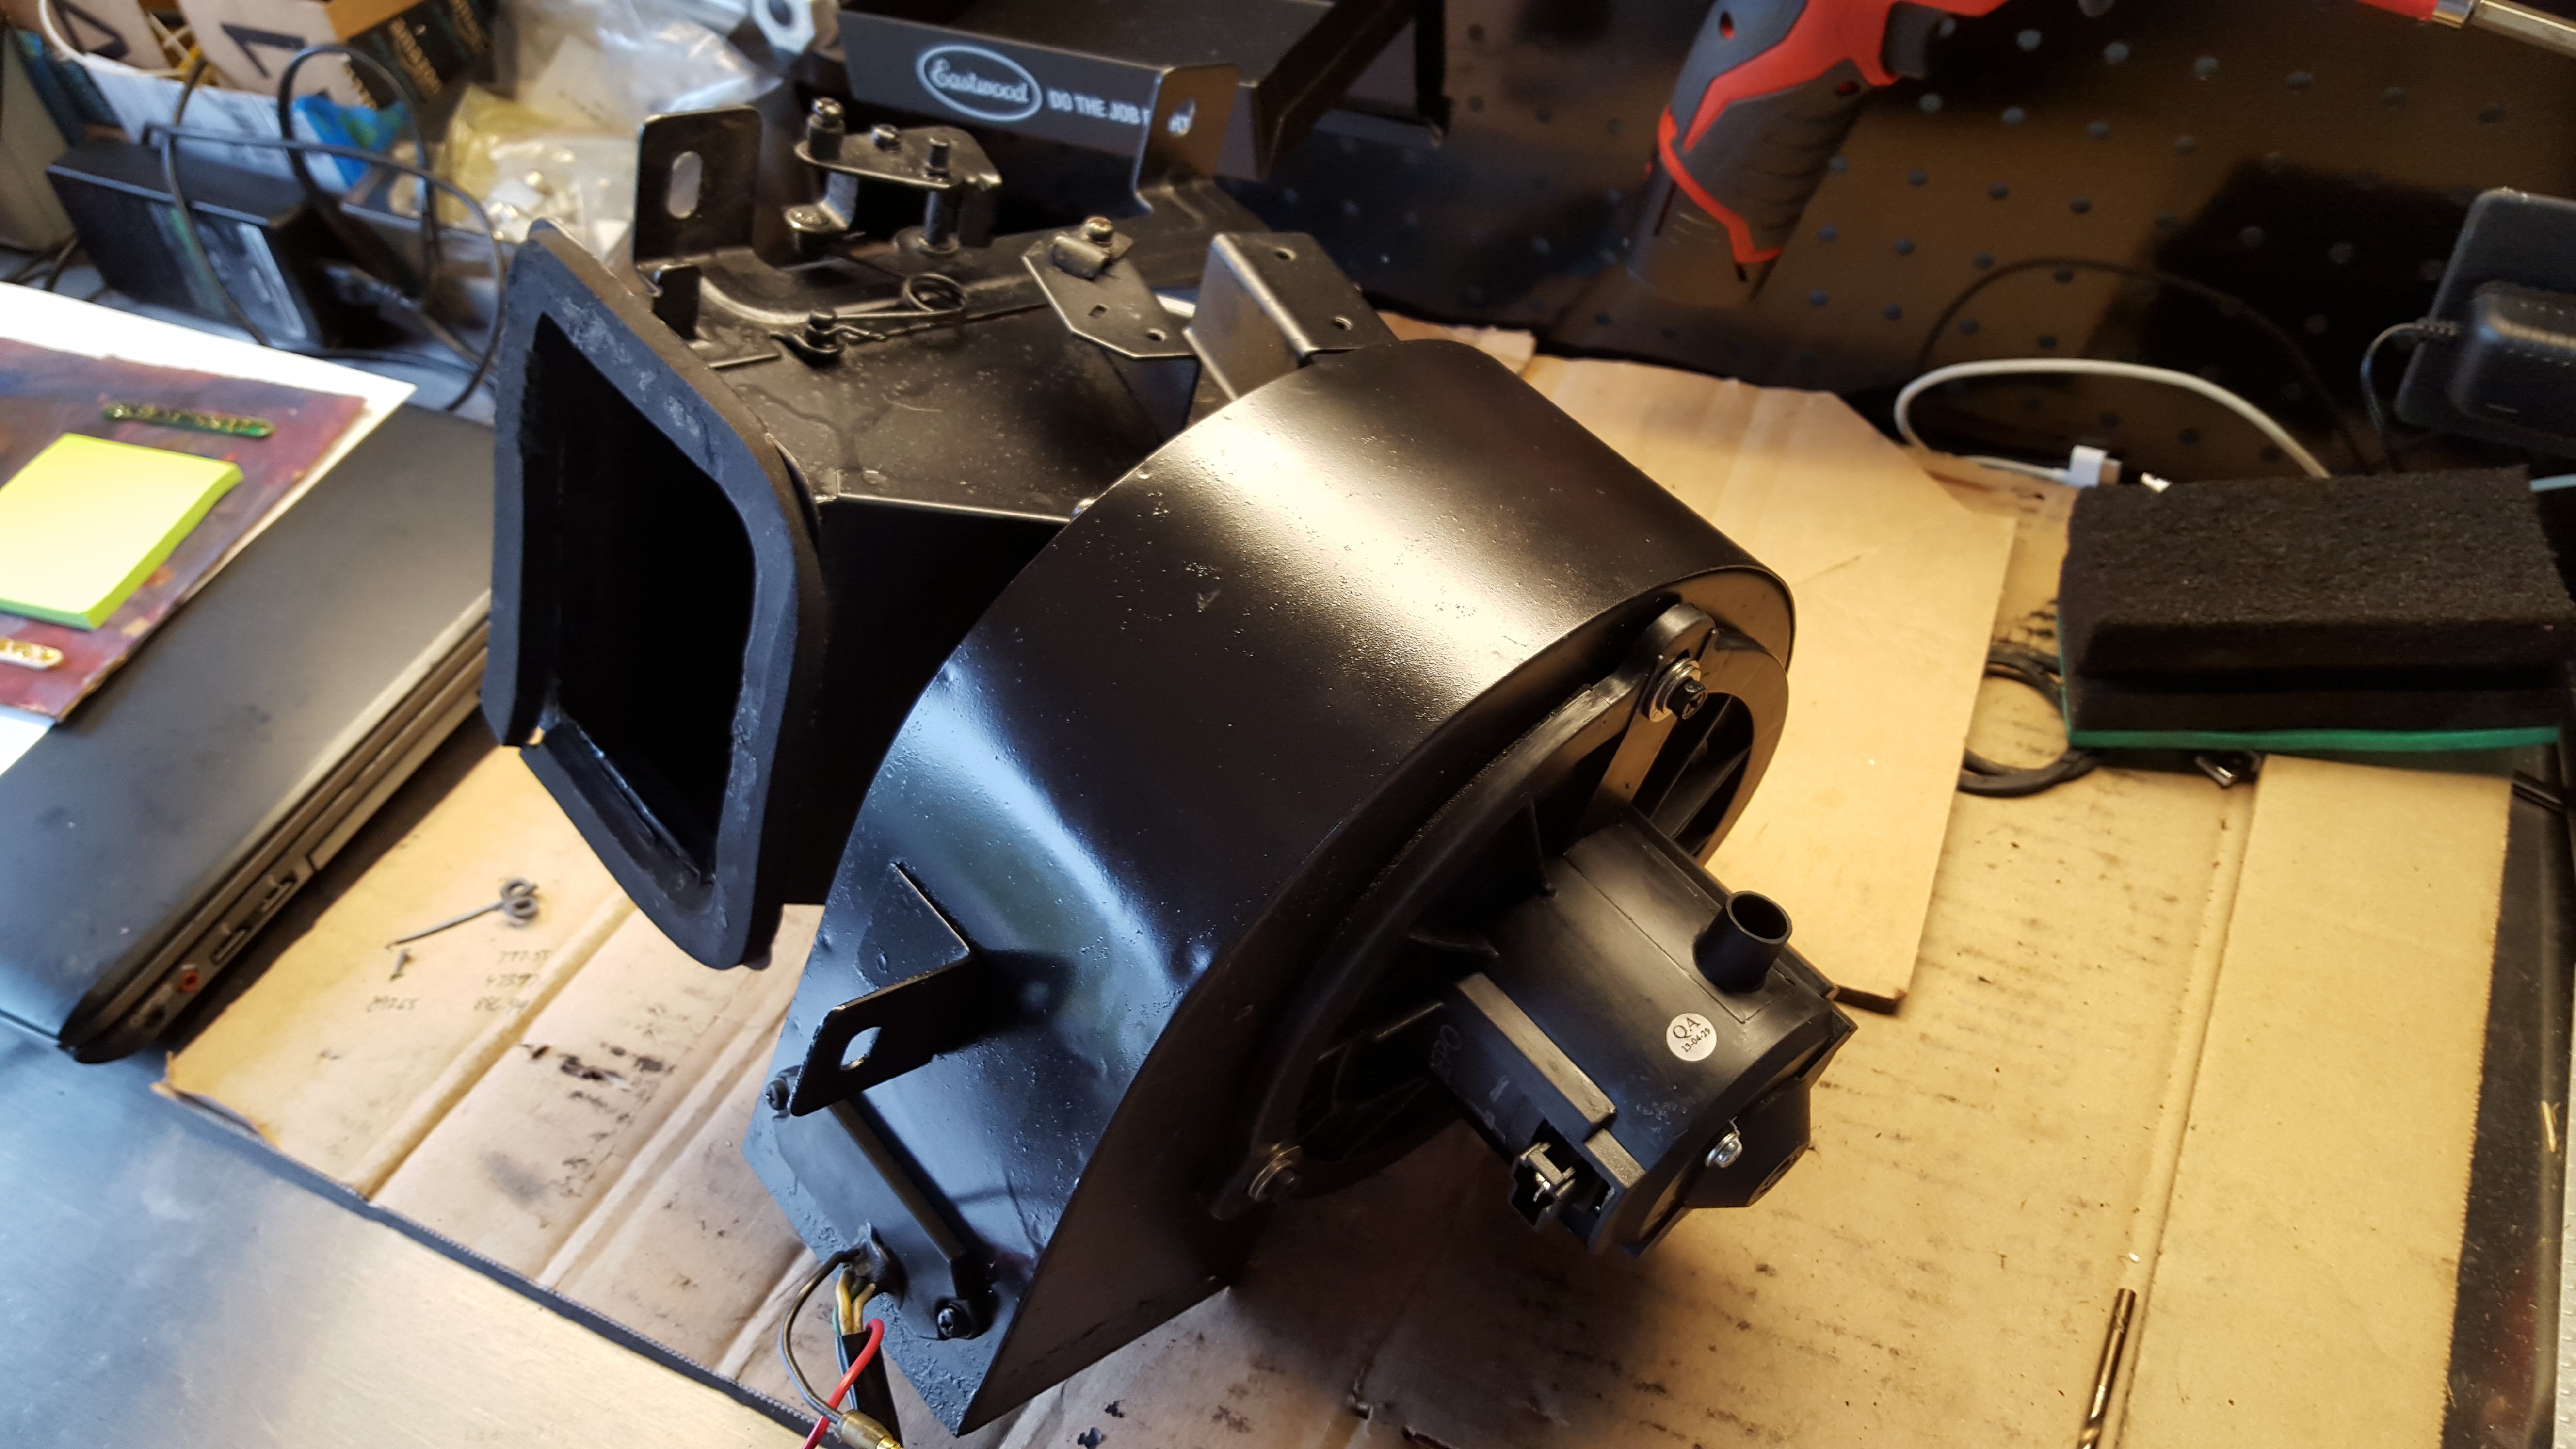
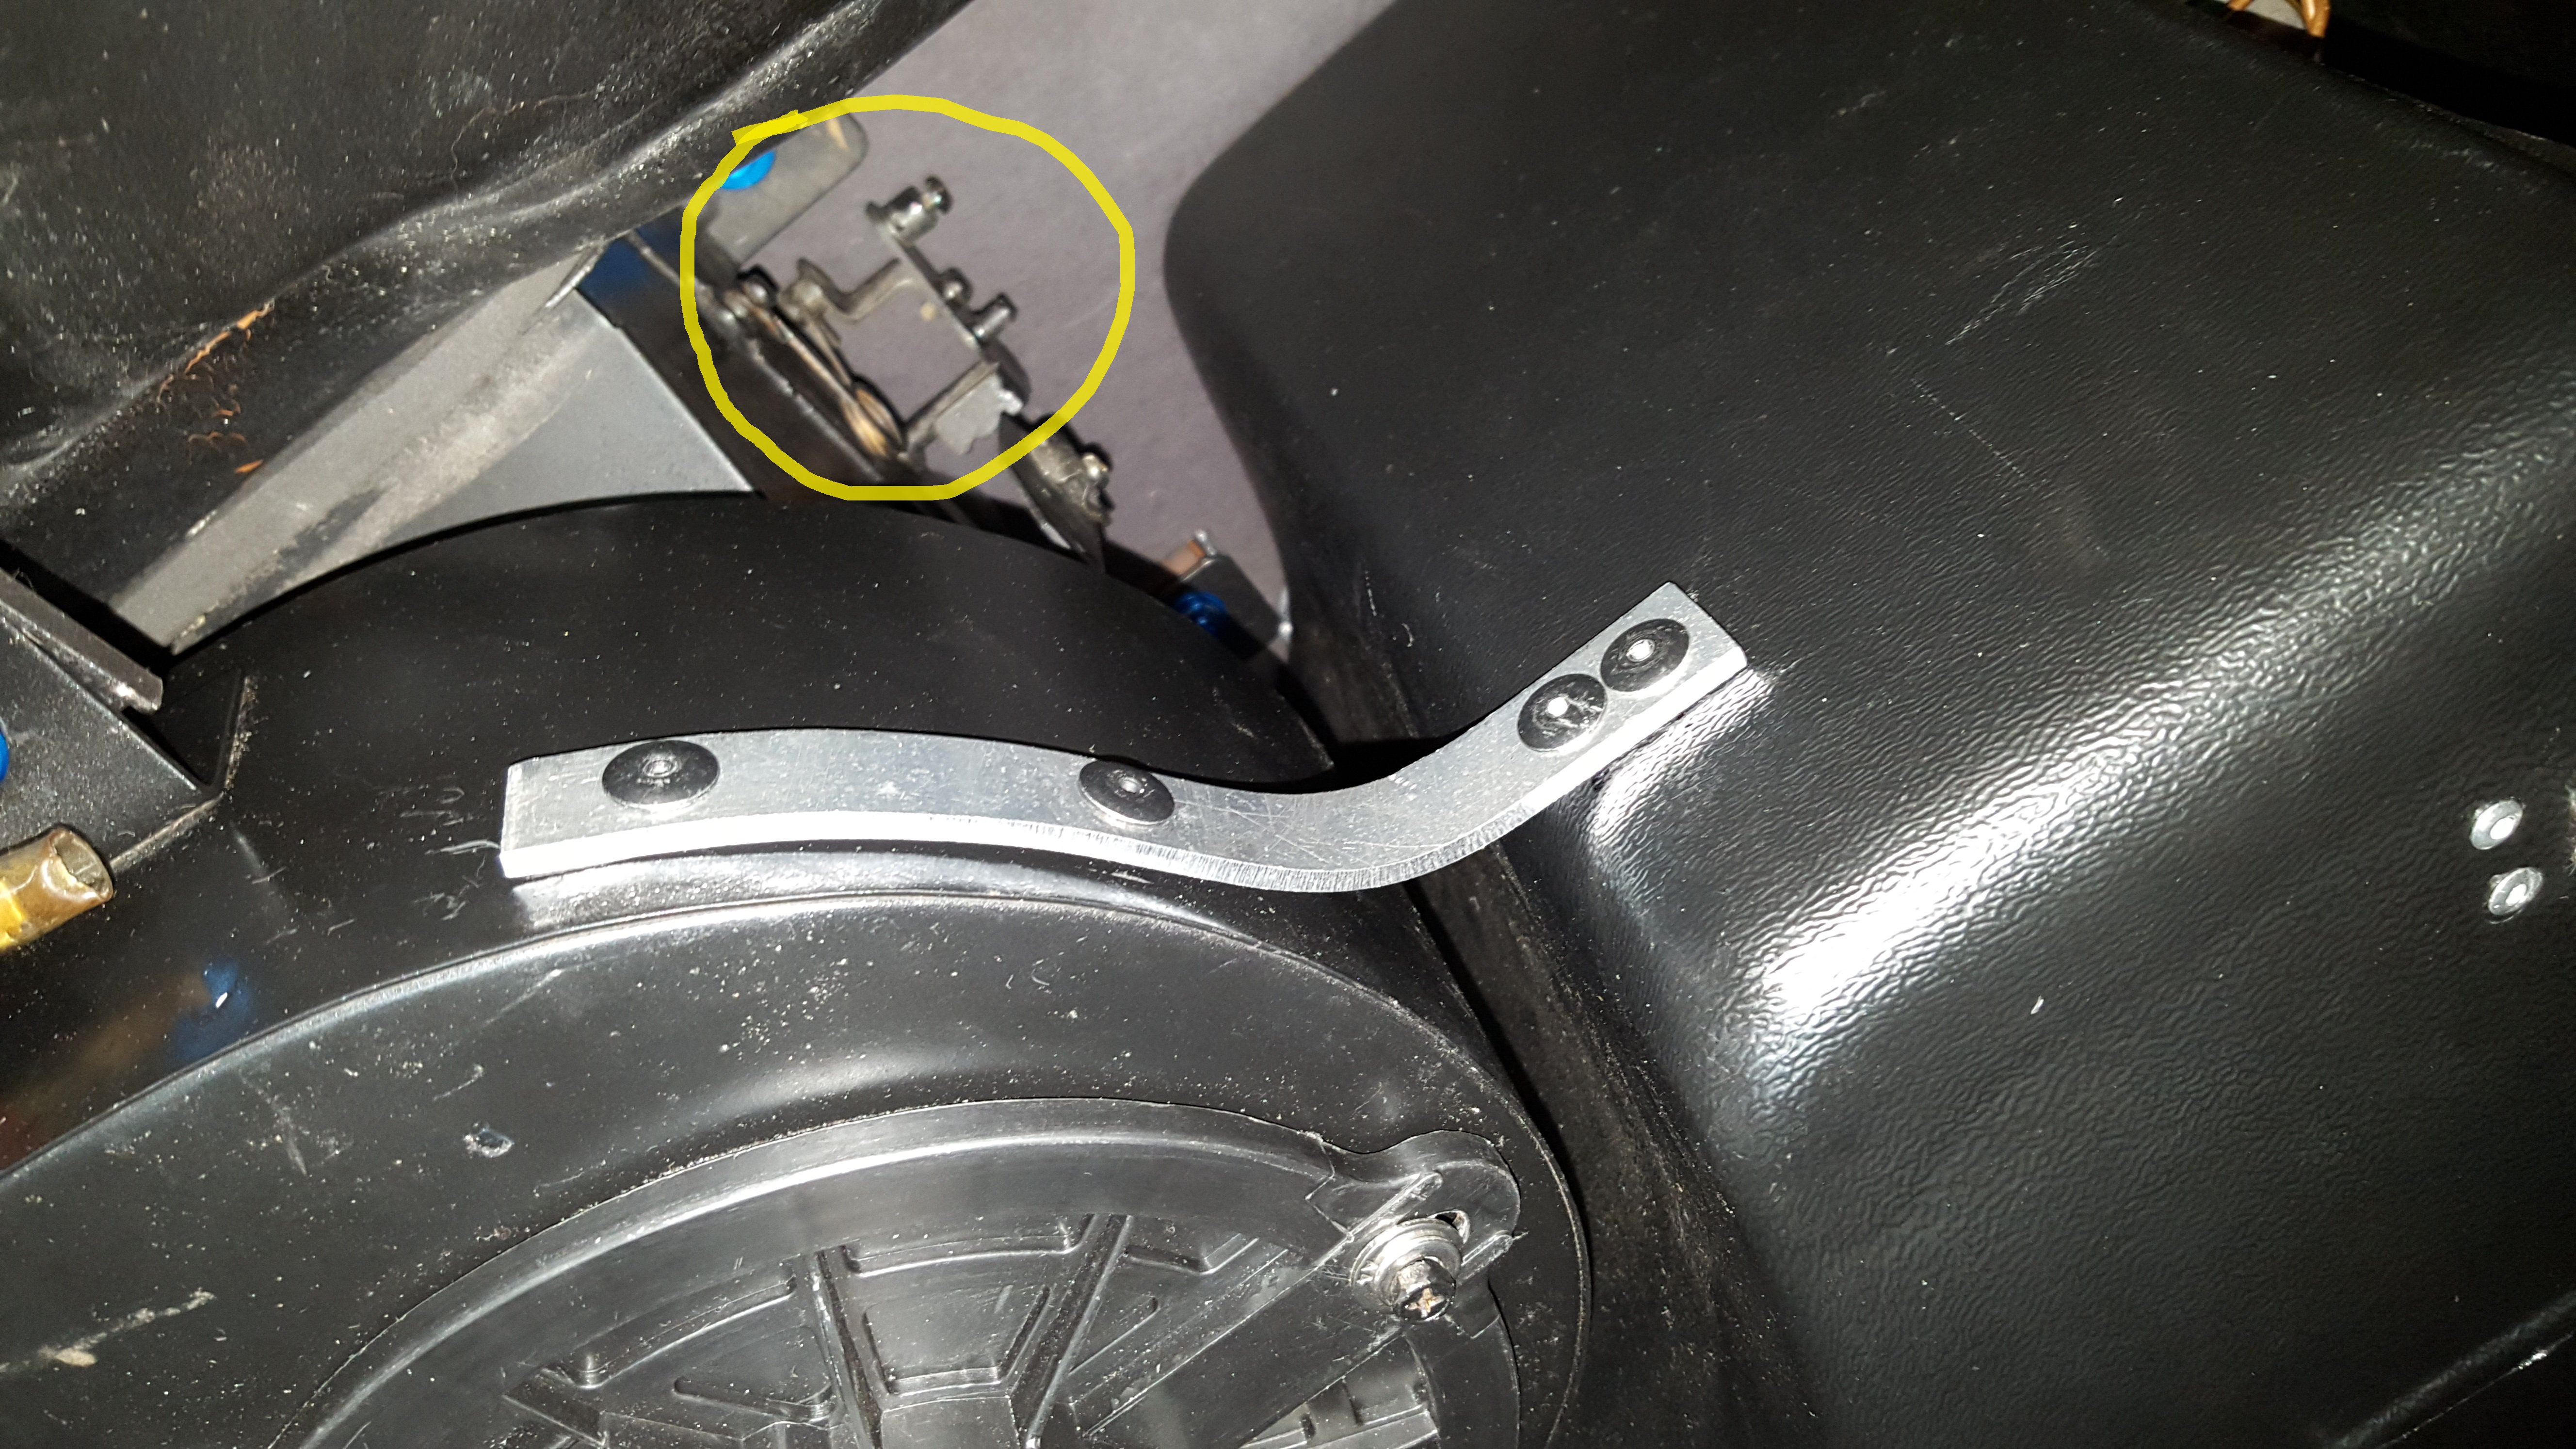
The fan was clearly on, and the lines and evaporator were ice cold, but nothing coming from the vents.... I tried all of the possible combinations of the factory levers to see if the vents were somehow closed or diverting the air somewhere else. I noticed that, despite moving the DEF/ROOM vent lever, there was no change in the flow at all which I found to be unusual... Thinking back to when I had the entire dash off and had taken out the fan components to tweak them, I remembered there was a large flap inside the canister that would open or close to divert air flow... But now, moving the lever I expected to hear the flap opening and closing (because it did so with a noticeable "thunk"), and yet I heard nothing... Oh boy...the dash was obviously back in now and everything already bolted into place...it's not easy at all to access that area... I squirmed my hand under the dash and somehow squeezed it all the way back to where I could only feel, not see, the flap lever... Sure enough I flipped the lever and heard the flap "thunk"...and lo and behold....COLD AIR from the vents! Hallelujah!! Unfortunately during reassembly, I omitted putting the lever cable back in place... Getting that cable back into the lever slot, where it is secured in place by a screw, after the dash was already installed...might have been the most difficult thing I have done on this car However, the story has a happy ending finally...I now have functioning AC in my almost 50 year old Japanese Resto-Mod... My next goal is to install the electric steering and heck...I might start taking this thing out on dates.

-
So I never finished this story... I ended up taking the car back to Kiki's a couple weeks later. We put a new expansion valve in and also a new dryer. After the system was charged, we cranked it up...the compressor kicked on for a second...and then shut off mysteriously. Some troubleshooting revealed that it was actually the fan switch, which had a bad contact...the system is activated by the factory fan switch. Some playing around with the switch and we got the compressor to engage completely....YESSS!! NO!! While the compressor had engaged, and the lines and evaporator were ice cold...there was no cold air coming out of the vents...wth???
-
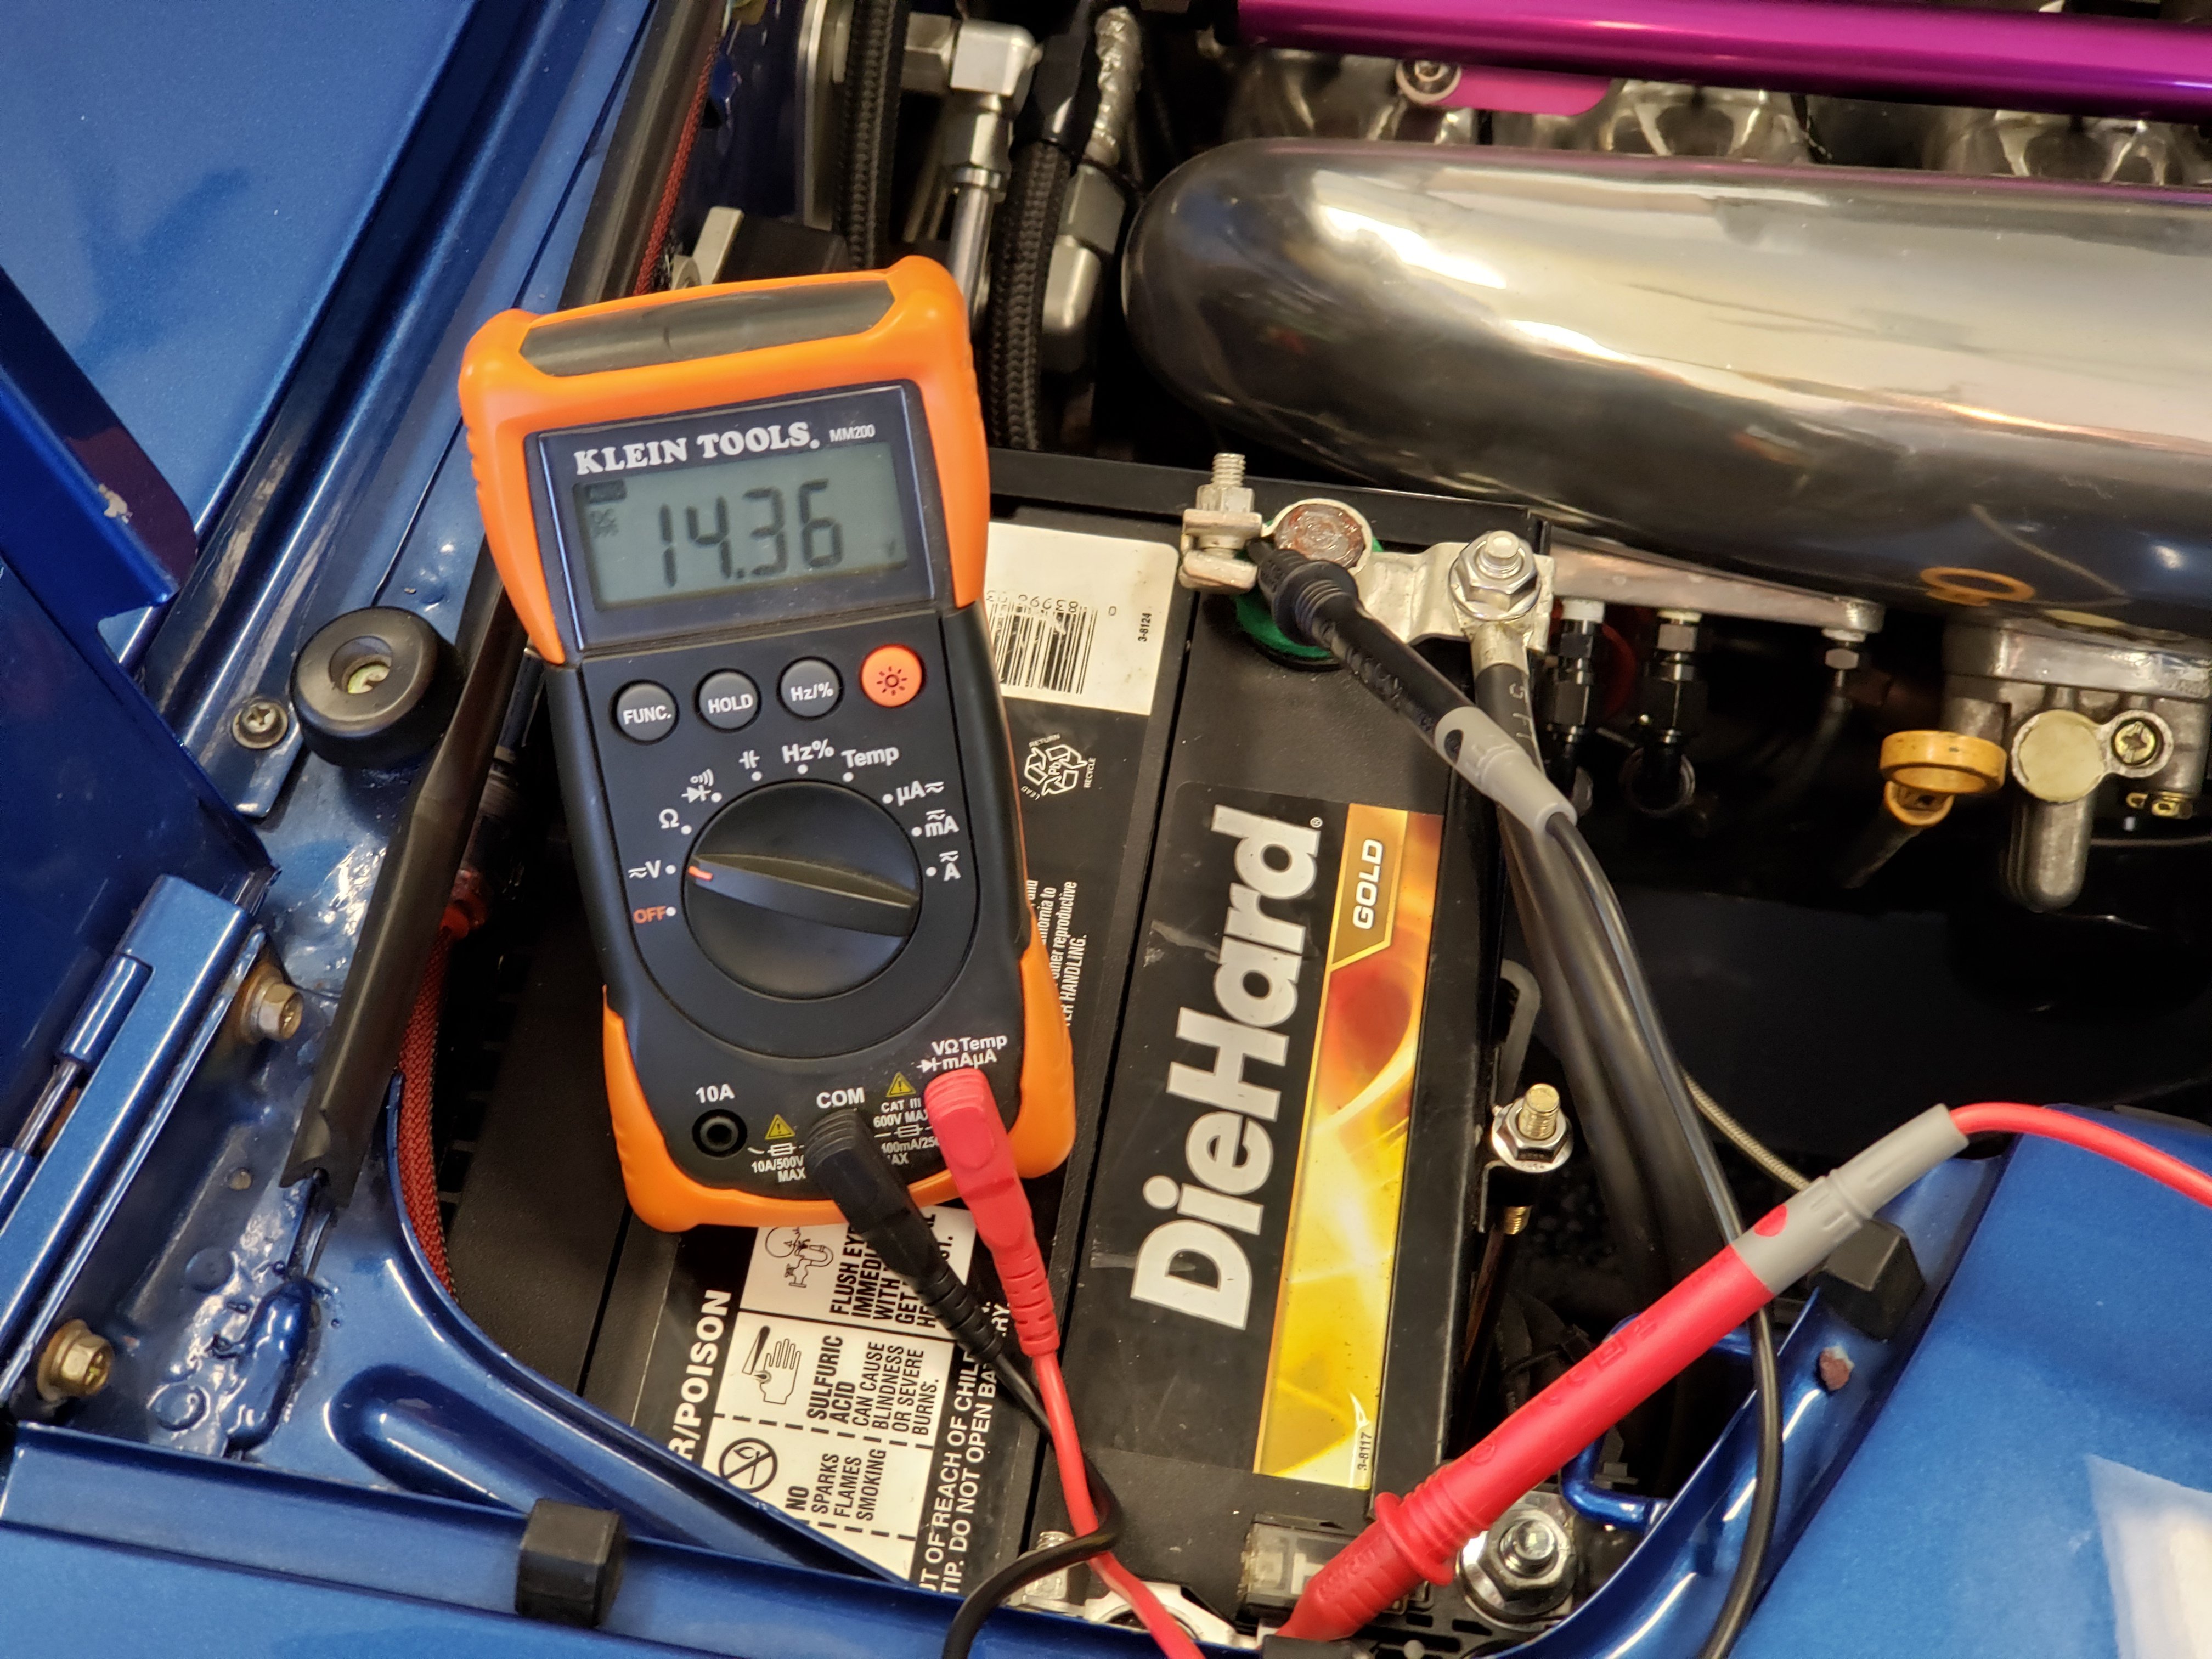
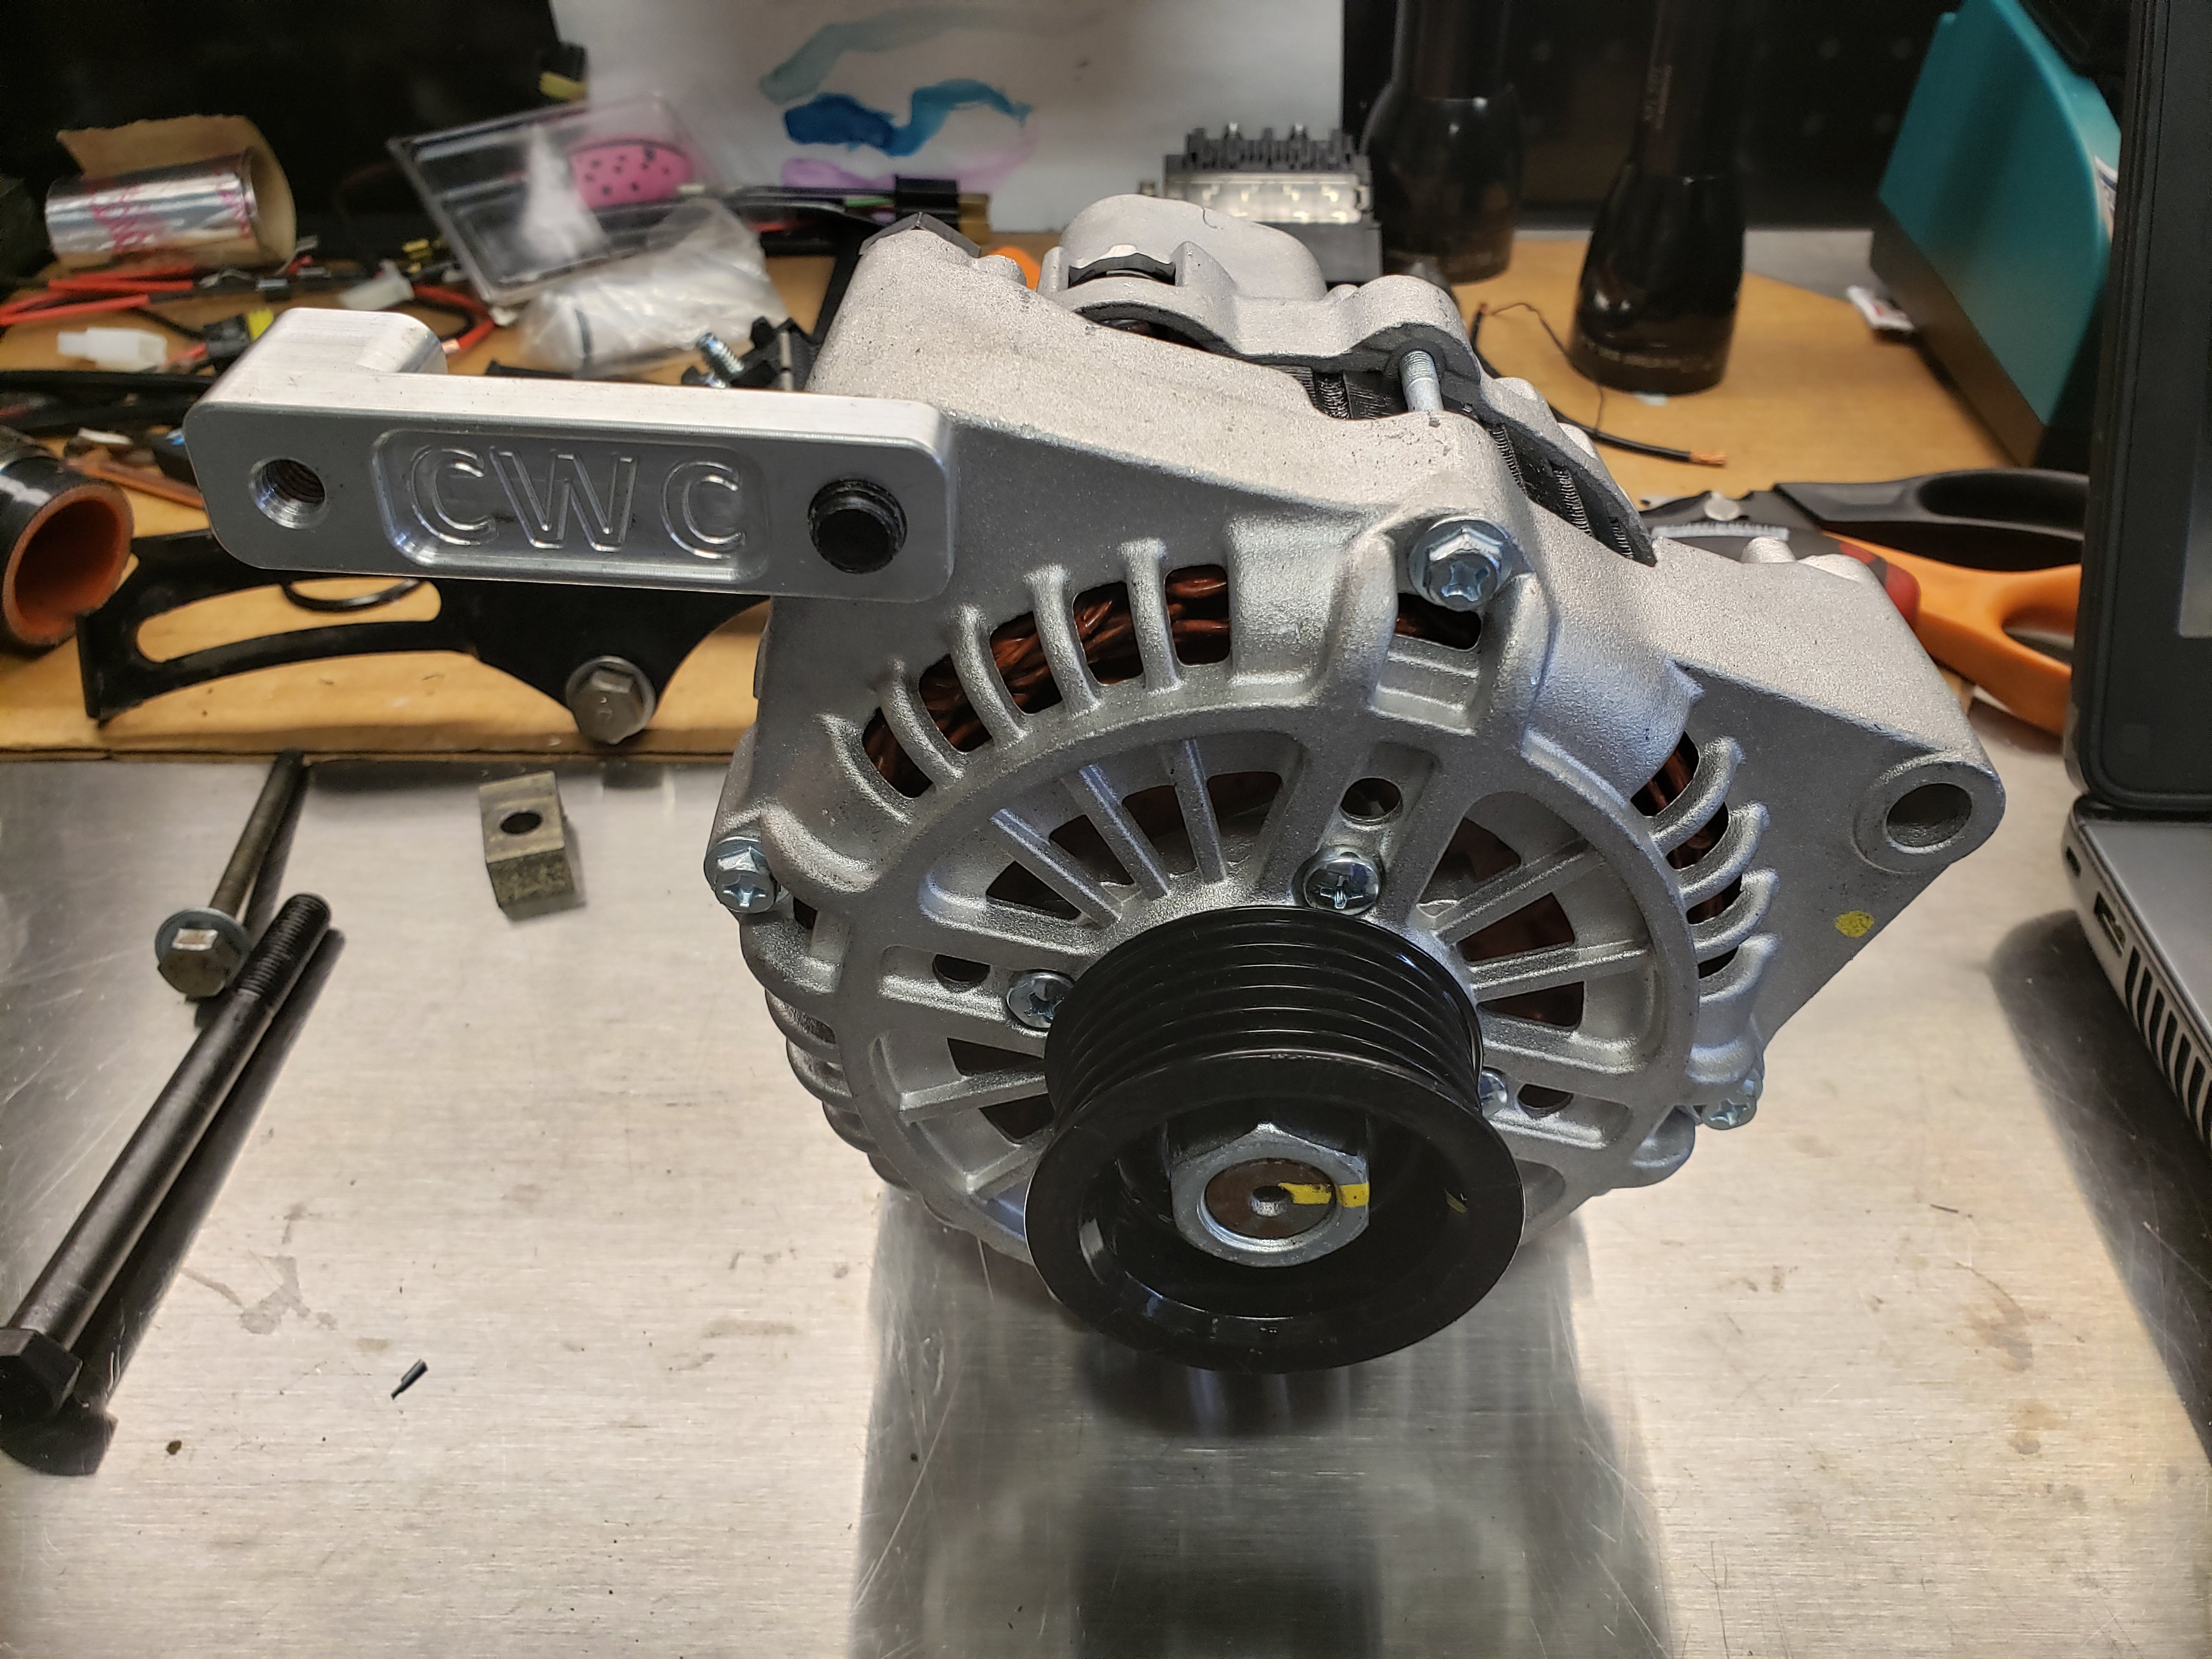
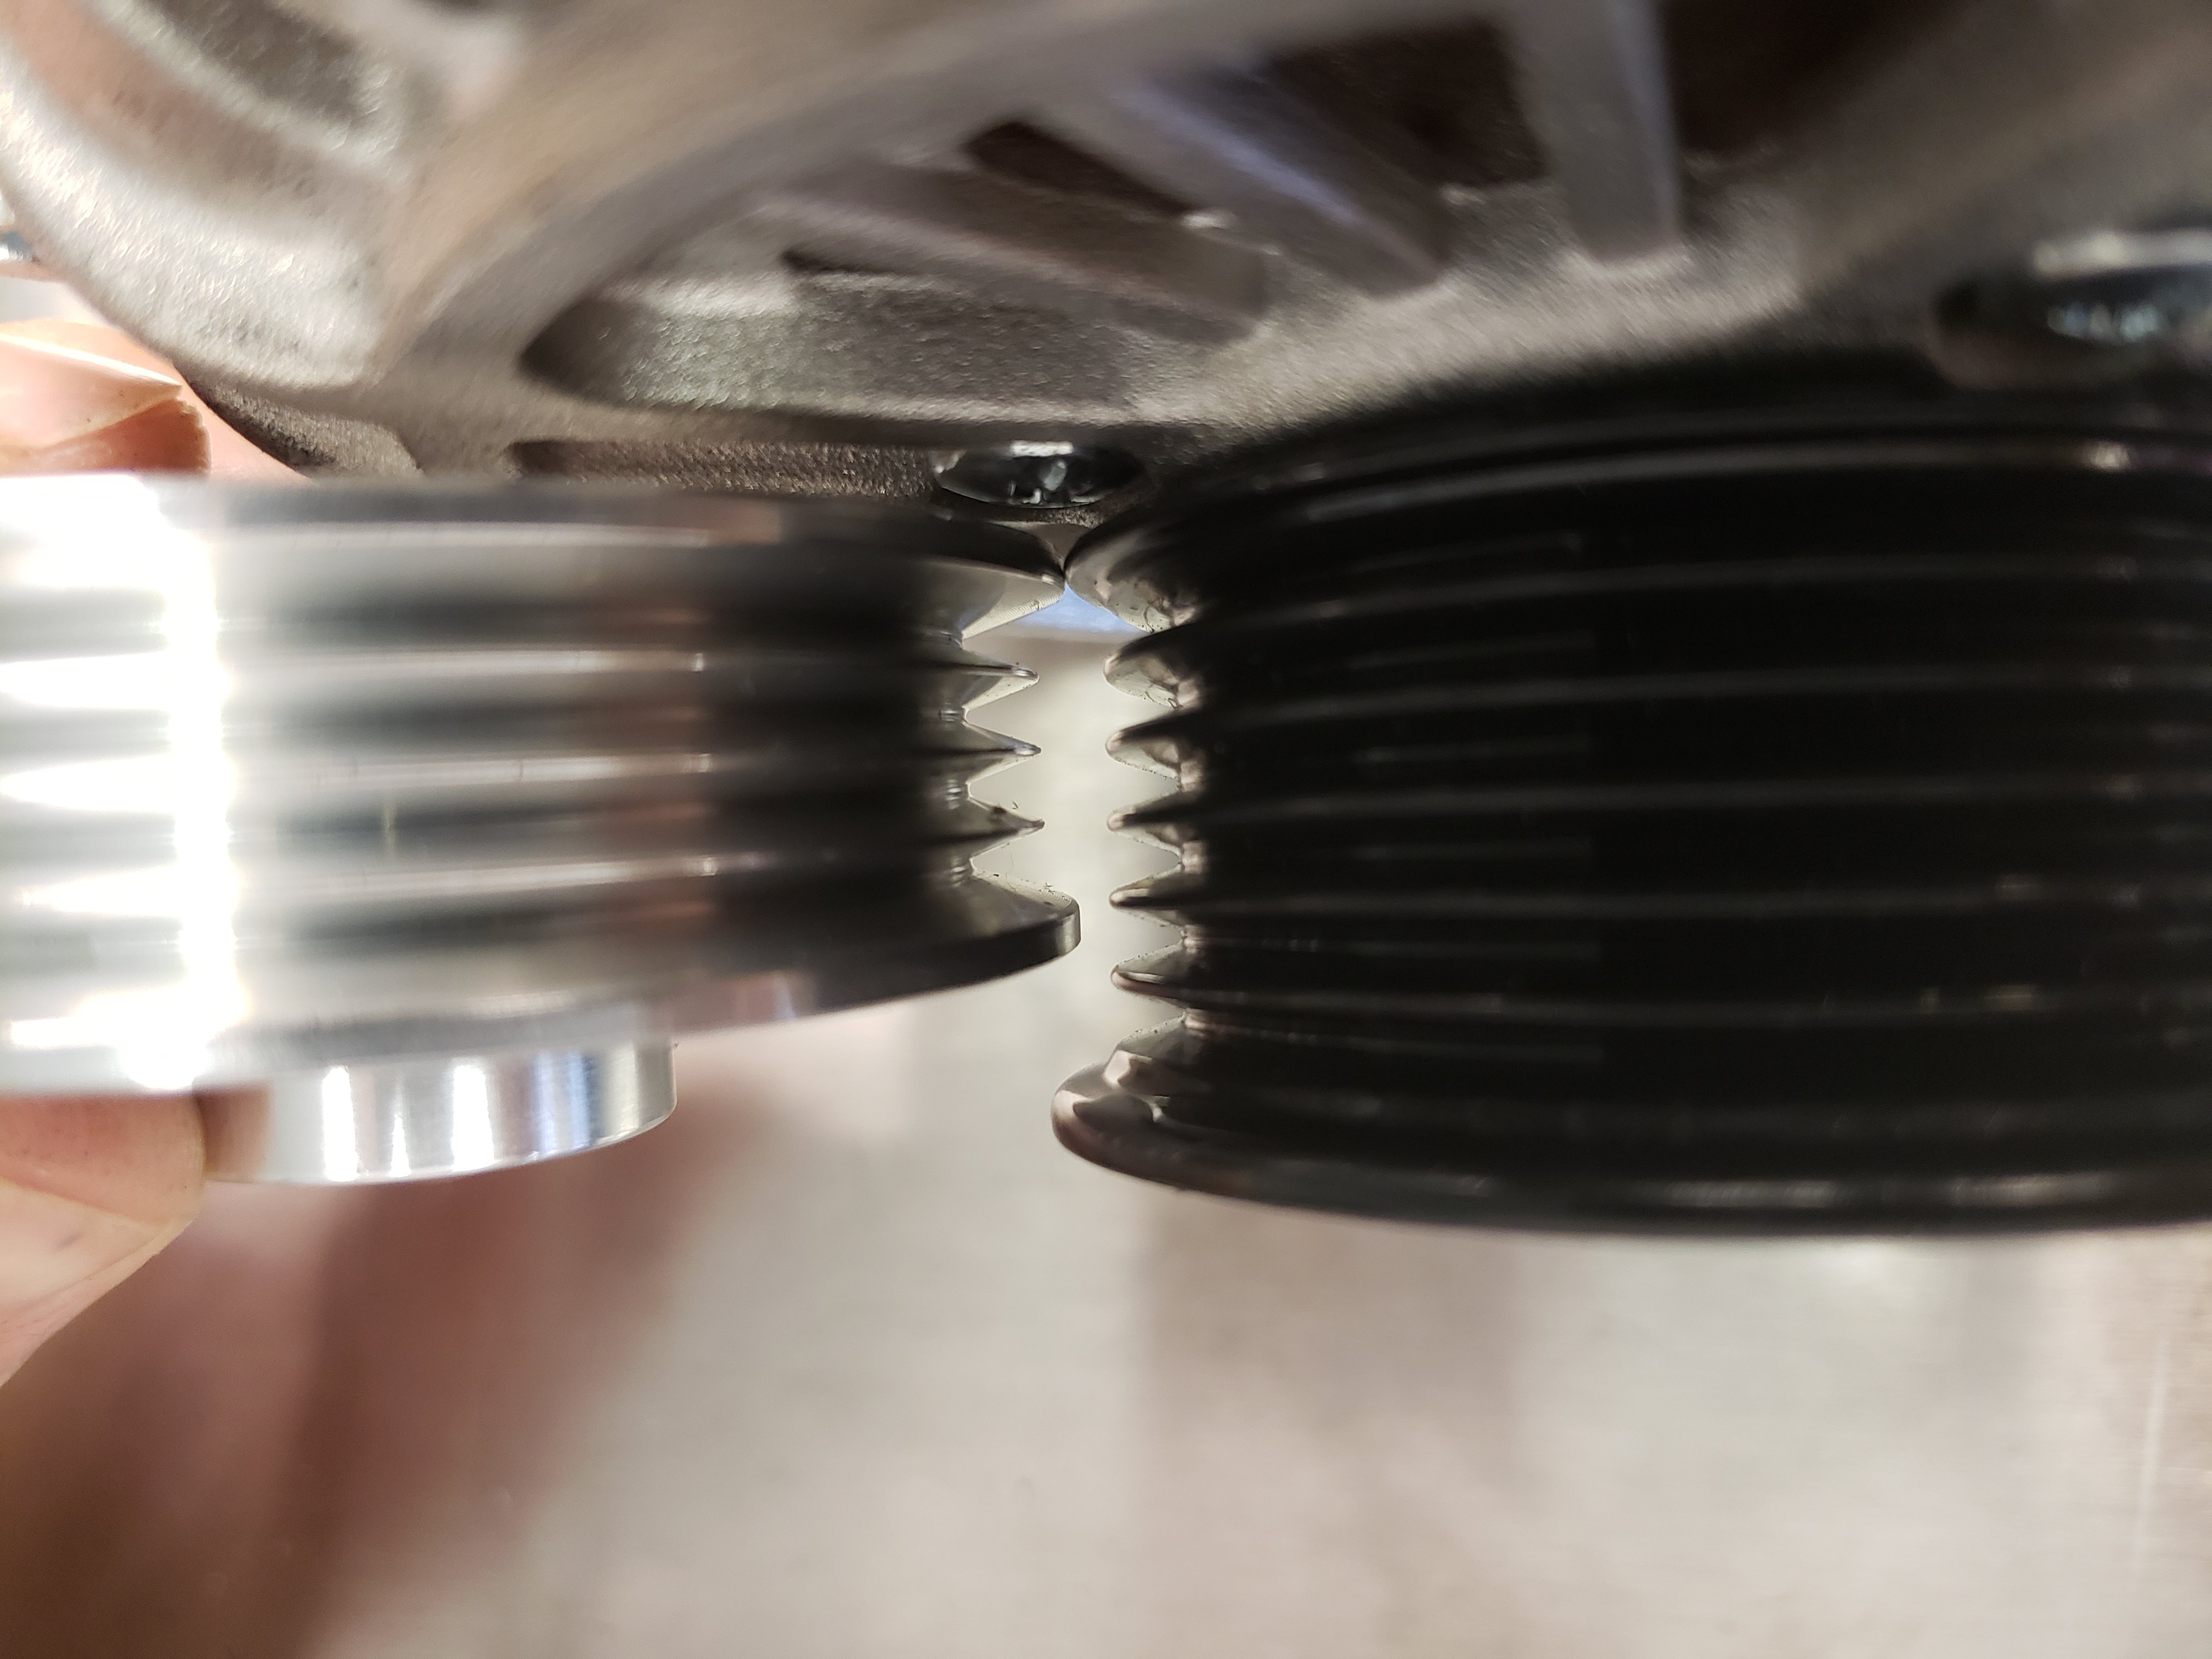
I am a big fan of if it isn't broken, don't fix it...Although the billet pulley looks much nicer, I decided I didn't want to chance changing the pulley and perhaps not having it seat just right or be out of balance, which the factory one already was. So I installed the alternator as-is with the factory pulley. Having a few extra ribs on the pulley has no detrimental effect anyway. The kit provides two bolts, one long one to replace the factory mounting bolt, and one for the adapter bracket. Using a prybar I tensioned the unit, and tightened the adapter bolt...and that's it. This alternator cranks out 180 amps incidentally. That's double the amount the Mitsubishi Galant alternator had produced, and far more than enough for my needs. Fired up the engine to test it out... All good. Now I'm just keeping my fingers crossed that this one lasts longer than my previous units!
-
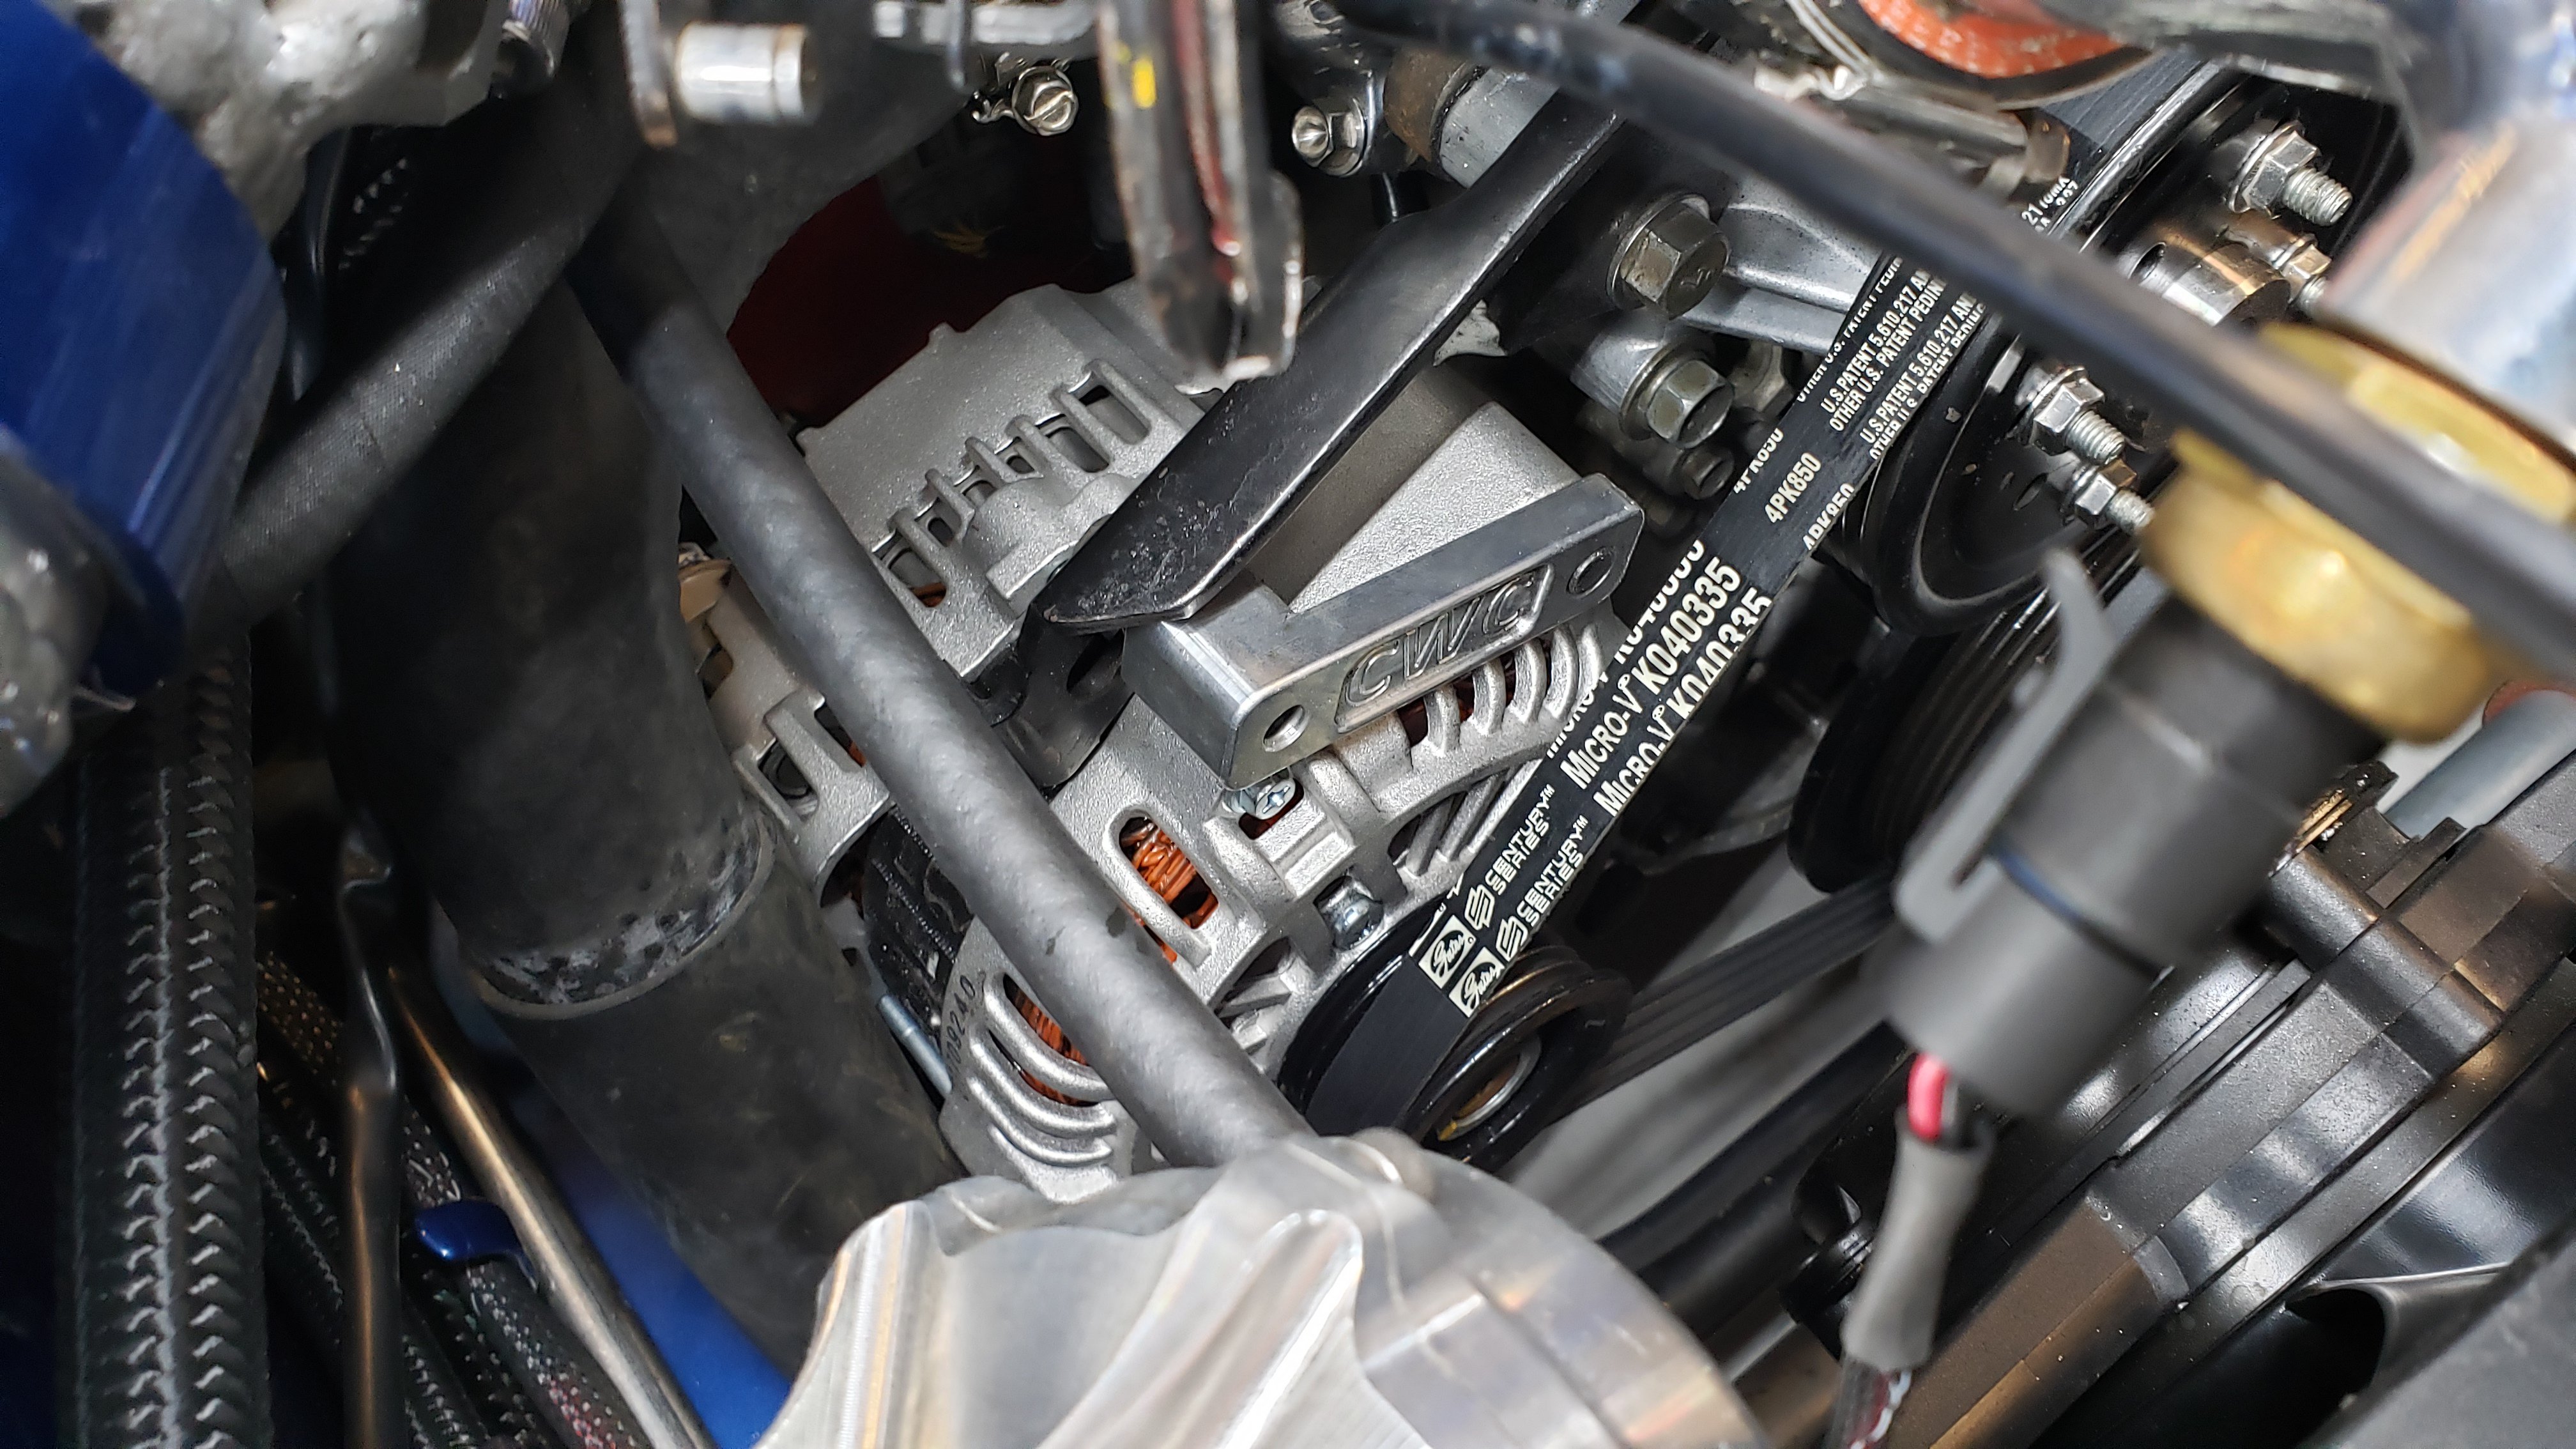
As you all may know there are a hundreds of different cars that use the LS-1, and you can't just walk into auto parts store and say "give me an alternator for an LS1", you have to know the specific model and year to get the one that will not only work with this kit but also use the same style plug and positive/negative configuration as the RB25DET...which it doesn't specify on the website. I called Ricky and inquired. He wasn't so sure off the bat, but he did some research and told me to try a 2004 Pontiac GTO. When I picked it up at the auto parts store, I confirmed that the plug was the same style. I also googled it to ensure that the positive/negative prongs inside the plug were in the same configuration as the RB25DET, which they were. Other than the fact that the LS1 alternator is much bigger and took some effort to tetris it down into place from the top of the engine, even with all of the pulleys and radiator hoses/tubes removed...I was pleasantly surprised at how easy the overall install was...yes, it was a true bolt on! The only drawback is that this adapter eliminates the tensioning screw on the factory assembly. As such, I now have to tension it the old fashion way via prybar. Here's a pic of the alternator with the adapter bracket. As you can see, the pulley from the kit is essentially the same diameter as the factory LS1, and the only difference is that it has a couple of ribs less.
-
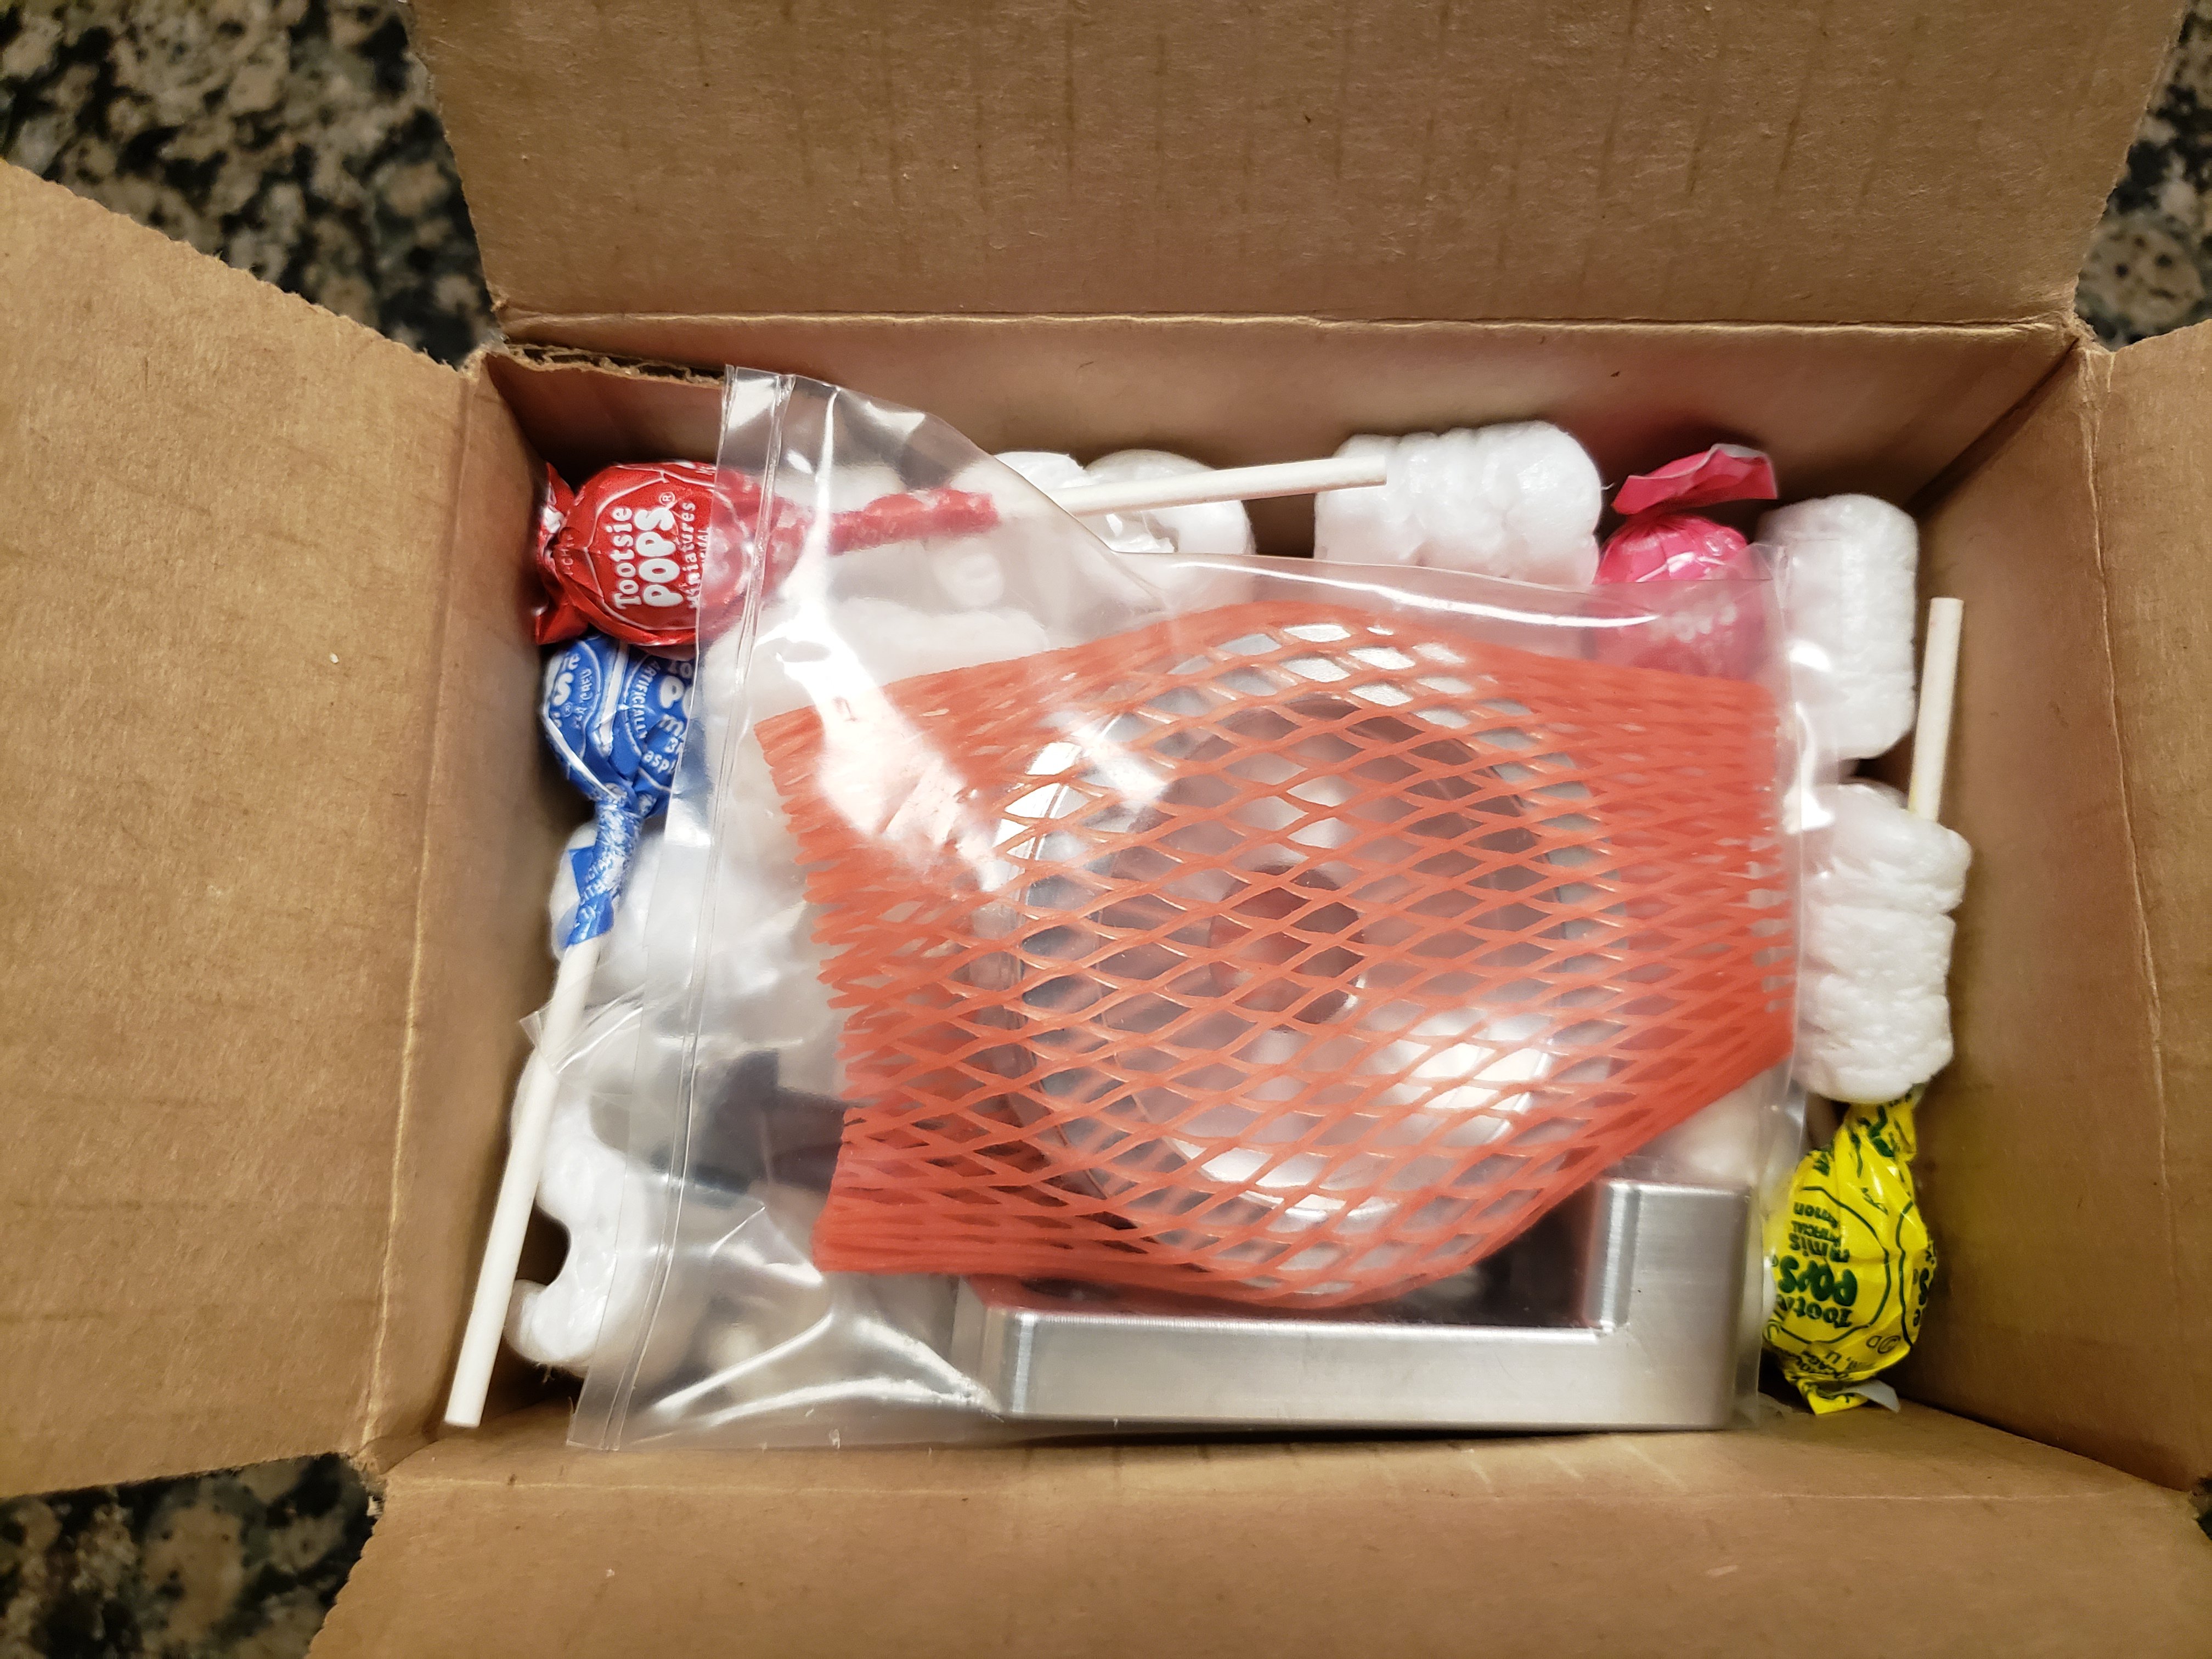
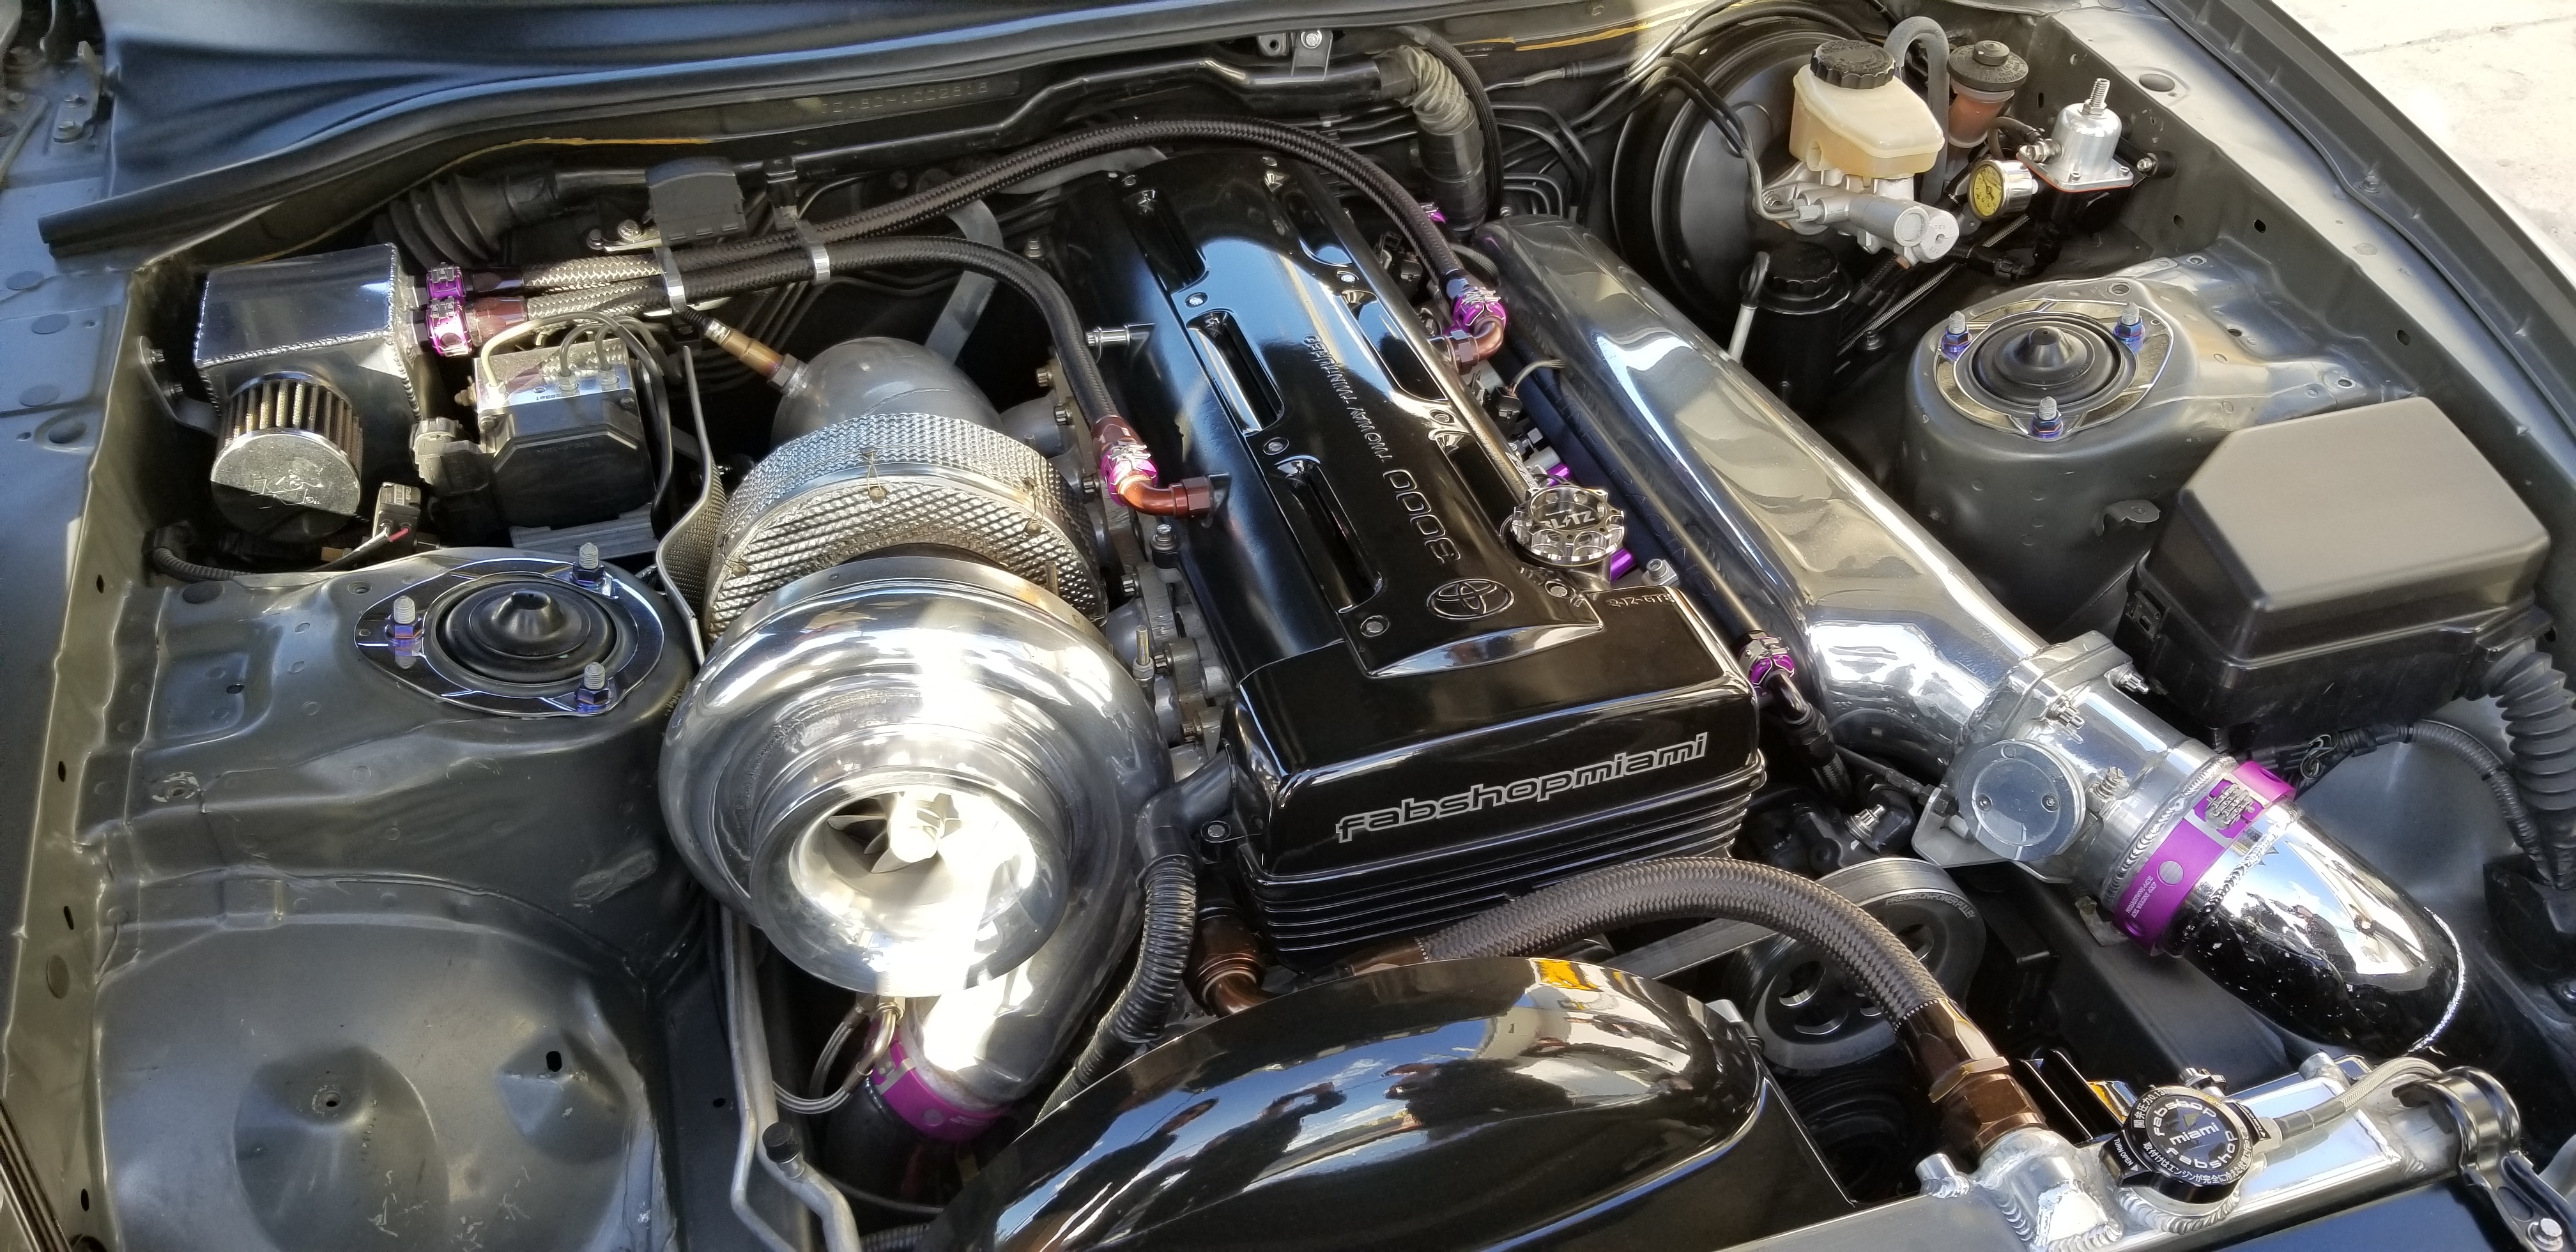
Winter is here and in Miami that means...Turbo weather! After hibernating for the summer, I dusted her off and started her up for the first time in probably about 4 months. I let her idle for a while and I noticed that she didn't sound just right. The next thing I know, I'm looking at the tach and it wasn't registering...I already knew what that meant. I posted in another sub-forum here about my travails with my alternator. I am on my fourth or fifth one over the past 6 years. For some reason that I have yet to figure out, they keep burning out on me. I started with the stock RB25DET unit and it went bad, then I went to a unit from Quality Power that was anything but quality, then ended up with a unit from a Mitsubishi Galant that was "close" to a direct bolt on. The Mitsubishi unit worked well for a while, but apparently it didn't want to wake from the summer's hibernation. Fed up with the alternator situation, I gave Raw Brokerage a call to see if they had any type of upgrade available. I spoke with Ricky who told me about a kit they offered that allows me to use an LS1 alternator..."direct bolt on". I say this in quotes because in my experience there is rarely such a thing as a direct bolt on! Somehow or the other you always have to end up modifying your modifications. I ordered the kit right around Halloween. I remember this specifically because this is how it arrived... That got a chuckle out of me. My first impression was that it was a quality kit
-
The setup is great, I finally have some traction although the first punch the tires will still spin while the car is rolling in second gear at about 40mph...but after a few punches they warm up and grip nicely. Before this modification, it was like driving on ice. As far as top speed, I really haven't gone more than about 120mph. If you are planning to hit 170mph+, ultimately it will all depend on the quality of your wheel to begin with...basically a GIGO type of thing. Weldcraft modifies wheels for all sorts of cars including drag cars so the modification itself doesn't worry me. If you are starting with a high quality wheel that is fully capable of 170mph+, then it should be fine for the same after the mod. I would call them and just inquire. Personally I agree with you, nothing looks better on these cars than Watanabe style wheels. I went with Rotas mainly because they were more cost effective at the time for the modification I wanted to try. A failed experiment with a wheel that costs $175.00 doesn't hurt as much as a wheel that costs $700.00! Now that I have the setup that I want and I know it works, I can try other options with confidence. I would loooooooove to get some Watanabes, but I don't think they are available in an offset that I can make work unfortunately.
-
Obviously I skipped offset day in school!
-
Lol, I wish I could do a "rudimentary" drawing like that! Yes I believe that you and, originally EF Ian, are correct...I completely forgot about the fact that centerline moved and failed to account for that. Thanks for Illustrating it for me. Now, (let's see if I get this part right!) adding the 10mm spacer then actually nets a +7?
-
1978 Datsun 280Z RB25 Restomod
boosted300 replied to Jethoncho's topic in S30 Series - 240z, 260z, 280z
So in going back and looking at my setup, the modification to my wheels gave me a +17 offset, and then I added a 10mm spacer, which actually ends up netting me an offset of +7...if my math is correct? Rear suspension looks great! -
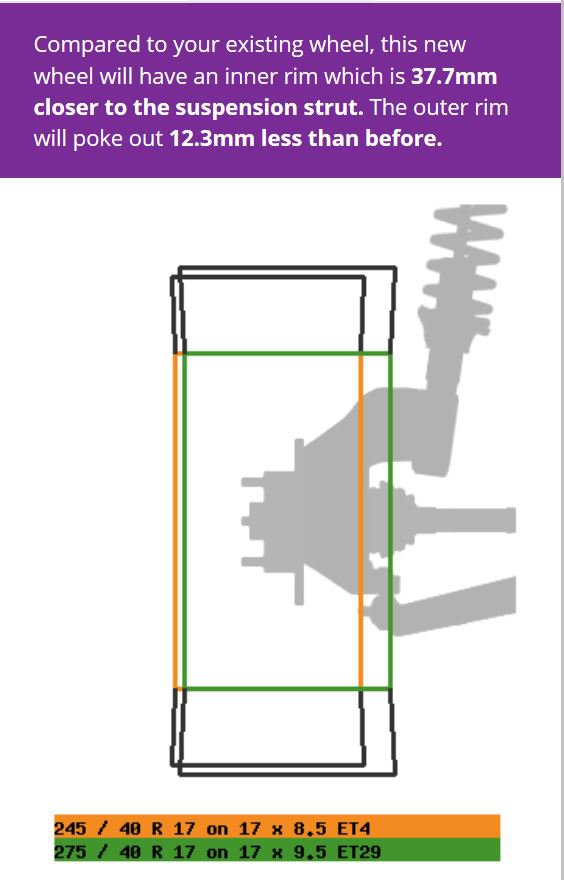
Ok, as near as I can tell my original calculation of +29 was correct... Here are two diagrams from online offset-calculators that depict the modification that I made. The +29 offset shows entire inch that was added goes to the inside towards the car. The yellow line depicts the new/modified wheel of +29. As you can see the outer profile relative to the fender remains unchanged. In this pic it is the green line. Hope this helps!
-
Sorry for the tardy response! So I'm still not positive on this but in thinking more about it... The original wheel was 8.5 +4... since I added 1 inch (25 mm) to the inside only, wouldn't it be the full 25 instead of 1/2 of the 25? or +29?
-
Wow...thats quite an update! So much to absorb... Awesome washer bottle... I got sick to my stomach seeing the damage to your car... But most importantly...congratulations on your house! That's a tremendous milestone!
-
Thanks! My rim setup is somewhat unconventional... I did a separate write up on it Take a look it should give you the answers you're looking for
-
Yeah, plus I'm sure yours were taken with something better than a camera phone...
-
Instead of shaving weight I just try to add more power
-
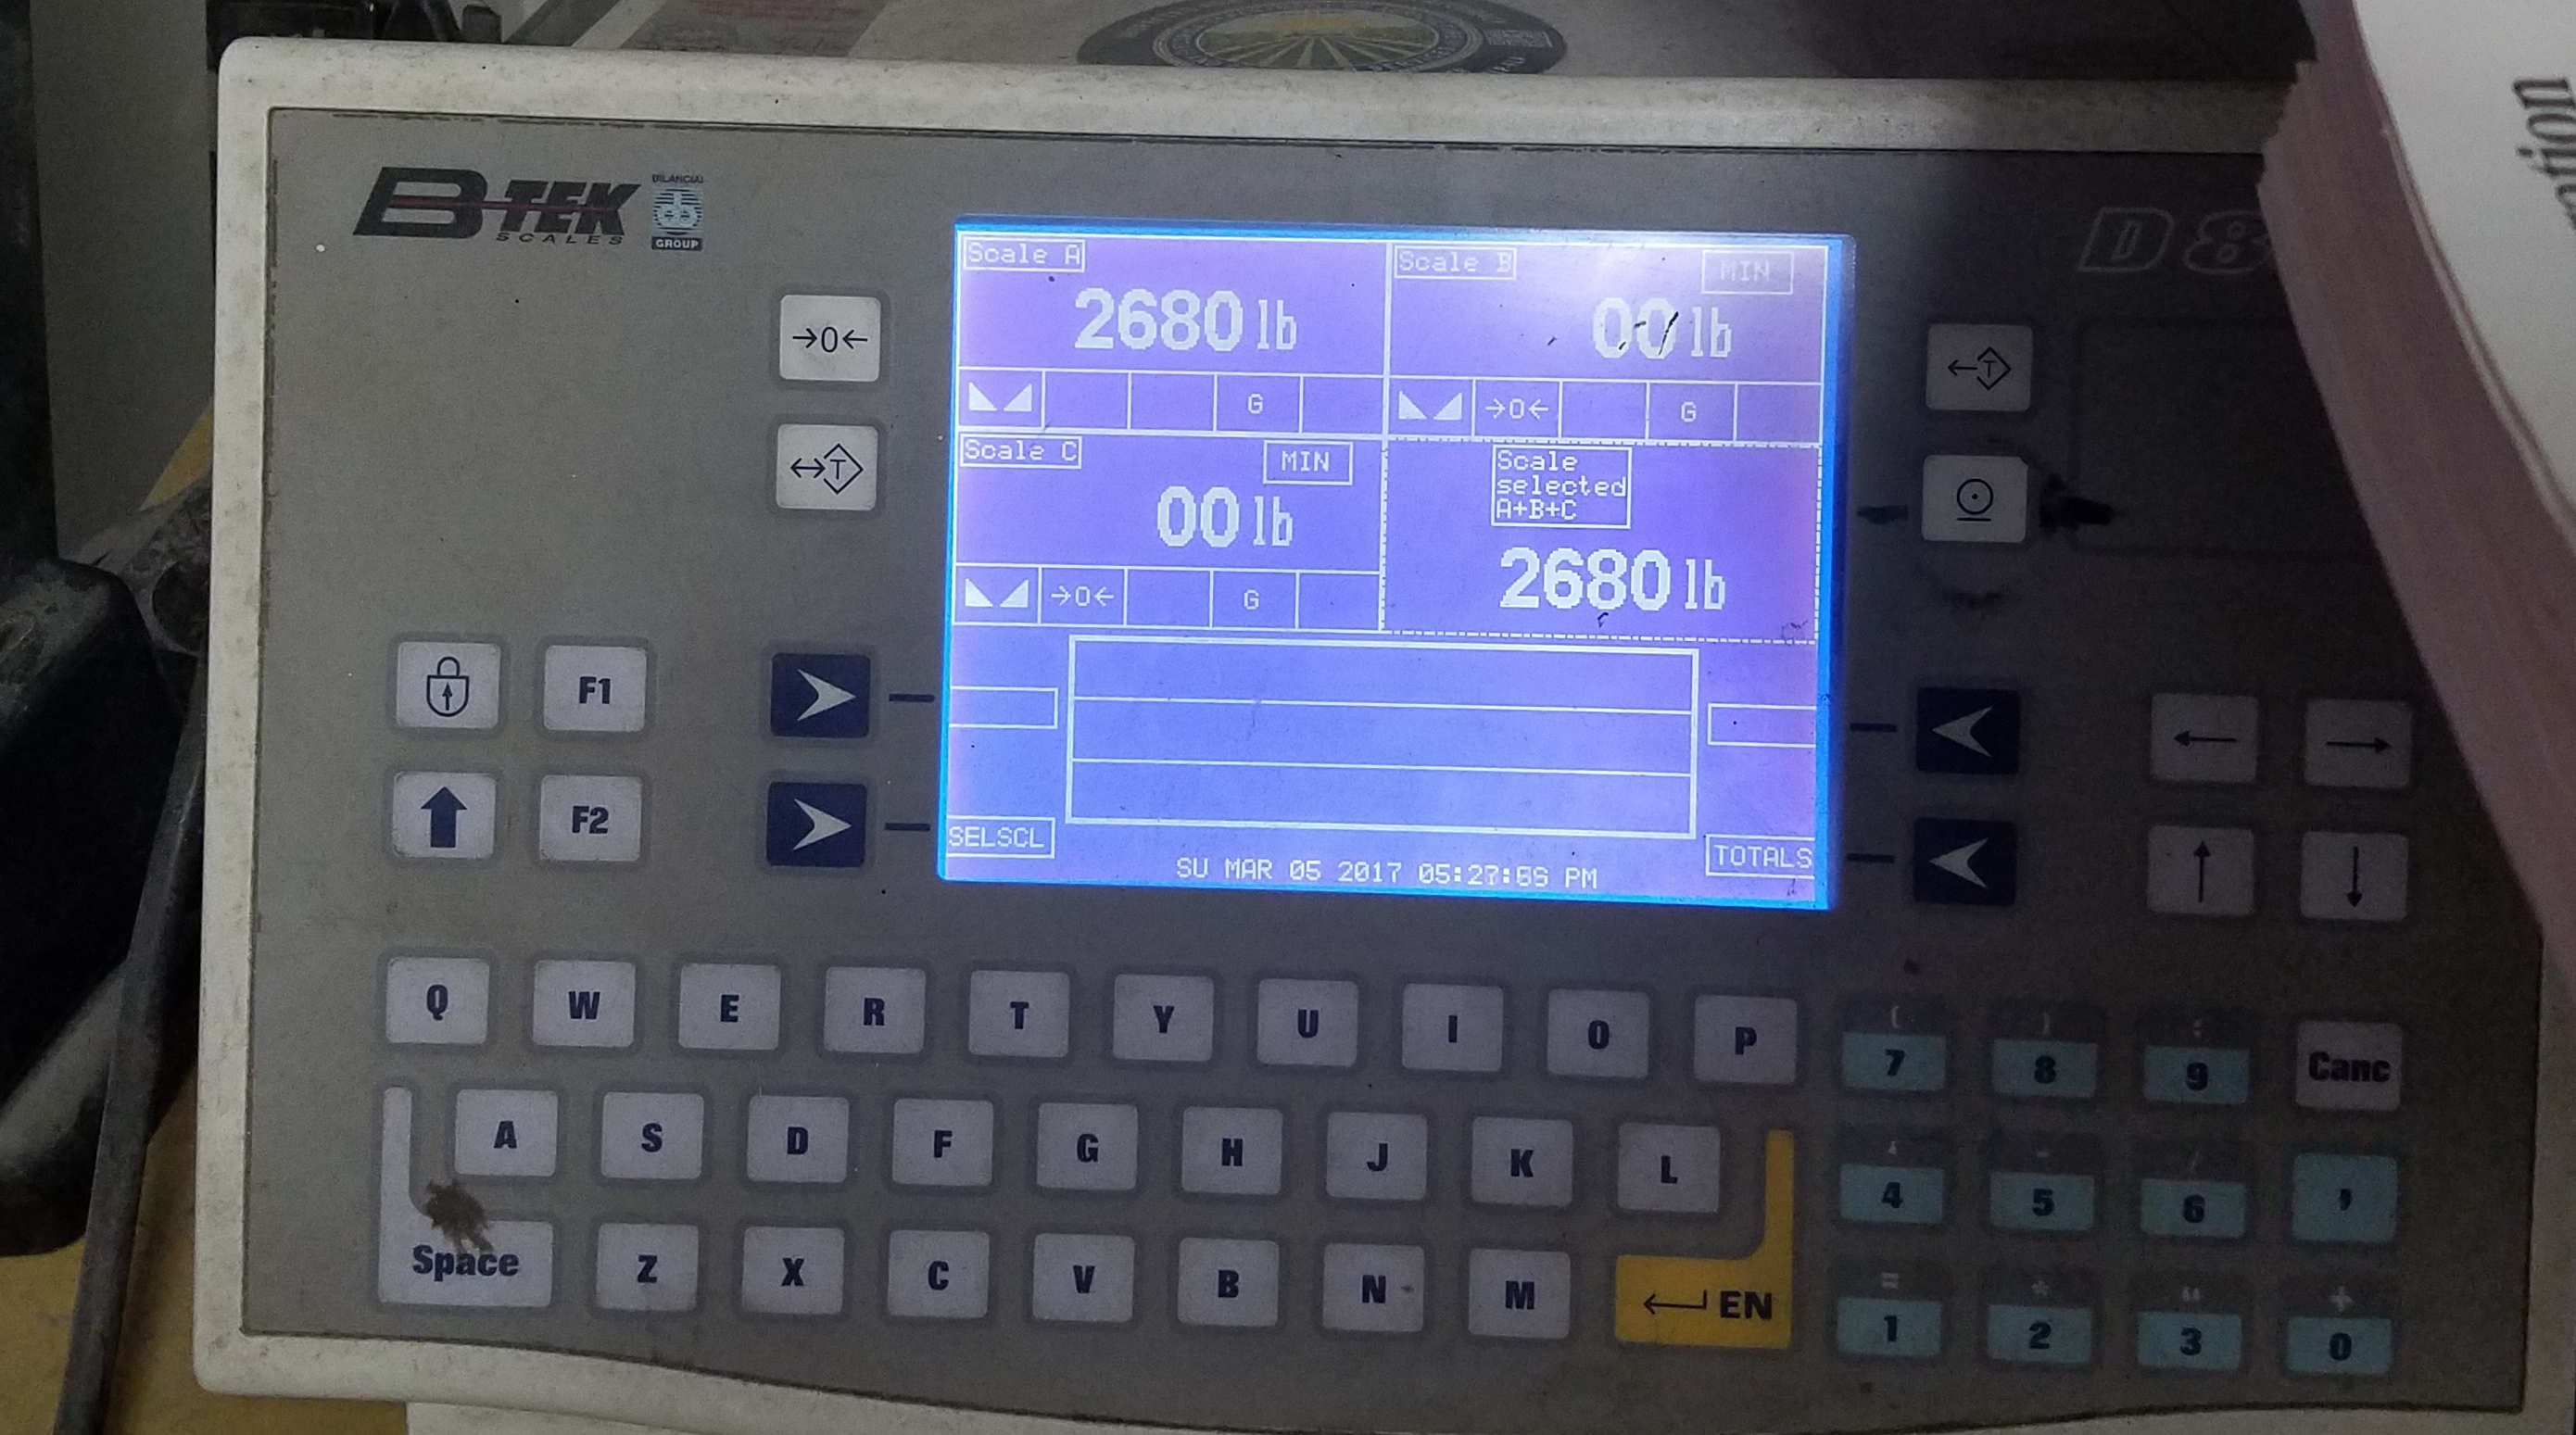
RB25DET, Intercooler, Full AC system, Bad Dog rails, Dynamat in the front passenger compartment floors and firewall only, full AZC Suspension, full wilwood brake setup, 17 x8.5/9.5 Rotas, Aftermarket big radiator and twin electric fans, spare tire...2,680
-
Oh man, now you're making me do math!! I have to think about this one... I mean, my fronts are +4 with a 235 tire and they fit nearly perfect... So wouldn't 10 mm more of tire need about 10mm more of wheel? So then it would be around +14...? Im not sure if my logic is sound on that or not...I'm sure there are some tire/wheel gurus on here that would know better...
-
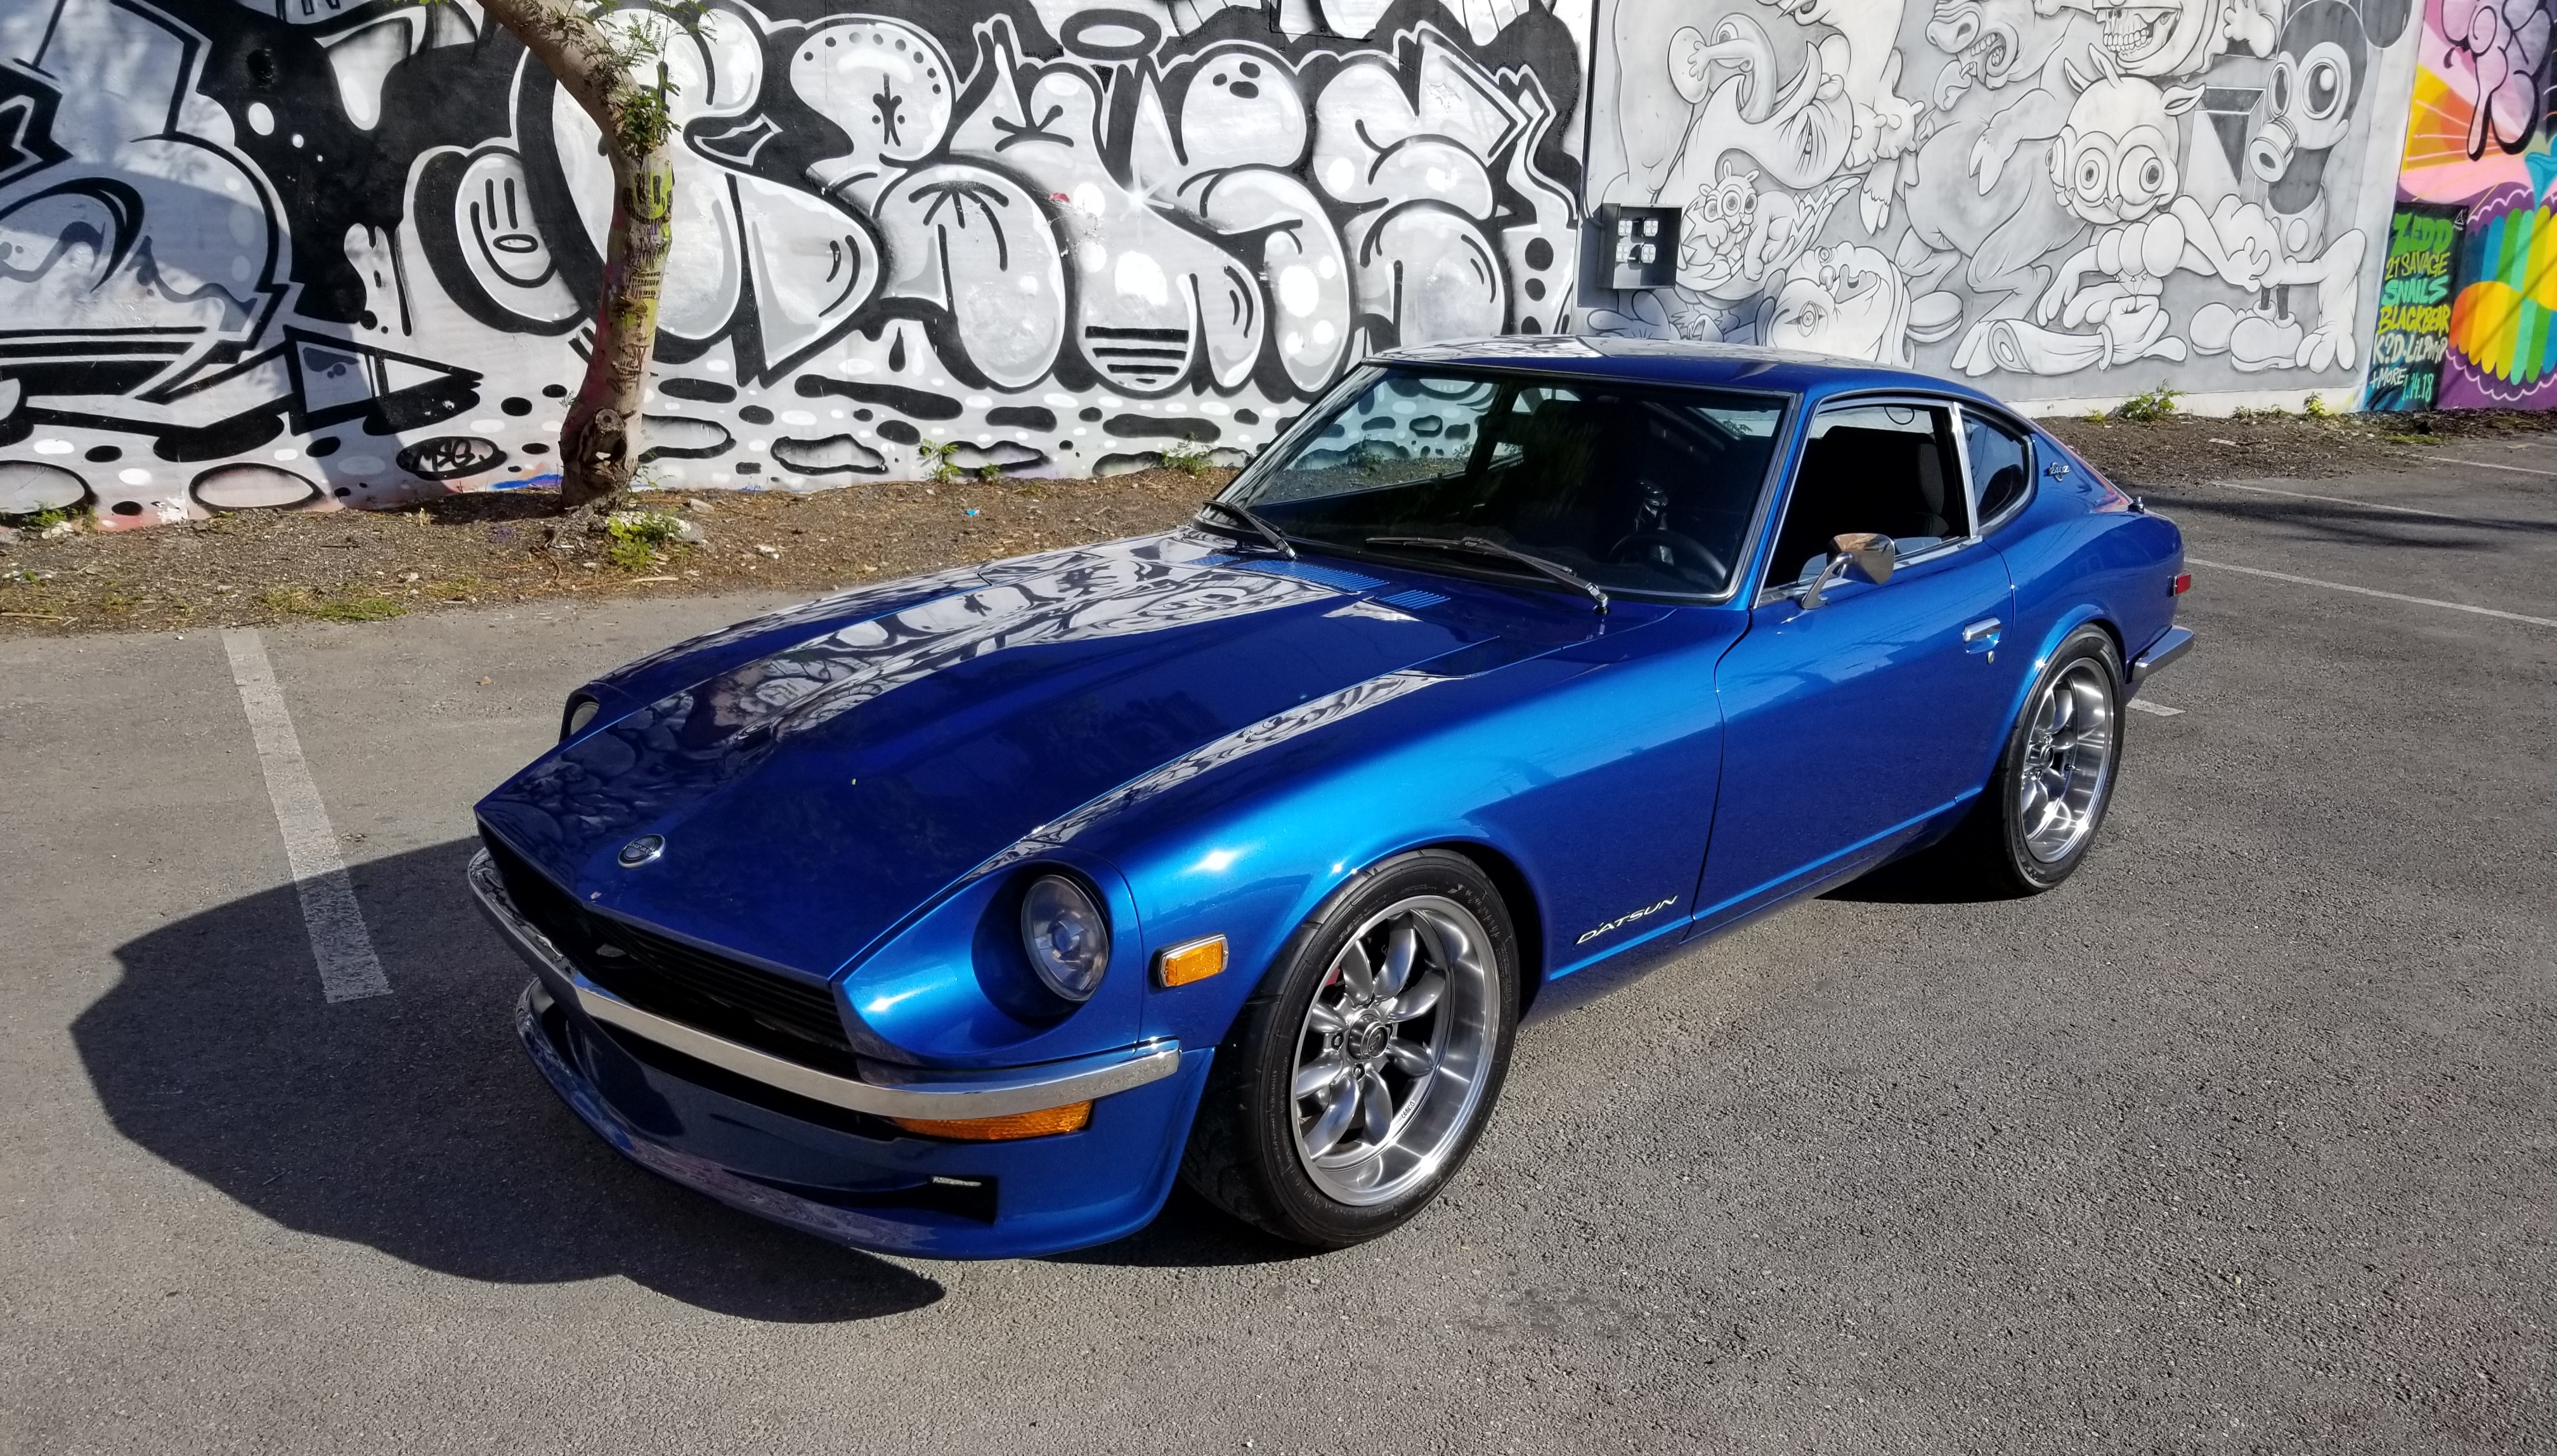
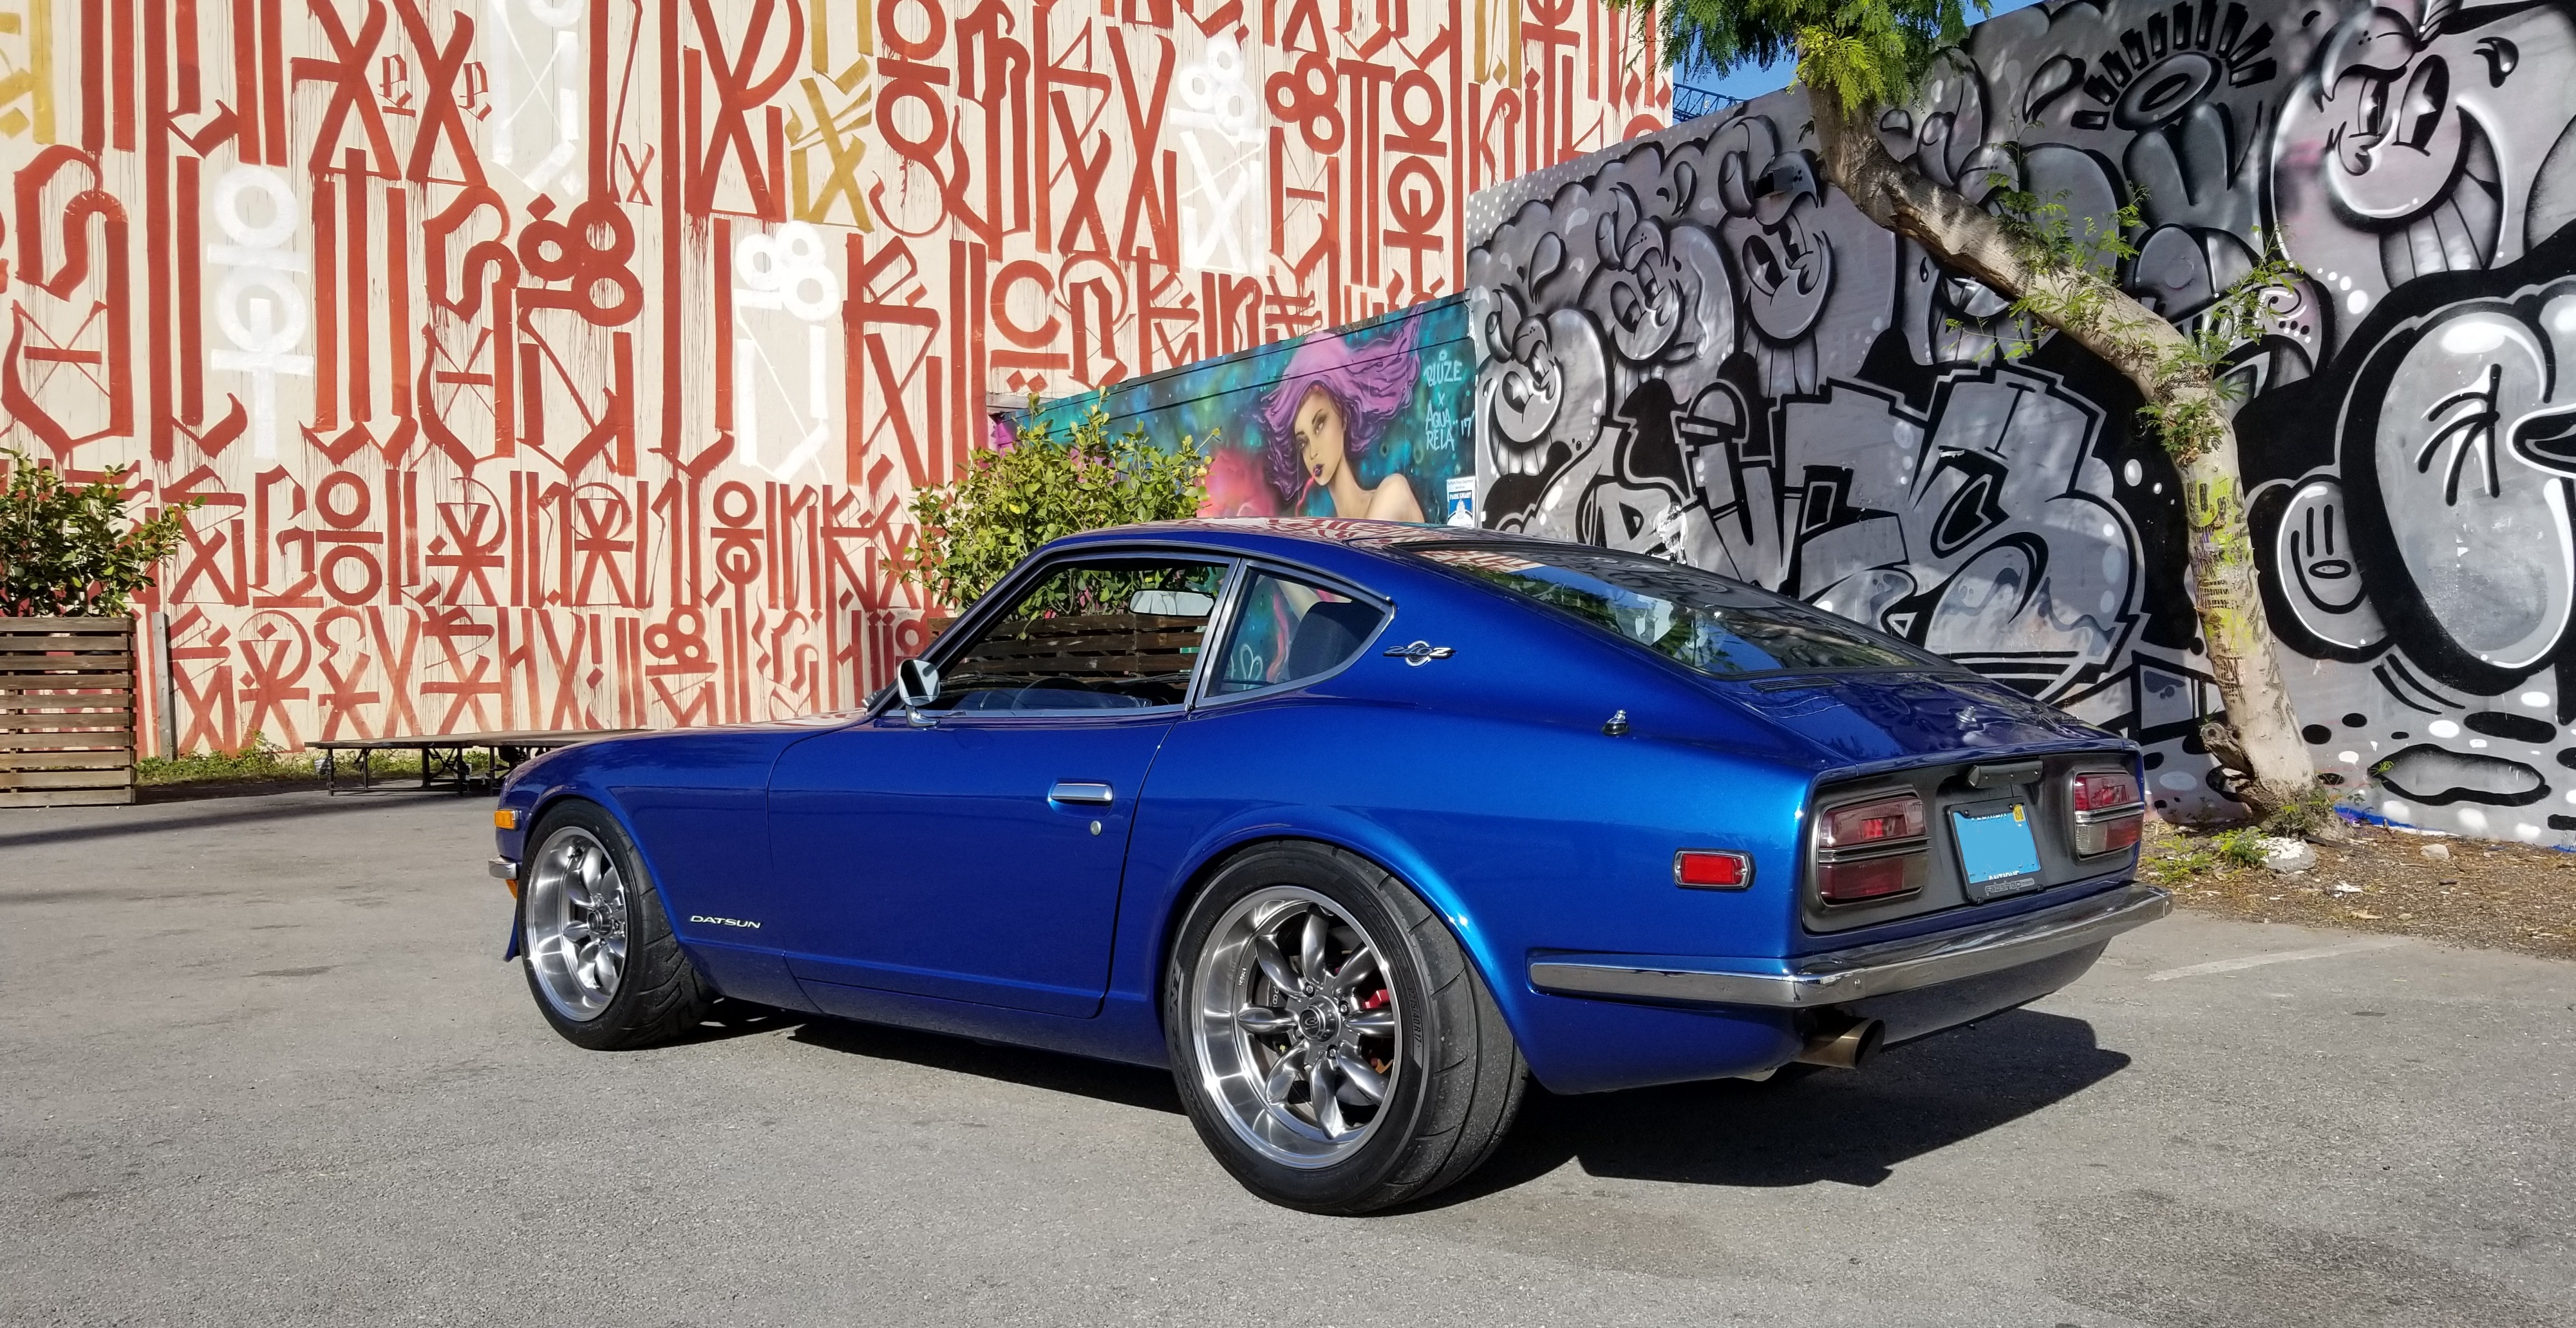
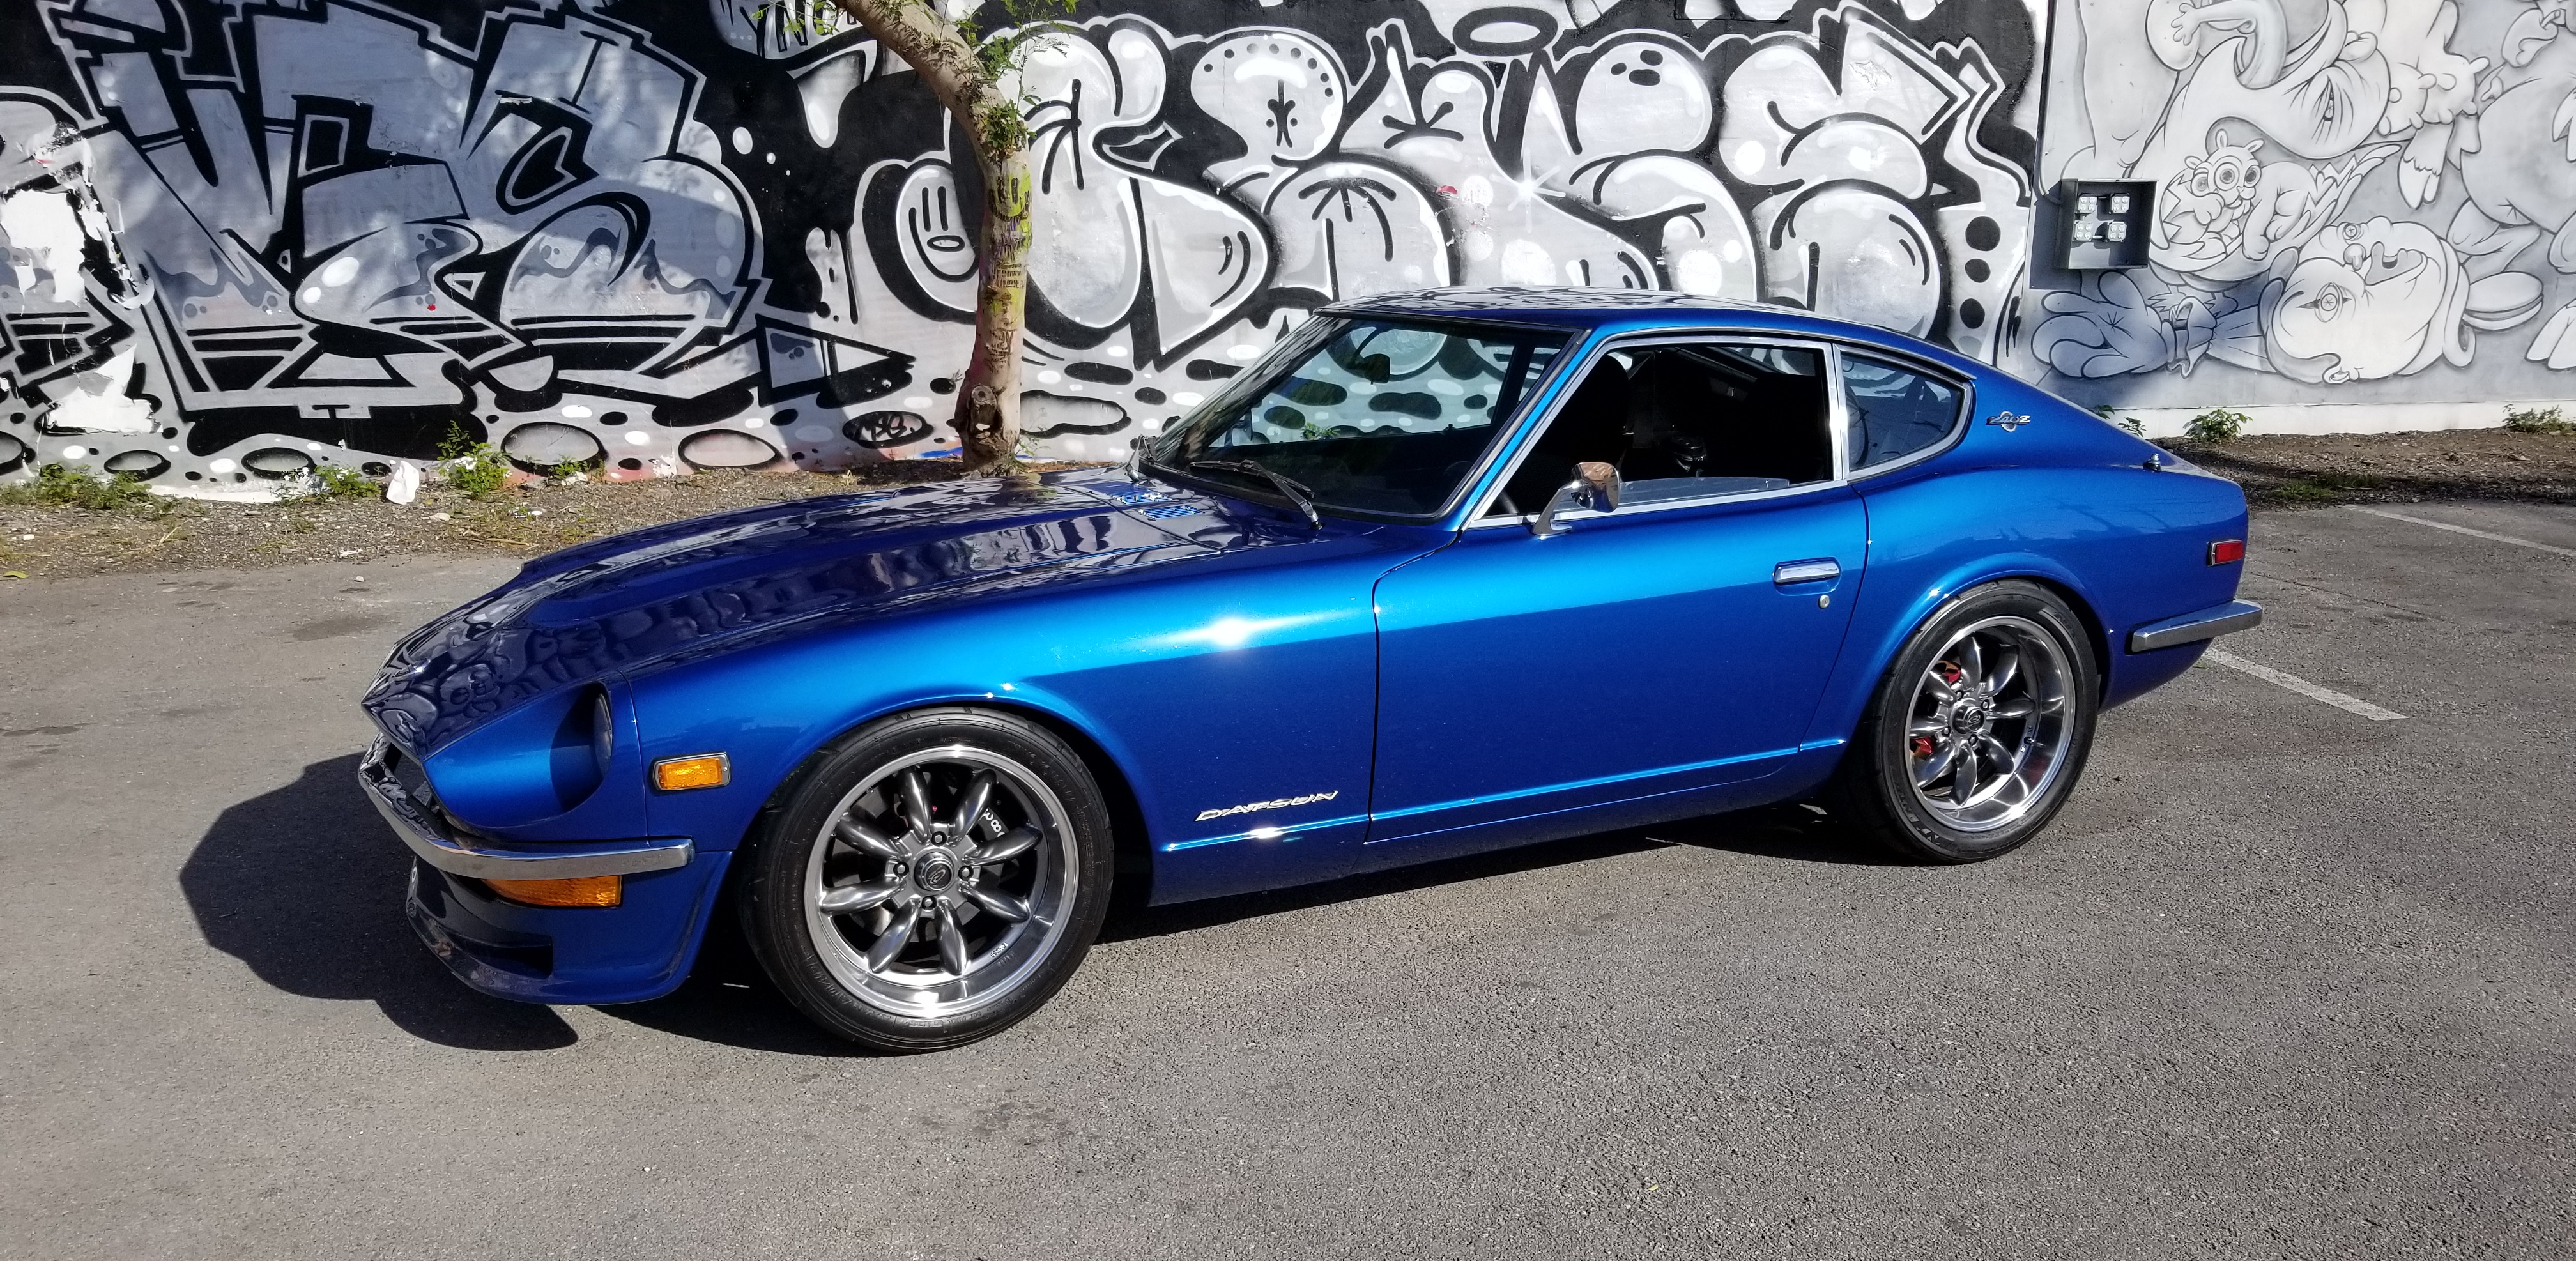
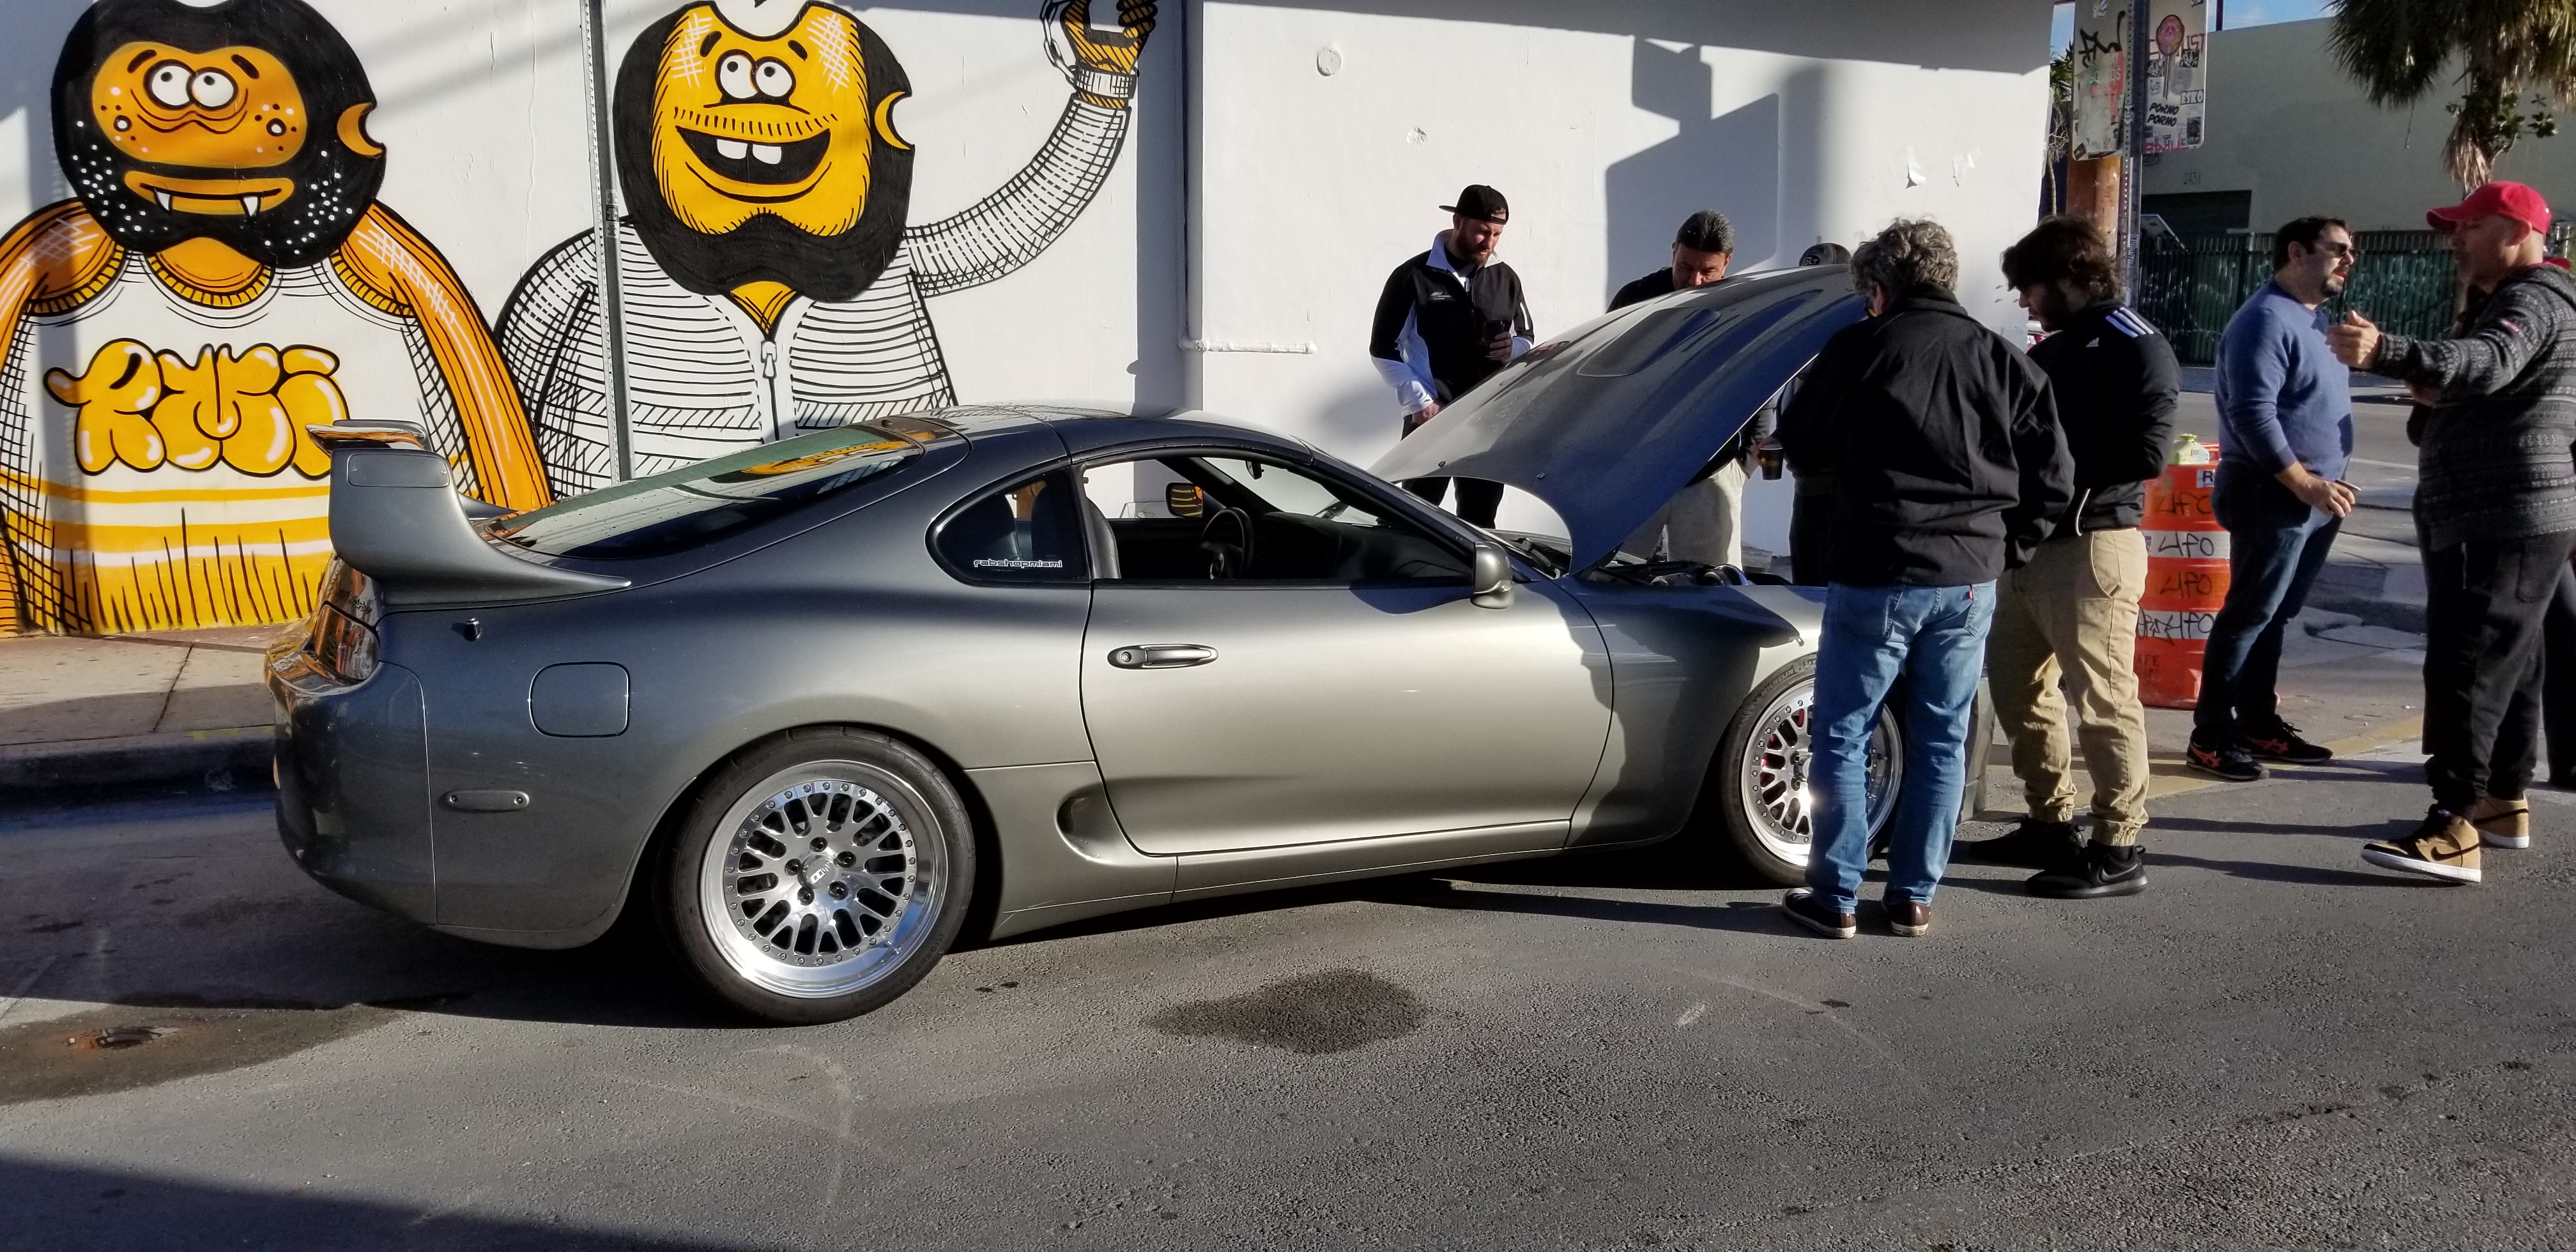
At Cars and Coffee, I found a nice spot for some pics...wish I had a higher end camera for some more picturesque photos like EF Ian's... But these are the best ones I've personally gotten so far I think, the spot and the lighting were just right...
- 199 replies
-
- 1
-

-
- rb25det 240z
- rota rb-r
- (and 2 more)
-
...and Cars and coffee again the week after that.... Some interesting cars this time, out of the ordinary stuff... Then this guy rolls in halfway through and steals the show... It's cool to see a $1.5 million dollar car, but even cooler that the owner actually drives it around...
-
The story continues...
-
So I went to another Cars and Coffee the next weekend...I can't lie, the 240 gets a lot of love at these things... Doug brought a different toy this time... A modest 1,100 RWHP
-
Thanks!
-
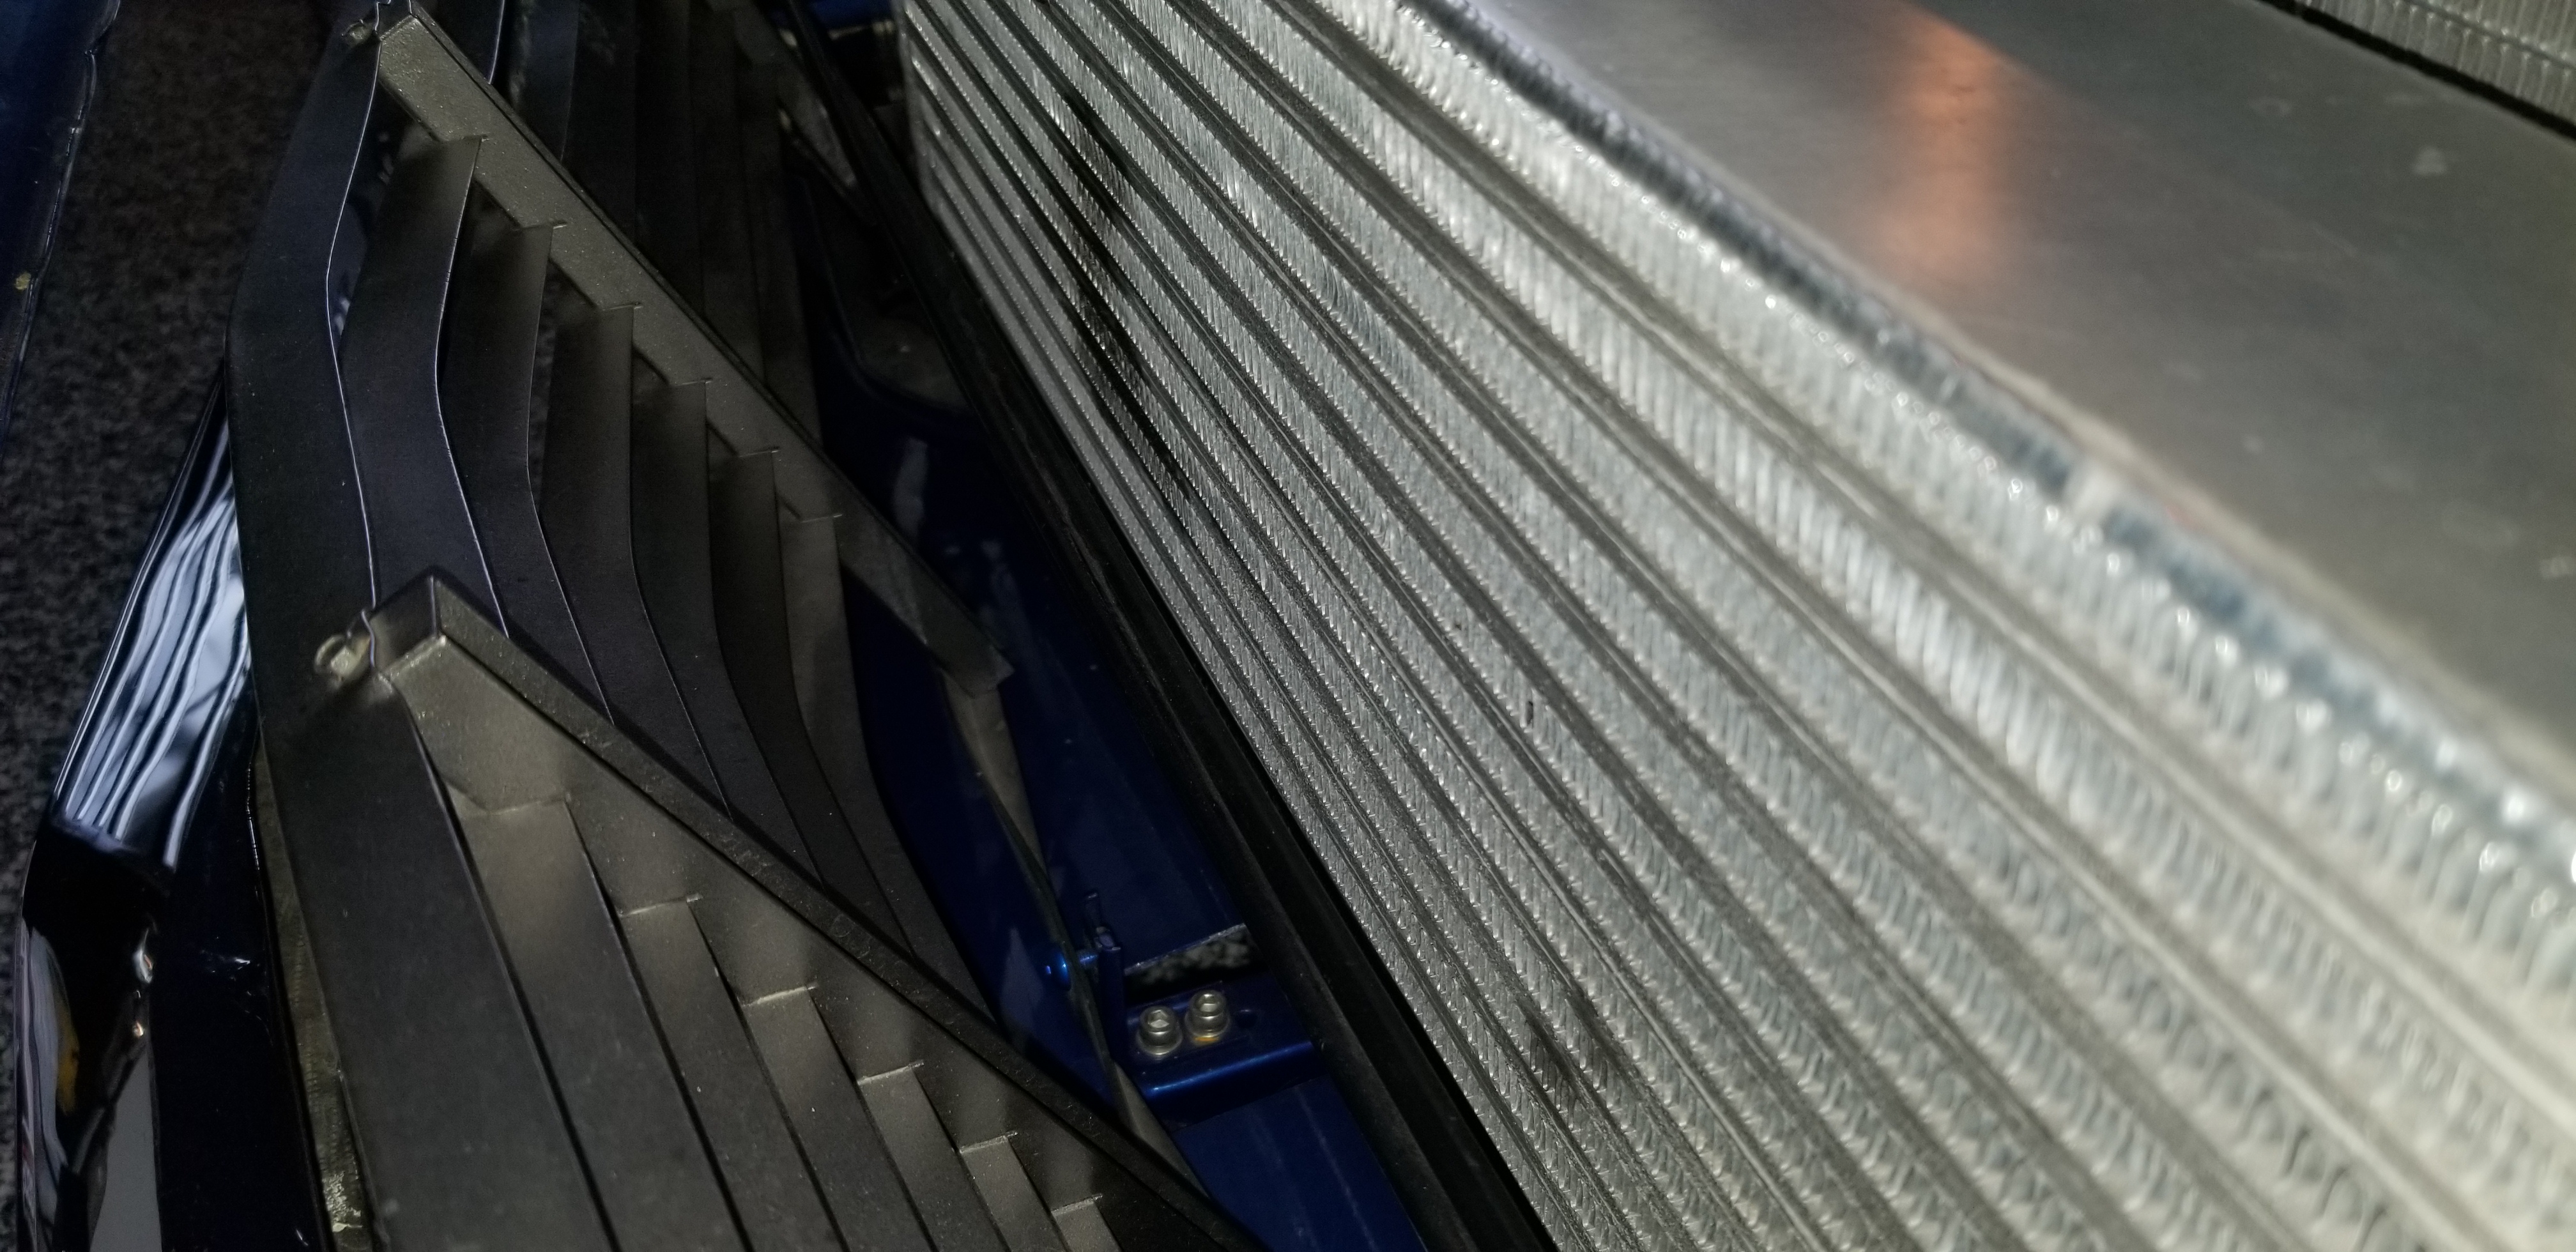
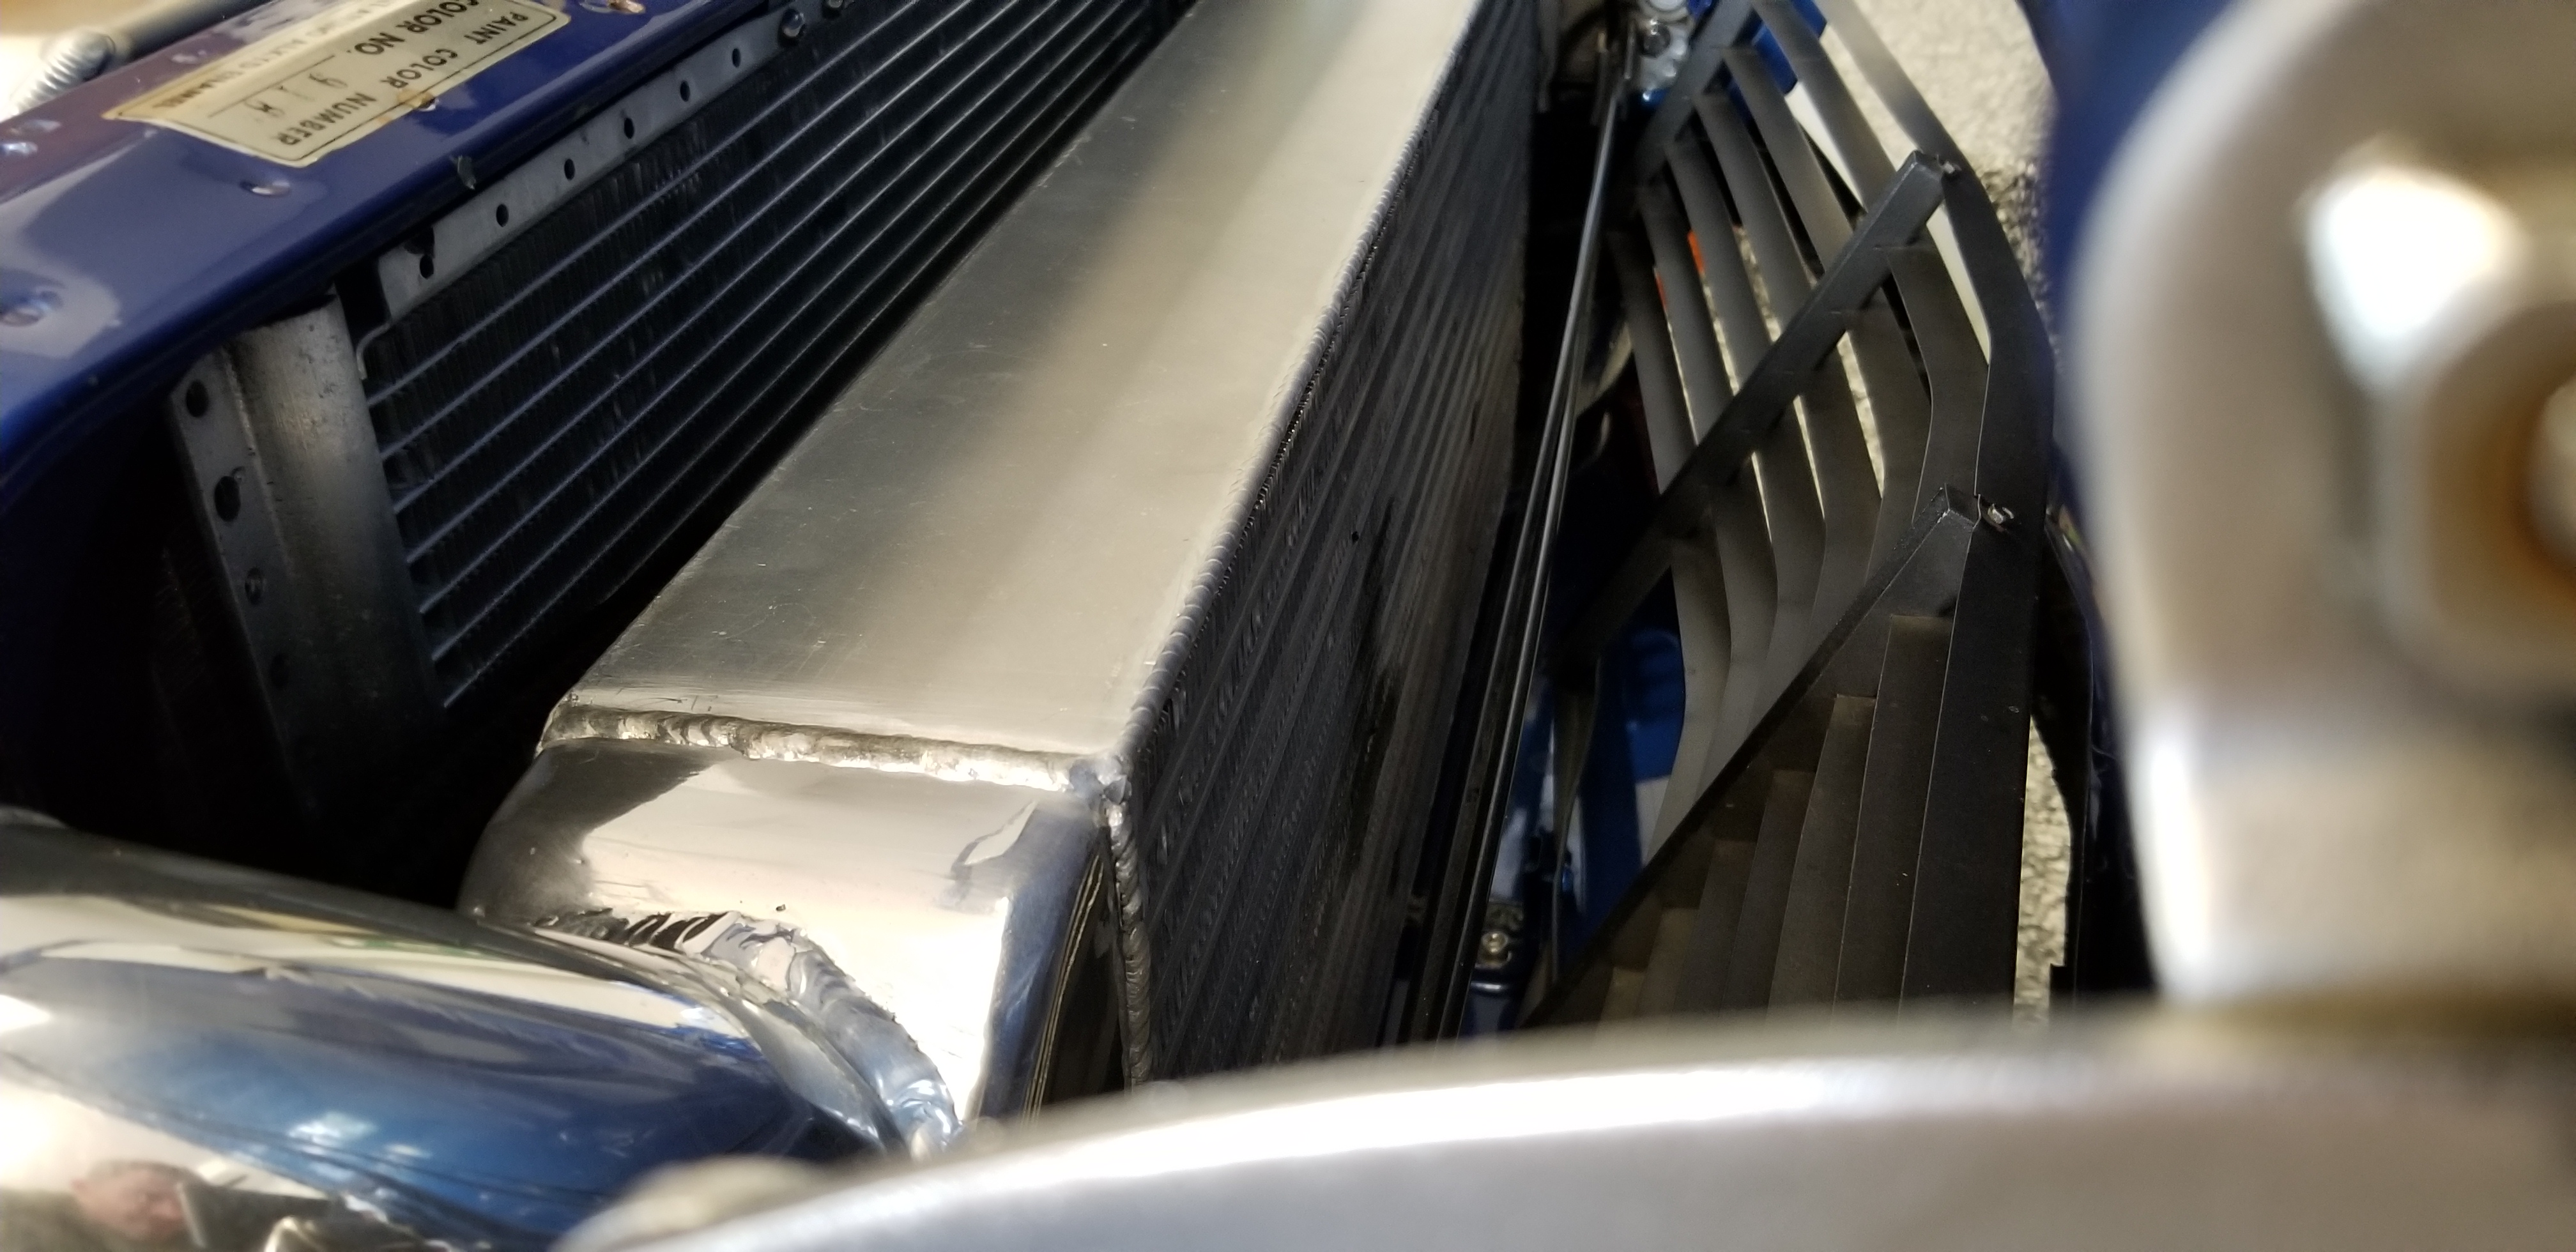
I drive the car home and am giving it its normal once over of affection...and I noticed dark patches on the front side of the intercooler...weird, I thought... Was the oil cooler behind it leaking? But even if it was why would it leak forward especially with air pressure going towards the engine bay? Turns out the intercooler has some small leaks, and in more than one place...ugggggggh!! Had this been an inexpensive Chinese core off ebay, this probably wouldn't have surprised me, but it certainly wasn't what I expected from a "top quality" intercooler like Bell... The thought of all the work that went into that thing...and all the work it would take to get it out and re-do.... Hopefully at least Bell will be cool about it and warranty it out for me.
-
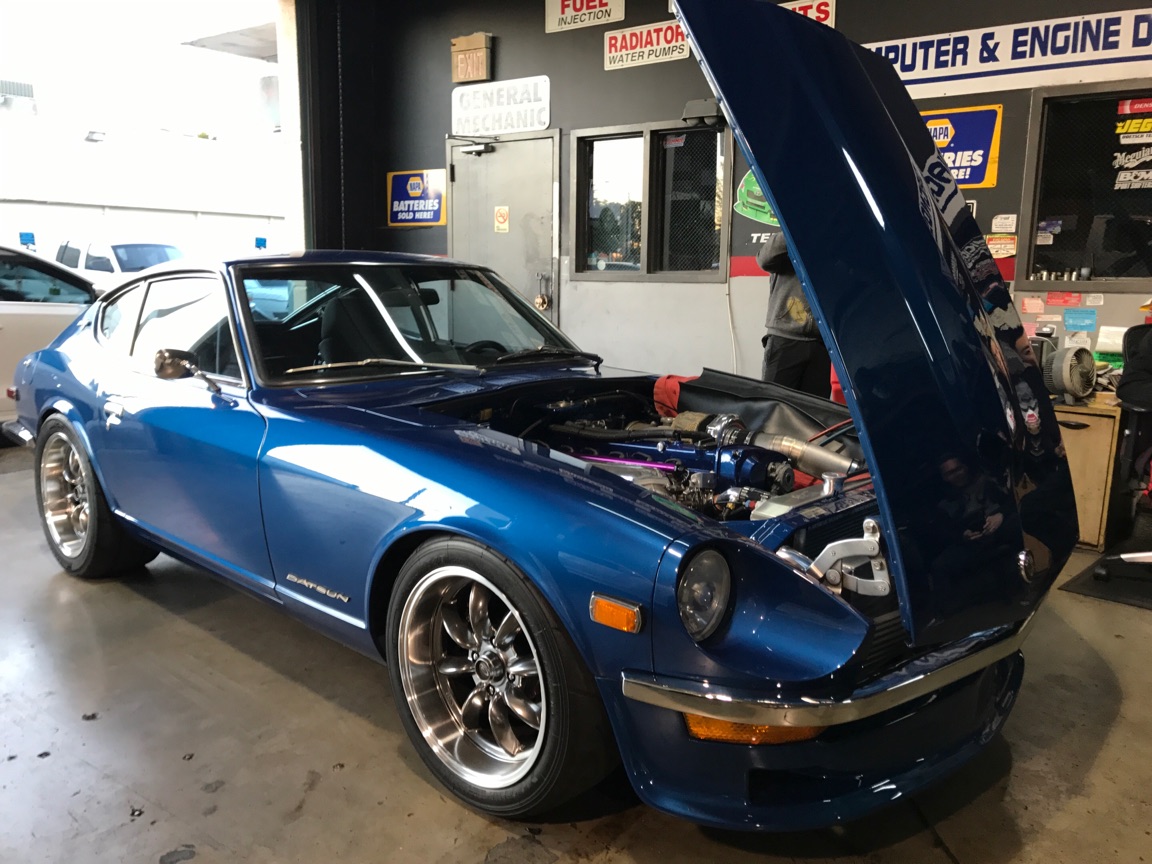
So the new year rolled around, and the cold weather was still hanging around so I decided I better address the AC sooner rather than later... Took it to a place called Kiki's Automotive that had gotten strong word of mouth for quality AC work. The owner and his son couldn't have been any nicer to me. Sensing how nervous I was about anyone touching my car, they cleared out a space, worked on it personally rather than have one of their mechanics do it, and treated me and my car like serious VIP's. And most importantly for me, they allowed me to remain in the work area and hover over them while they touched my baby. They first vacuumed the system and, perhaps most importantly...it held vacuum. No leaks! Now that I knew they system was sealed, all they had to do was charge it and I would finally have AC in my car! Or so I thought.... With the system fully charged, I started the car to feel the magic of cold air pass through the ventilation system for the first time and...nothing... We looked at the compressor and it wasn't kicking on. Now this is where I will admit ignorance about AC systems...the owner told me that the two different gauges had to equalize, or something along those lines, and they weren't equalizing...I had no clue what that meant, but according to them there was some sort of blockage in the system. He believed it was the expansion valve (which I have no clue what that does)...long story short they swapped out a new one annnnnnd....nothing... This whole process took most of the day and it was now closing time for them. The owner said that he wanted to swap the dryer next as process of elimination to find the blockage, but since it was late, and the weekend...he told me to come back on another day when they could focus on it the whole day... The dream of air conditioning still eluded me...
-
Just read the whole thing...outstanding!!