
280zjoel
-
Posts
270 -
Joined
-
Last visited
Content Type
Profiles
Forums
Blogs
Events
Gallery
Downloads
Store
Everything posted by 280zjoel
-
I just measured on my setup. From the base of the shifter plate to the top of the trans tunnel I got exactly 2''. Also if you want, I could send you my alignment tool to make sure your engine and trans is lined up with your diff. I had a friend of mine press part of an input shaft from an SR into a pipe, and balance out the end to make it perfectly straight. Its basically like a mock up driveshaft to make sure the end aligns up. I could loan it to you if your willing to pay shipping both ways.
-
Is using a KA24DE MAF sensor on a SR20DET a good idea?
280zjoel replied to icapture's topic in Nissan 4 Cyl Forum
Dont quote me on this , but if i remember correctly the single cam ka24 Mafs works on the sr20det. Although it needs to be rewired. -
Science related fun facts related to common stuff
280zjoel replied to woldson's topic in Non Tech Board
ROFL -
ZERO feedback score, I smell a scammer...
-
bump...... anyone?
-
Forgot to post some pics of the progress I got yesterday. Did some work on the dashboard. It has 3 layers of fiberglass cloth on top with a thin layer of body filler to even things out. I also ended up adding a very small amount of fiberglass Resin to the body filler to add some strength to it, it just makes it a little harder to sand You can see in the last picture how warped the dash got, notice the high spot where there is no filler above the second gauge curve is, all and all its looks pretty decent and I think it should come out good.
-
Thanks, I had to add a spacer on one motor mount to tilt the engine more to to one side, I have 1/8'' space between the line and intake manifold. So thats something ill have to buy in the future.
-
Its getting there: Installed the Radiator, Intercooler, fenders, and some other stuff. Im surprised by how much CLEANER the engine bay looks from before. Its been so long I forgot how dirty it looked. Before: After: ....*drools* looks much cleaner. Gotta love them Rota RB-R's Almost done
-
I am looking for an Autometer Pro-comp silver face oil pressure gauge for my Z. It has to be the 2 5/8 dia. gauge. Anyhow let me know what you guys got. Thanks
-
No pics right now but here is a list of the things I got done today: - Inststalled outer tie rods - Eyeballed Alignment - Bled the front brakes - Installed Down pipe - Fixed the intake from hitting the clutch line - Installed the slave cylinder And some other bits and piece's I cant think of right now. Anyhow its getting close to being back on the road soon.
-
I'm curious, what are you going to do about the shifter?
-
Anyone know any good junkyards in LA area for Z parts ??
280zjoel replied to nasshh's topic in Non Tech Board
Hey there is a Junkyard near by my house that has only Japanese cars, I usually see 3-5 s30's out there when I go including some 240z's. I can check the next time i go out there if there are any Z's and let you know about it. Anyhow here is the address, also I haven't been there in a few weeks so I cant say for sure if there are any Z's there currently. Ecology Auto Parts 15228 Boyle Avenue, Fontana, CA - (909) 356-1860 -
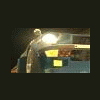
Ok guys, got more work done. Here is where I stand as of now( Today I used my brothers Nikon, and man that thing works great:mrgreen:): POW!! MOTOR IS IN!! It took some TLC to squeeze it in but its in. I did run into a few problems though. Notice How close my clutch Master is to my intake? So here Is my problem, the clutch master line barely touches the intake manifold, I think Im going to place a washer under the the motor mount to move it slightly over and away from the line. Here is a pic of the Alternator bracket... Its super close to the rail but will work. I did have to take the alternator, and lower bracket off when I put the engine in. Another angle of the alternator. Hehe... check out my Gangstered out shifter:icon45: My uncle who is a machinist made it in the early 80's. Its pretty cool, so im going to use it. Anyhow Ill have this thing going pretty soon, ill keep you guys posted.
-
I know what you mean. I wish I had more money to work on the car, in order for me to paint the engine bay with the red, I would also need to buy some black base coat to spray on first. Originally when I went to the paint shop the guy there told me that the color I bought was a 2 stage paint. When I got the tech sheet for the paint, it mentioned to spray the red base over black base to get the desired color. So now I have to buy black base coat and hardener( Cali state law prohibits solvent based paints unless used with a hardener to bring it up to spec) which would cost me more $$$$. So its satin black for now. Maybe in the future I will repaint it, when I have more time and money. I think it looks a whole lot better than before, It will also be easier for touch ups.
-
rofl
-
Here is what I did today to switch the alternator to the left hand side. First off I took the alternator bracket and flipped it upside down and positioned it on the other side, I had to measure how much to offset it to line up with the other pulleys. I ended up drilling a new hole, and making 2 brakets to help support it(circled in yellow). Also the spot I drilled the hole needed to be grinded flat since it is not level. Here is a better shot of the new hole I had to drill, hehehe I machined it flat( actually I grinded it down:icon45:) It came out pretty well, one thing I did not like was welding the steel piece to the cast steel bracket, not the cleanest weld but I will make sure to check it often to make sure I doesnt crack. Alternator On And thats about it. All I need to do now I get some right sized bolts and im good to go( Notice the ghetto bolt spacers on the bracket).
-
Well, not much going on so far. I changed the timing chain on my engine and its just about ready to go in. I still need to fab up a bracket for my alternator ( I might do it tomorrow depending on the rain:sad:) Hopefully ill have this thing wrapped up pretty soon, then ill get to drive it again:mparty:
-
Actually, I will be working on making the bracket for the alternator this week. I will post pics as soon as make the bracket. I will have to check the part number on the belt, I took my old belt to the Auto store and they just got me one that was the same size length wise.
-
Do you have bigger pics of the adapters U made?
-
I was but I waited about 3 weeks for my brother to do the body work and he never got it done, I ended up doing the bodywork myself and since im not too good at bodywork it did not come out to my liking. So for now satin black will do. As for shaving my cross member, I have an SR20DET installed so I dont need those mounts there:mrgreen::
-
If Corn Oil is made of corn, And Vegetable Oil is made of Vegetables. Then what is Baby Oil made of????????
-
Got some more work done today. I had to go out and buy a brake line bender(actually I really did not) and a brake line flare tool. I had to make a line from the master cylinder to the left hand side of the car and also a line from the clutch master cylinder. All and all it came out pretty good, I forgot to mention that I also installed the wind shield wiper assembly. here some pics of the progress: Lines, and harness are all in:mrgreen: I know it looks kinda messy, once the motor is in i can set the wiring in the right spot. Just a side shot of the "Mess" Interior shot. Everything is in except the dash( I know I need to work on that:icon45:) BTW I will soon be in the process of installing s14 240sx seats in the Z so I will let you guys know how it came out. And a shot of the cowl panel with the wiper motor installed. I'm so close to getting the motor in. I need to change the timing chain on the engine and back in it goes. Hopefully ill have it going soon.
-
Hey guys, got quite a bit done(well at least in my opinion I think i did). The wire harness is in, Im happy TonyD IS ALWAYS RIGHT!!!! hehehe the LHD and RHD lower harness are the same and have the same connections. Its just the harness that runs in the dash that is different. Other than that It all looks plug and play:mrgreen:. I got the Master cylinder and slave Master on and mounted up, I just now need to make the lines for one side of the brake lines and mount em up and Im almost ready to drop the engine back In, I have a goal to have the motor in and running by the end of this week. As for fiber glassing the dash, that might take some time. I will post some pics tomorrow of the work done so far.
-
WOW.... JUST WOW... I feel like punching the first guy I see driving a mustang for the heck of it(unless they own a z of course) just kidding, but seriously wow!!!! Some people need to act their age and not their shoe size.
-
Alrighty, got some decent progress today. I installed the cross member, and the steering Rack. Also I re-installed the steering column. YAY its in!!!!!!!! I still have to do a little bit of touch up work on the firewall. as well give it another coat of paint lol I was about to install the heater core when I realized that the heater hoses were older than me:-|.... 1 1/2hrs later after I go to the local Autozone and get sent to the back to look for the hoses myself we end up with this: My camera sucks!!!! It make the hoses look used.... anyhow I spent about $25 on less than 1ft of hose(2 pre-bent, and 1 straight piece) and 6 new clamps. Oh well, beats having to change those hoses when its in the car. And here it is installed, It doesnt look like much got done, but all those little things end up taking alot of time. Stay tuned for more updates soon.