Sirpent
-
Posts
229 -
Joined
-
Last visited
-
Days Won
1
Content Type
Profiles
Forums
Blogs
Events
Gallery
Downloads
Store
Everything posted by Sirpent
-
Sirpents 260Z / C32 AMG Powered RS30 - Australia
Sirpent replied to Sirpent's topic in S30 Series - 240z, 260z, 280z
Some would say that’s an understatement One day soon -
Sirpents 260Z / C32 AMG Powered RS30 - Australia
Sirpent replied to Sirpent's topic in S30 Series - 240z, 260z, 280z
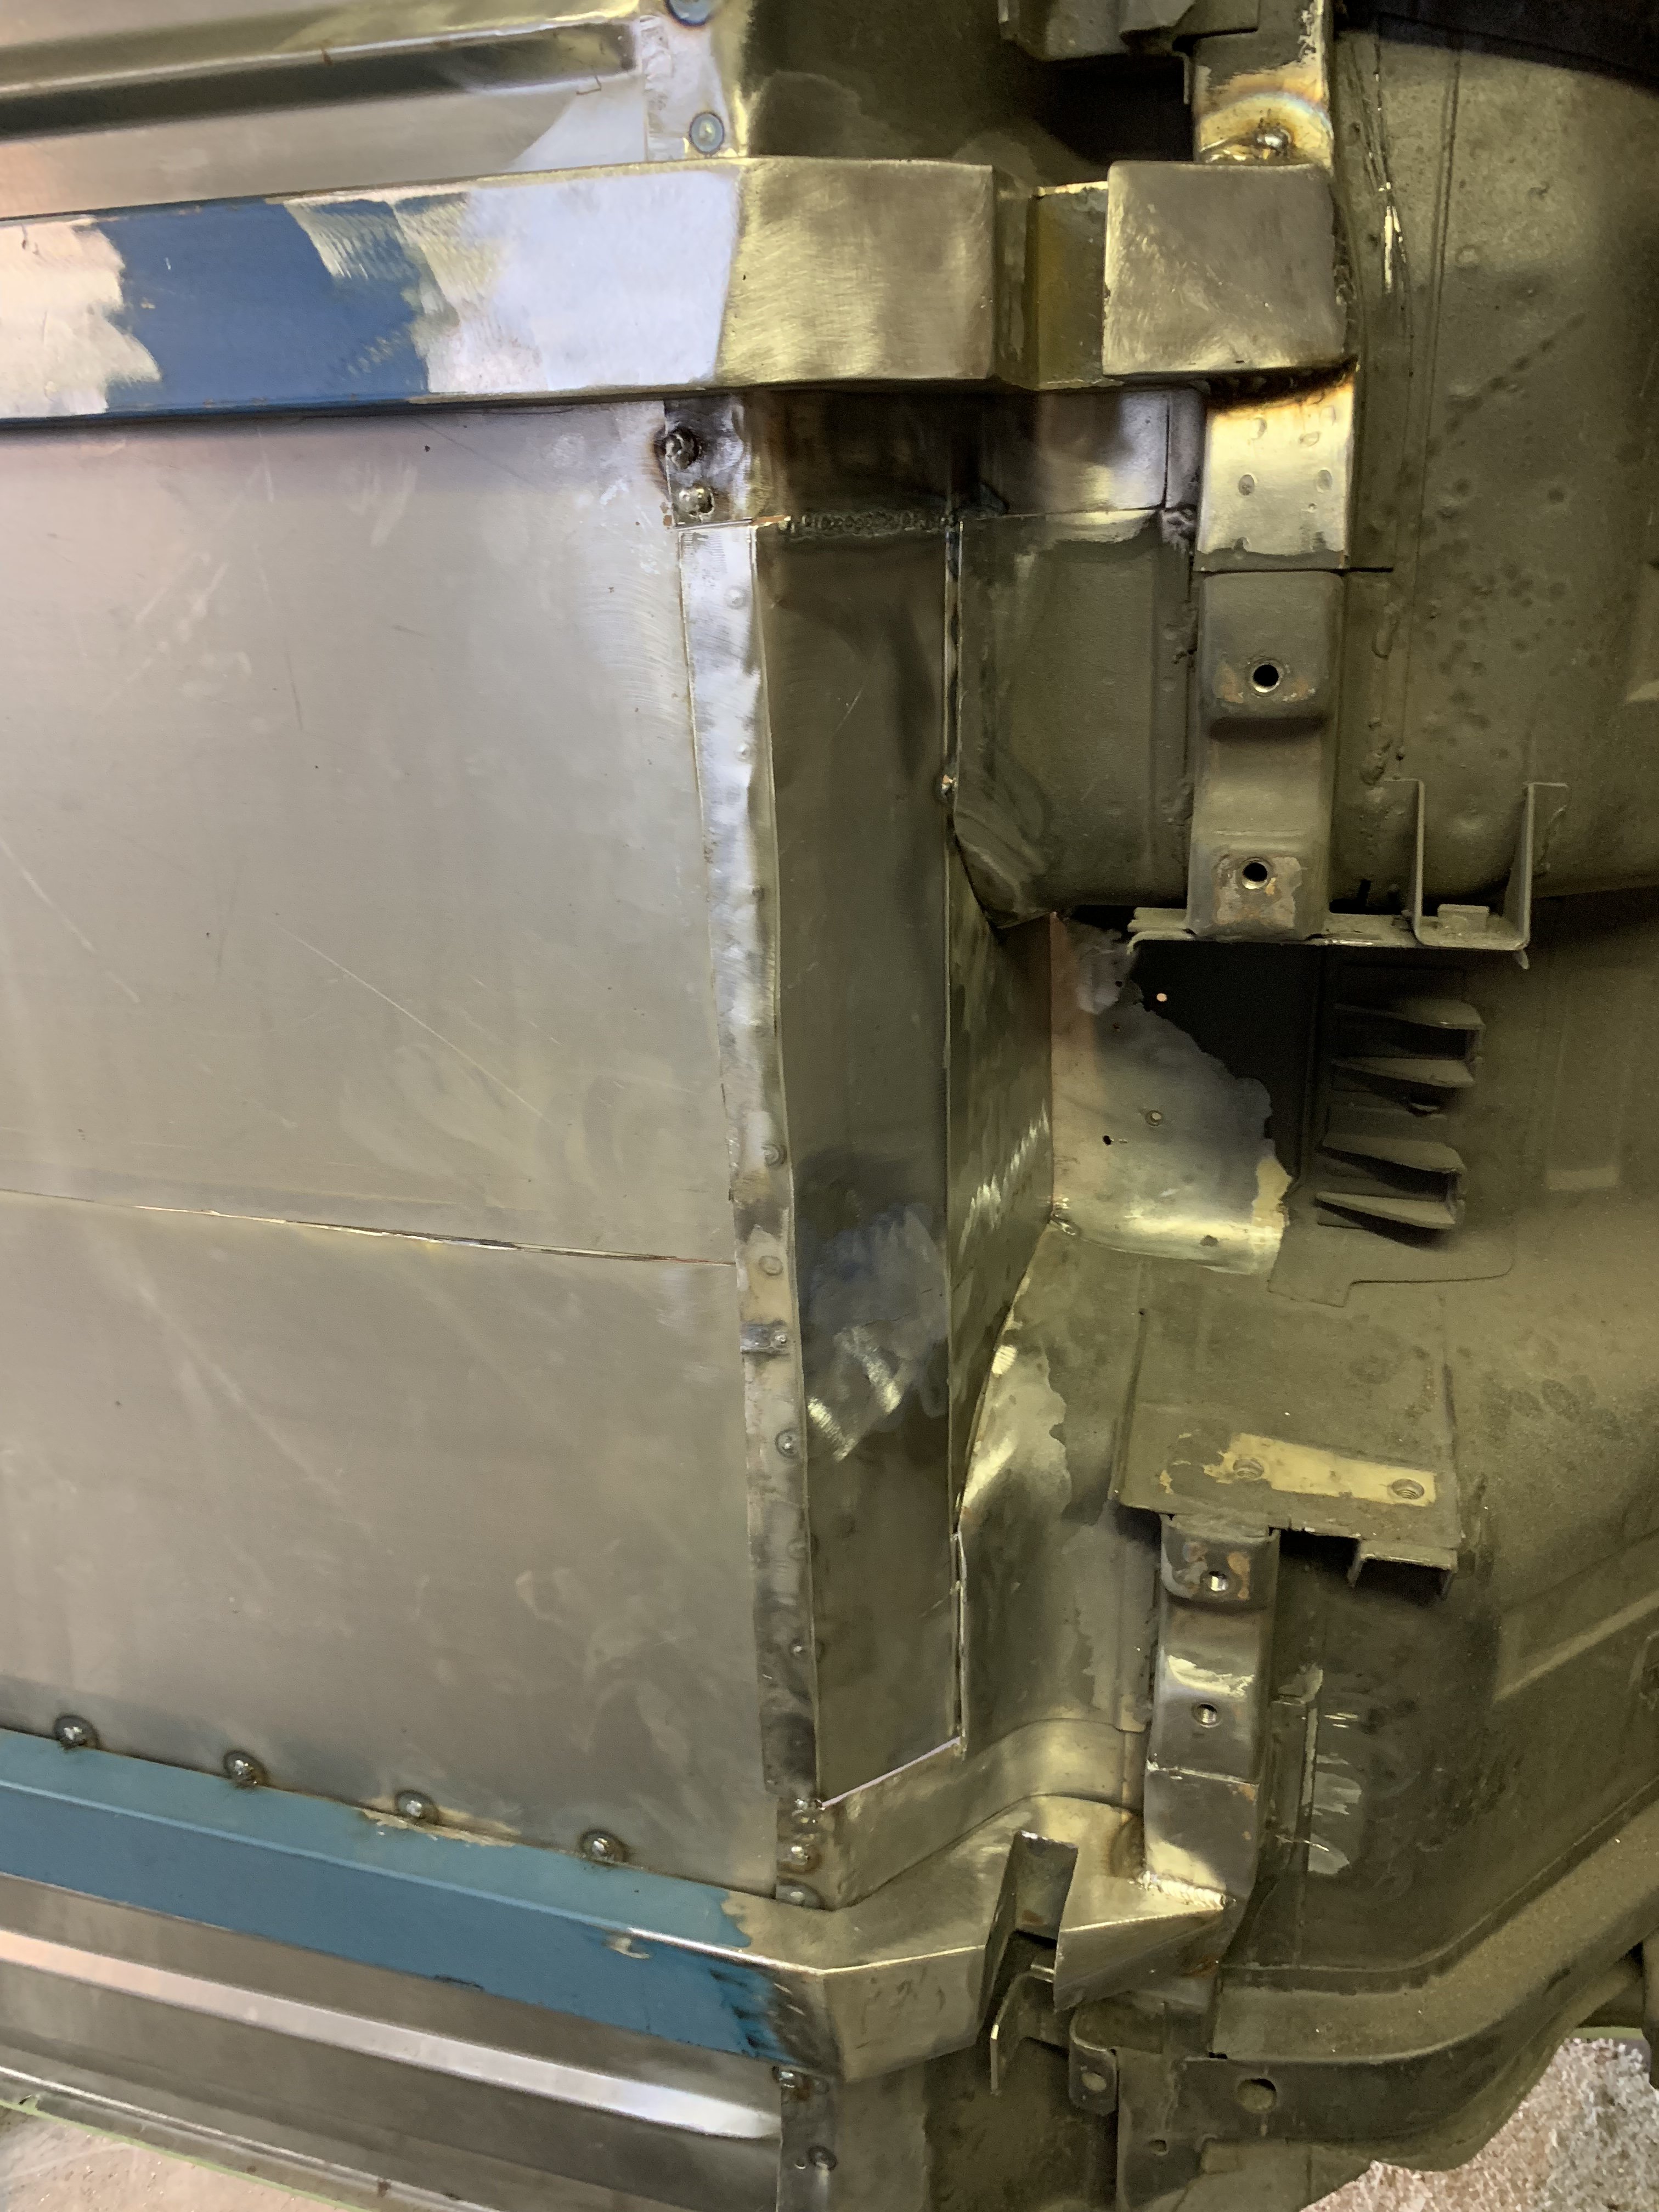
Thanks jpndave Just a comparison between old and new and a look at the new enclosed fuel filler route
-
Sirpents 260Z / C32 AMG Powered RS30 - Australia
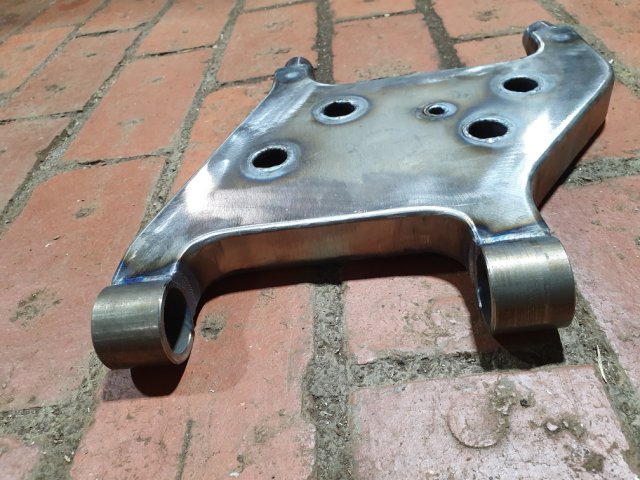
Sirpent replied to Sirpent's topic in S30 Series - 240z, 260z, 280z
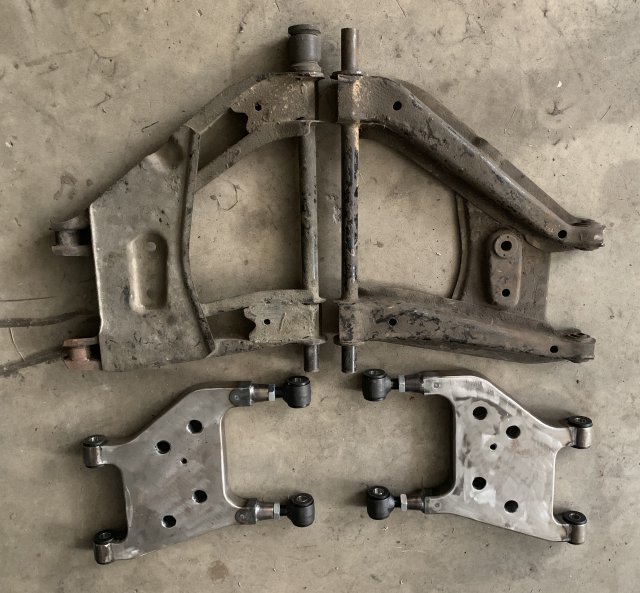
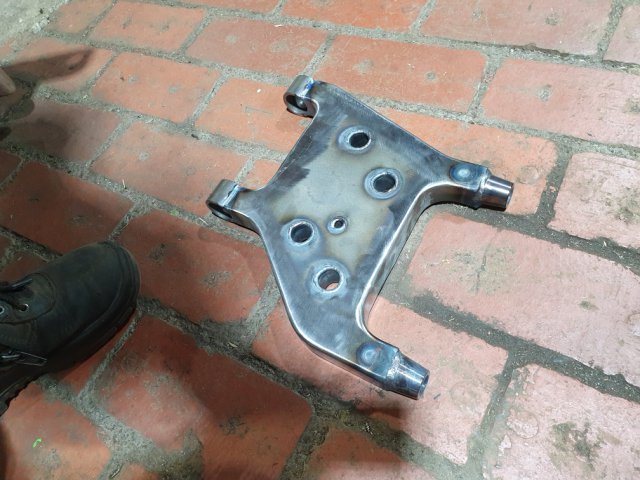
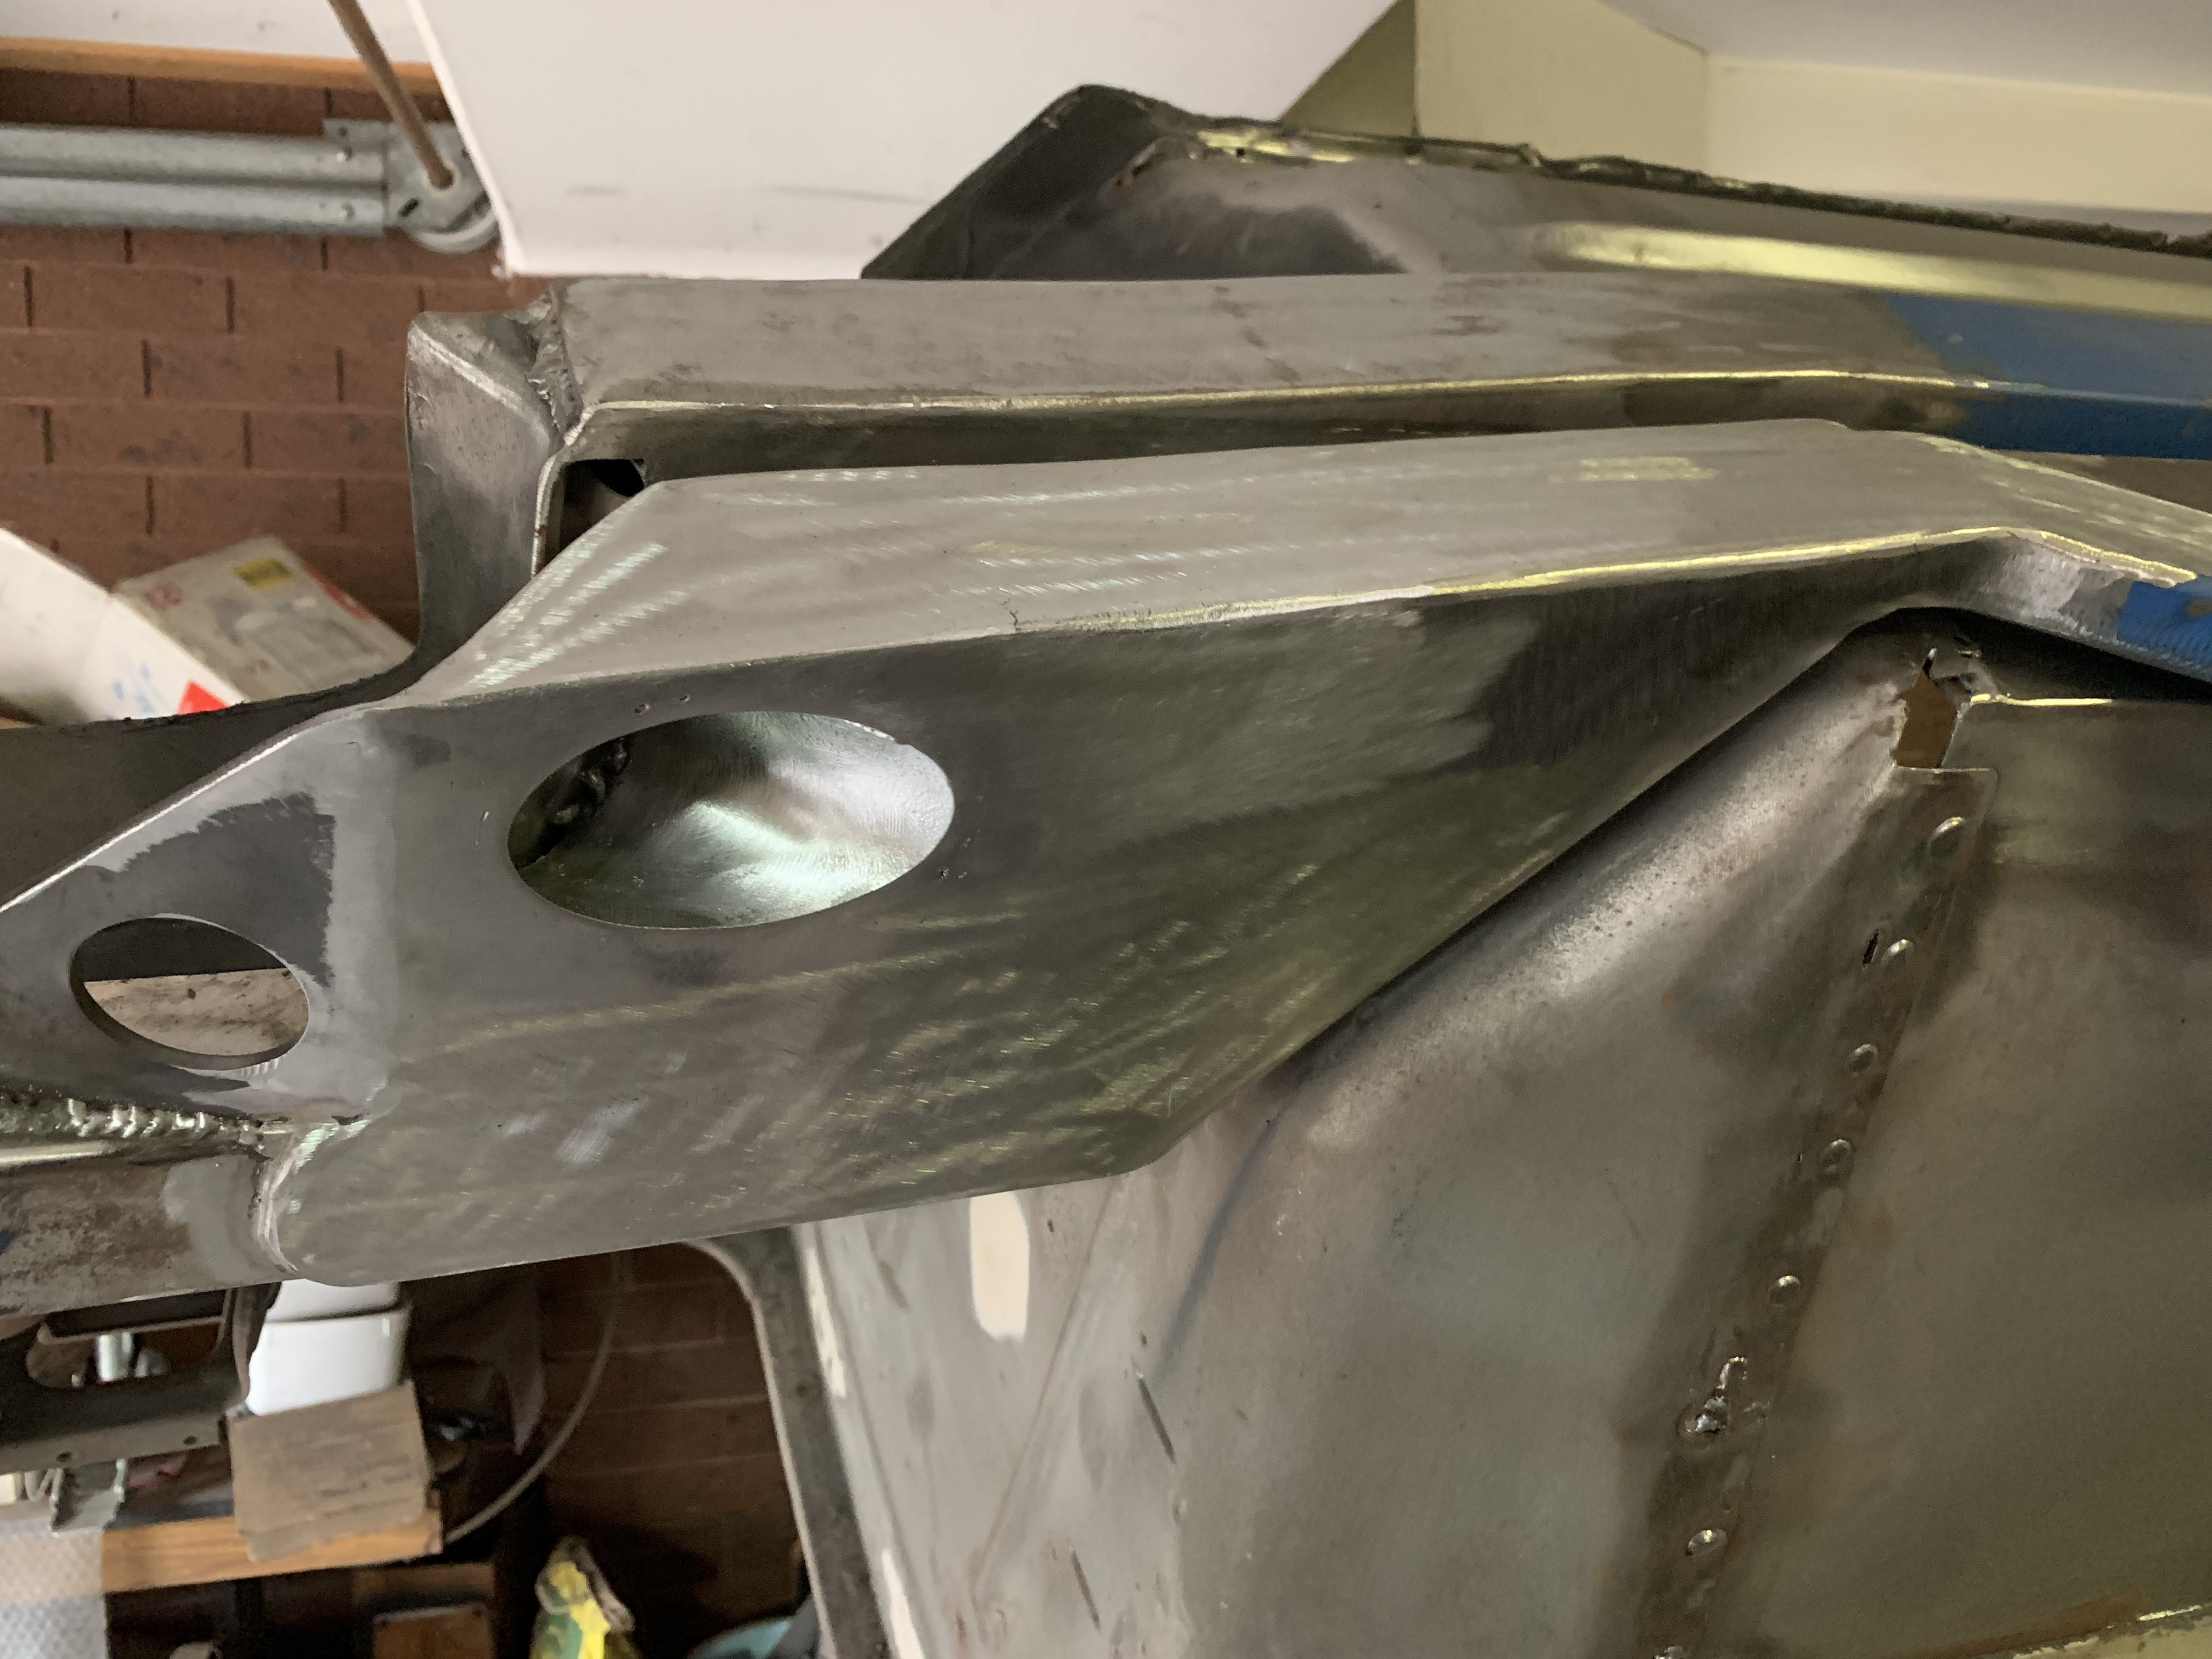
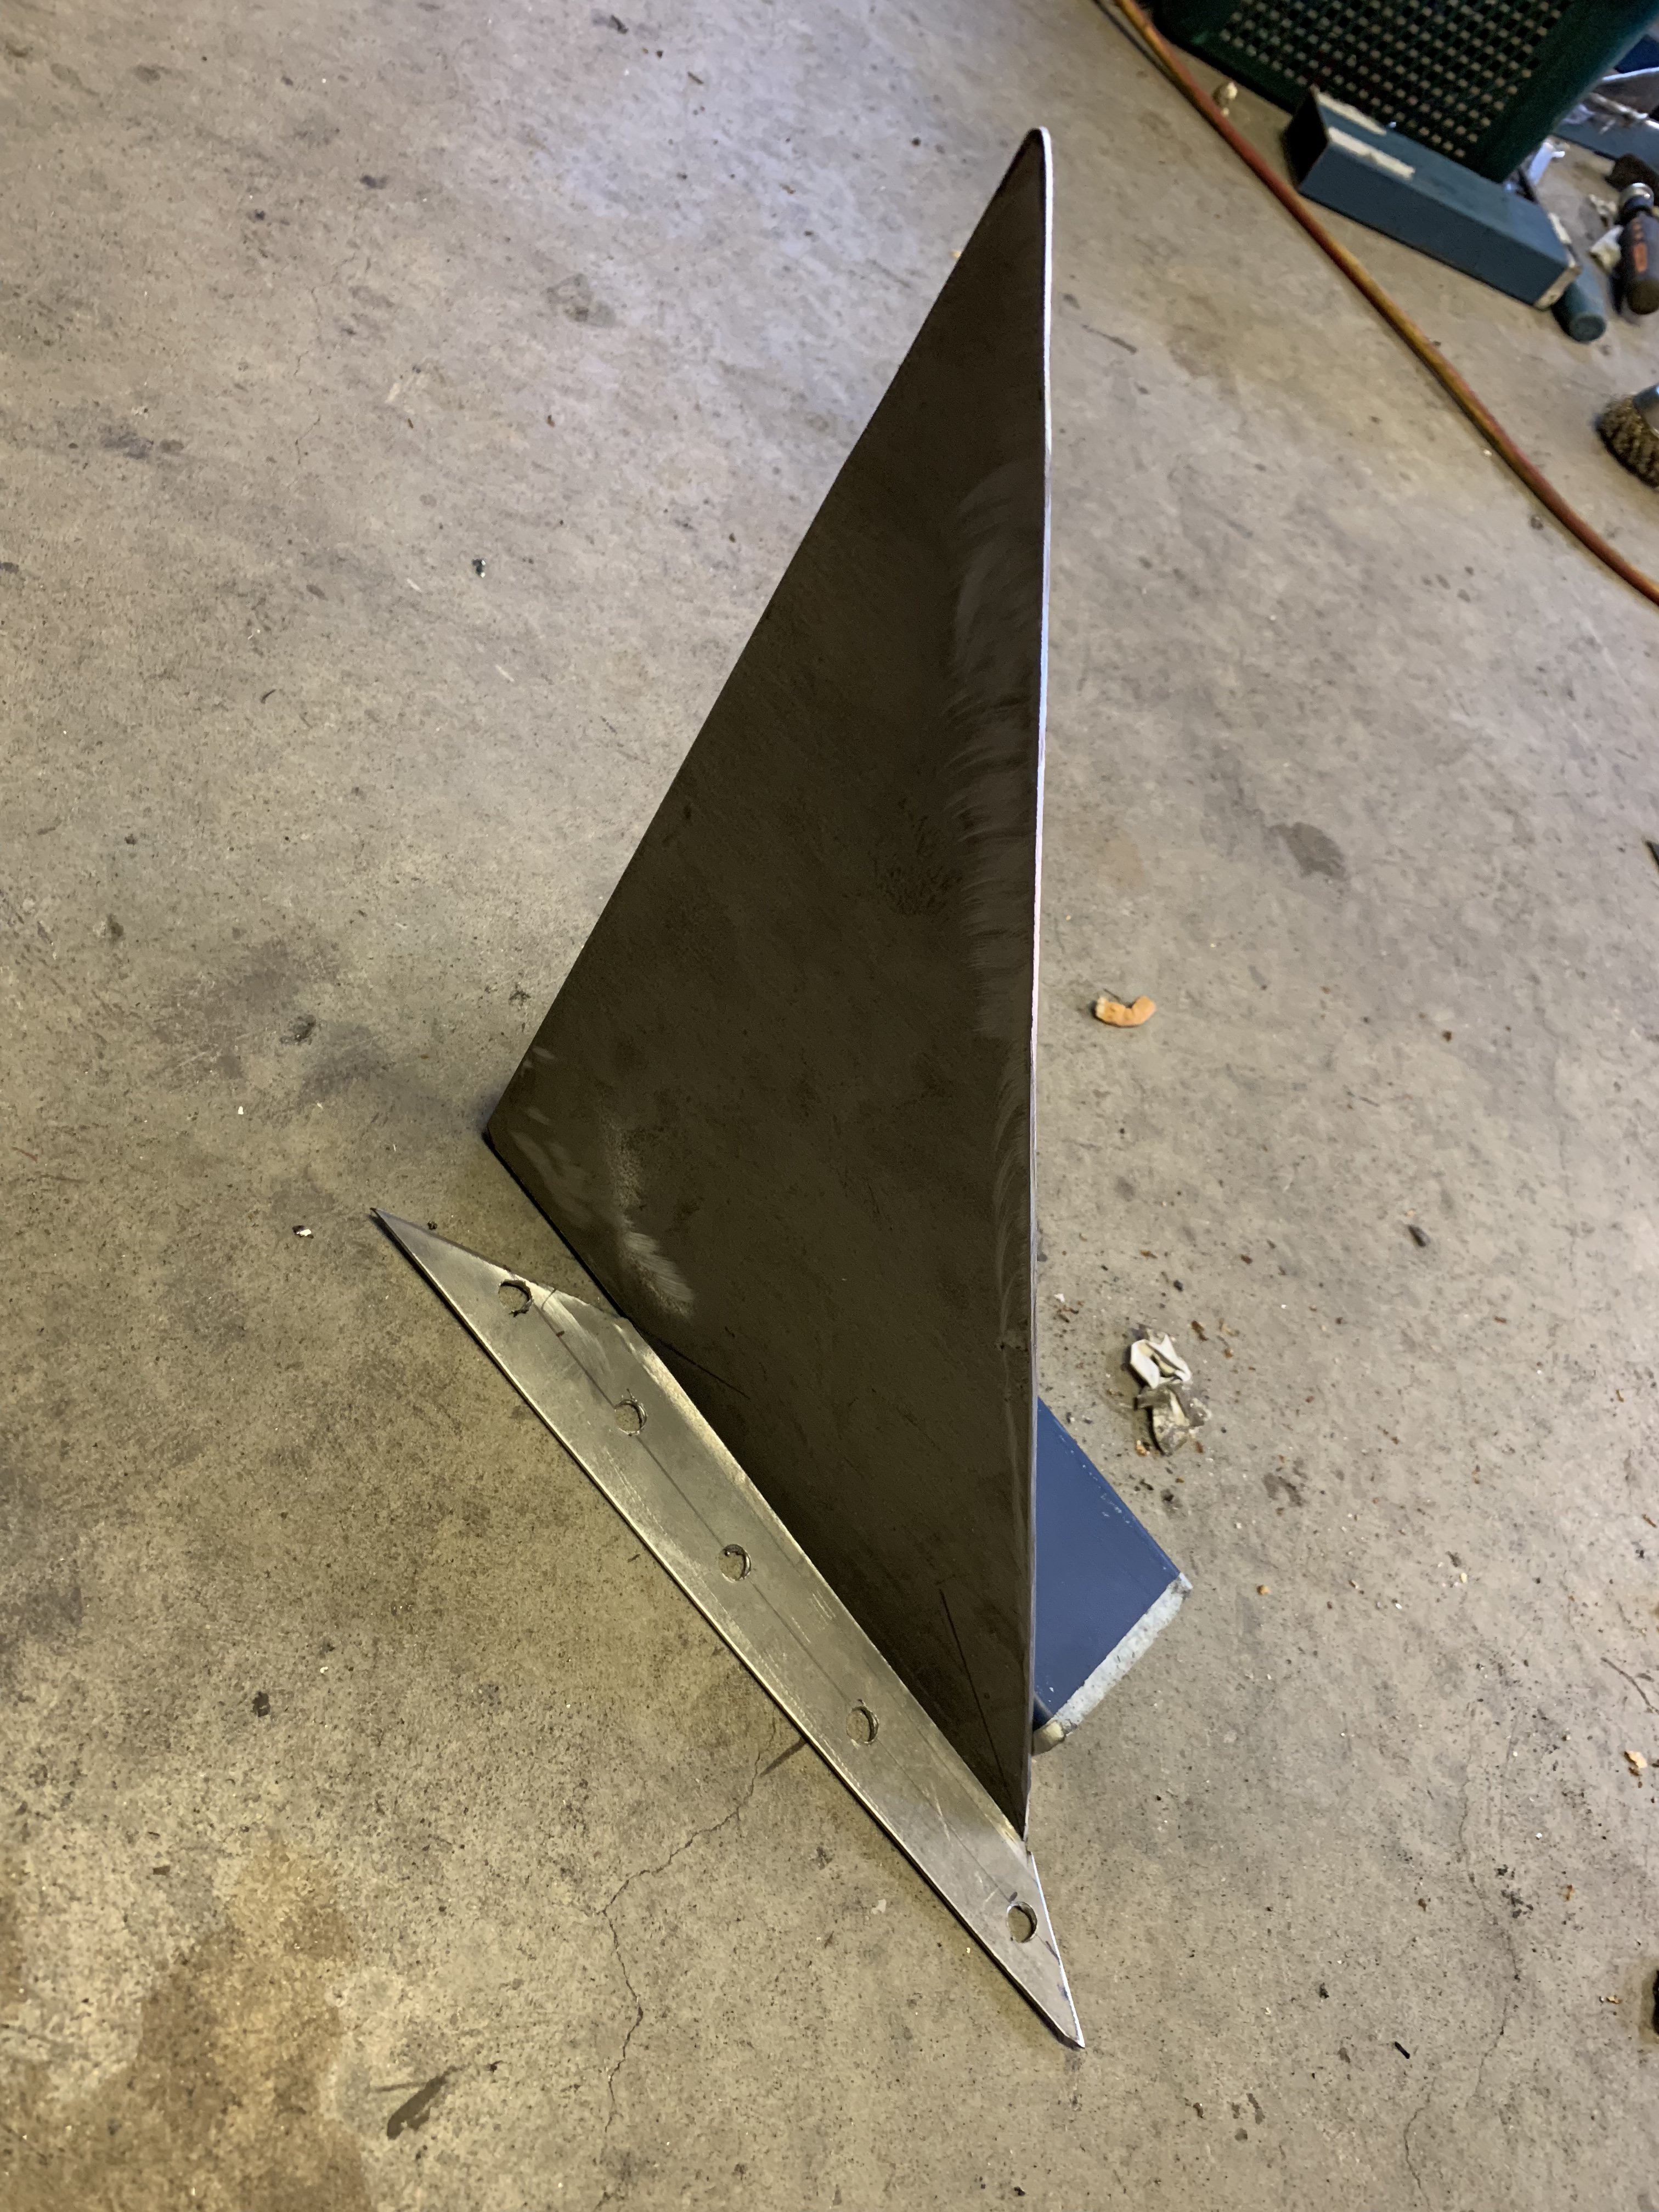
Custom rear lower control arms near completion
-
Sirpents 260Z / C32 AMG Powered RS30 - Australia
Sirpent replied to Sirpent's topic in S30 Series - 240z, 260z, 280z
Greetings
-
Sirpents 260Z / C32 AMG Powered RS30 - Australia
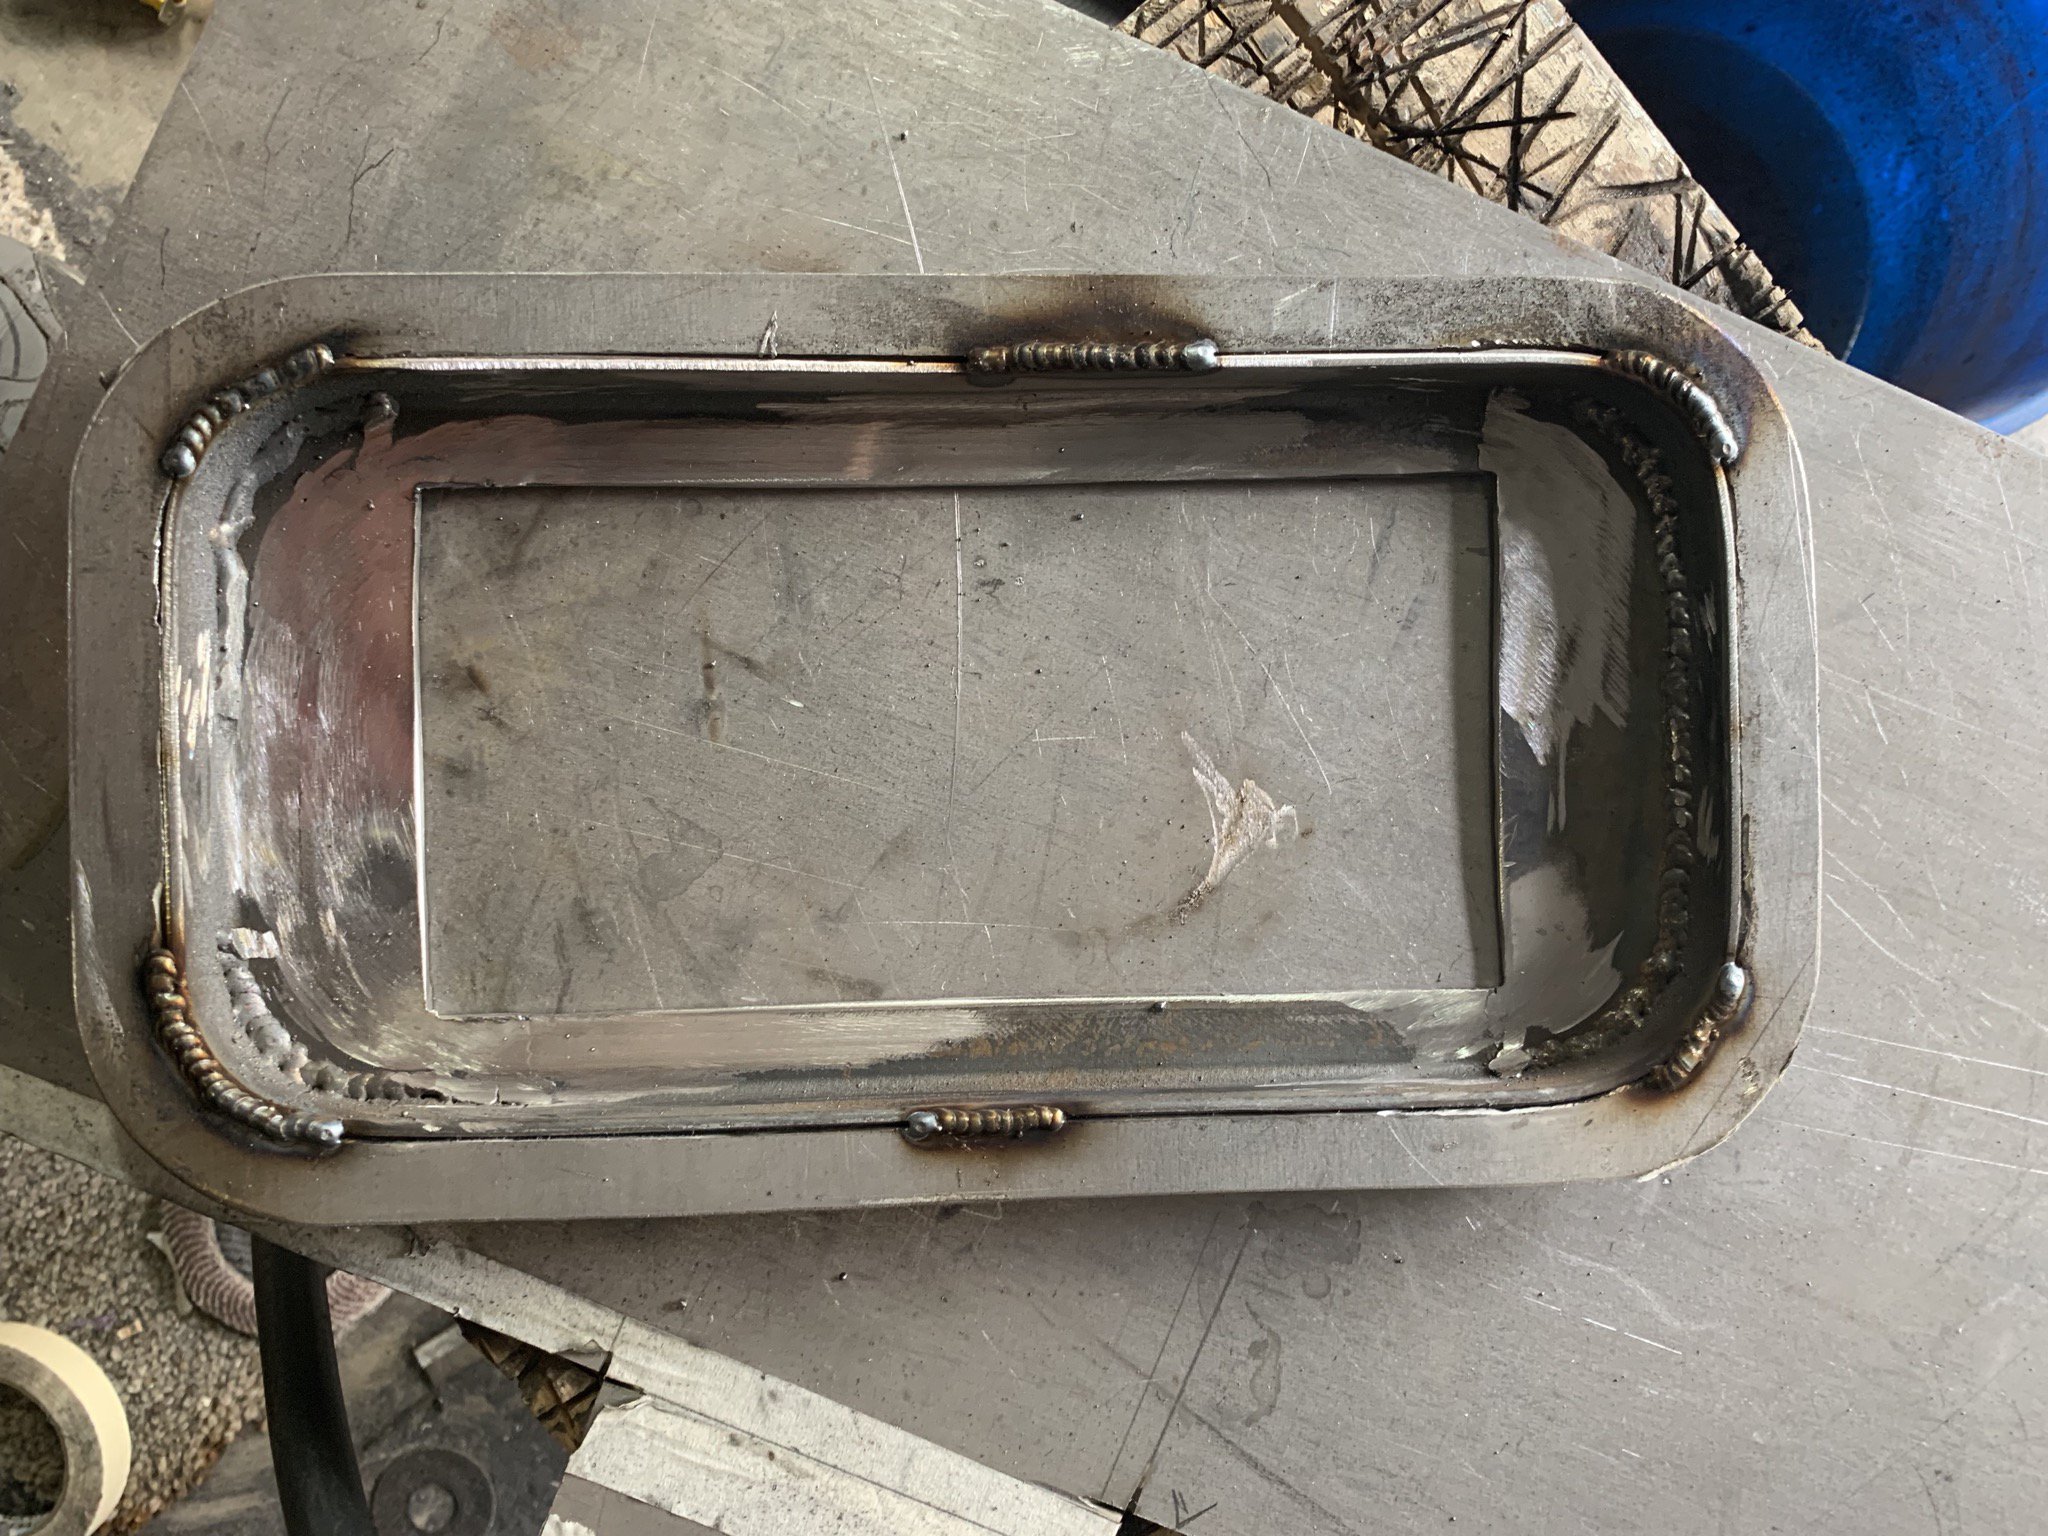
Sirpent replied to Sirpent's topic in S30 Series - 240z, 260z, 280z
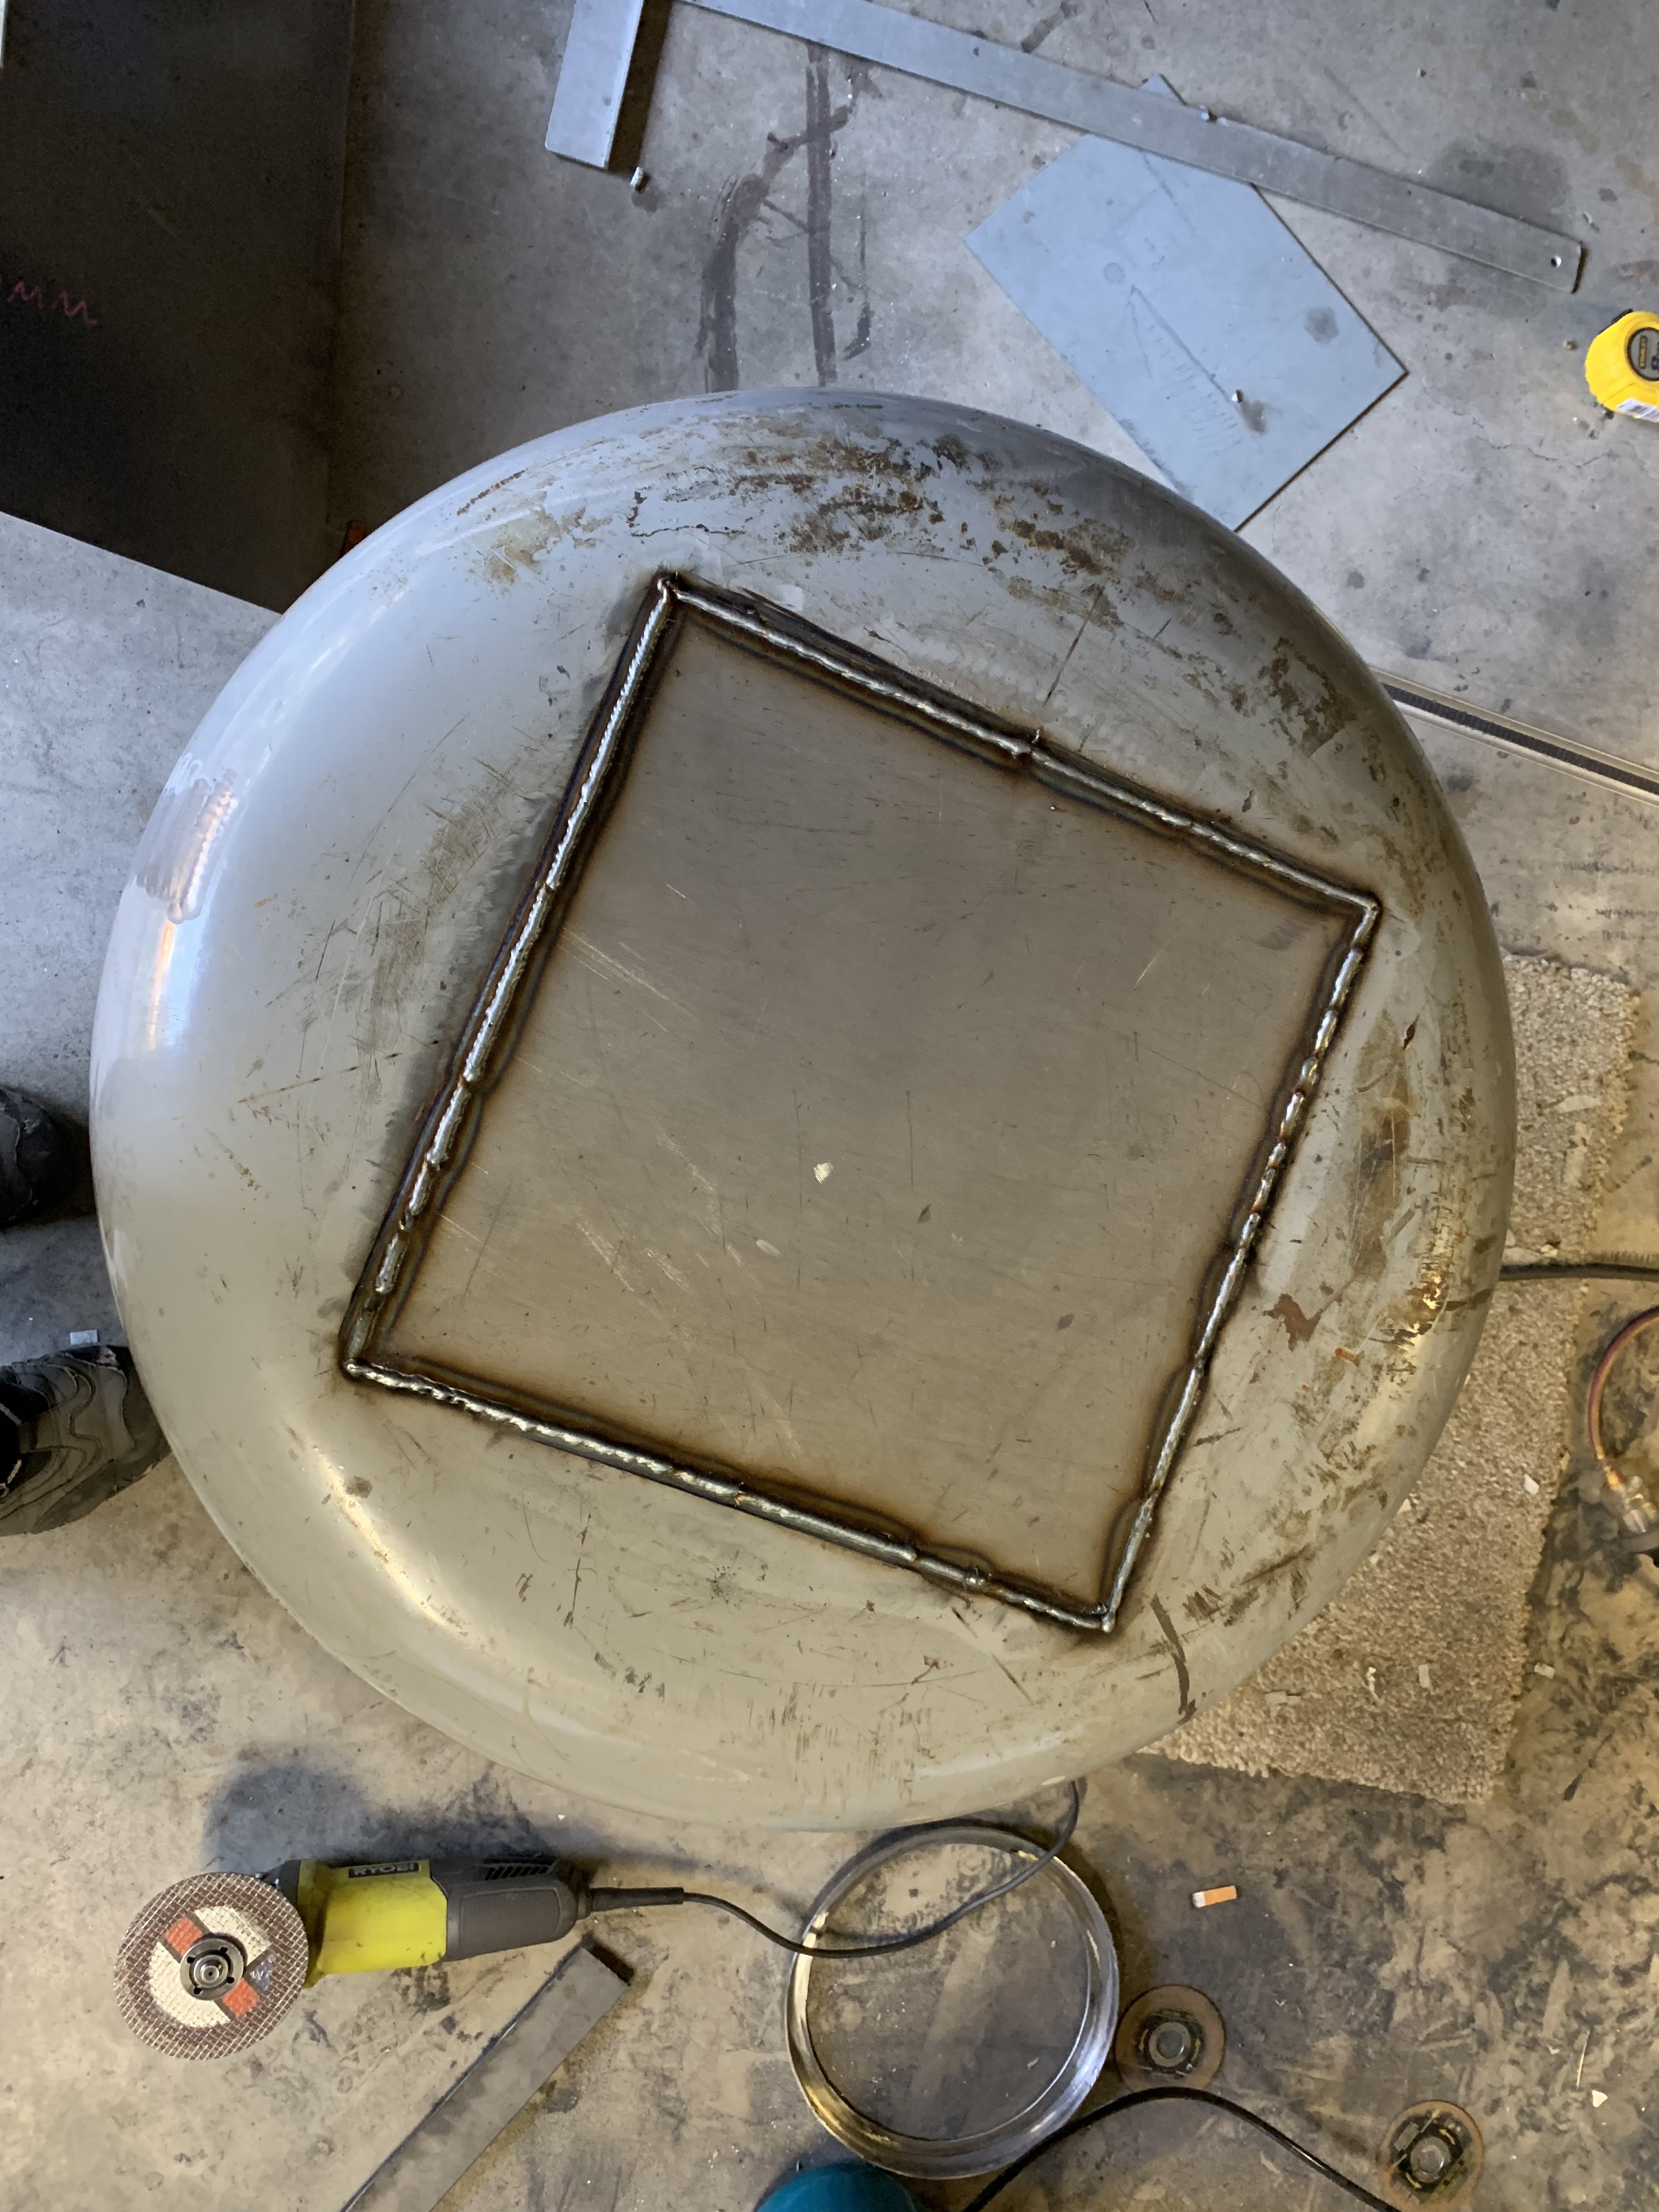
Port lid for the new surge tank done, now for the guts of it next week all
-
Sirpents 260Z / C32 AMG Powered RS30 - Australia
Sirpent replied to Sirpent's topic in S30 Series - 240z, 260z, 280z
Thanks Buddy We are all a bit insane to have started these projects so no holds on how we accomplish the result I say -
Sirpents 260Z / C32 AMG Powered RS30 - Australia
Sirpent replied to Sirpent's topic in S30 Series - 240z, 260z, 280z
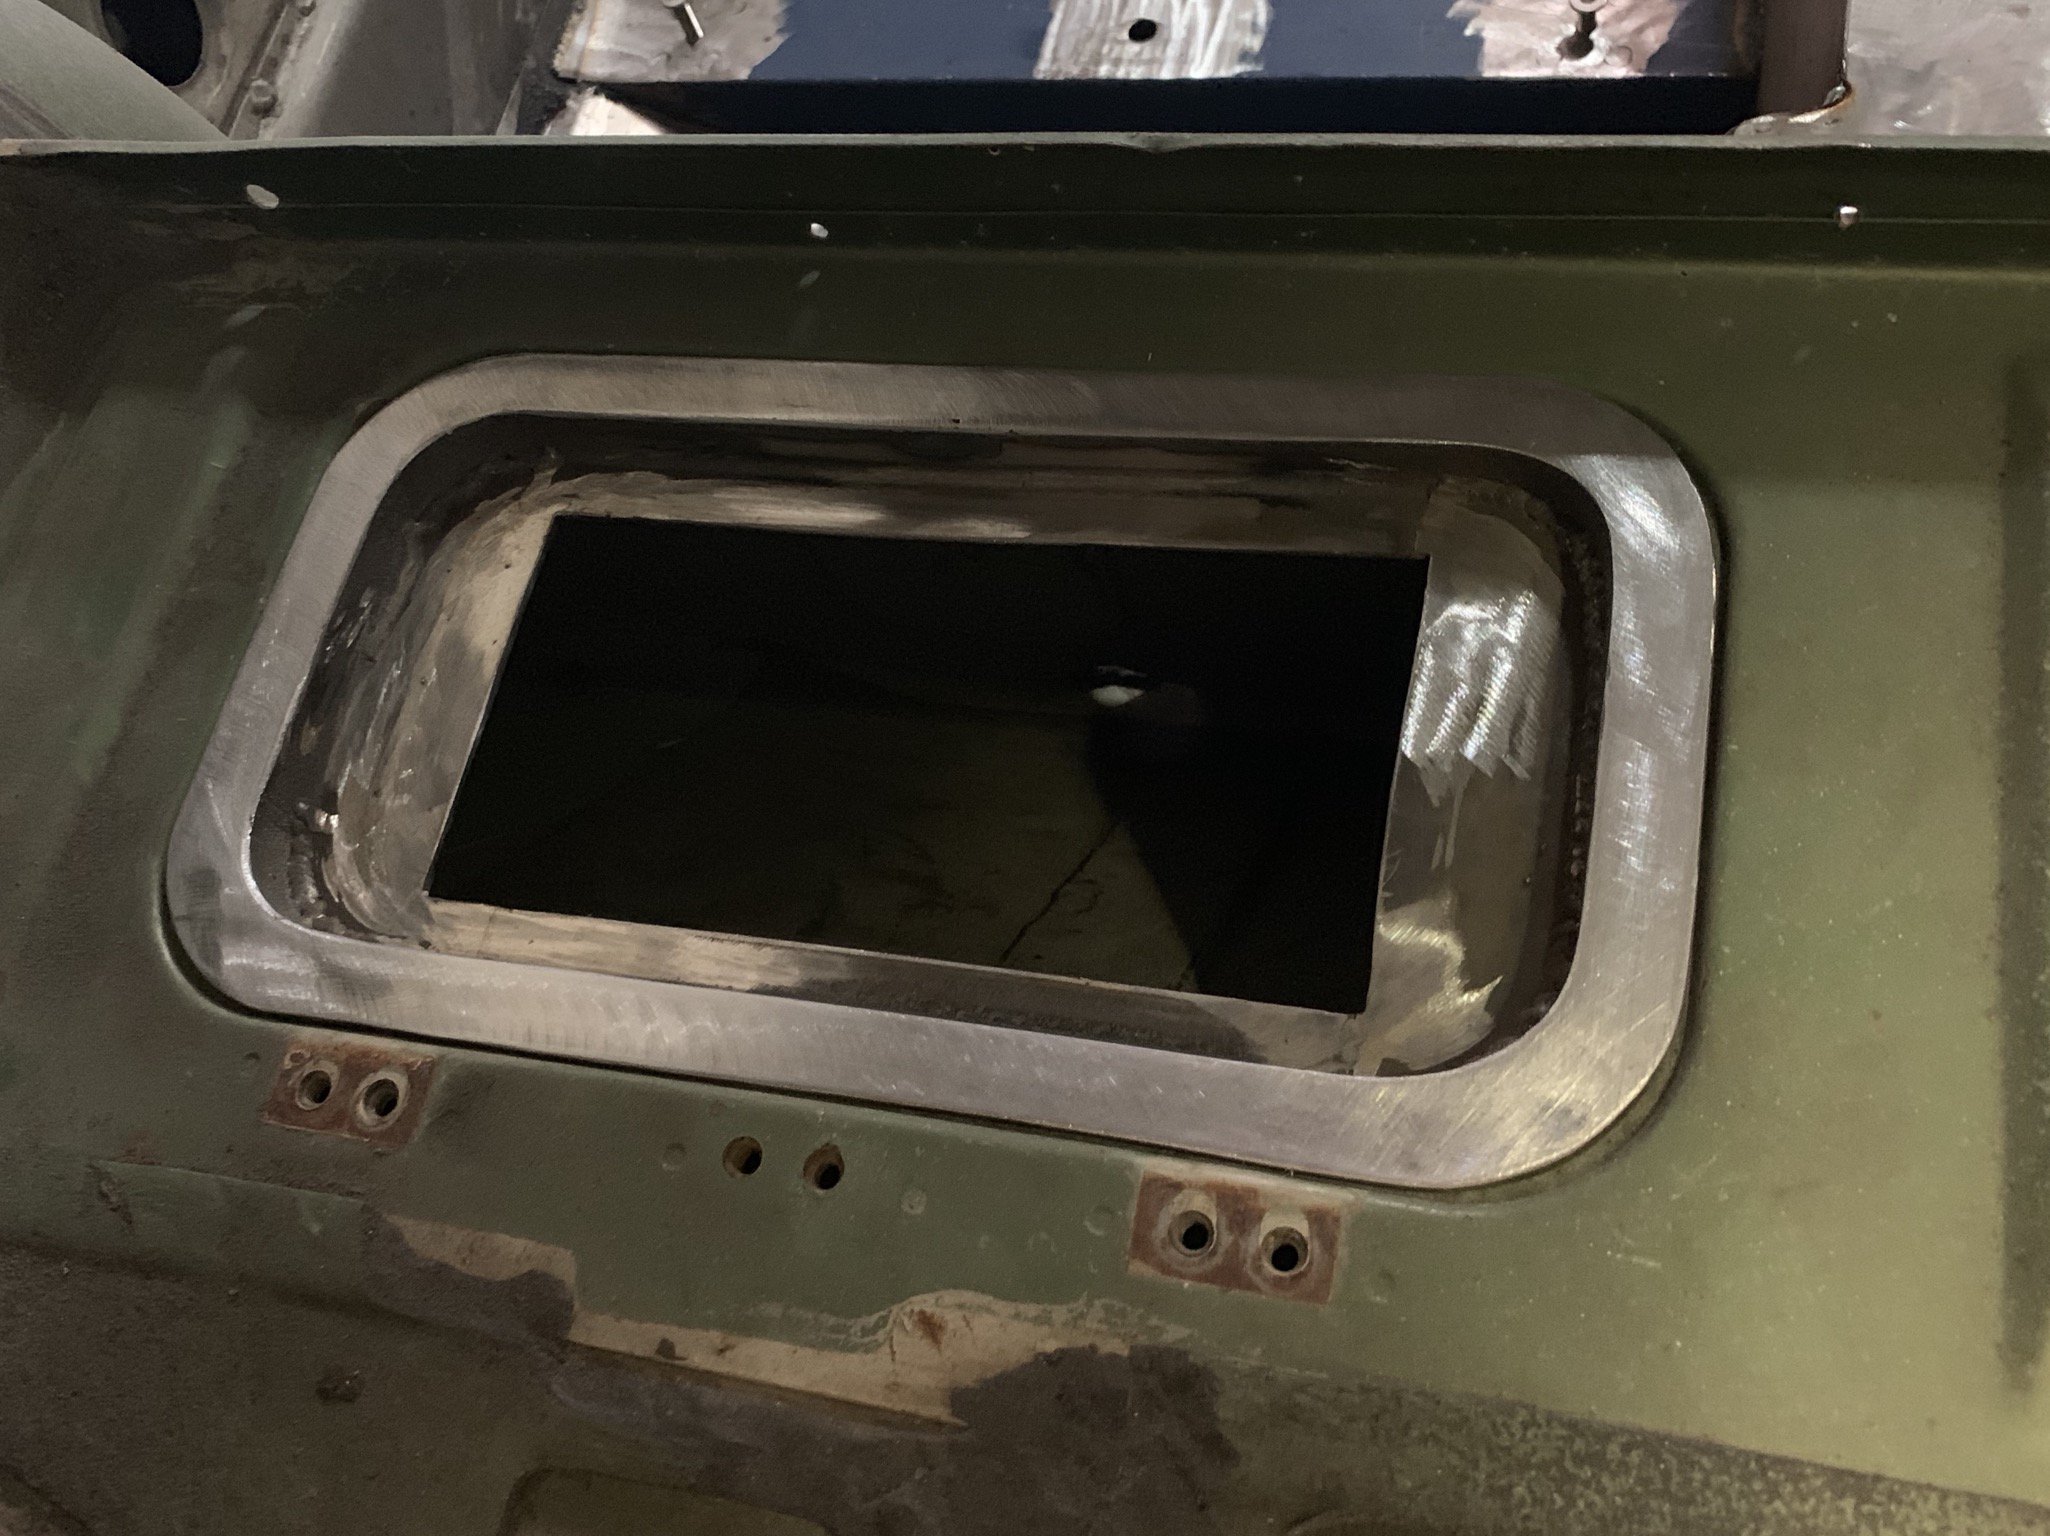
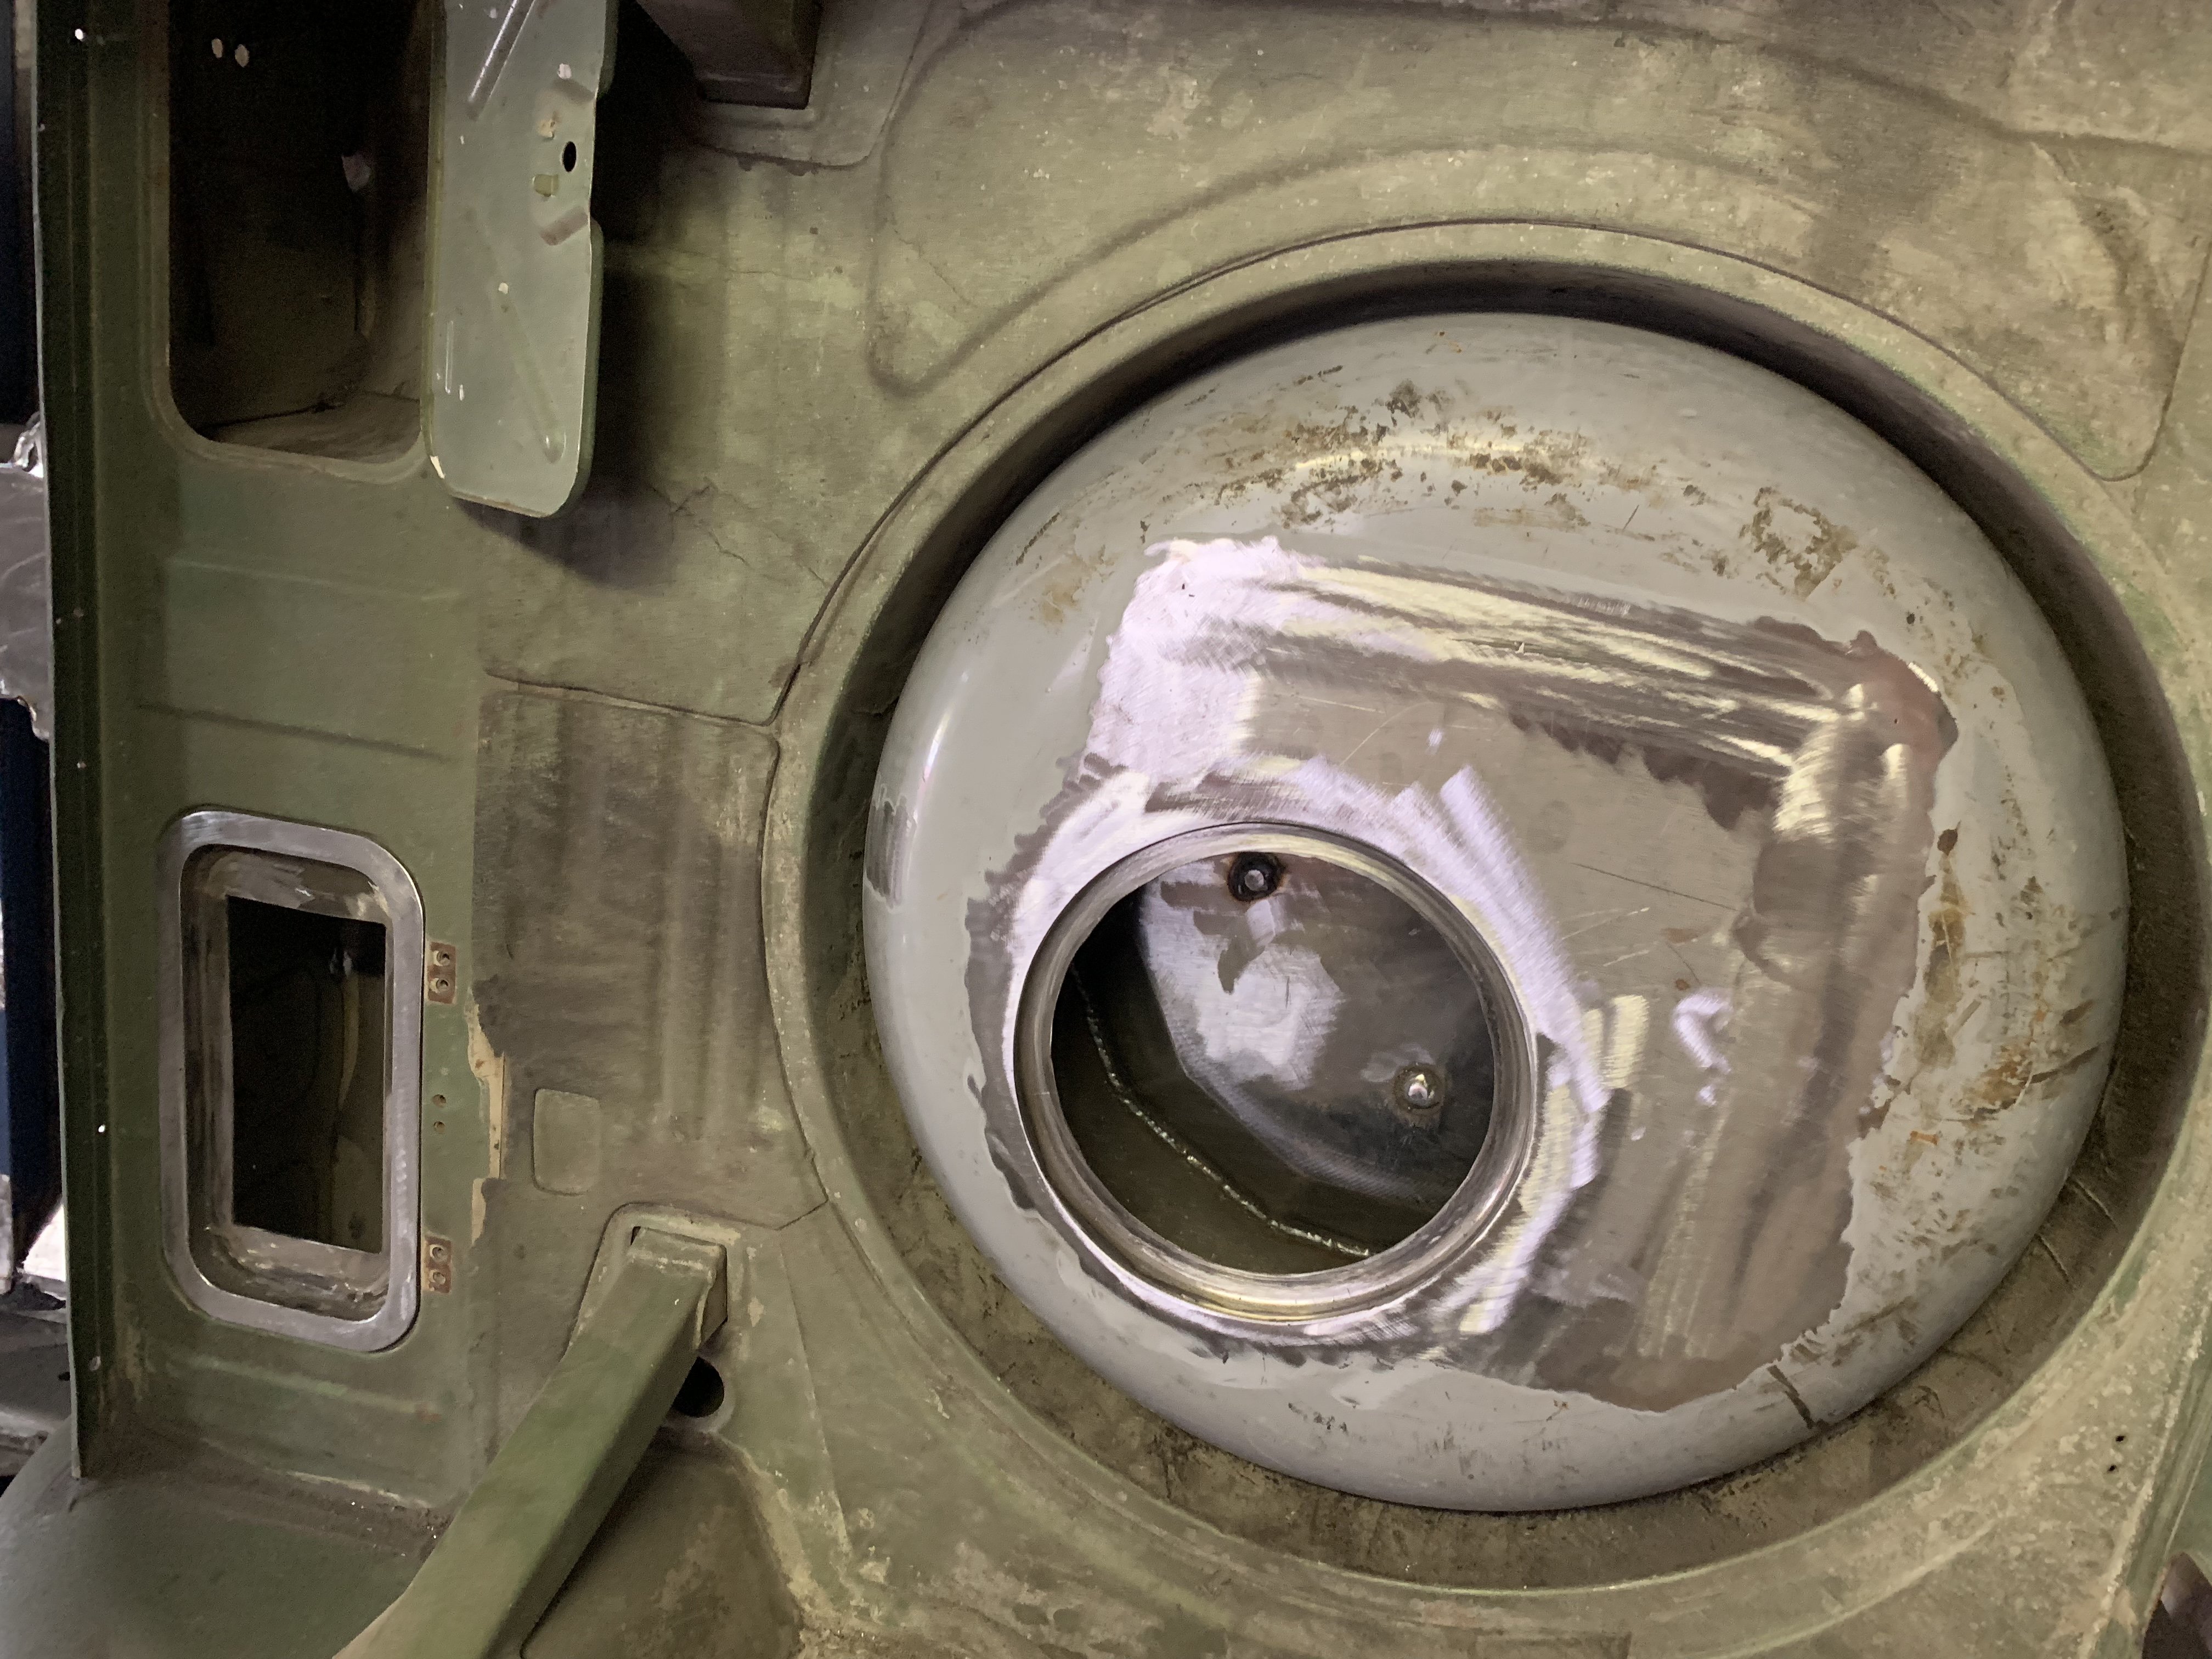
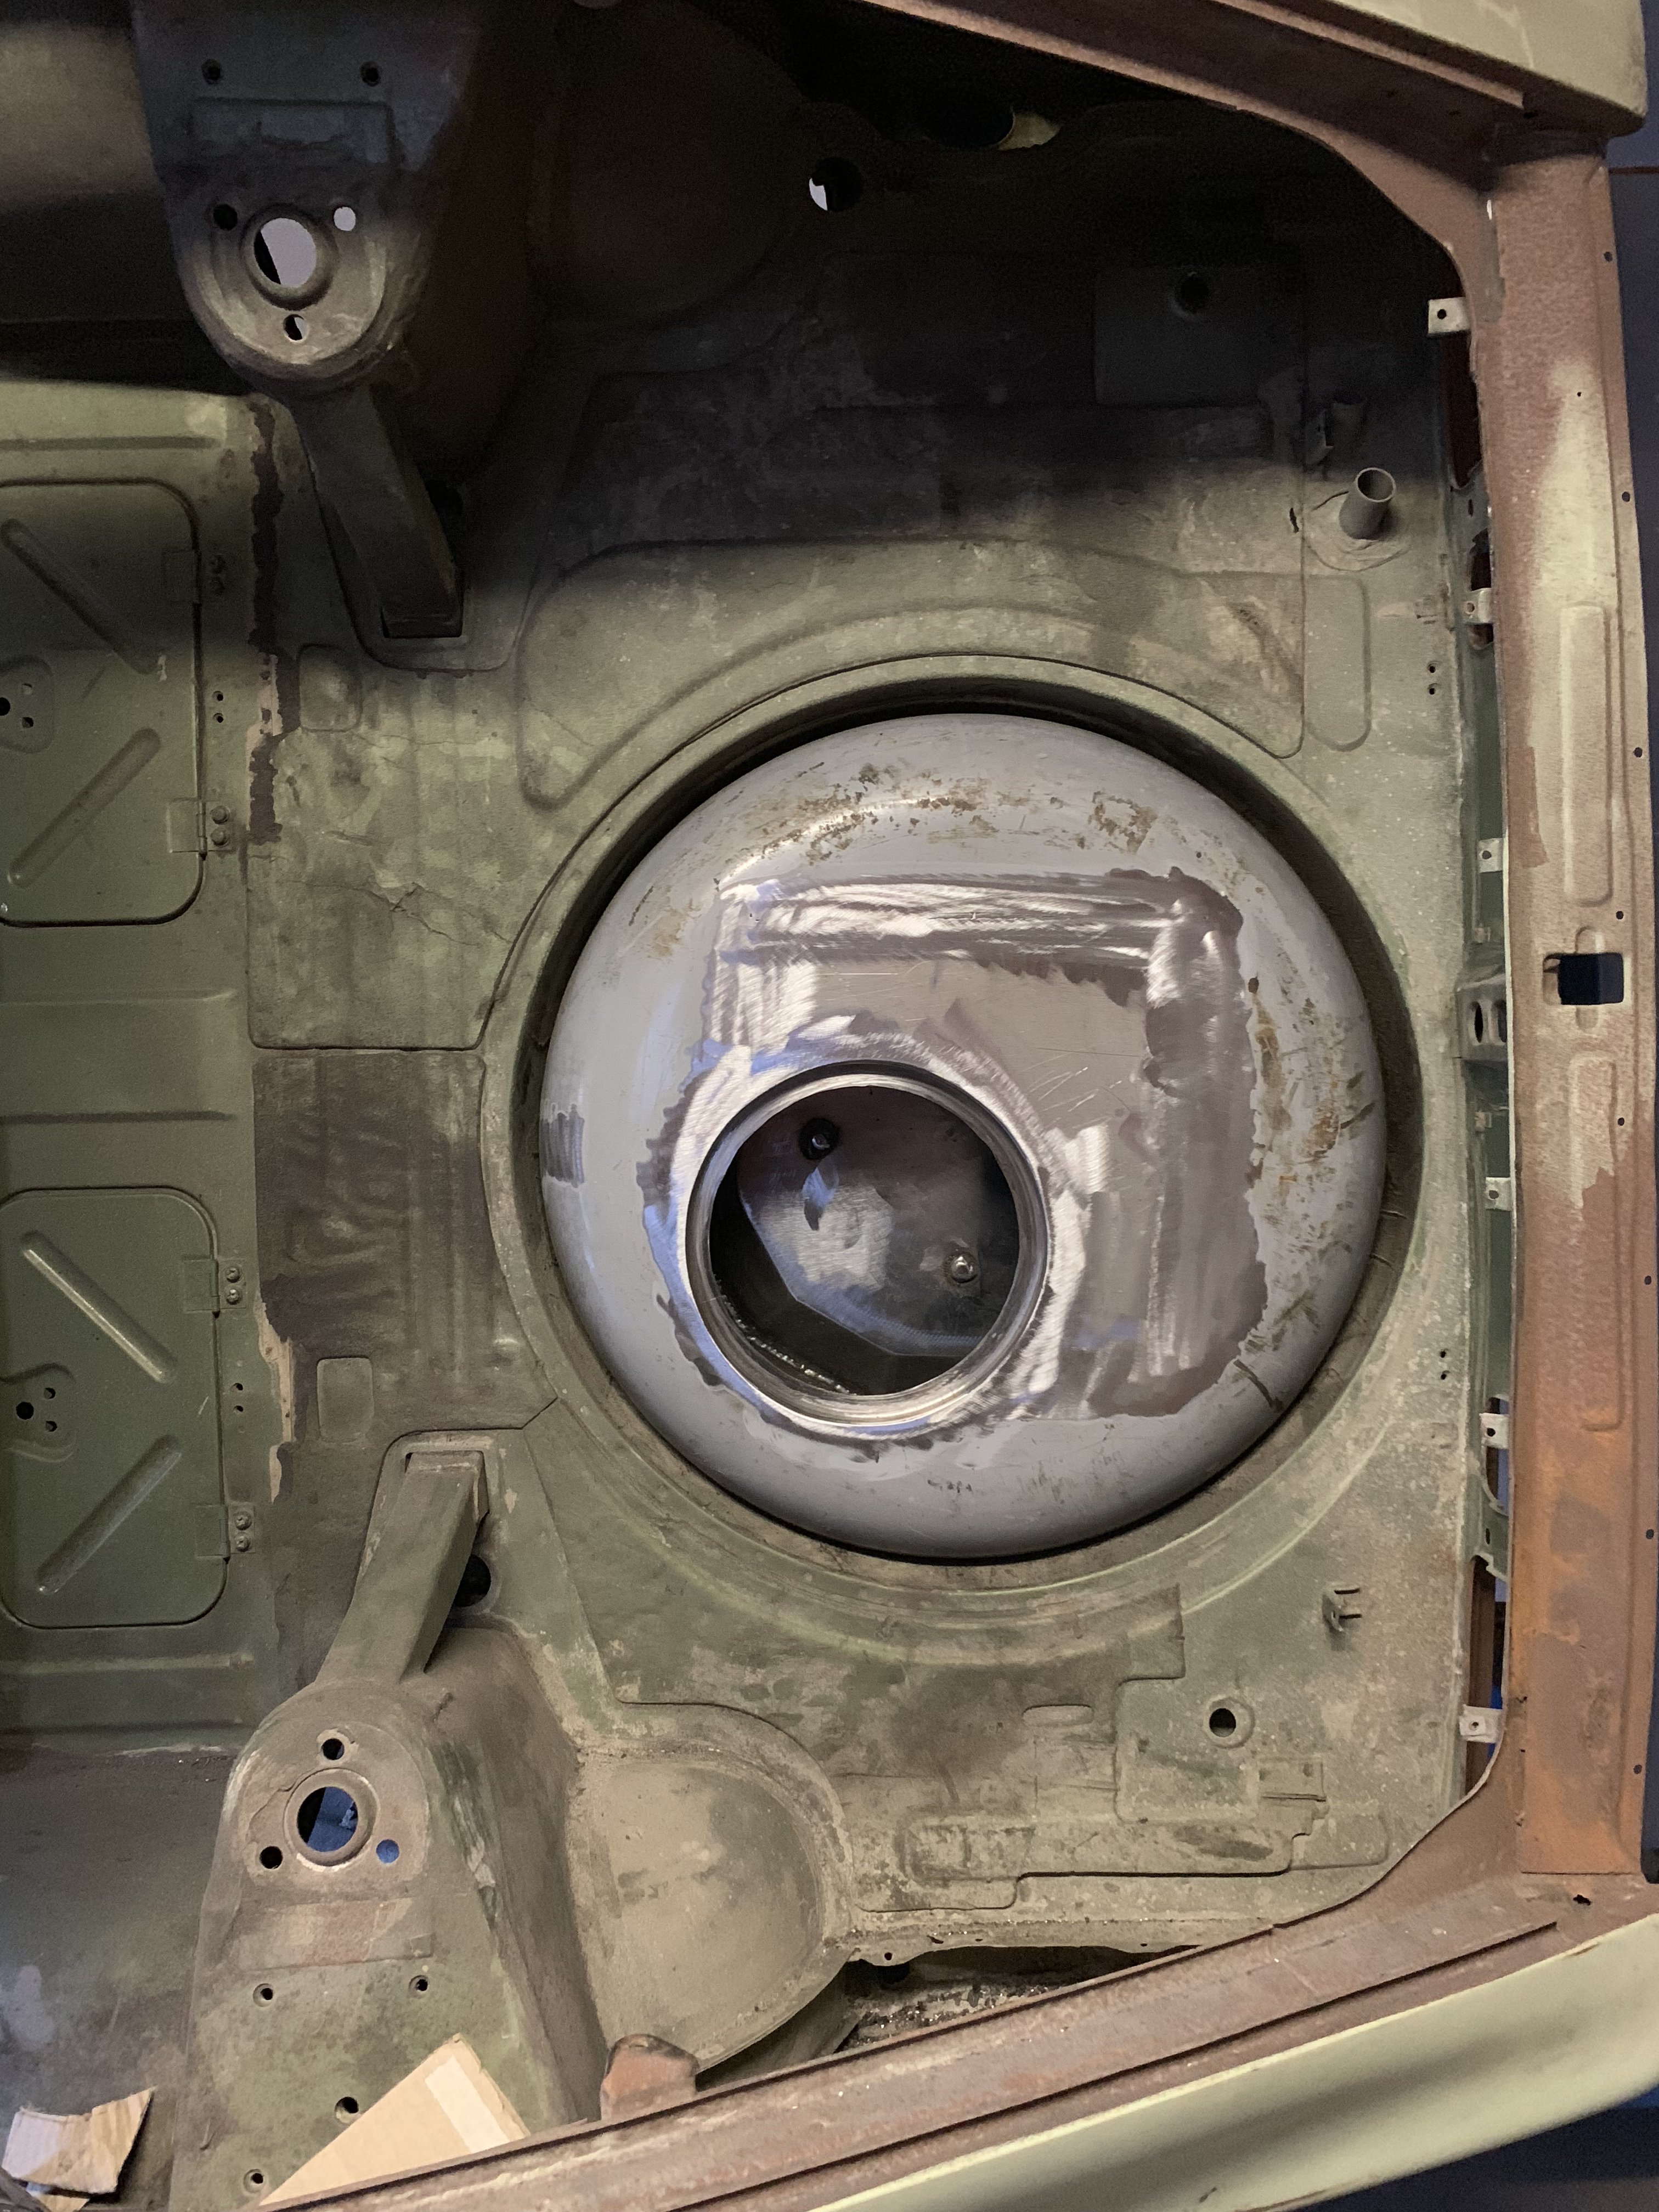
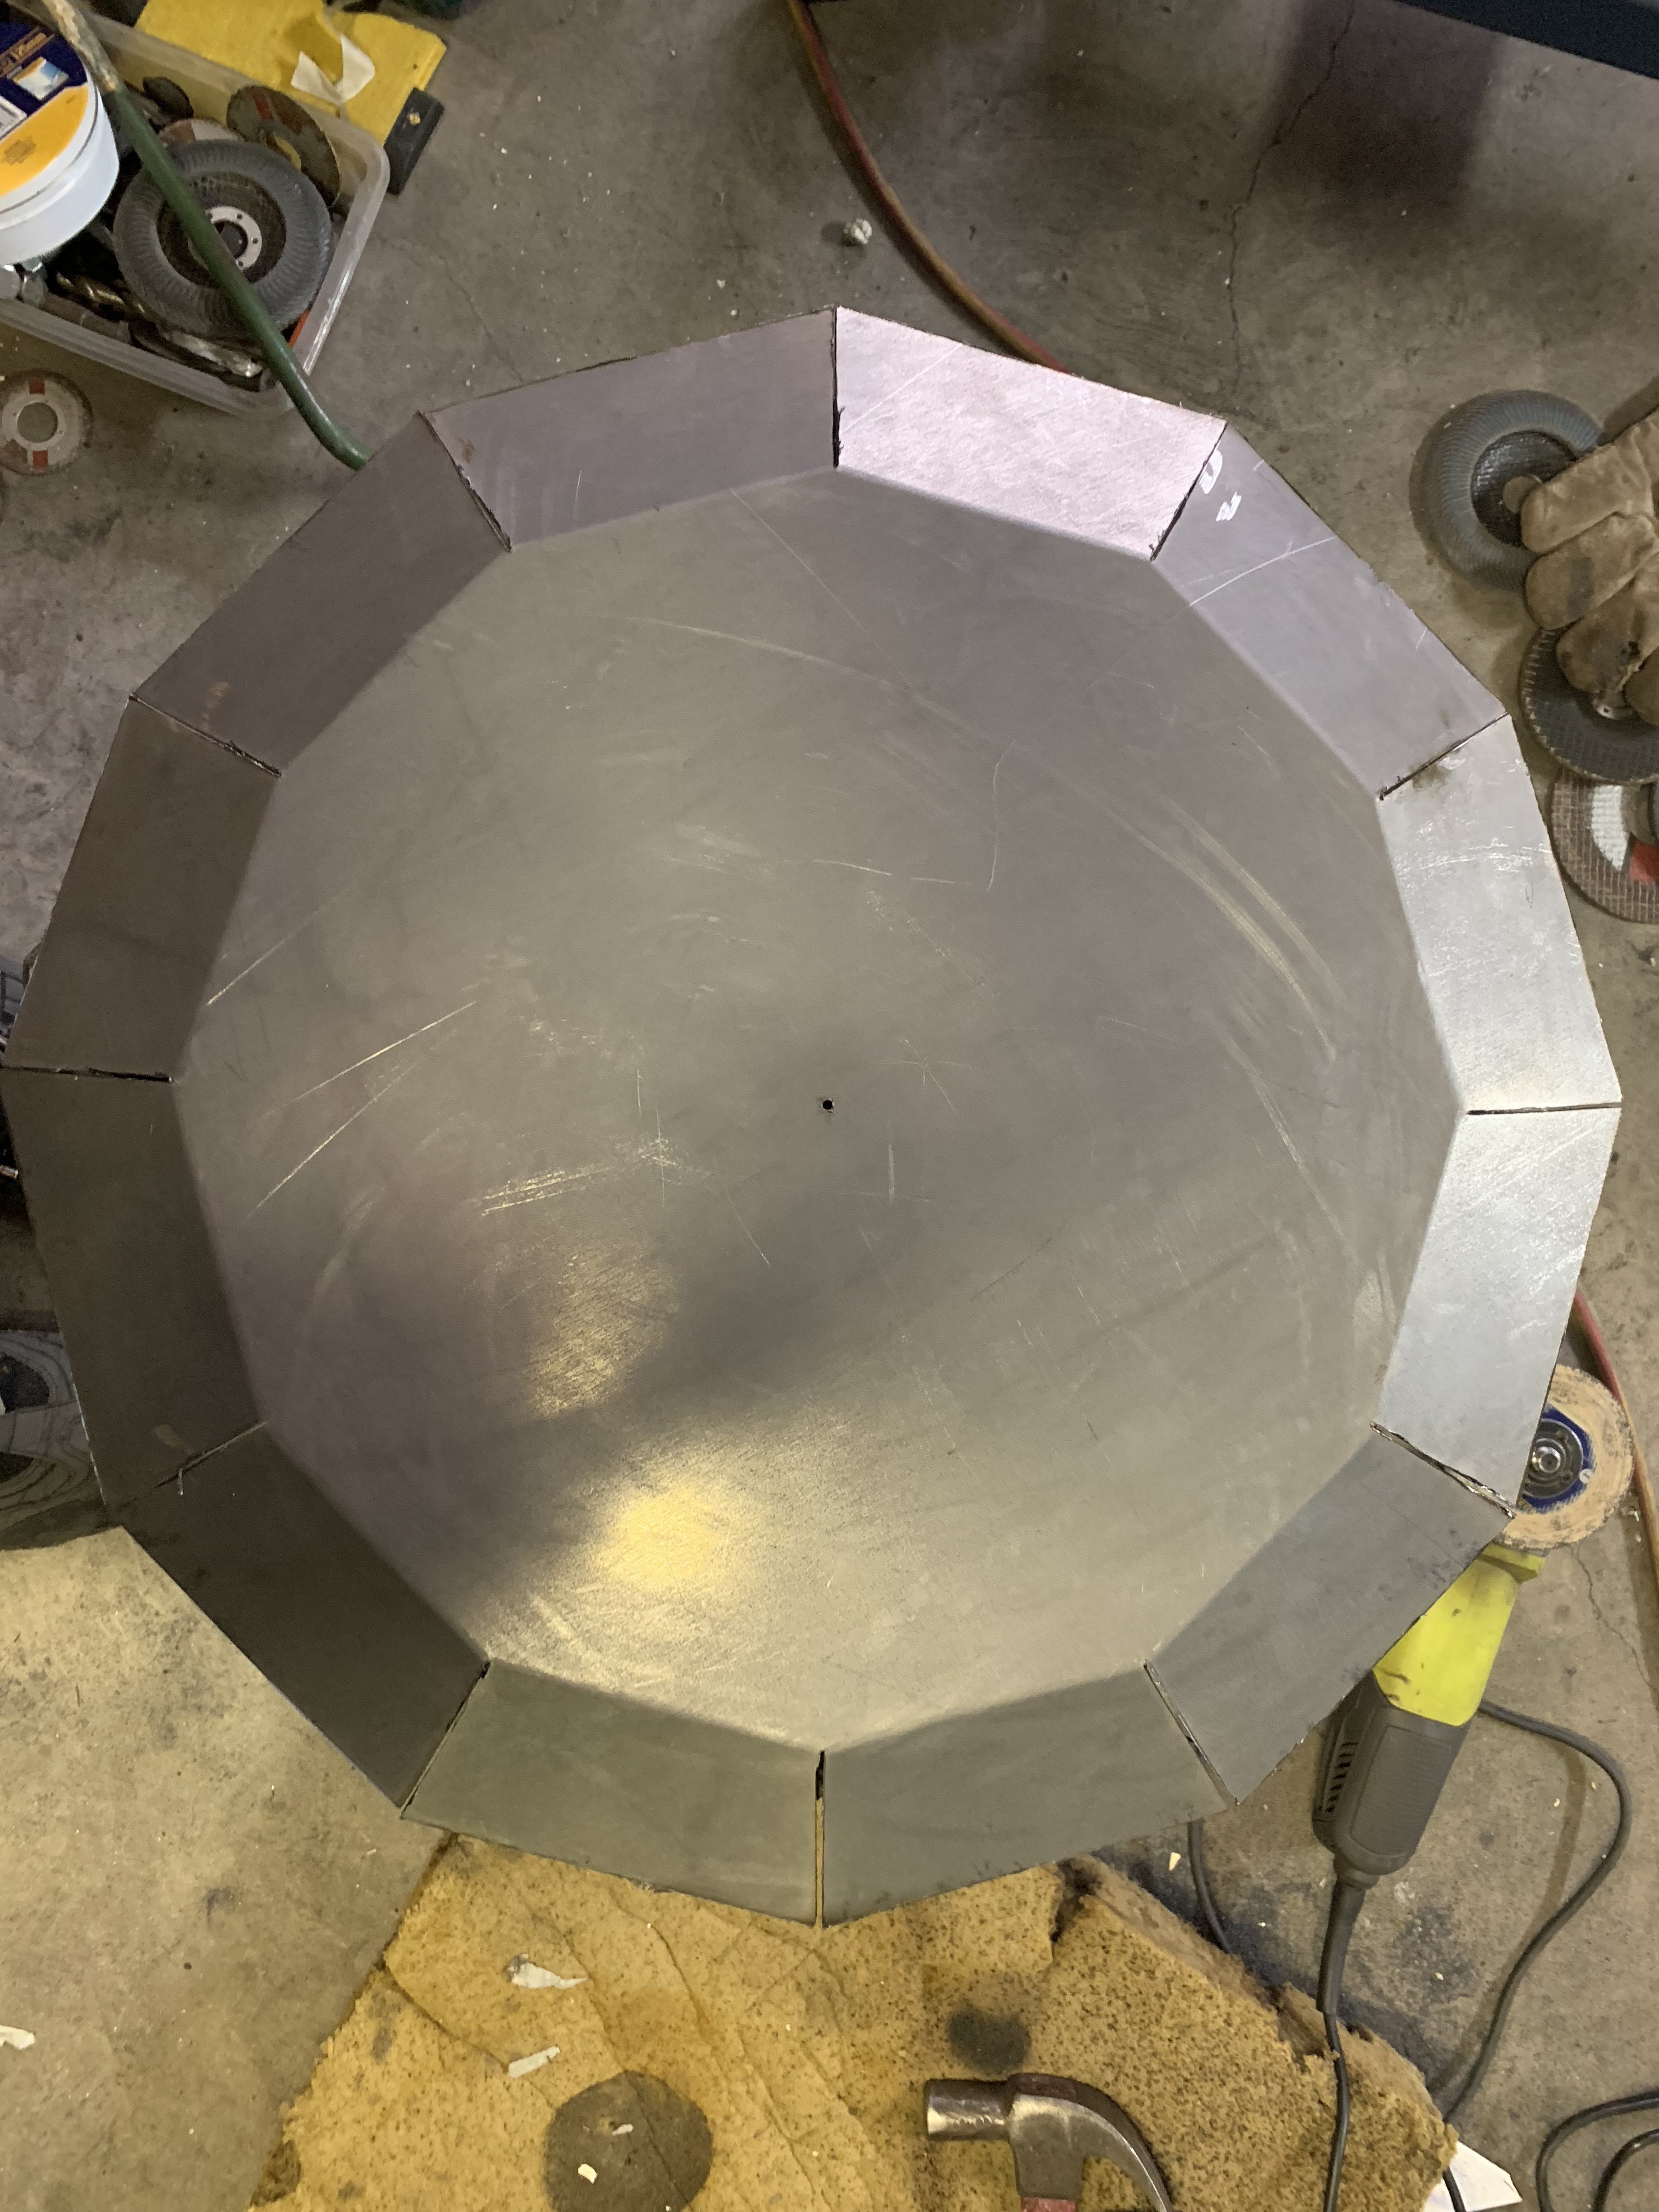
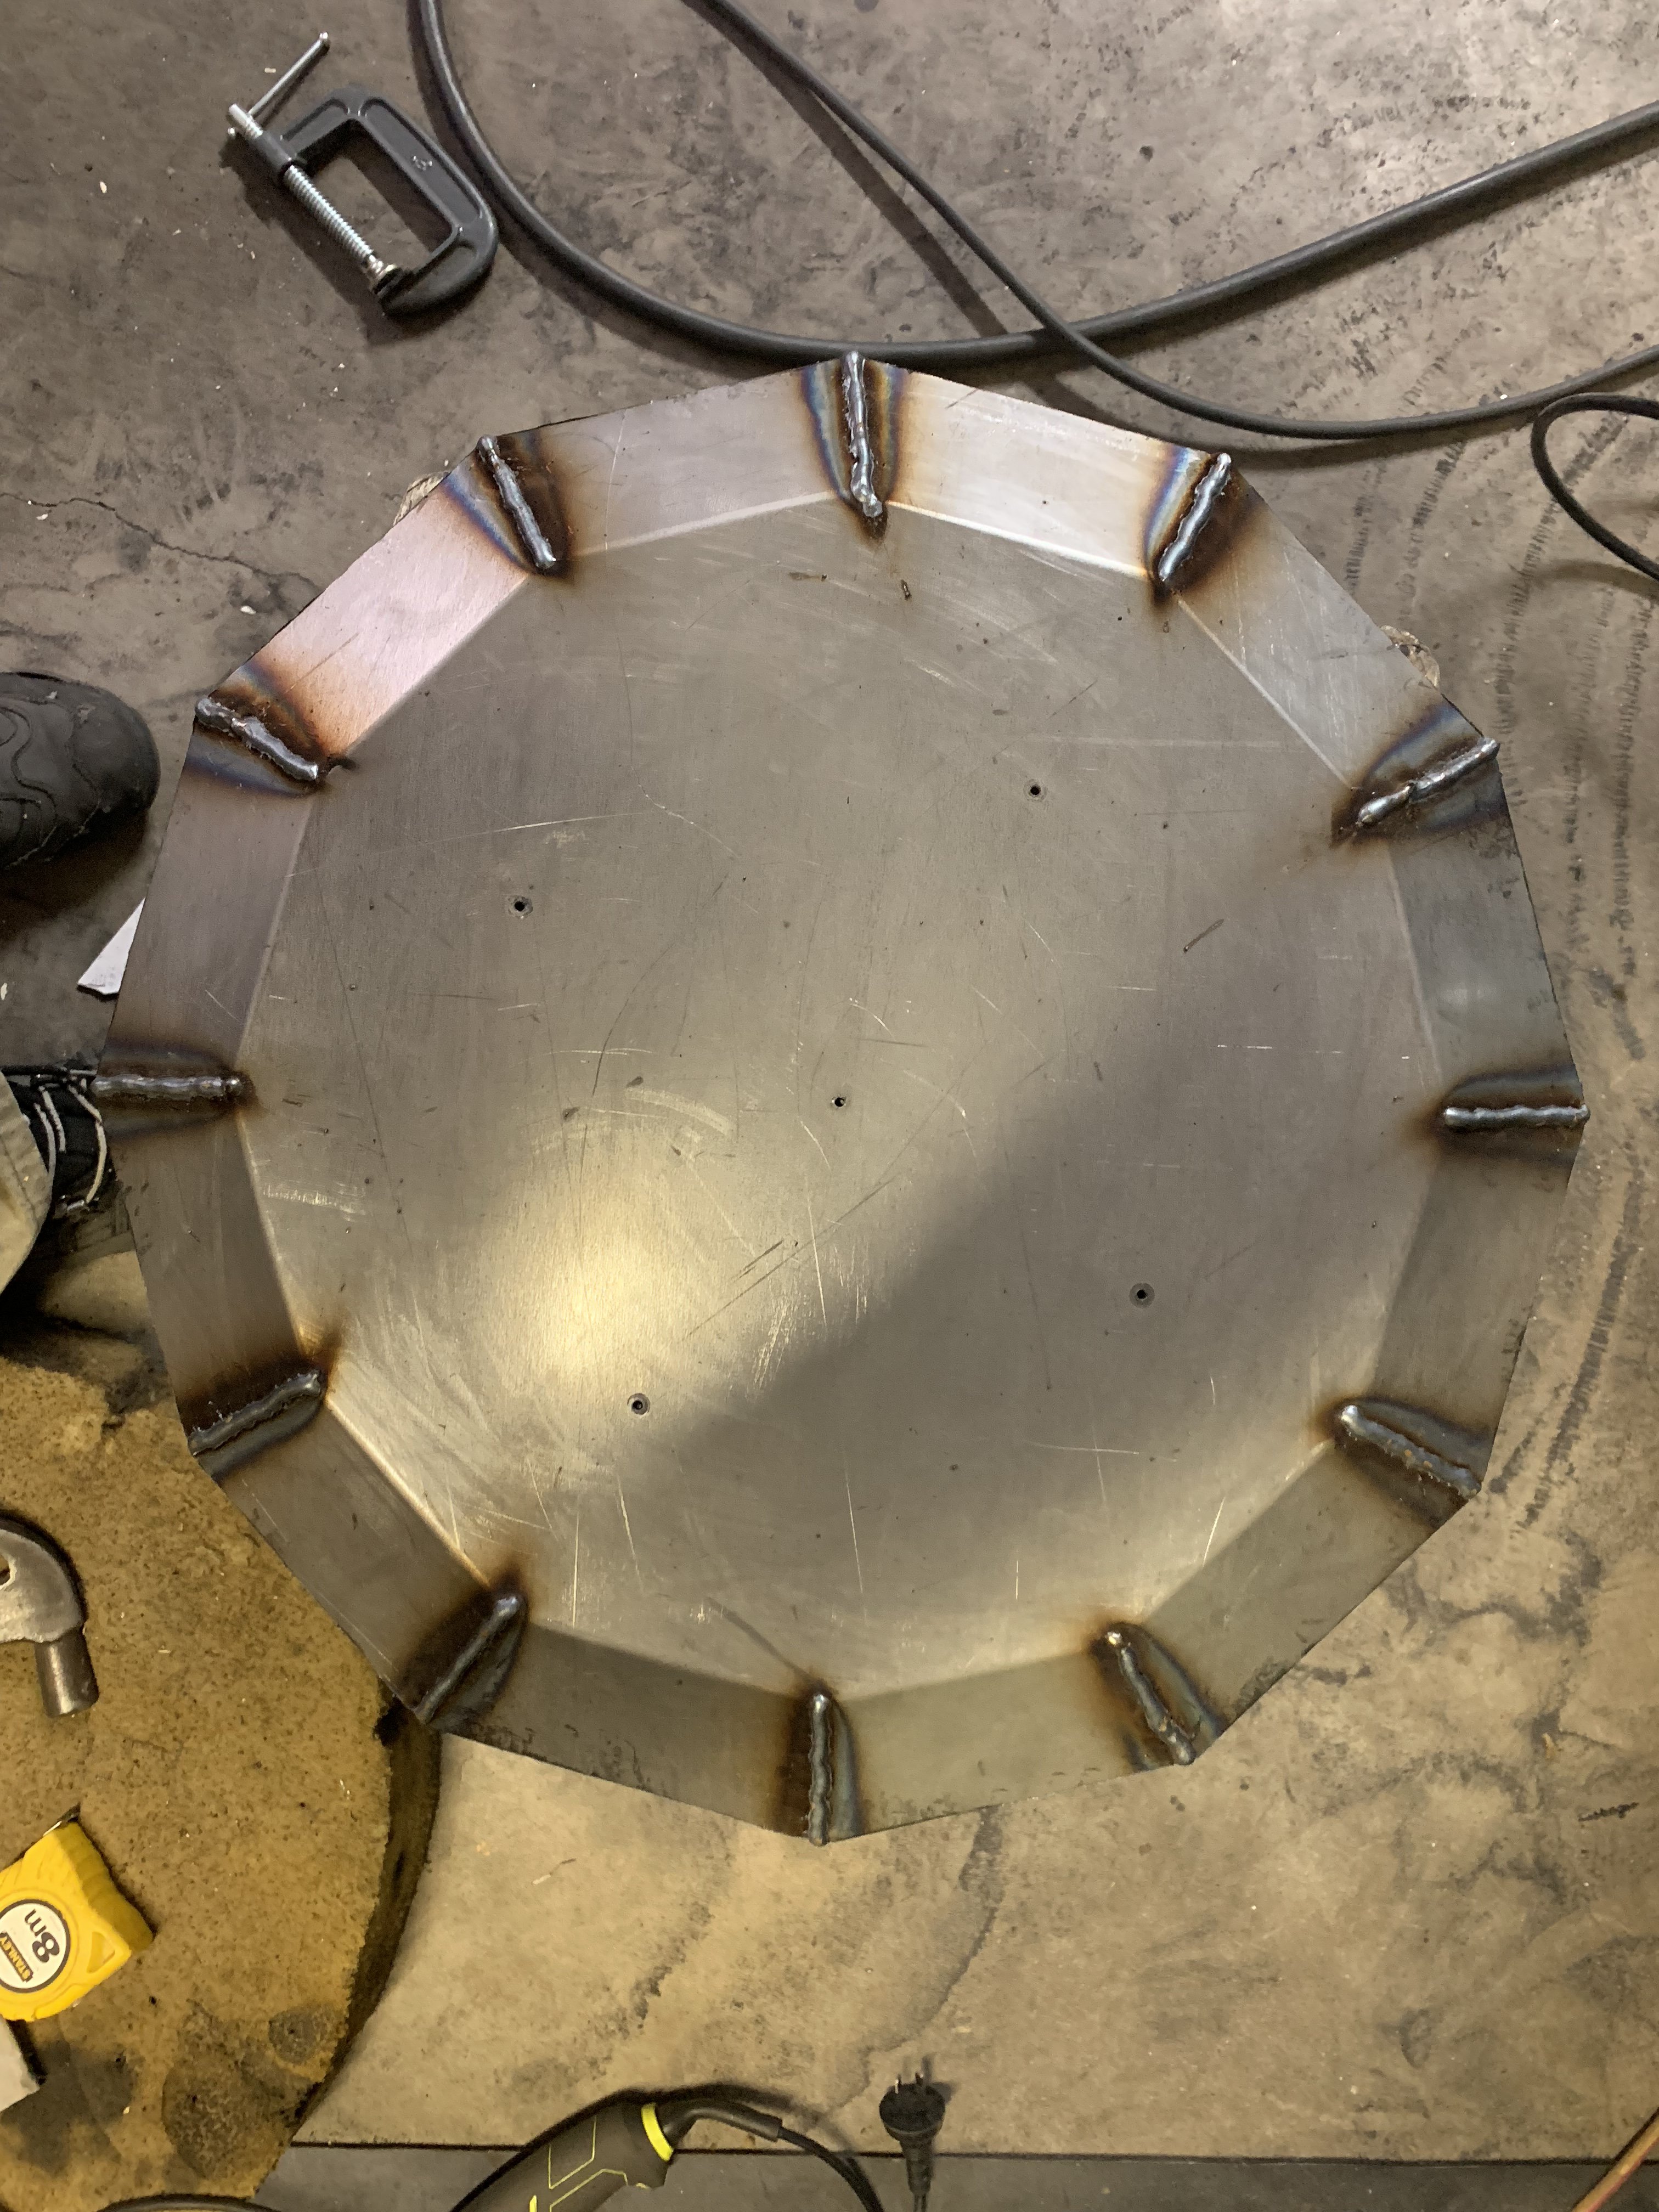
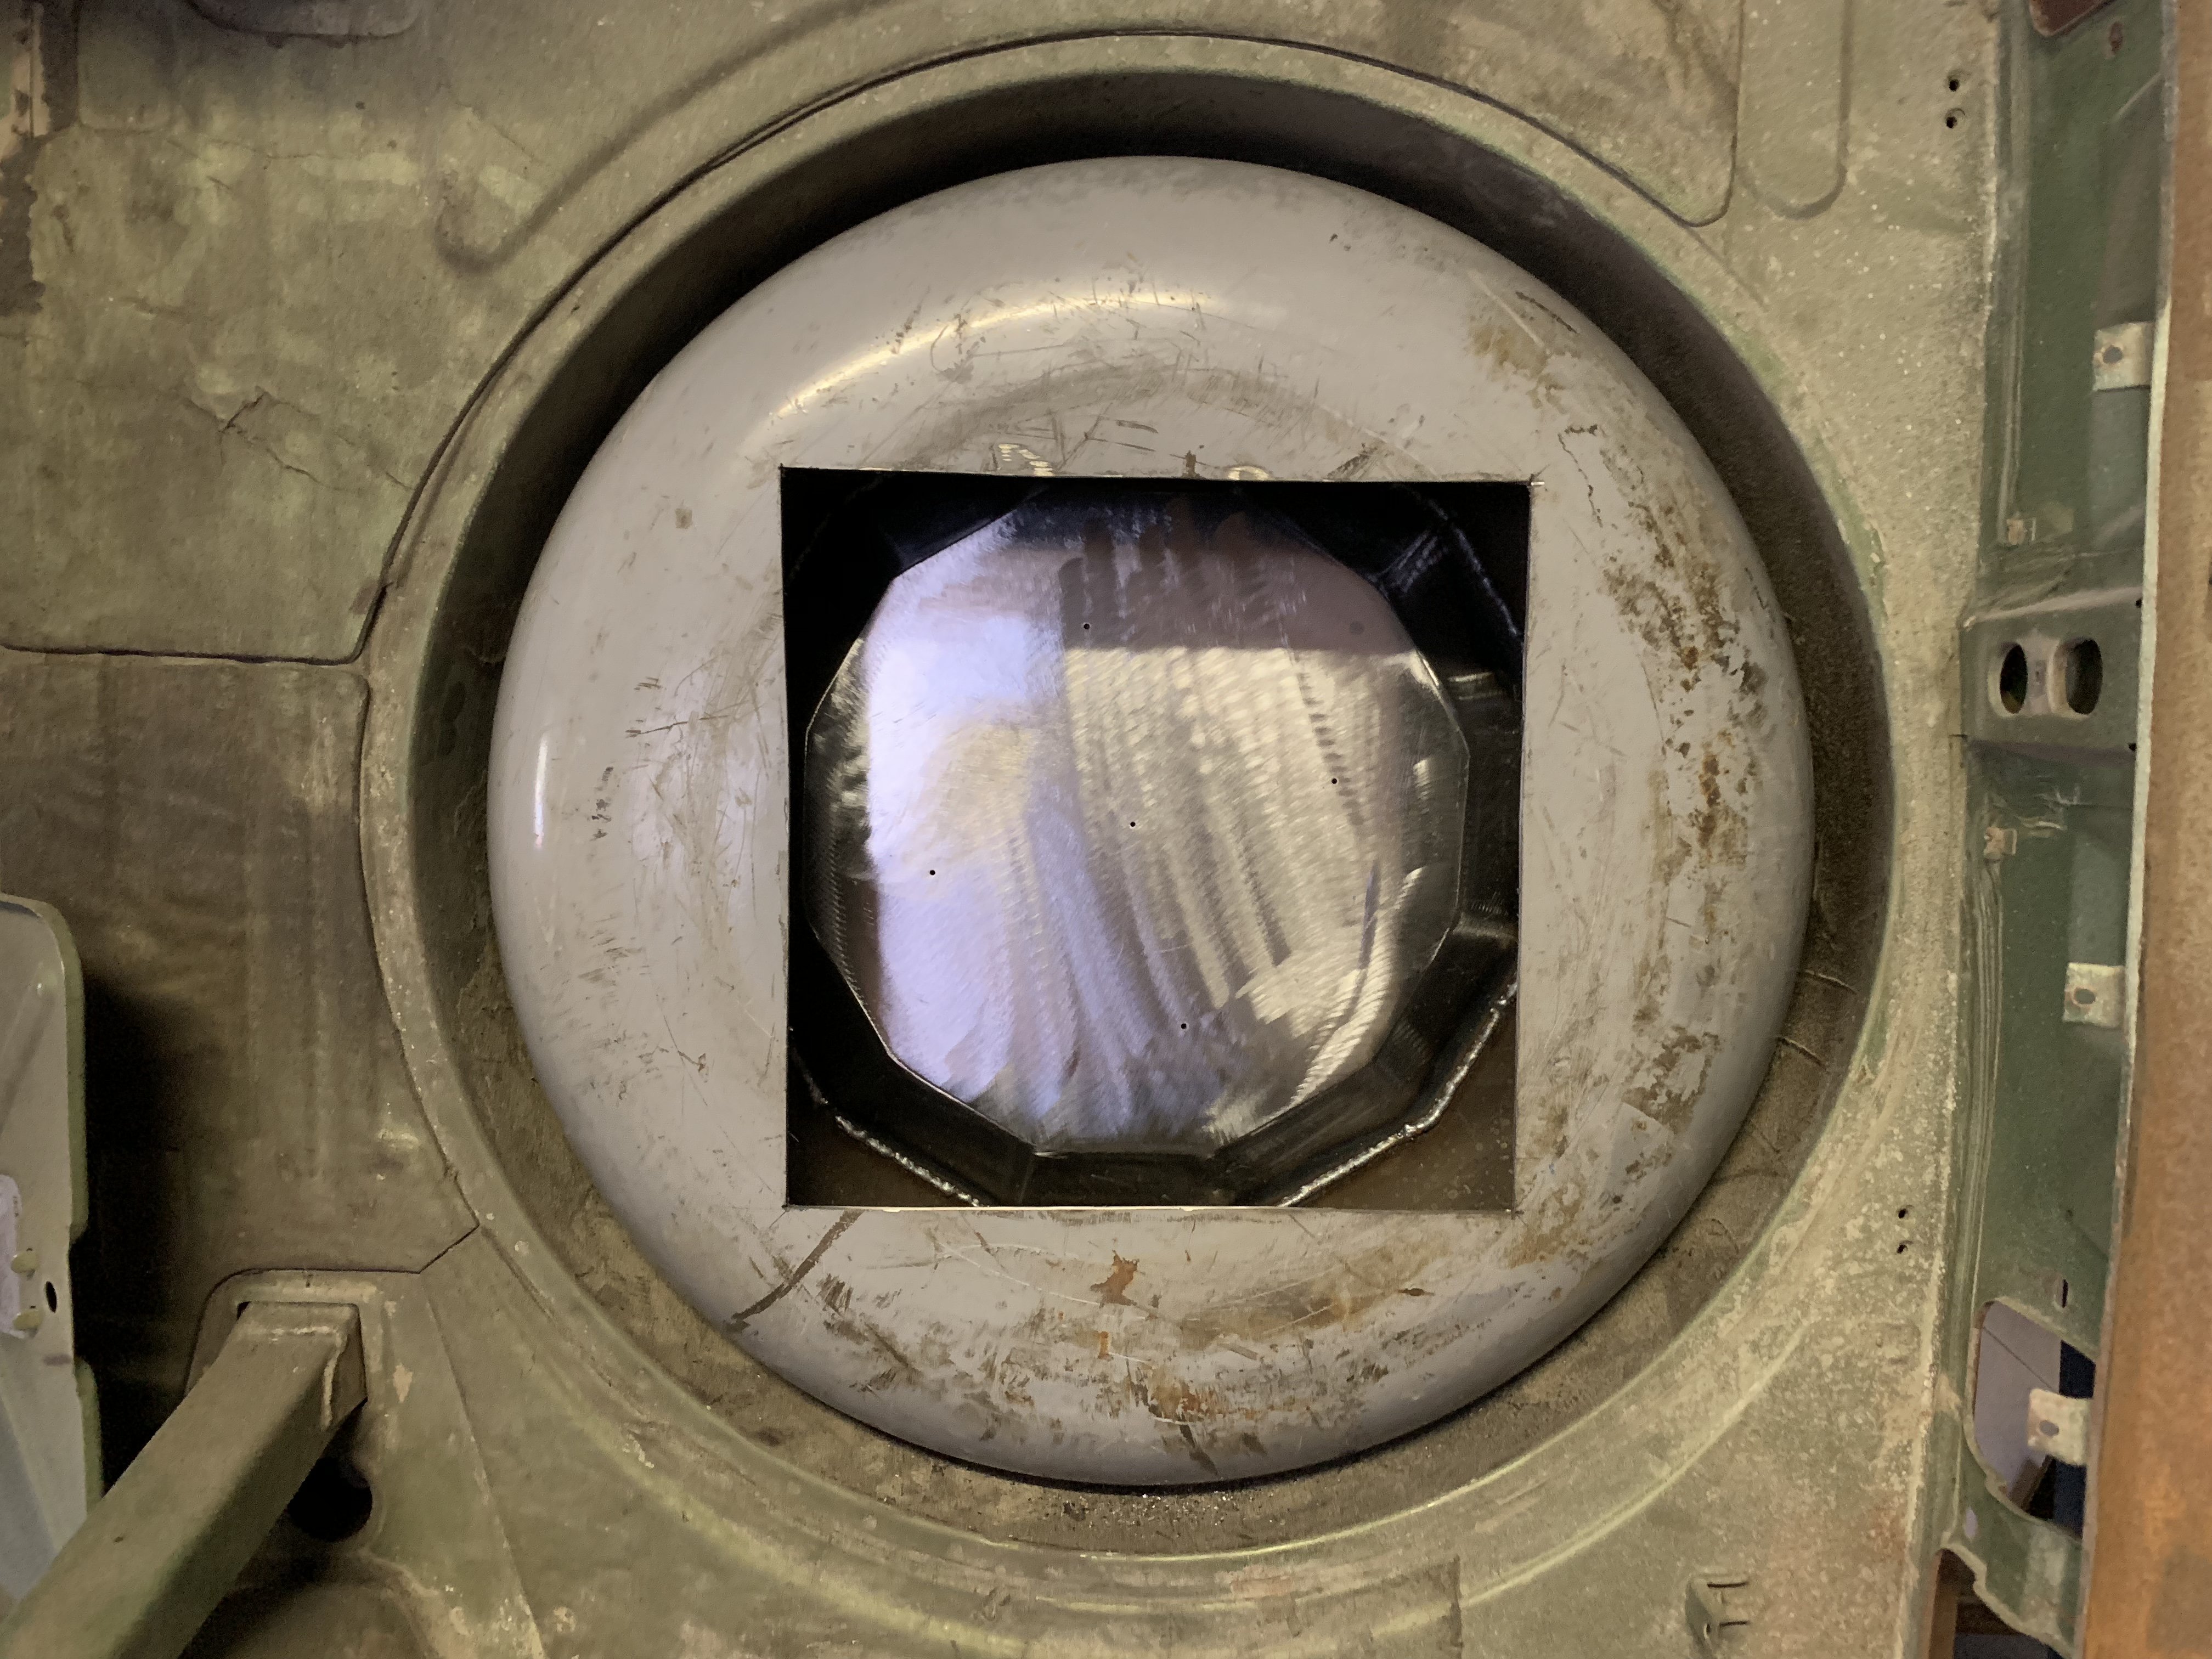
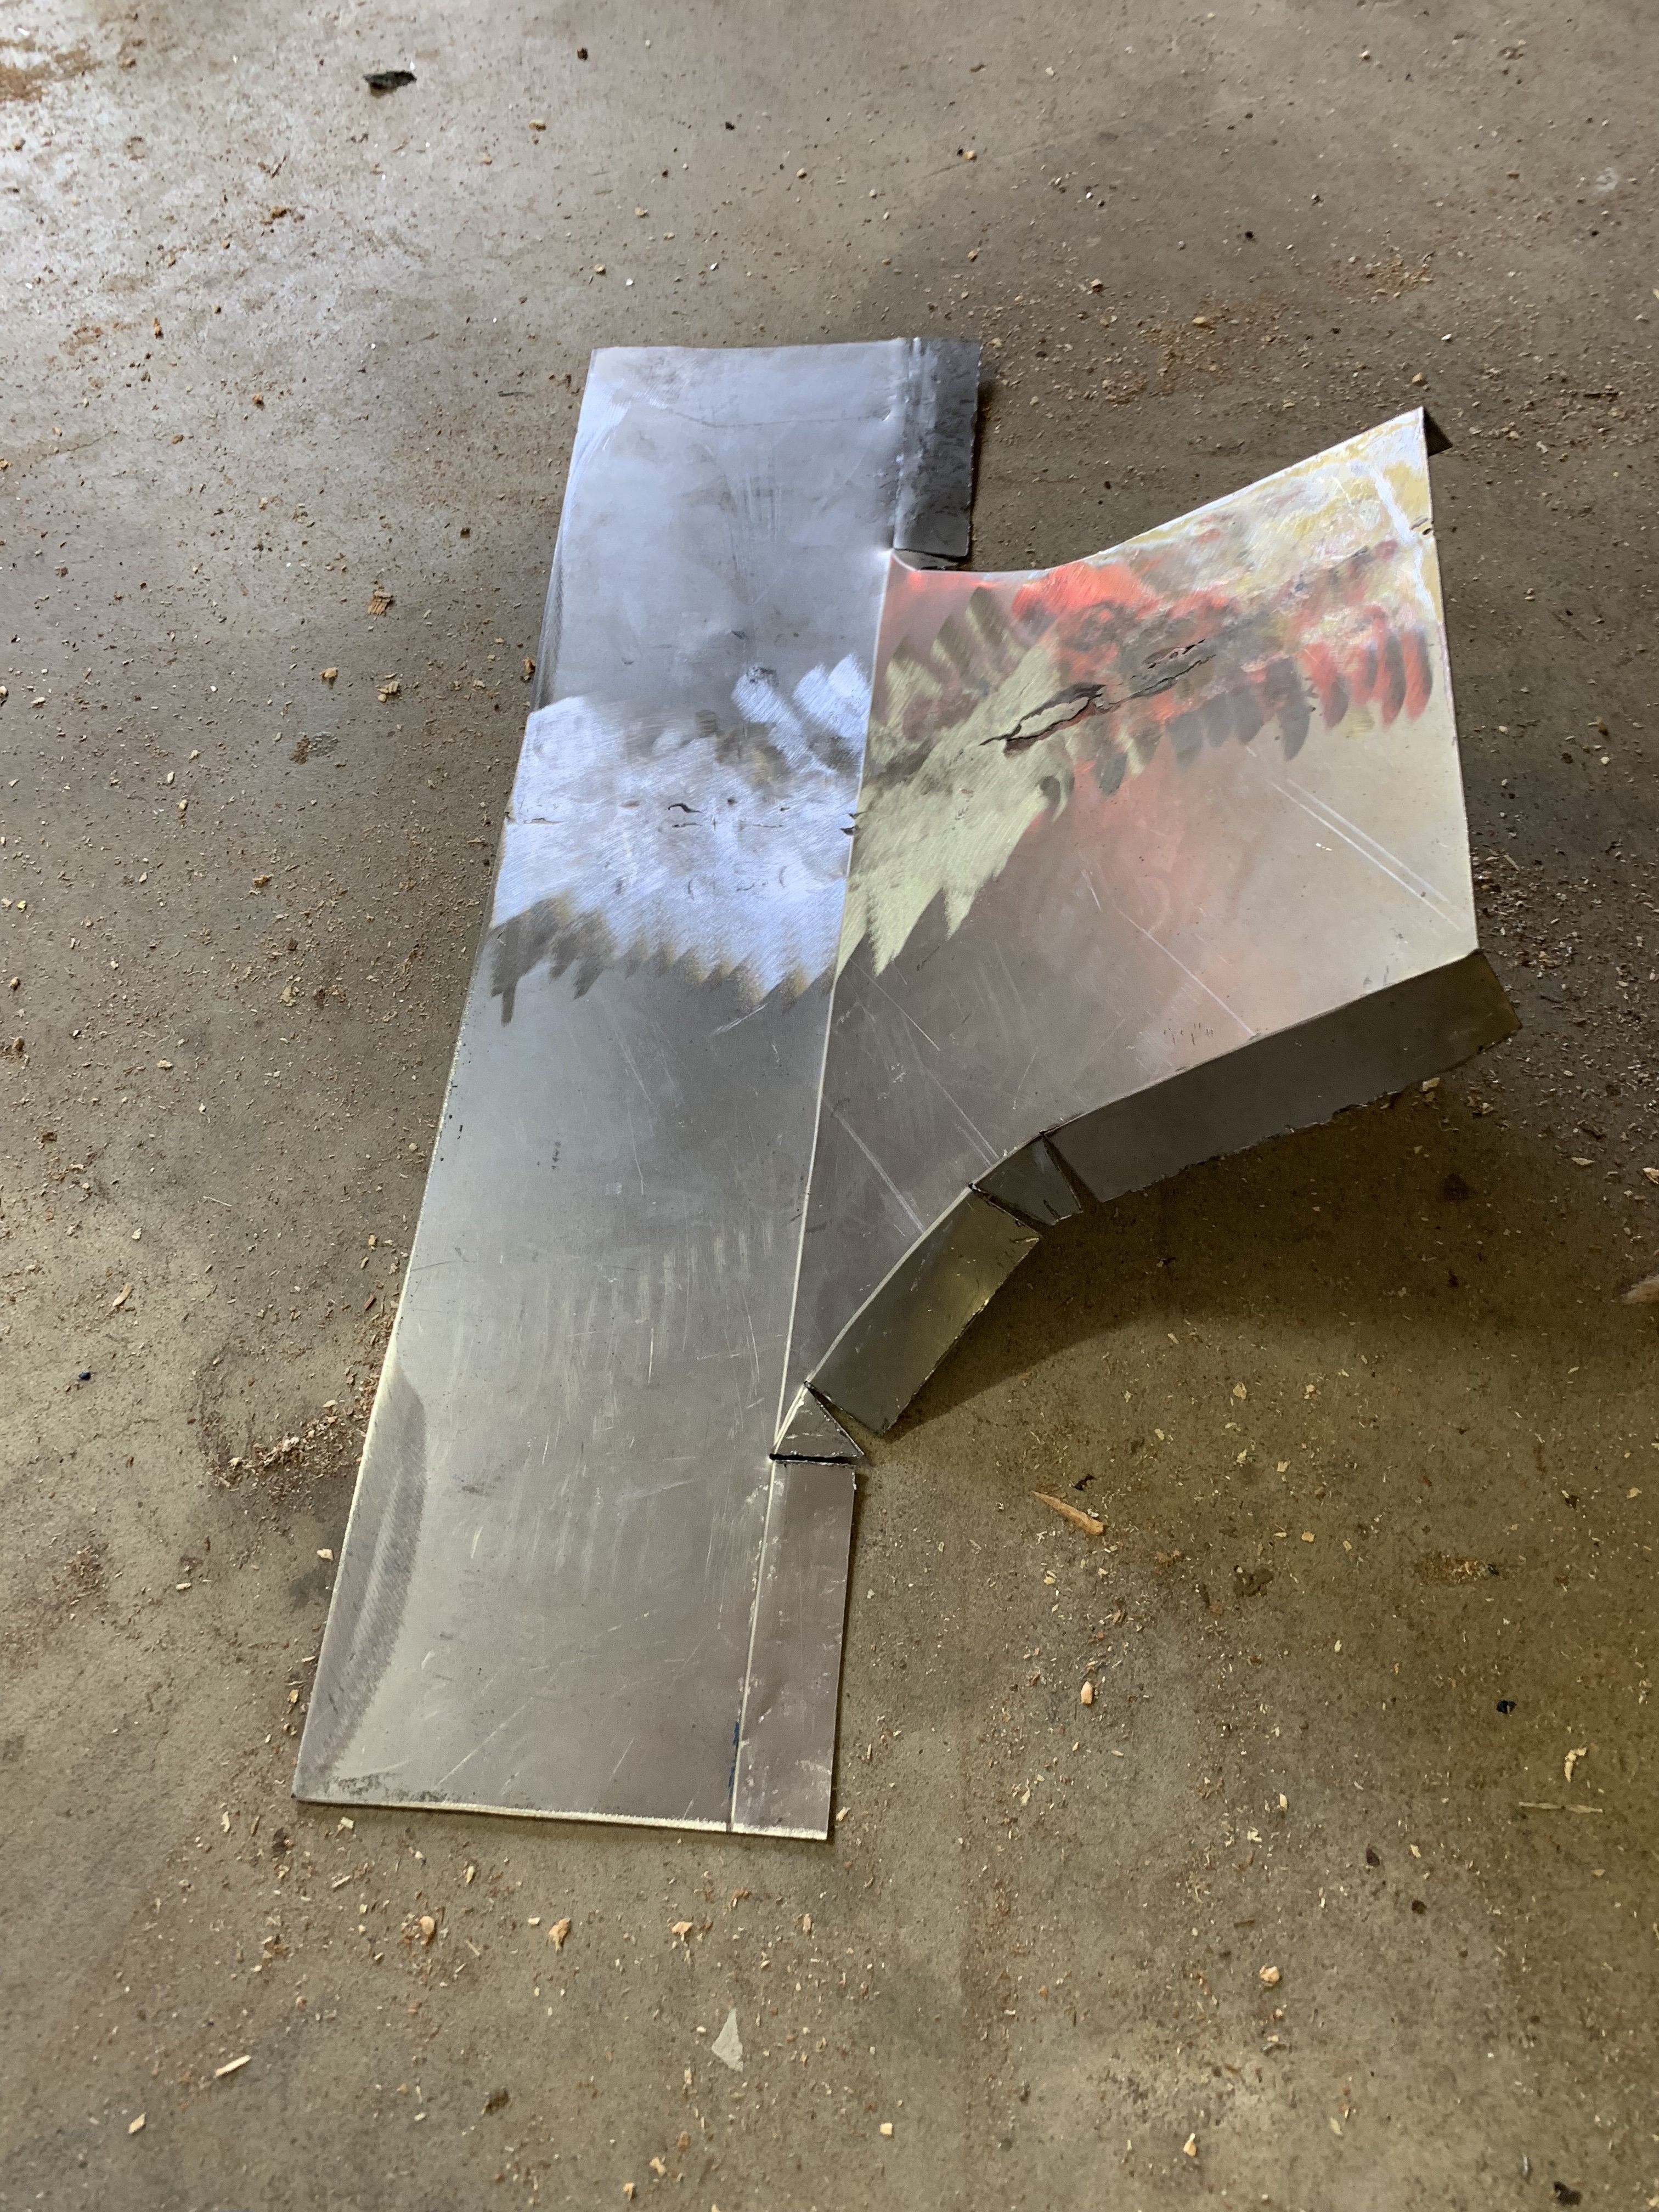
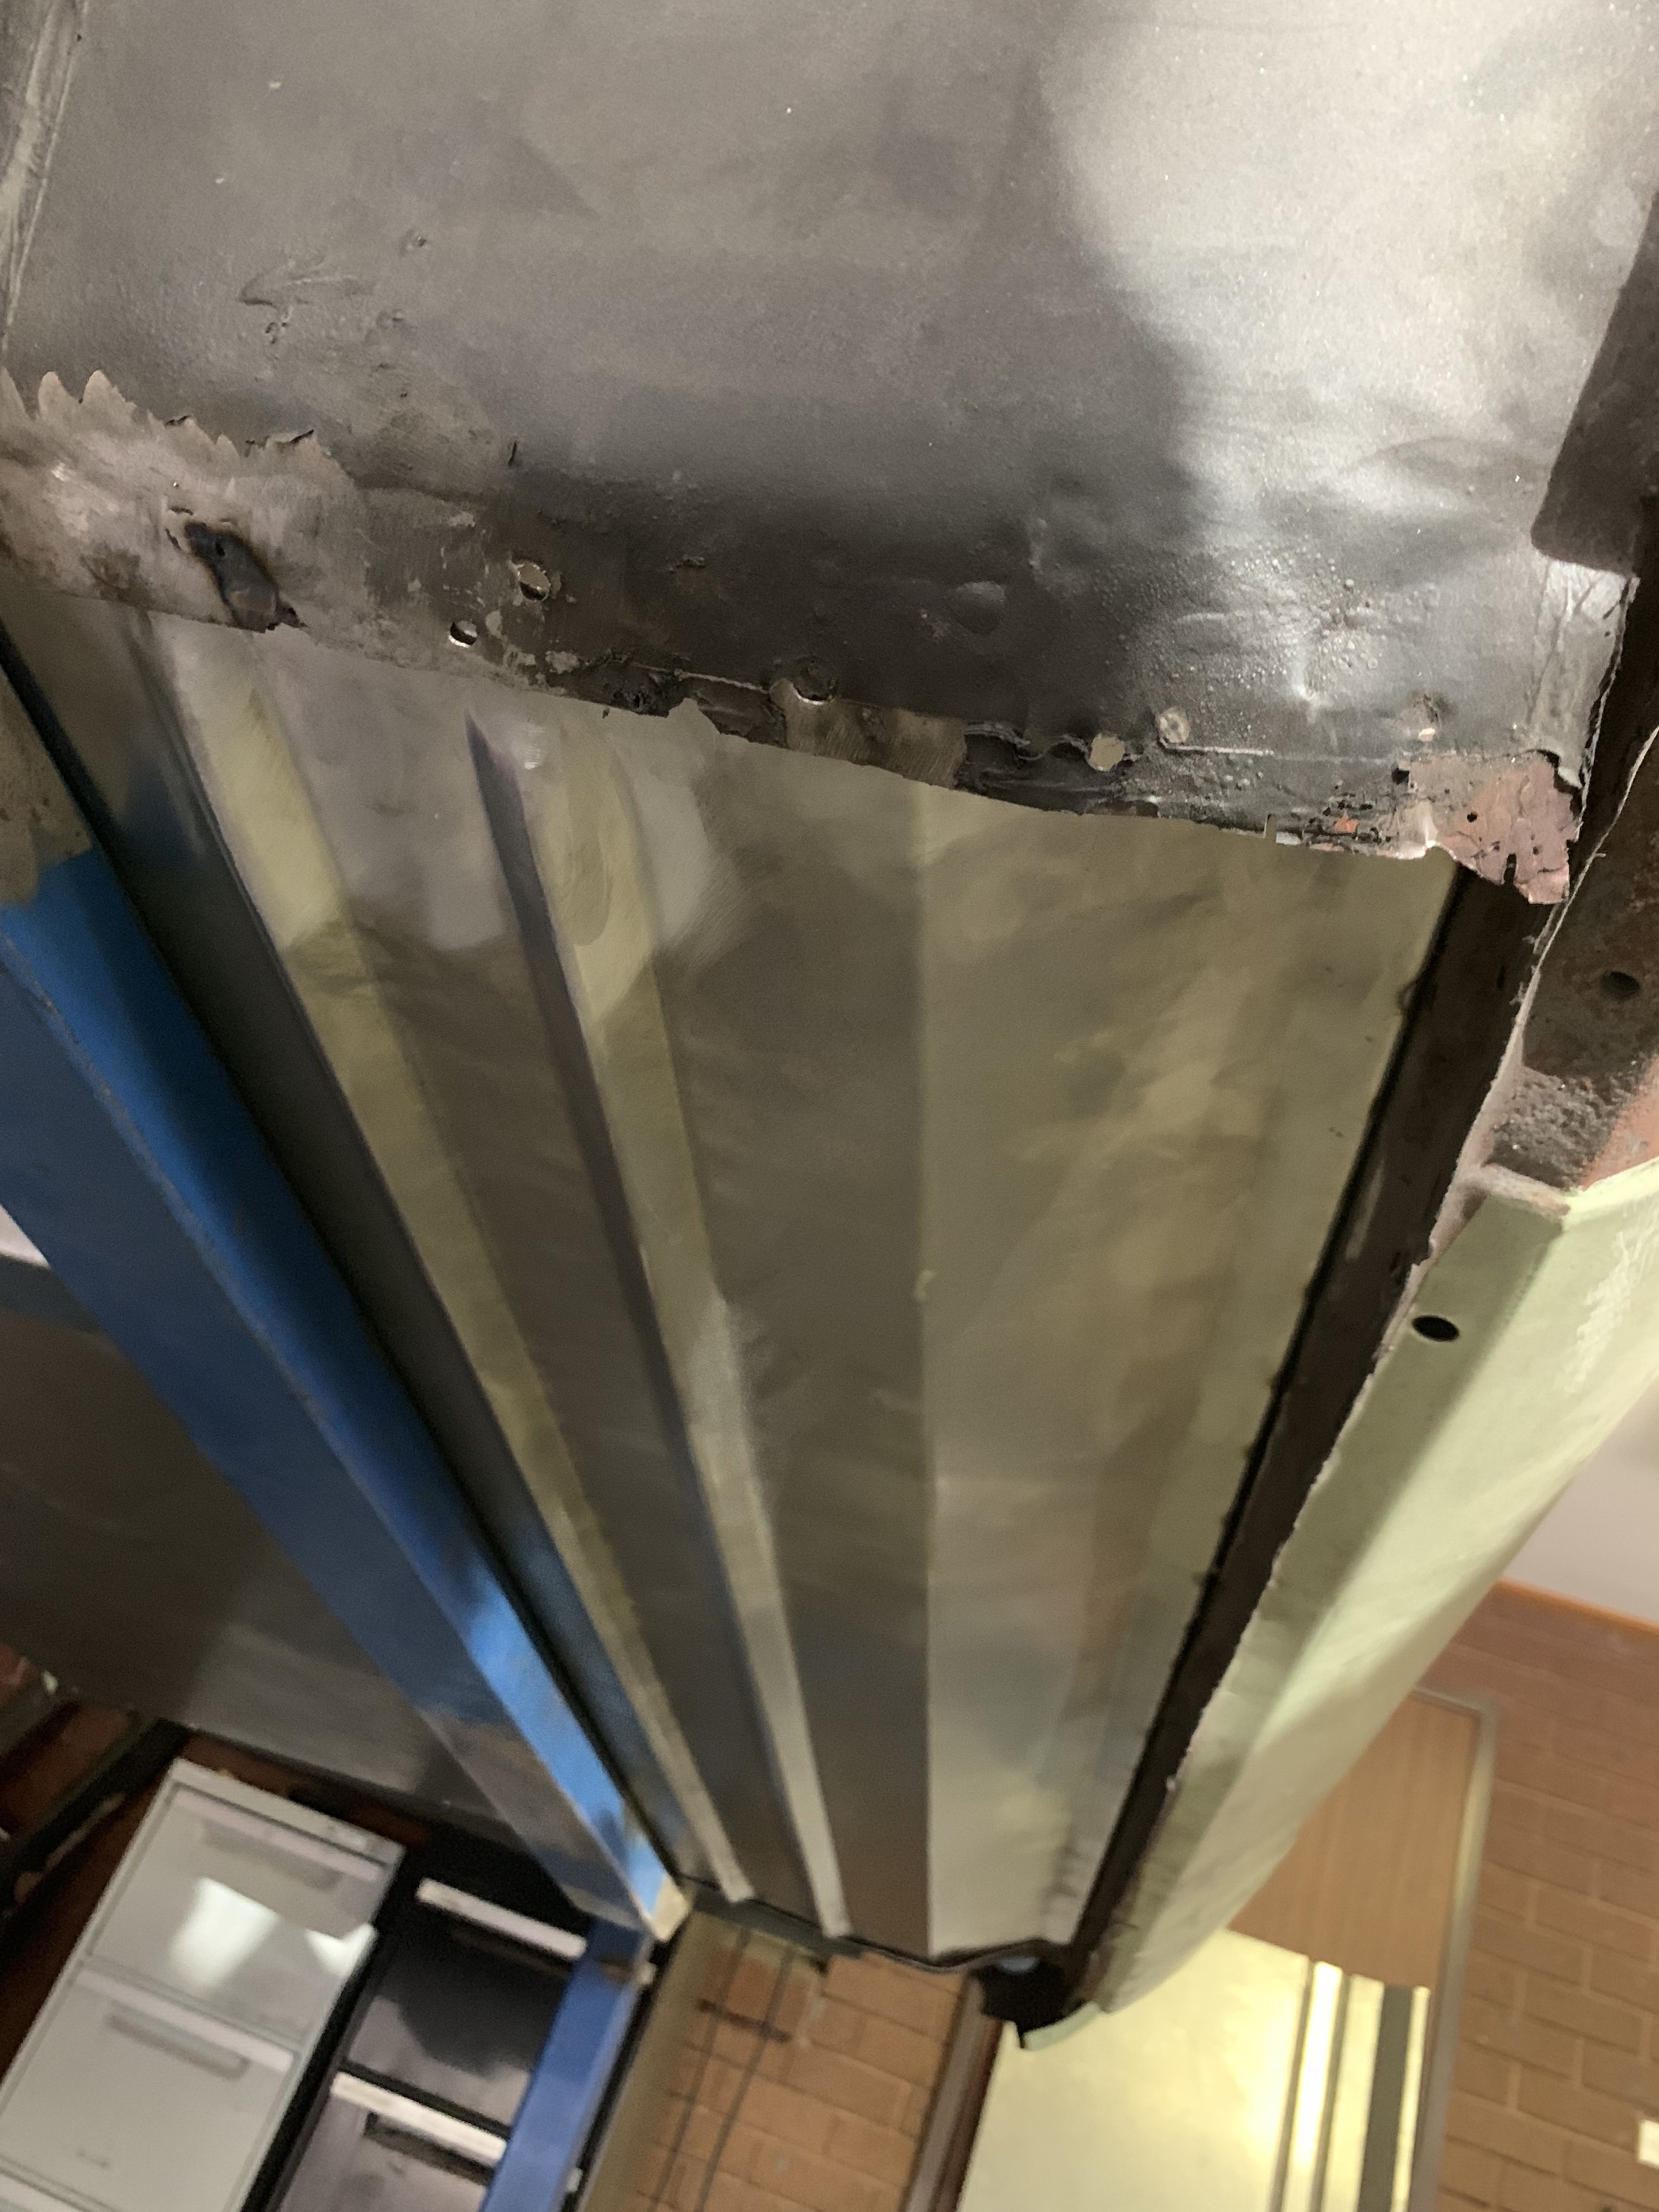
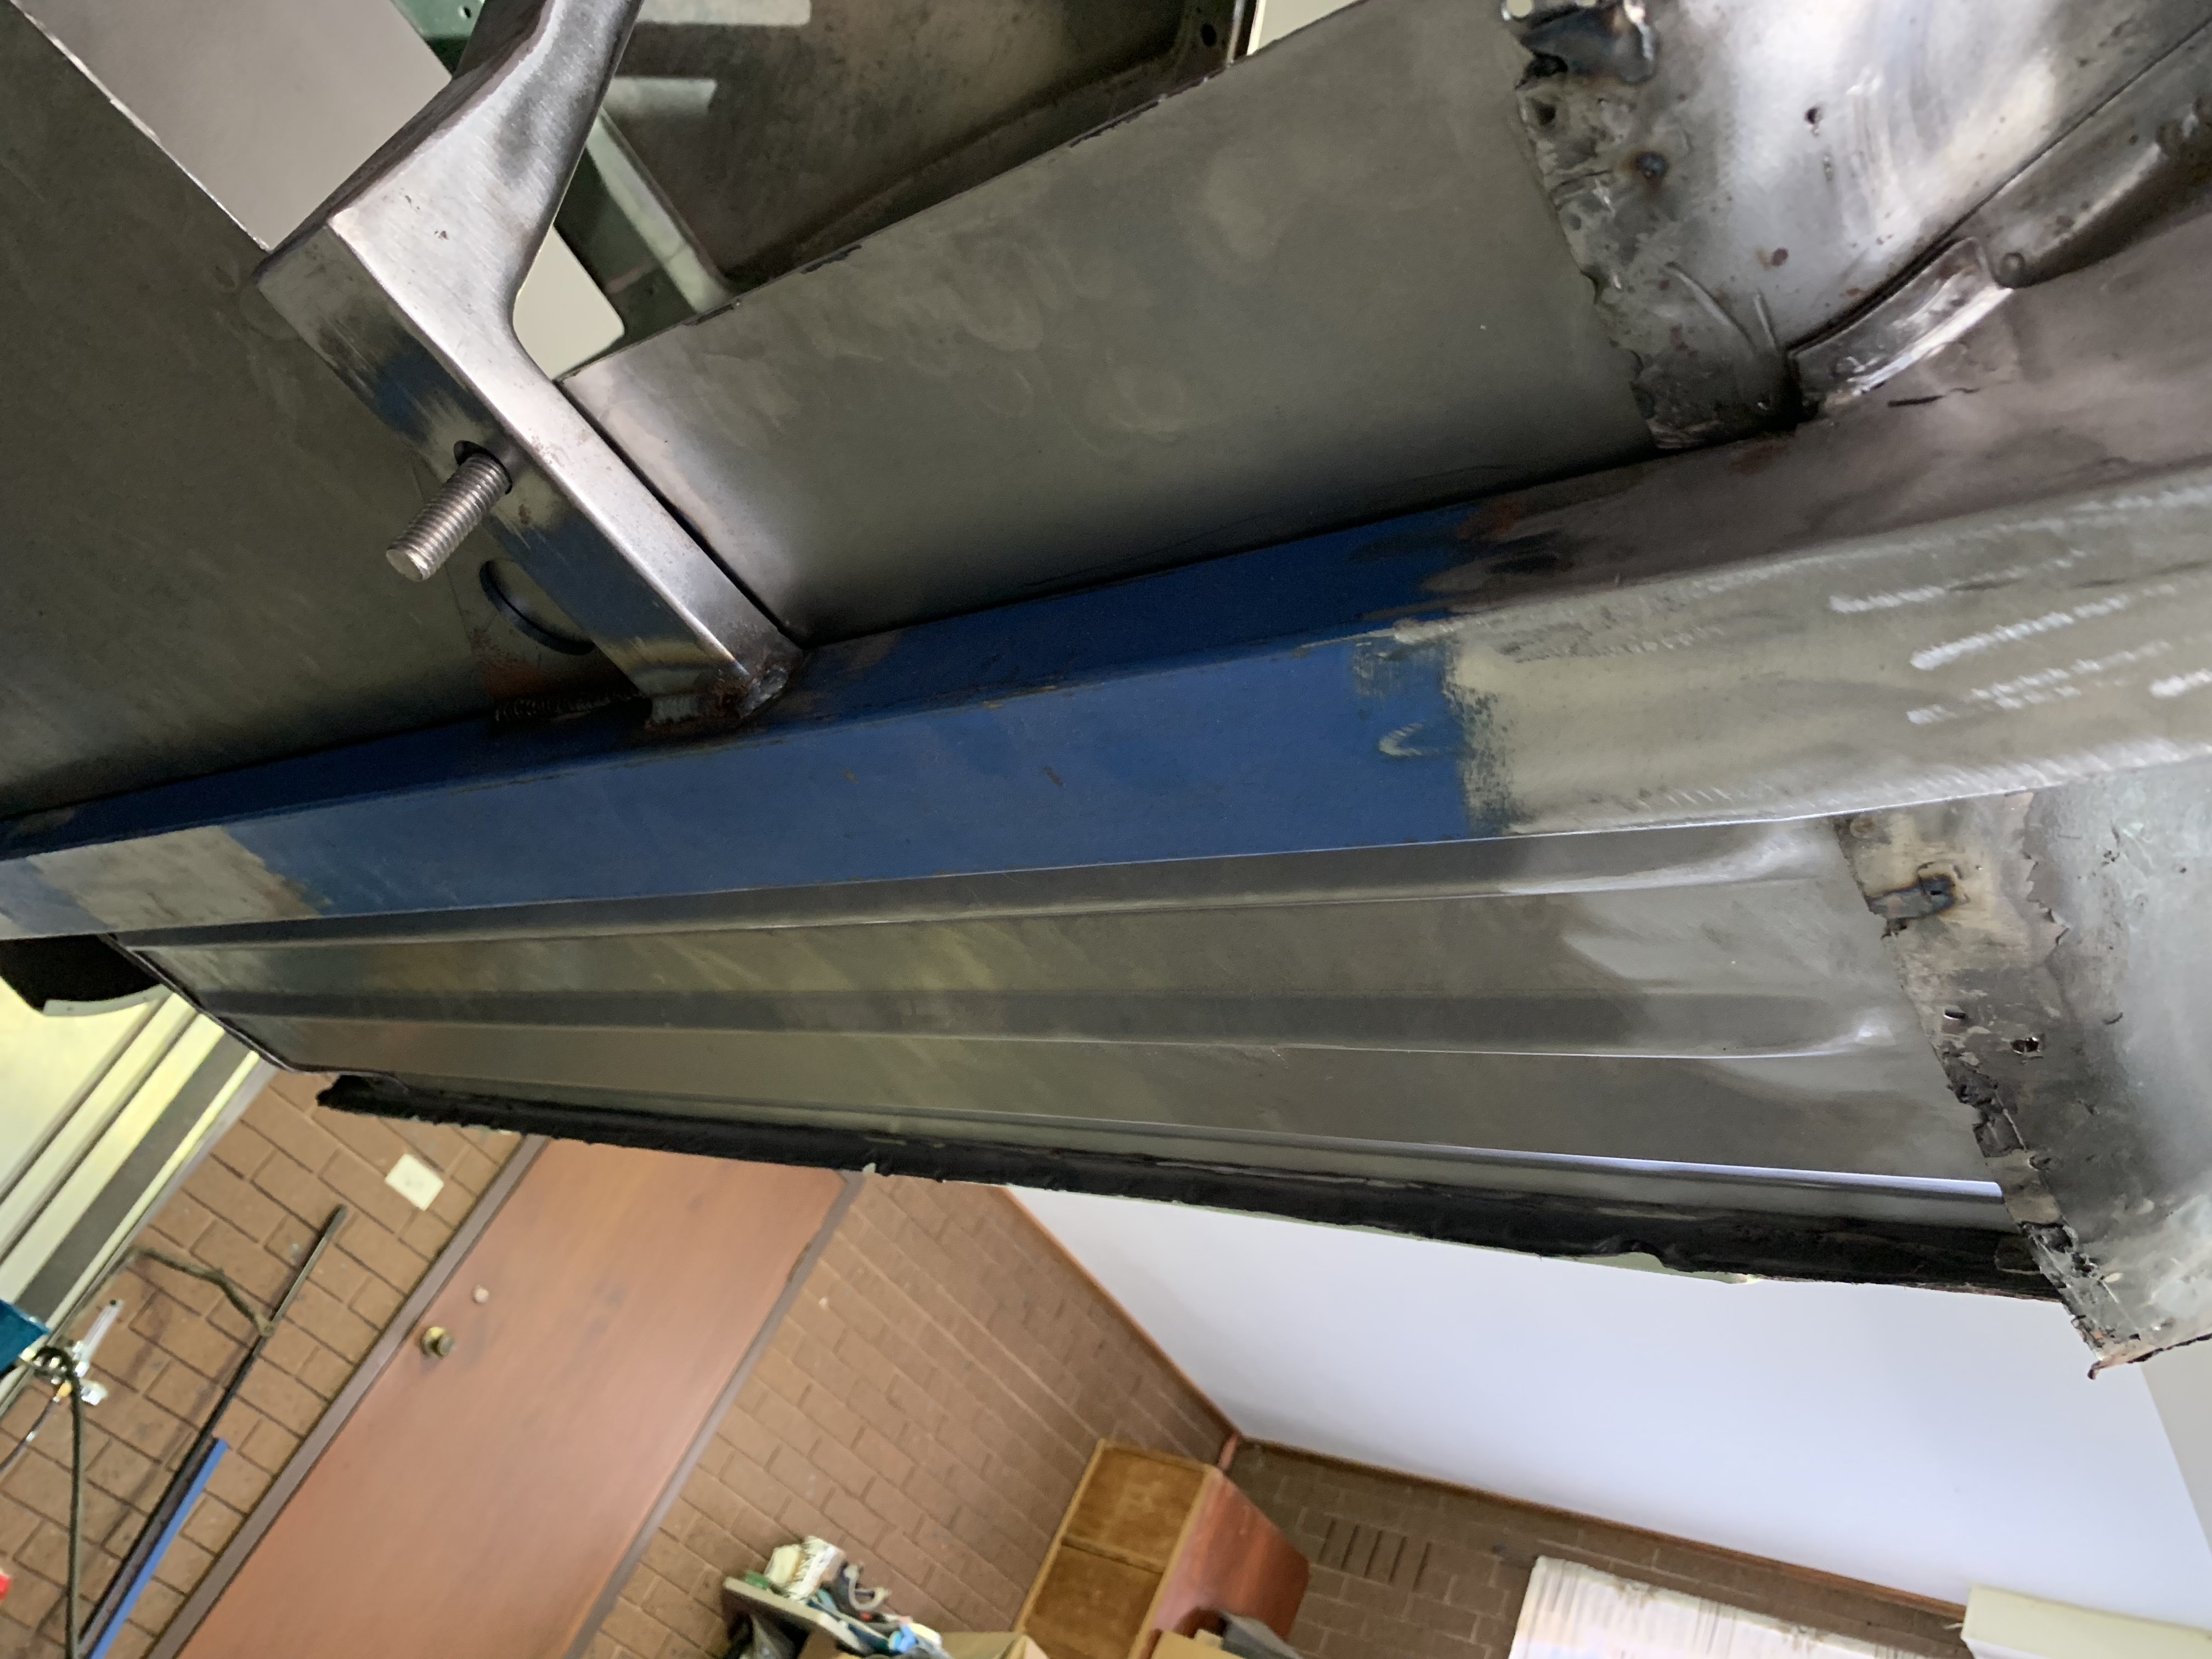
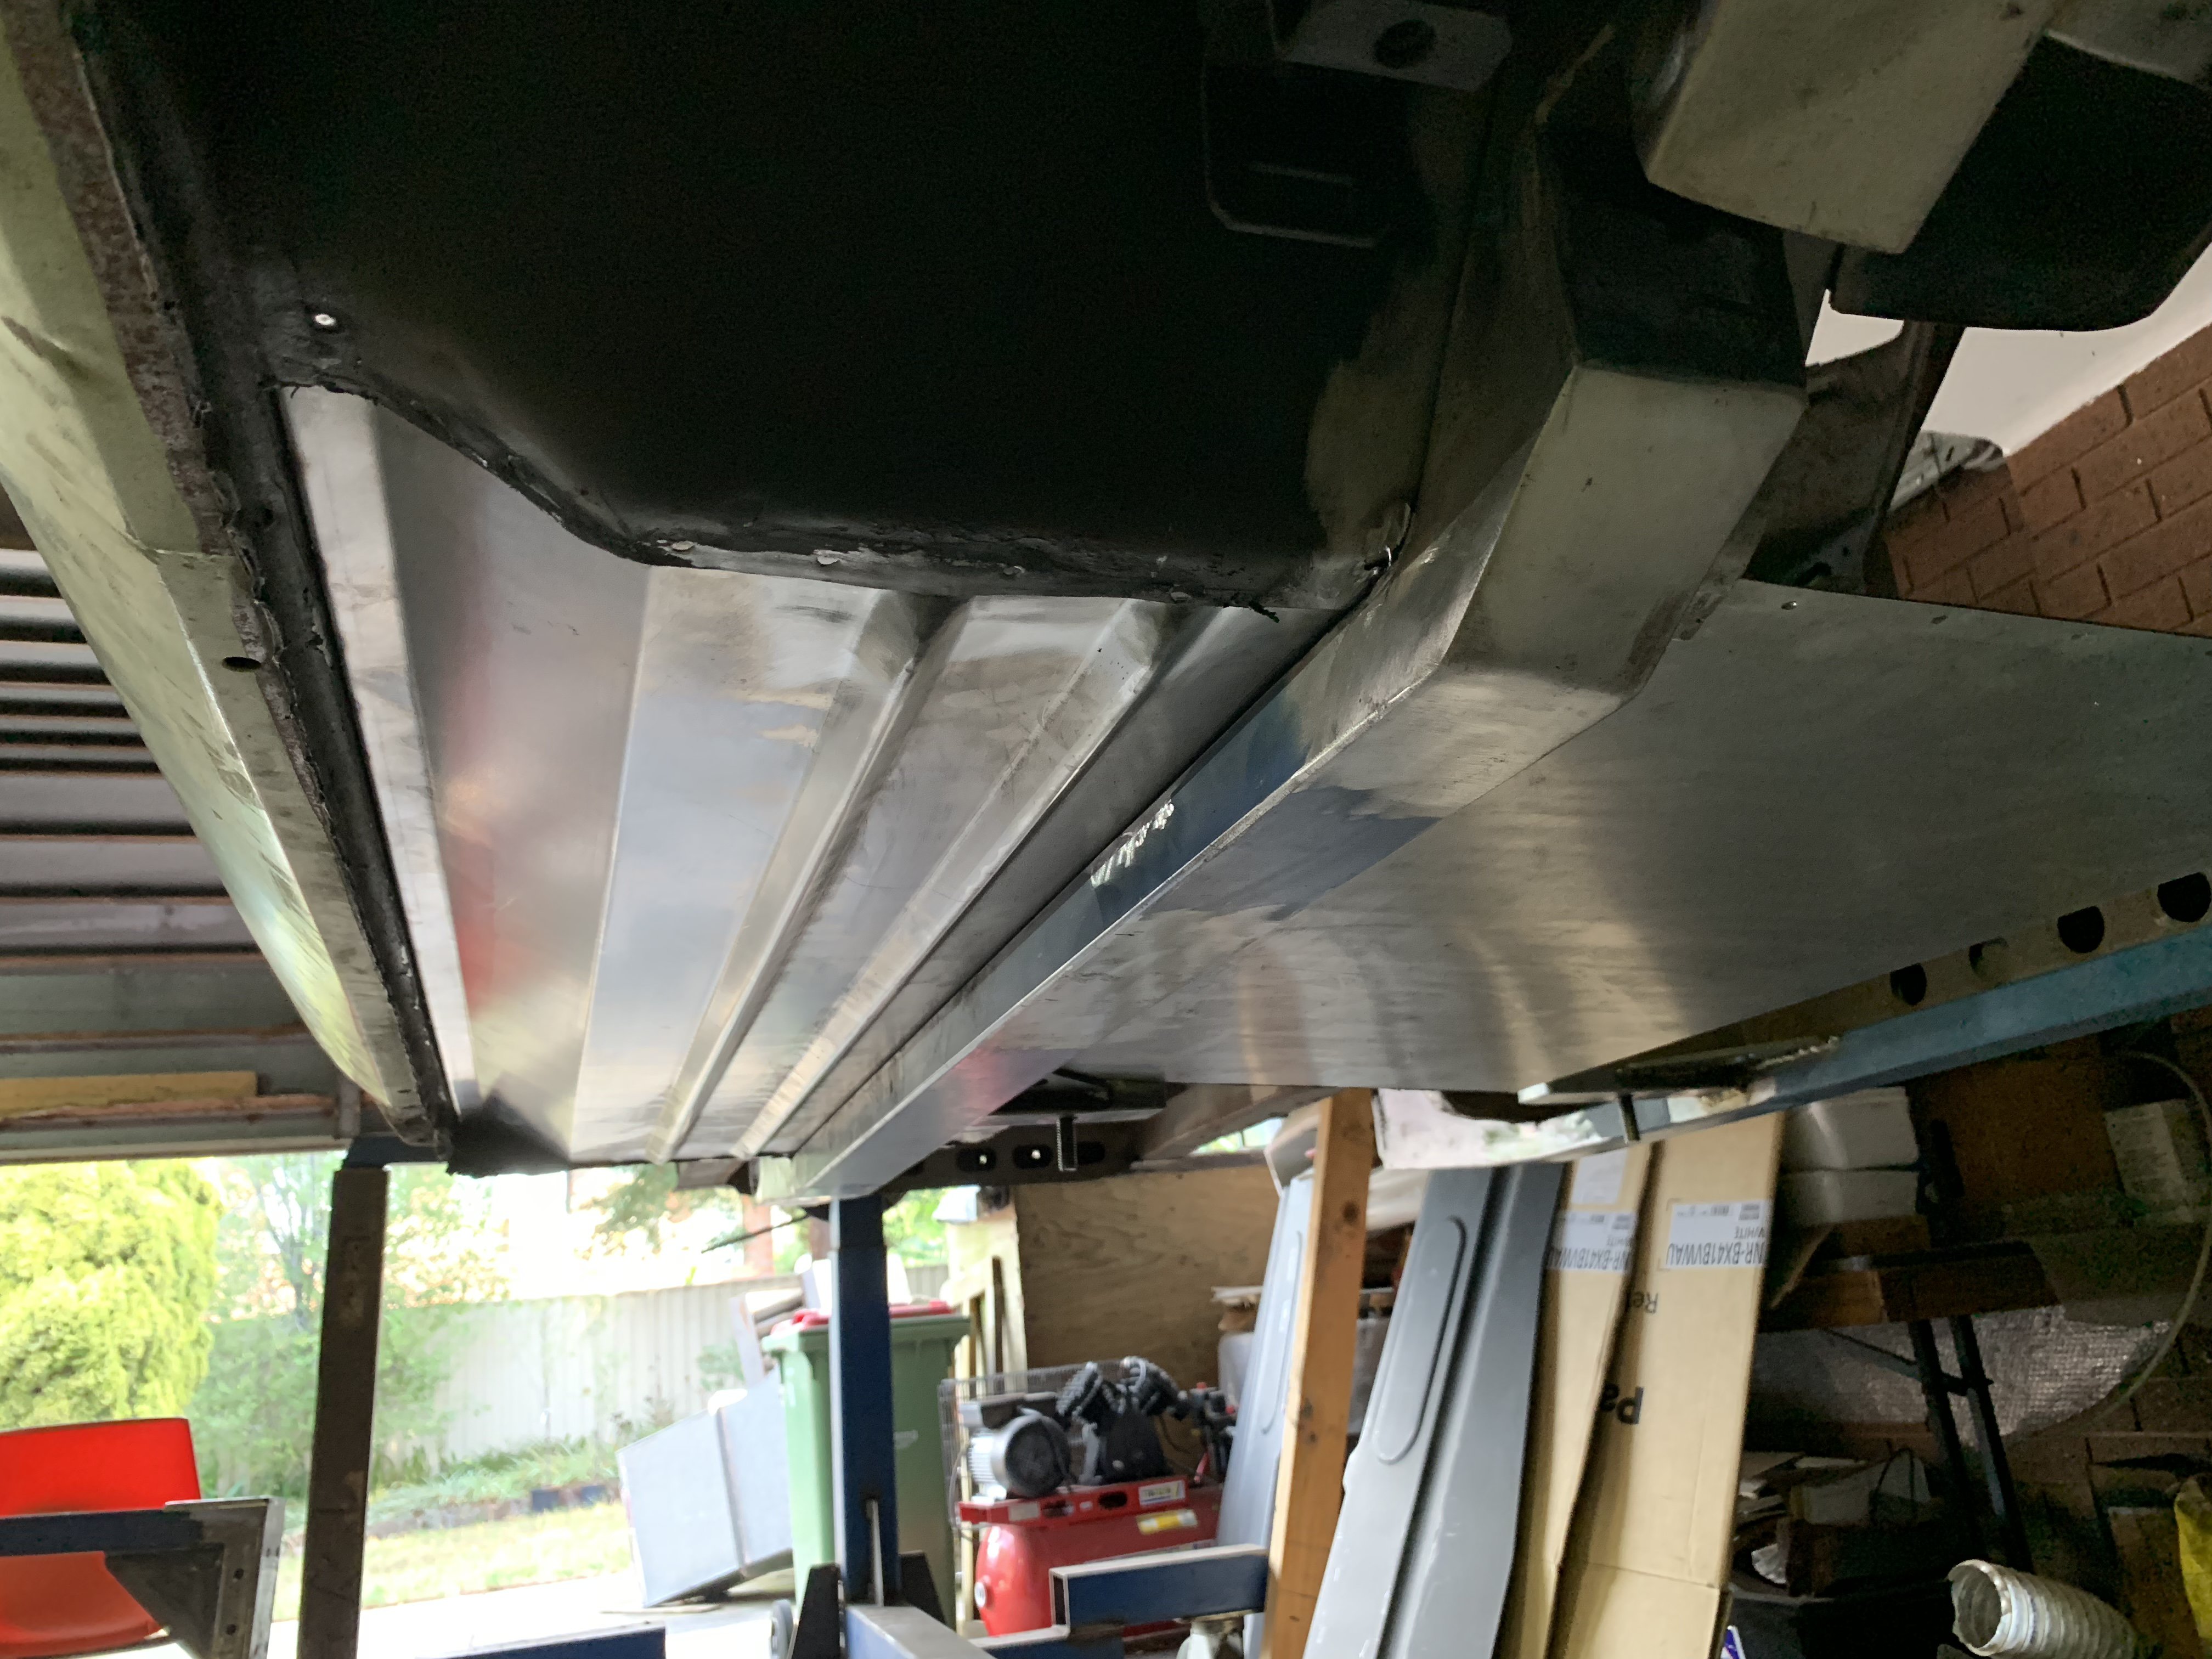
When necessity is the mother of invention Core of the tank is now complete and can now to move onto all the ancillary pipes and fittings I’m having an alloy surge tank fabricated to sit inside one of the storage bins then route fuel and vapor lines between the 2 within an enclosed alloy conduit An alloy bolt down lid will be made for the main tank where I’ve provisioned the access hatch and on which the pump filter etc will hang off for the main tank I still have to weld in a filler neck and breather to the main tank to the vapor tank also Then finally a round alloy plate will go over the top of the tank to seal it off from the interior and meet certification requirements
-
Sirpents 260Z / C32 AMG Powered RS30 - Australia
Sirpent replied to Sirpent's topic in S30 Series - 240z, 260z, 280z
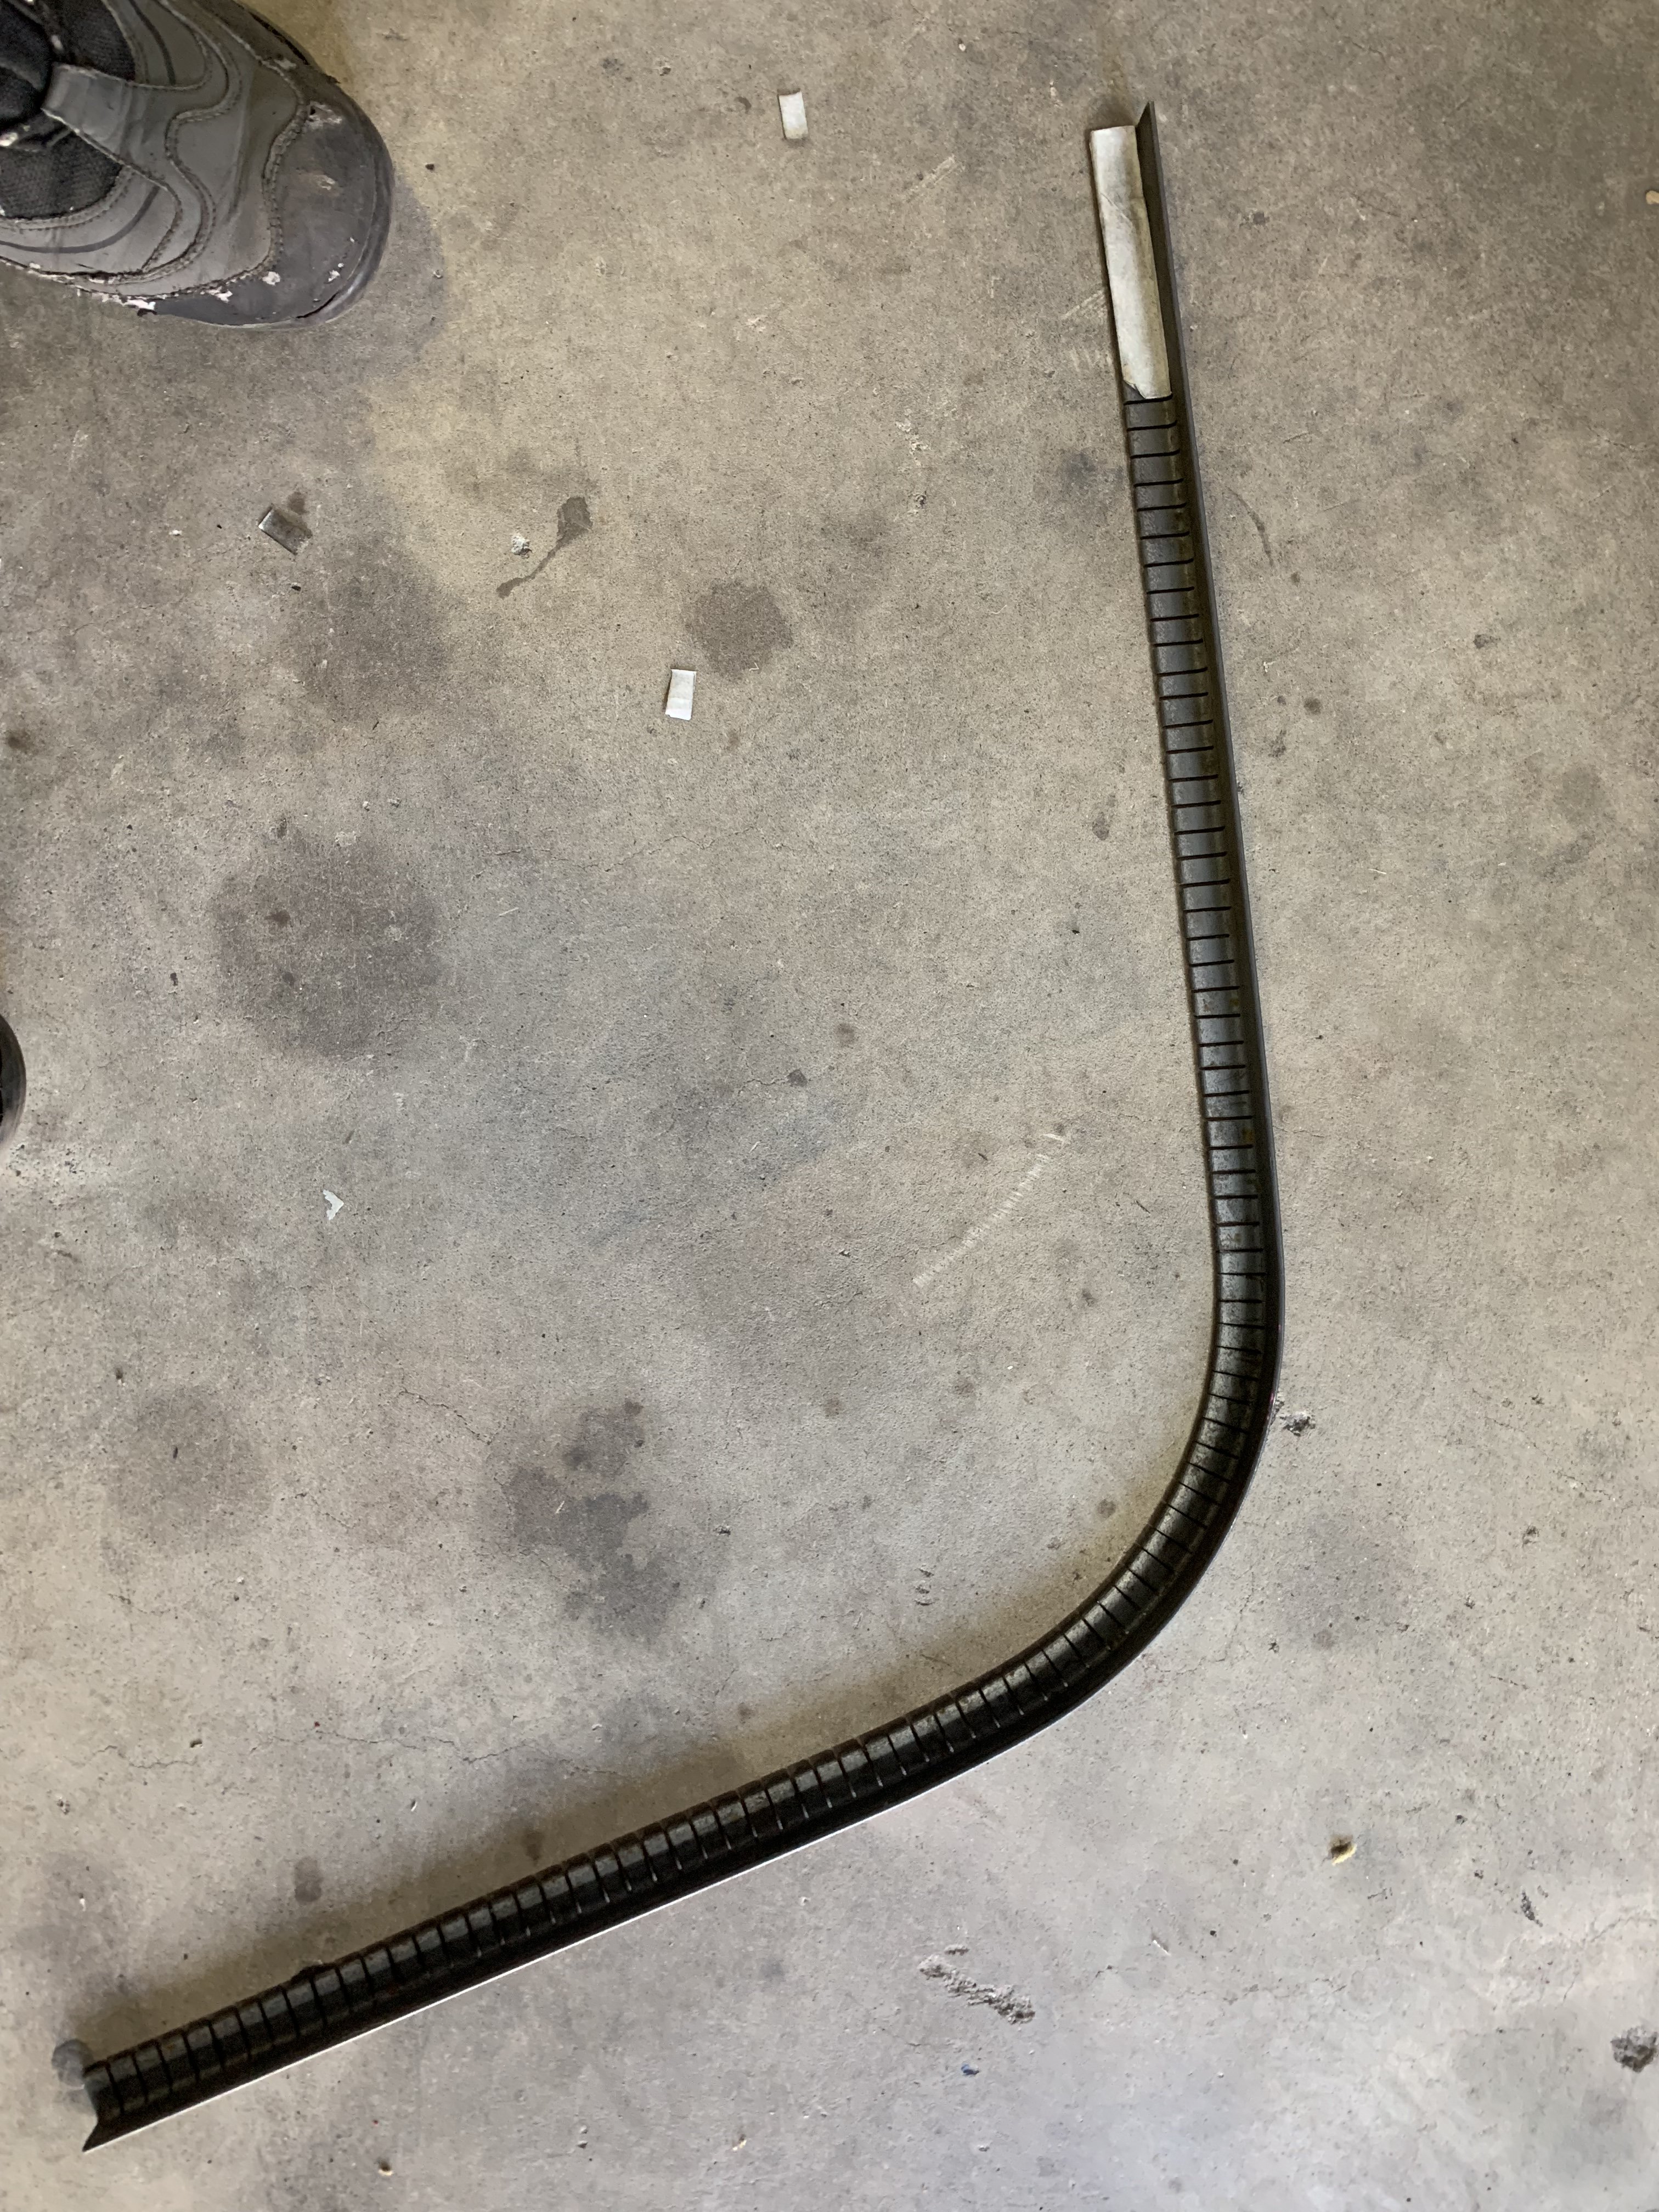
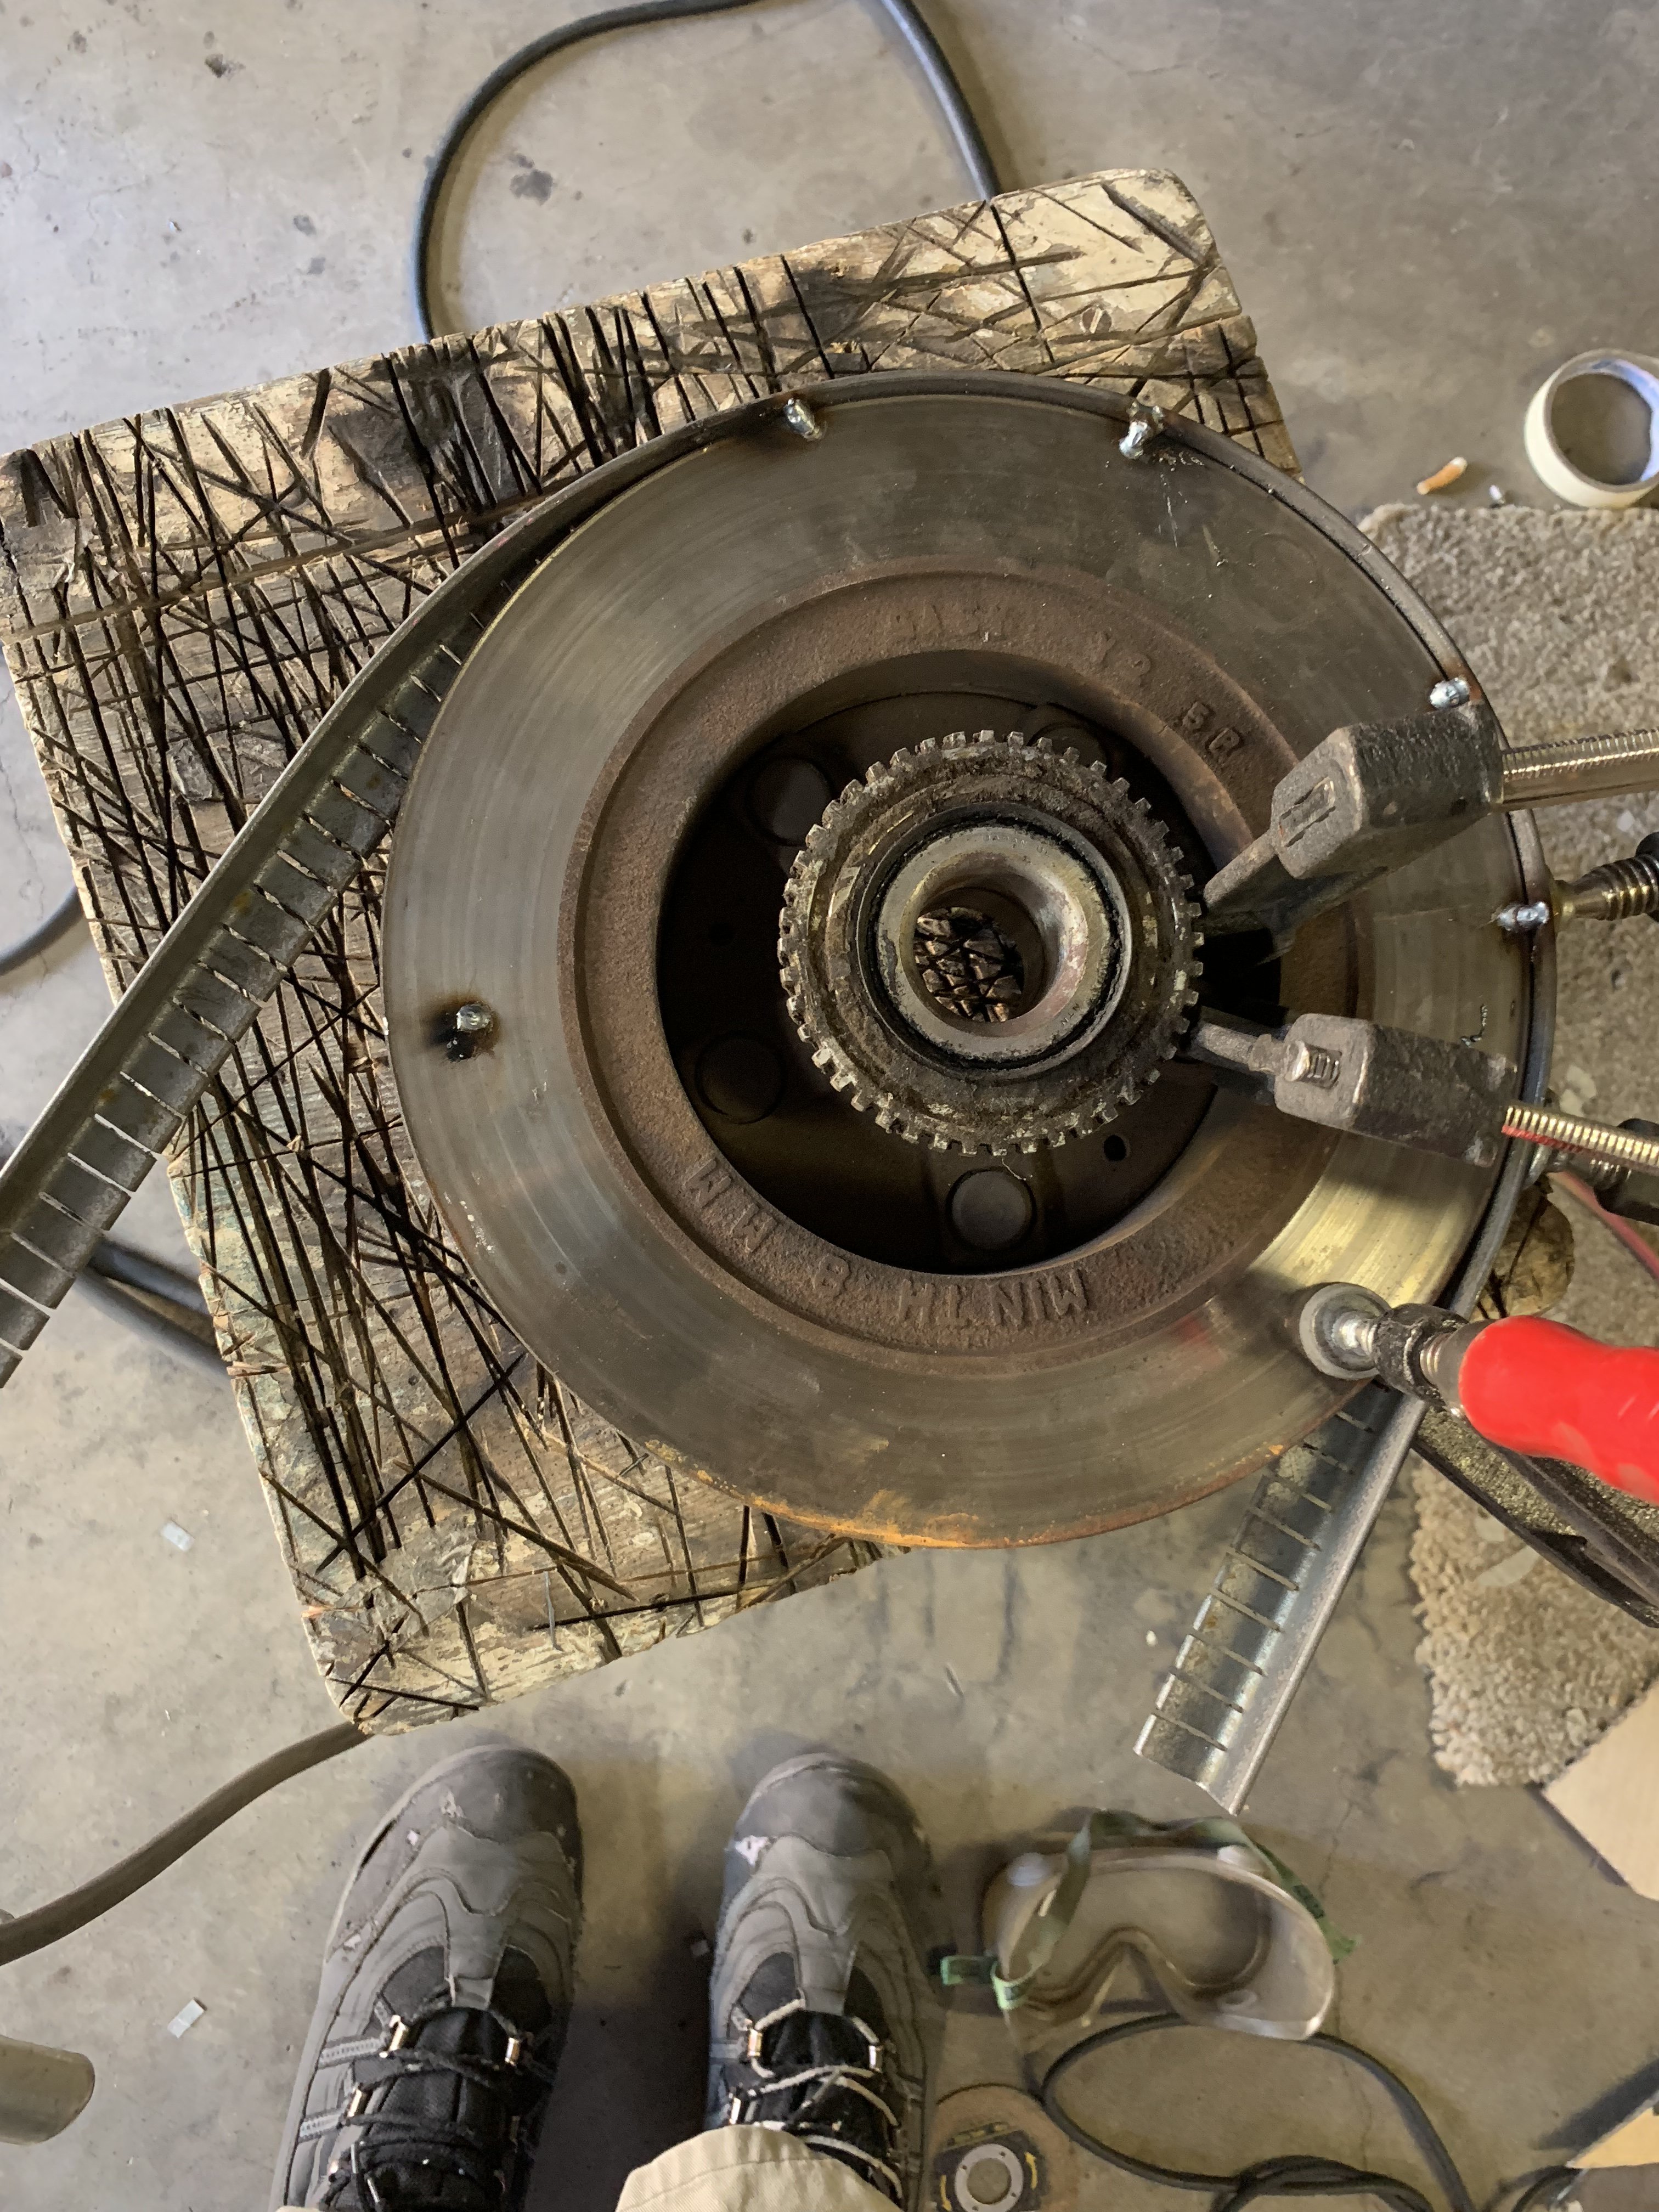
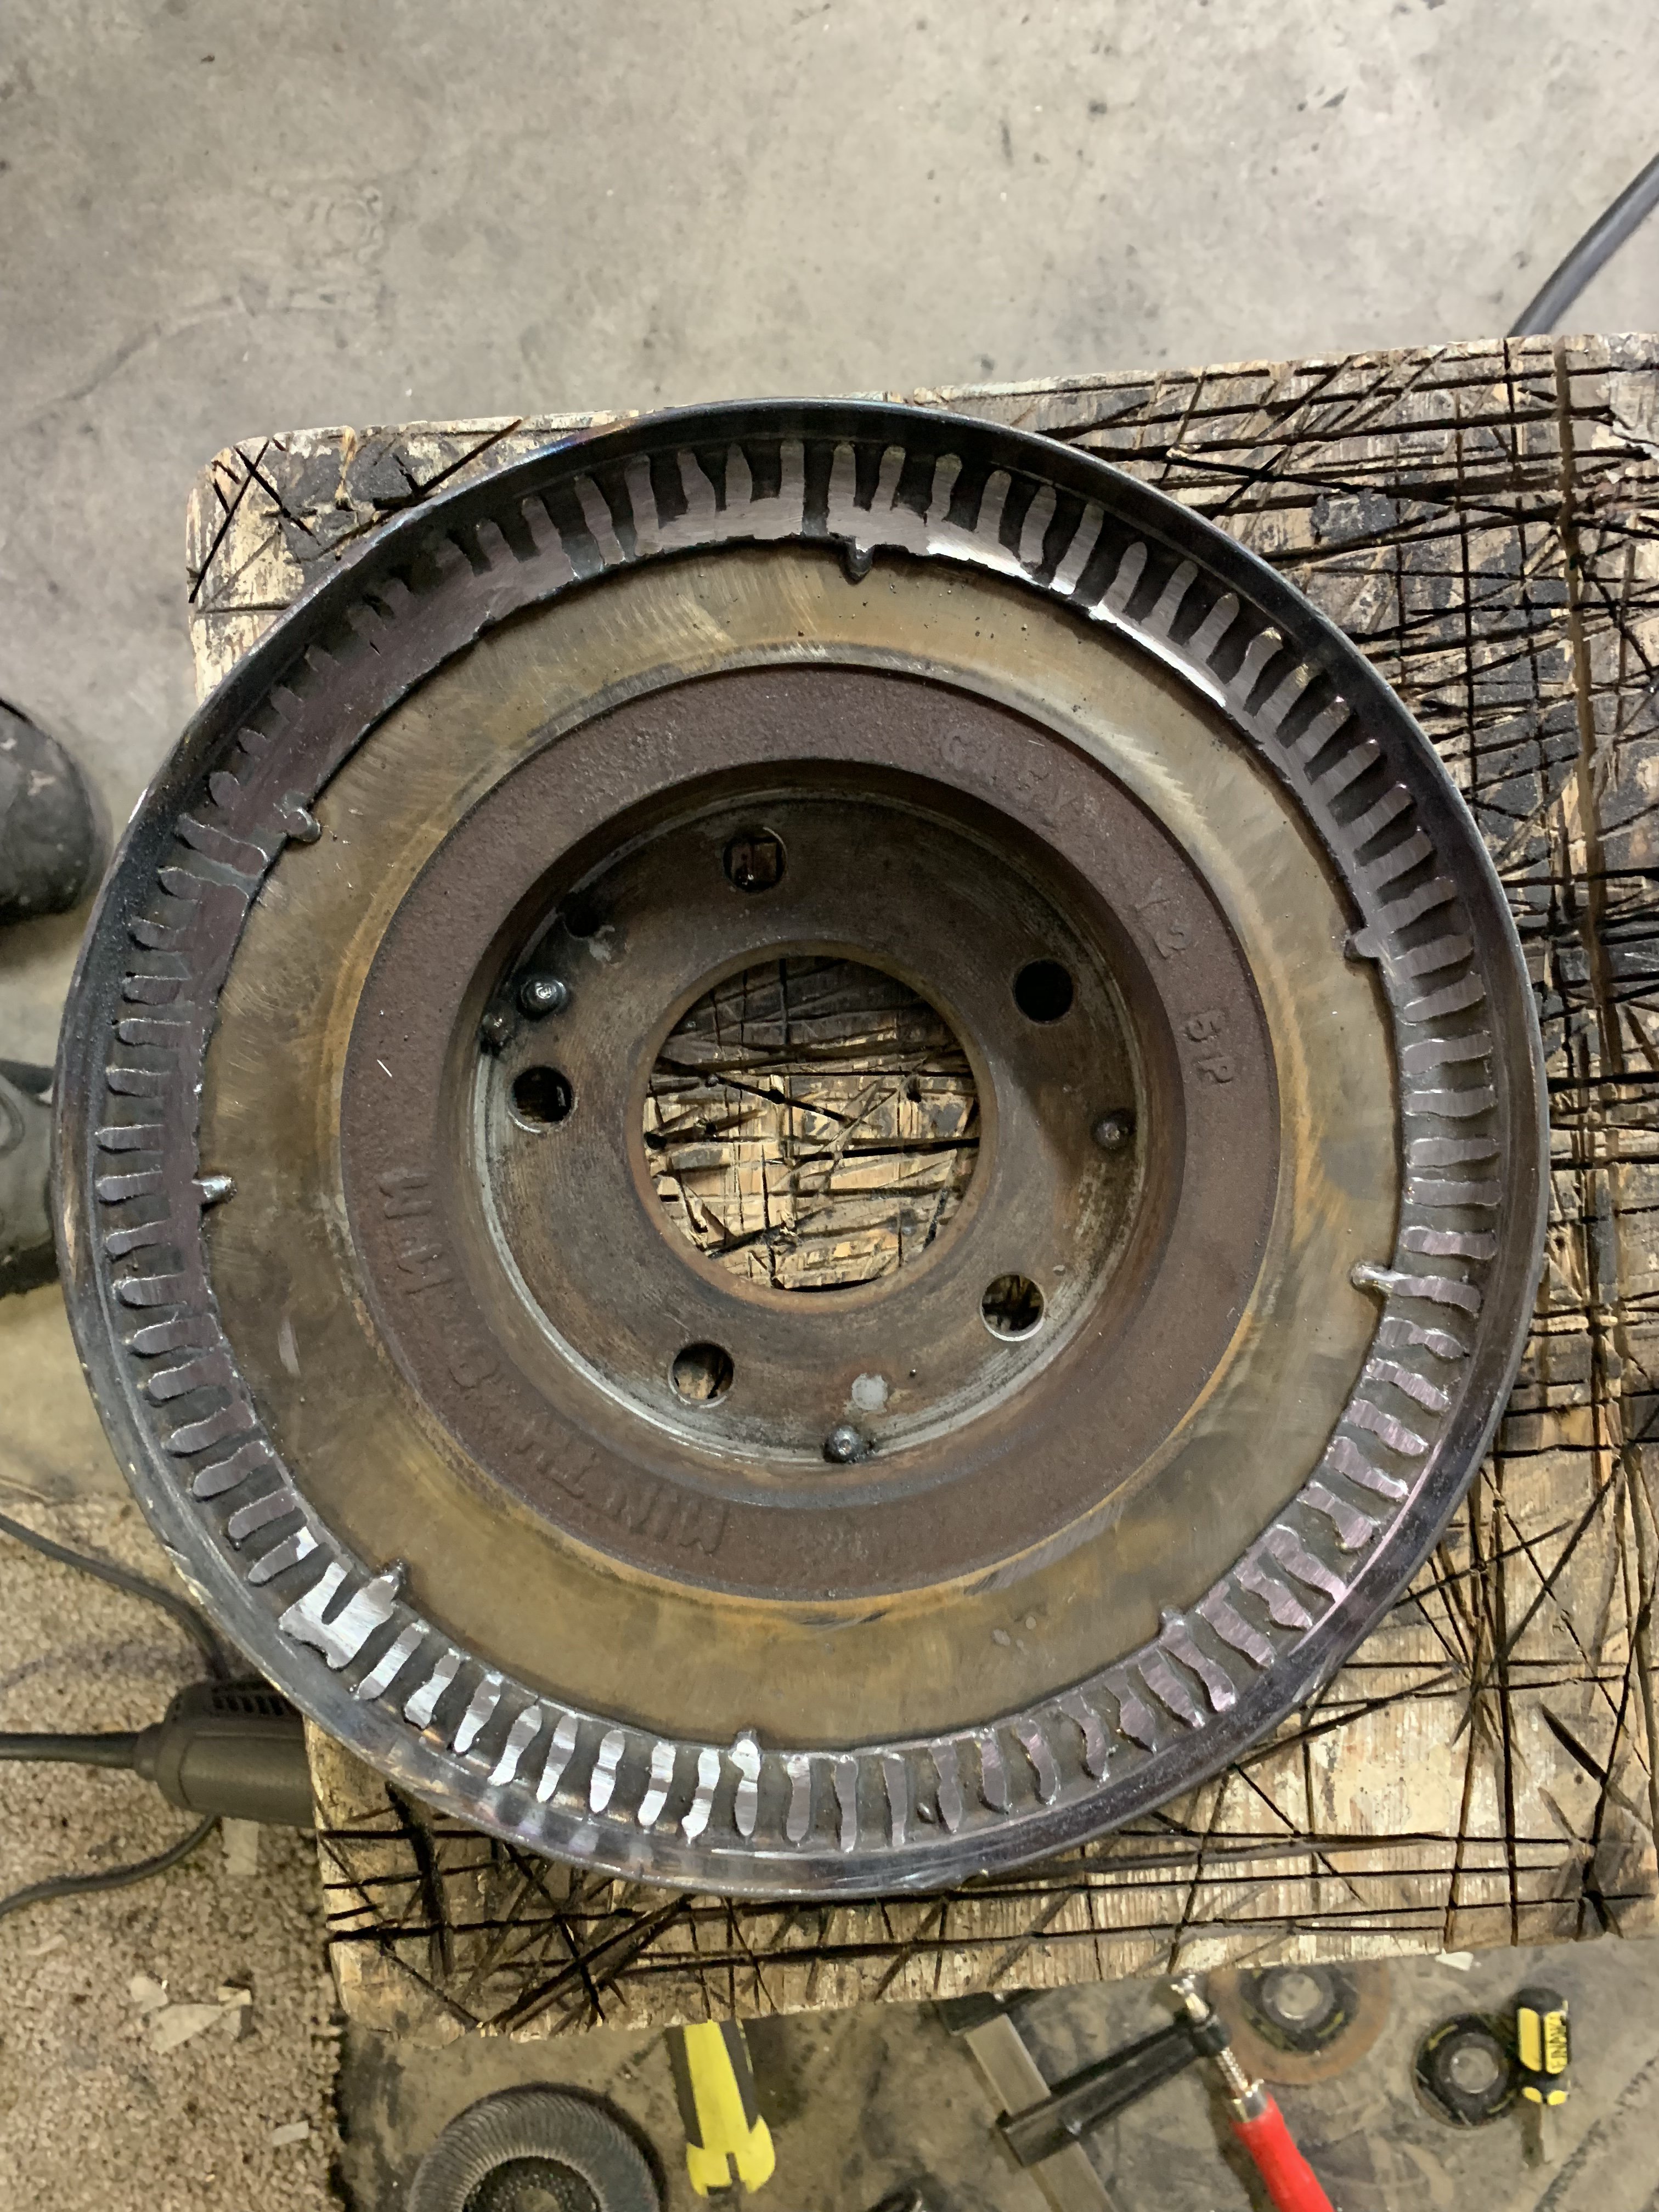
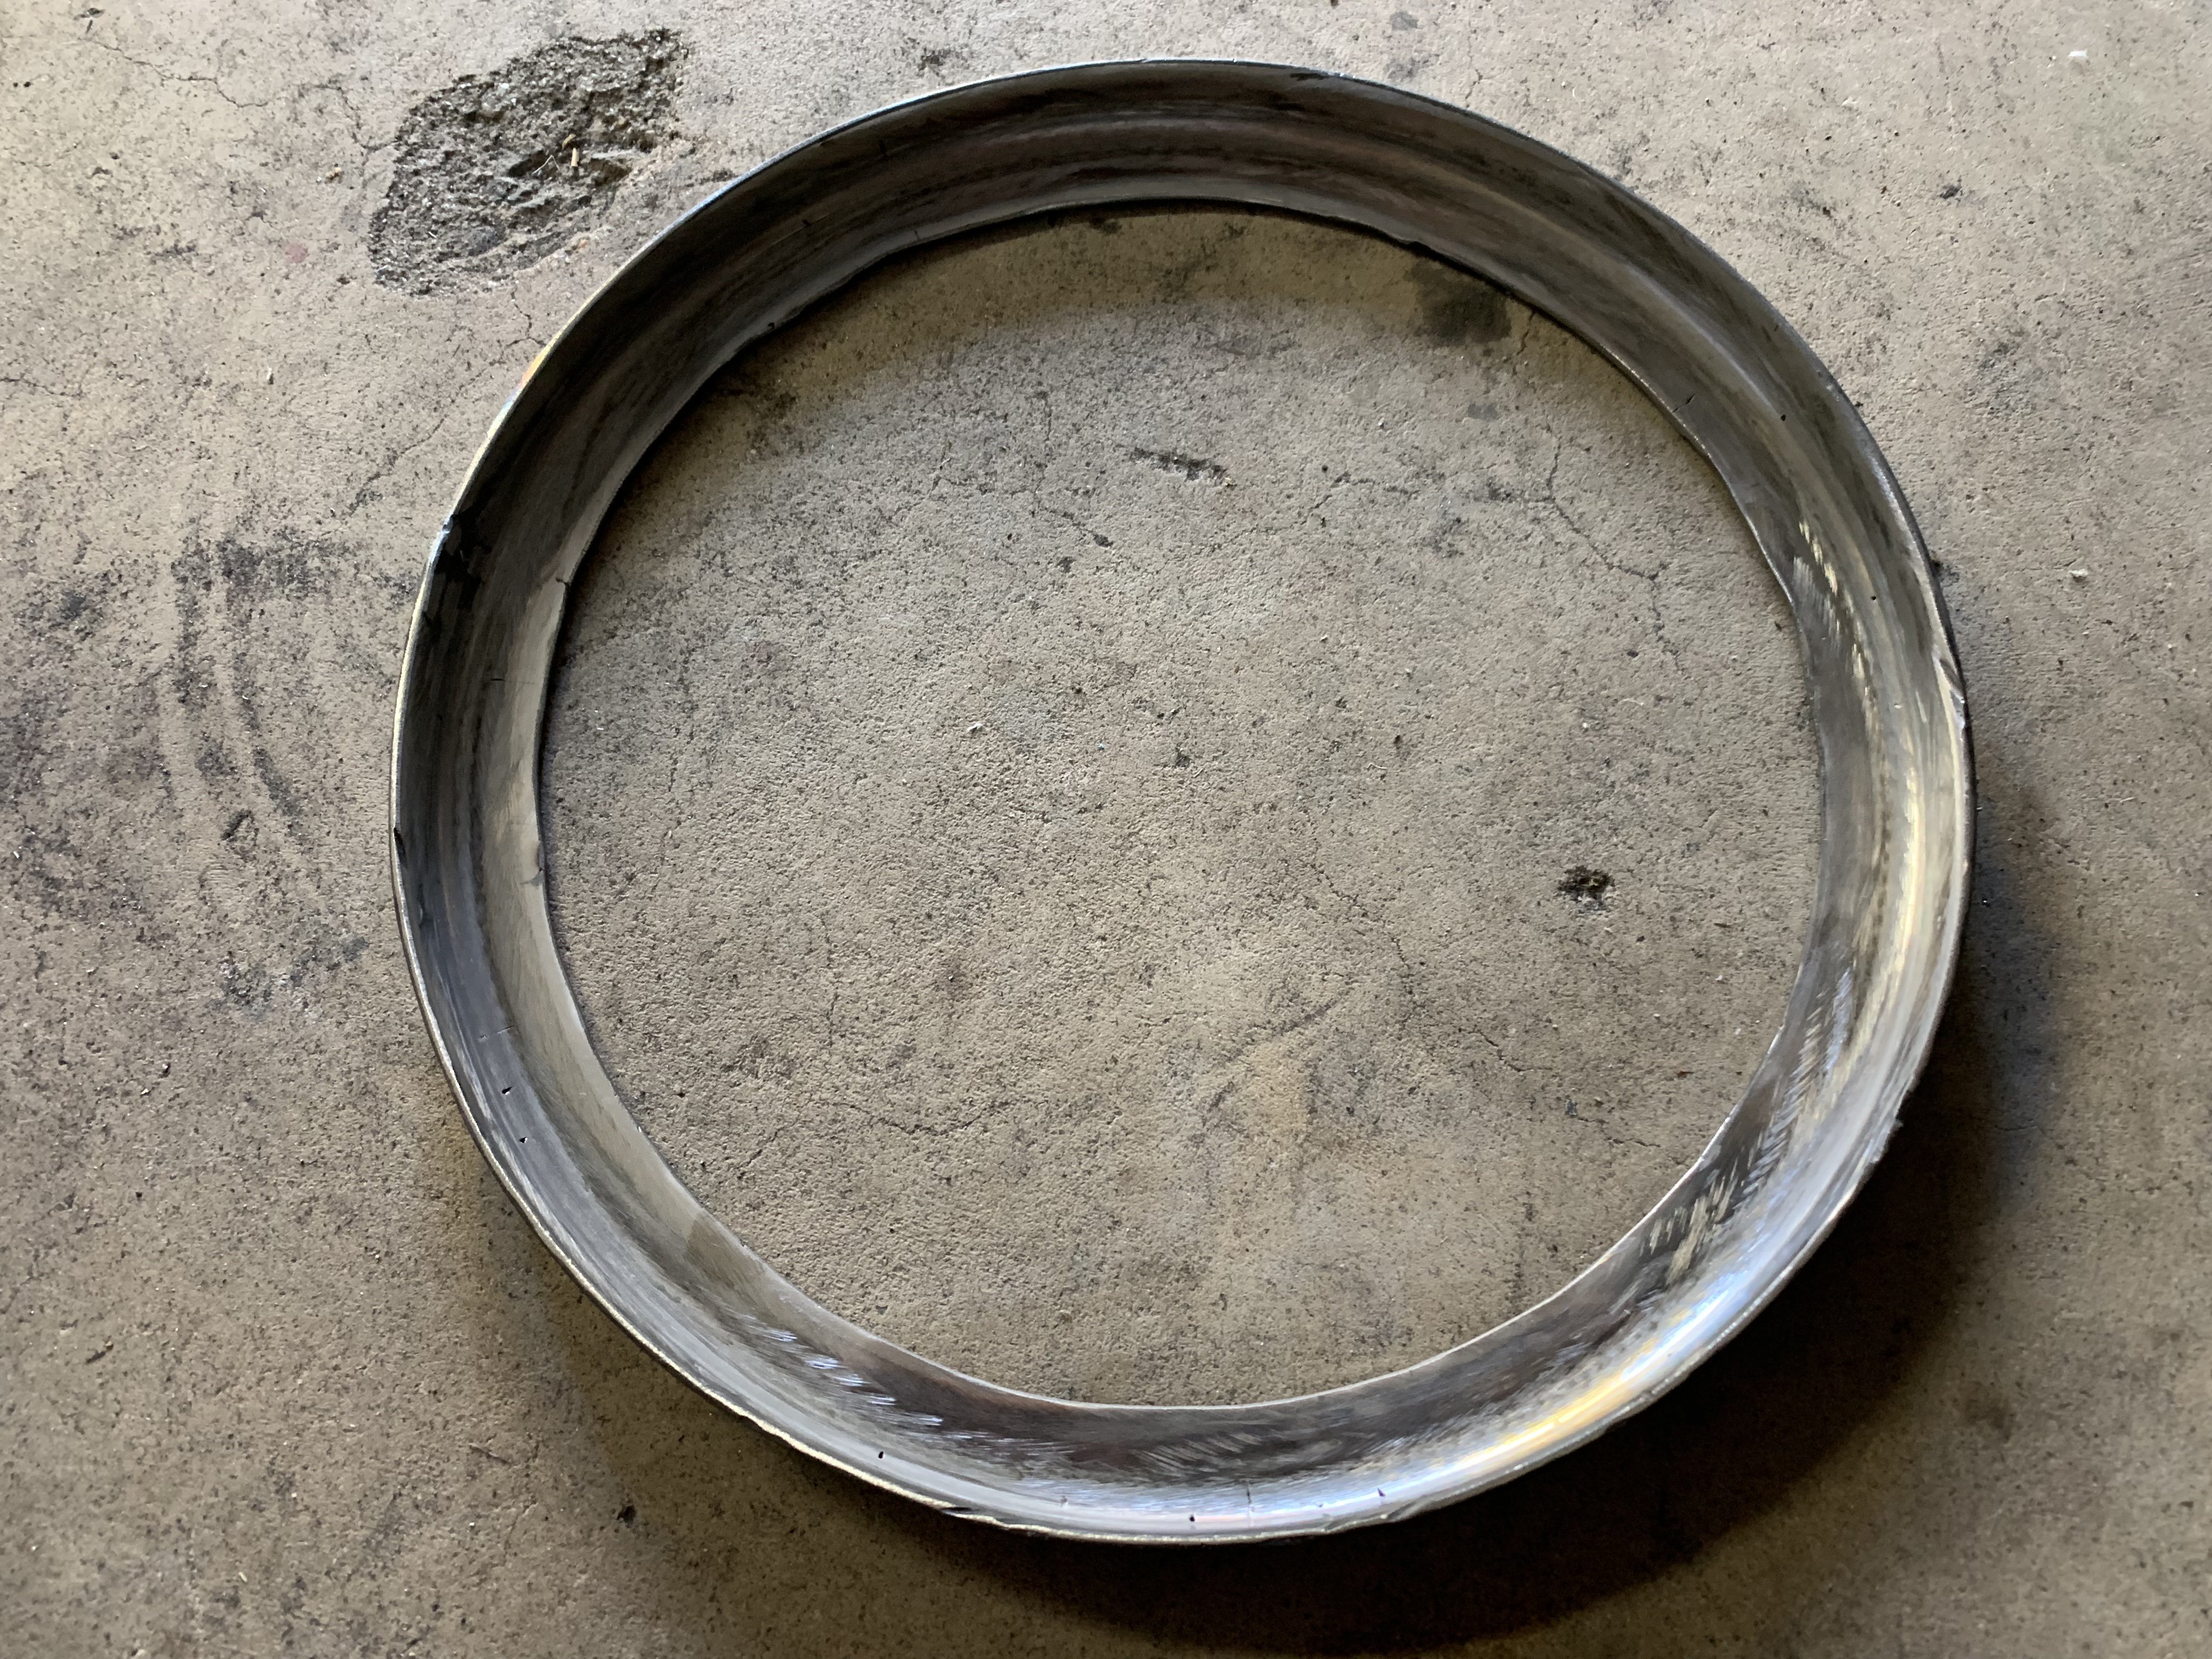
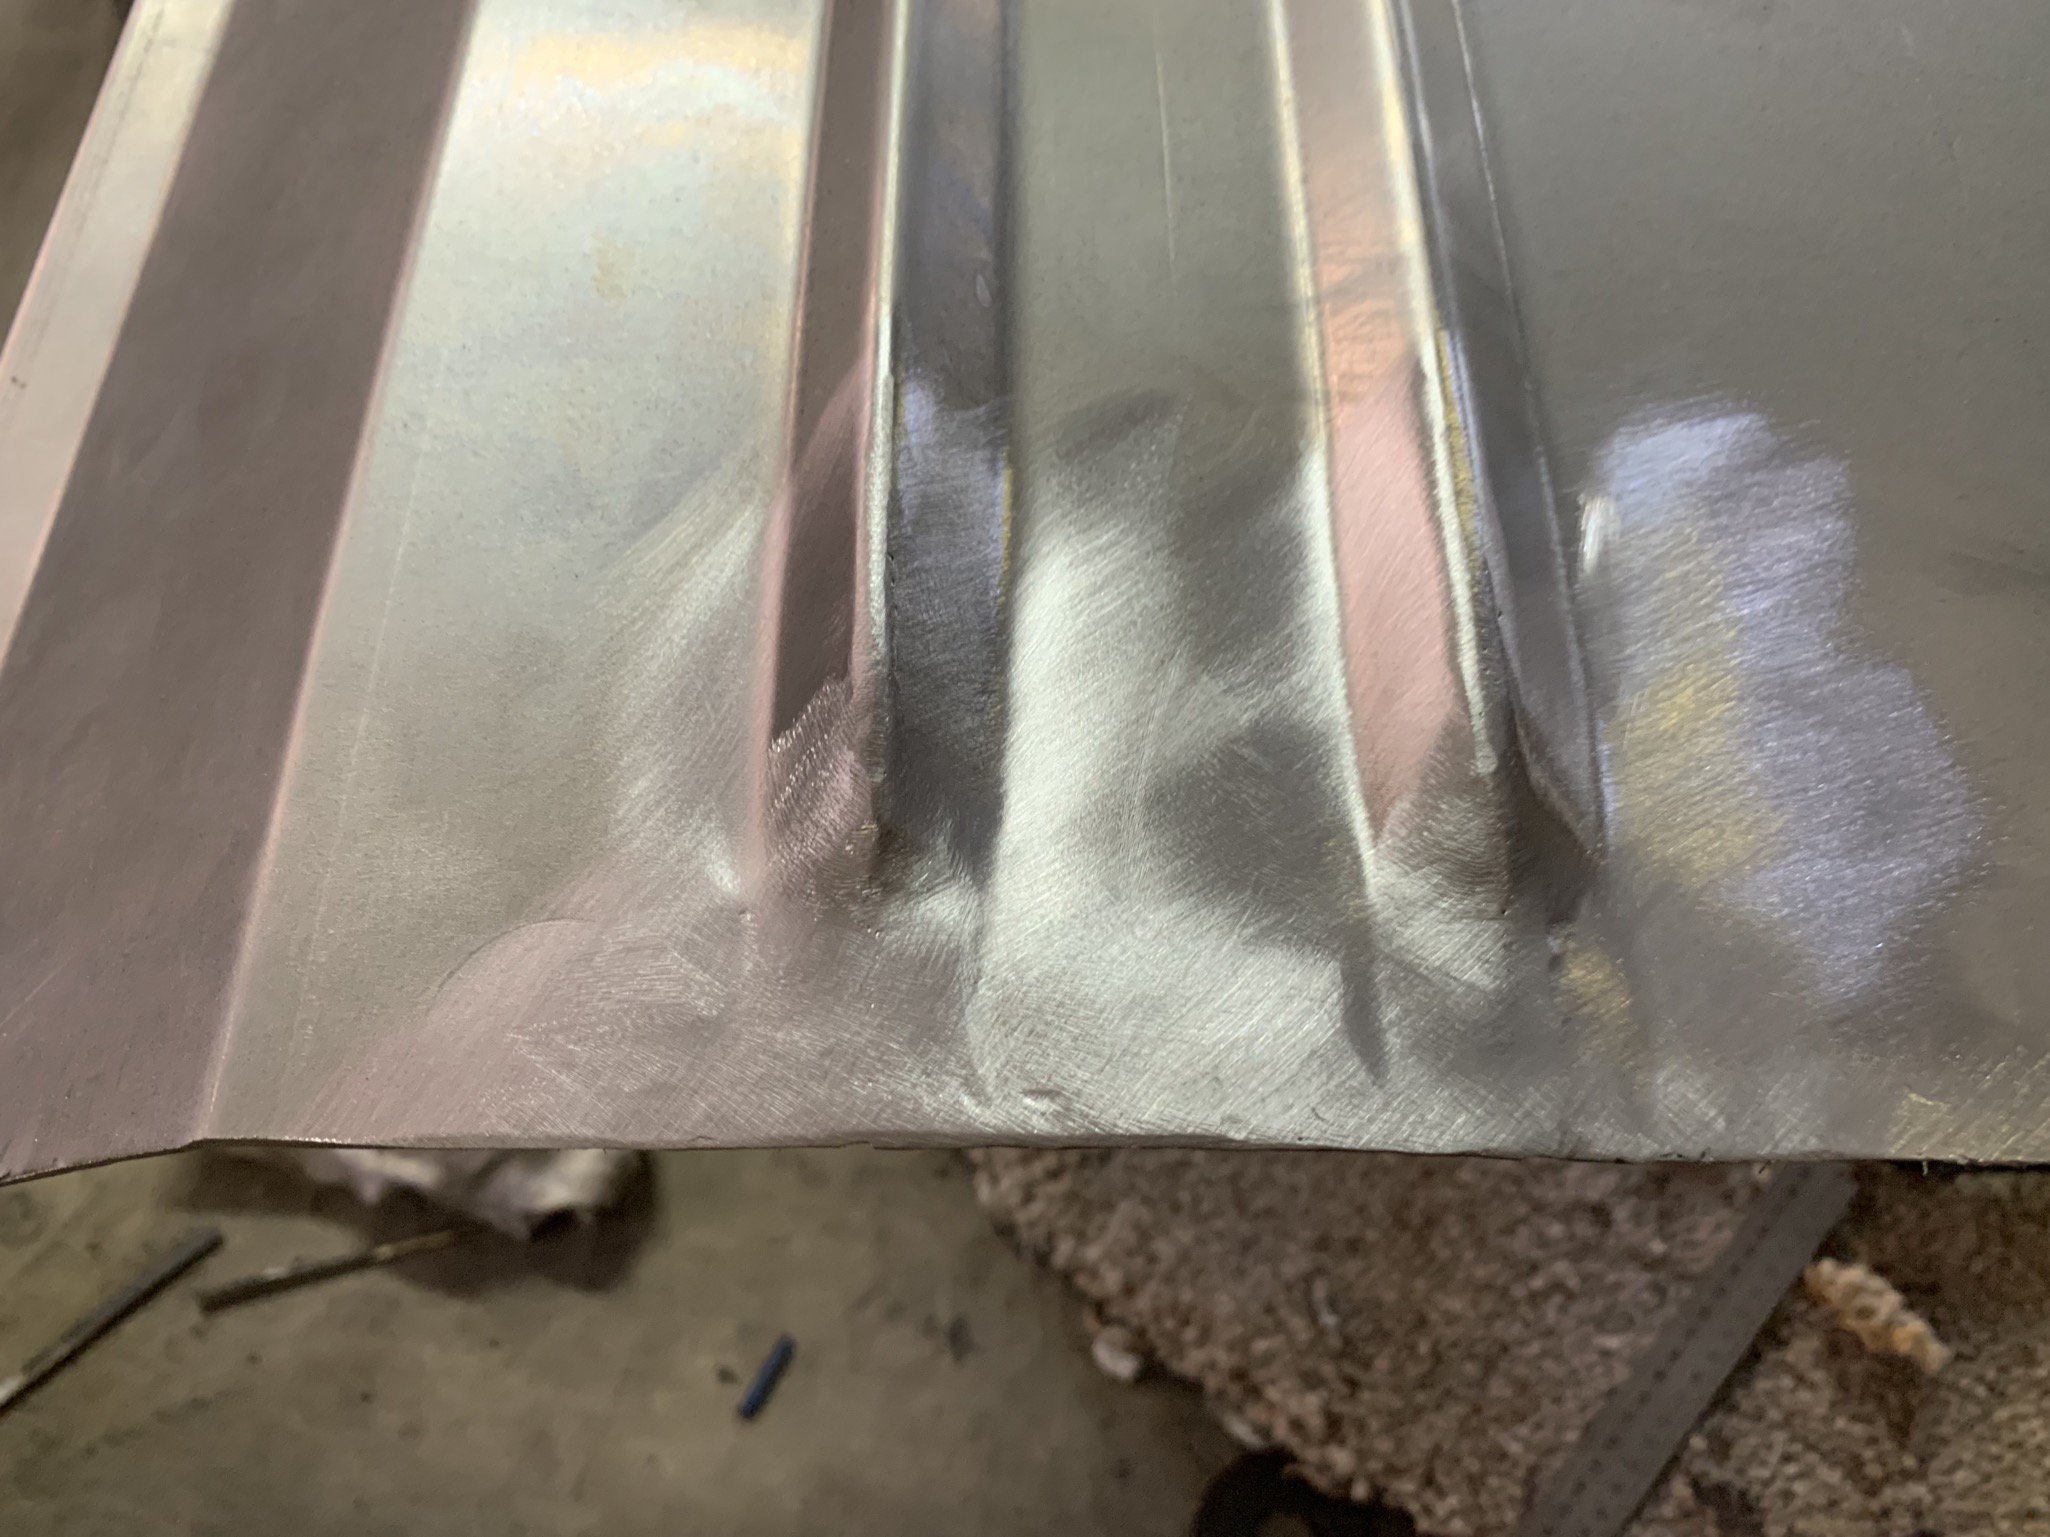
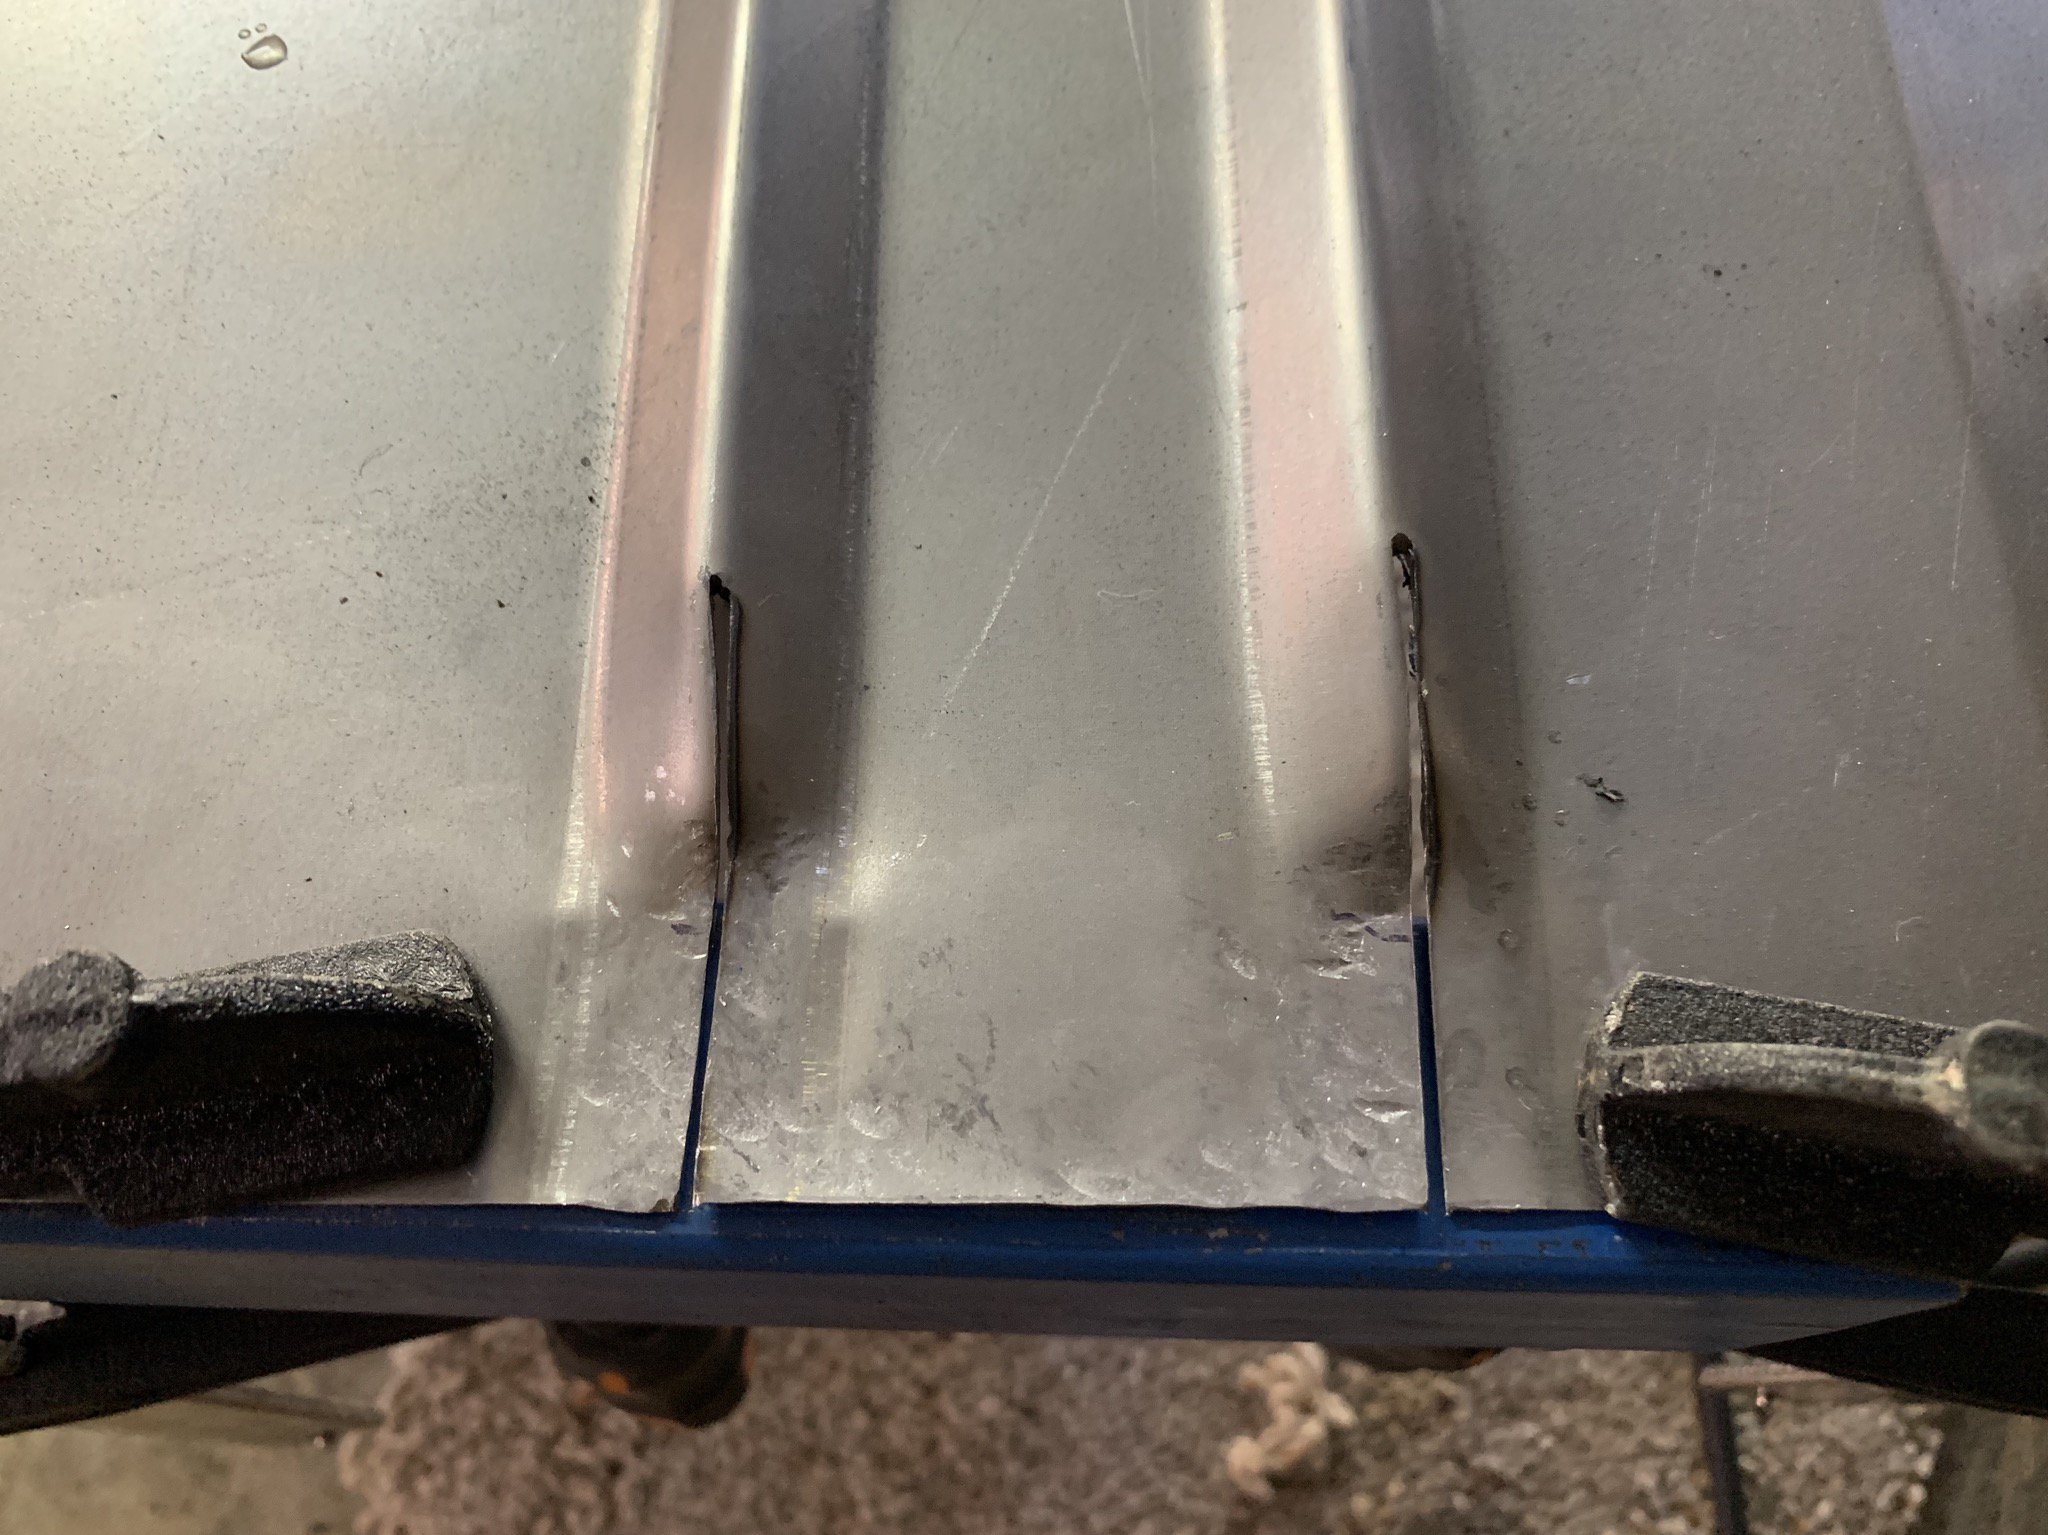
Been a few weeks, unfortunately illness and waiting for John Lange to finish the custom rear control arms have slowed me down So moved onto the rear fuel tank fabrication, using the LPG donut tank as the basis First was chopping 65mm out of the height through the centre aa well as removing the center tube section Then it was a matter of fabricating a centre rise section to clear the spare wheel well hump With the modifications, I’ve worked out it should be between 58-60 litres plus another 8-10 in the additional surge tank All in all so far a perfect fit See you all next week
-
Sirpents 260Z / C32 AMG Powered RS30 - Australia
Sirpent replied to Sirpent's topic in S30 Series - 240z, 260z, 280z
Moving ahead
-
Sirpents 260Z / C32 AMG Powered RS30 - Australia
Sirpent replied to Sirpent's topic in S30 Series - 240z, 260z, 280z
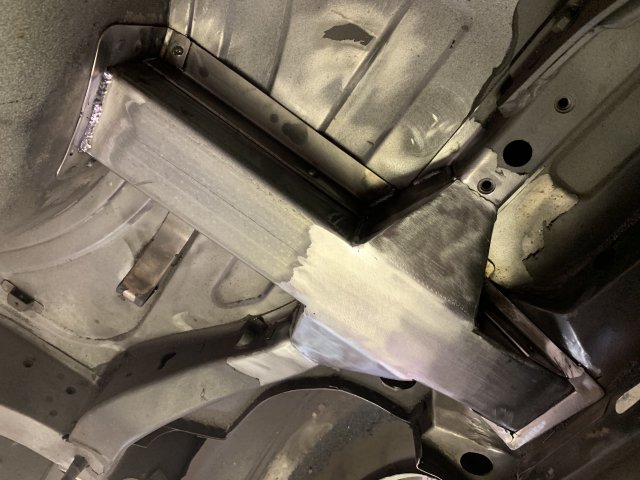
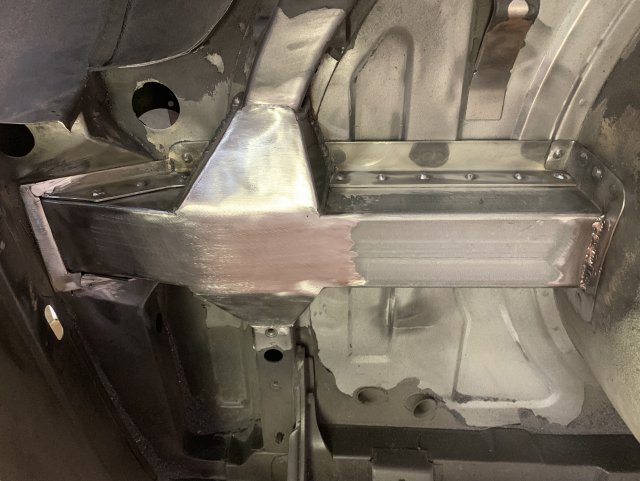
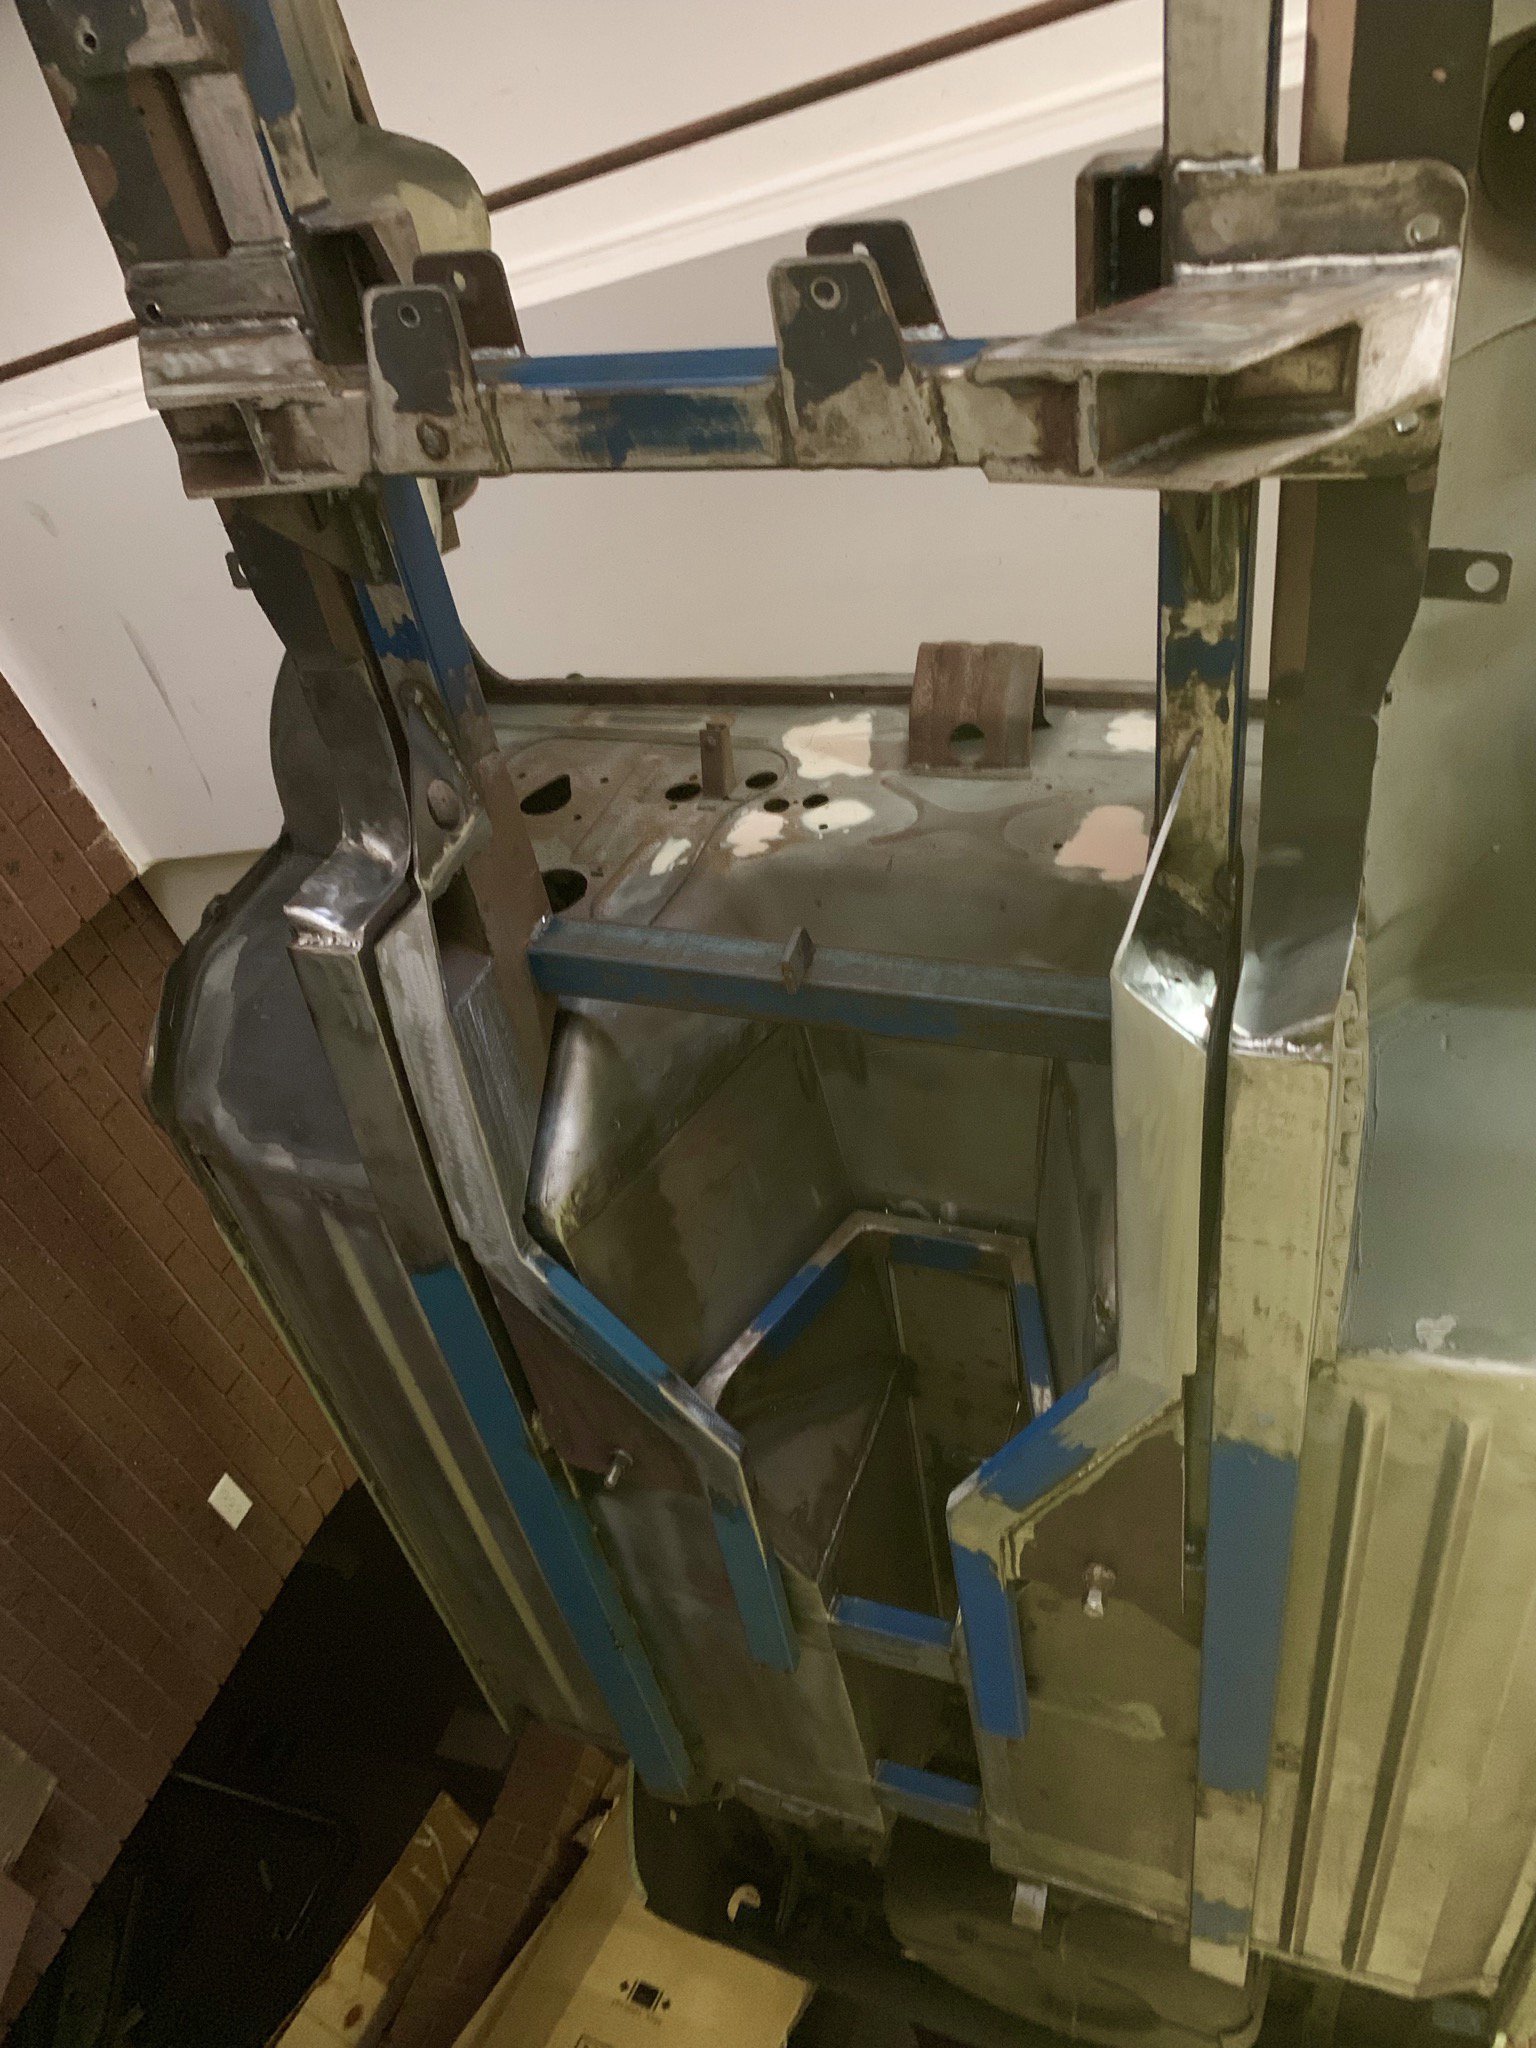
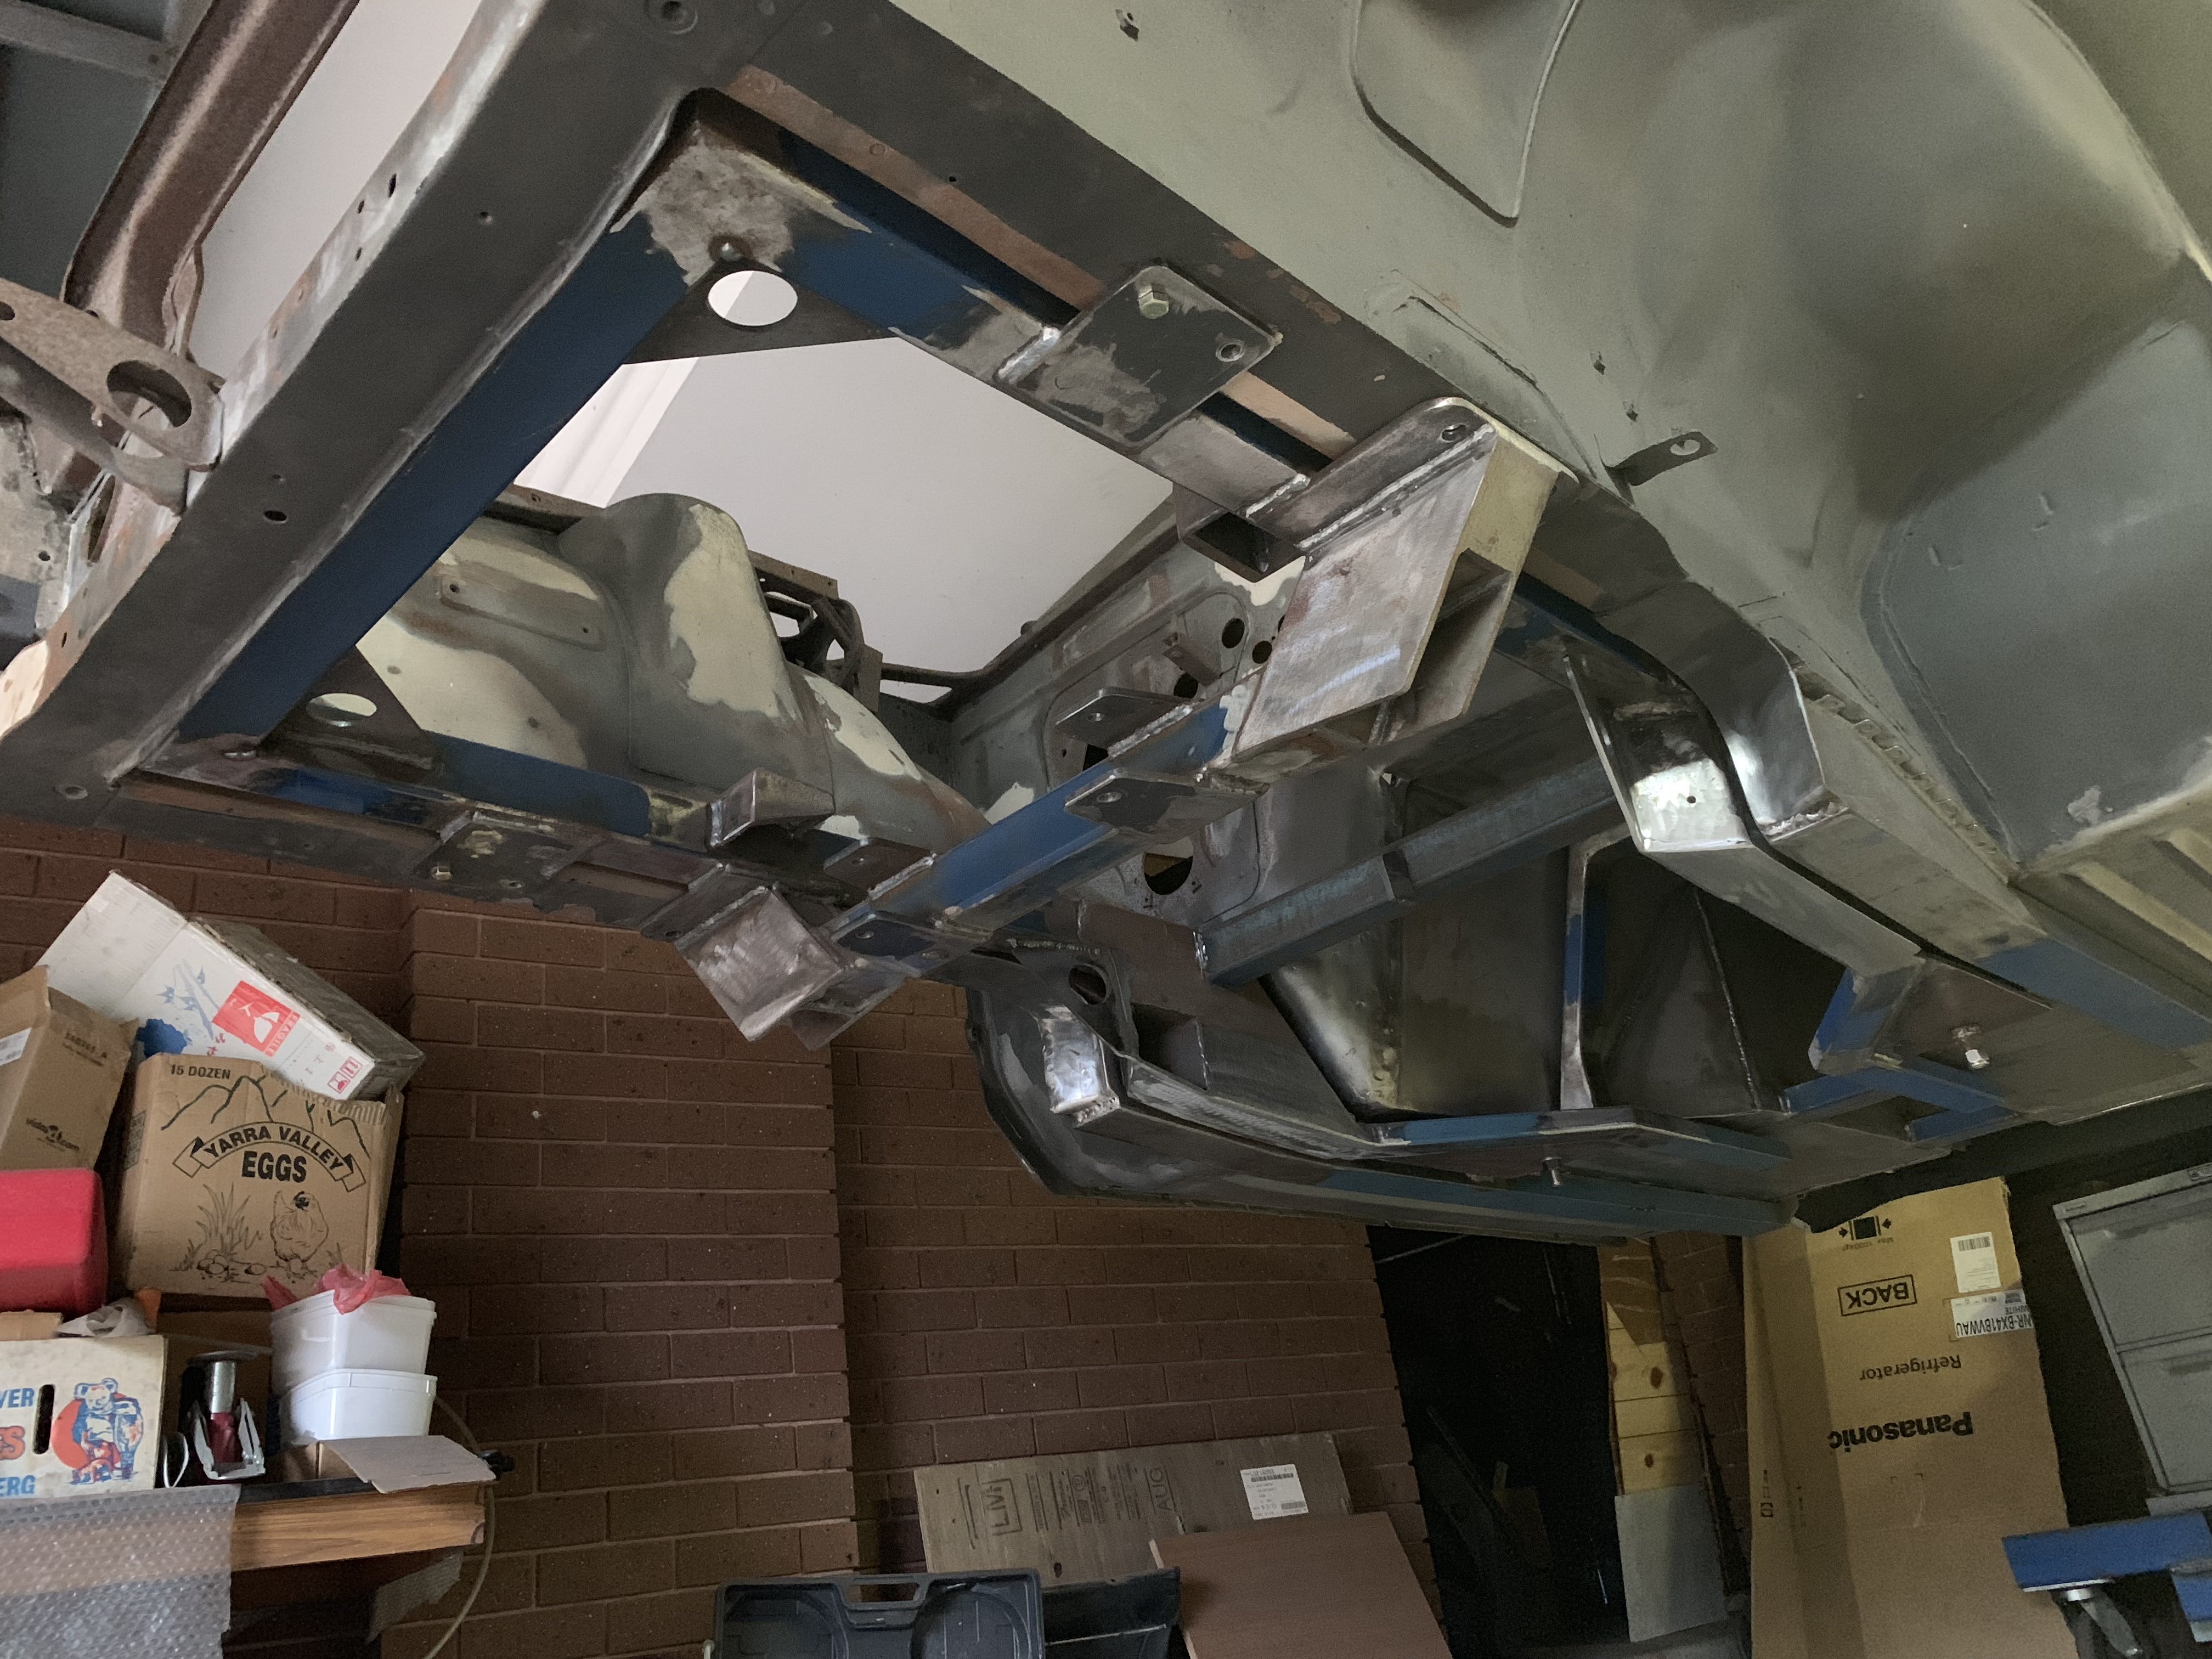
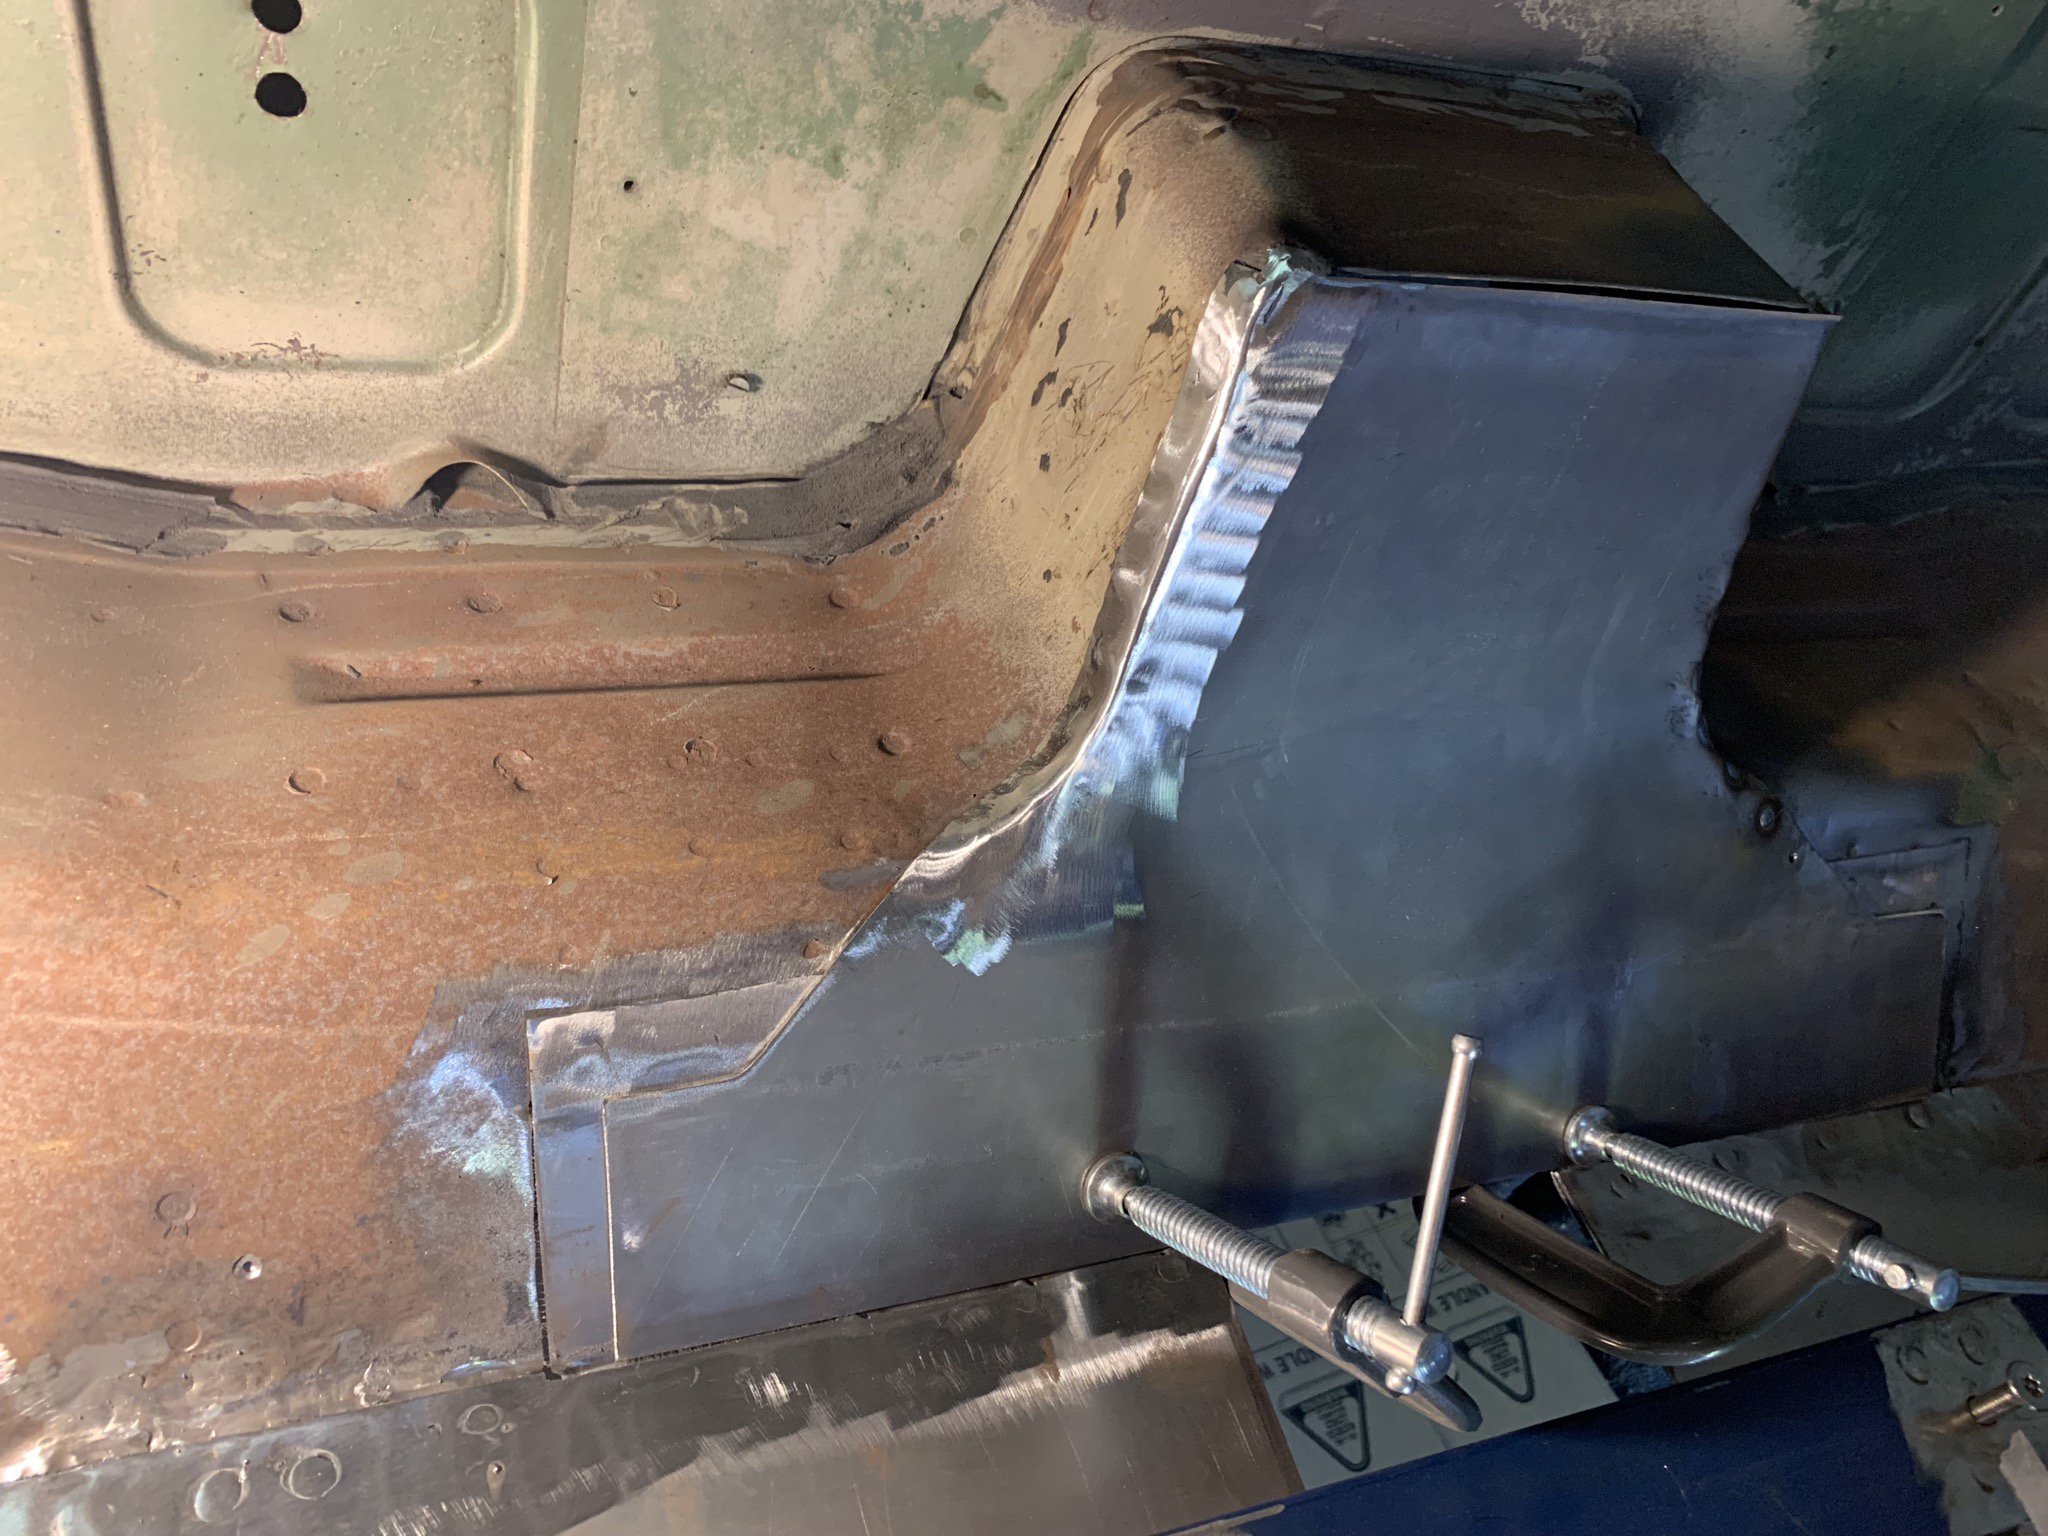
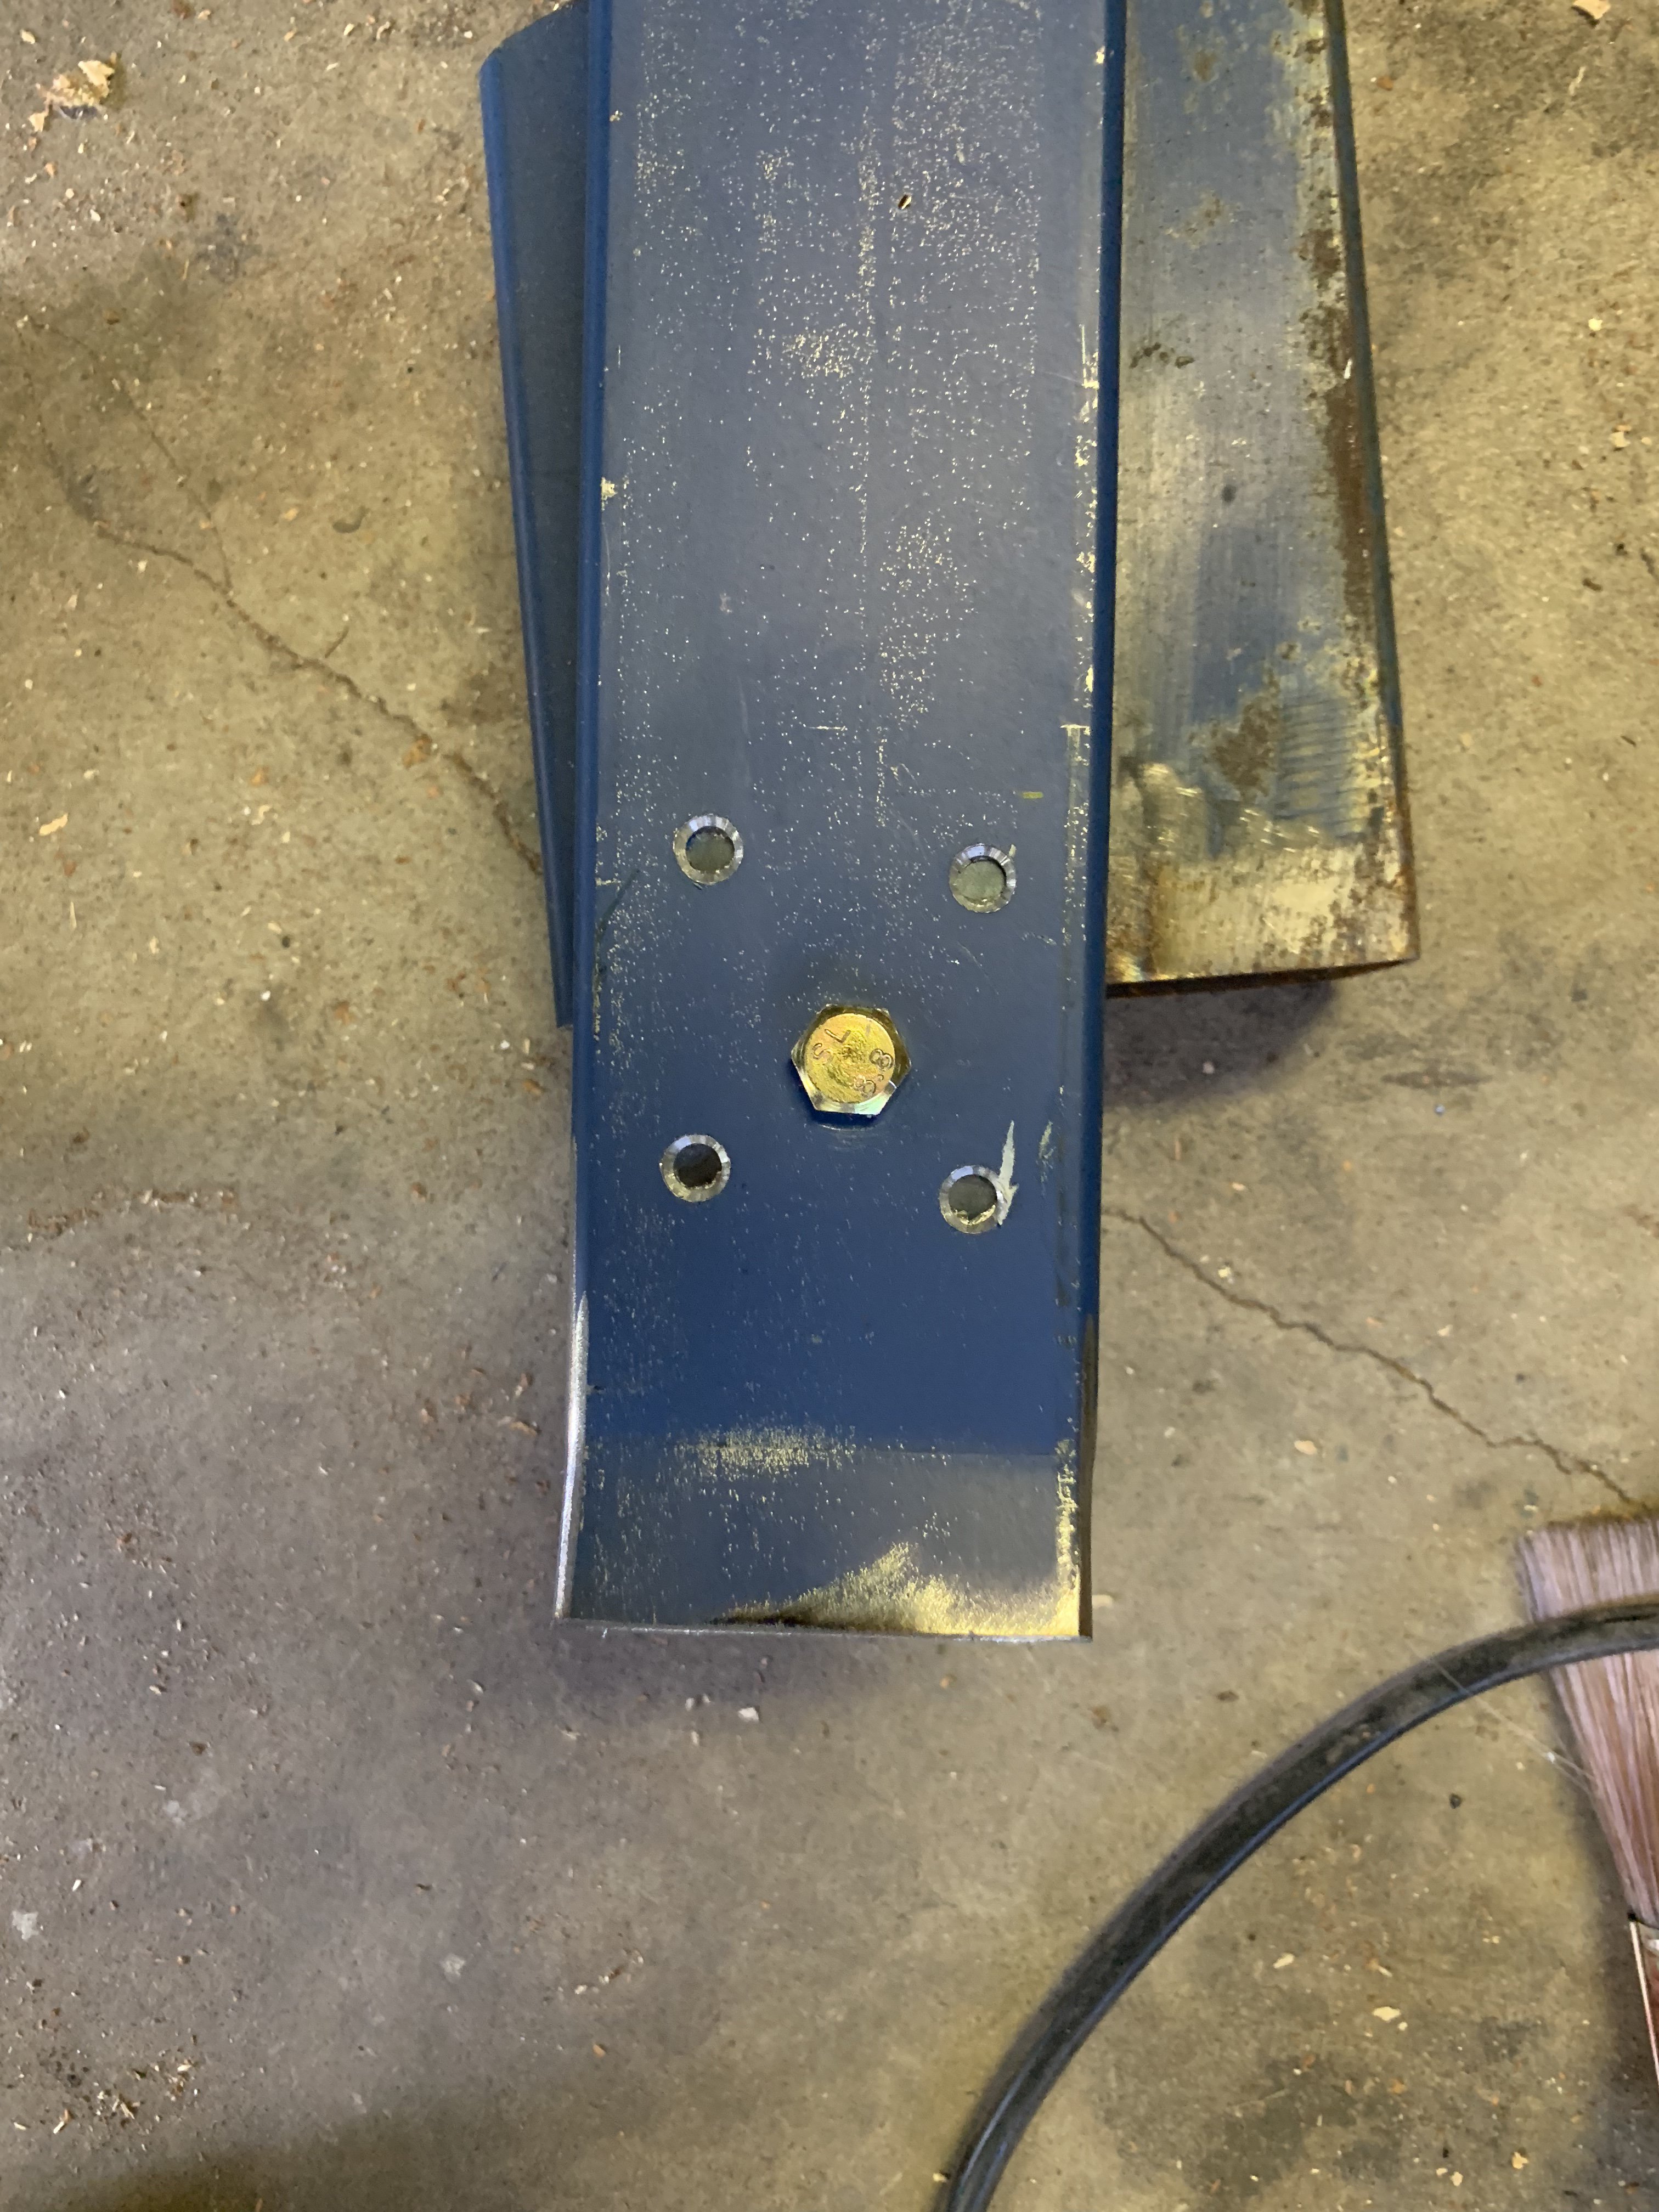
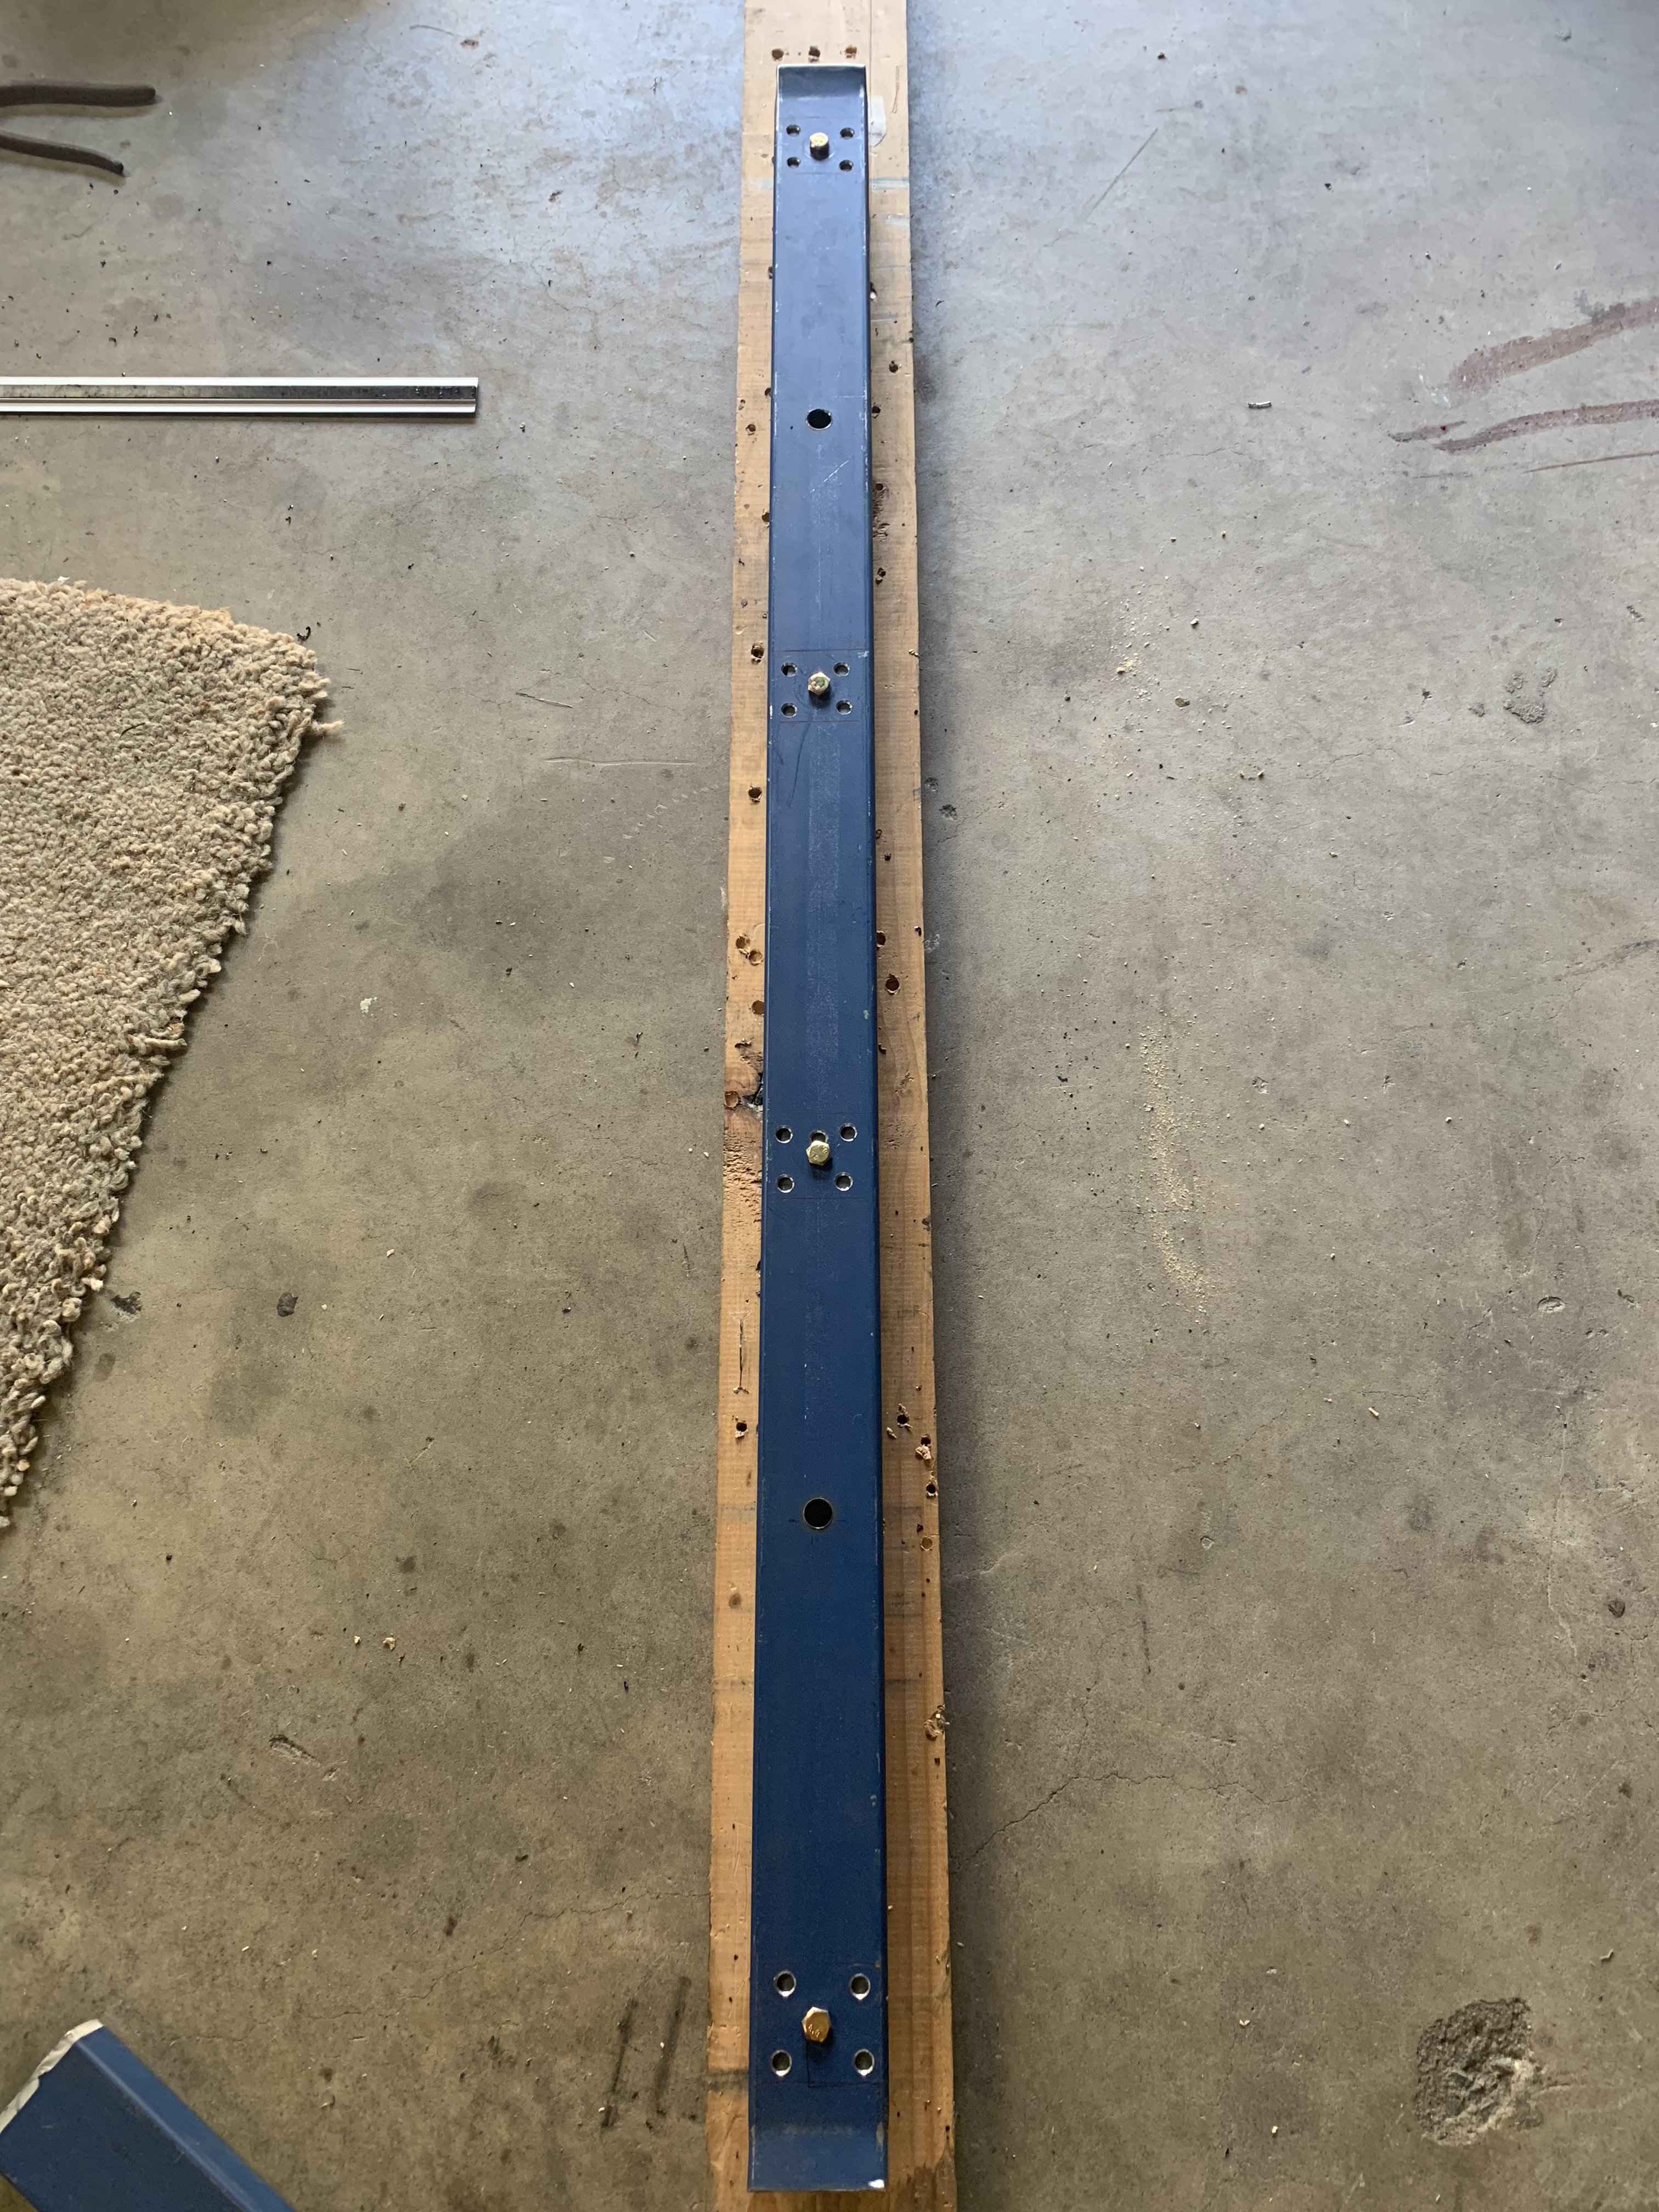
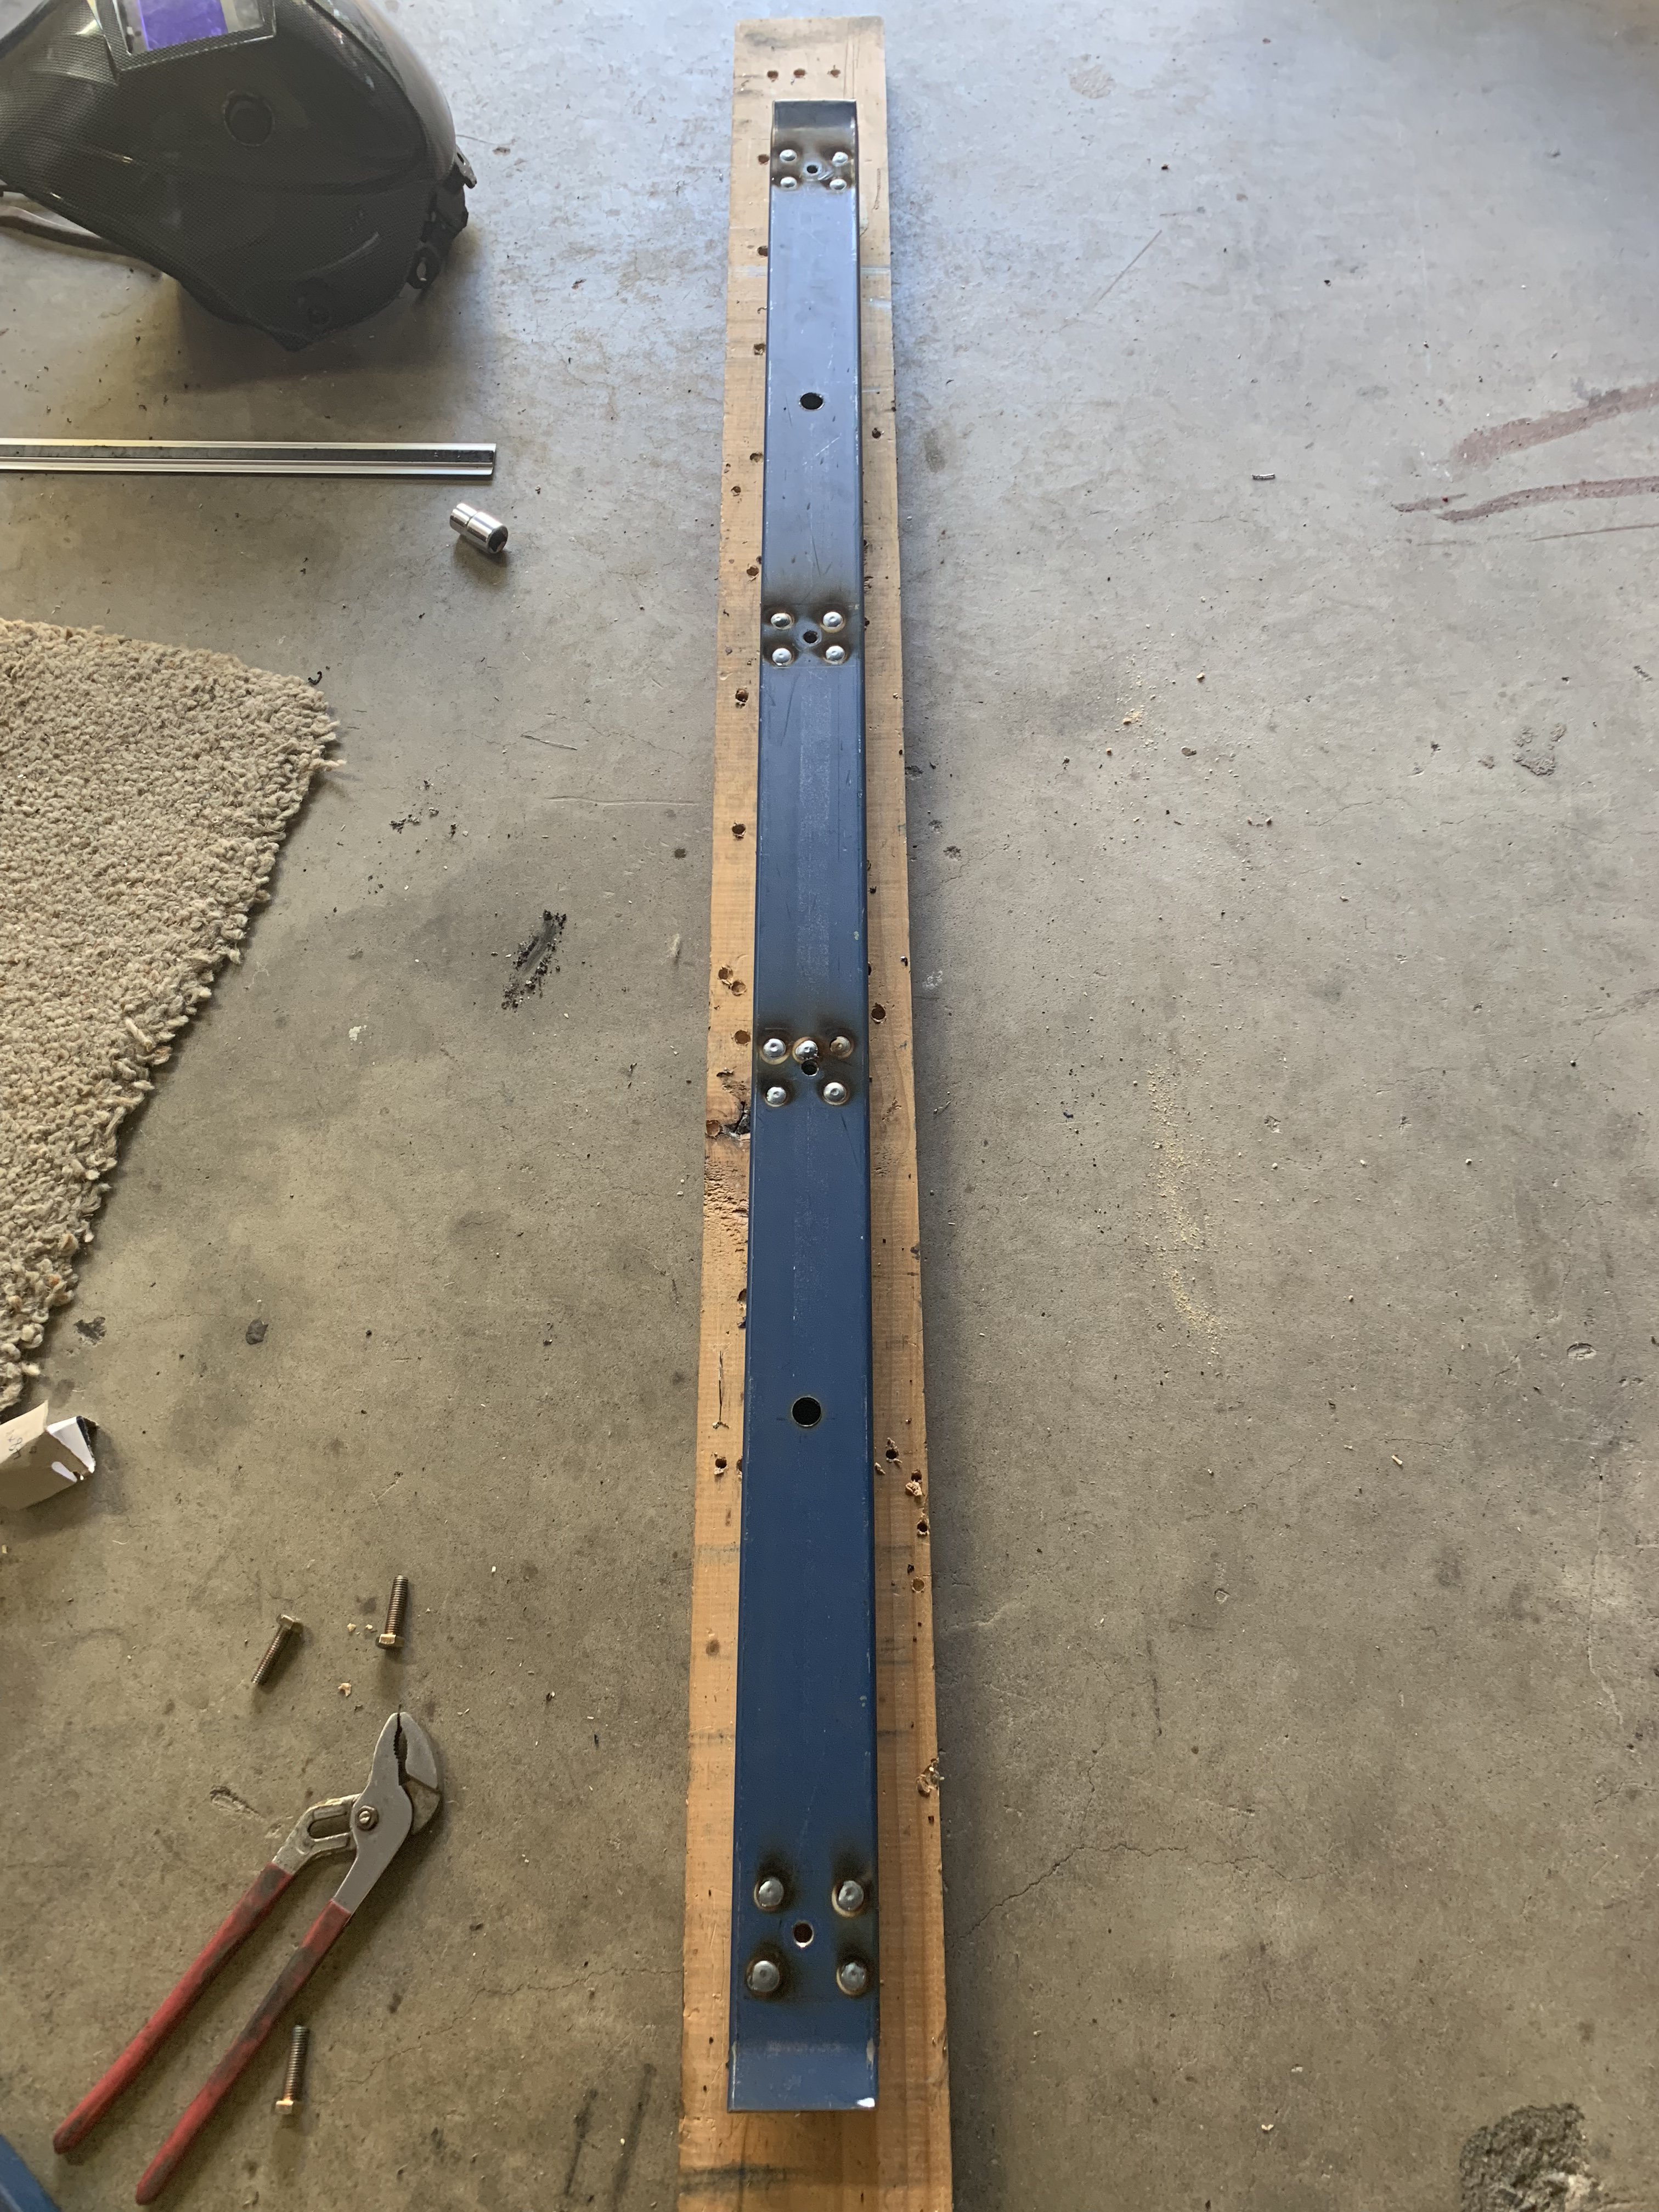
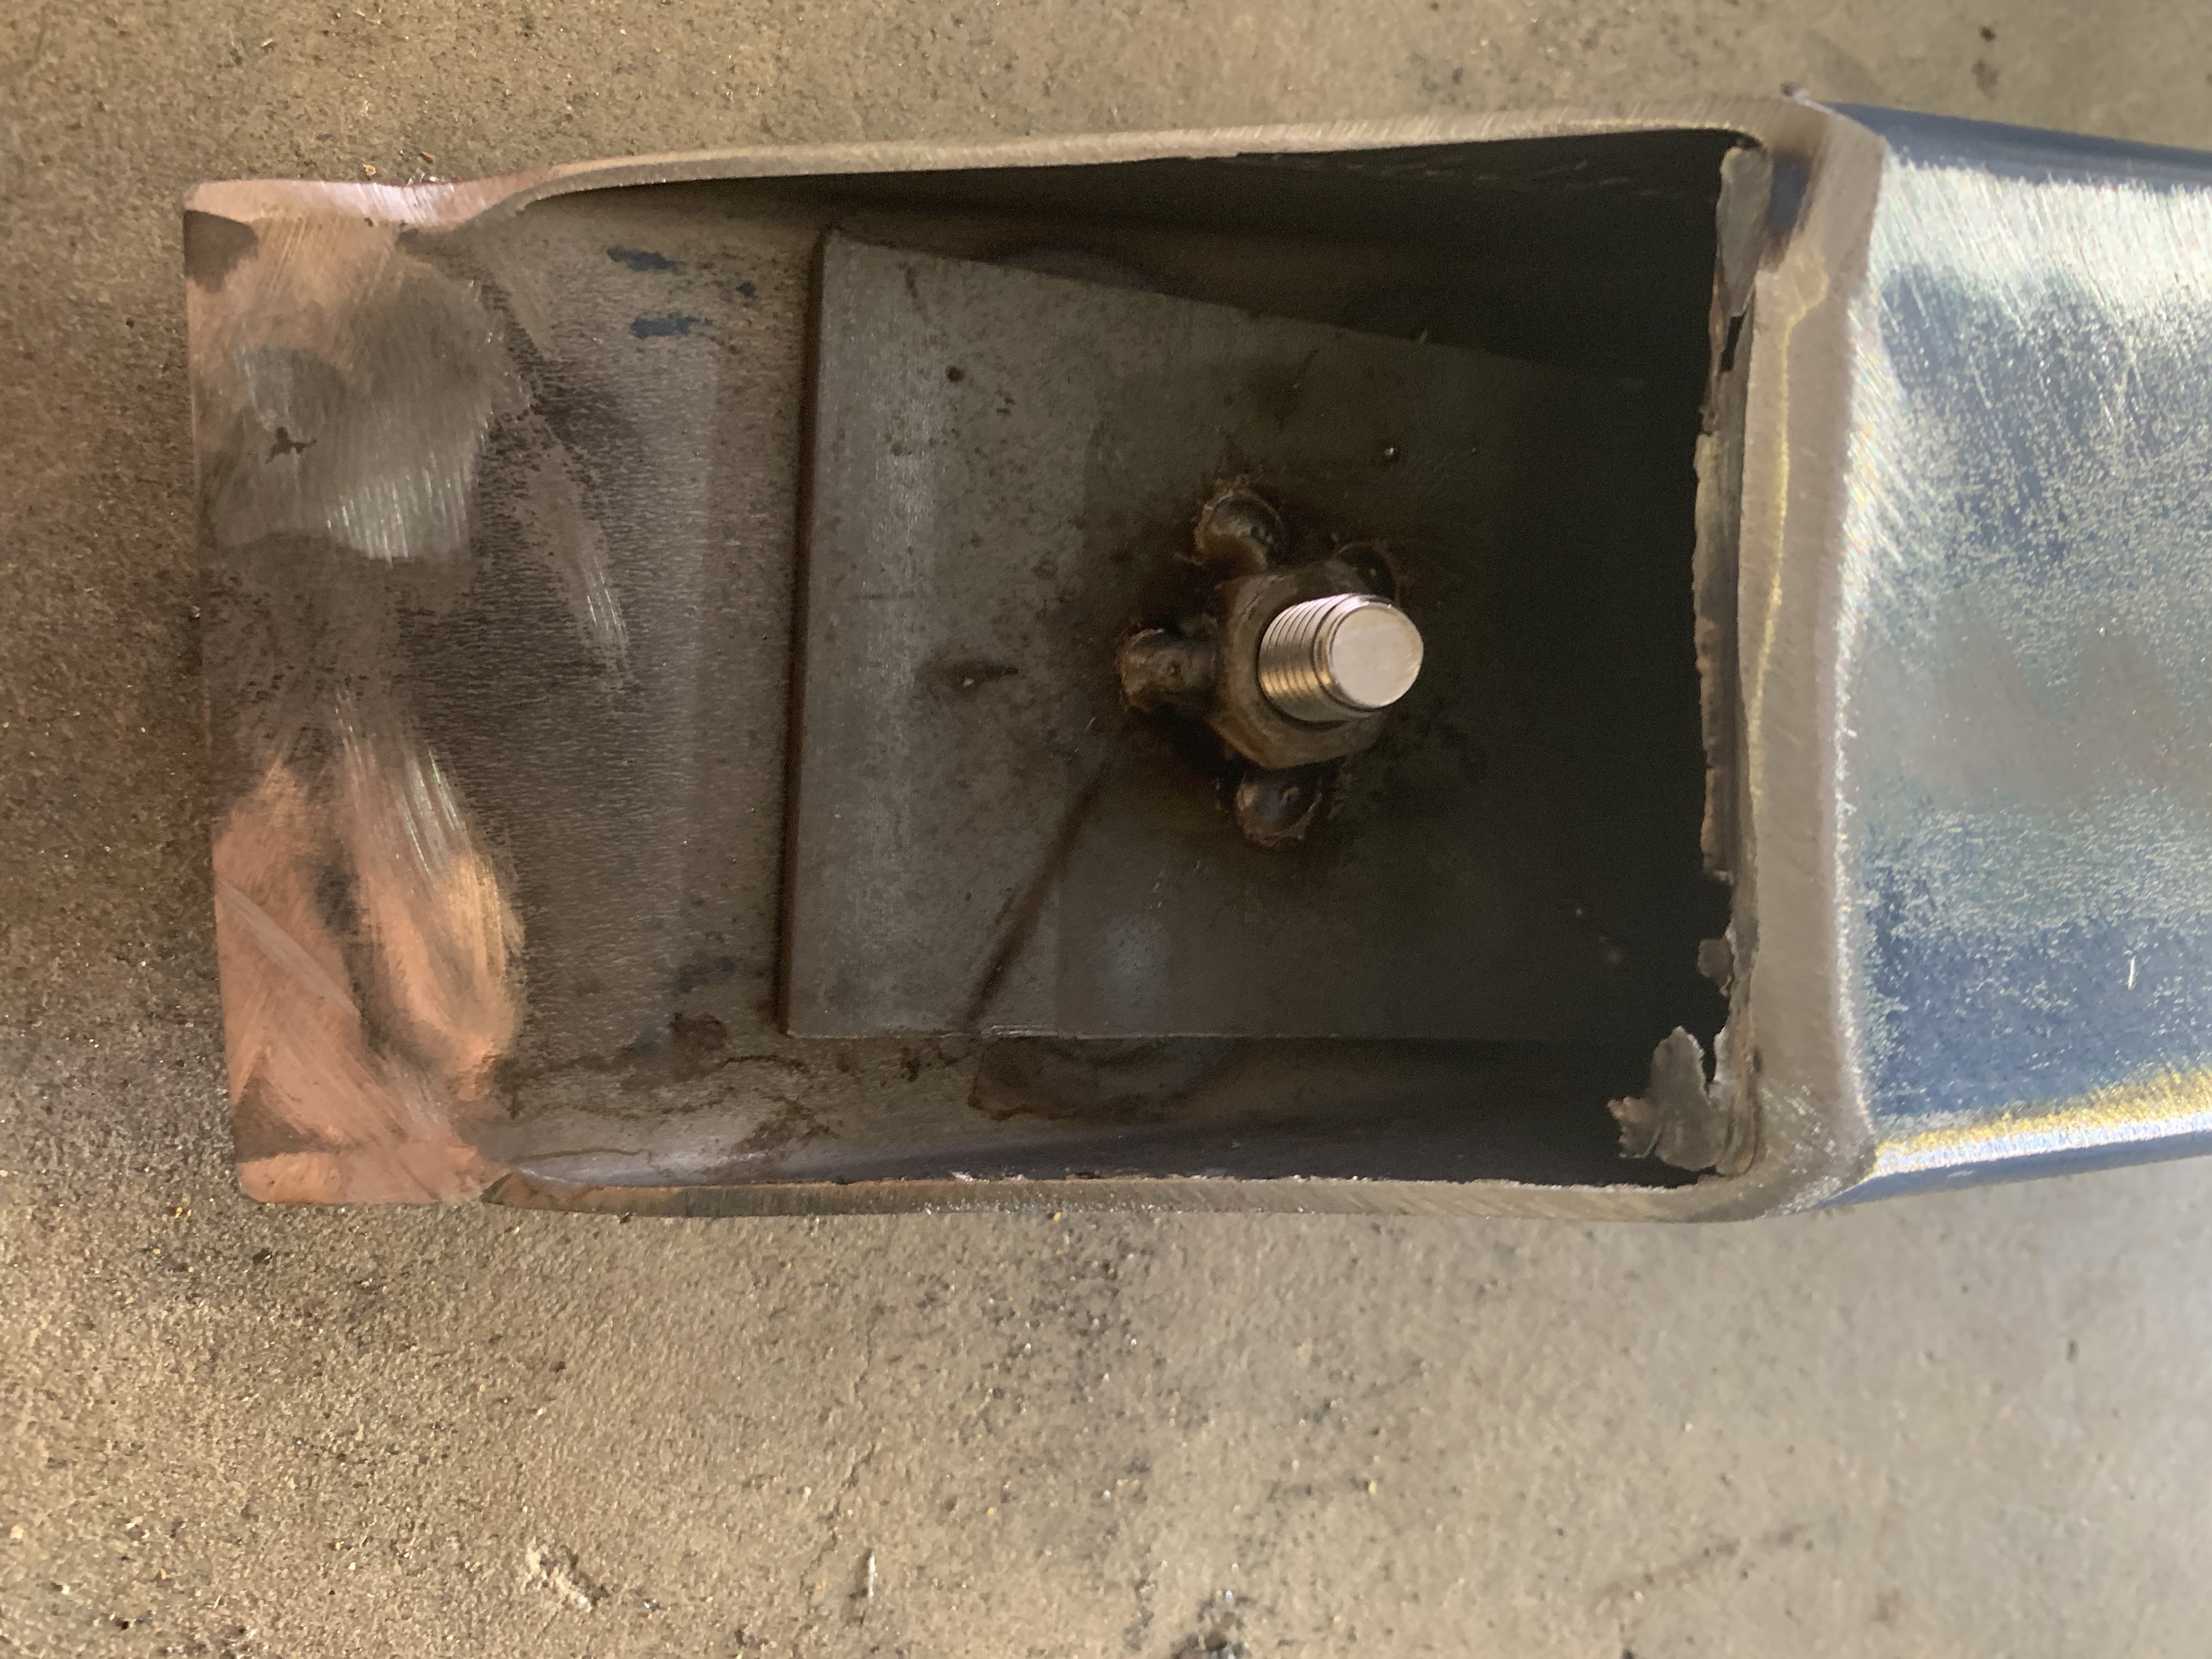
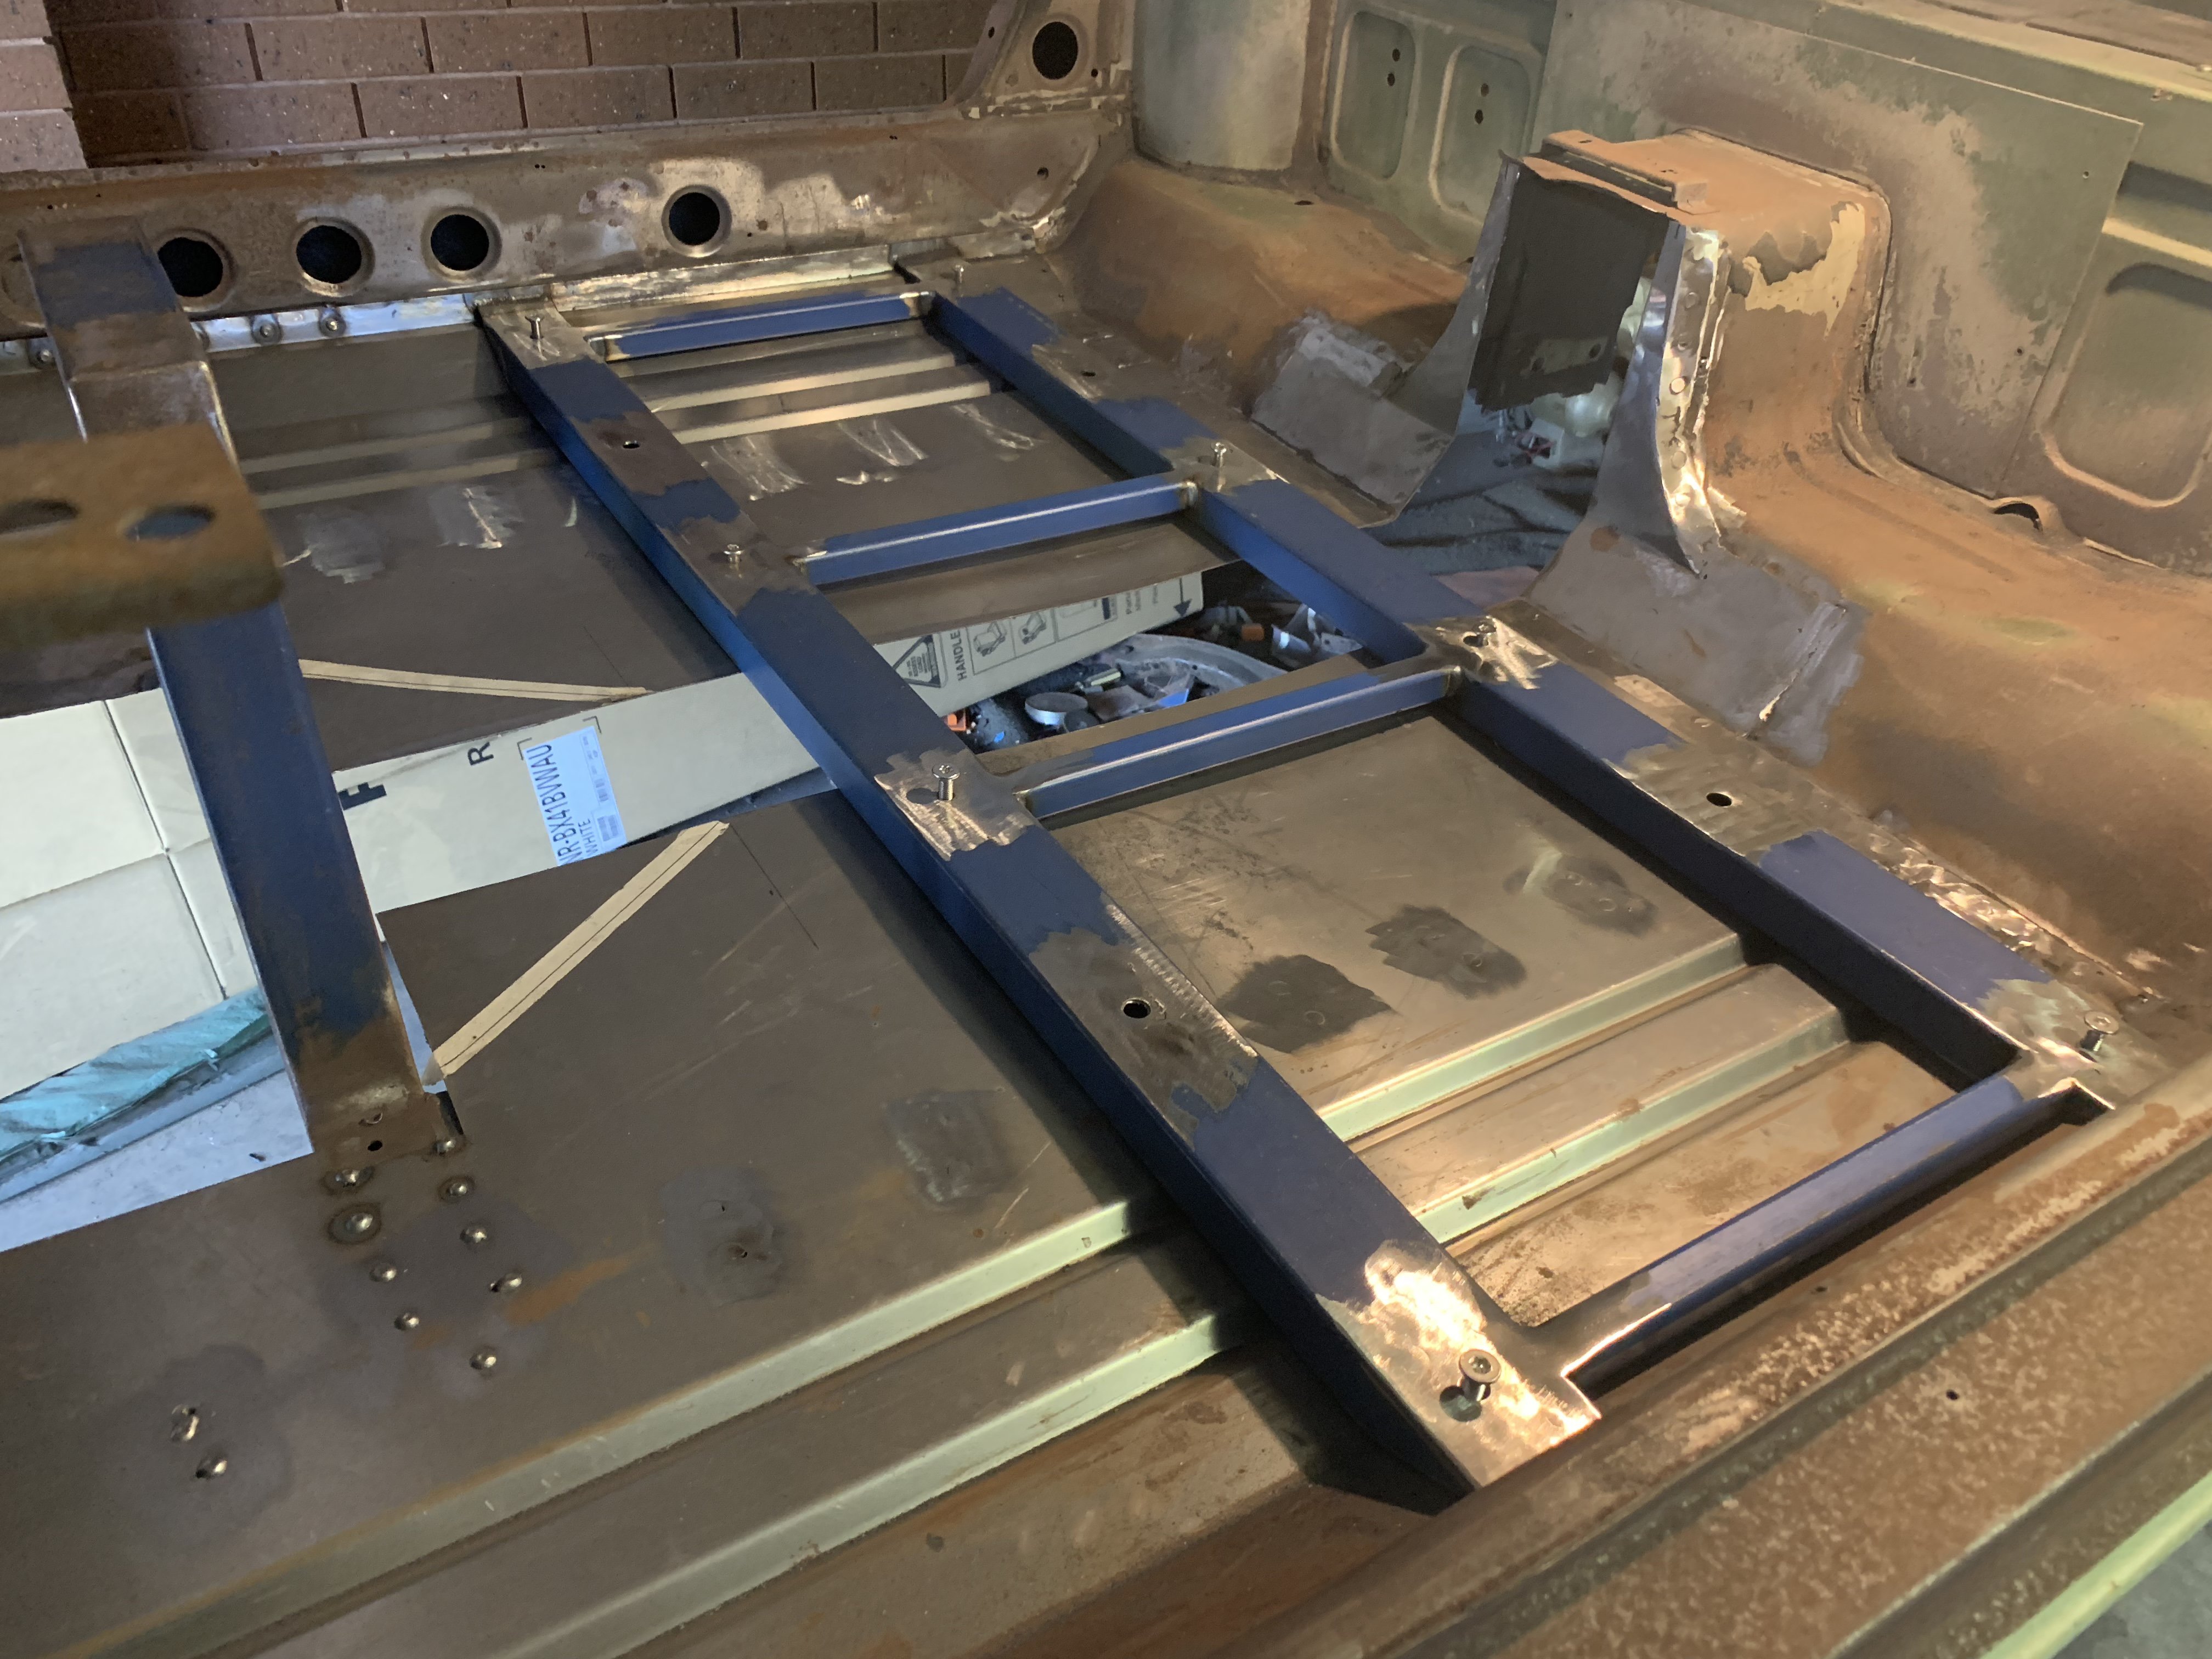
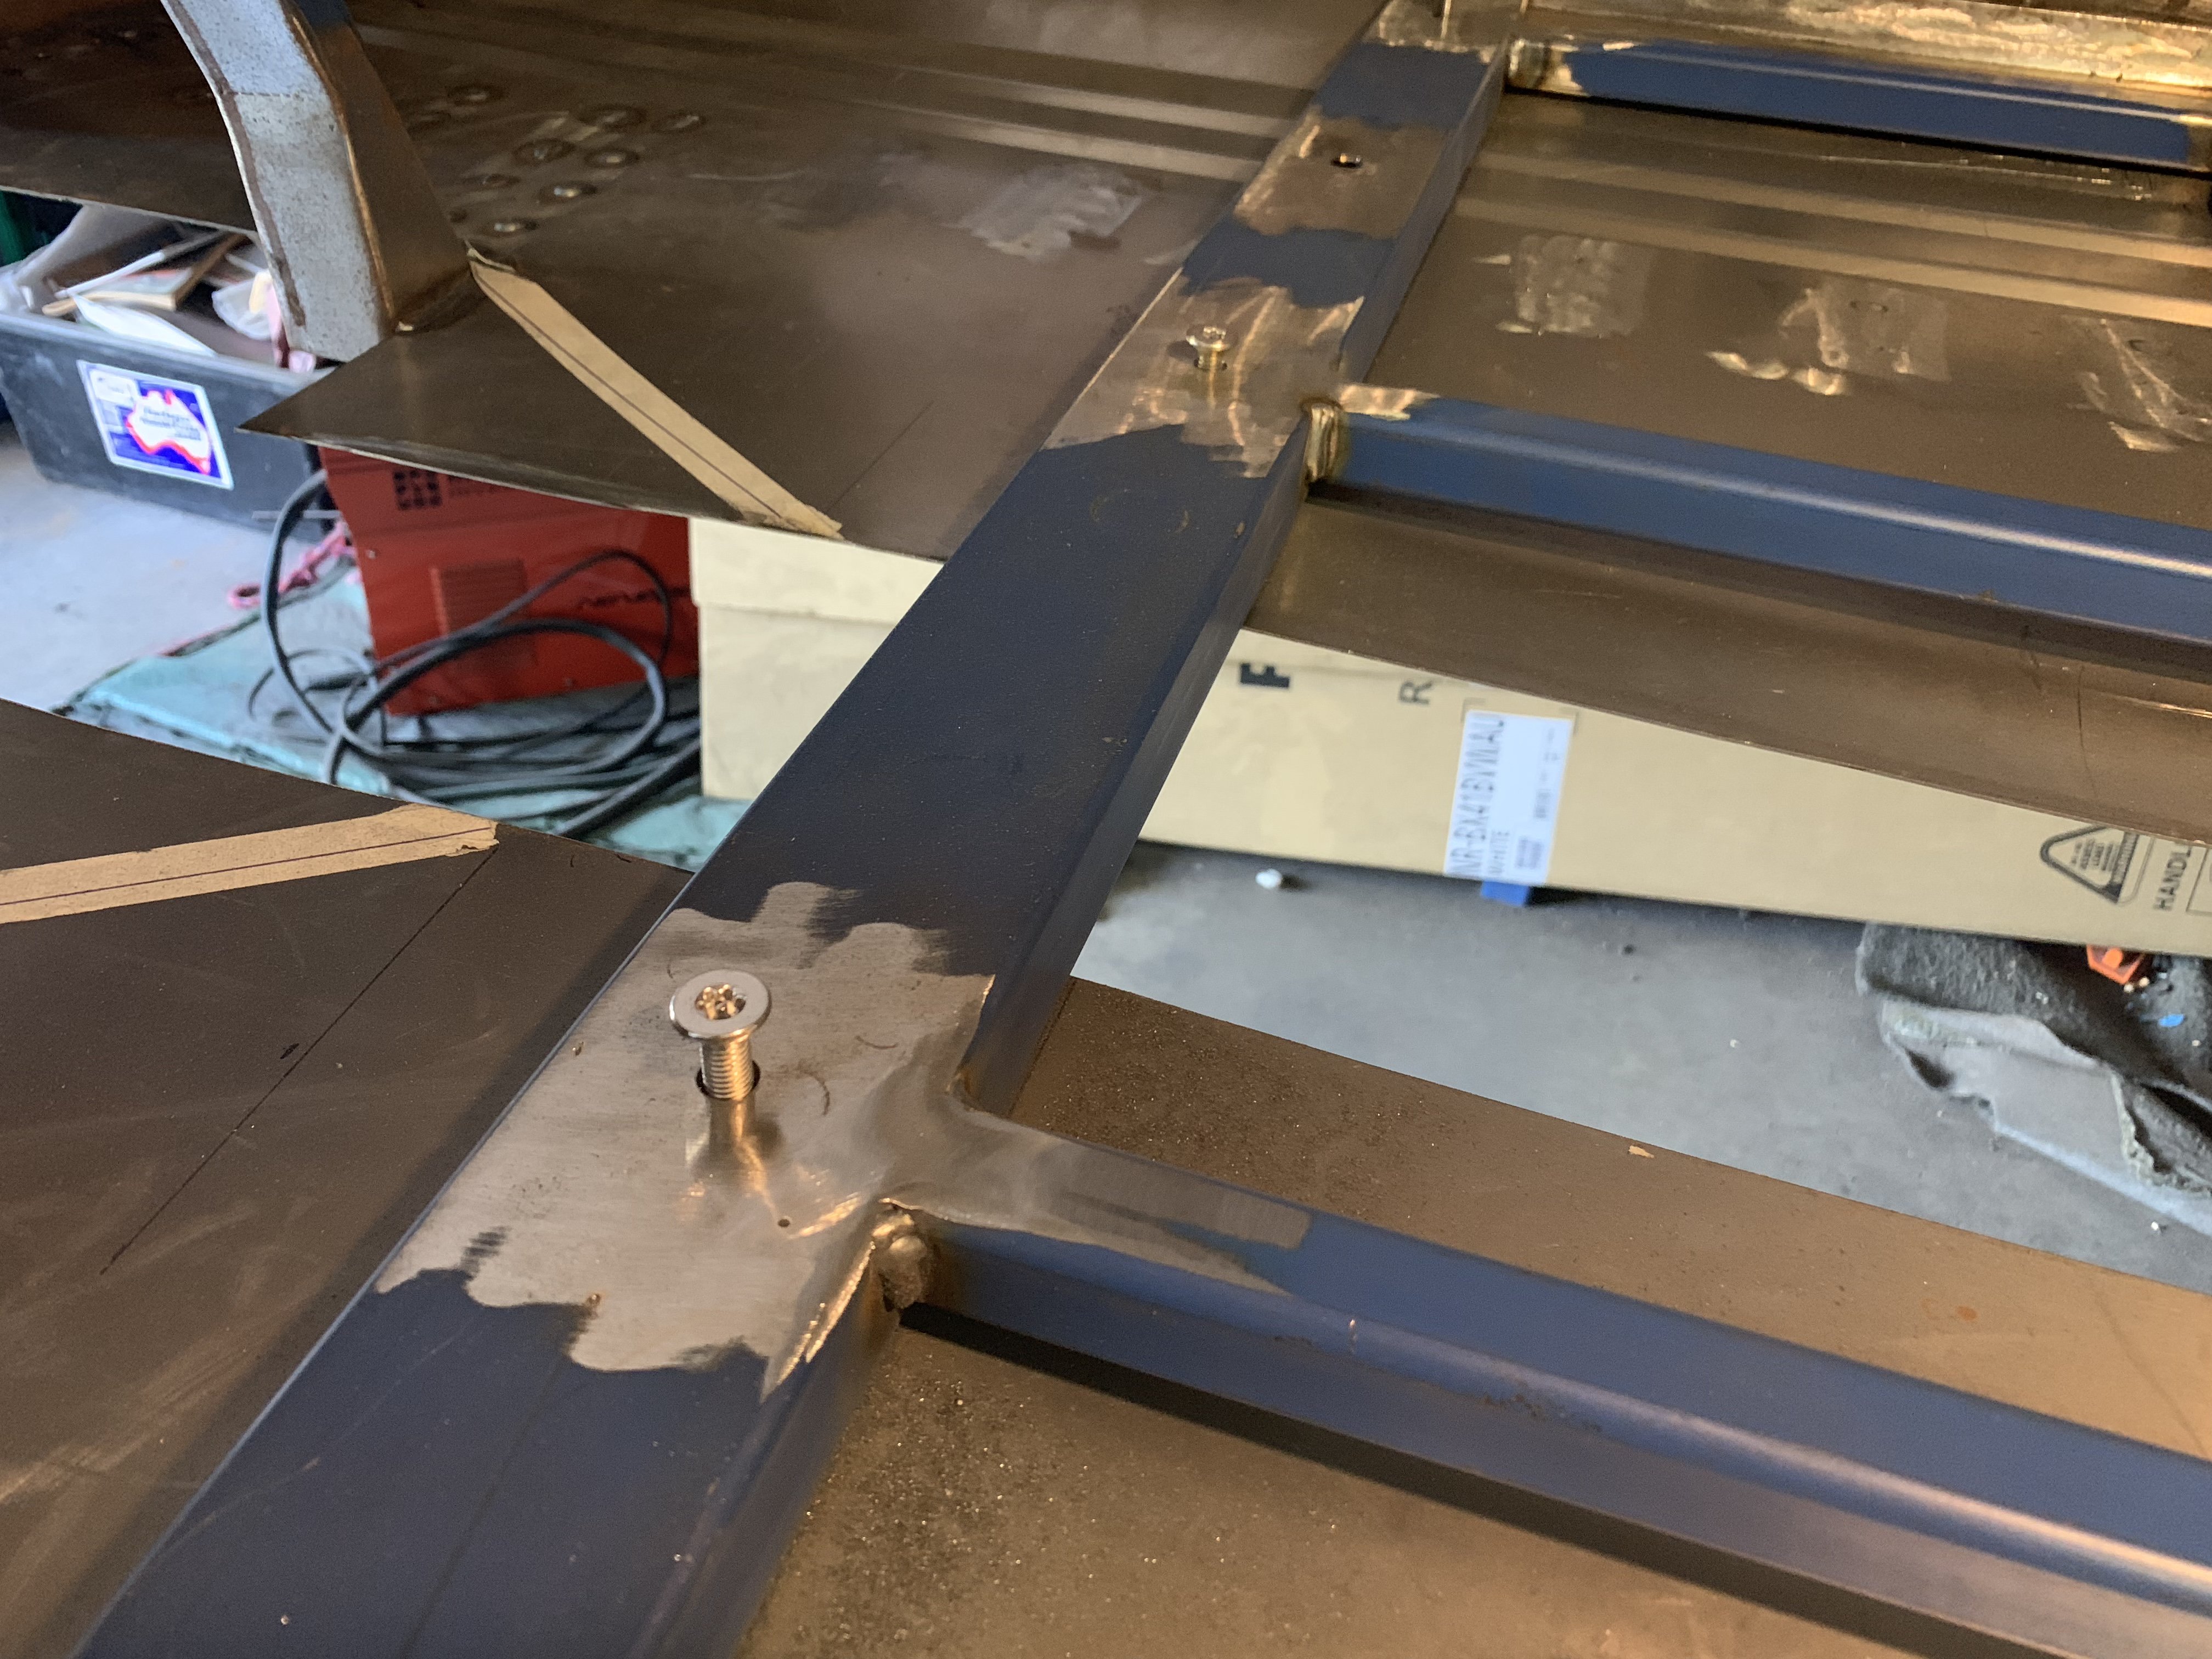
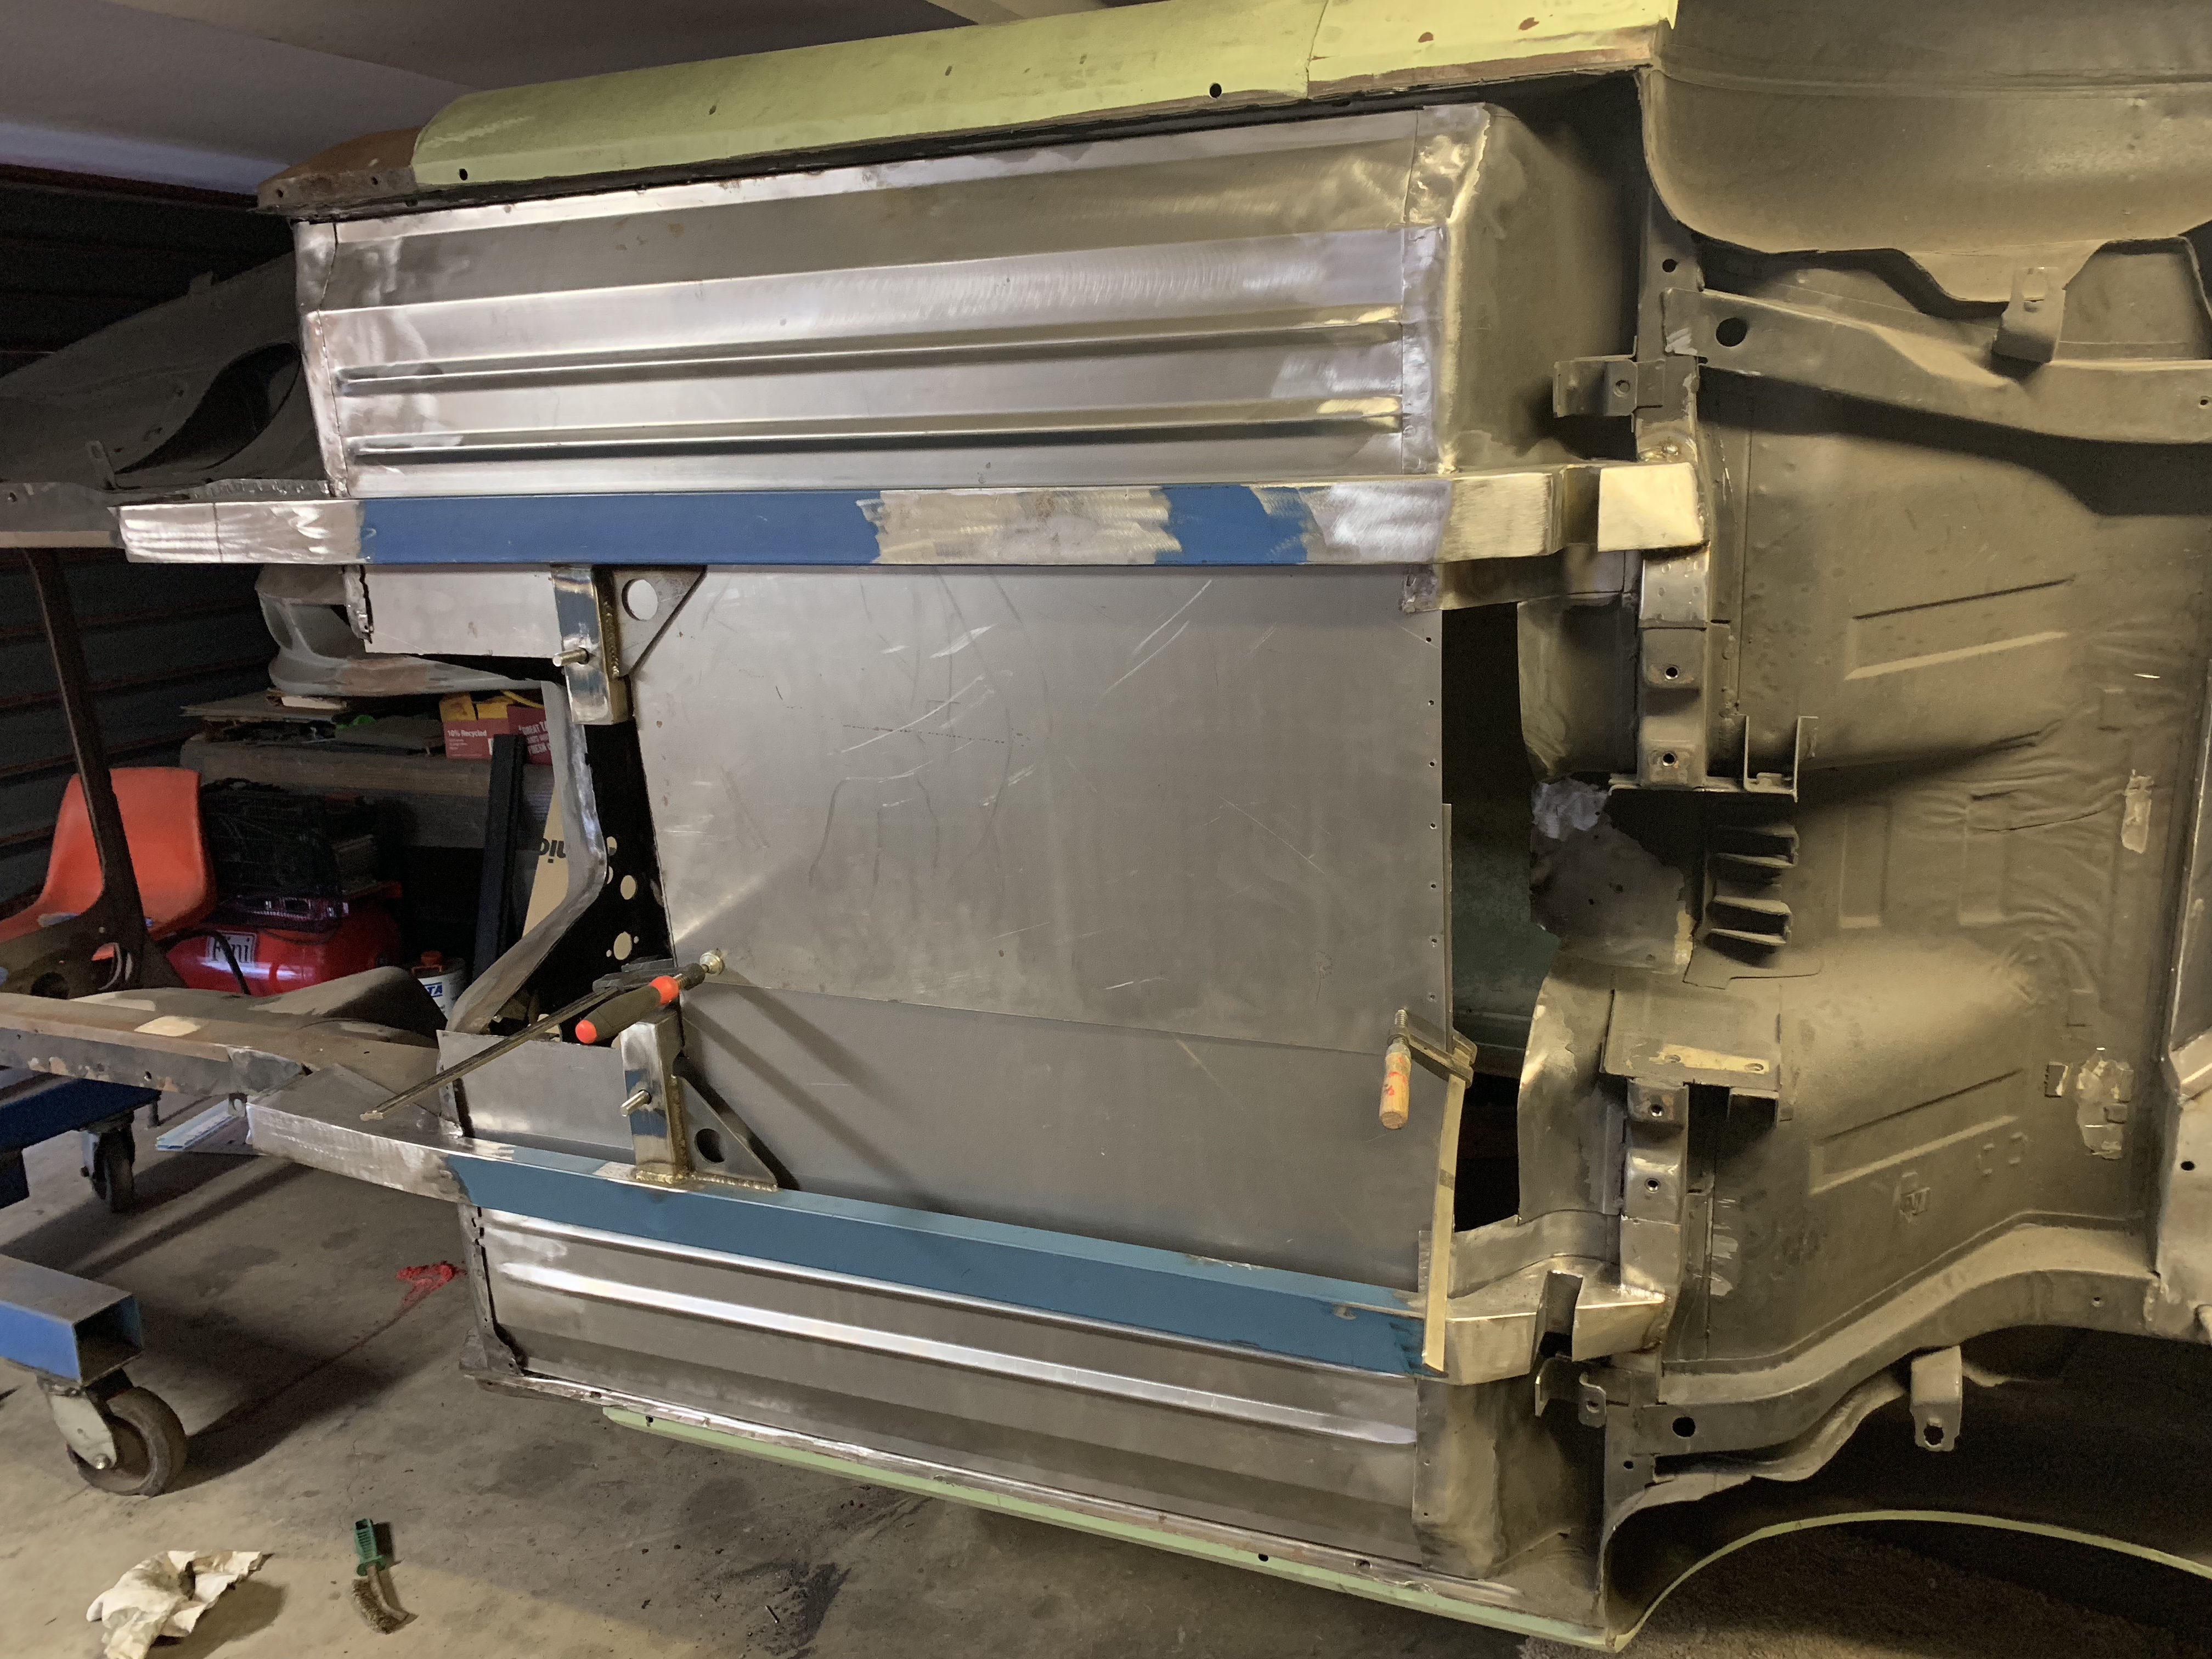
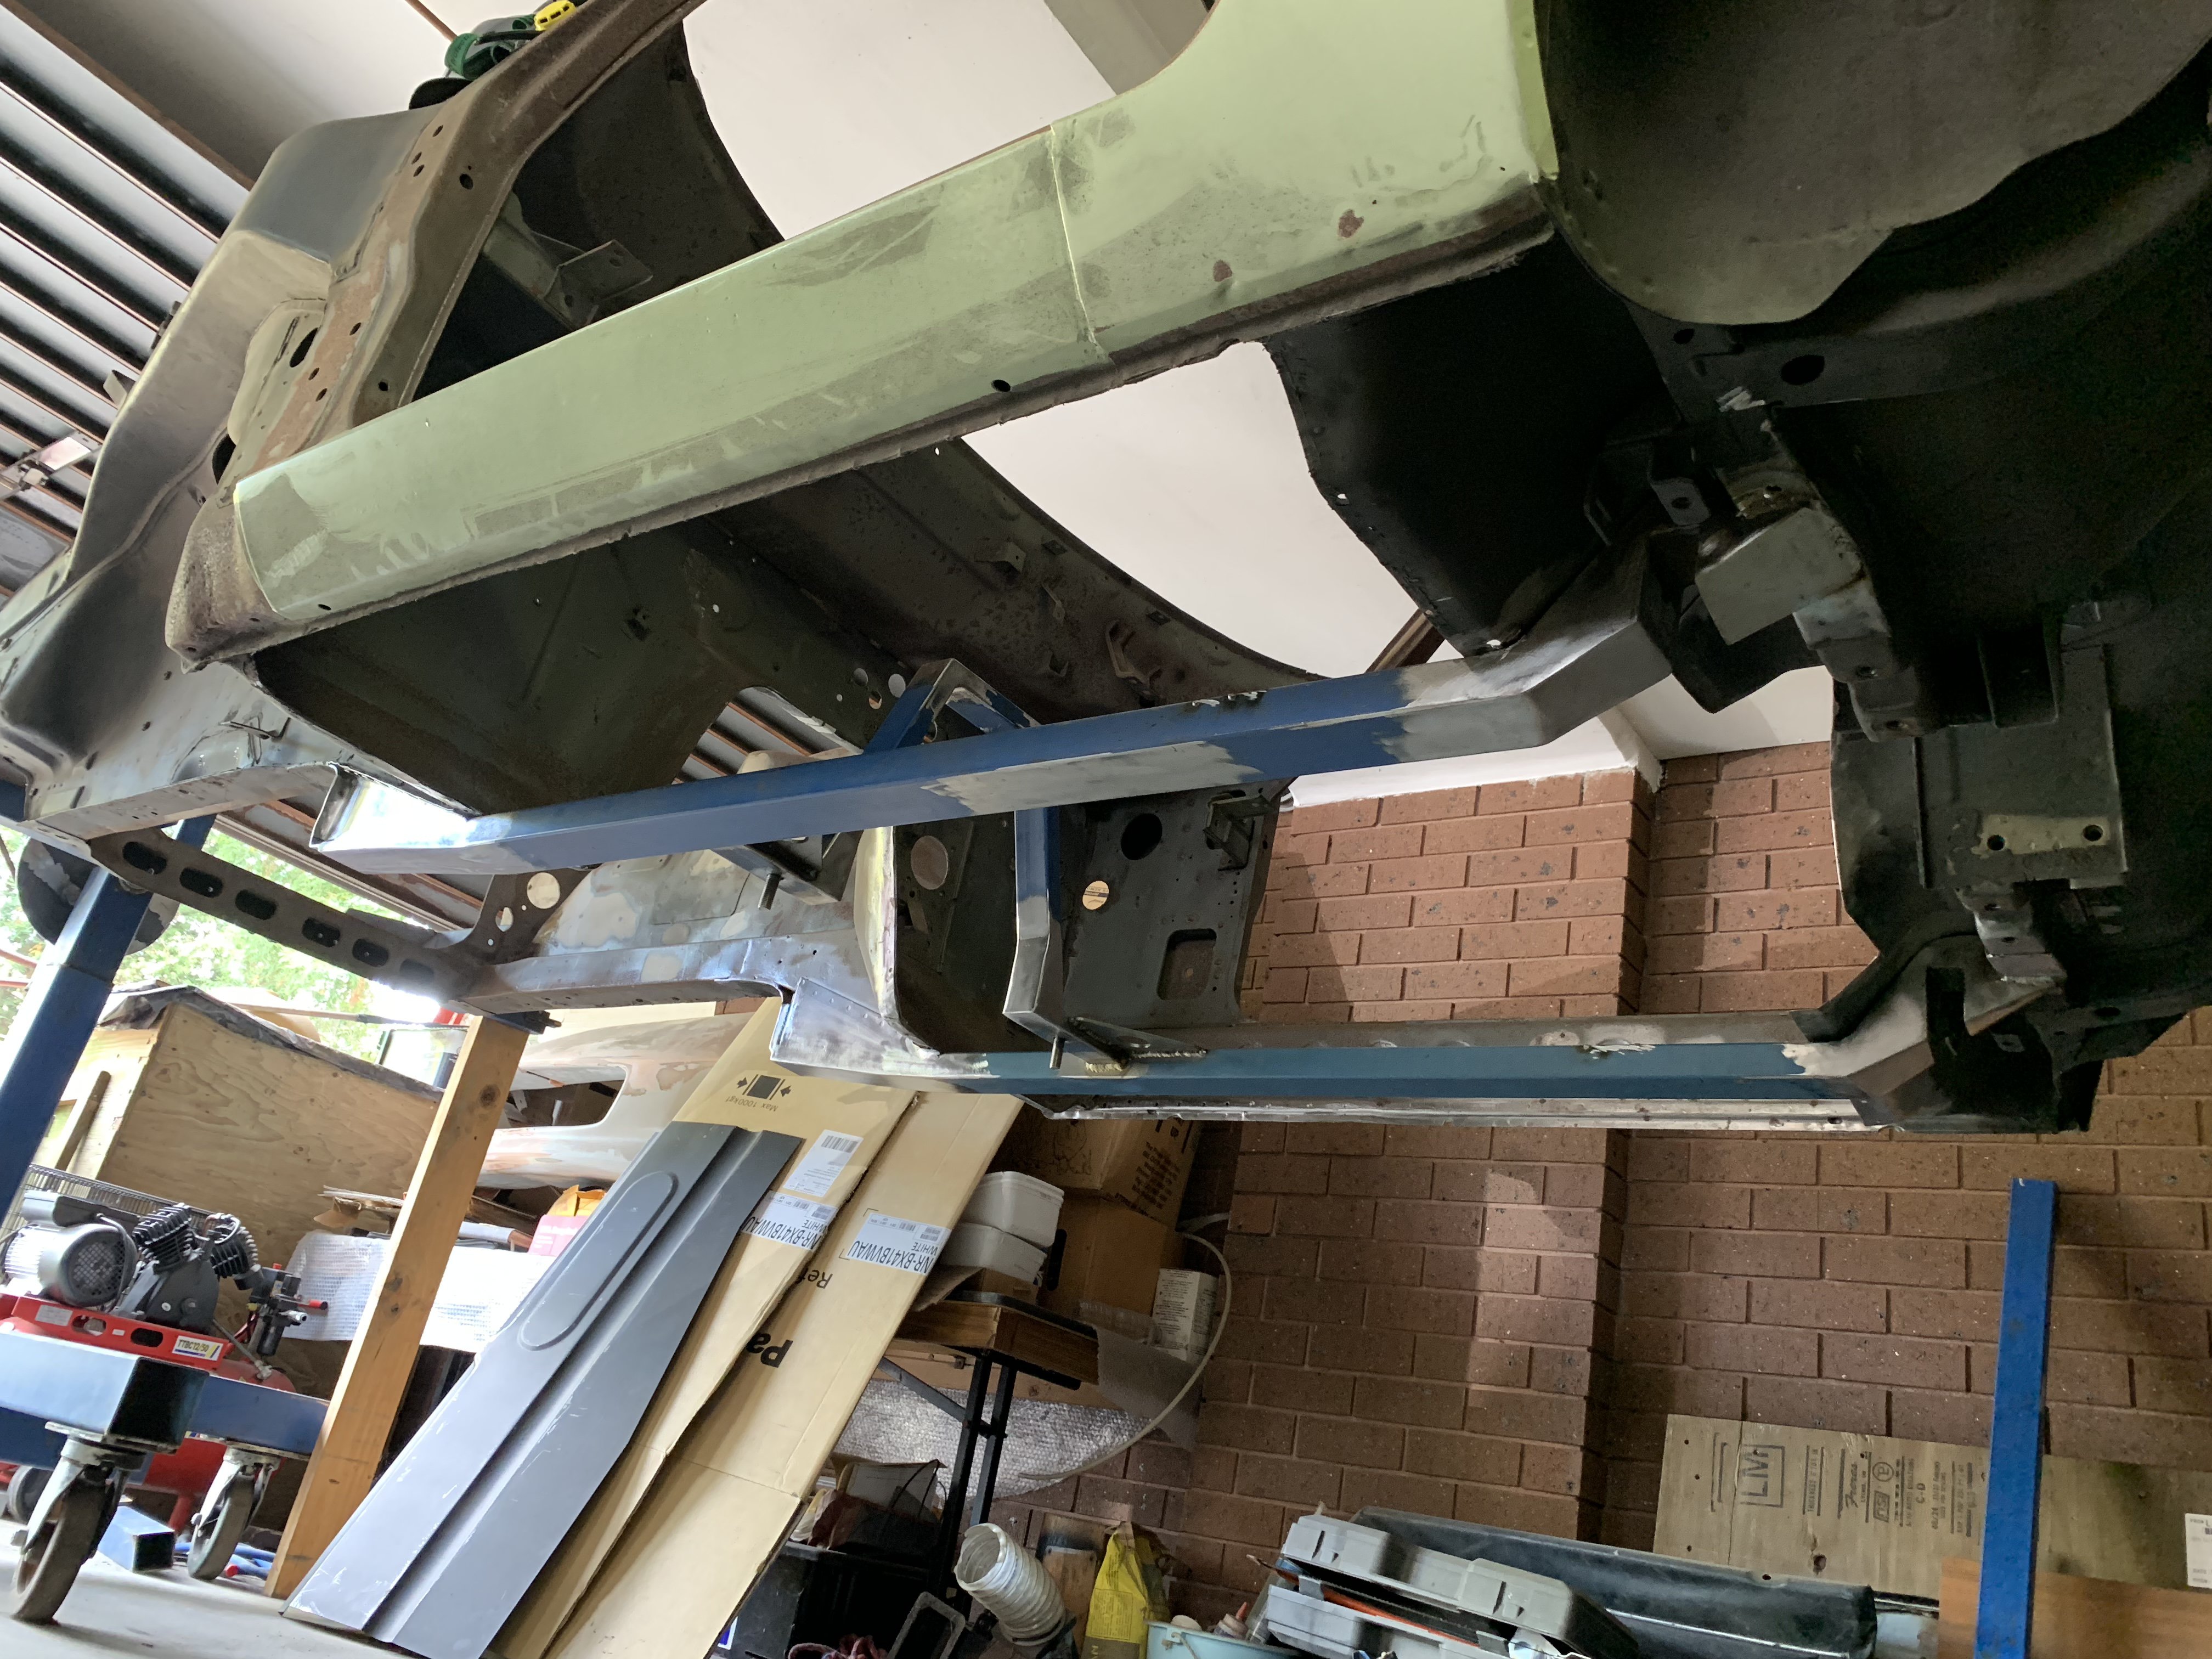
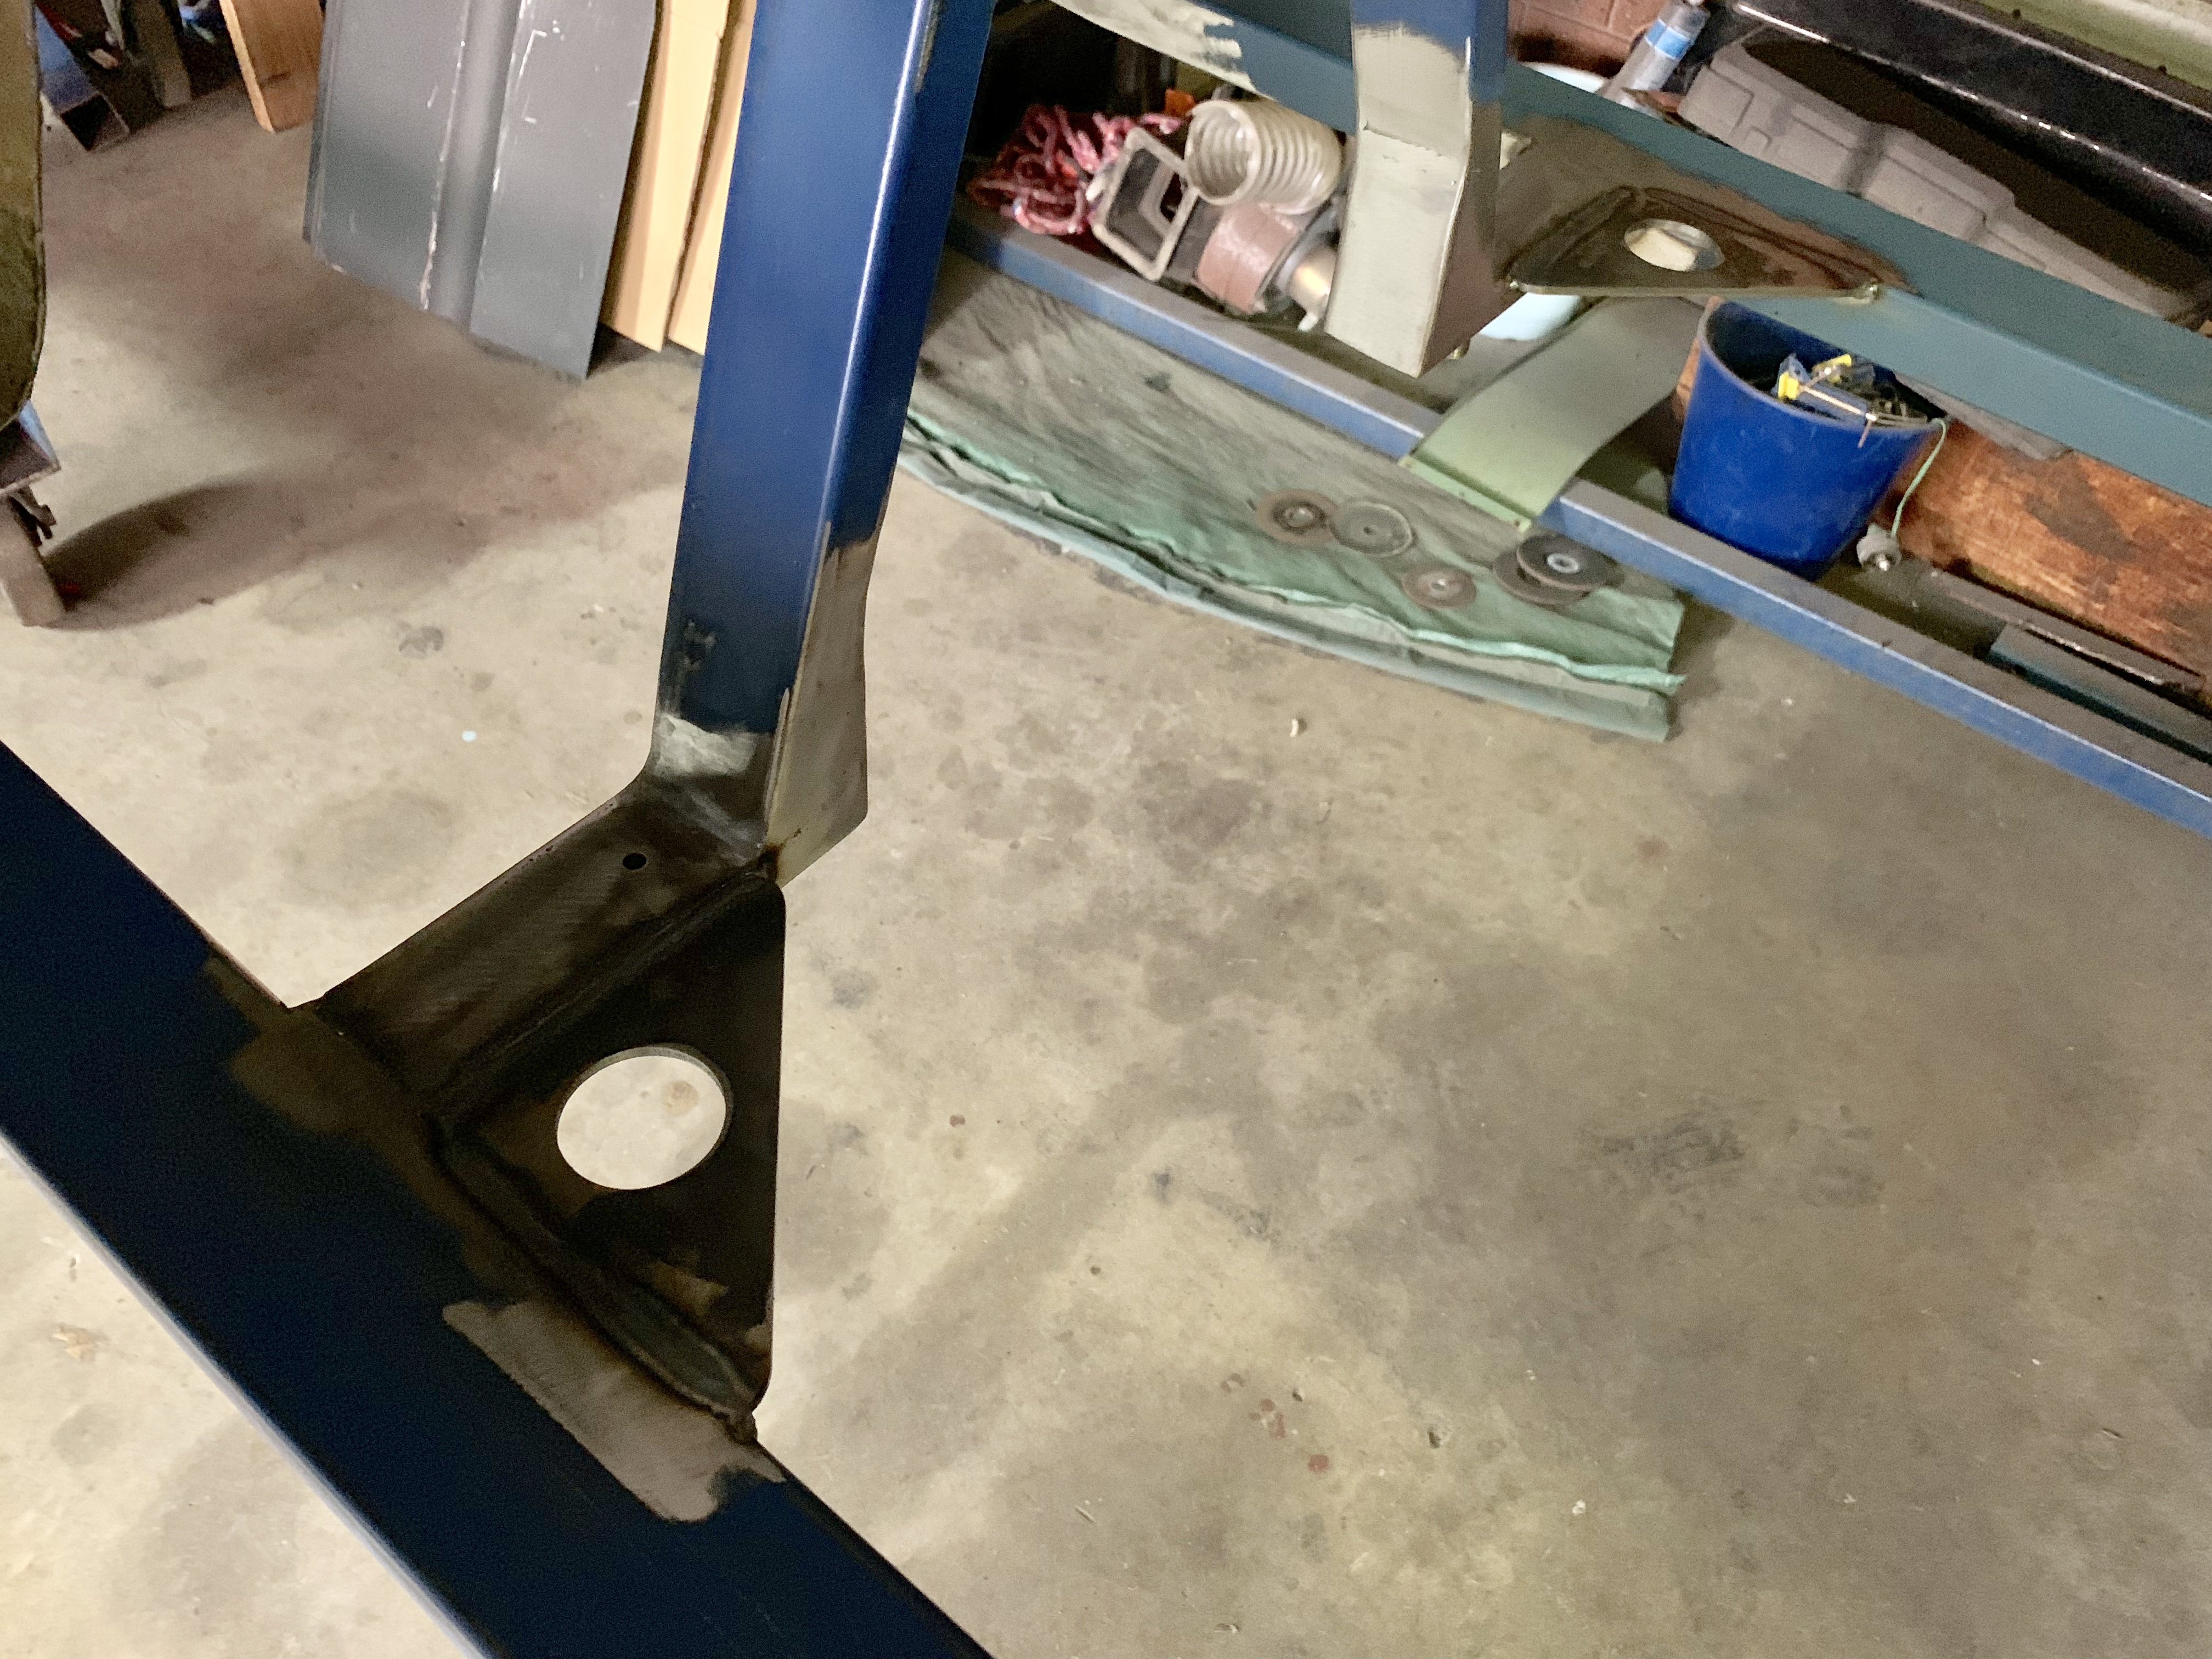
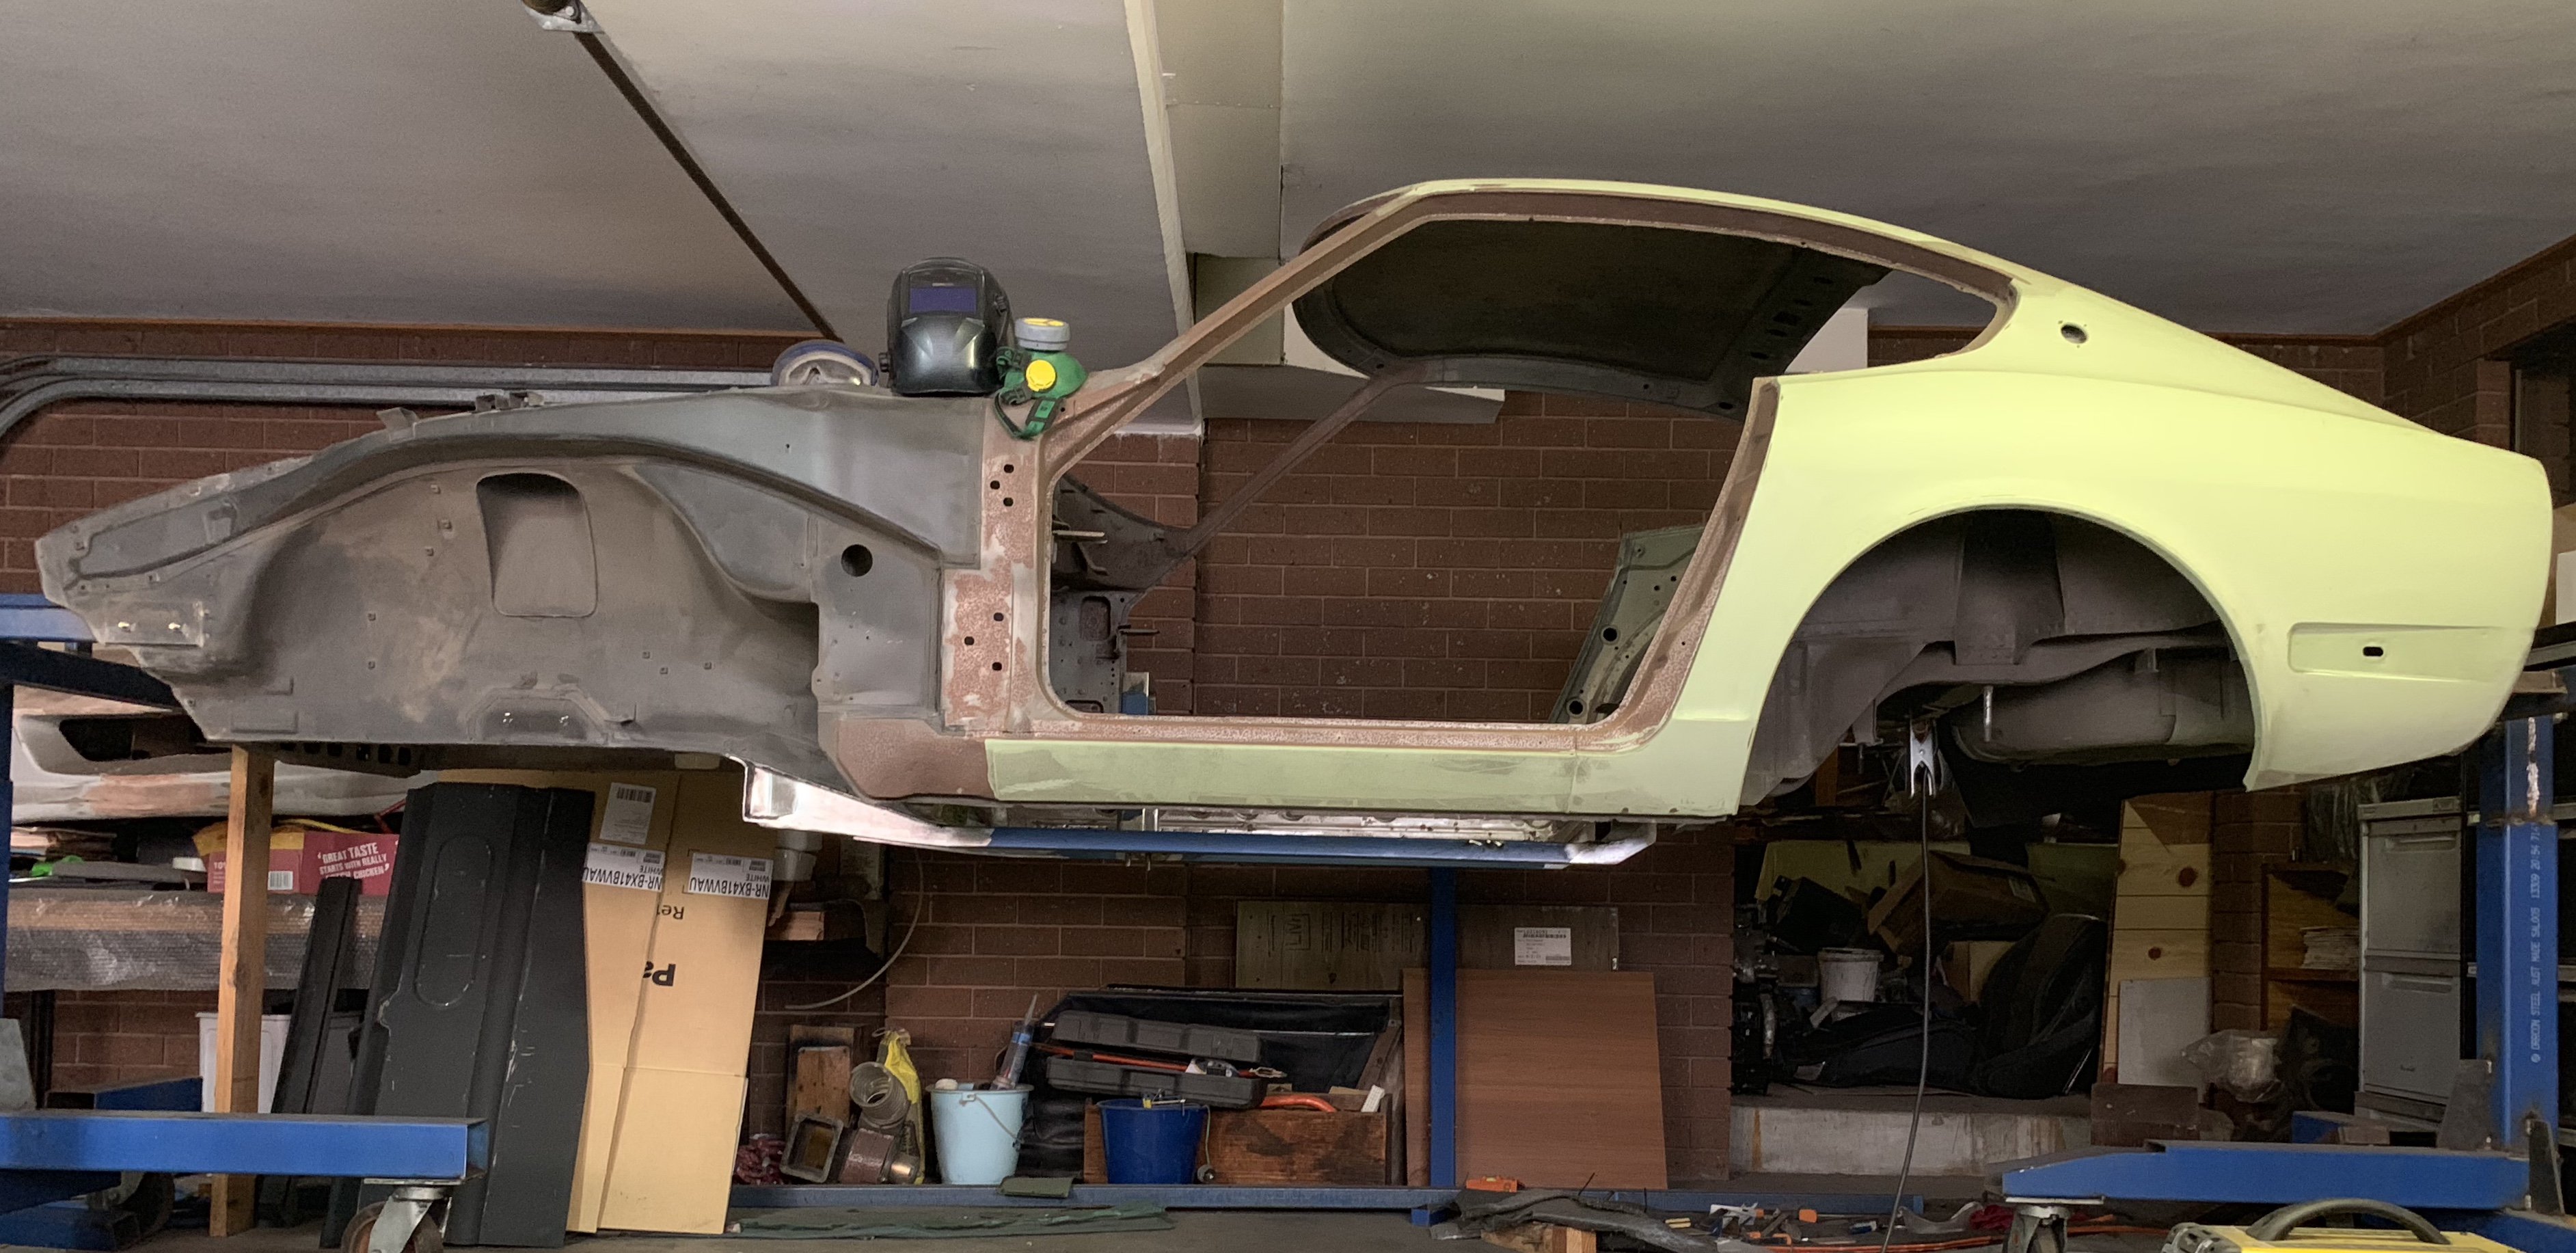
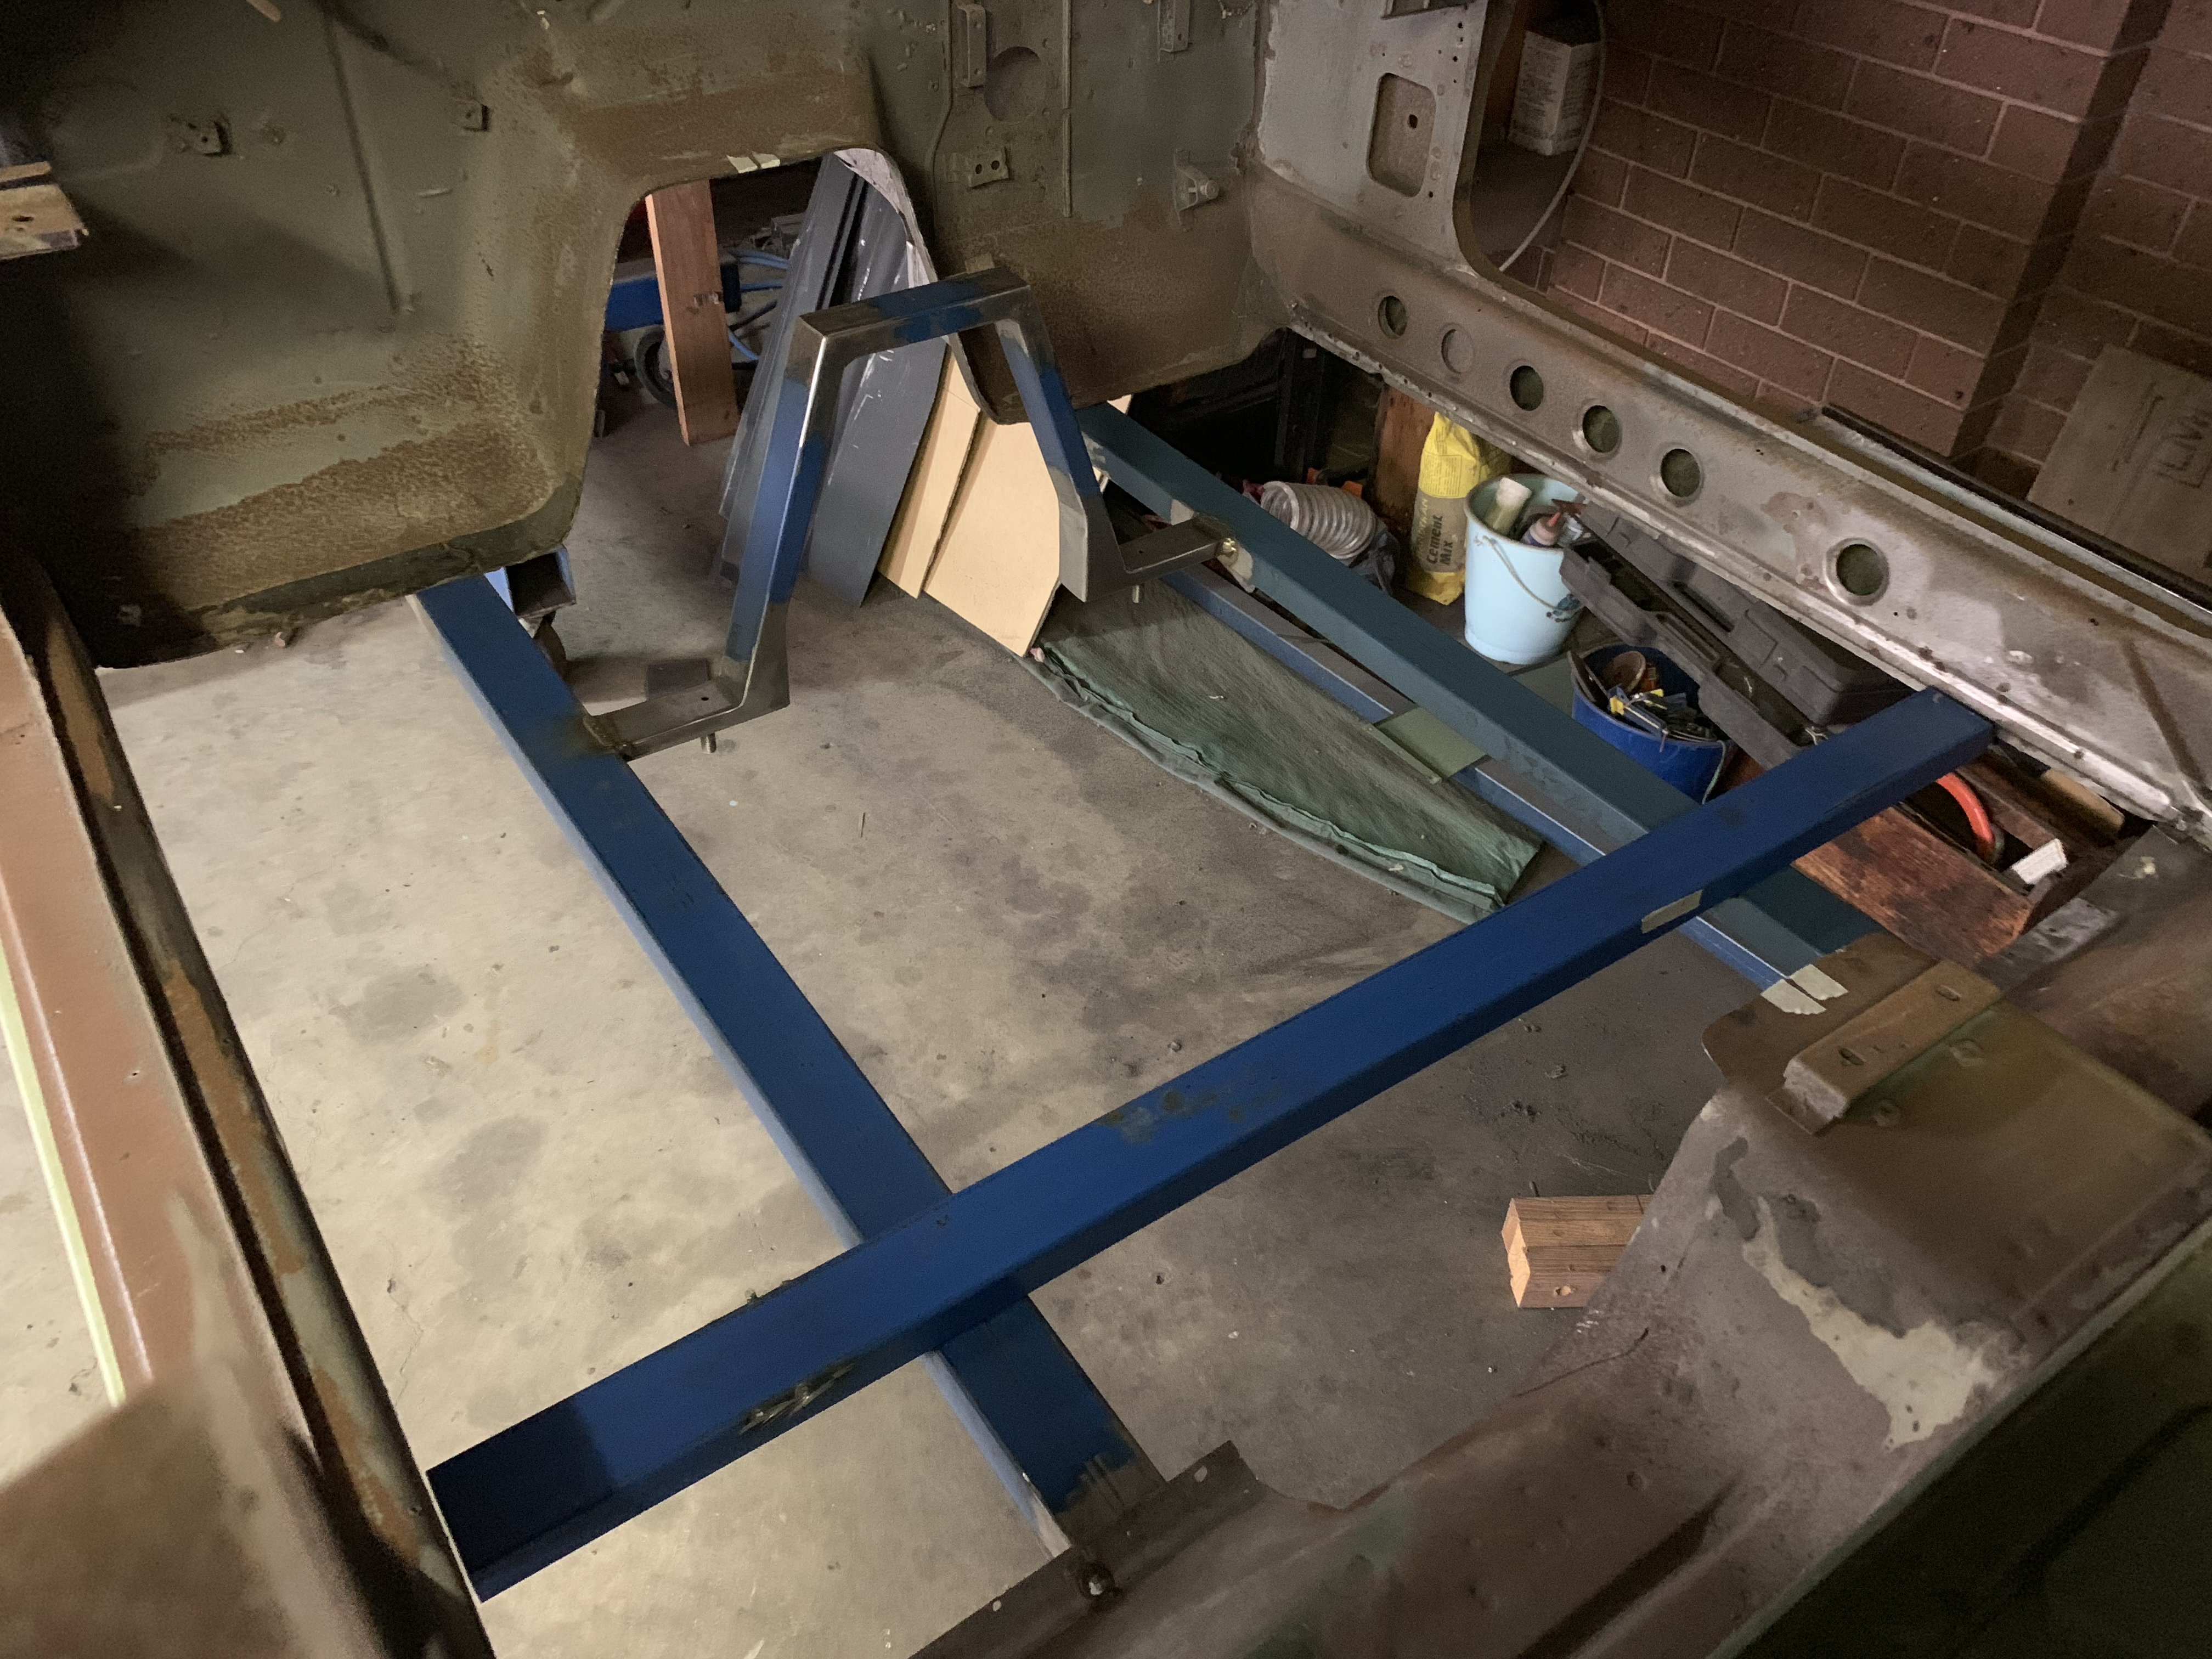
Been a busy past 2 weeks but made some progress today Chassis reconfiguration is now flush with the new rails Gearbox rear mount is next up
-
ANOTHER Datsun Z/LS3/T56 Swap Thread
Sirpent replied to Ironhead's topic in S30 Series - 240z, 260z, 280z
Fancy you writing this on my build thread and then me spending the last hour at 4am catching up in yours “Fantastic project and work. Every aspect of your metalwork is so impressive. Honestly, it almost looks like you could have just built a new Z from scratch!” Seriously? You kidding me right? I mean my work looks like the construction on a sardine can compared to this Hercelian “Transformers” build......... Pfffffffffffft I am seriously going to raid some ideas 💡 I got from your thread and also outright steal others. Please don’t leave any more sarcastic comments on my thread LMAO 😆 -
Sirpents 260Z / C32 AMG Powered RS30 - Australia
Sirpent replied to Sirpent's topic in S30 Series - 240z, 260z, 280z
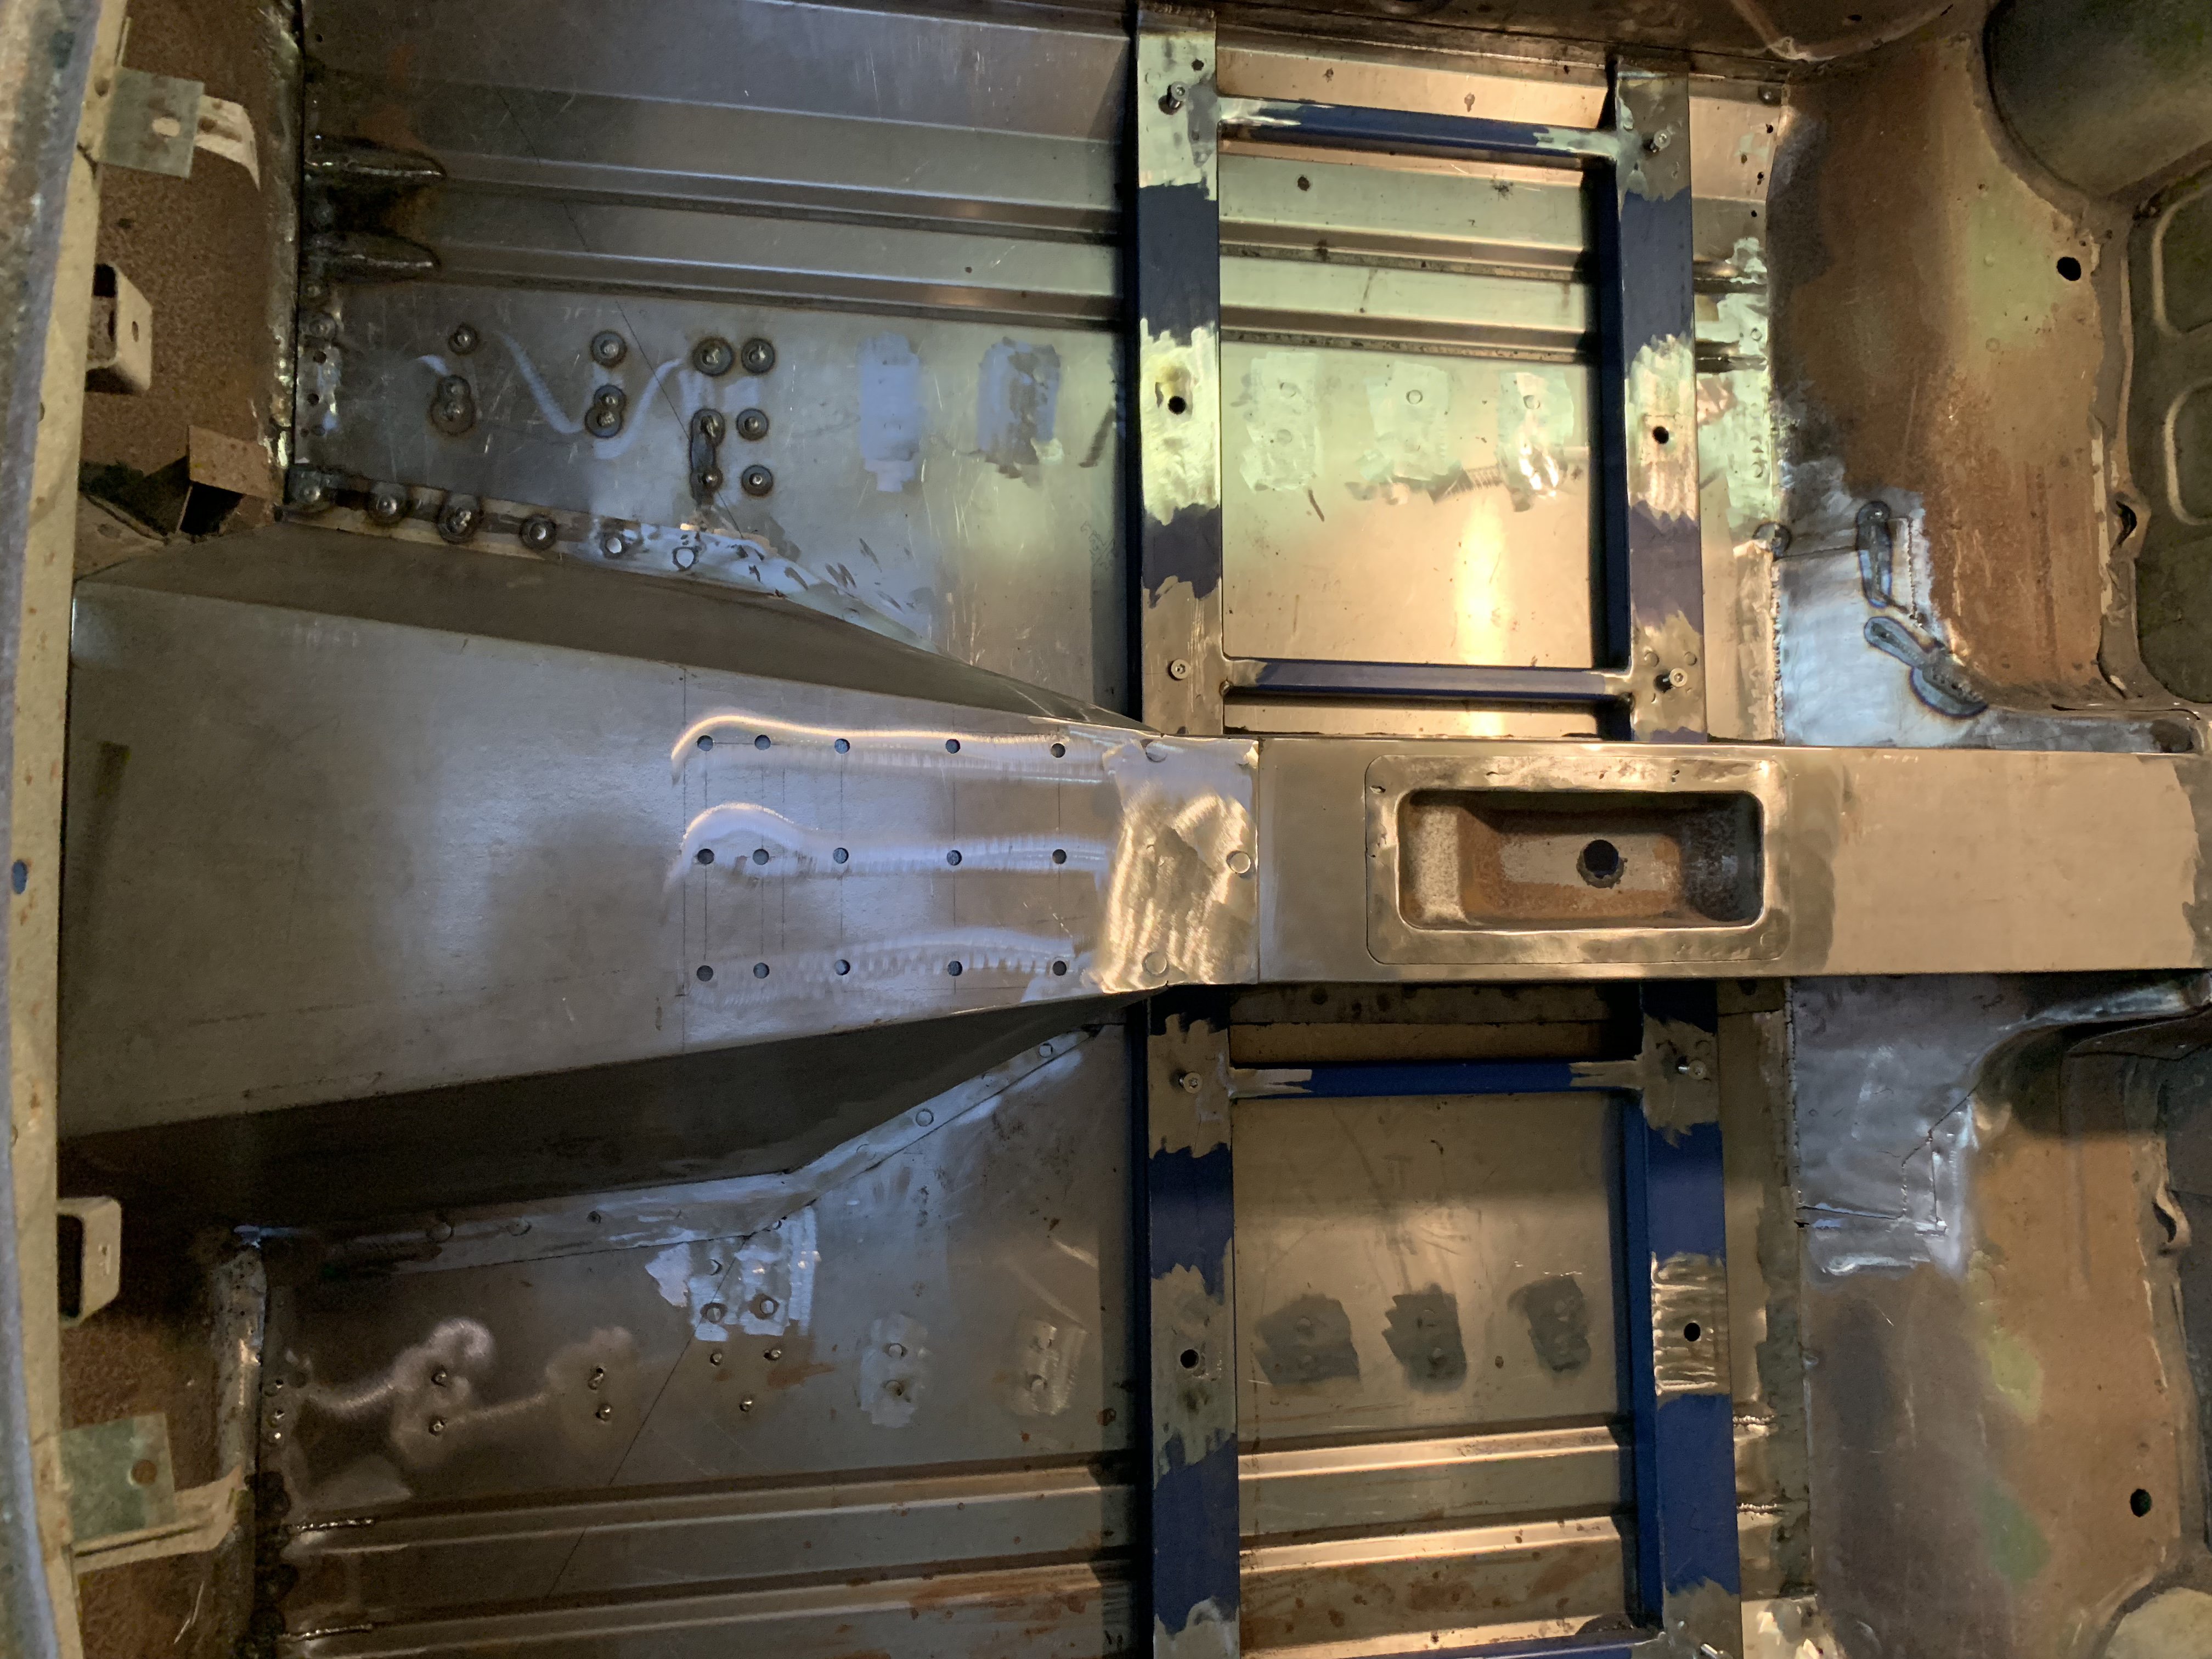
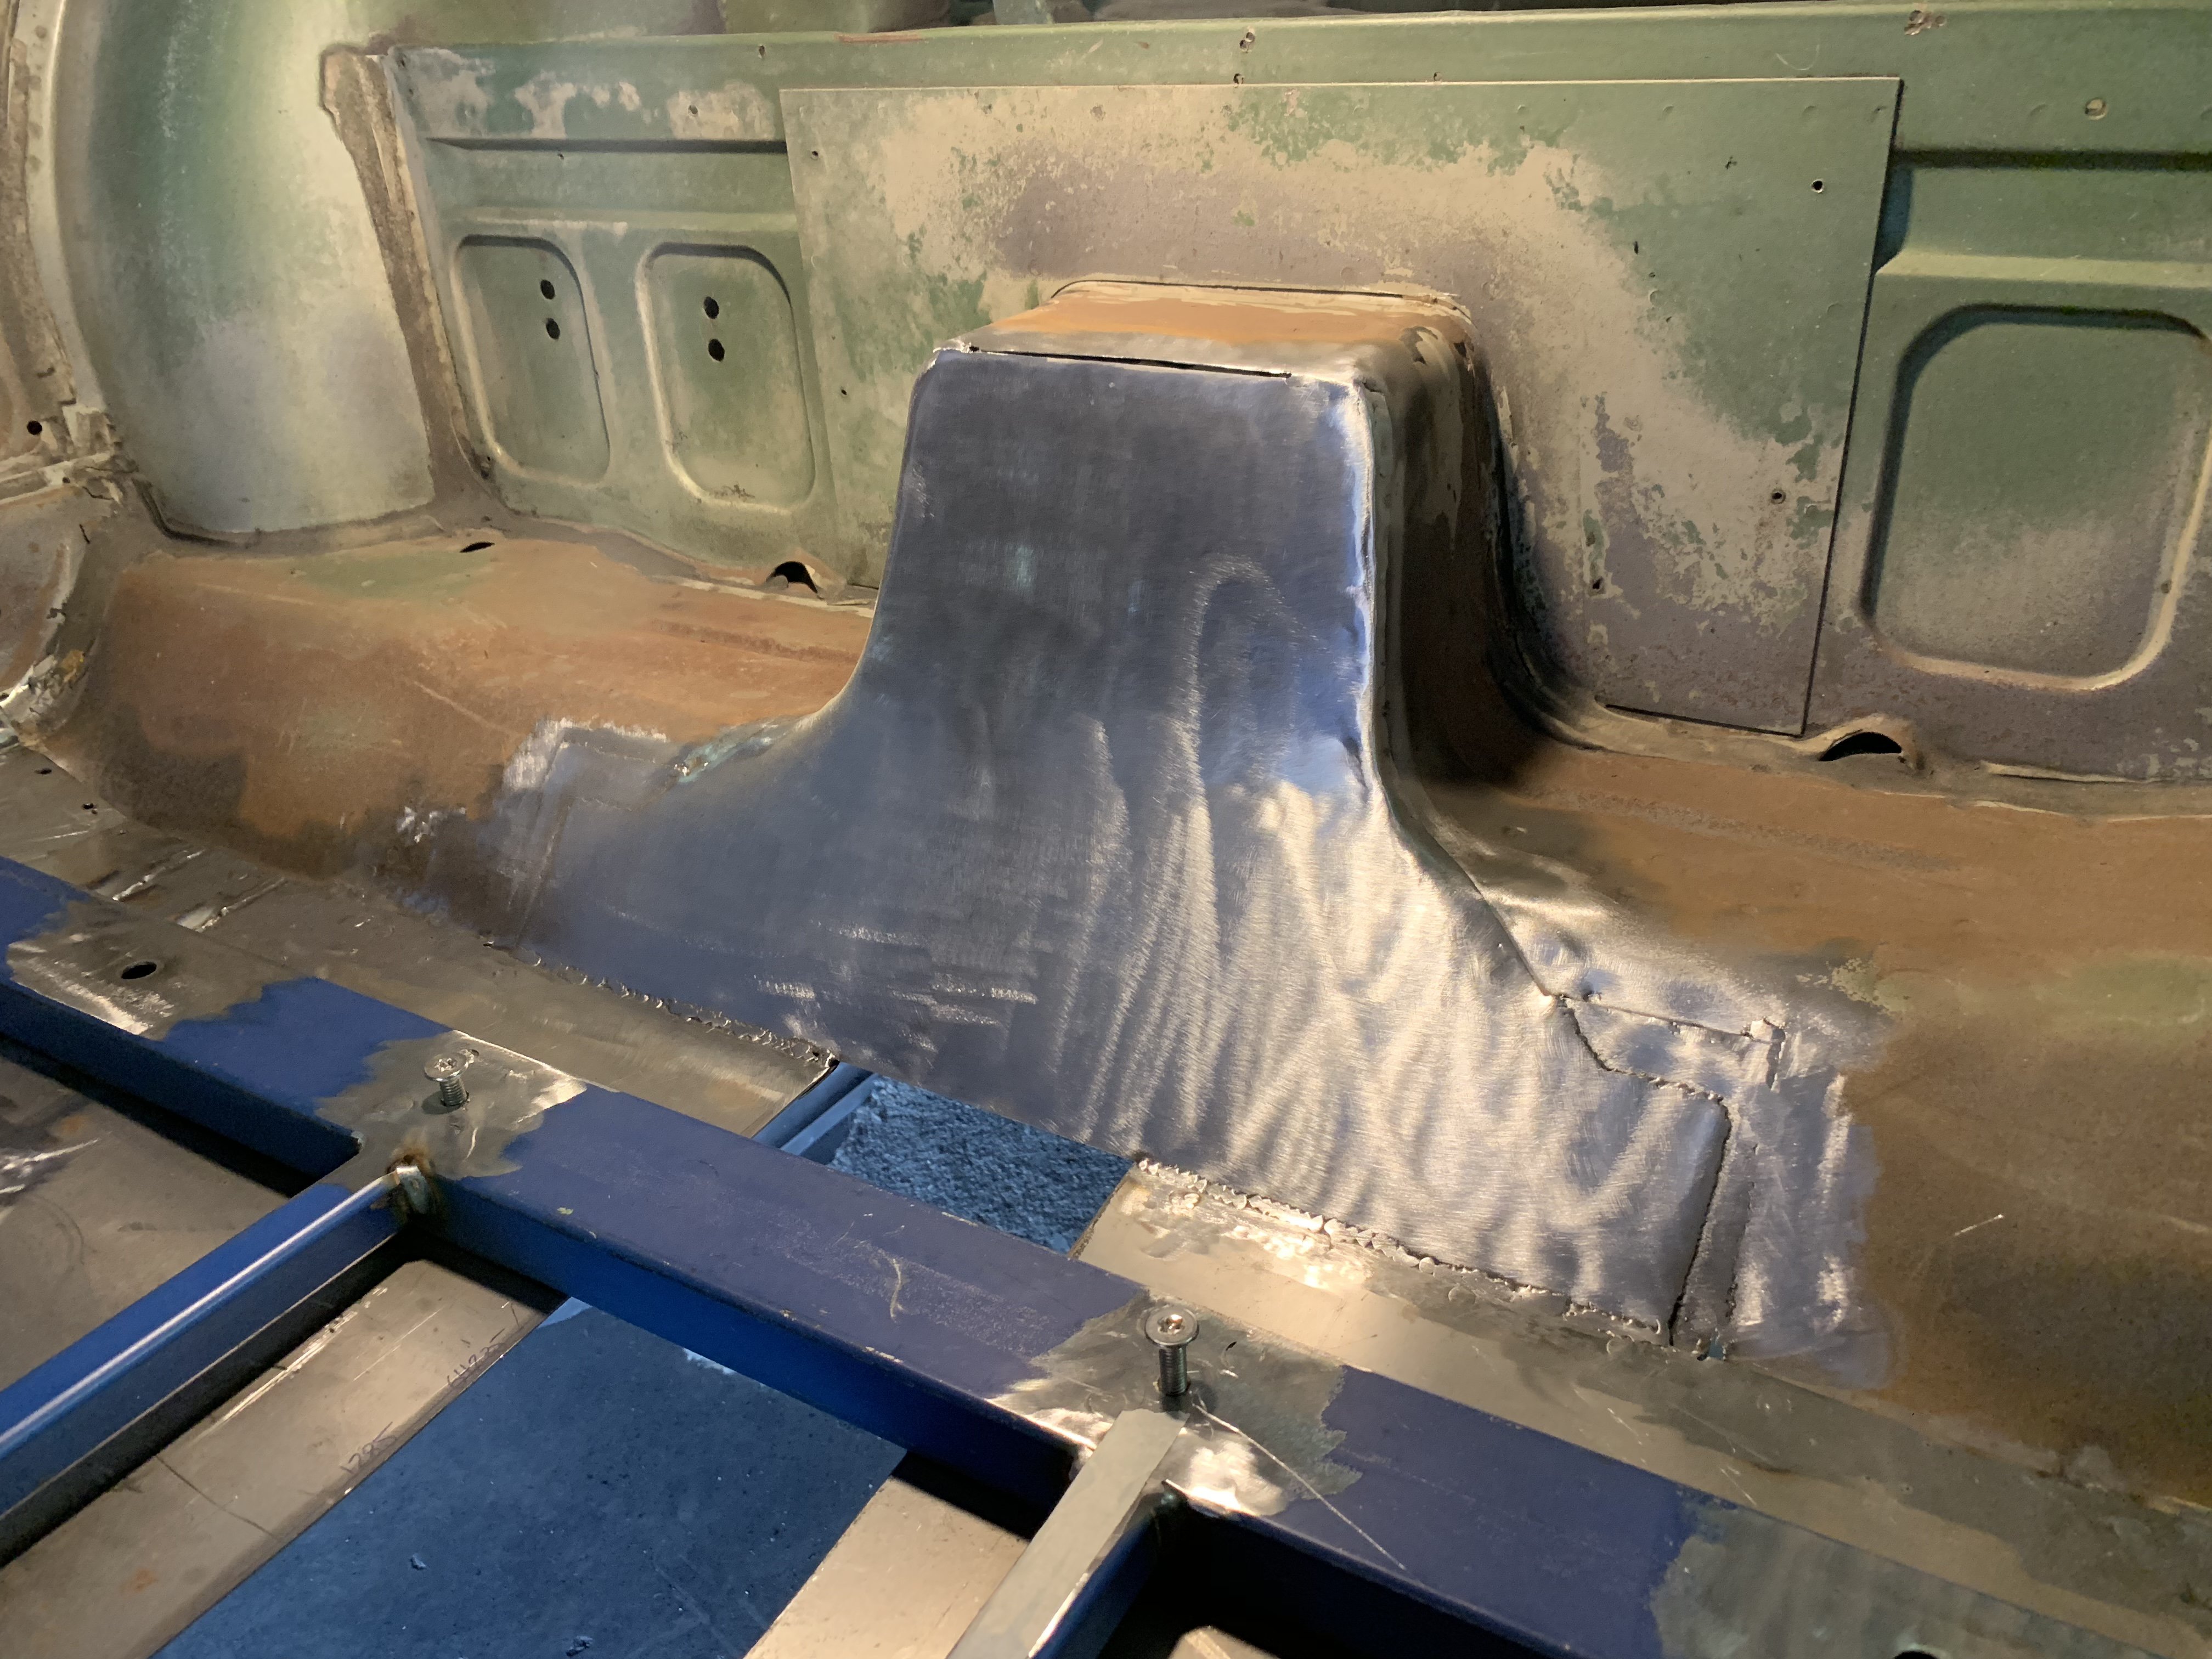
Thanks buddy but it gone the final step and now I’m truly over the hump 2BFE69E9-F883-4167-ABC1-E03B1ADF436D.MOV
-
Sirpents 260Z / C32 AMG Powered RS30 - Australia
Sirpent replied to Sirpent's topic in S30 Series - 240z, 260z, 280z
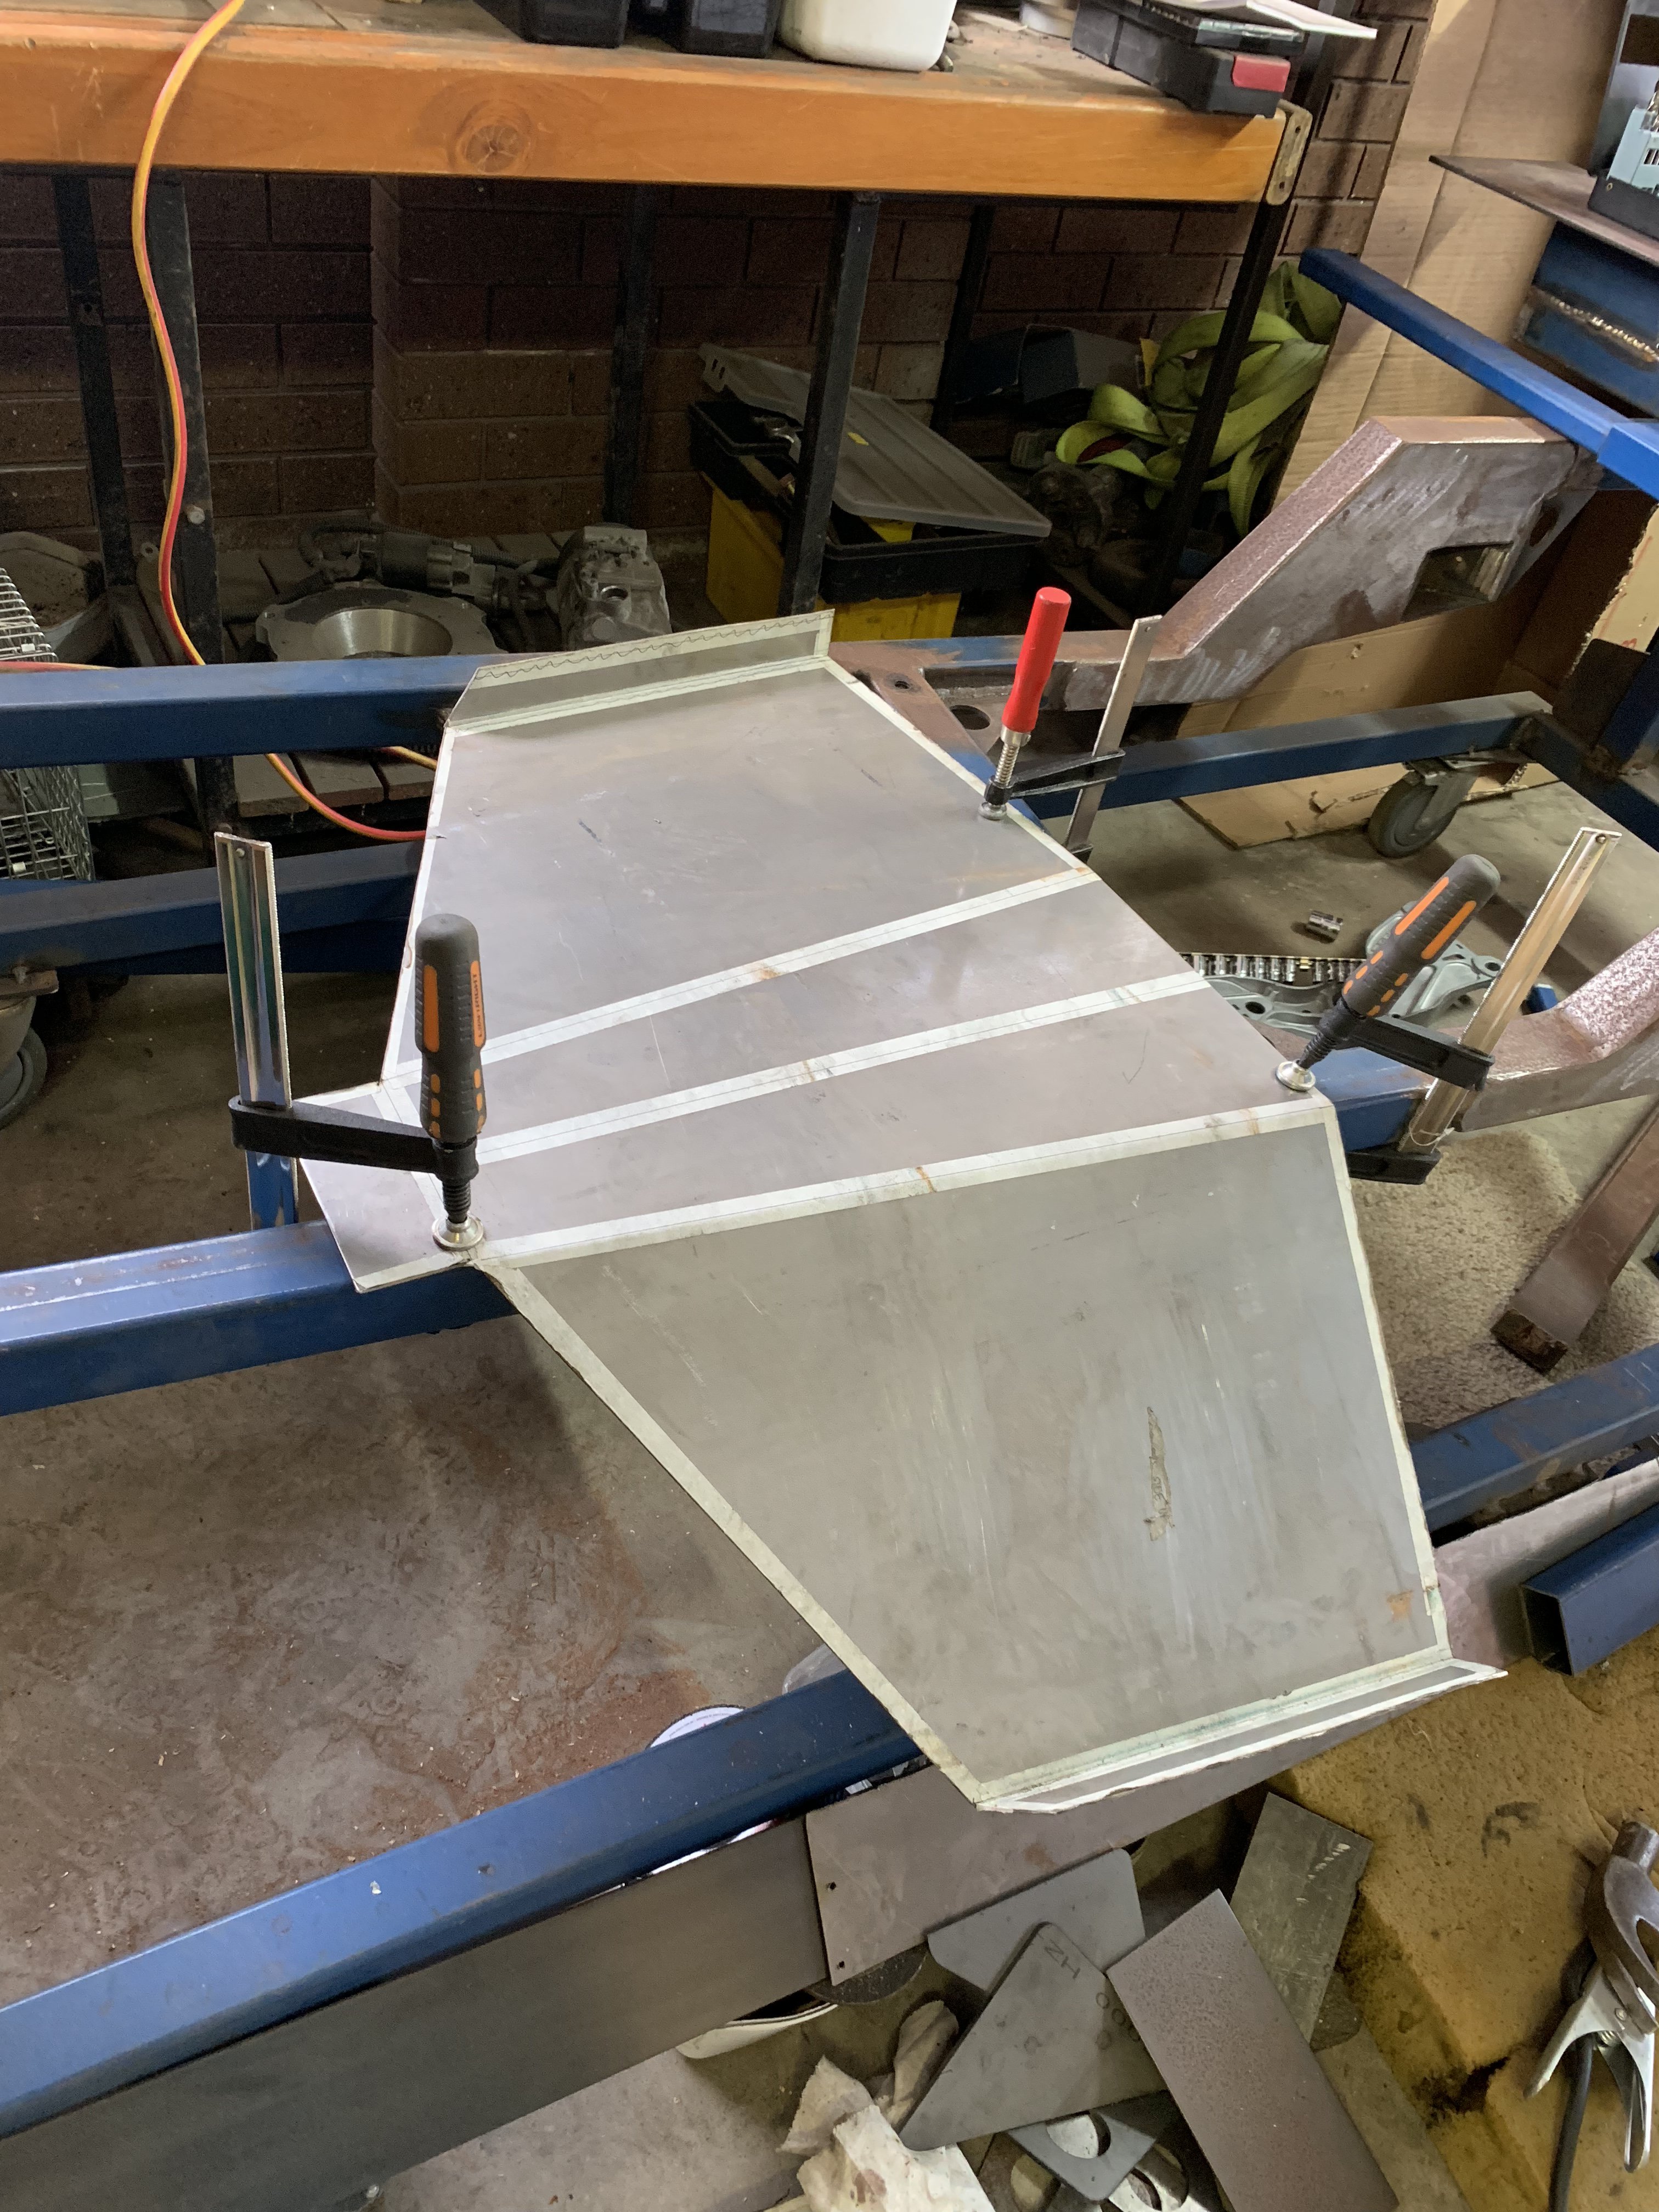
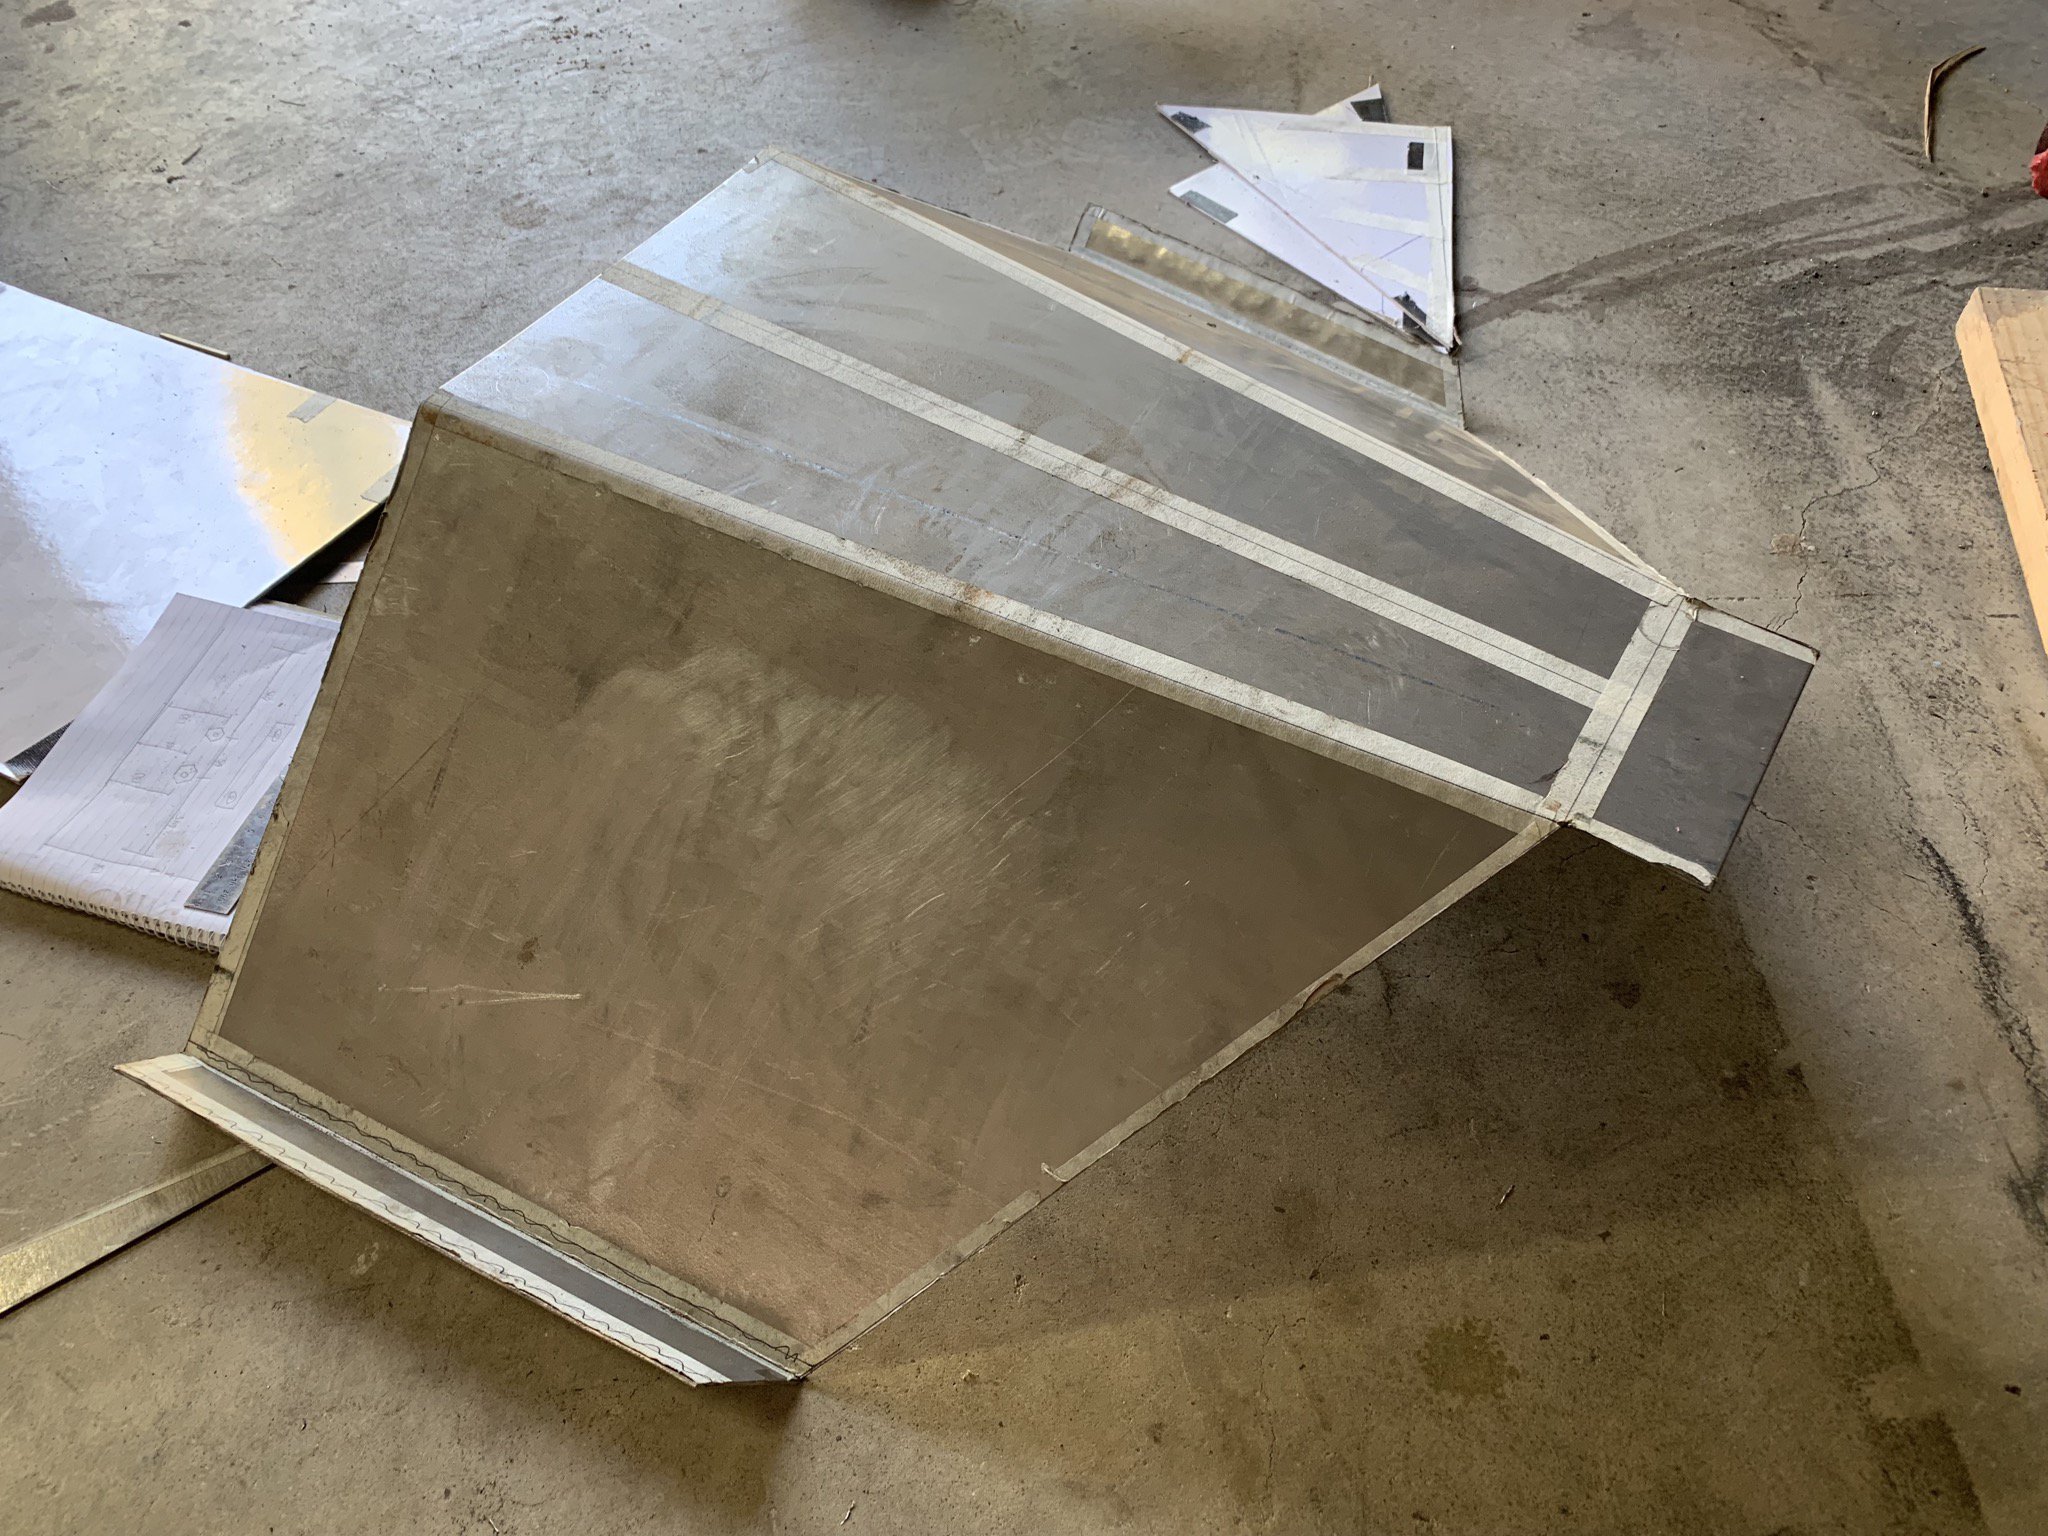
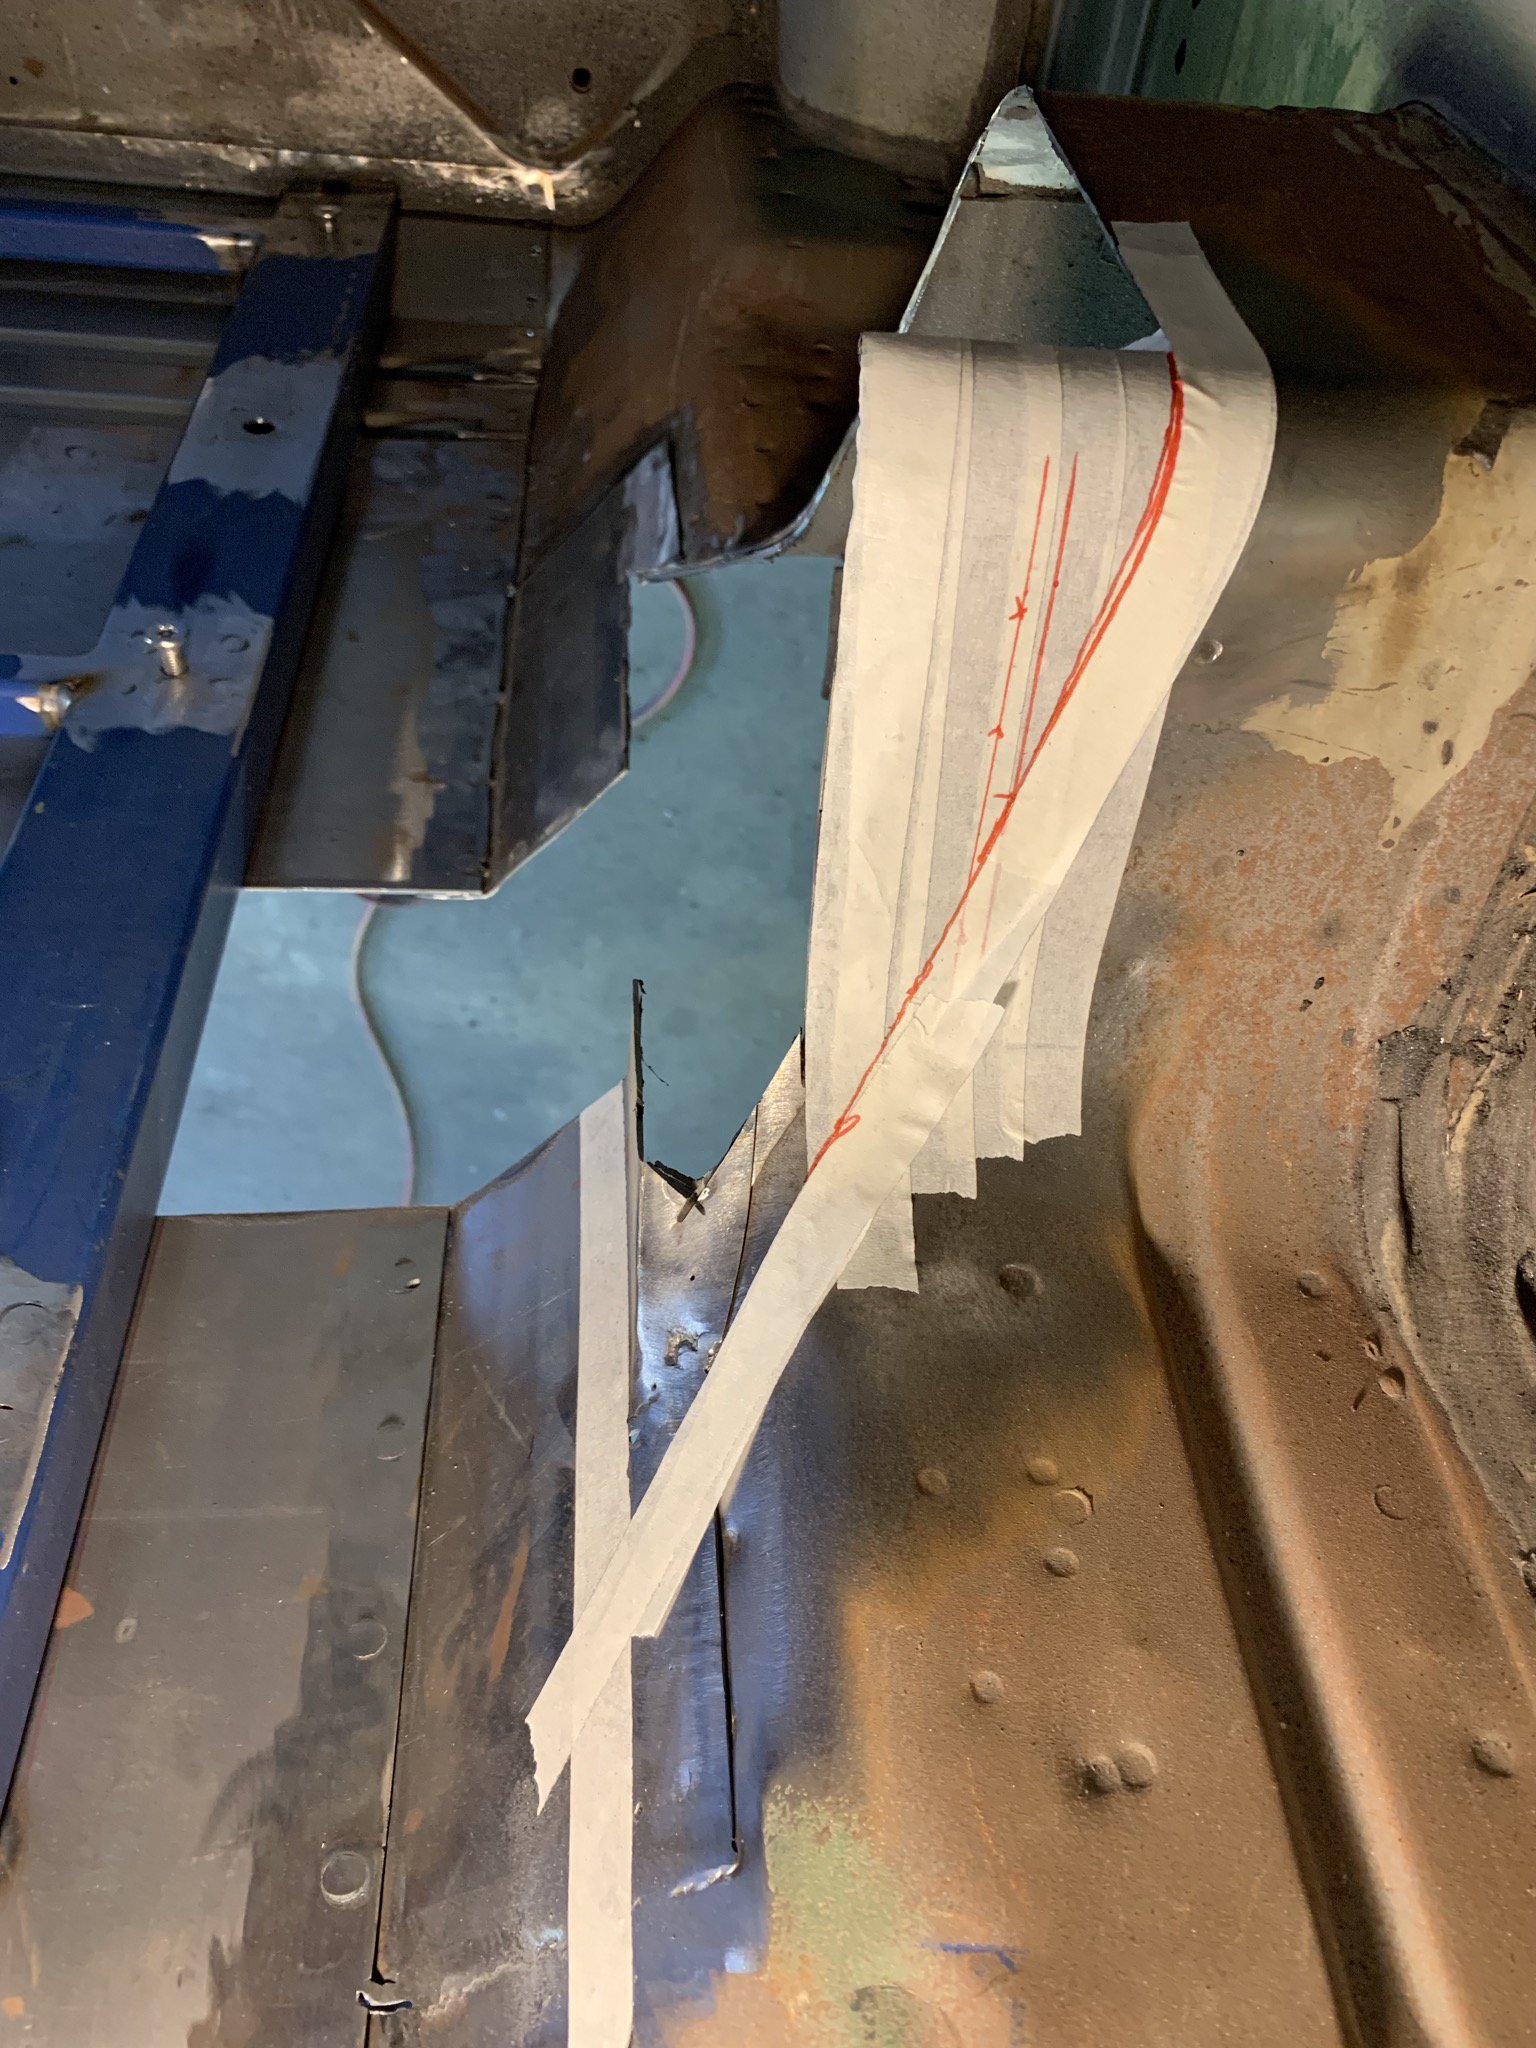
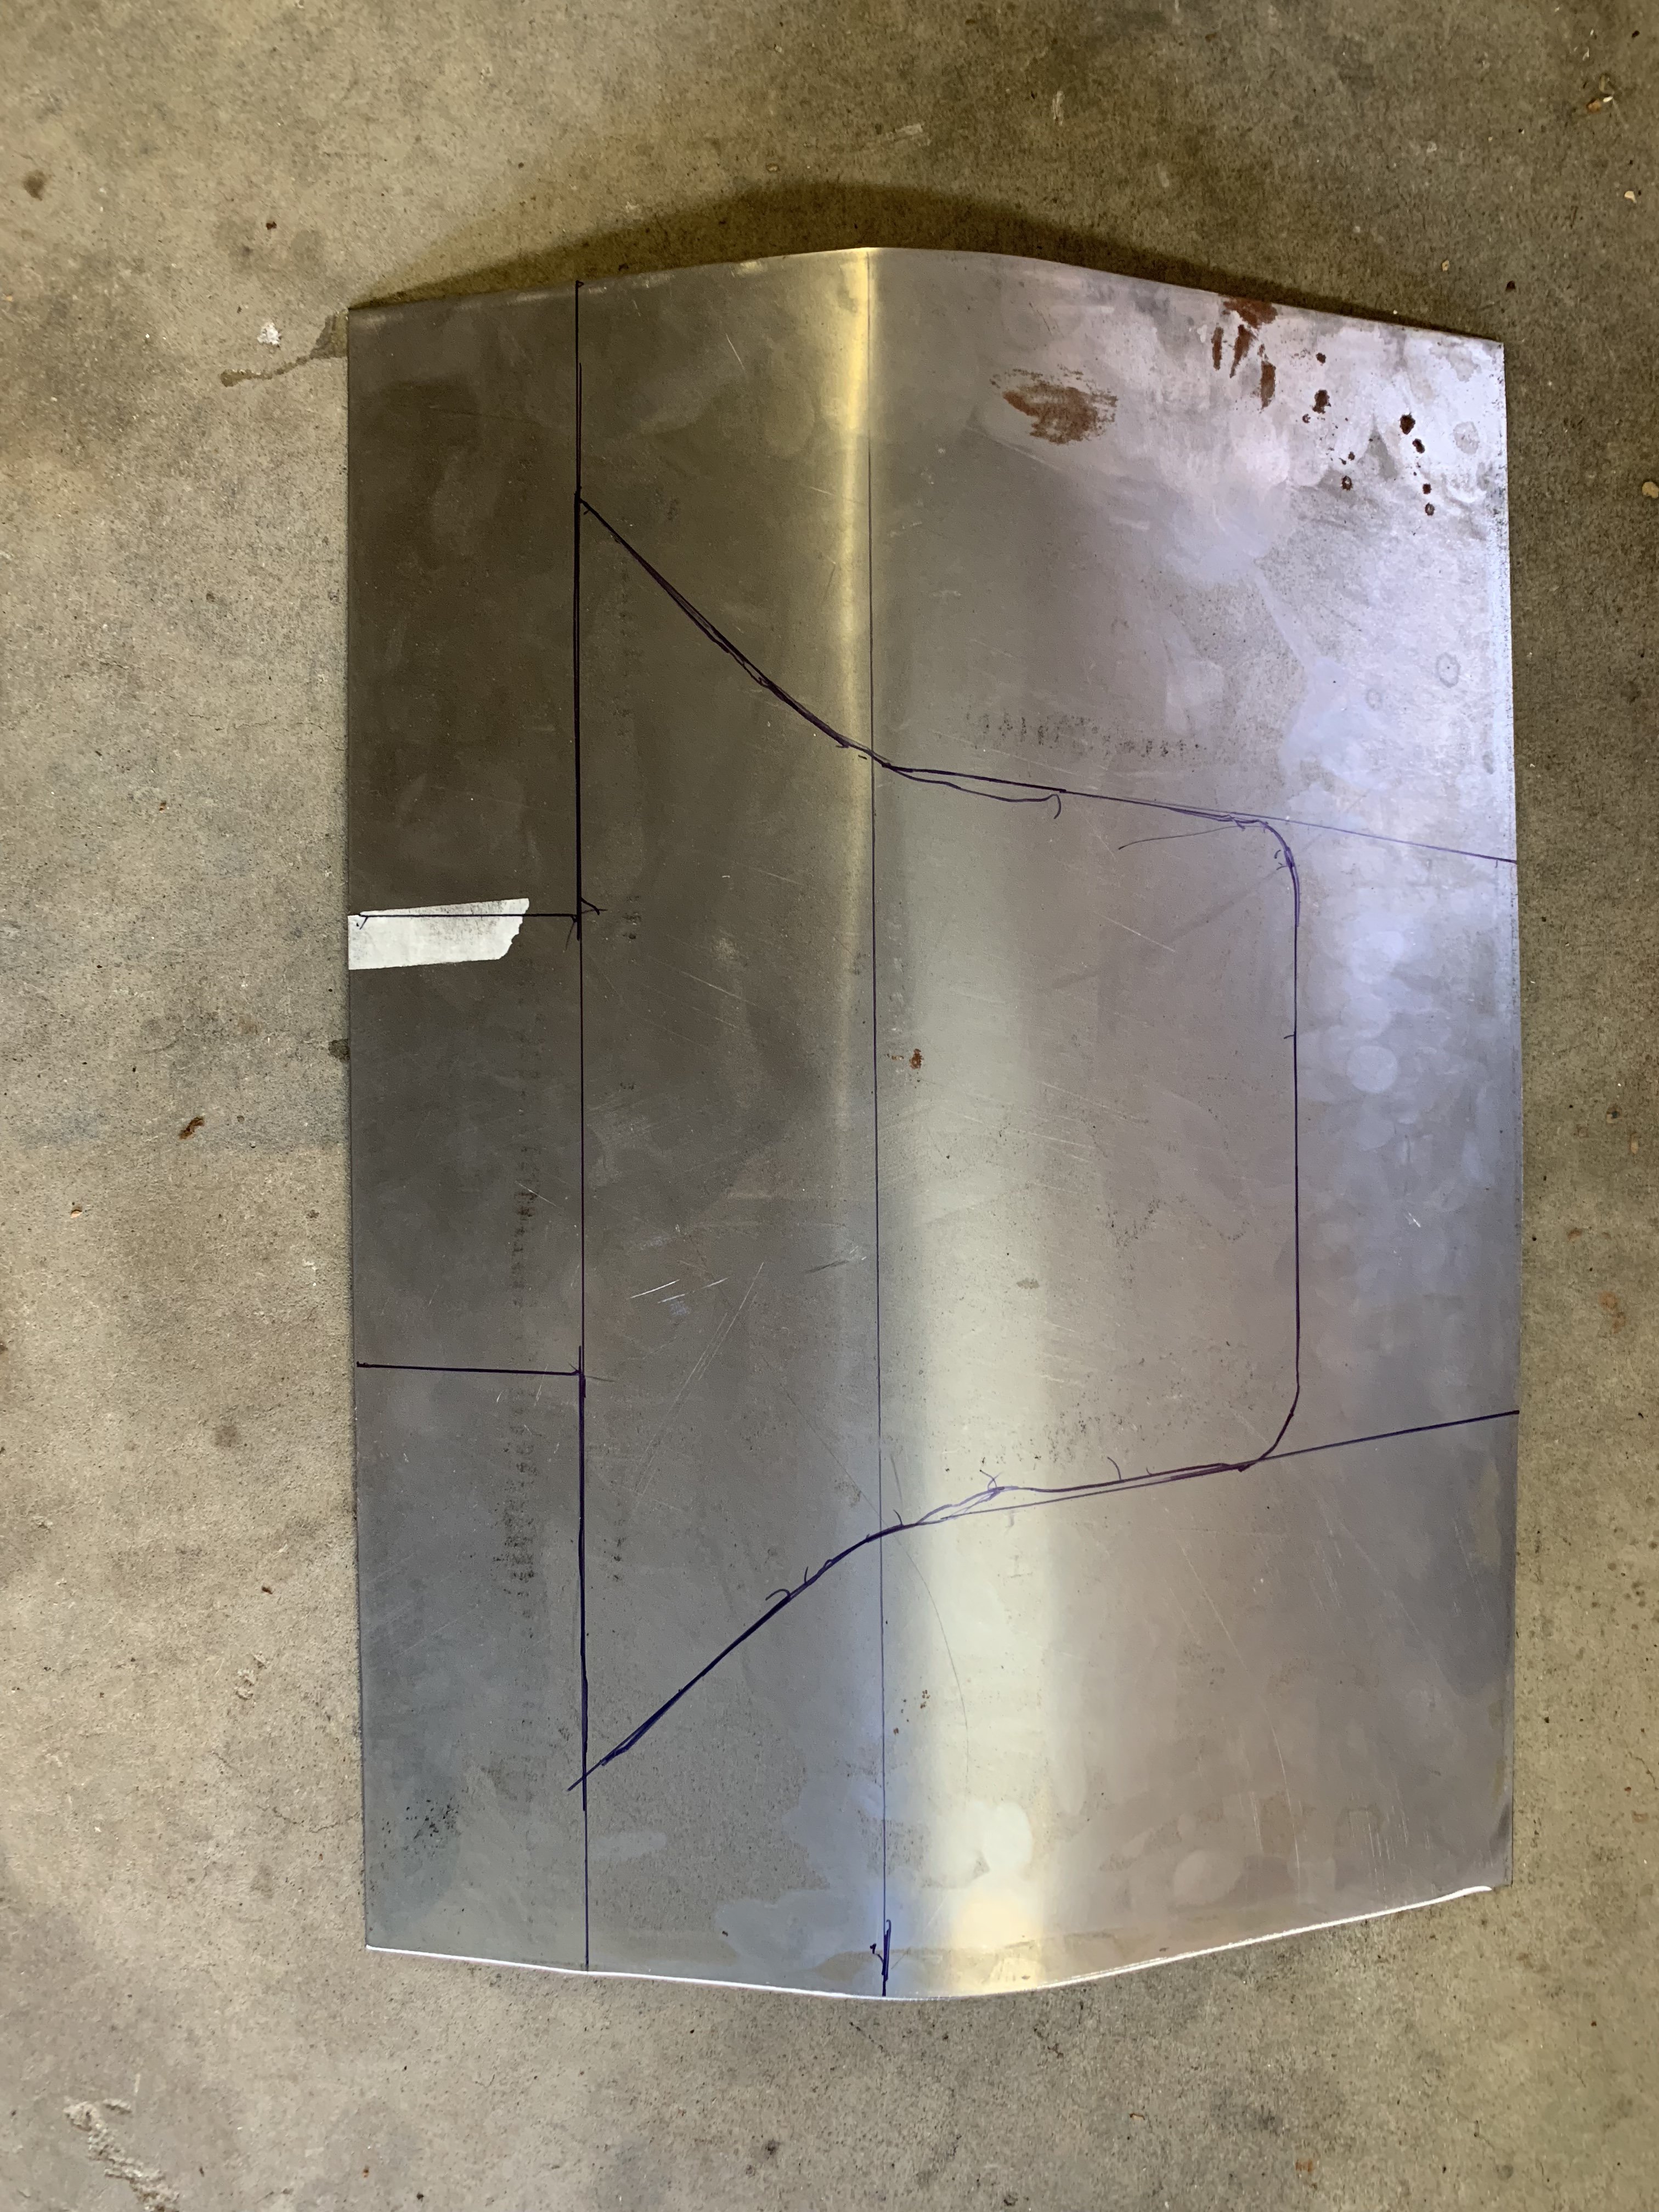
Modeling done time to bend metal
-
Sirpents 260Z / C32 AMG Powered RS30 - Australia
Sirpent replied to Sirpent's topic in S30 Series - 240z, 260z, 280z
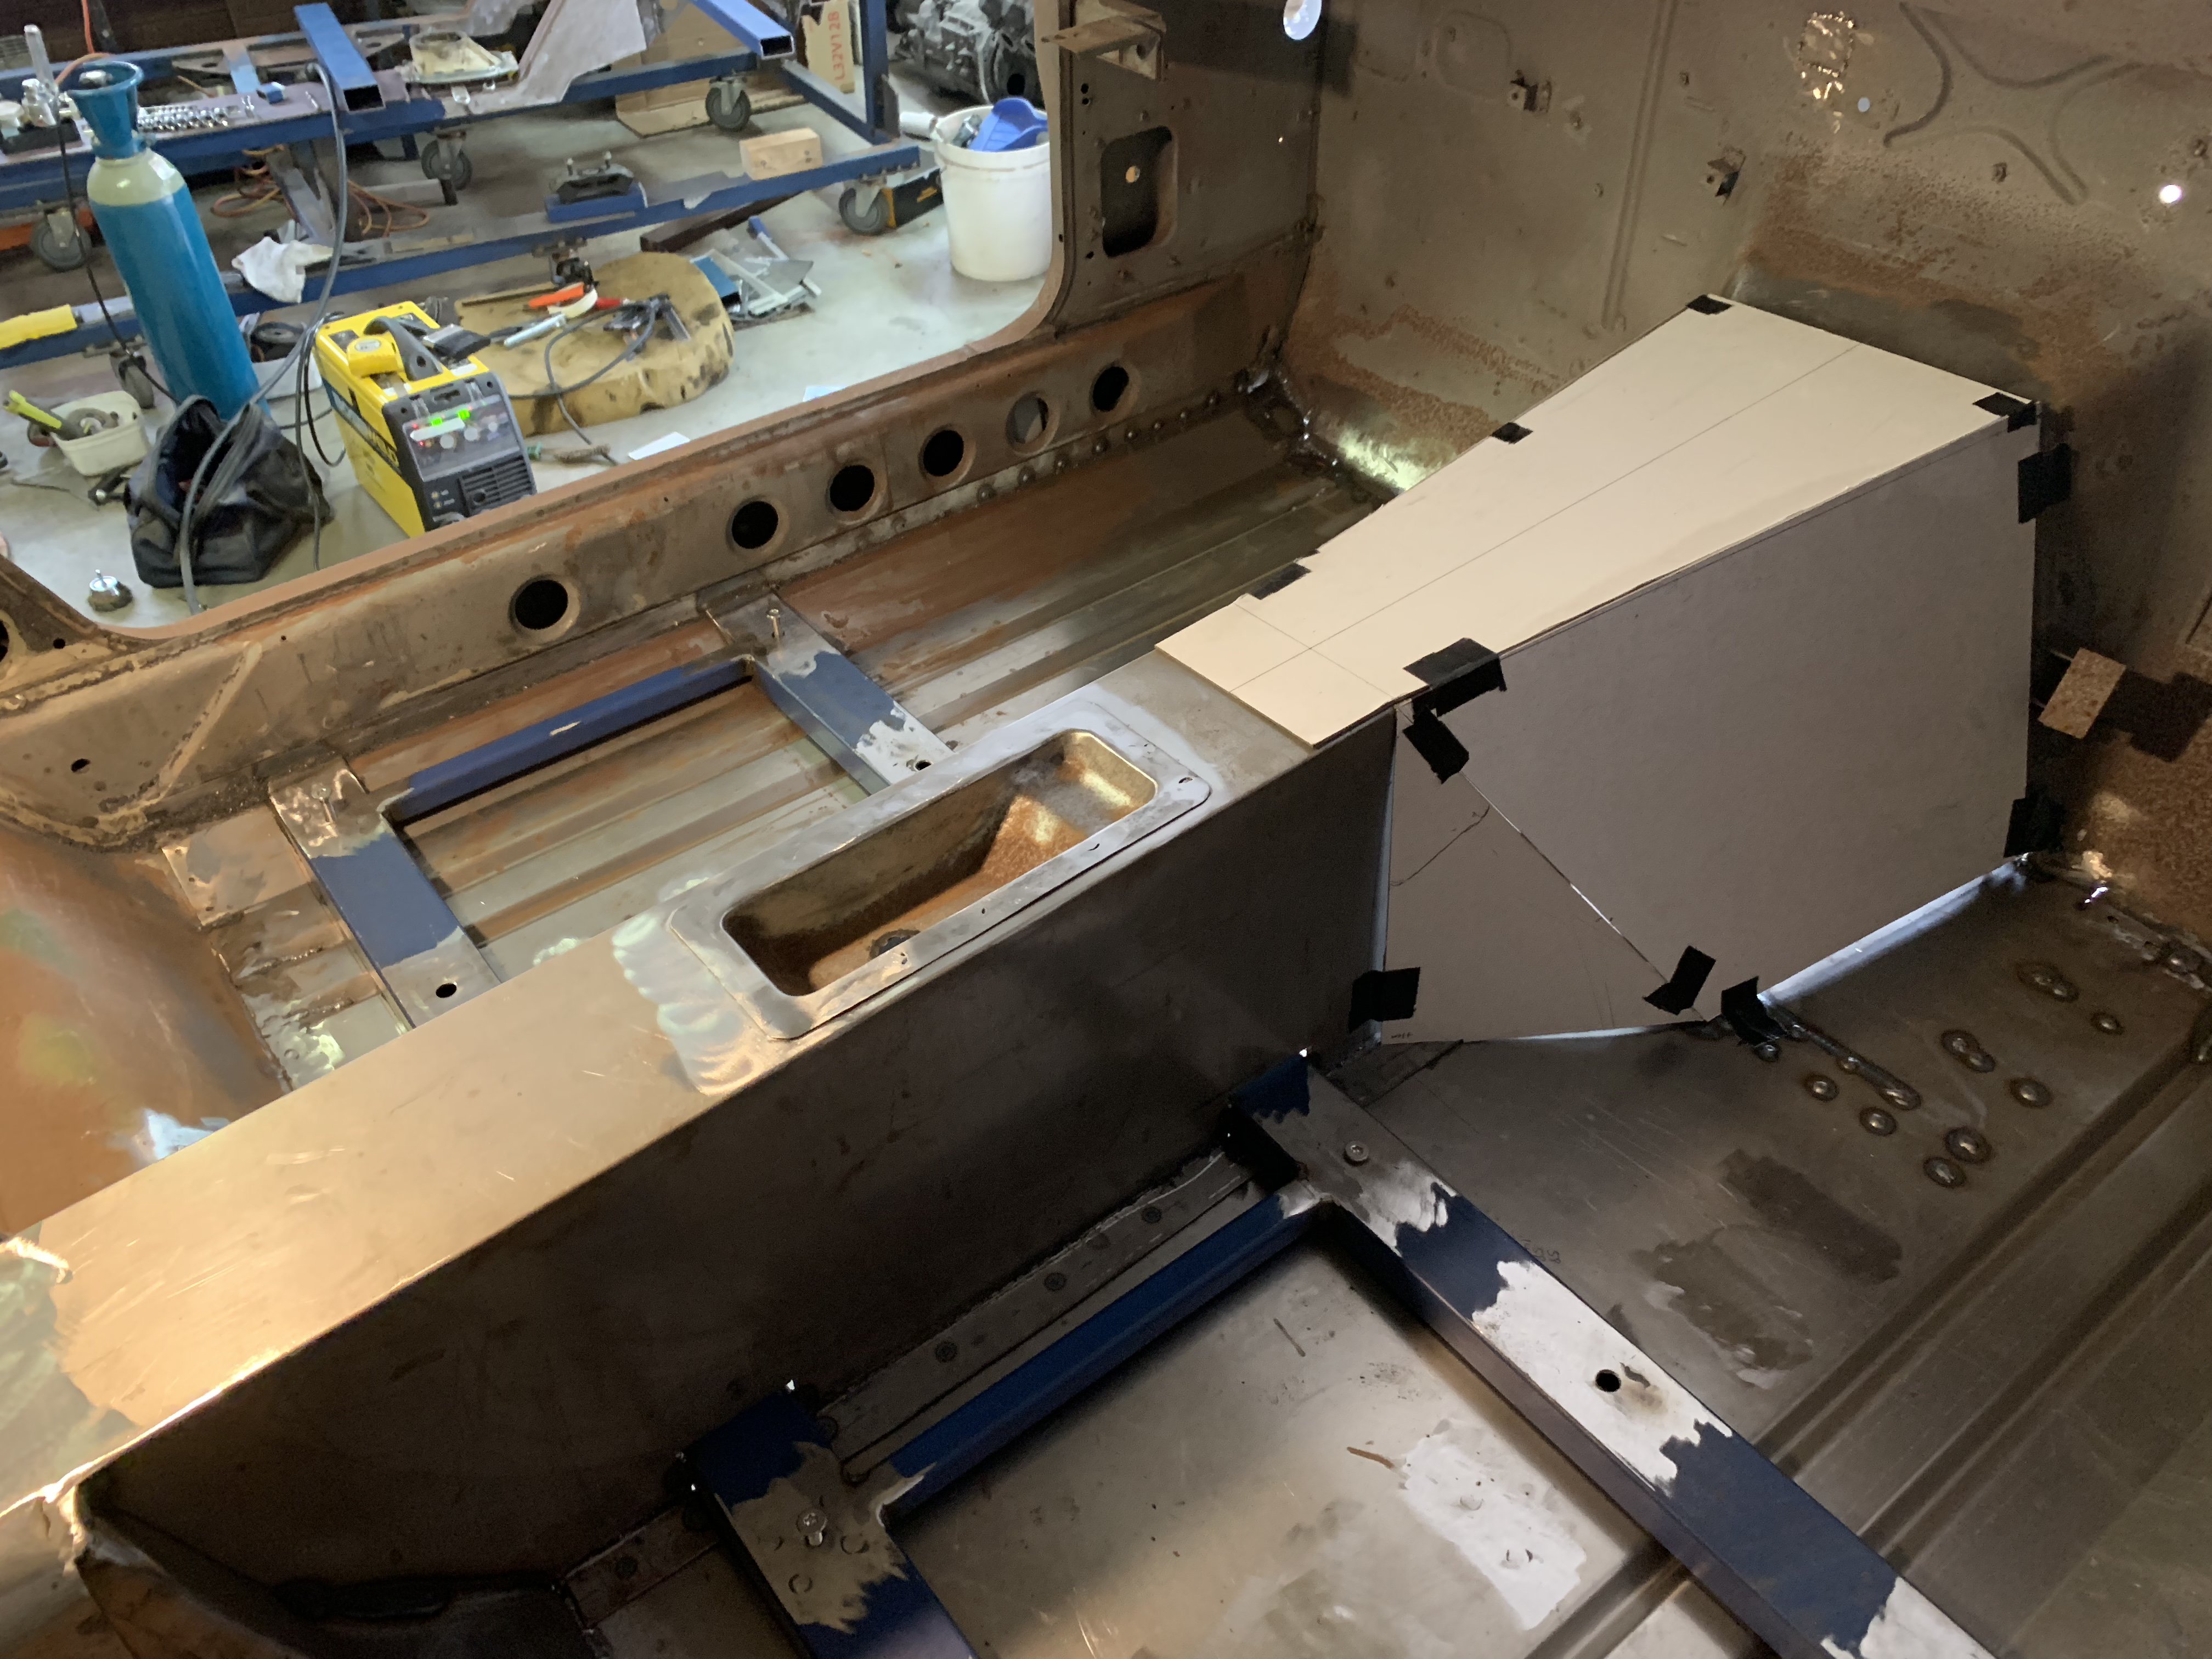
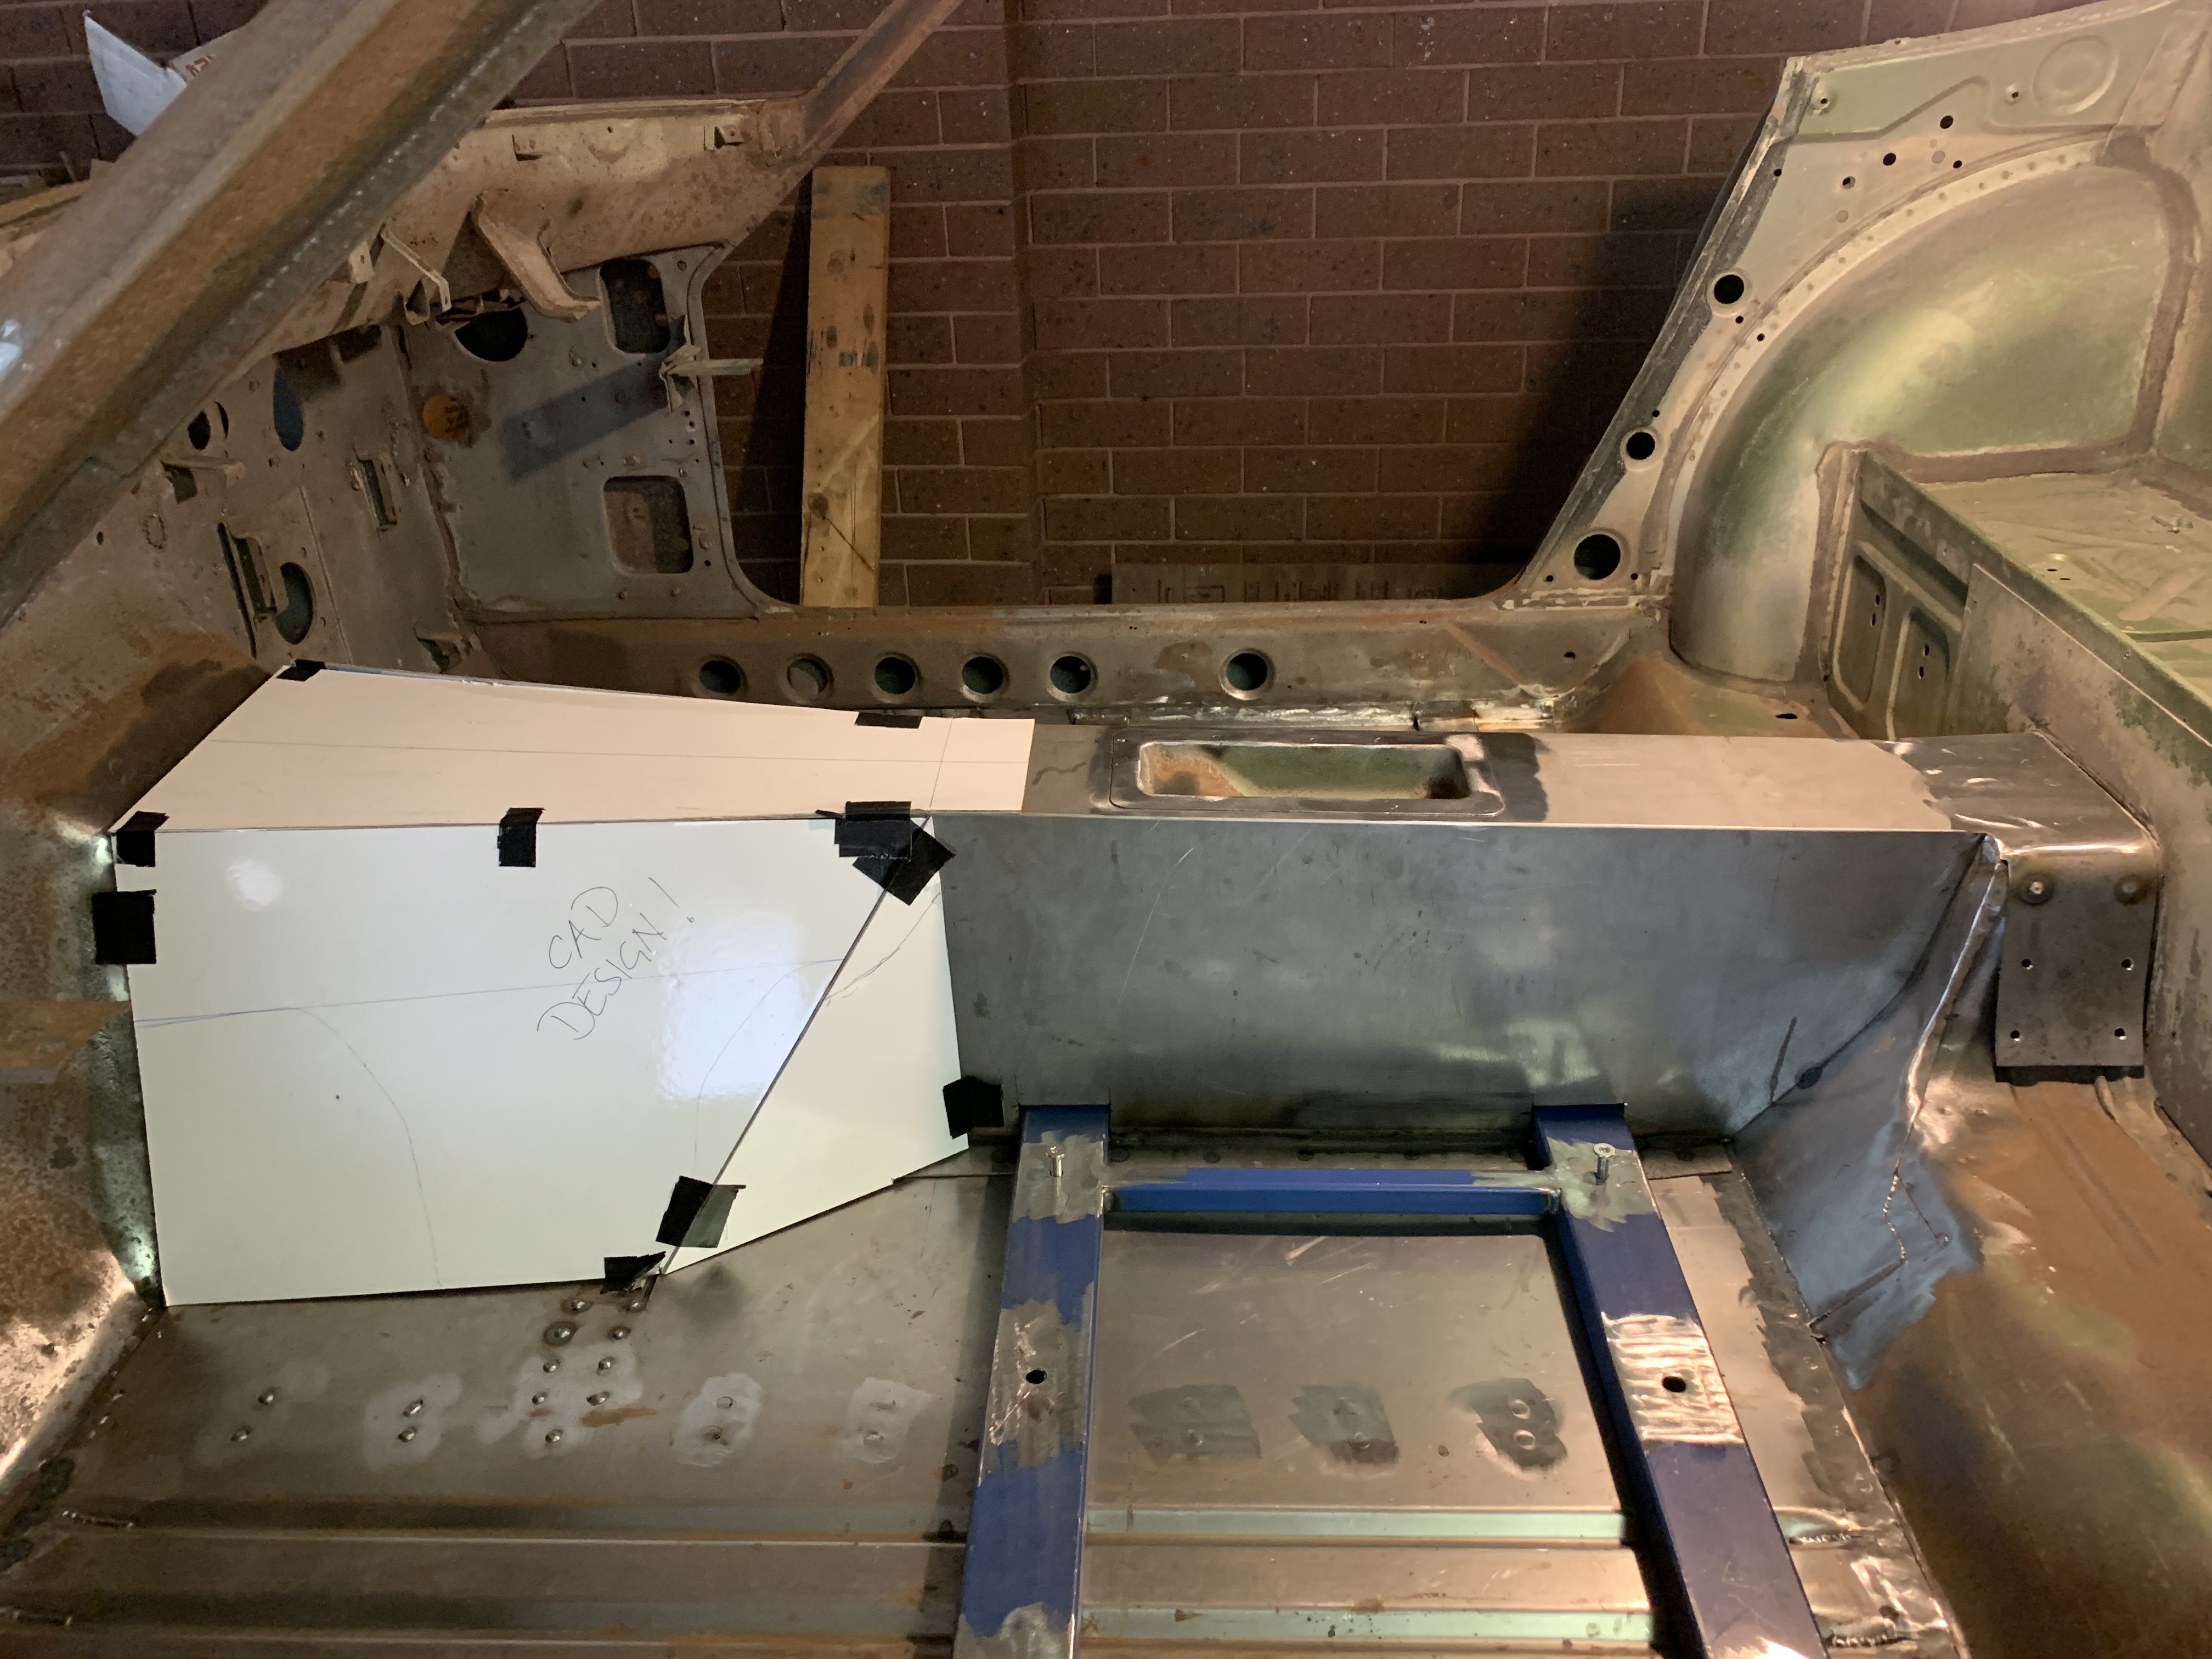
Tomorrow’s next adventure CAD design of the front tunnel section ;)- John
-
Sirpents 260Z / C32 AMG Powered RS30 - Australia
Sirpent replied to Sirpent's topic in S30 Series - 240z, 260z, 280z
Thanks Dave yeah it’s a journey as you well know, sometimes it’s well mapped out and others you literally trip over what you’re looking for if any of the info or ideas I post here helps another member out then I’ve done my duty how goes your pony Dave ? -
Sirpents 260Z / C32 AMG Powered RS30 - Australia
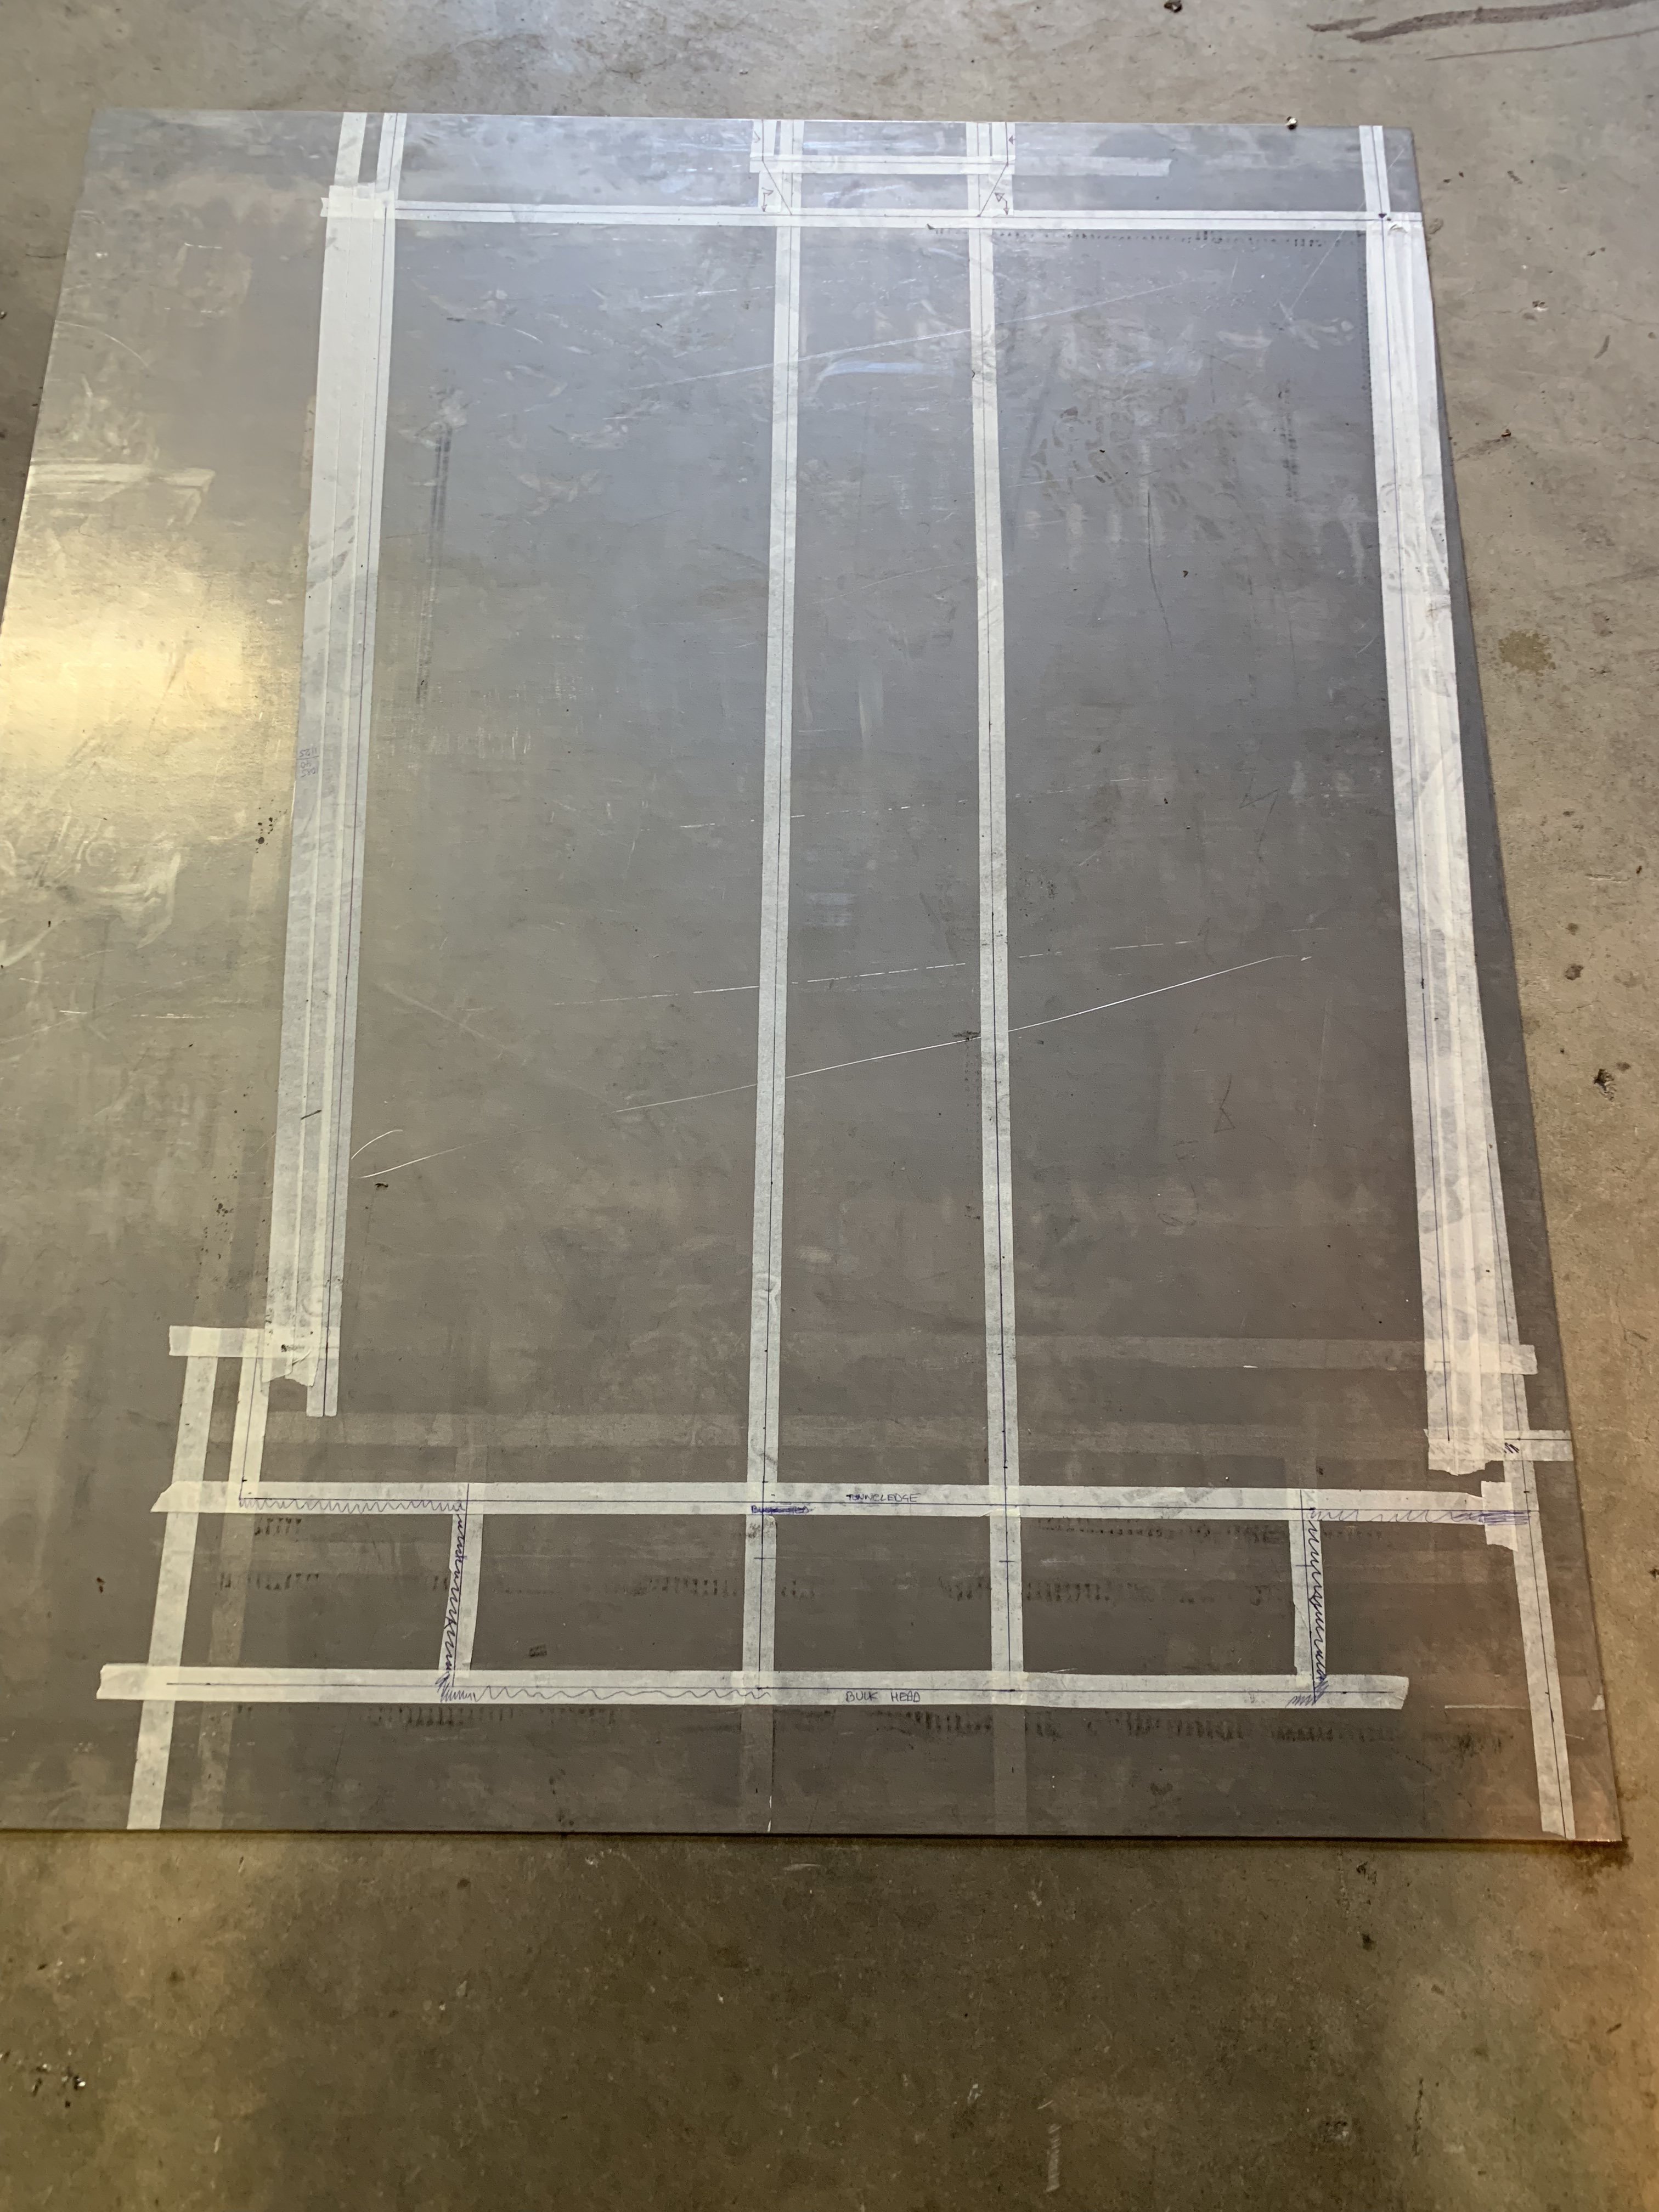
Sirpent replied to Sirpent's topic in S30 Series - 240z, 260z, 280z
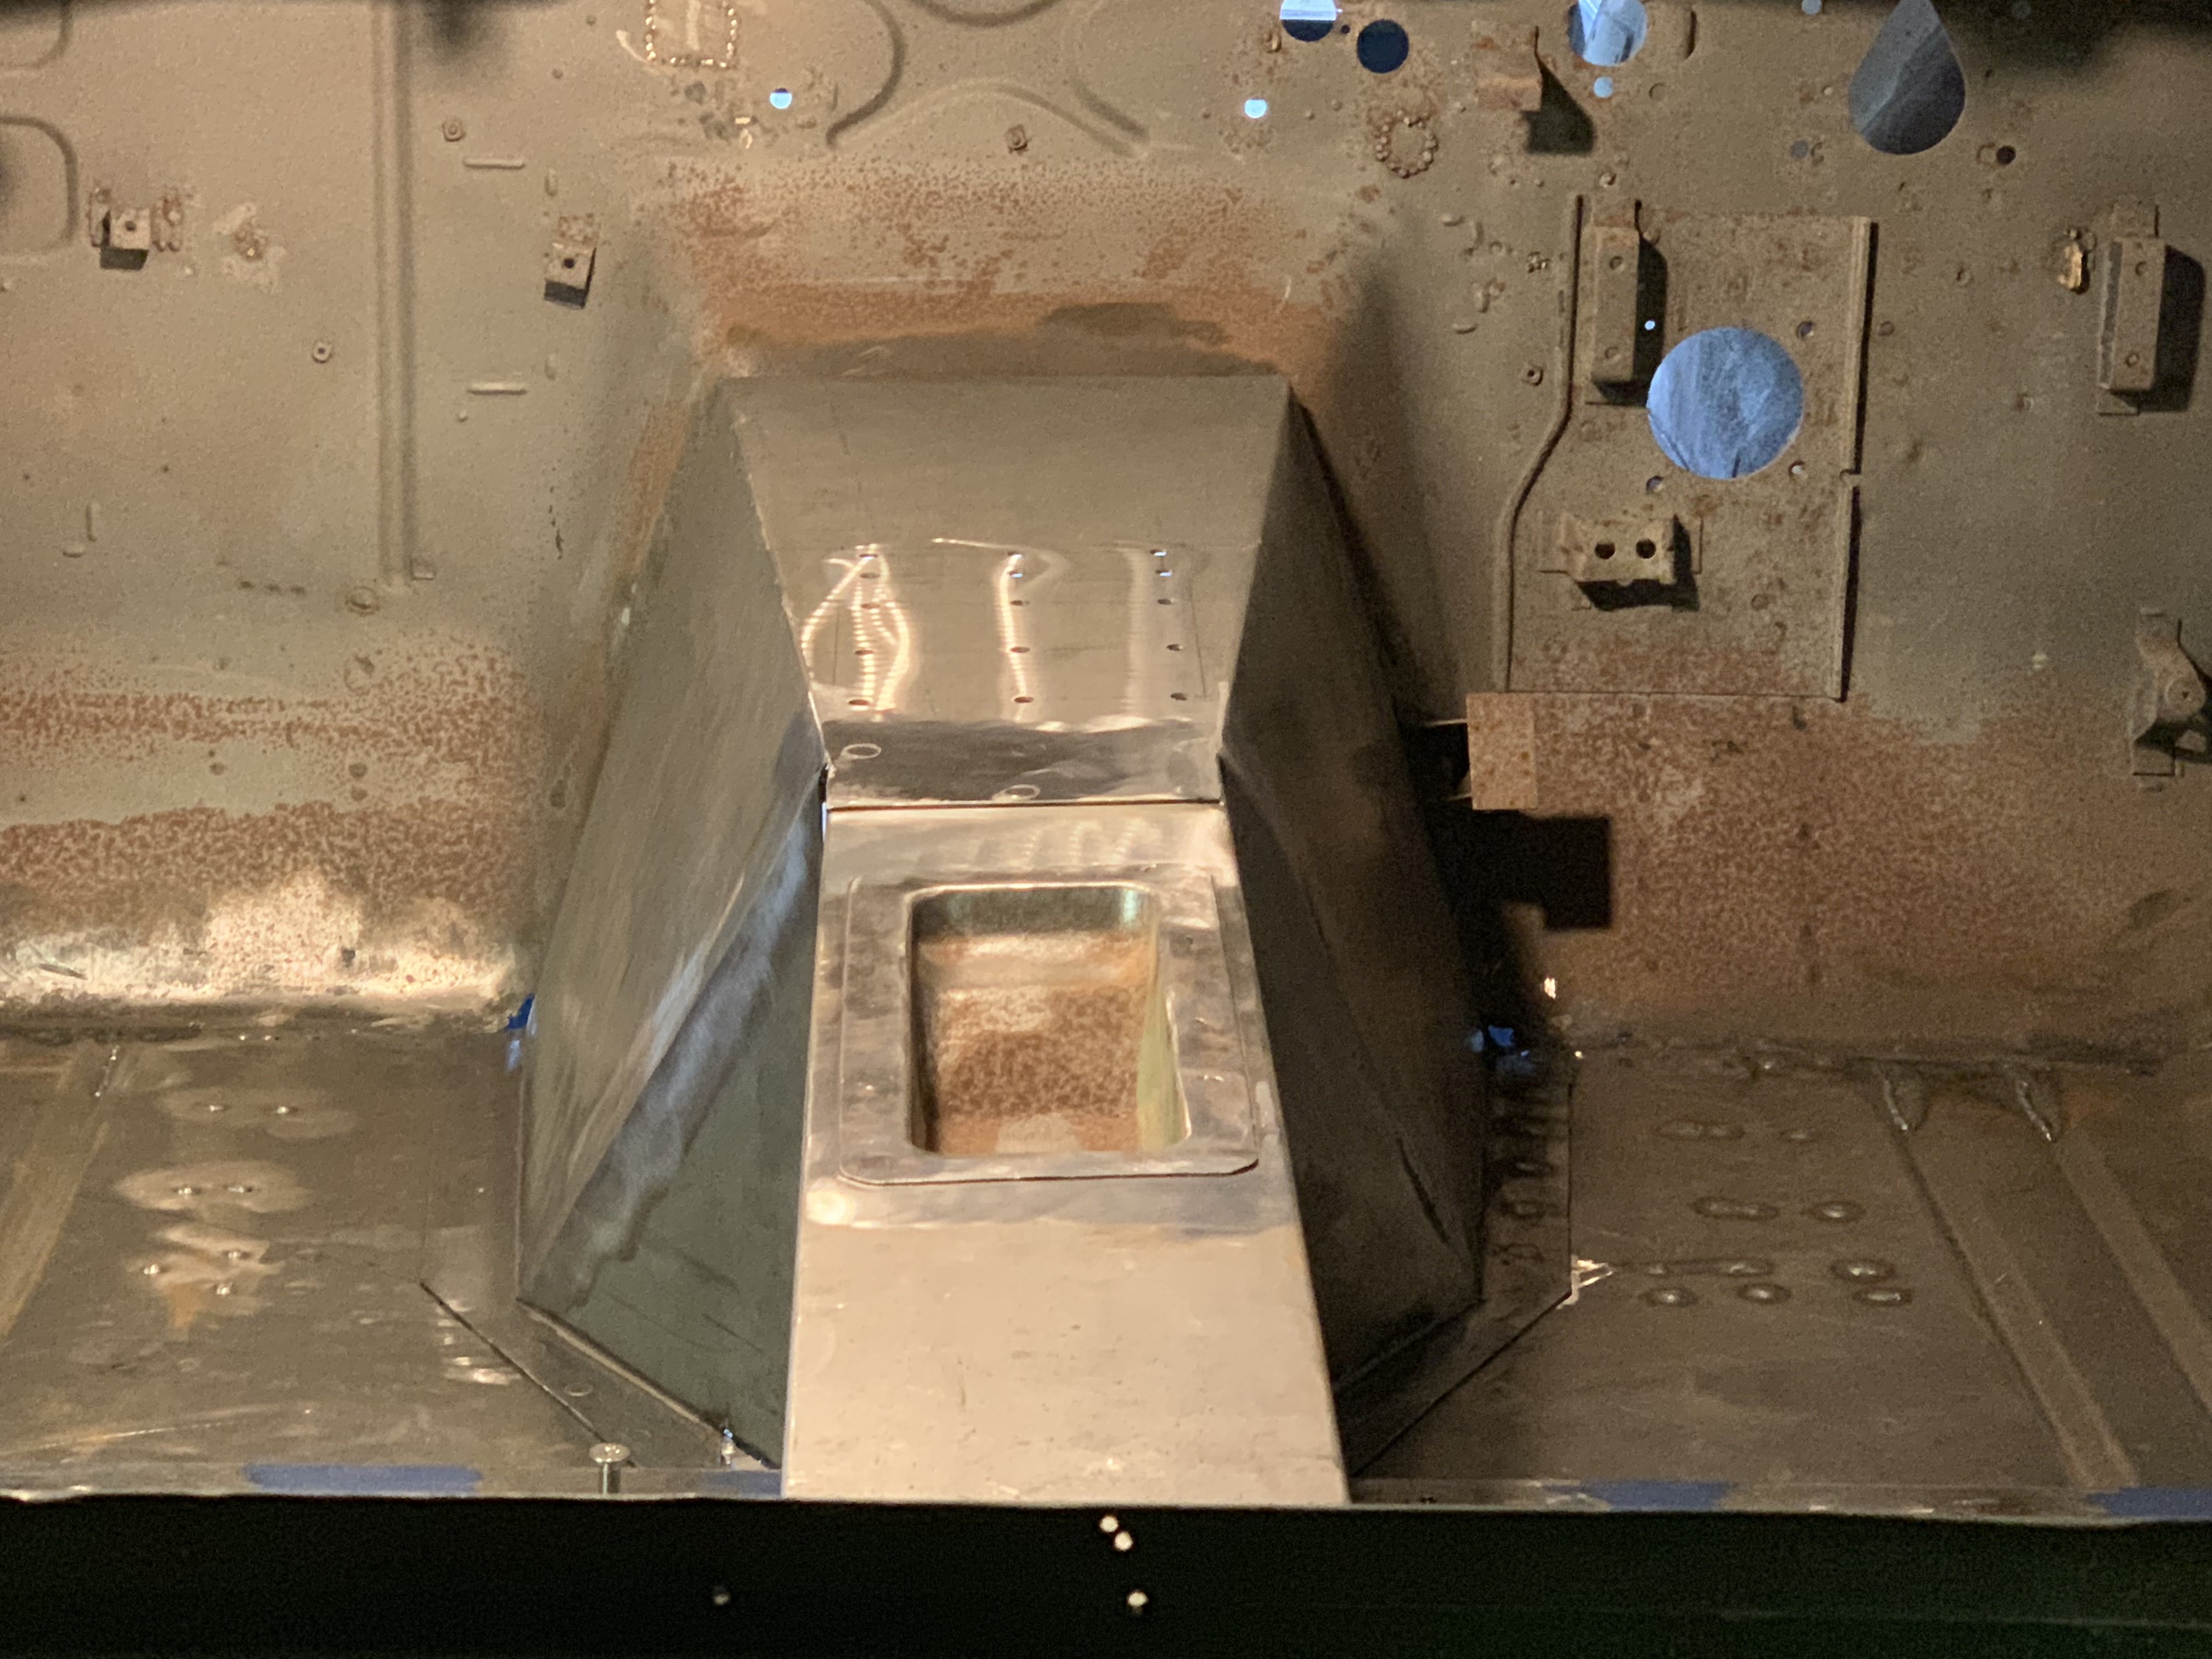
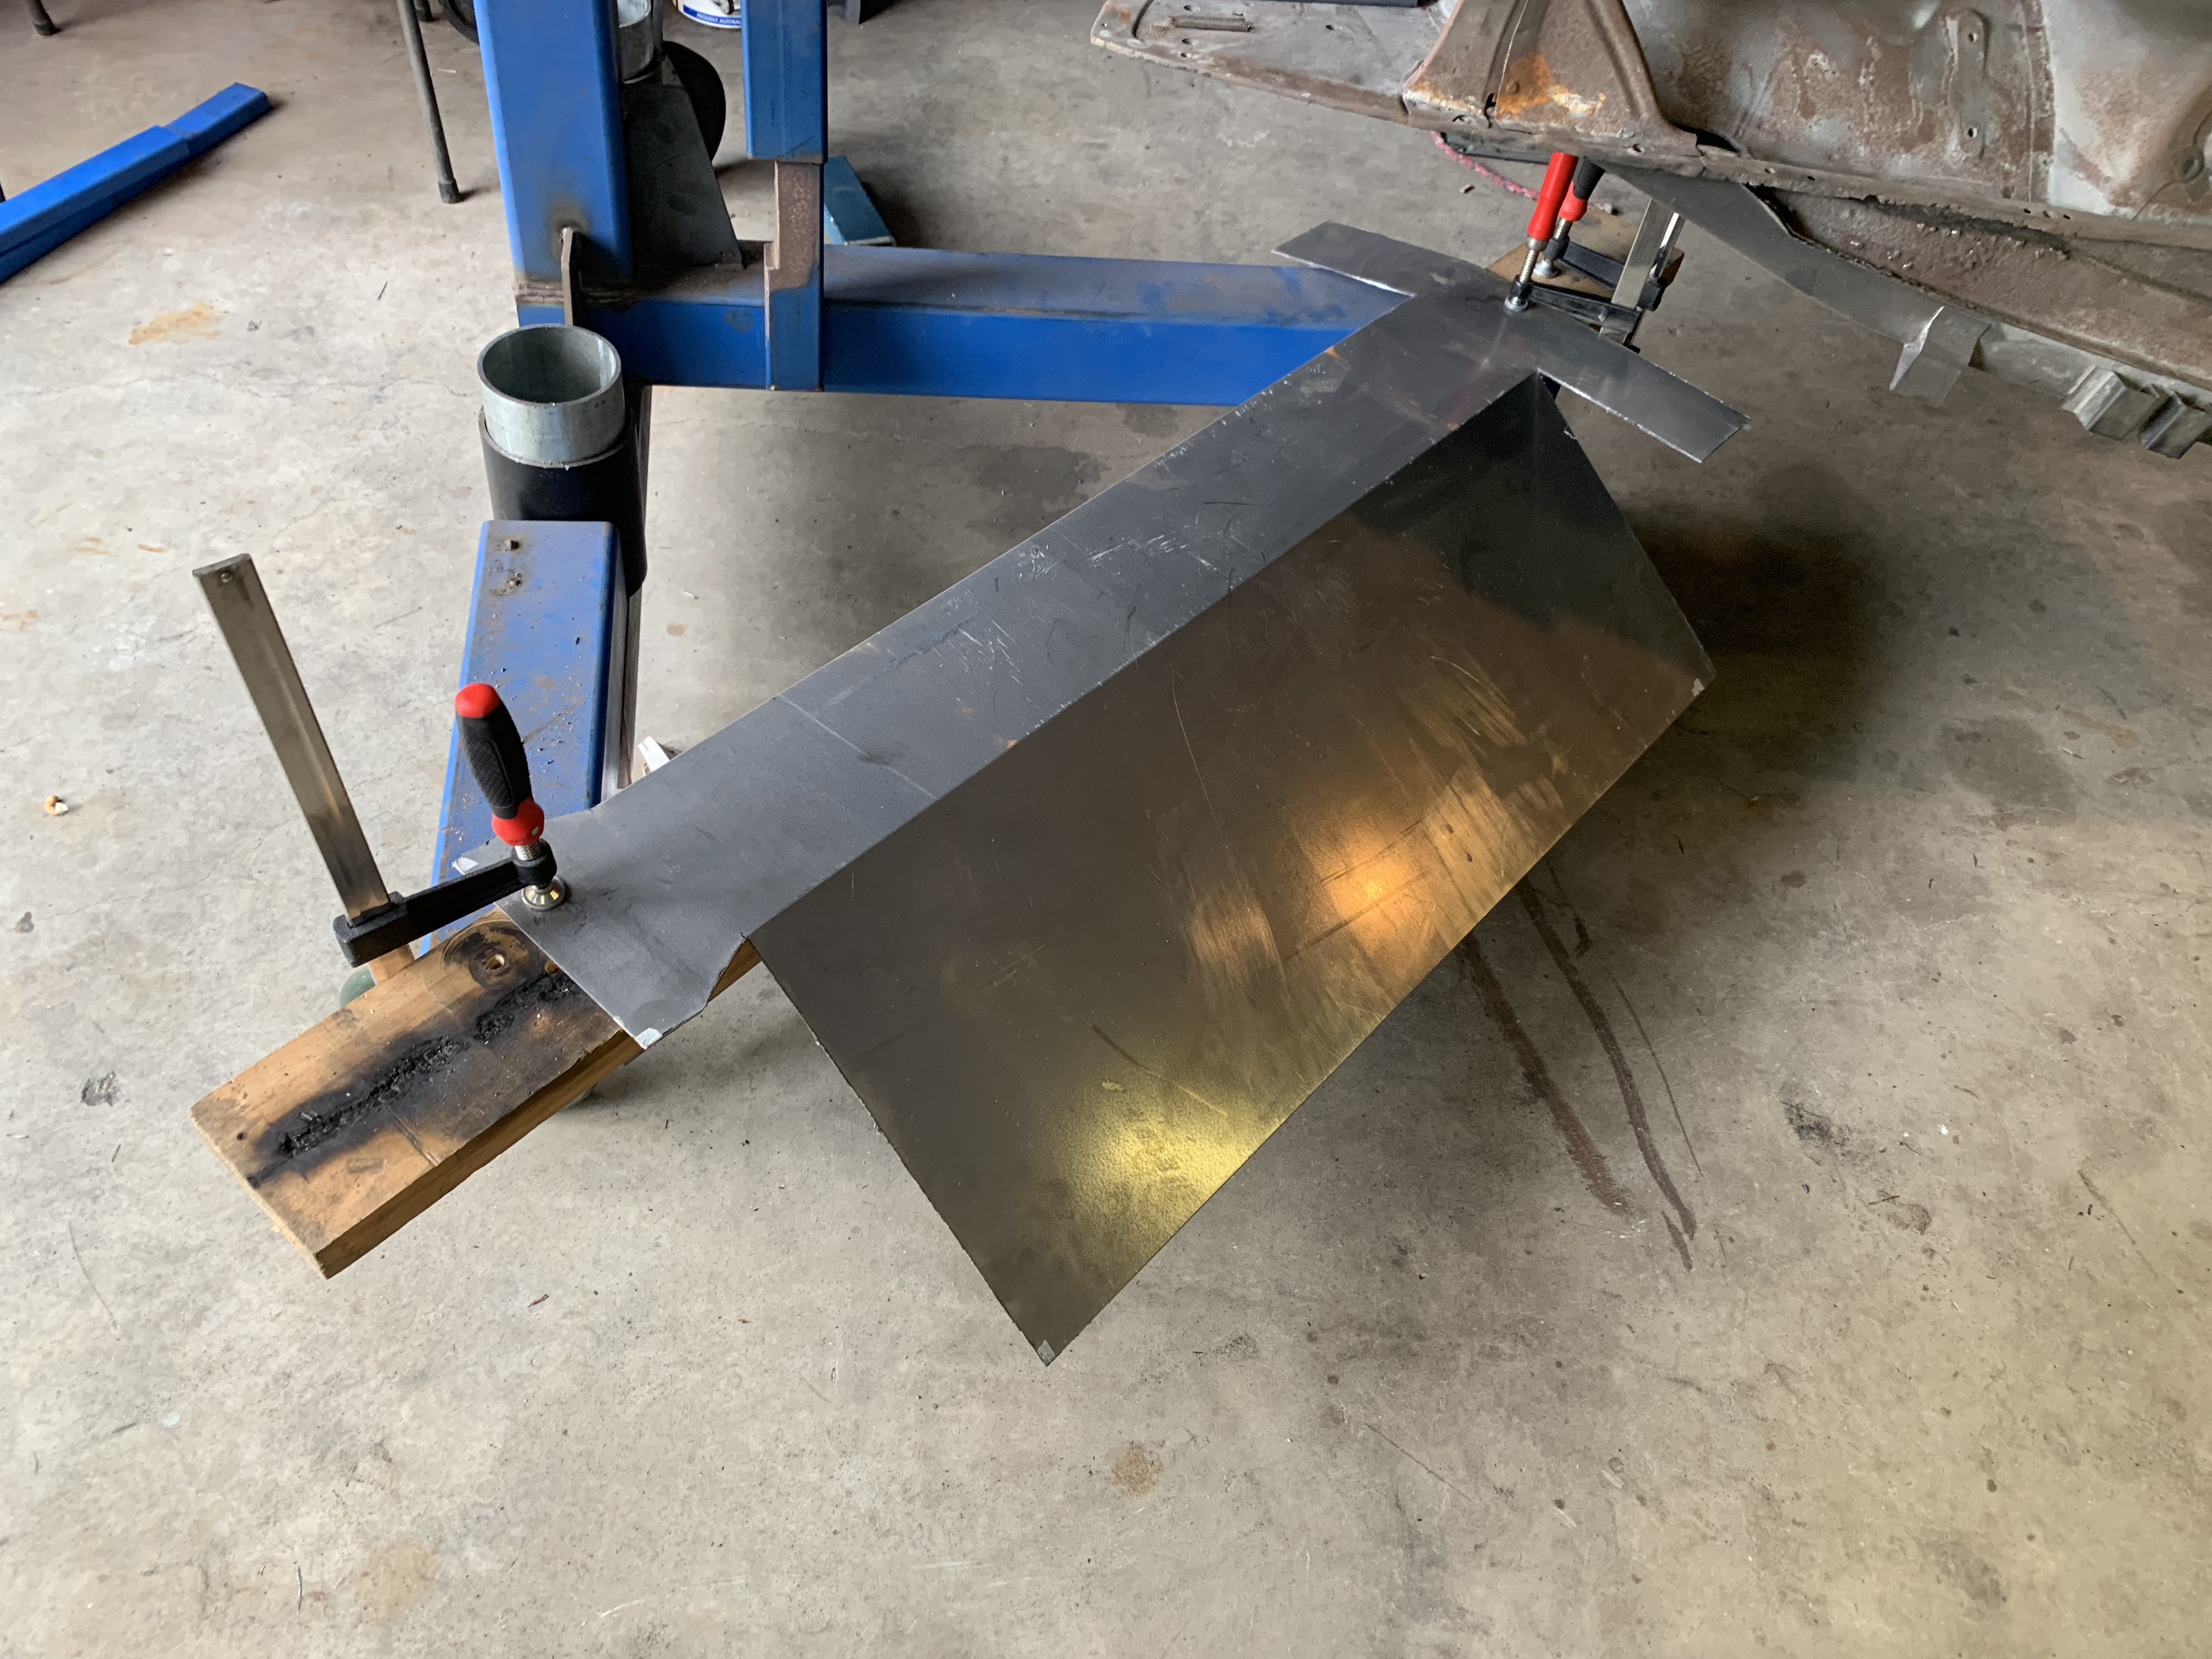
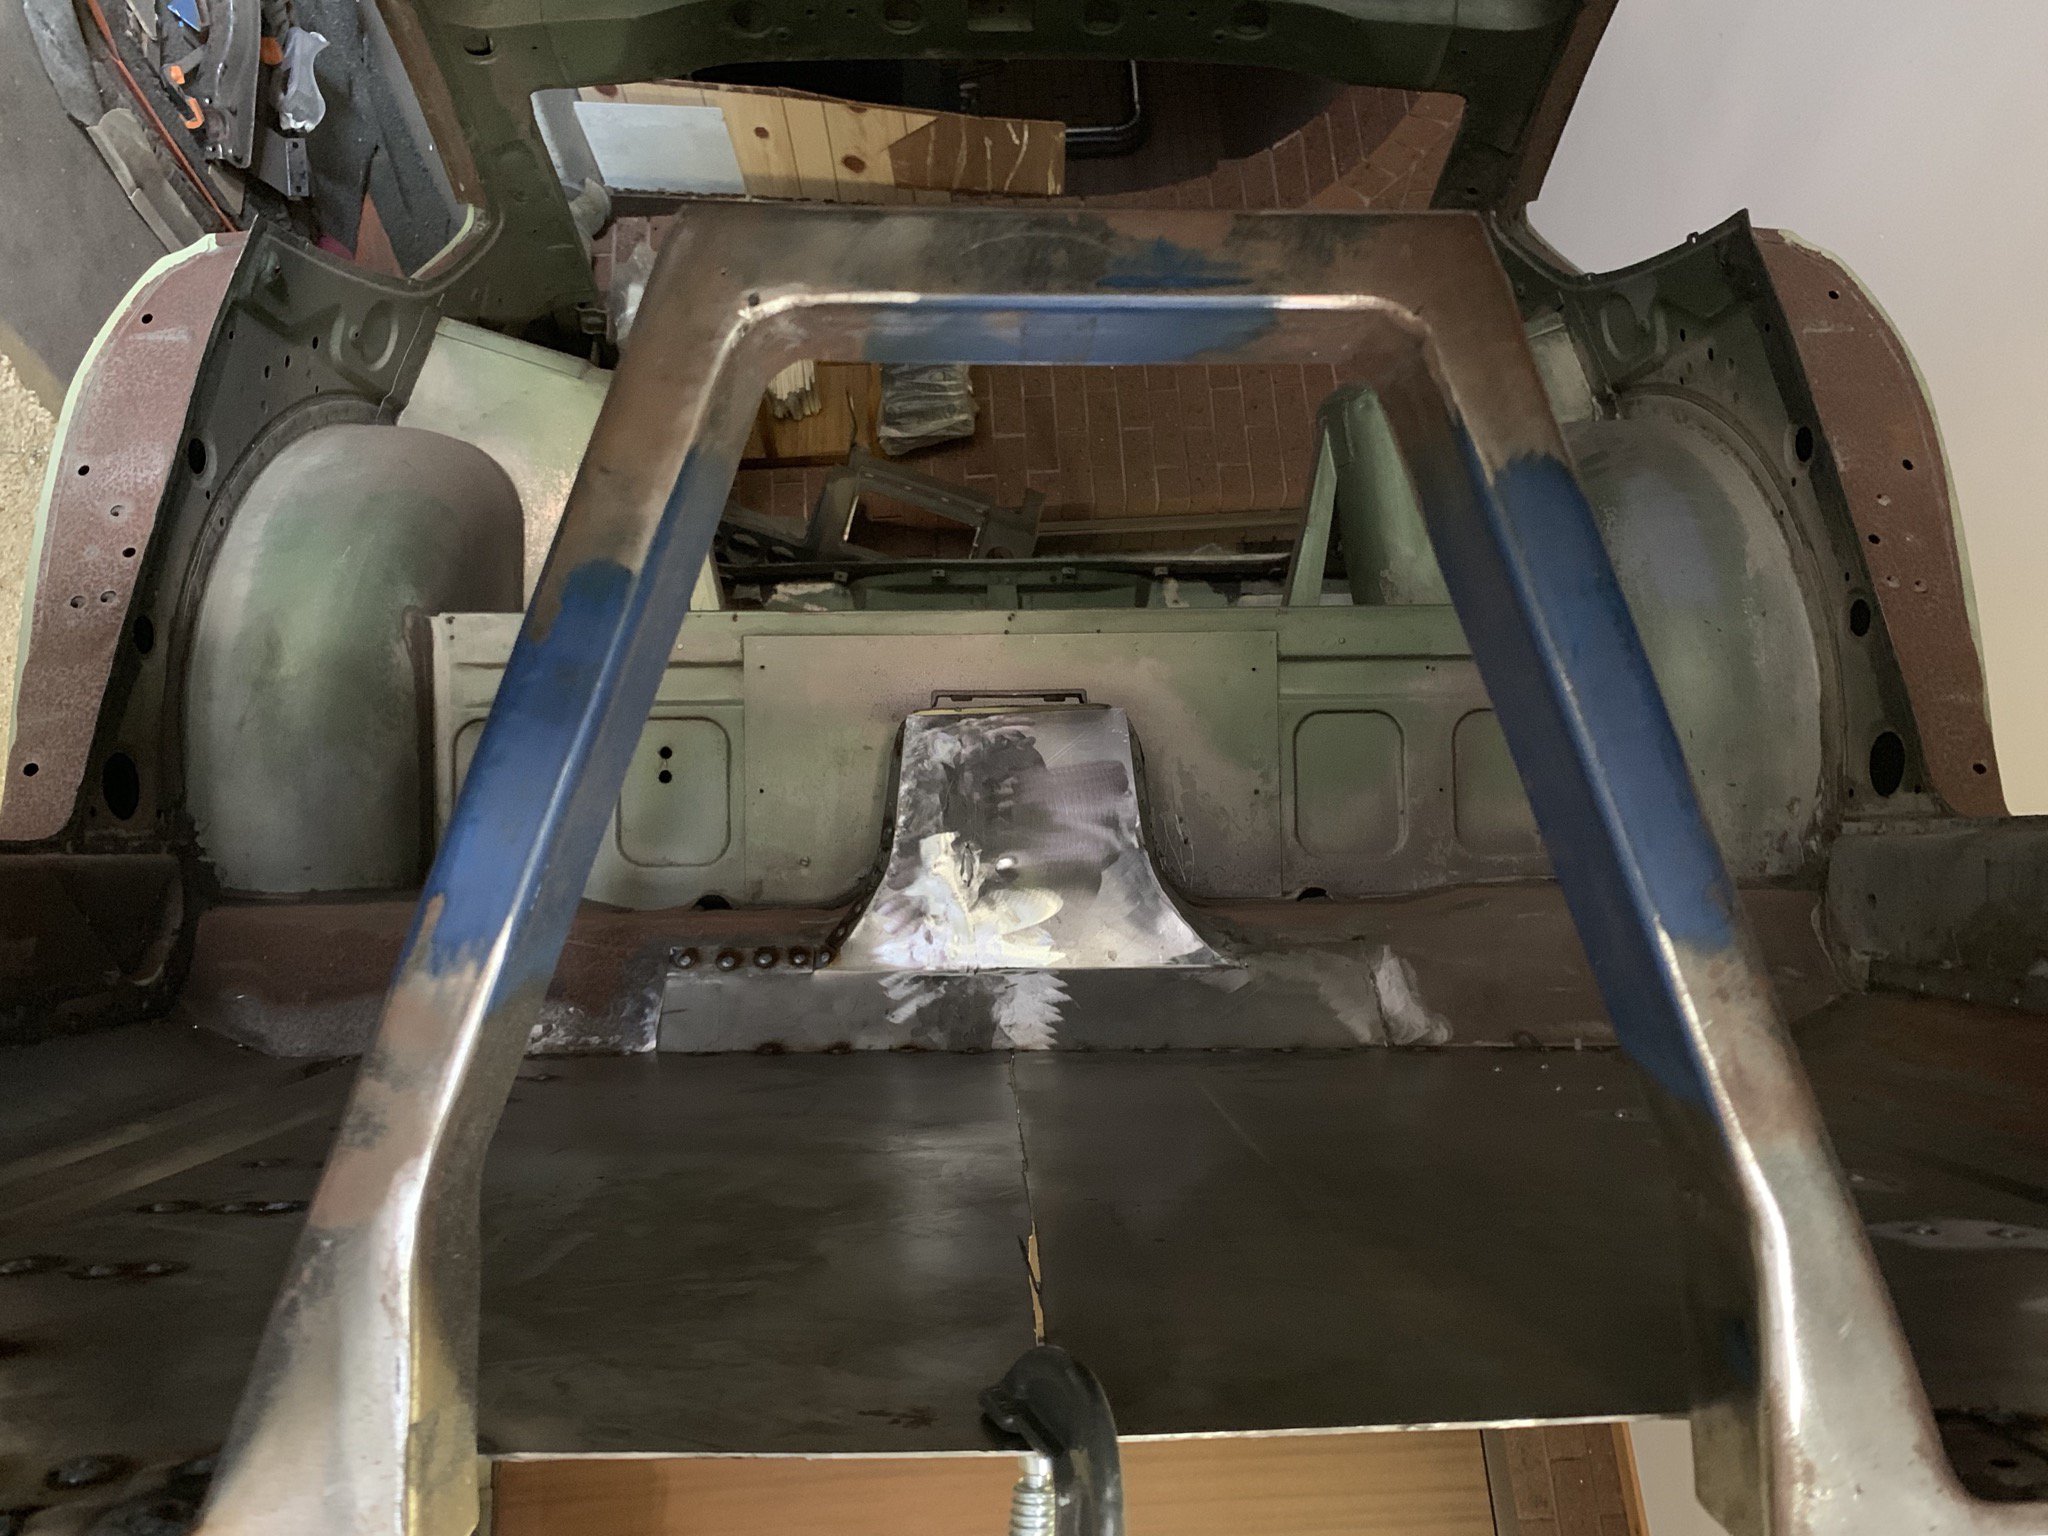
Sometimes you stand back and think, I could have done better, today was one of those days, so a bit more thought, polished up on my metal shaping and sliced and diced before playing geometry on a sheet of metal and then “HAND BENDING” the tunnel ! A priceless day having reached a mile stone. Cheers John
-
Sirpents 260Z / C32 AMG Powered RS30 - Australia
Sirpent replied to Sirpent's topic in S30 Series - 240z, 260z, 280z
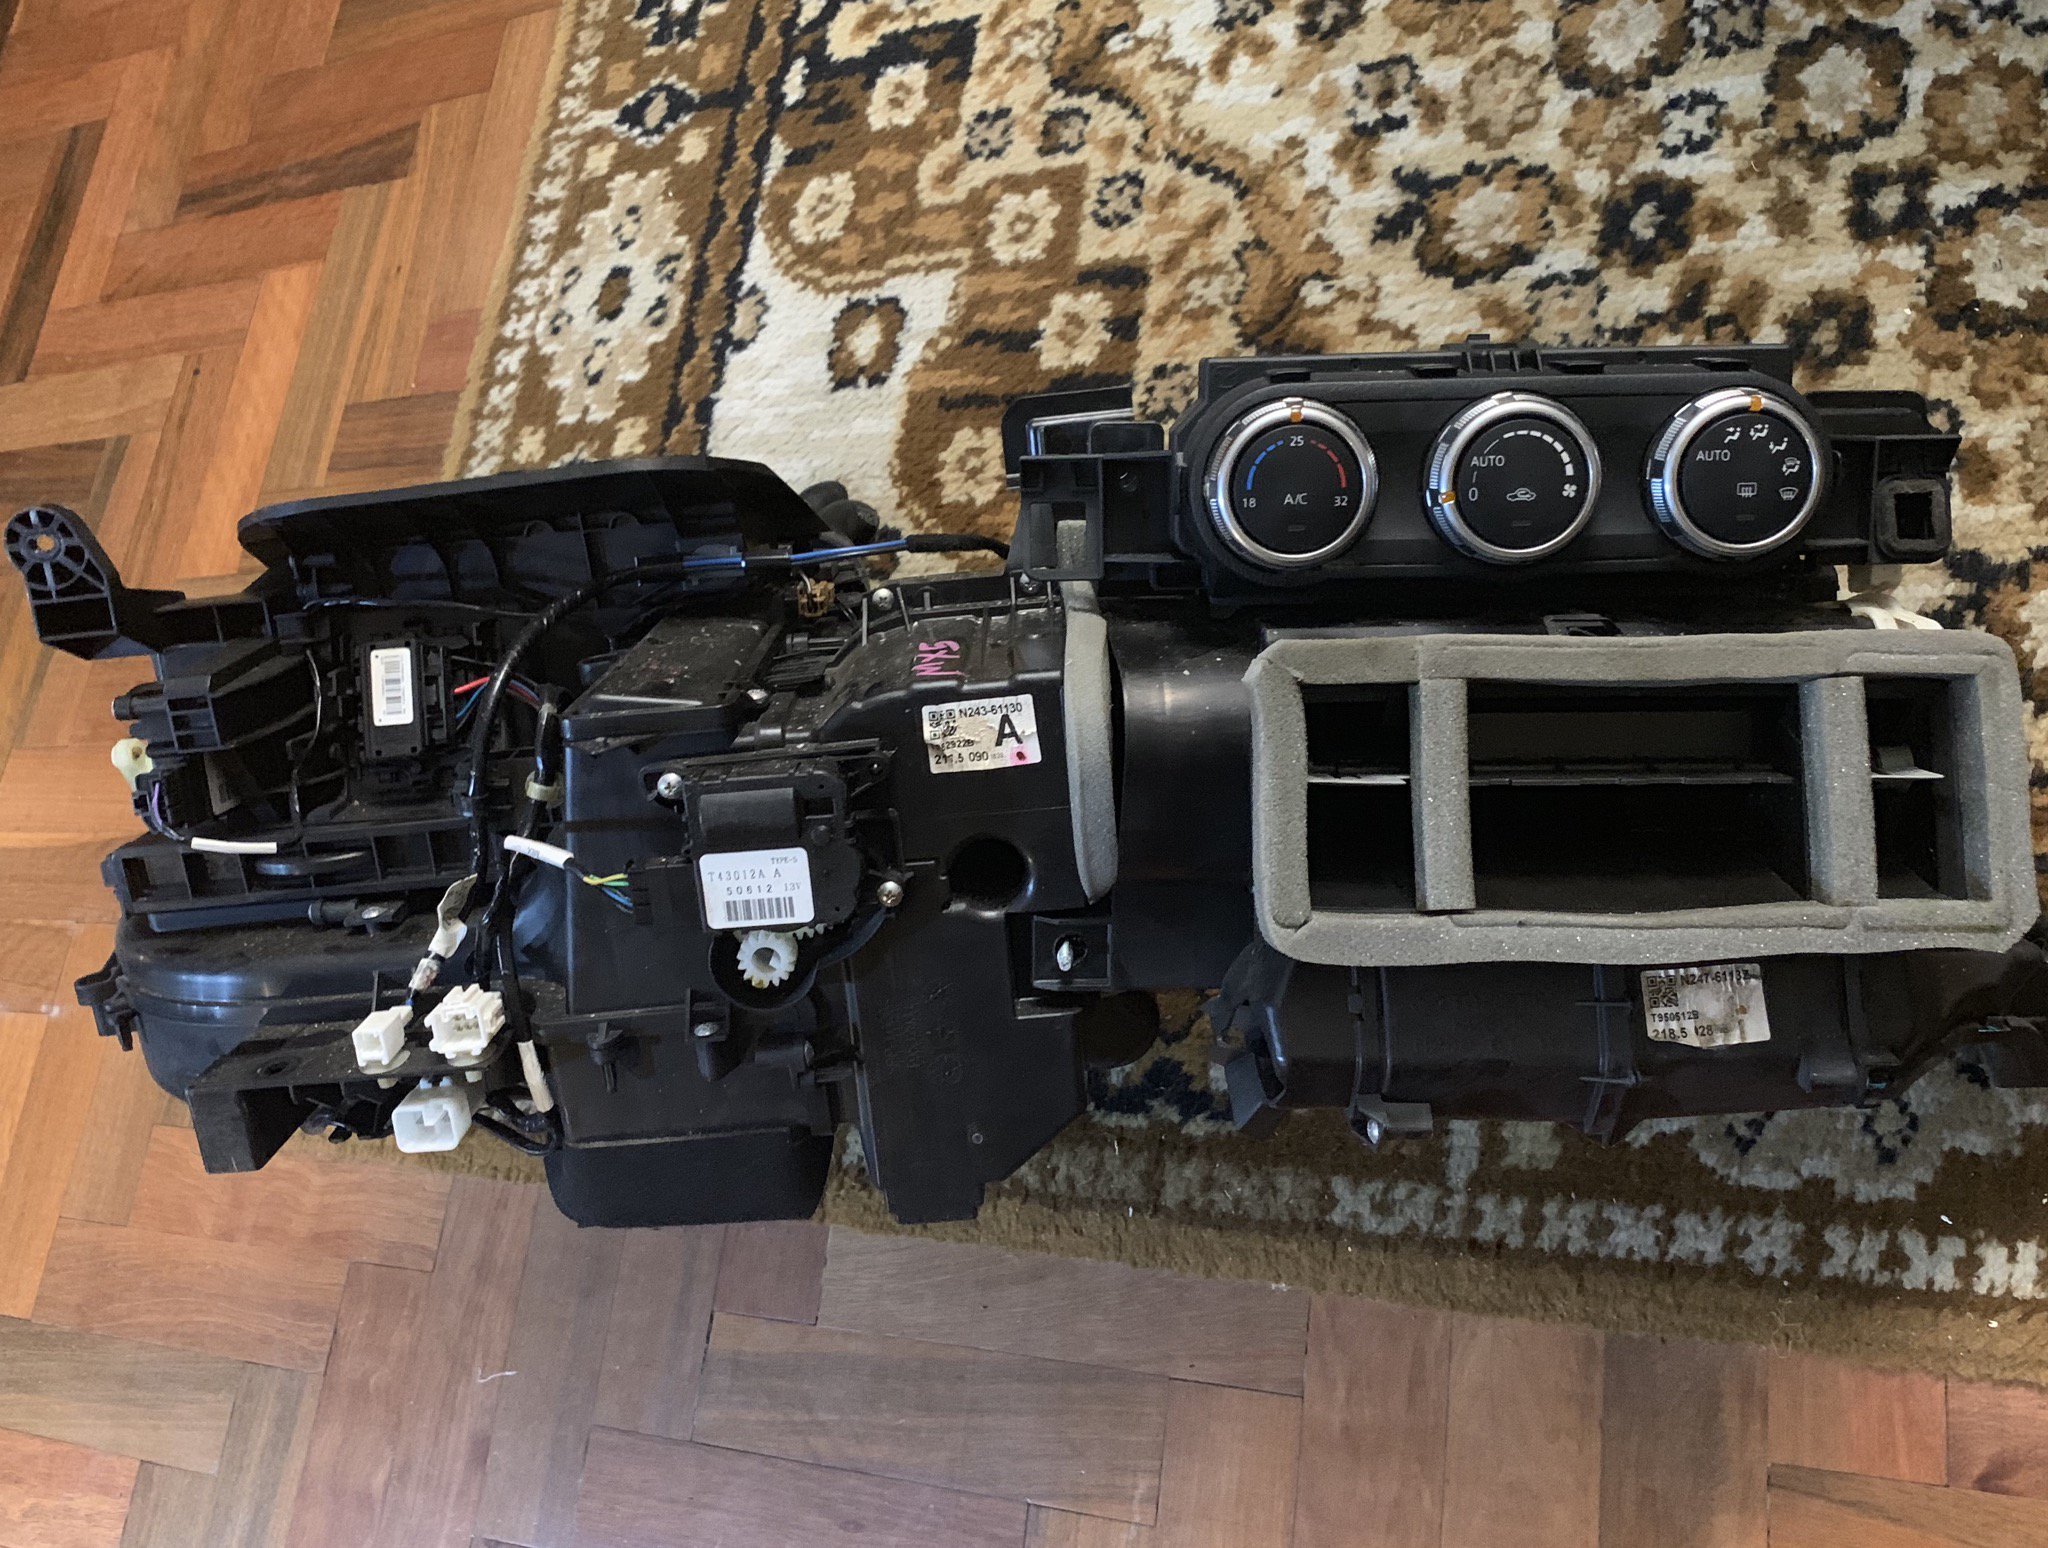
Thanks Buddy HVAC is out of a 2016 MX5 -
Sirpents 260Z / C32 AMG Powered RS30 - Australia
Sirpent replied to Sirpent's topic in S30 Series - 240z, 260z, 280z
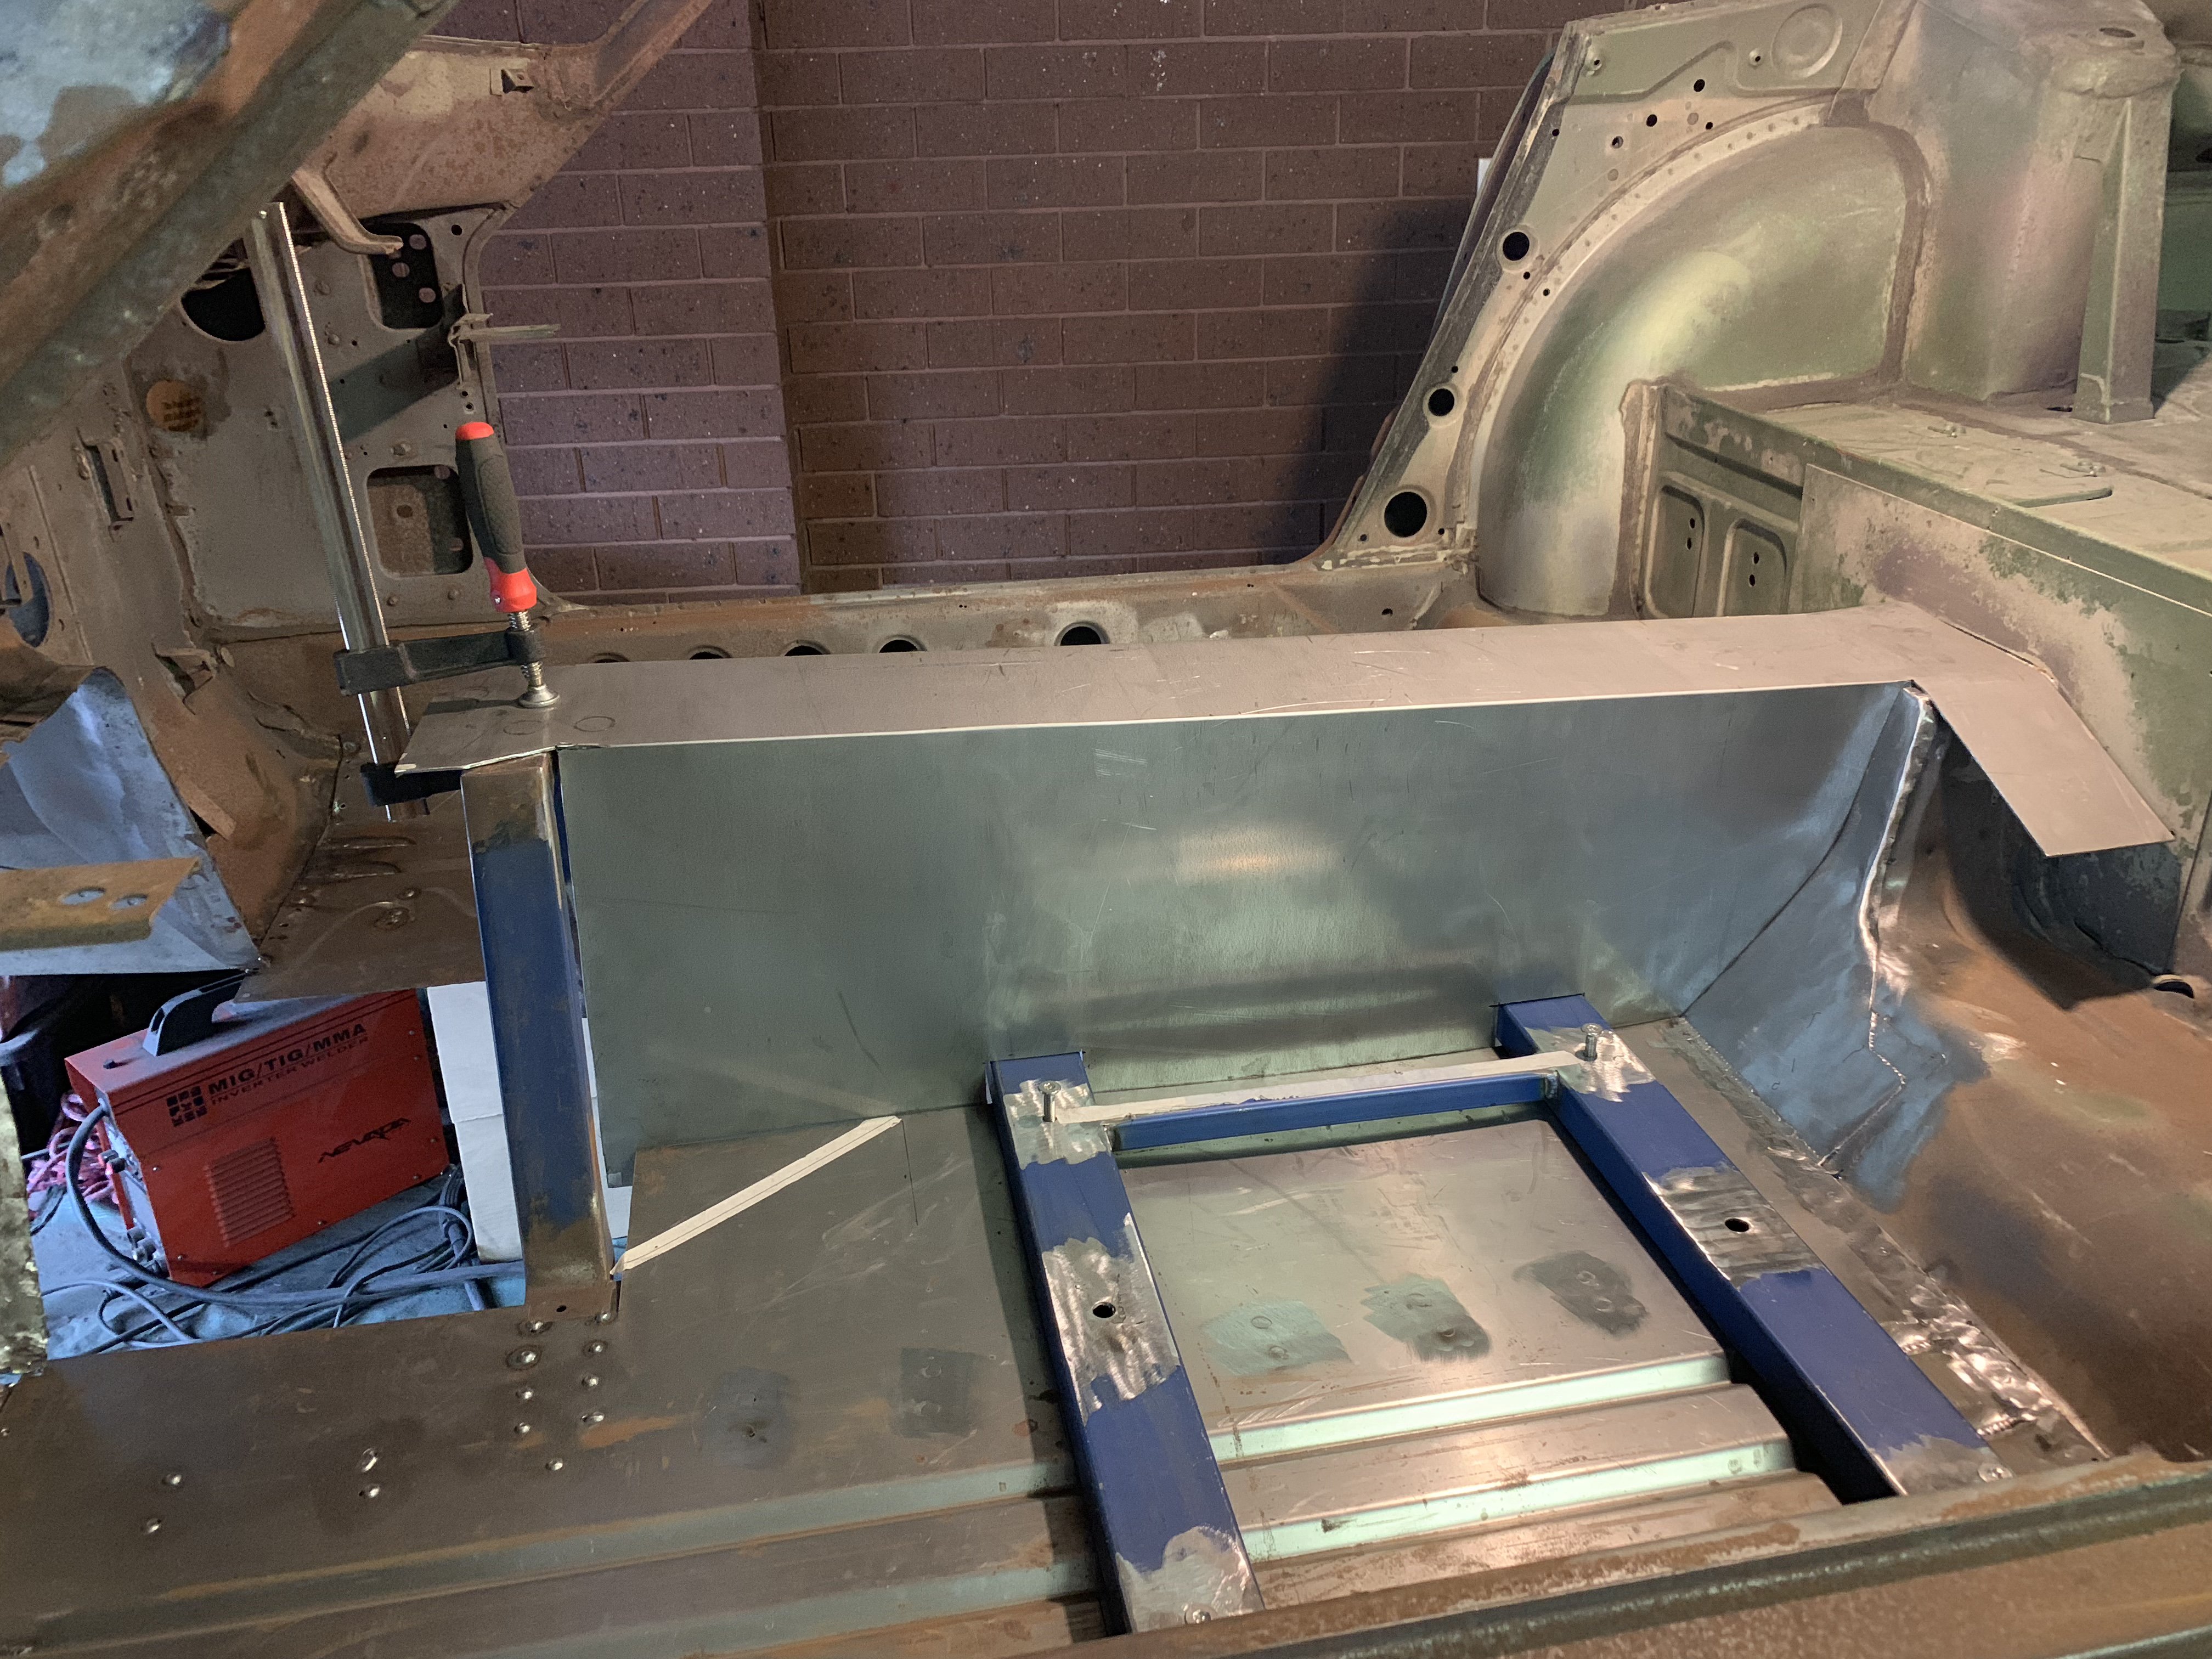
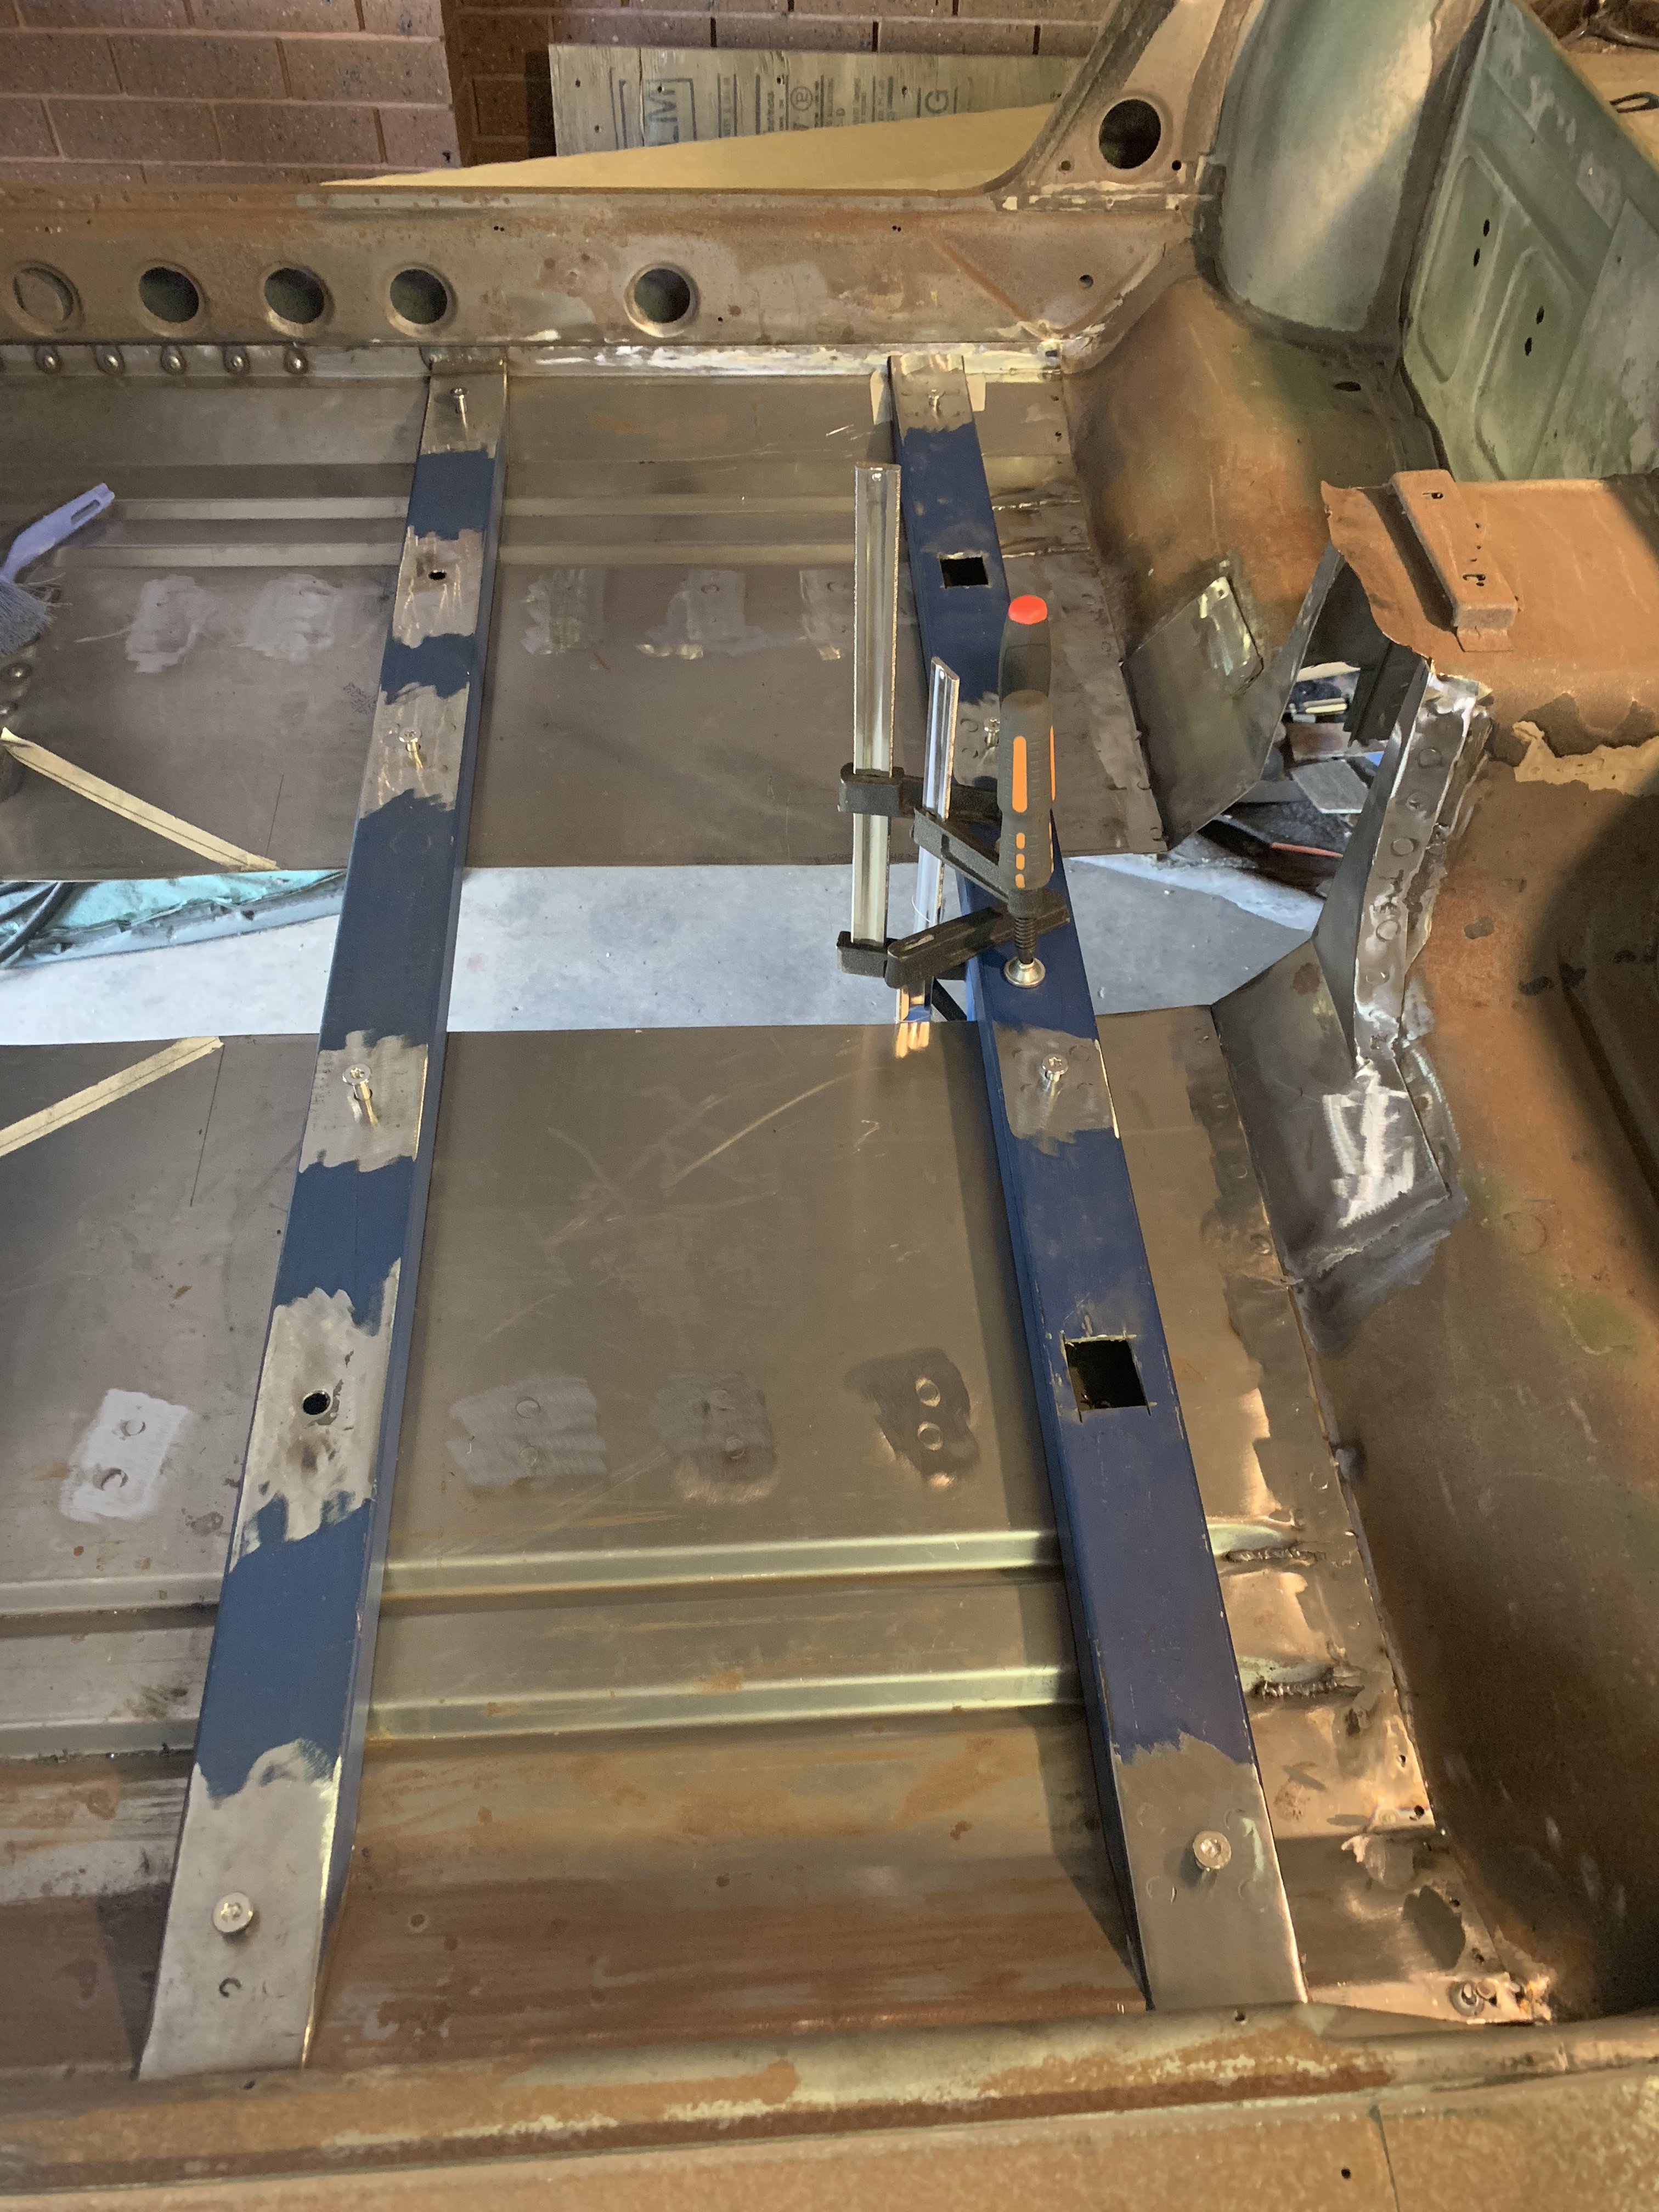
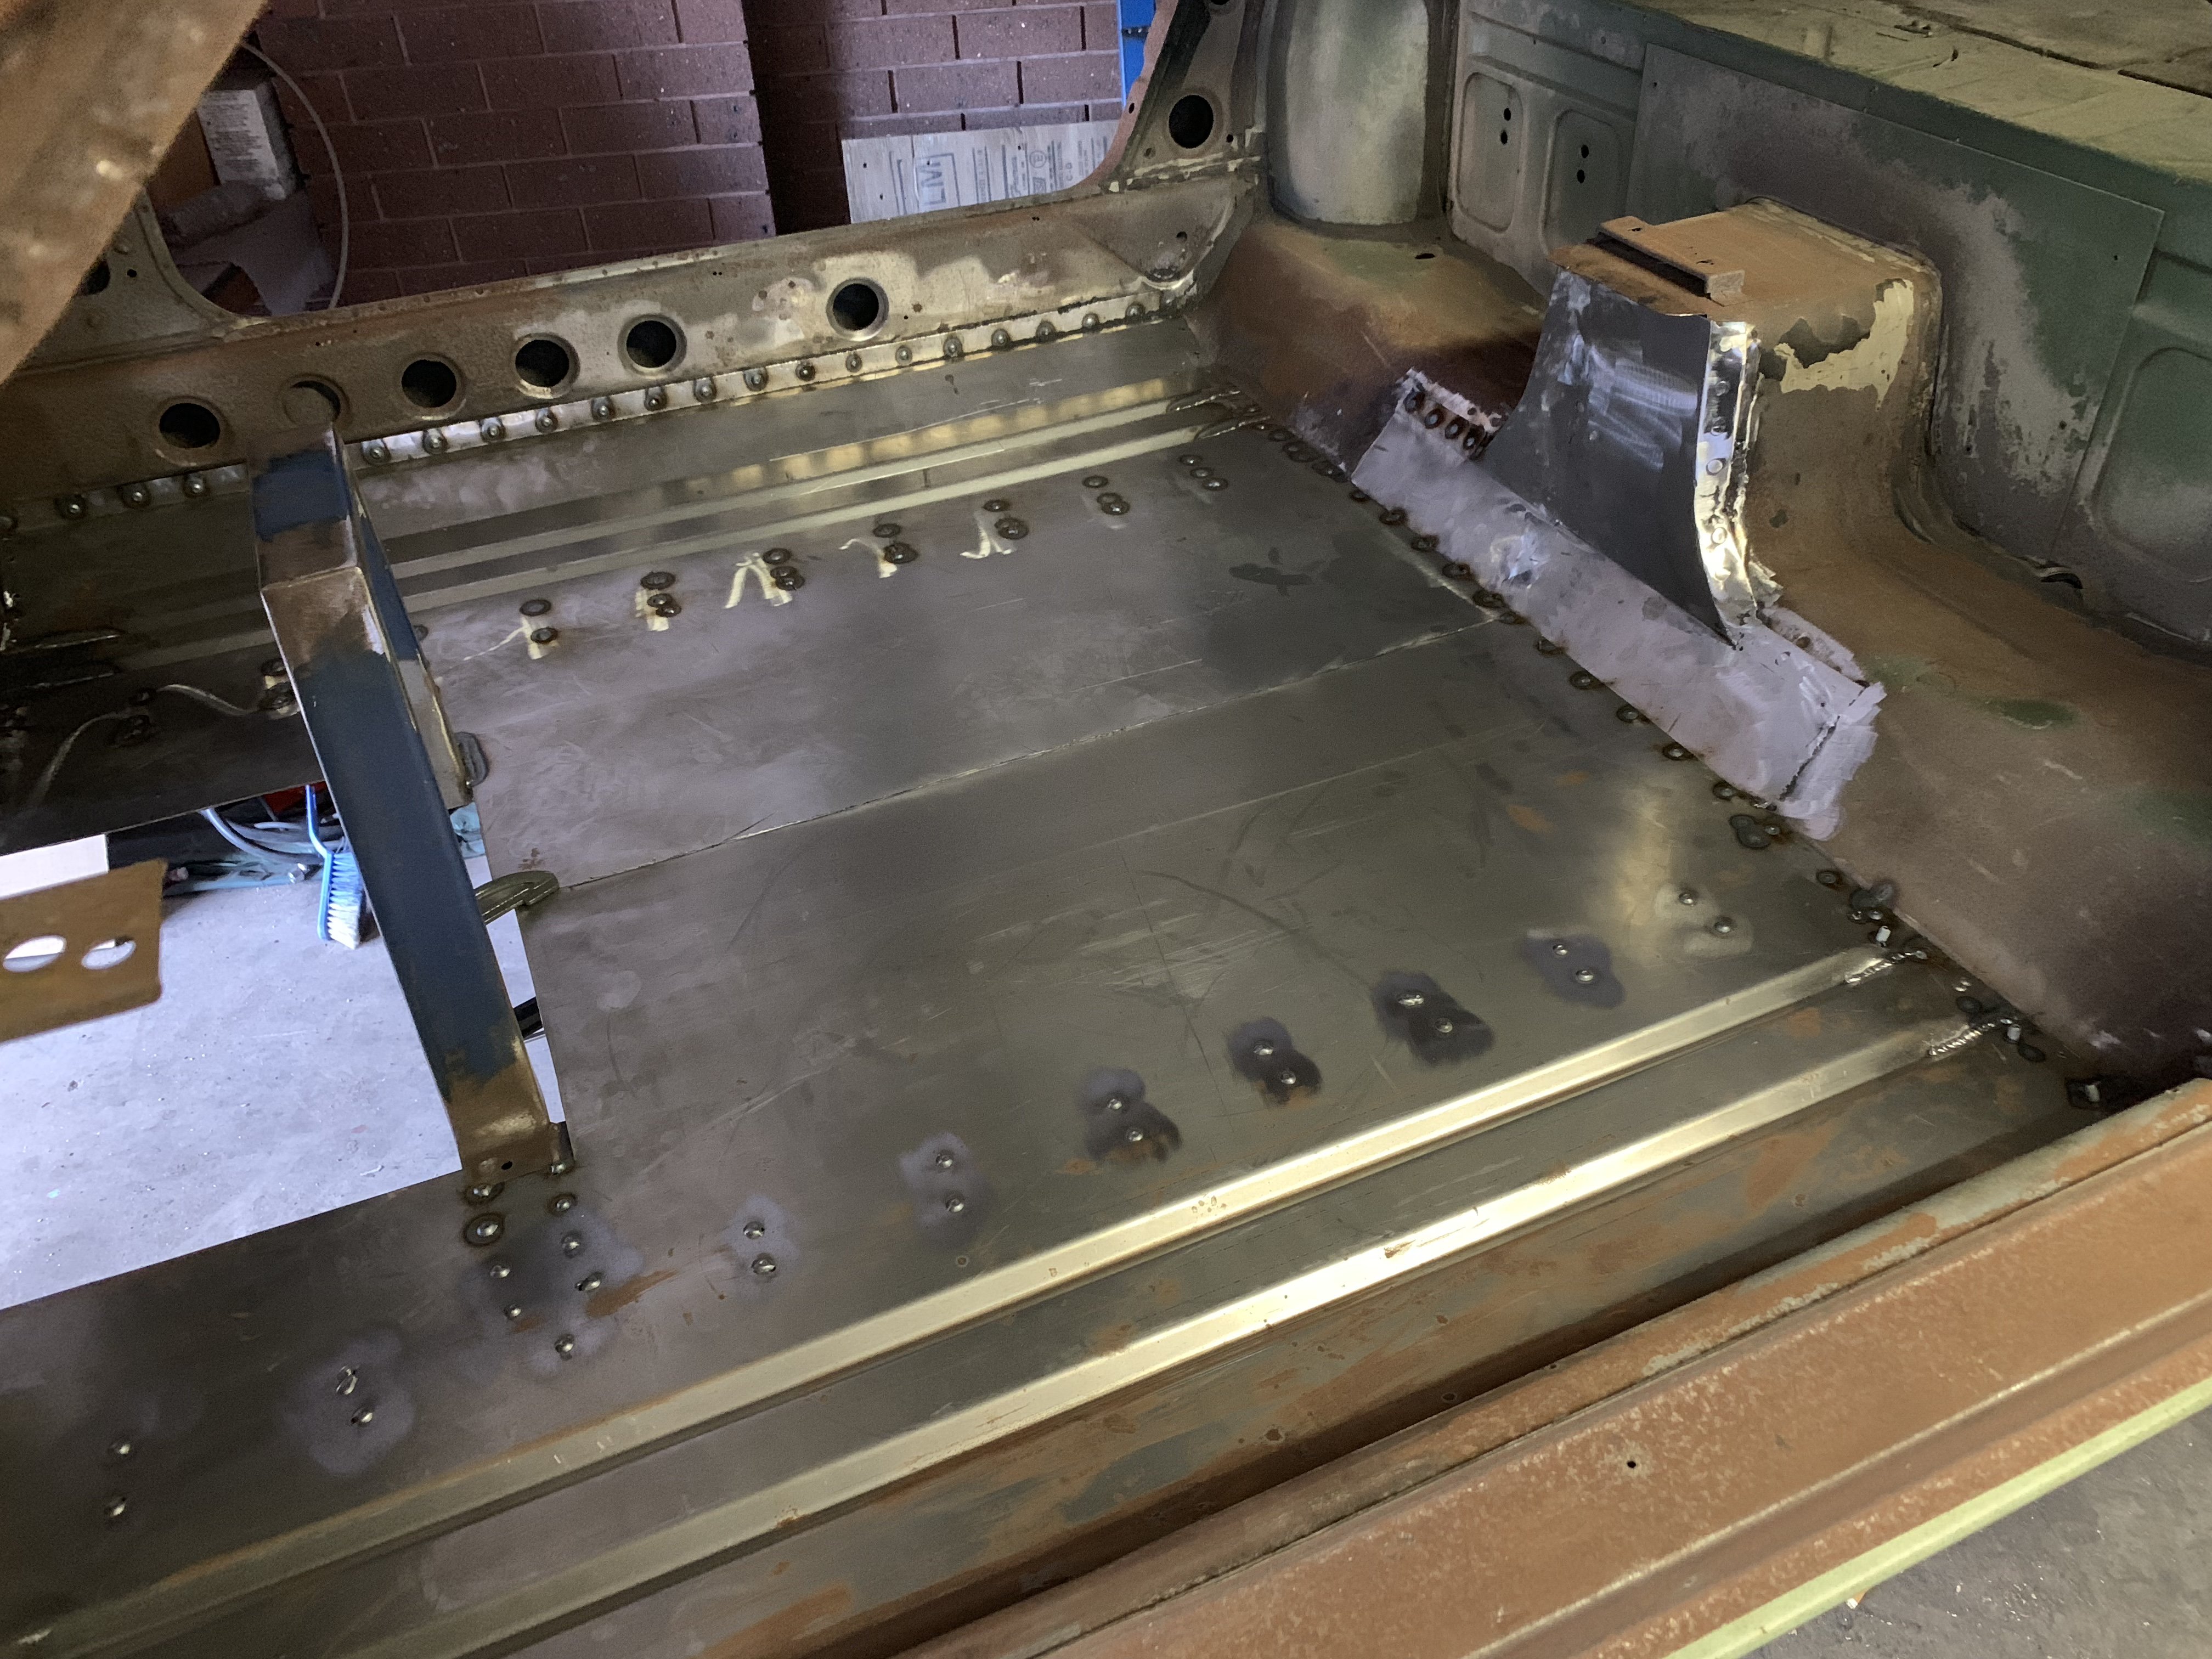
Tunnel sections are still being mocked up so in the meanwhile focused my attention on fabricating the new seat rails. basically because I’m dealing with a flat pan the seat rsils sandwich that pan to the new rails and lock in to each rail i have 2 options, slice them so I can notch in the tunnel or leave them and later install a series of rivet nuts so I can add an aluminum plate enclosing the tail shaft once installed to create a totally flat pan i also received a new addition this week, integrated air and heating HVAC with full climate control, it’s about 25% smaller than the original Z set up so this is going to be aninteresting mod once the tunnels in place and I can mount the dash to work out the hanger points and fresh air feed Cheers John
-
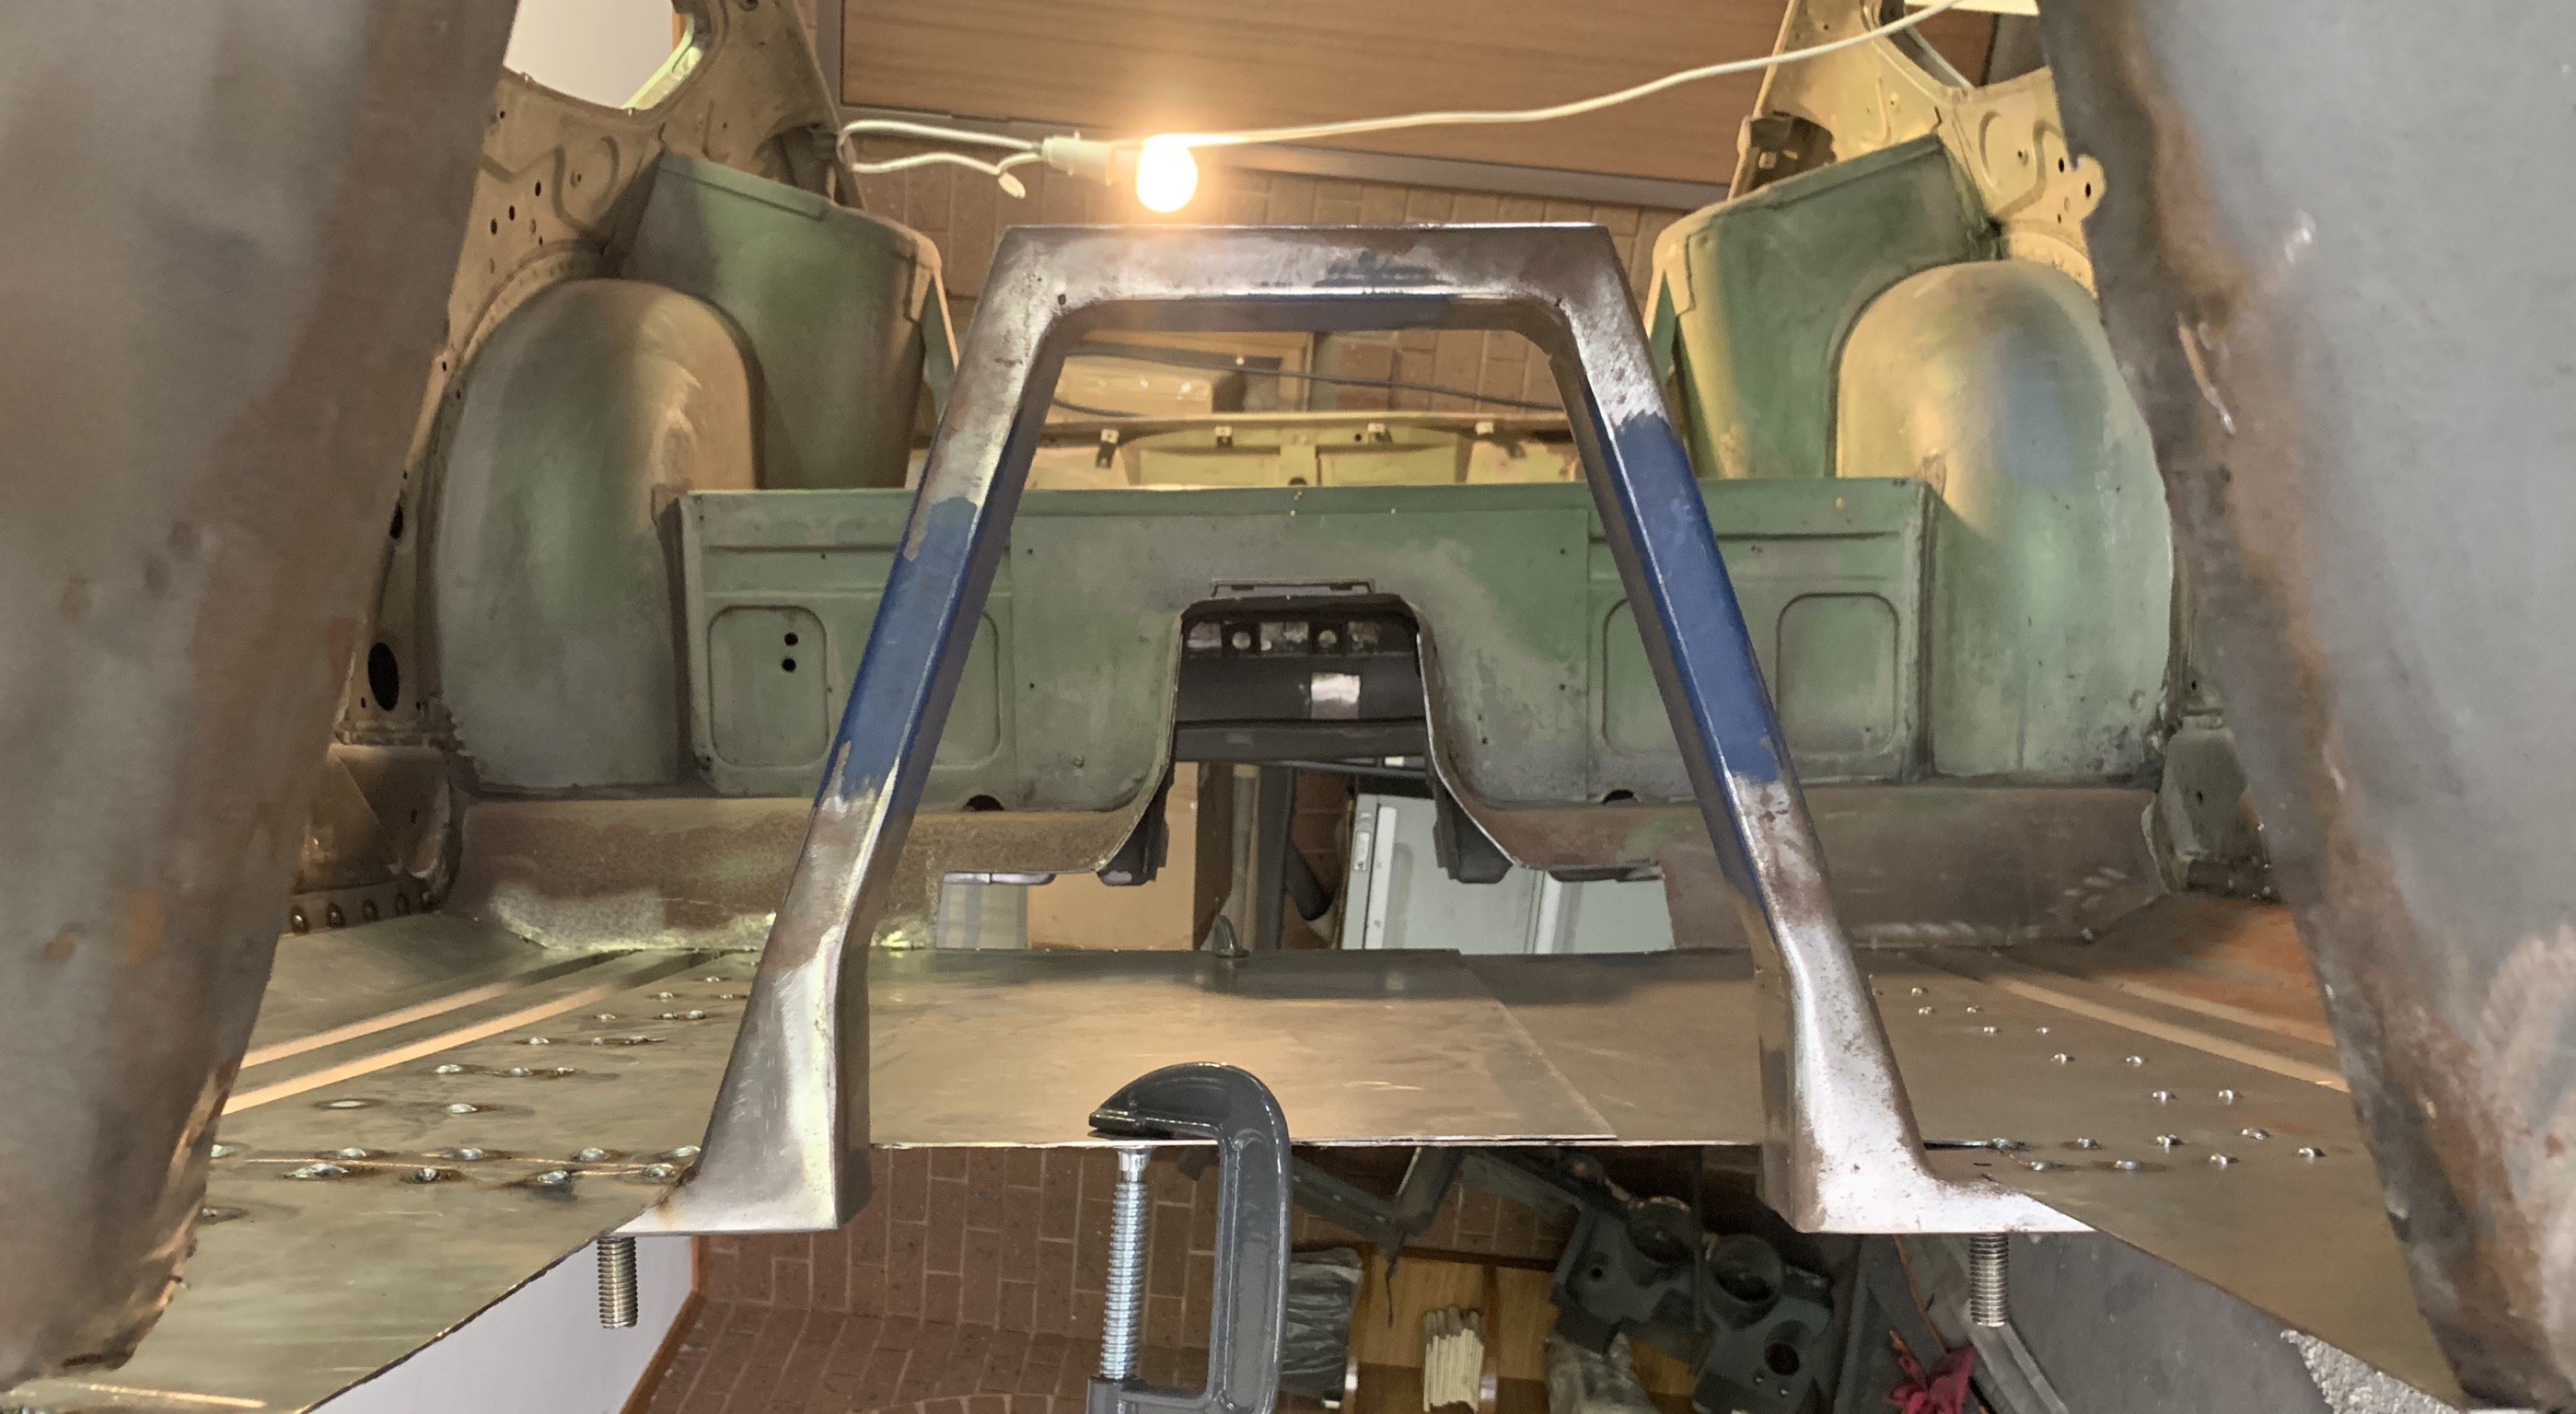
Sirpents 260Z / C32 AMG Powered RS30 - Australia
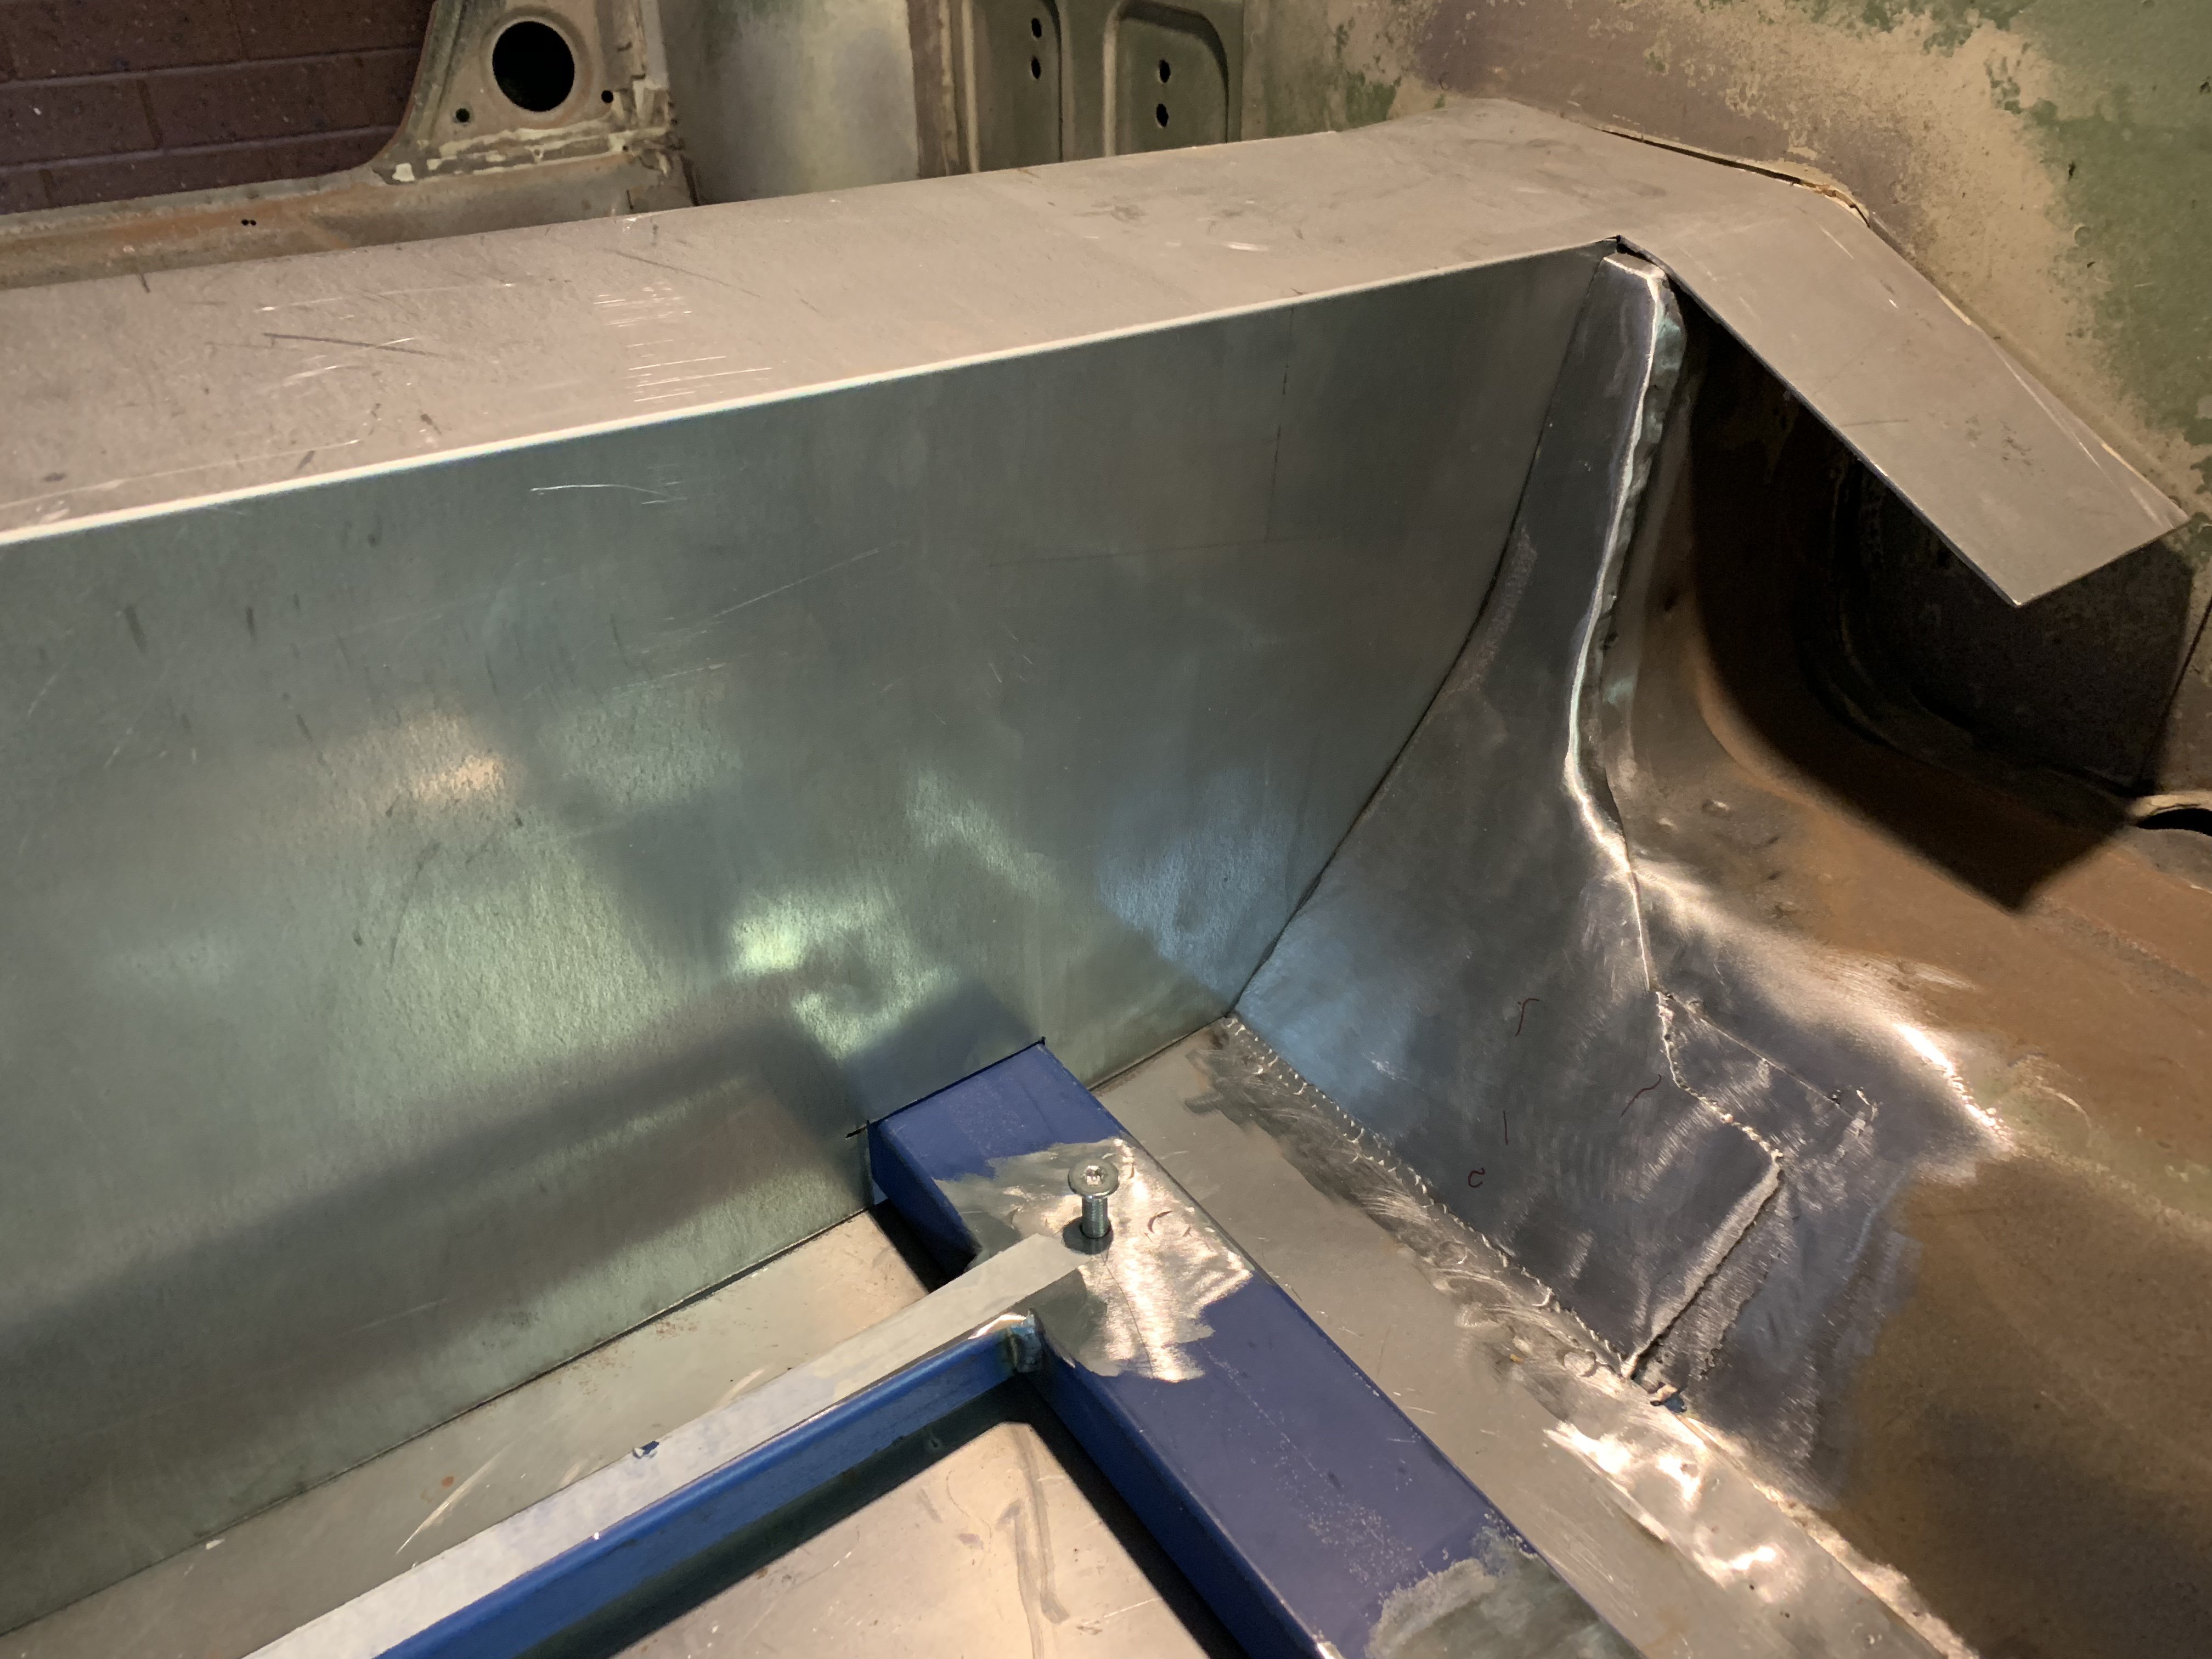
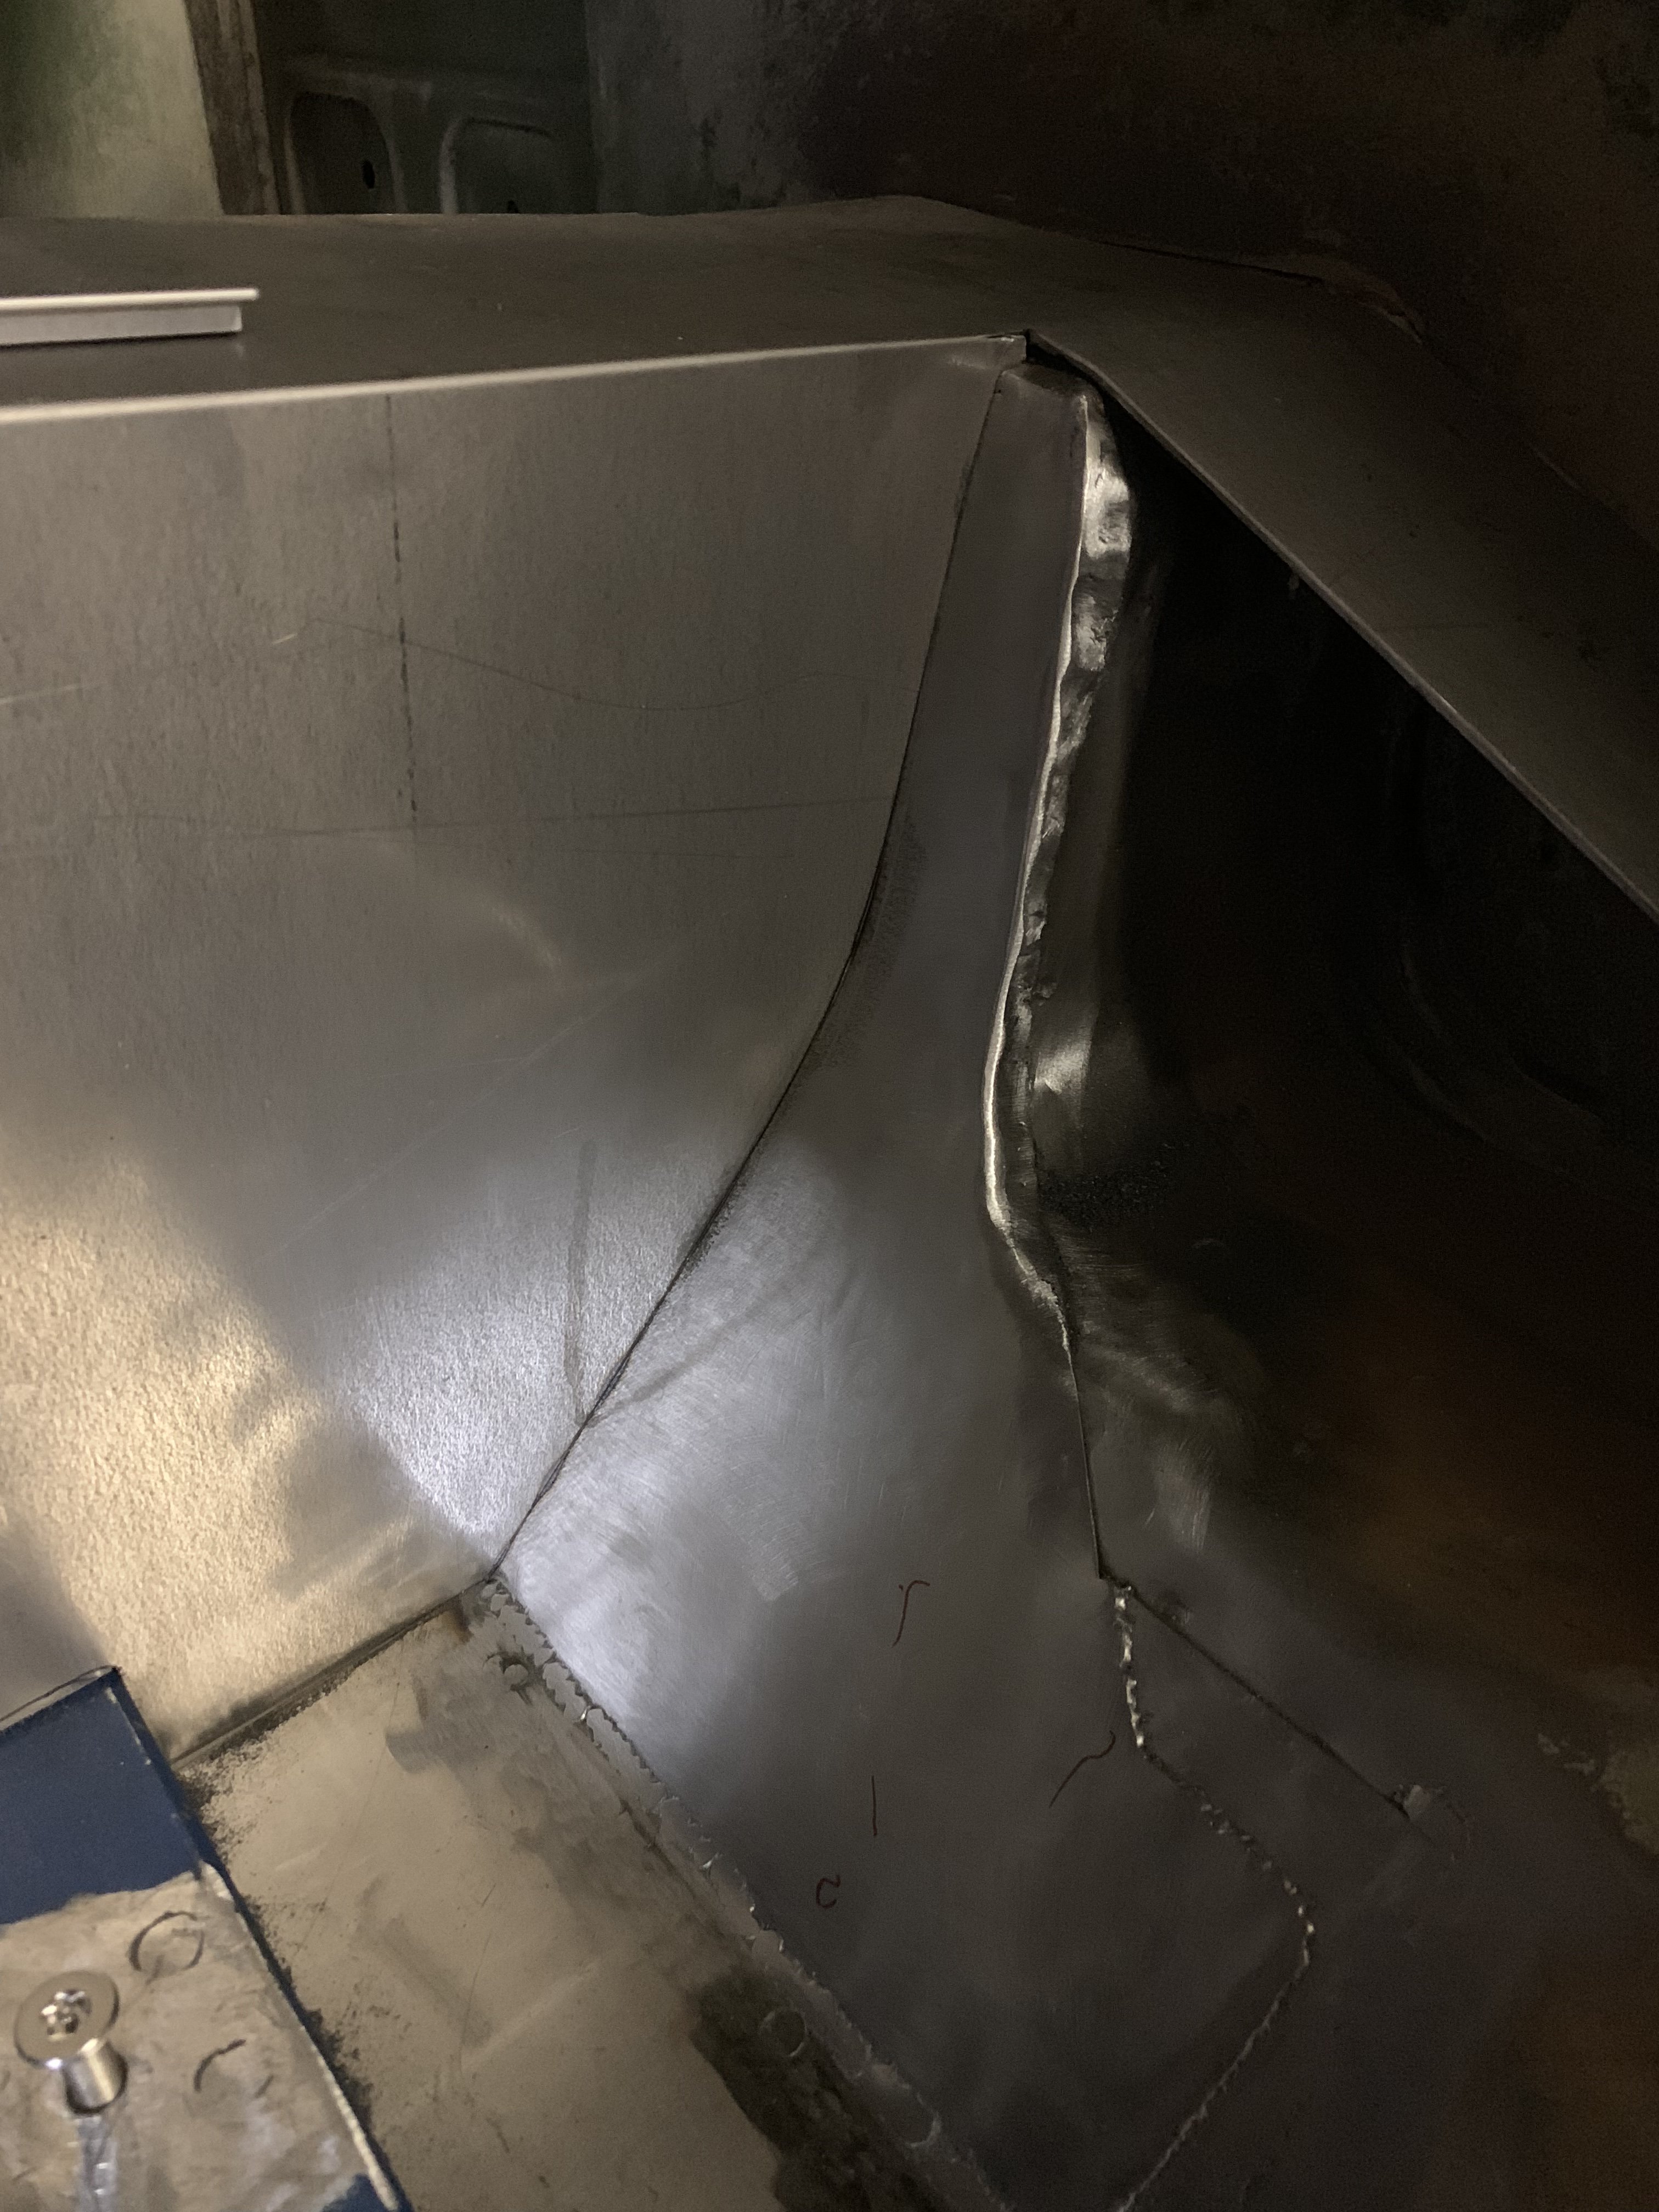
Sirpent replied to Sirpent's topic in S30 Series - 240z, 260z, 280z
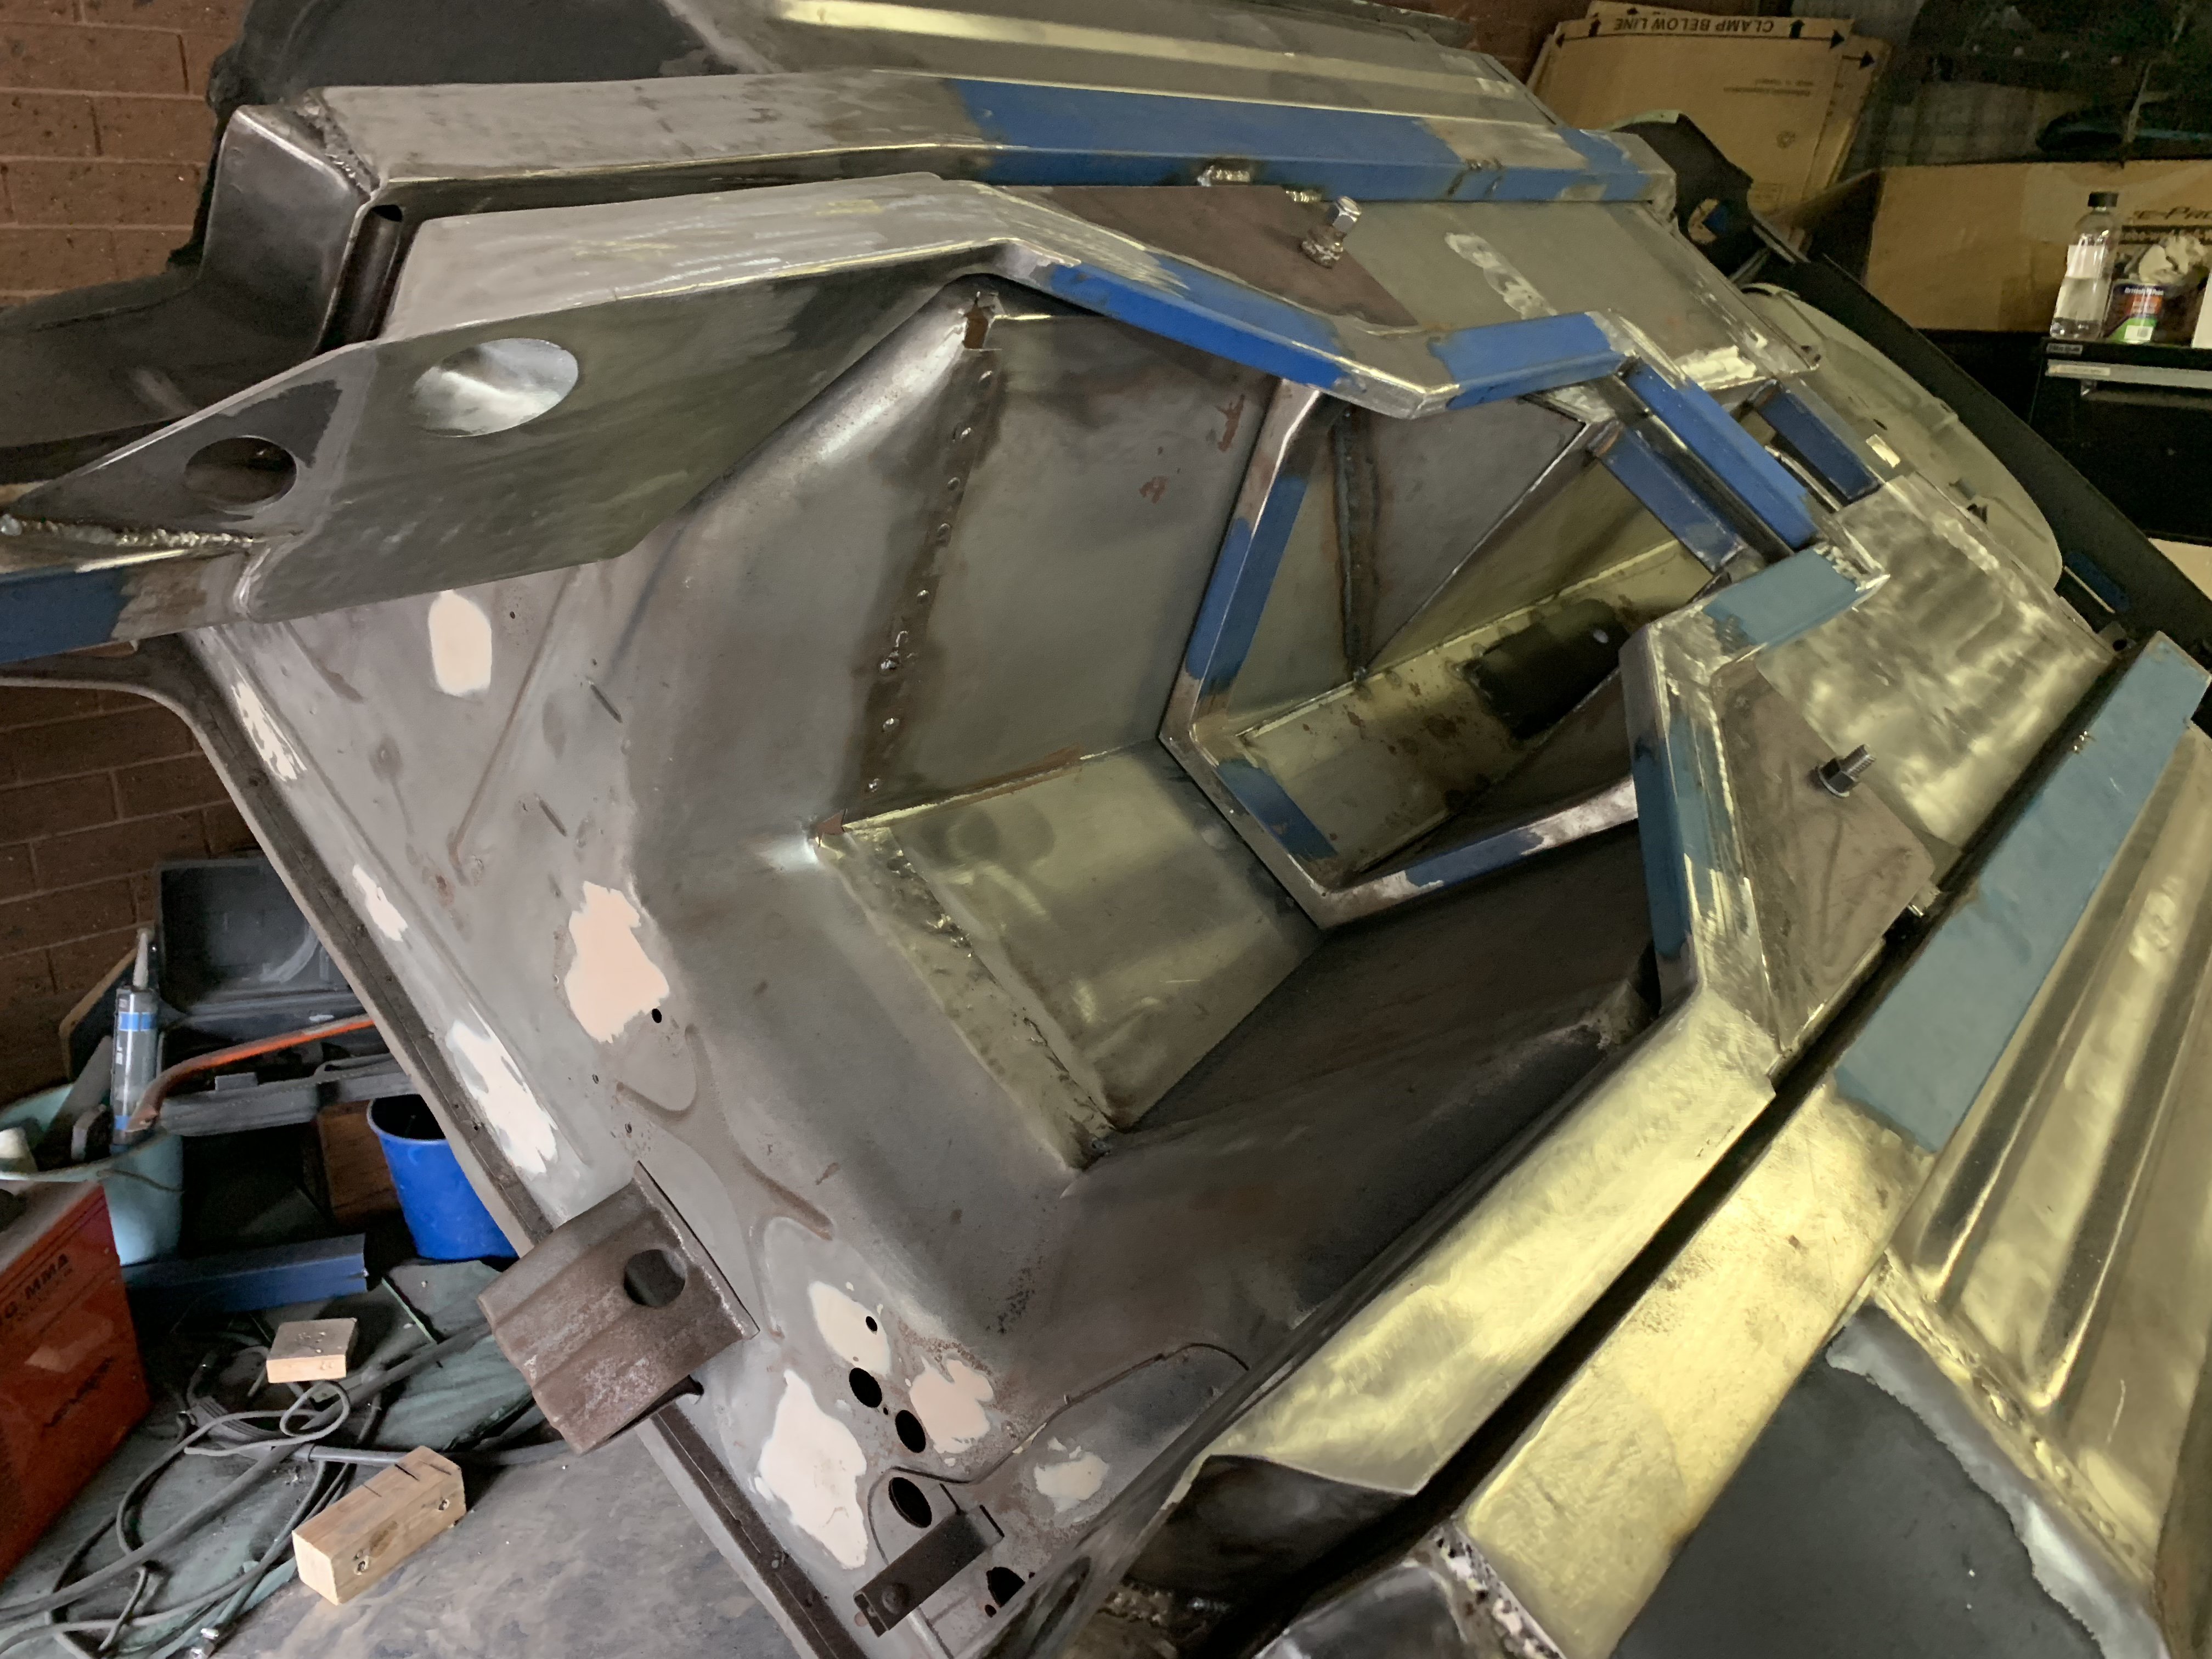
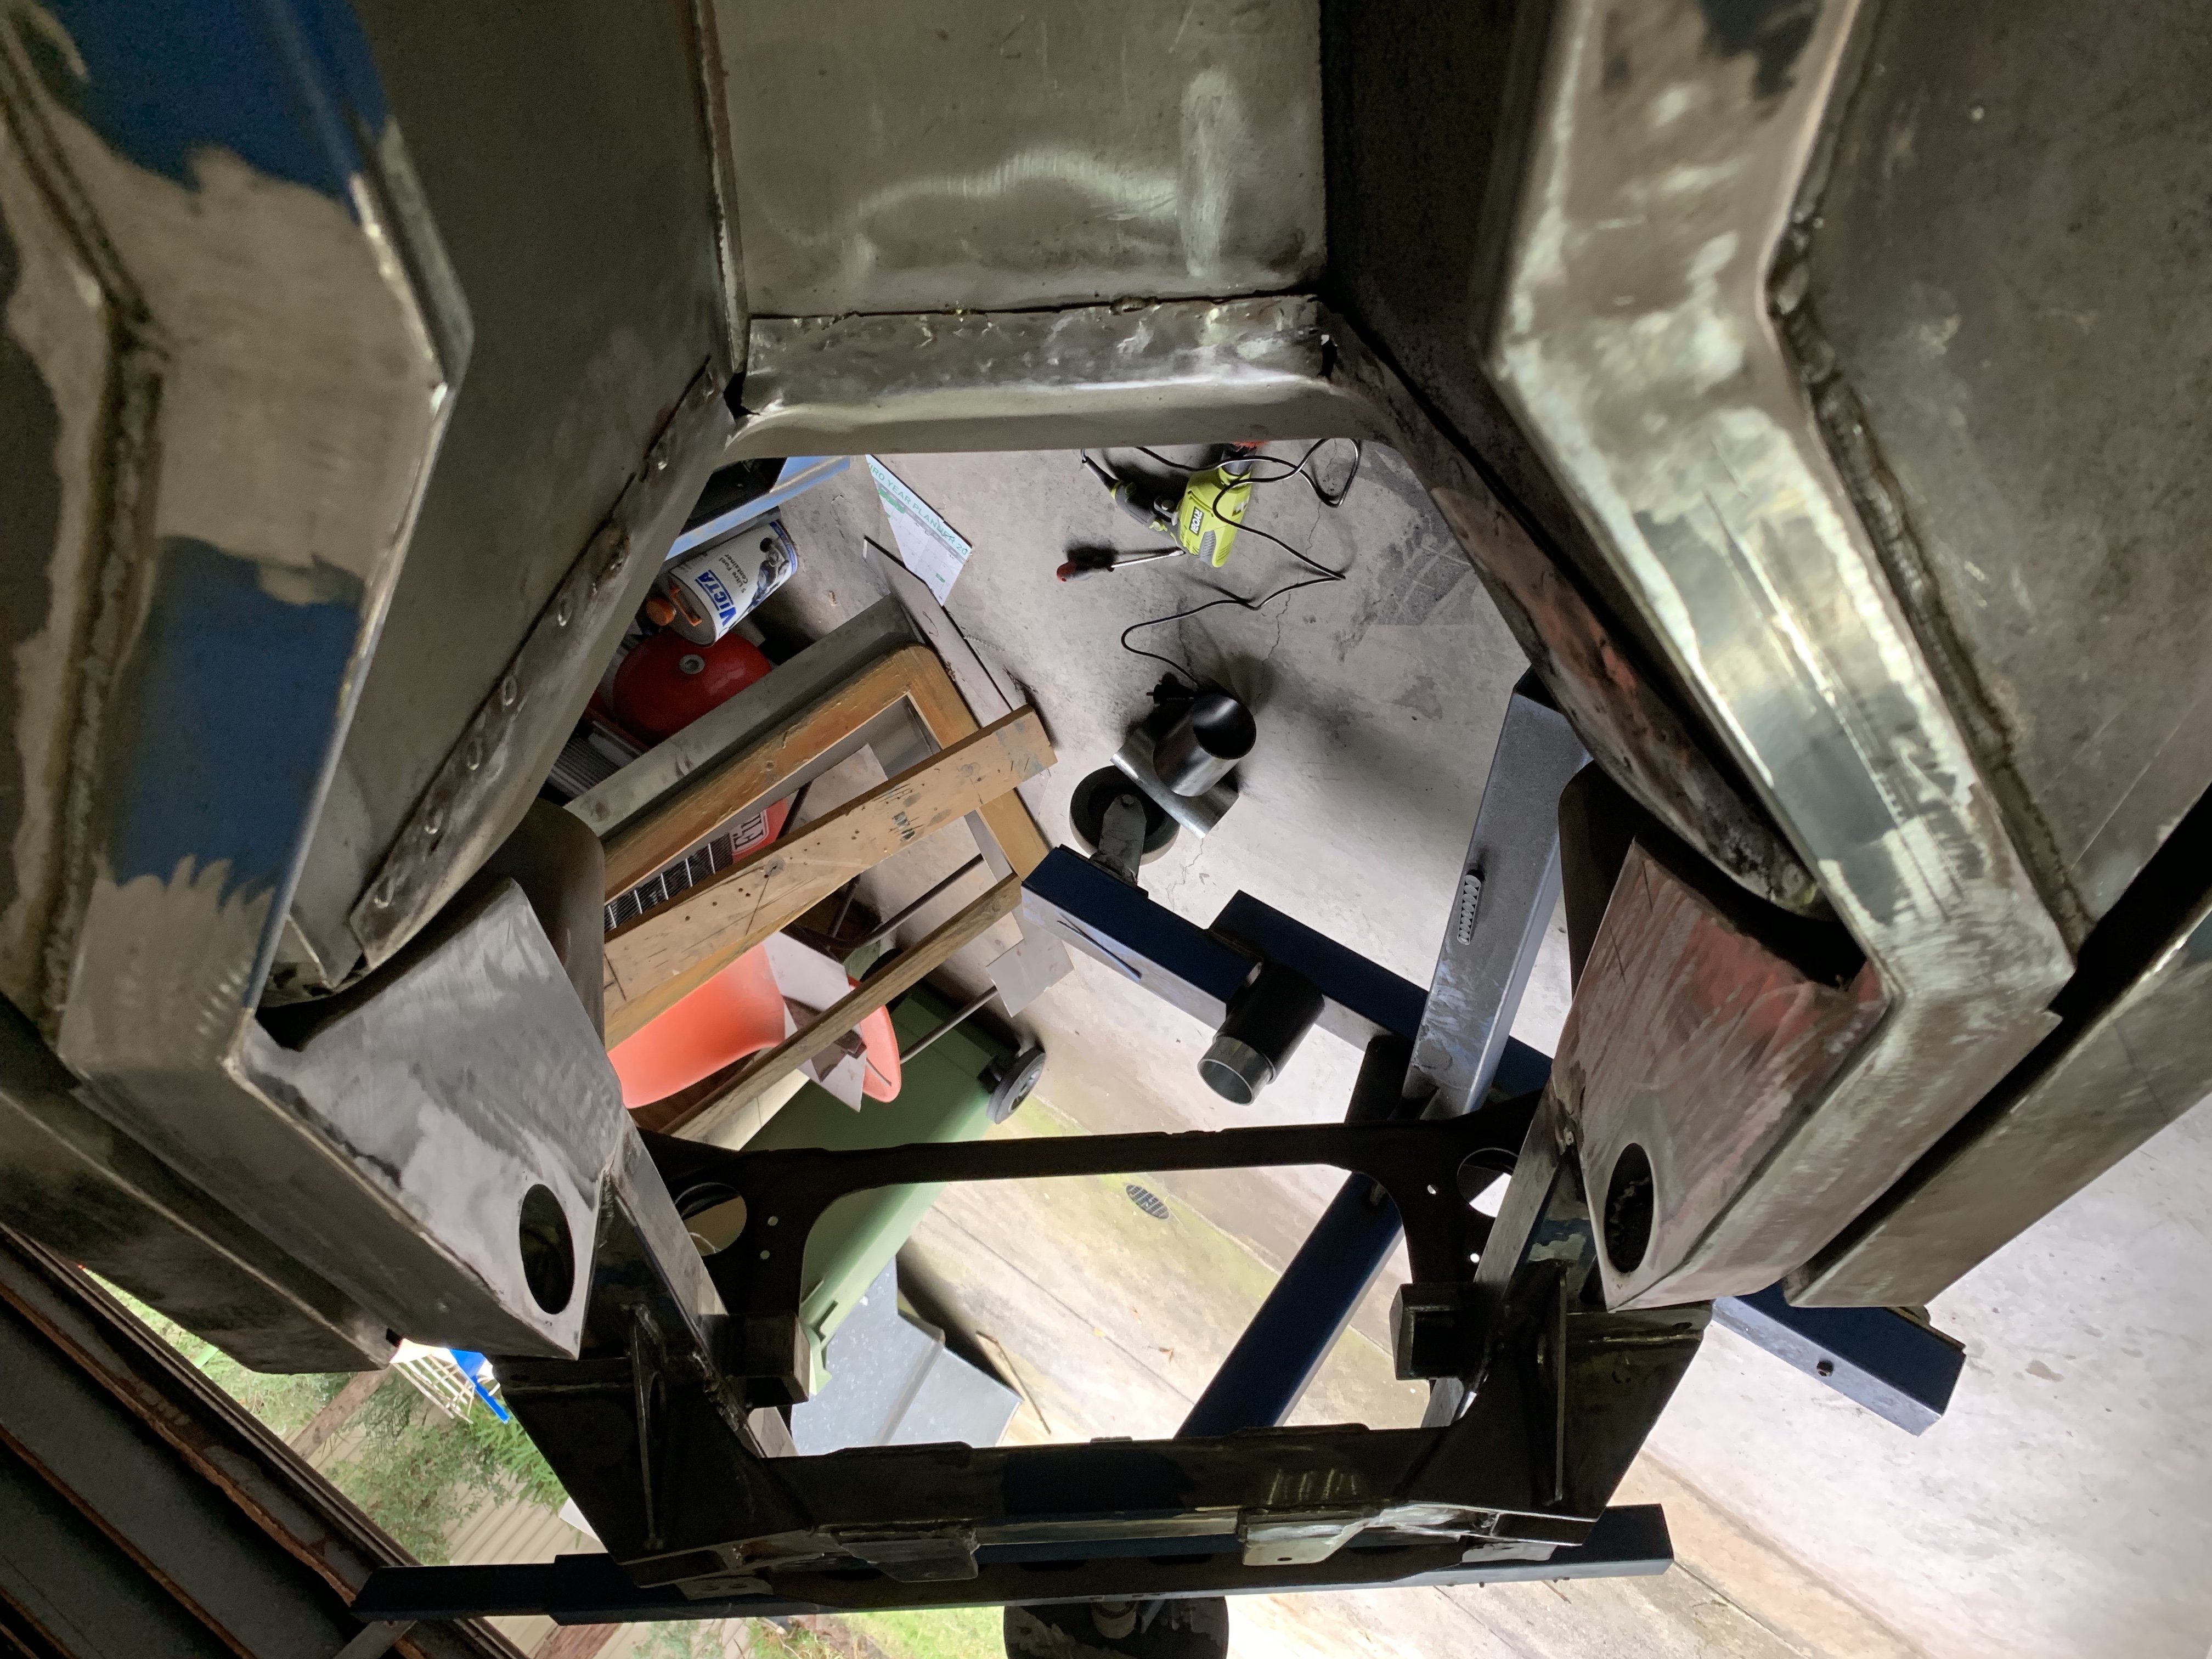
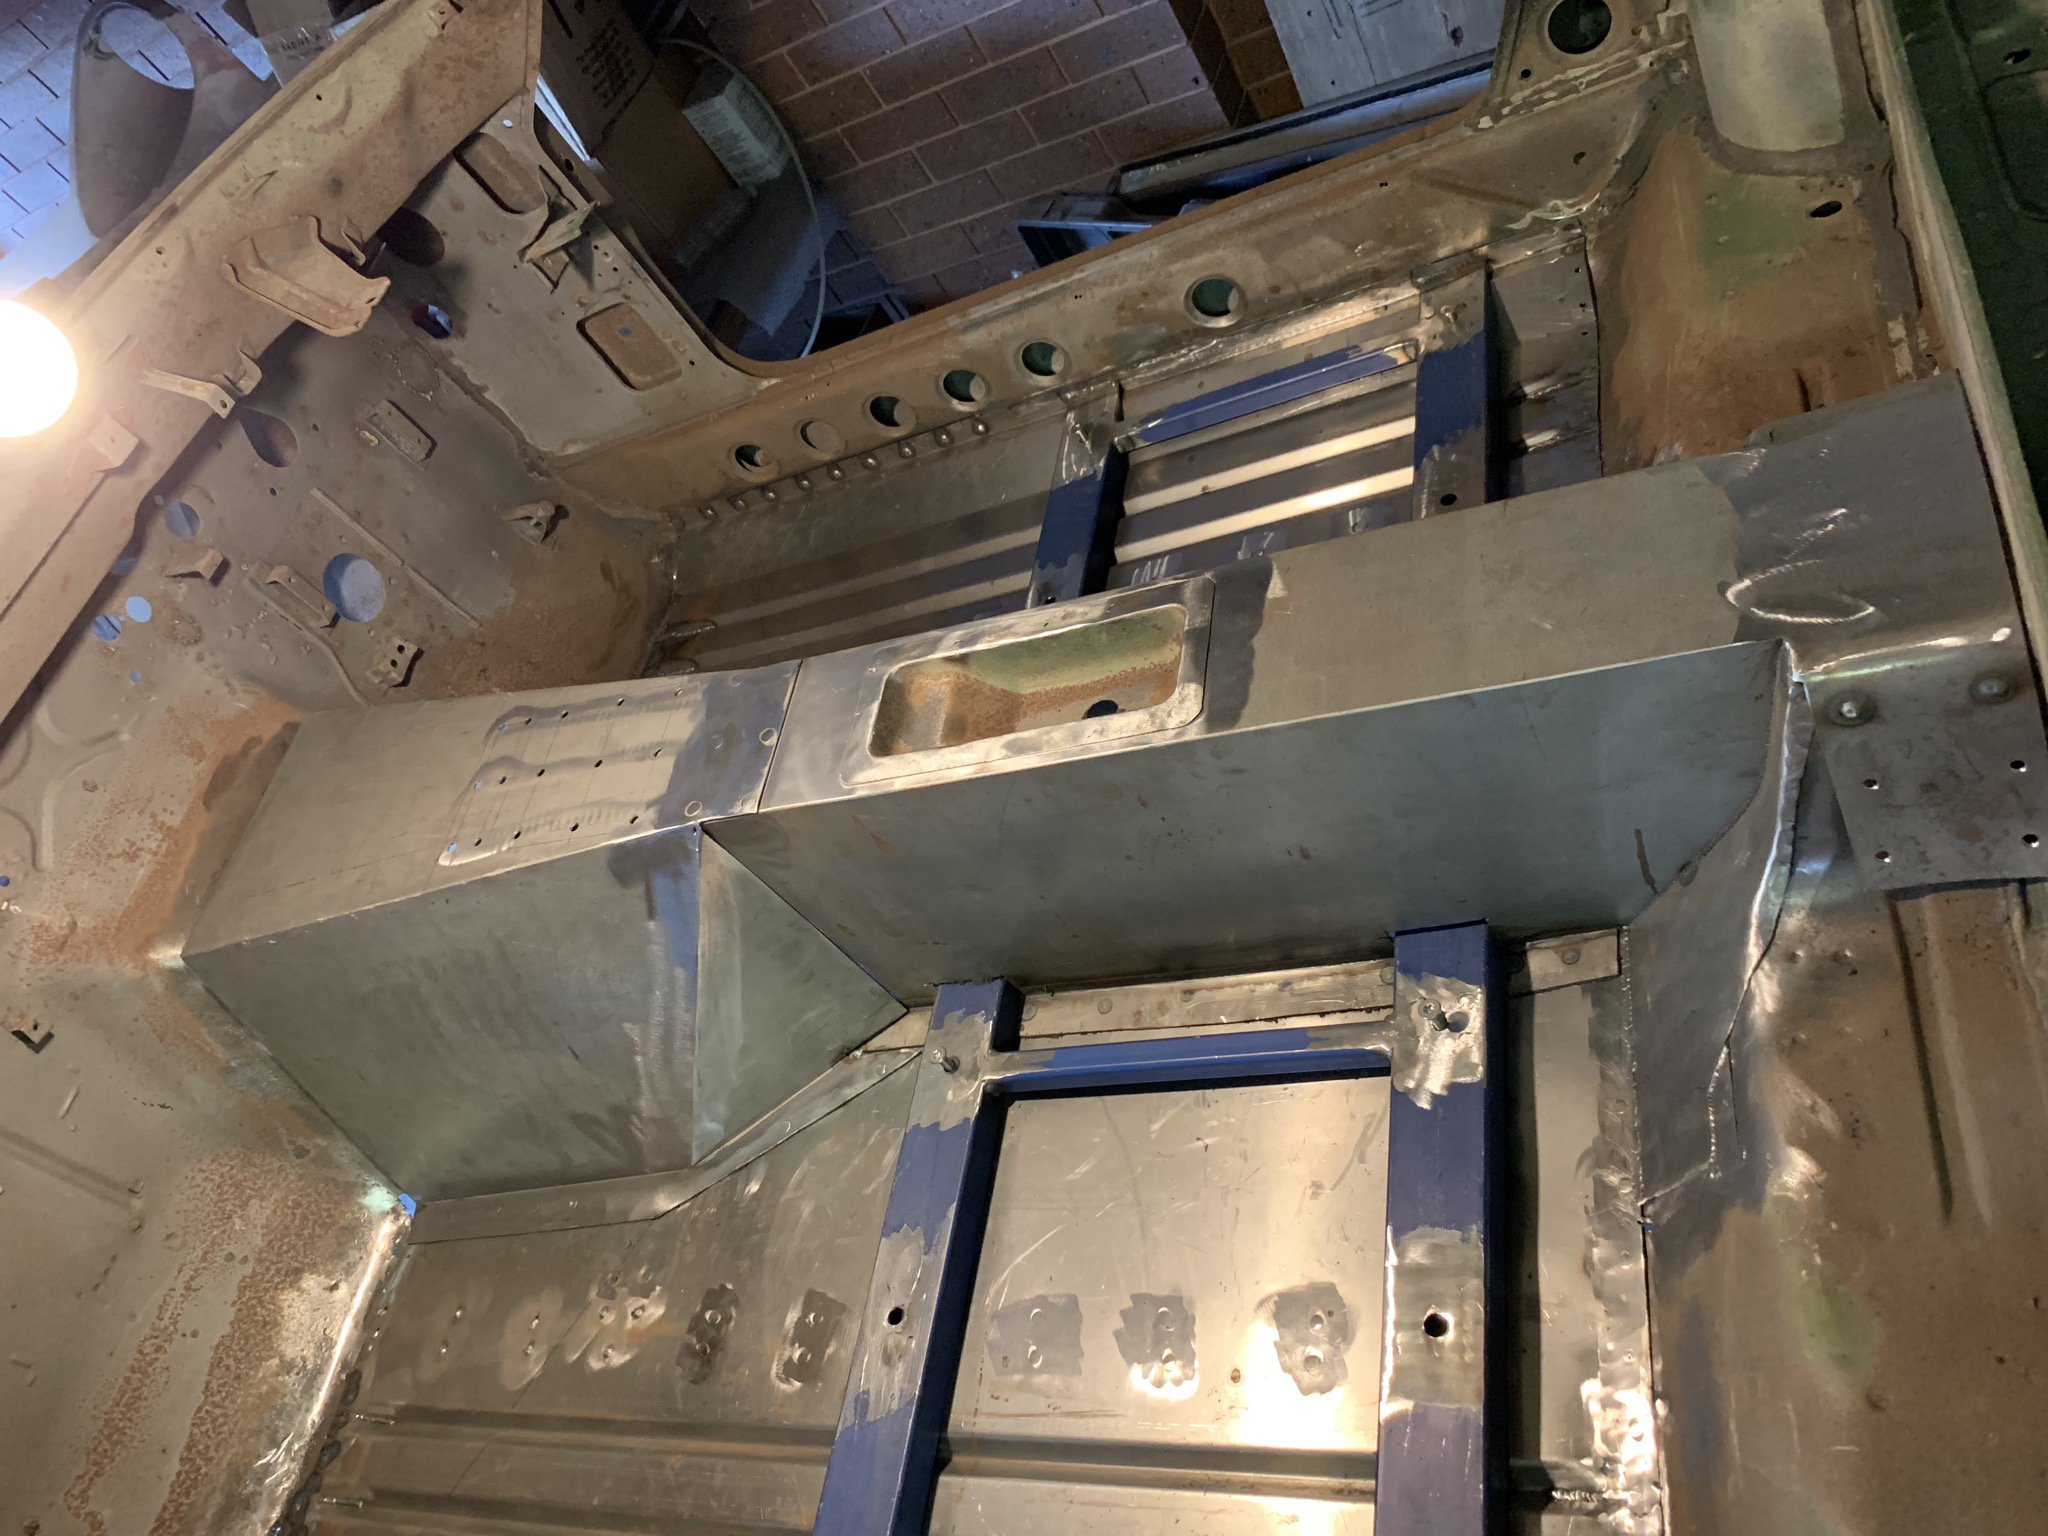
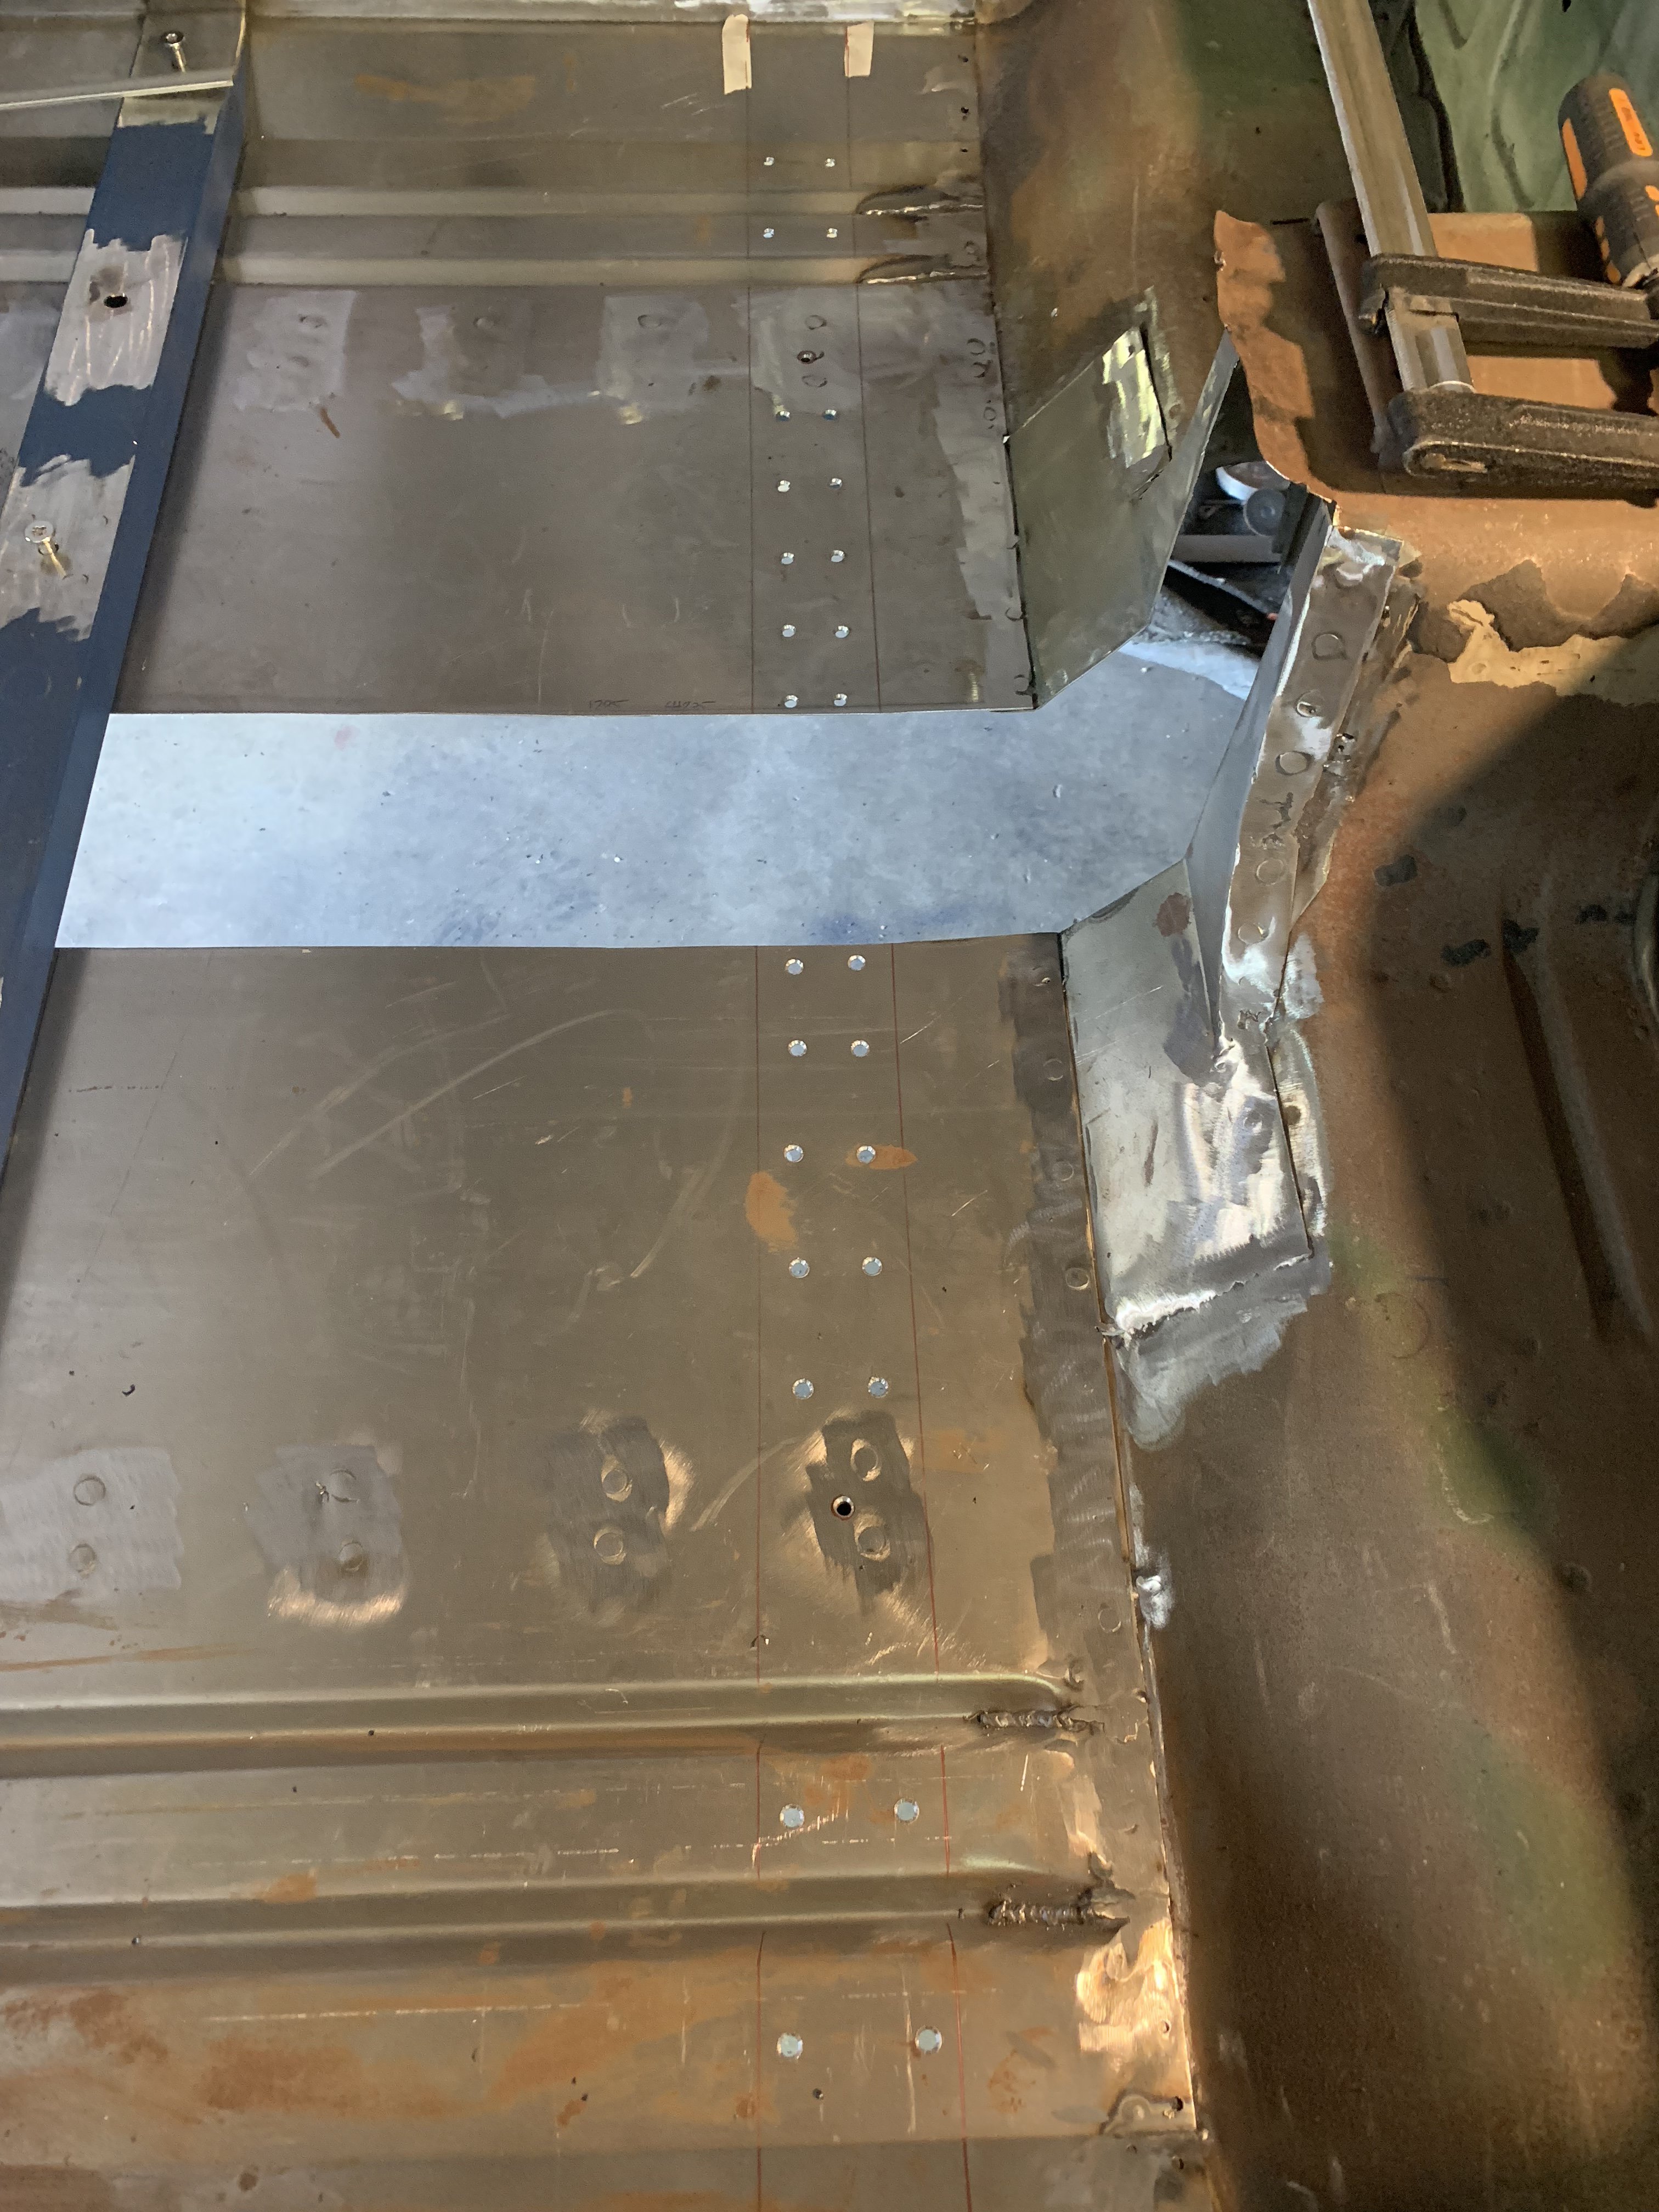
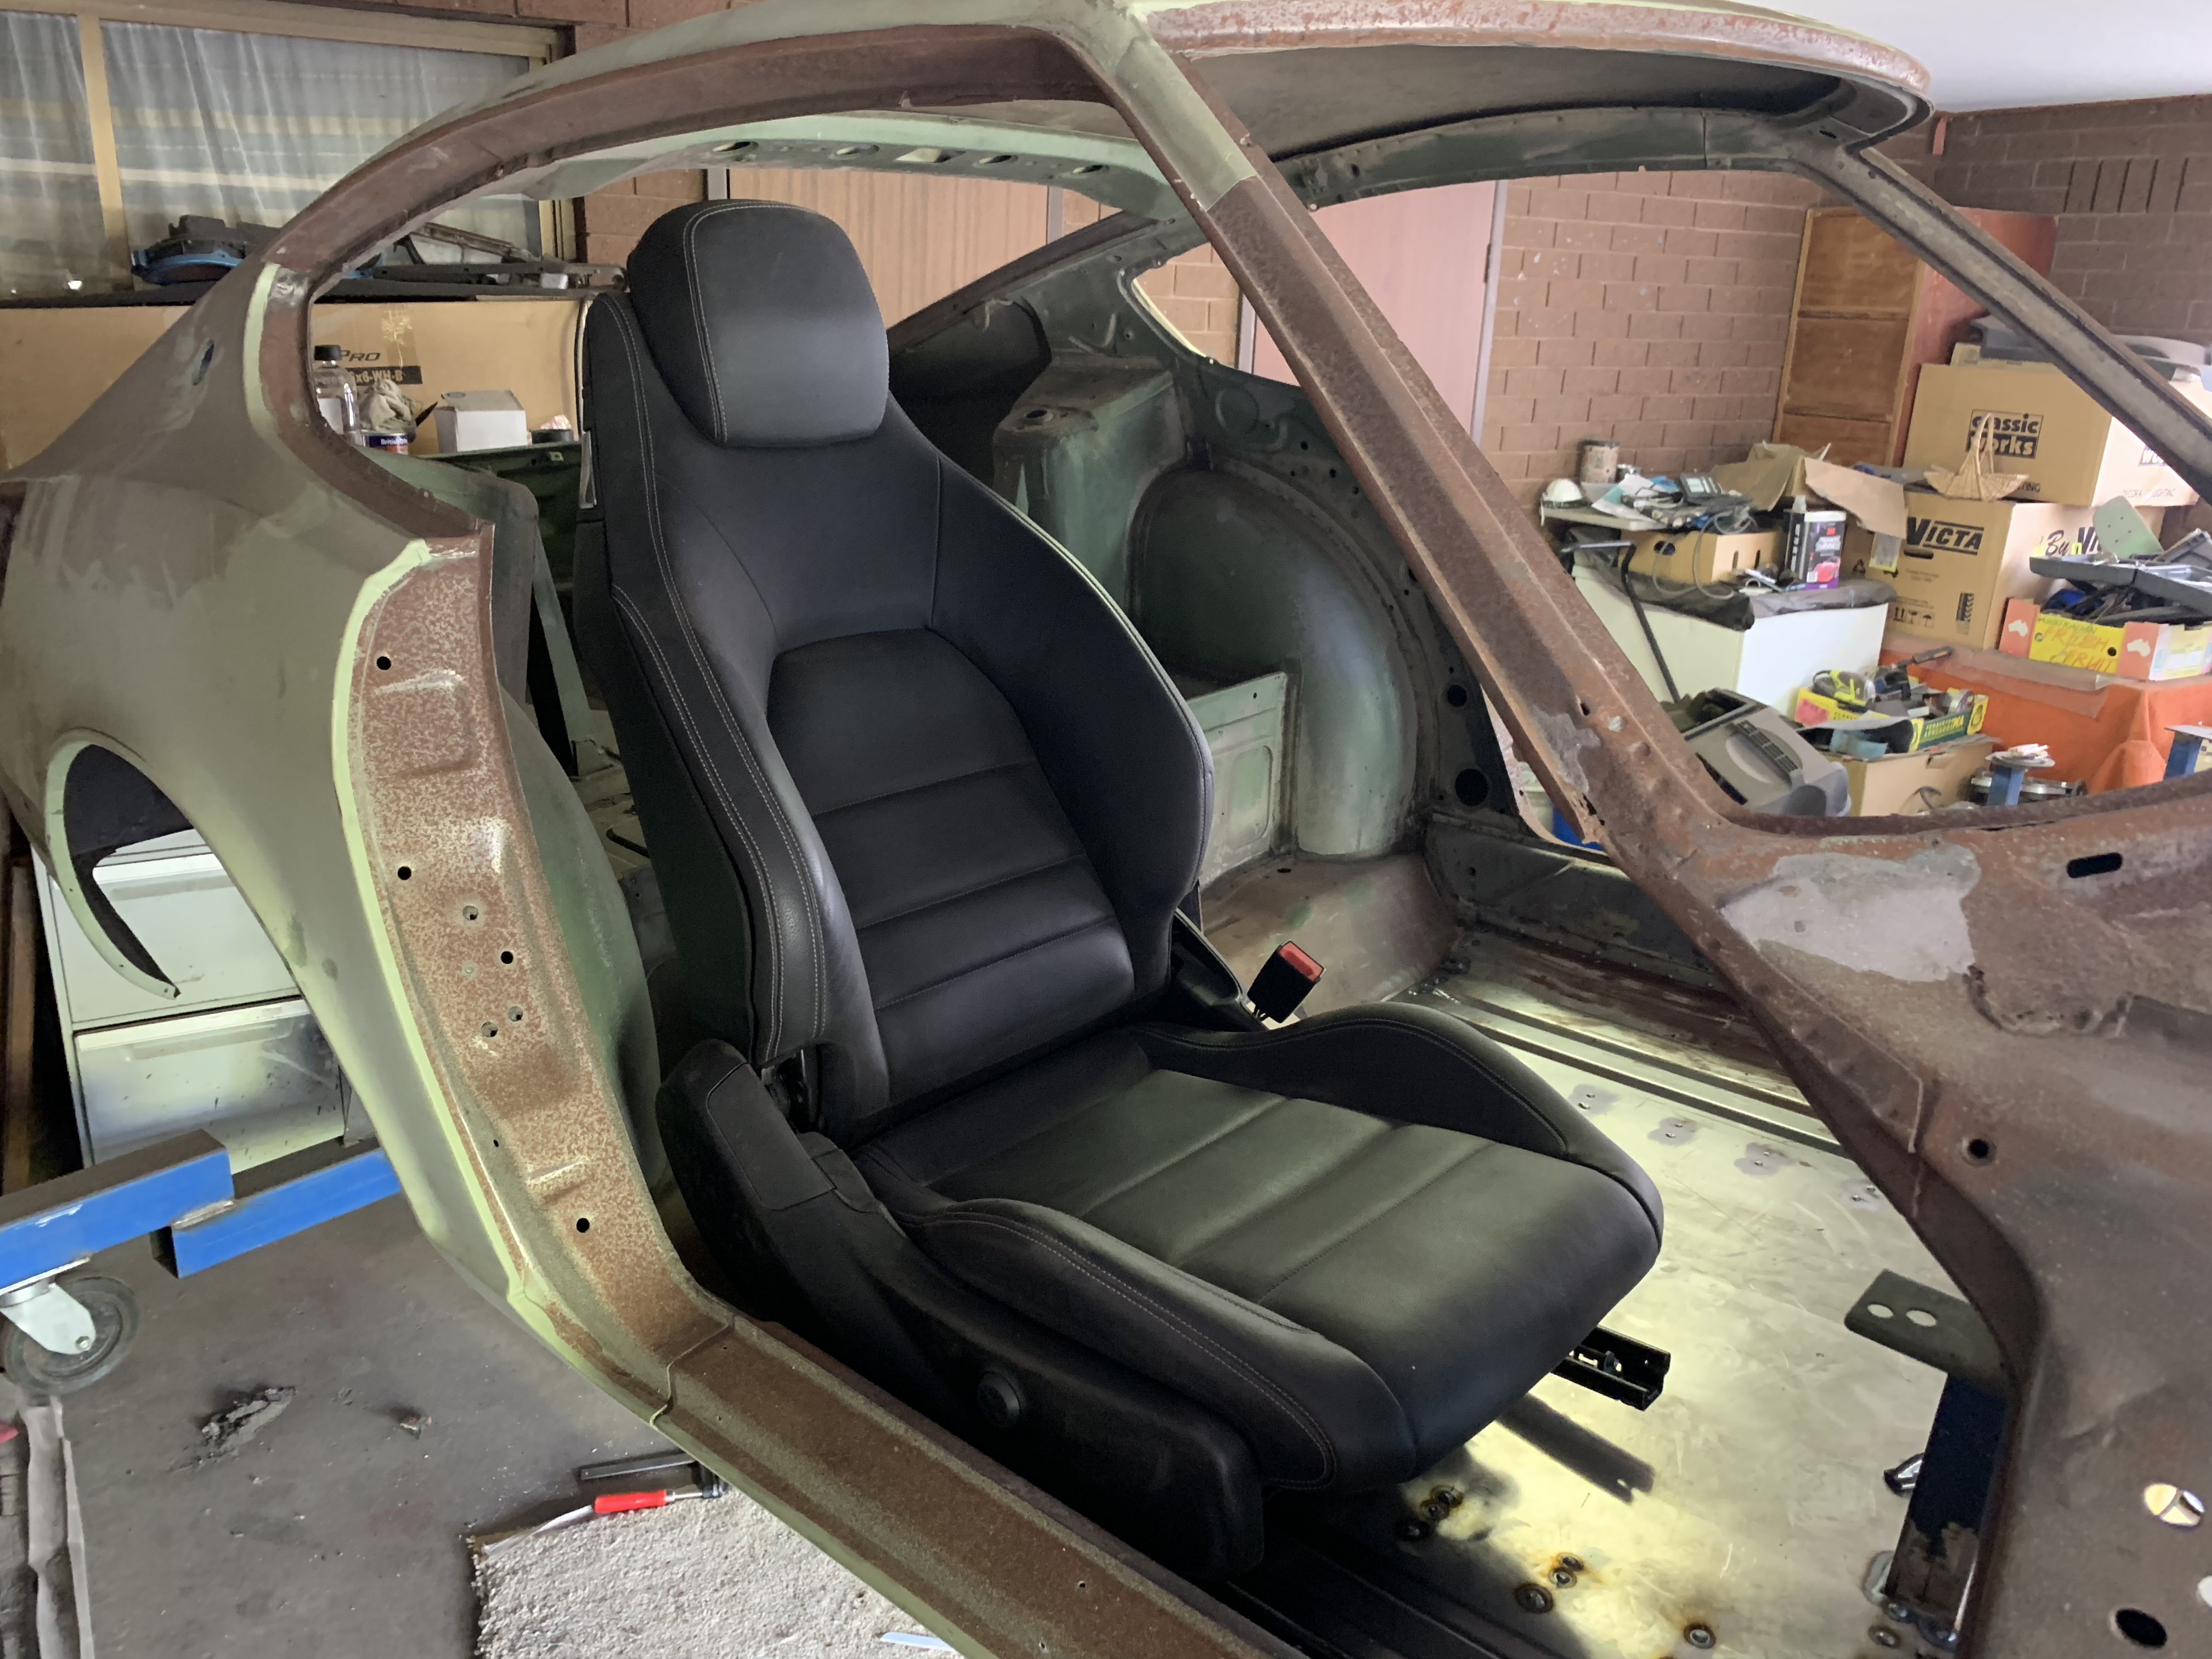
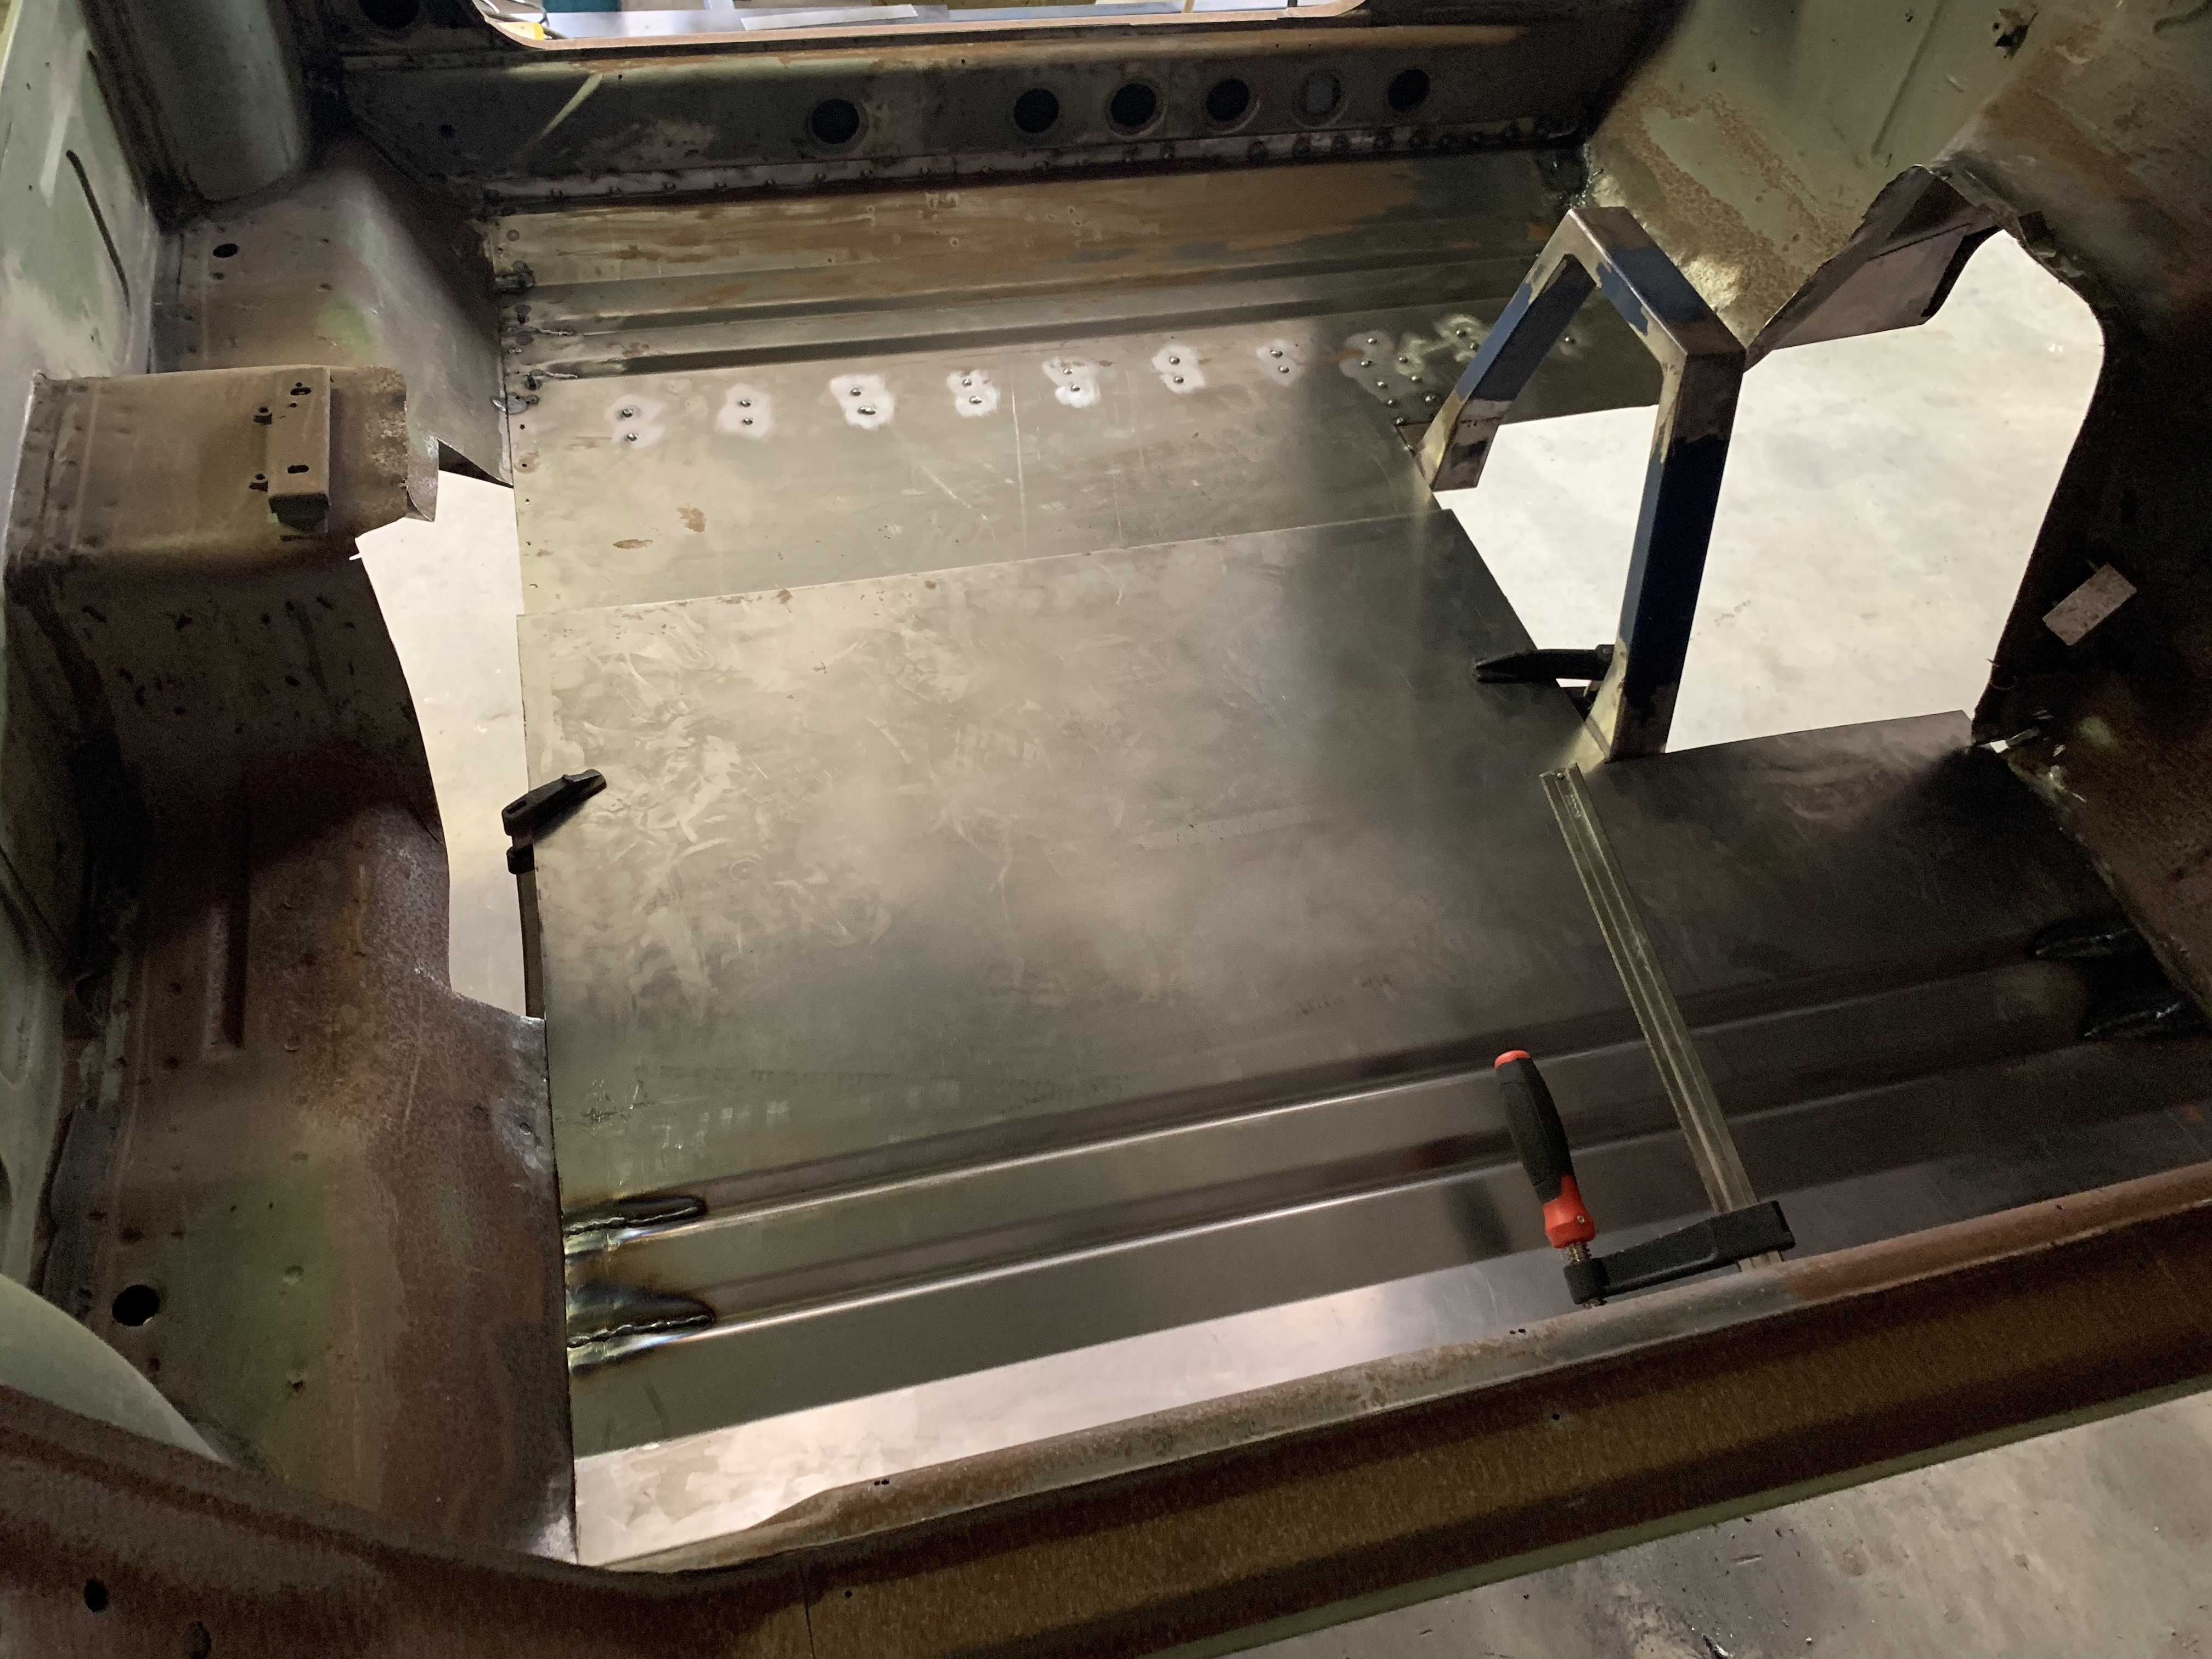
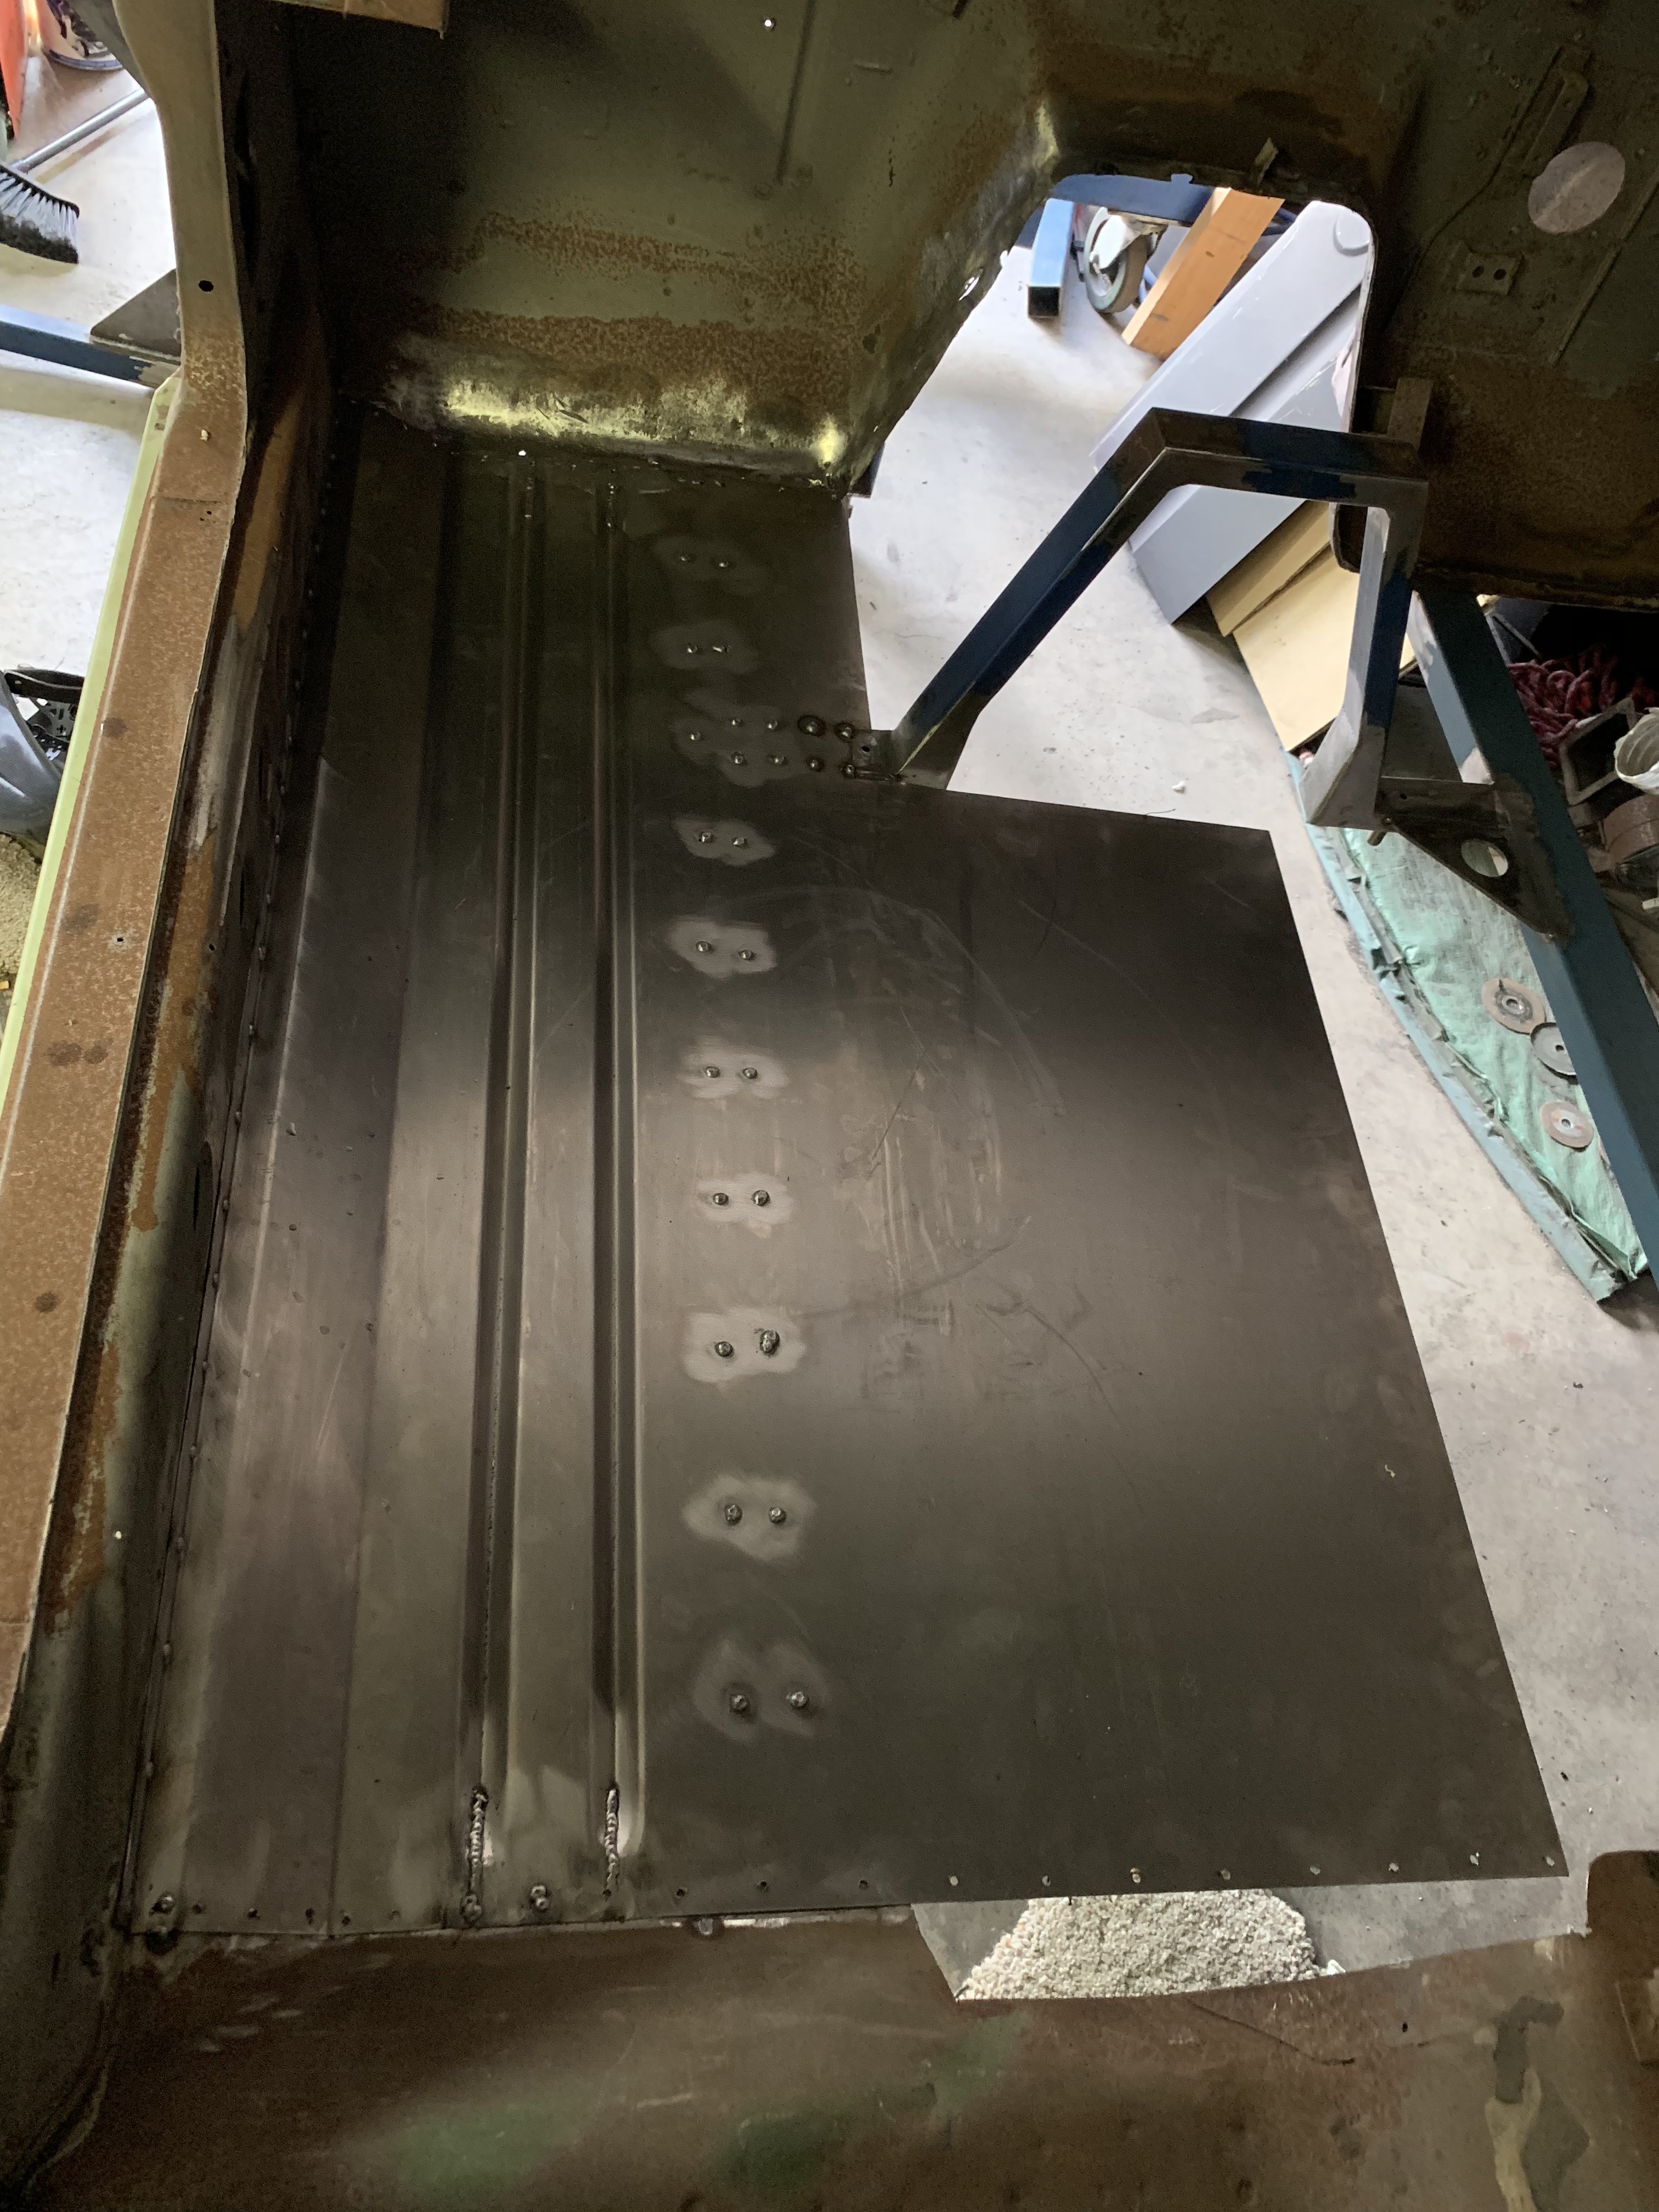
Today’s effort Both pans now in including the rear tunnel plate, this was all done as one assy so as to make everything uniform and kept square in the process. Next the tunnel will be formed then the pans and rear plate will be cut and trimmed to suit A lot of fine tuning to be done with small mods and fabrication around the pans, plate etc but all in all happiness that this major structural work is coming to an end Even had the first chance to place the AMG drivers seat in place and the smile was from ear to ear Cheers John
-
Sirpents 260Z / C32 AMG Powered RS30 - Australia
Sirpent replied to Sirpent's topic in S30 Series - 240z, 260z, 280z
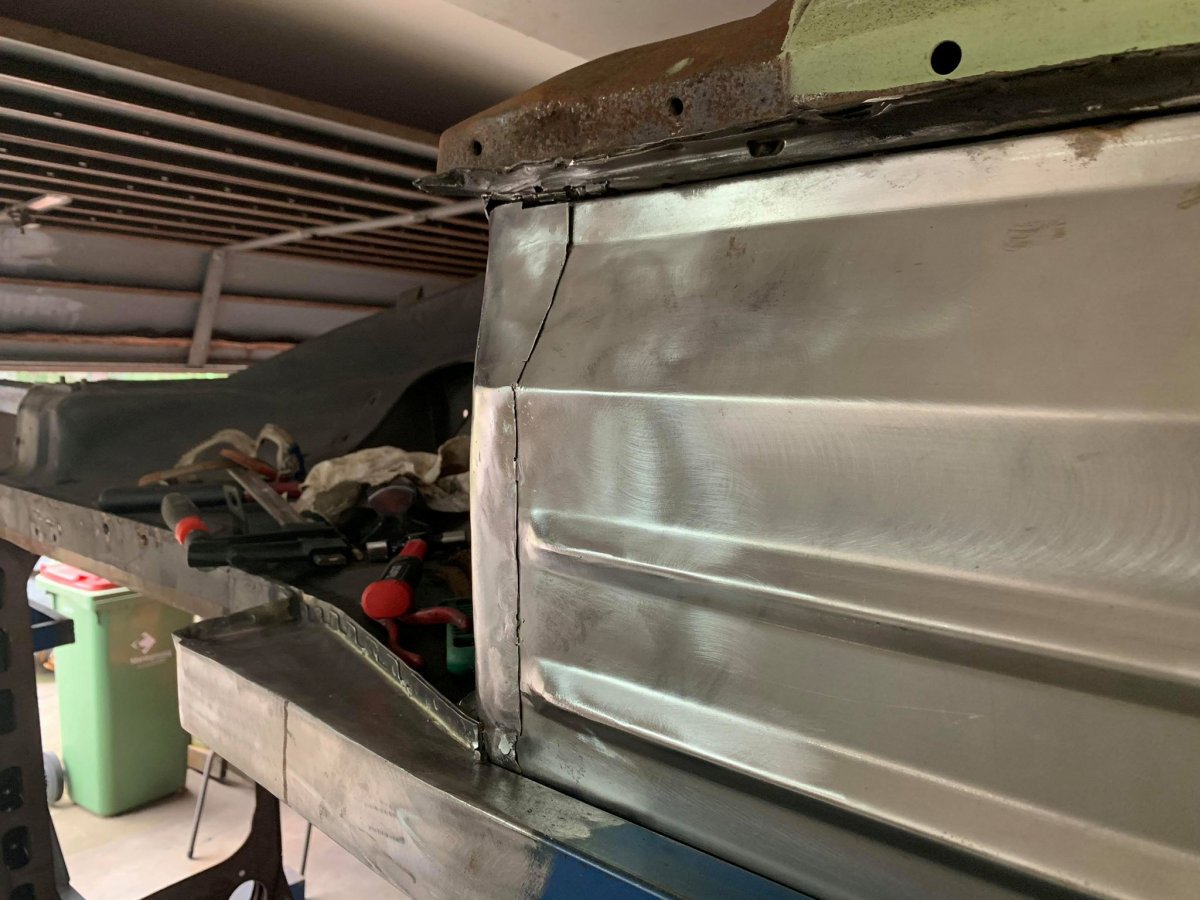
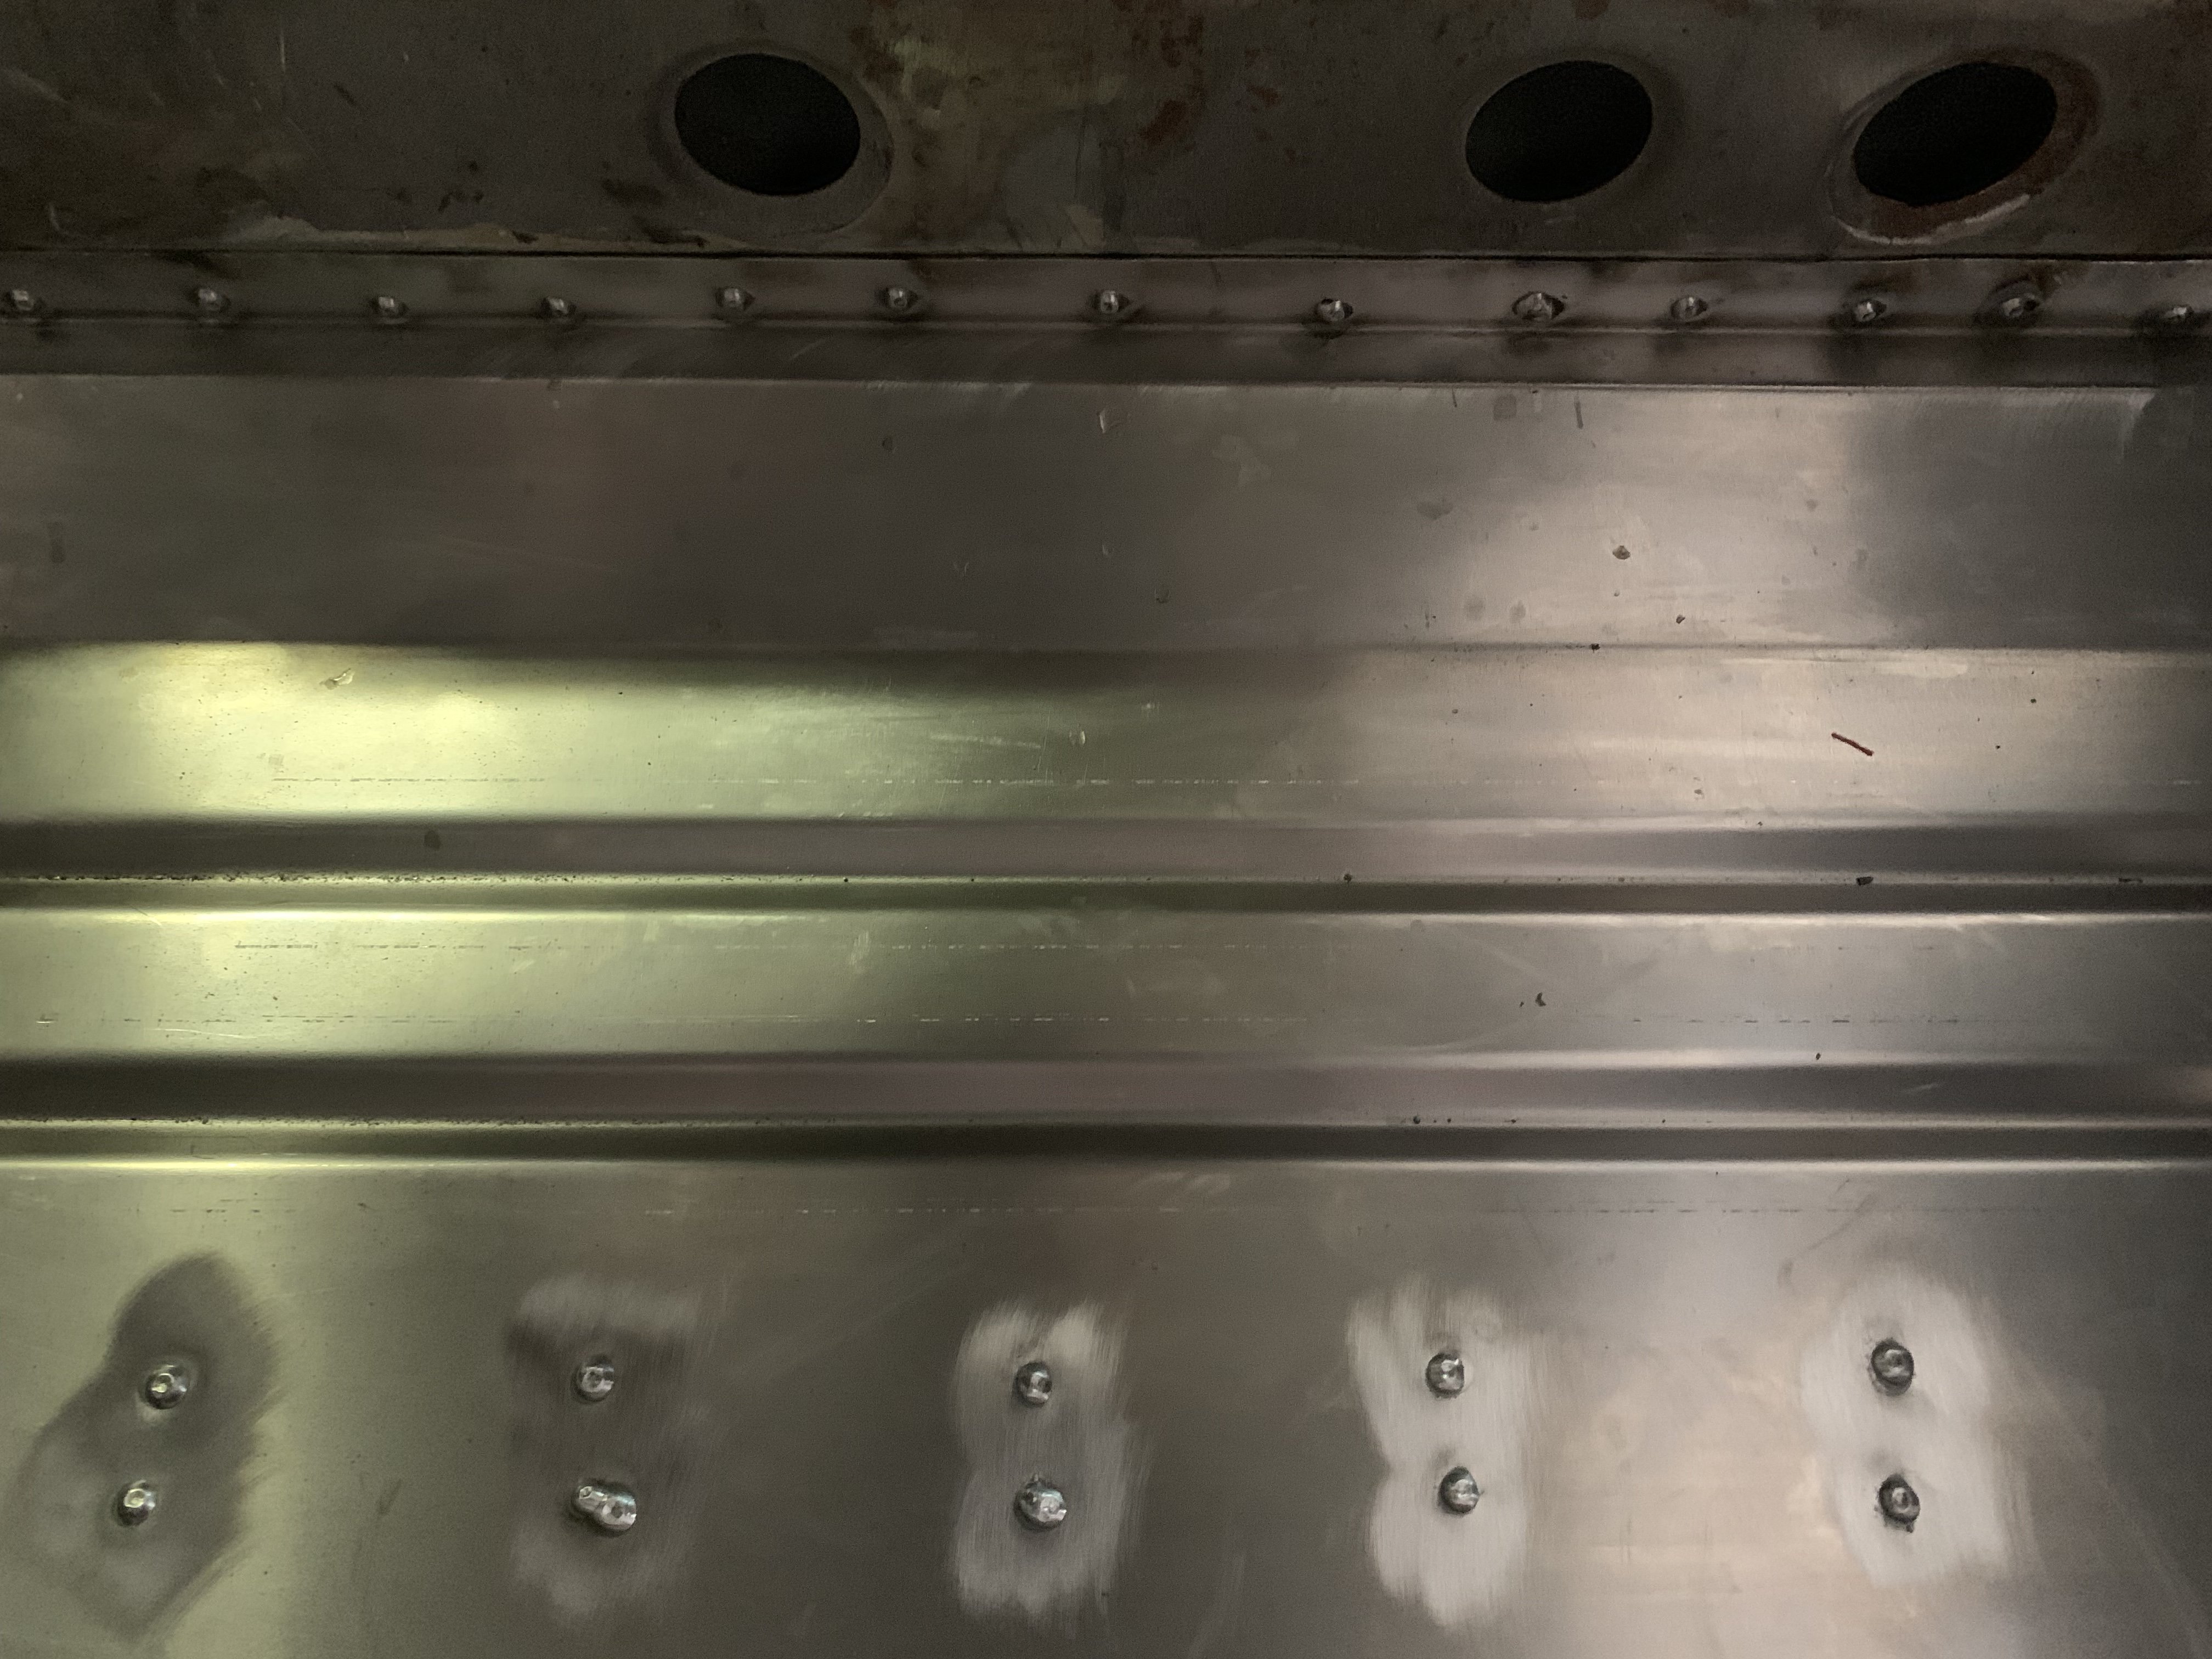
Well progress is slow but steady Im certain these old Zeds were built using recycled Bud cans from the 1970's, any how all good Got the first pan trimmed in to the remaining floor sections with much slicing dicing and welding, the result? once prepped, sealed, coated and colored Im pretty sure it will look the goods, Only just managed to sit the trimmed 2nd pan in place before sun down. Until next week......
-
Sirpents 260Z / C32 AMG Powered RS30 - Australia
Sirpent replied to Sirpent's topic in S30 Series - 240z, 260z, 280z
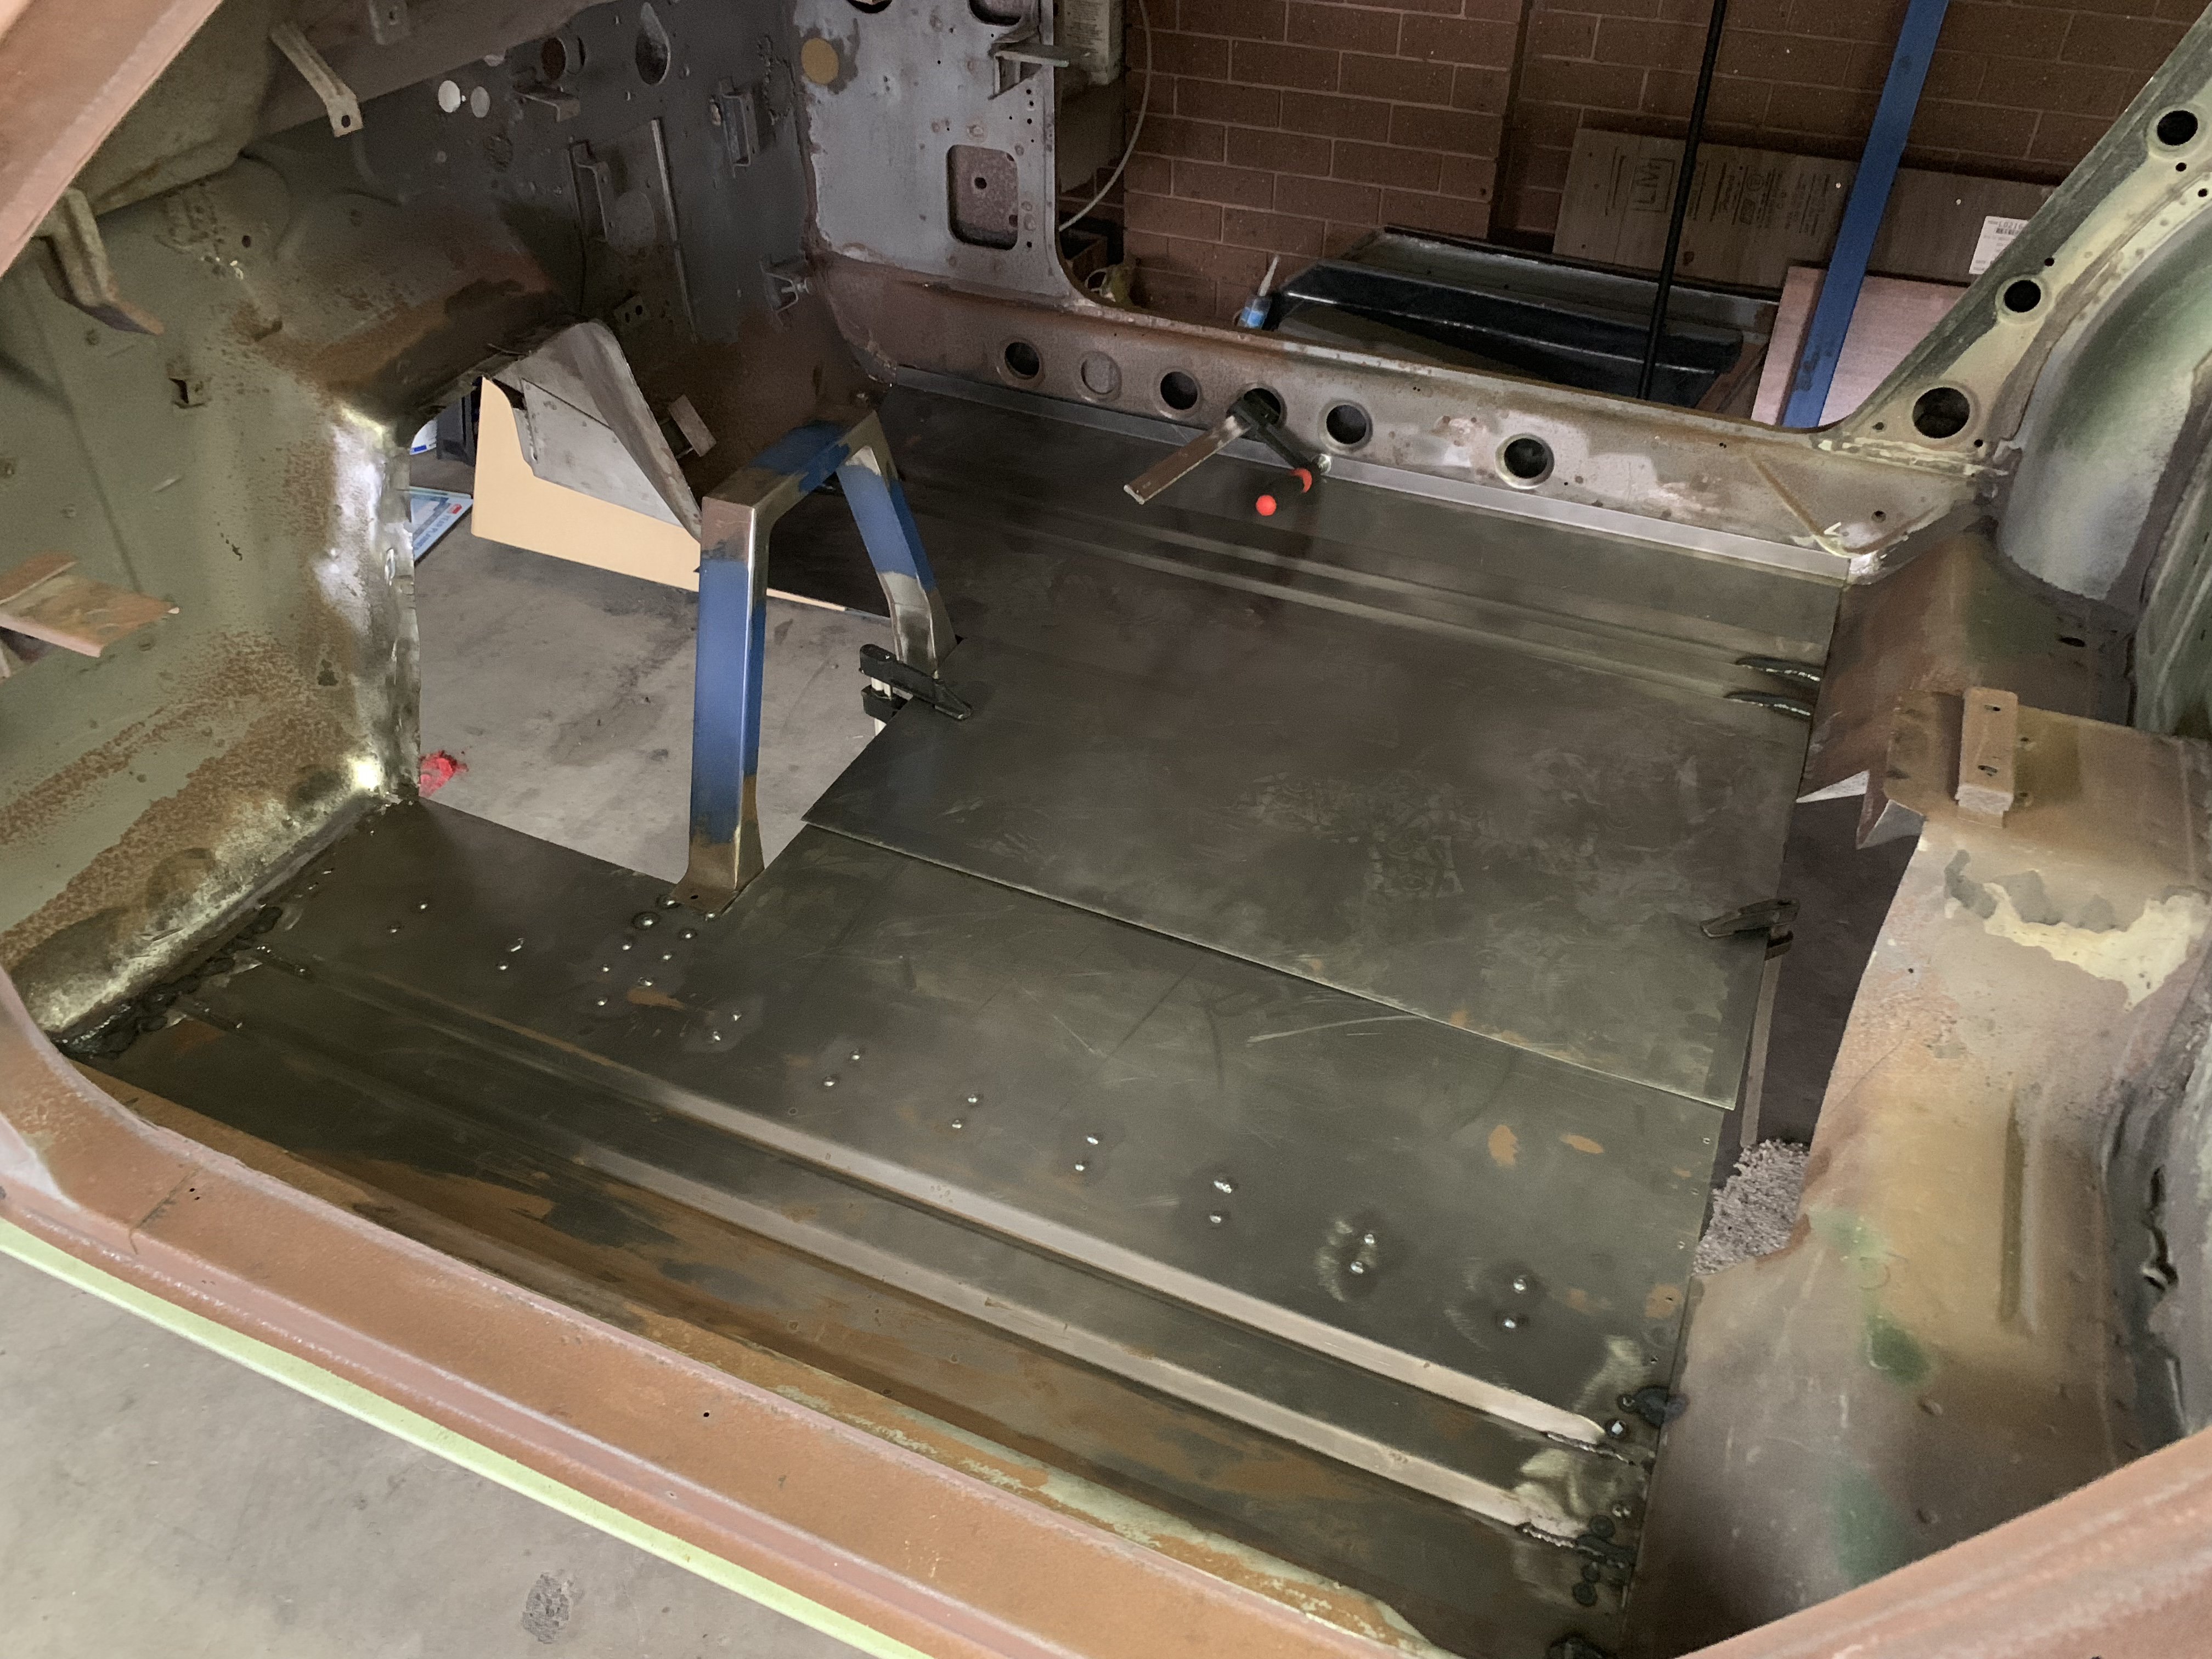
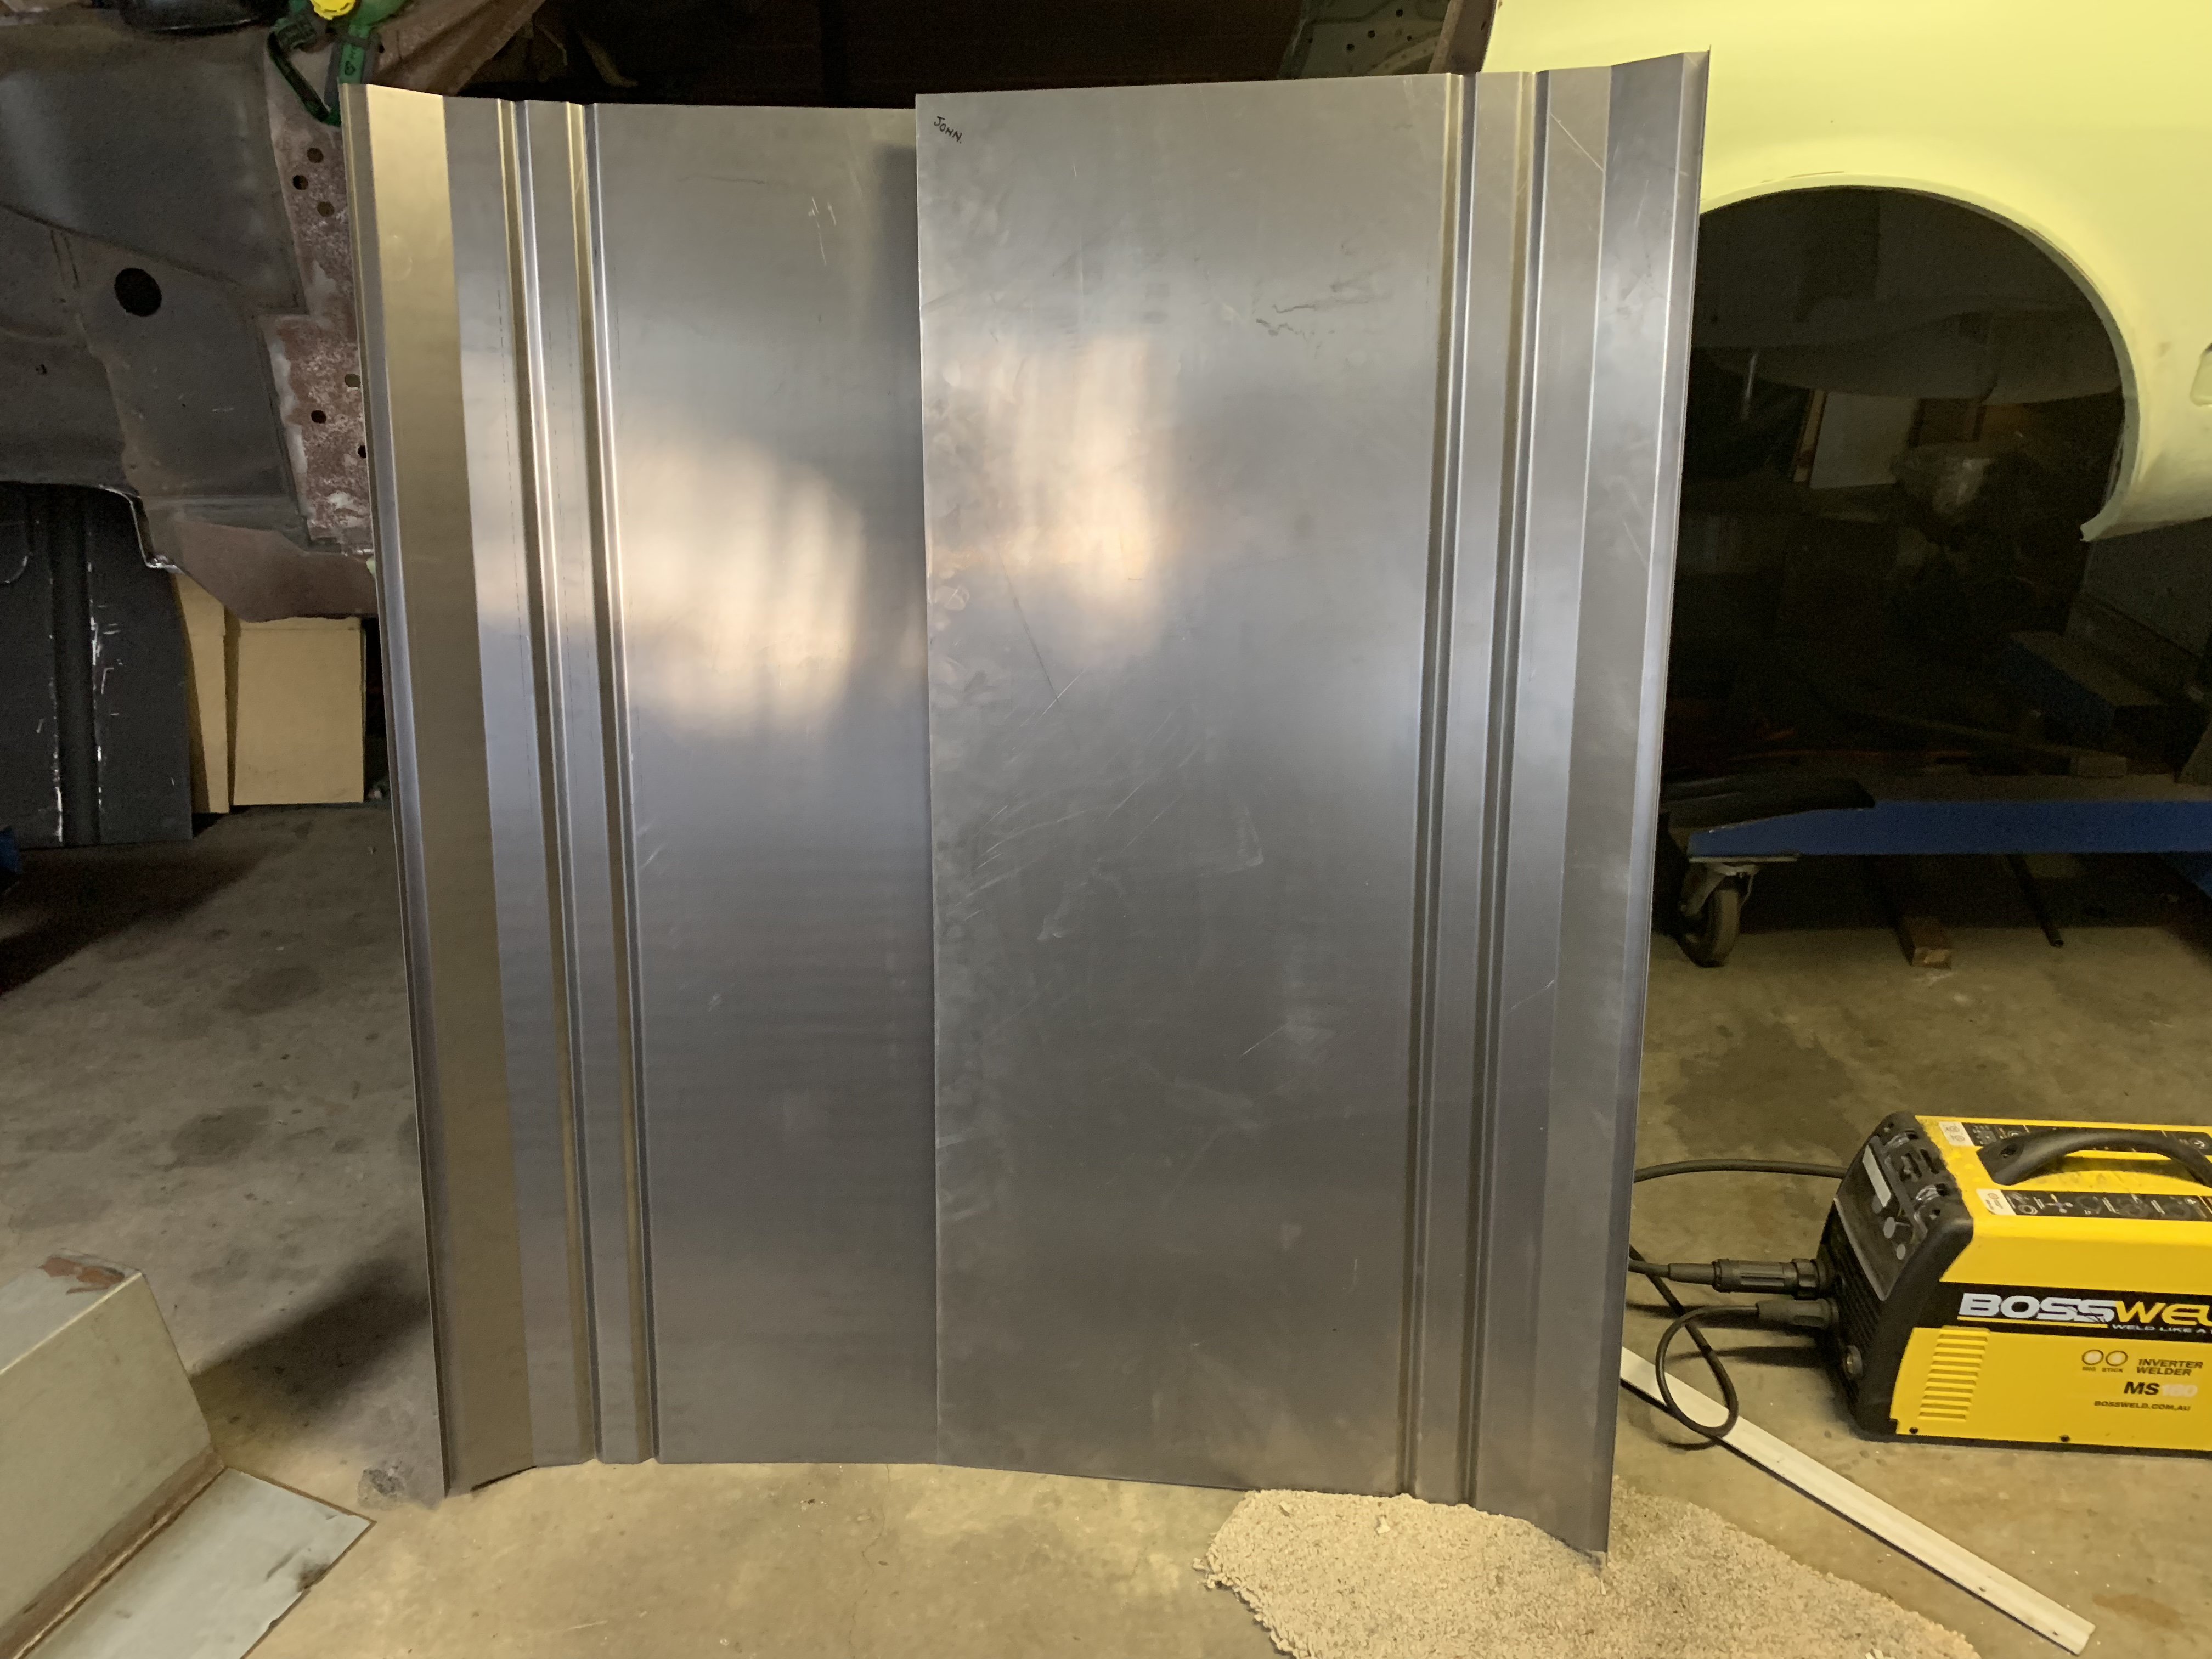
Love it when a proof of concept works out as well as you imagined and planned it So first pan went in today on the passenger side and lined up nicely after I blended the reinforcement beads flat at each end to allow mating the pan to the forward and rear sheet metal. cheers John
-
Sirpents 260Z / C32 AMG Powered RS30 - Australia
Sirpent replied to Sirpent's topic in S30 Series - 240z, 260z, 280z
Picked up the pans I had fabricated today Fun starts tomorrow
-
Sirpents 260Z / C32 AMG Powered RS30 - Australia
Sirpent replied to Sirpent's topic in S30 Series - 240z, 260z, 280z
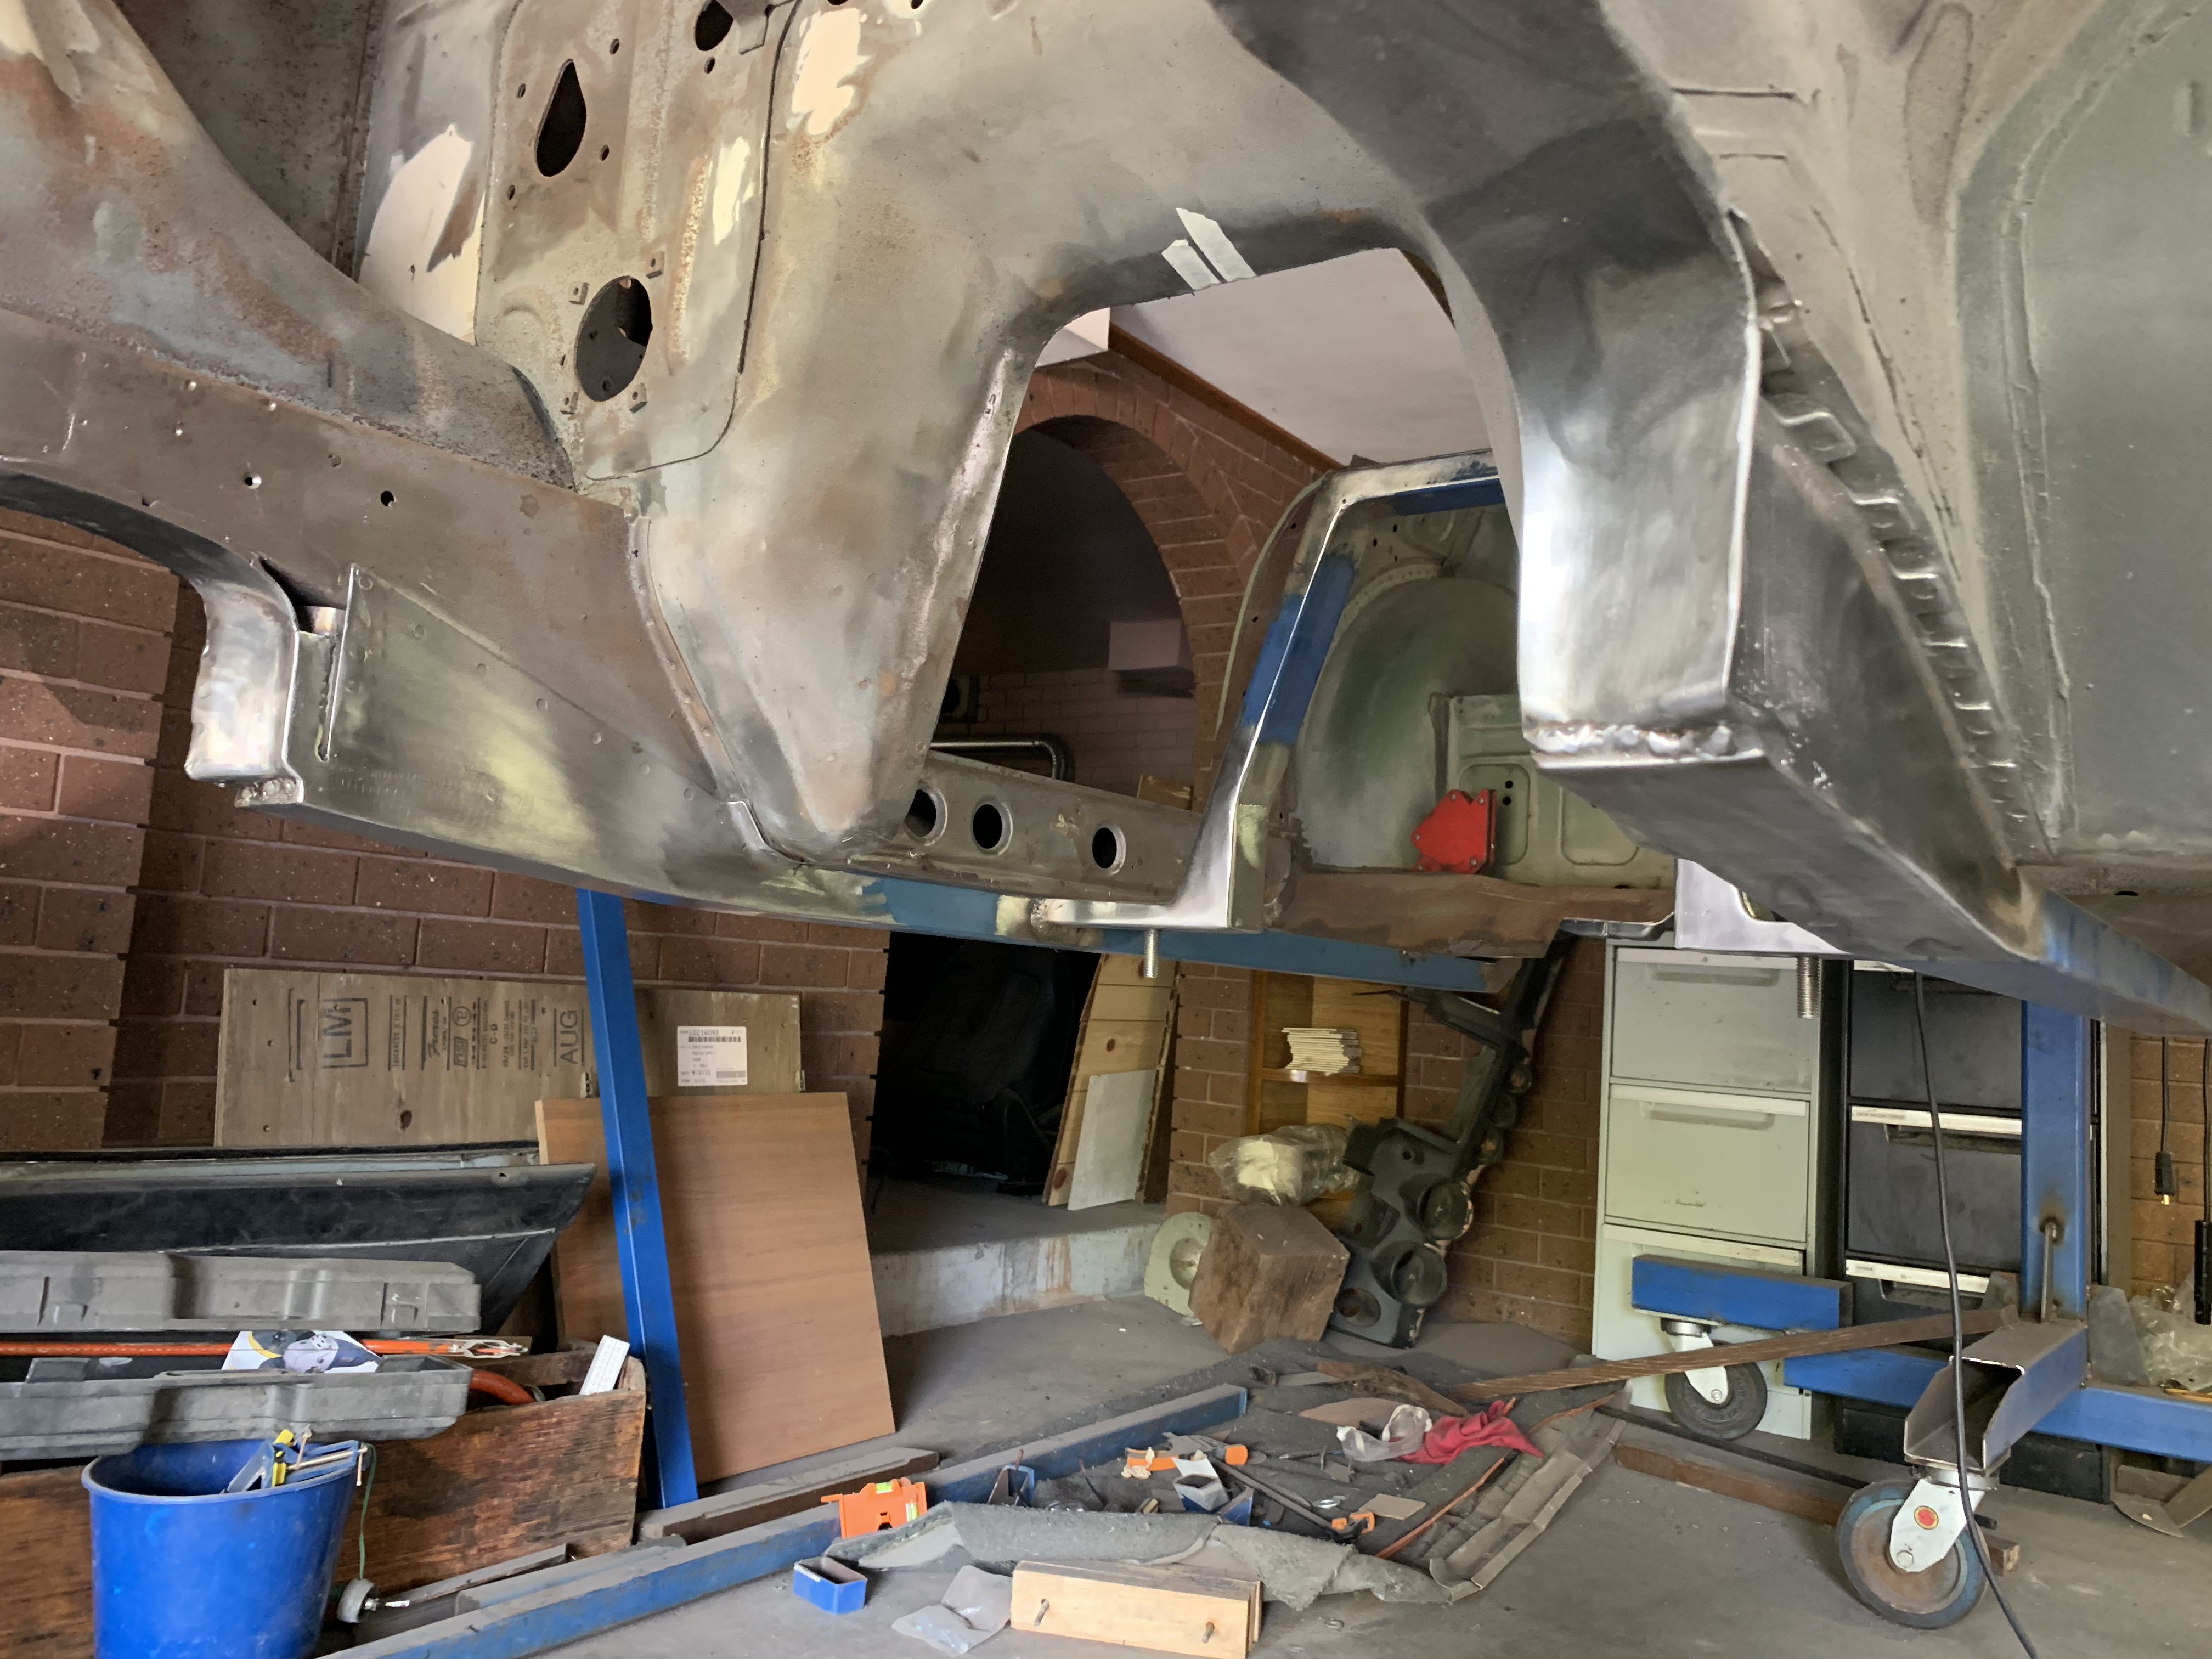
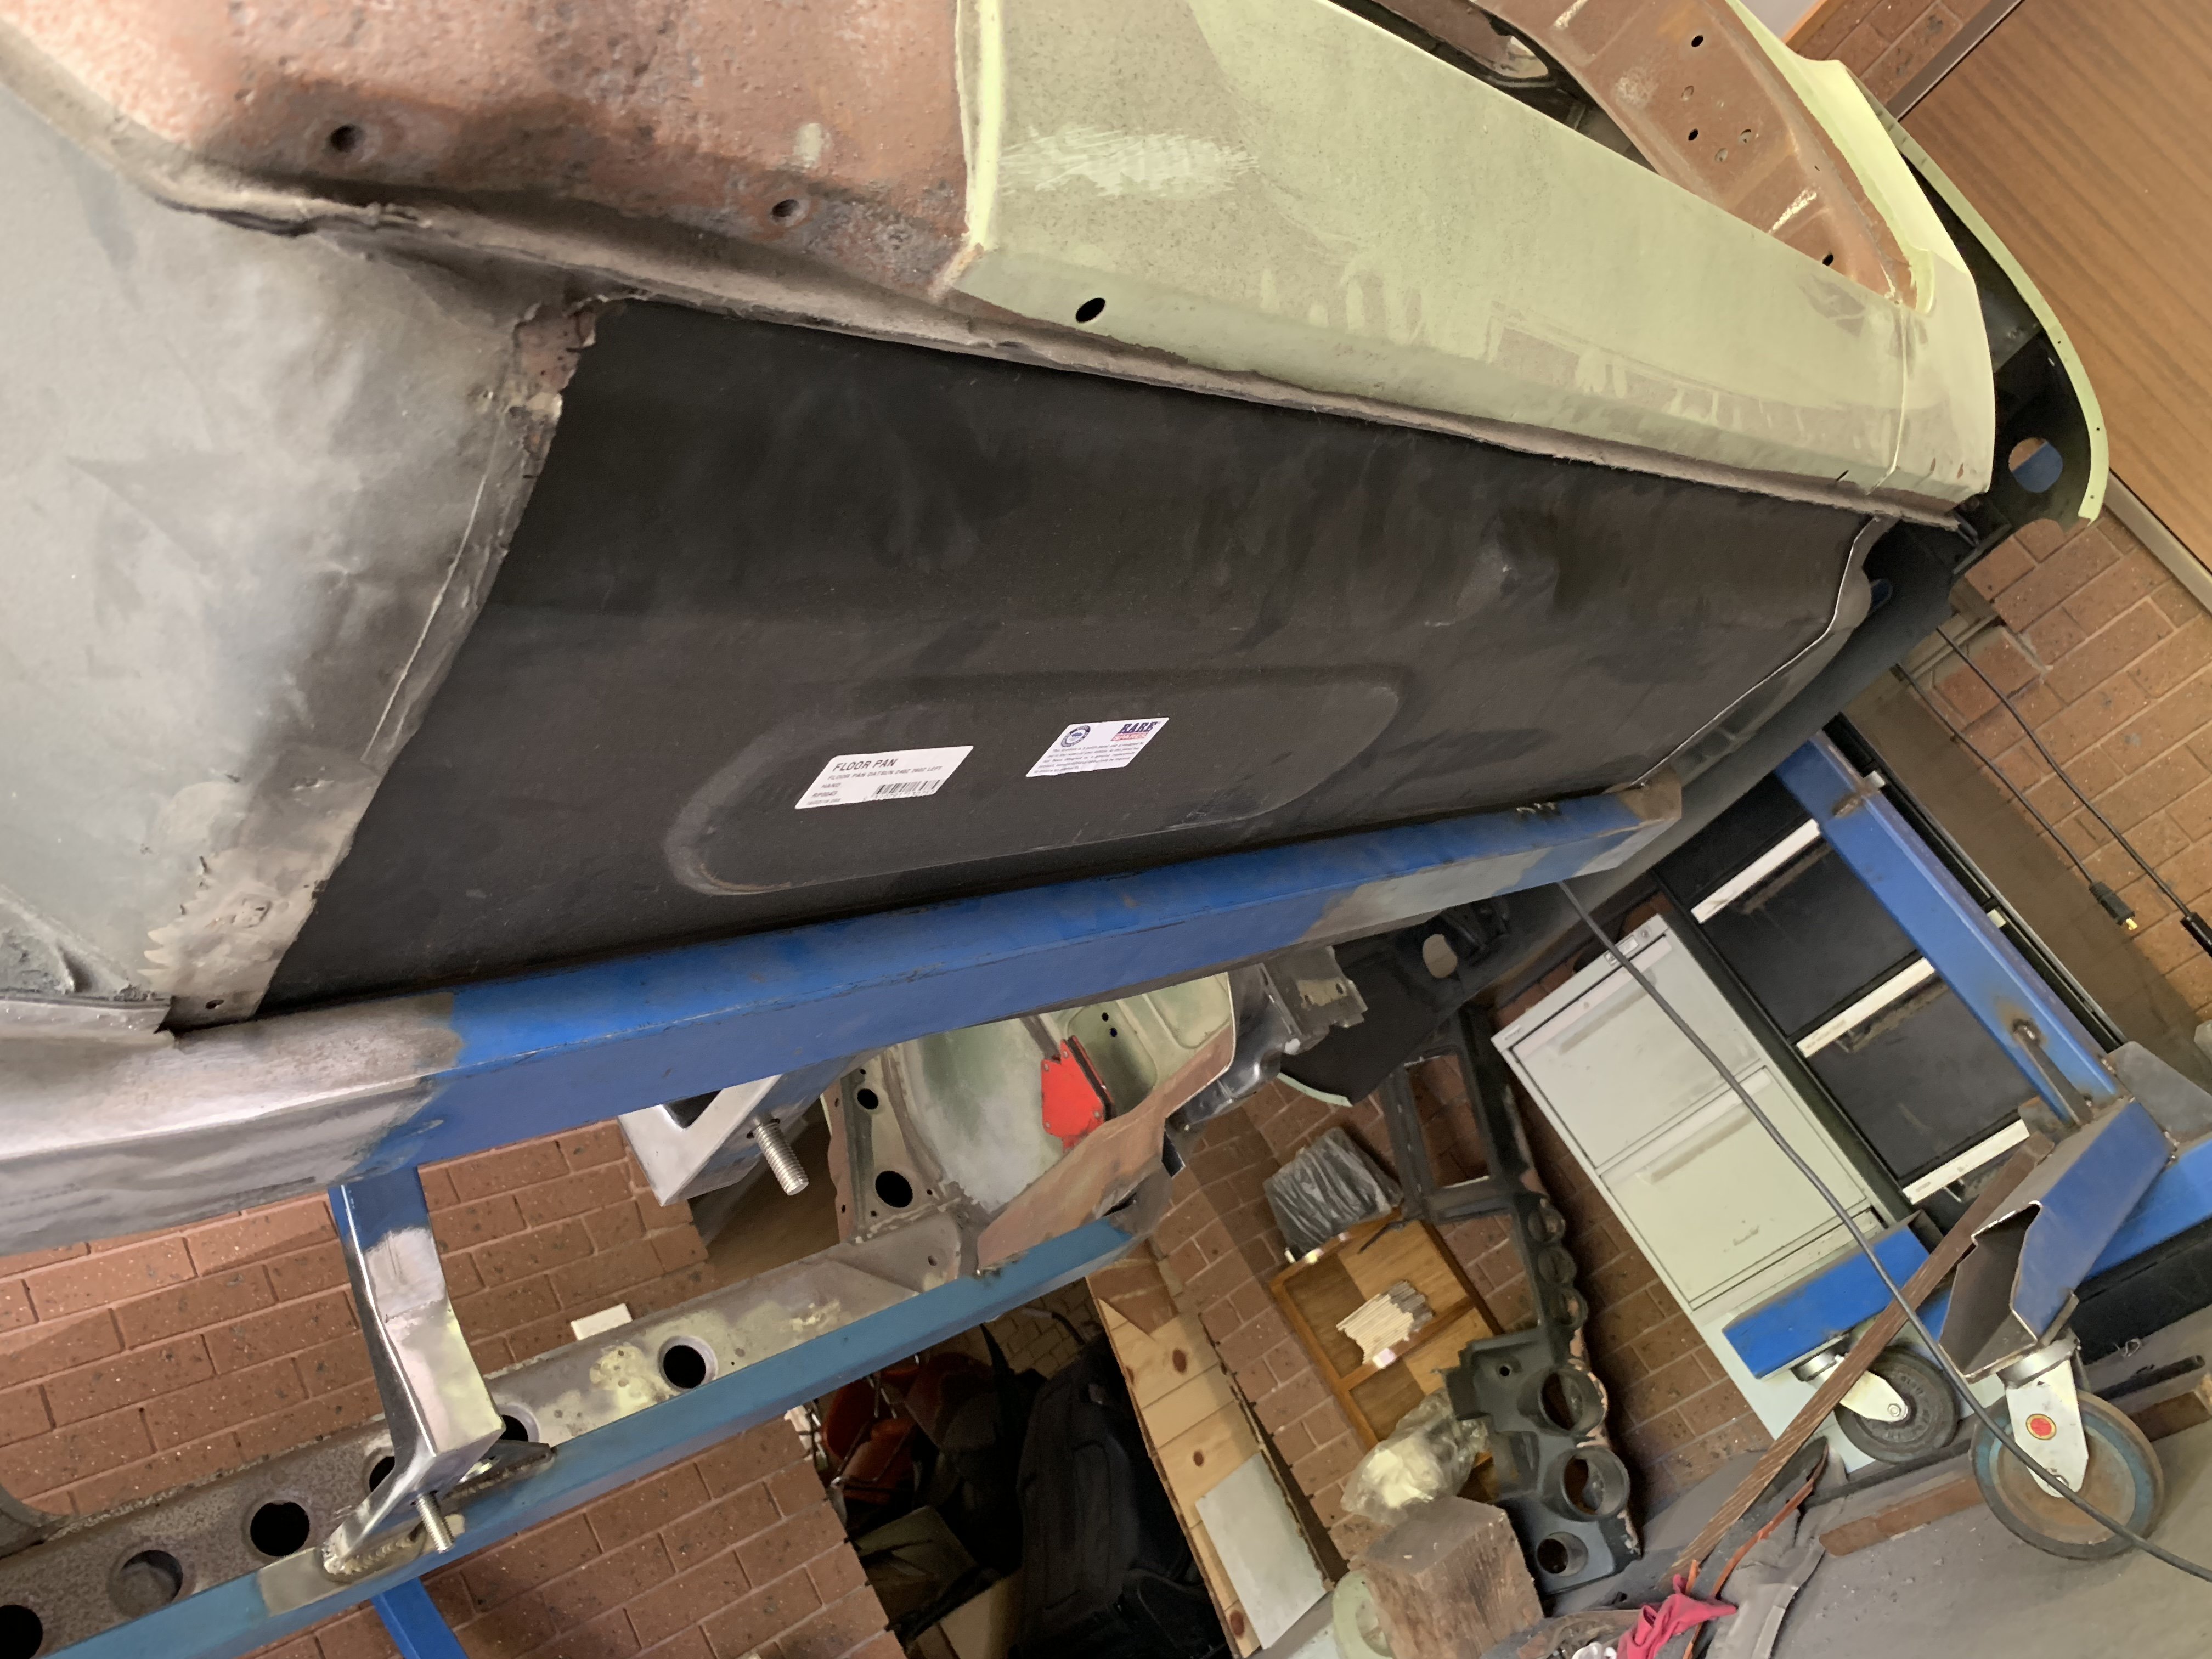
That’s all she wrote for this long weekend Added some additional gussets at the horse shoe and sat the rare spares pan in just to get an idea how all will sit with the new pans on order and am satisfied all will line up exceptionally well
-
Sirpents 260Z / C32 AMG Powered RS30 - Australia
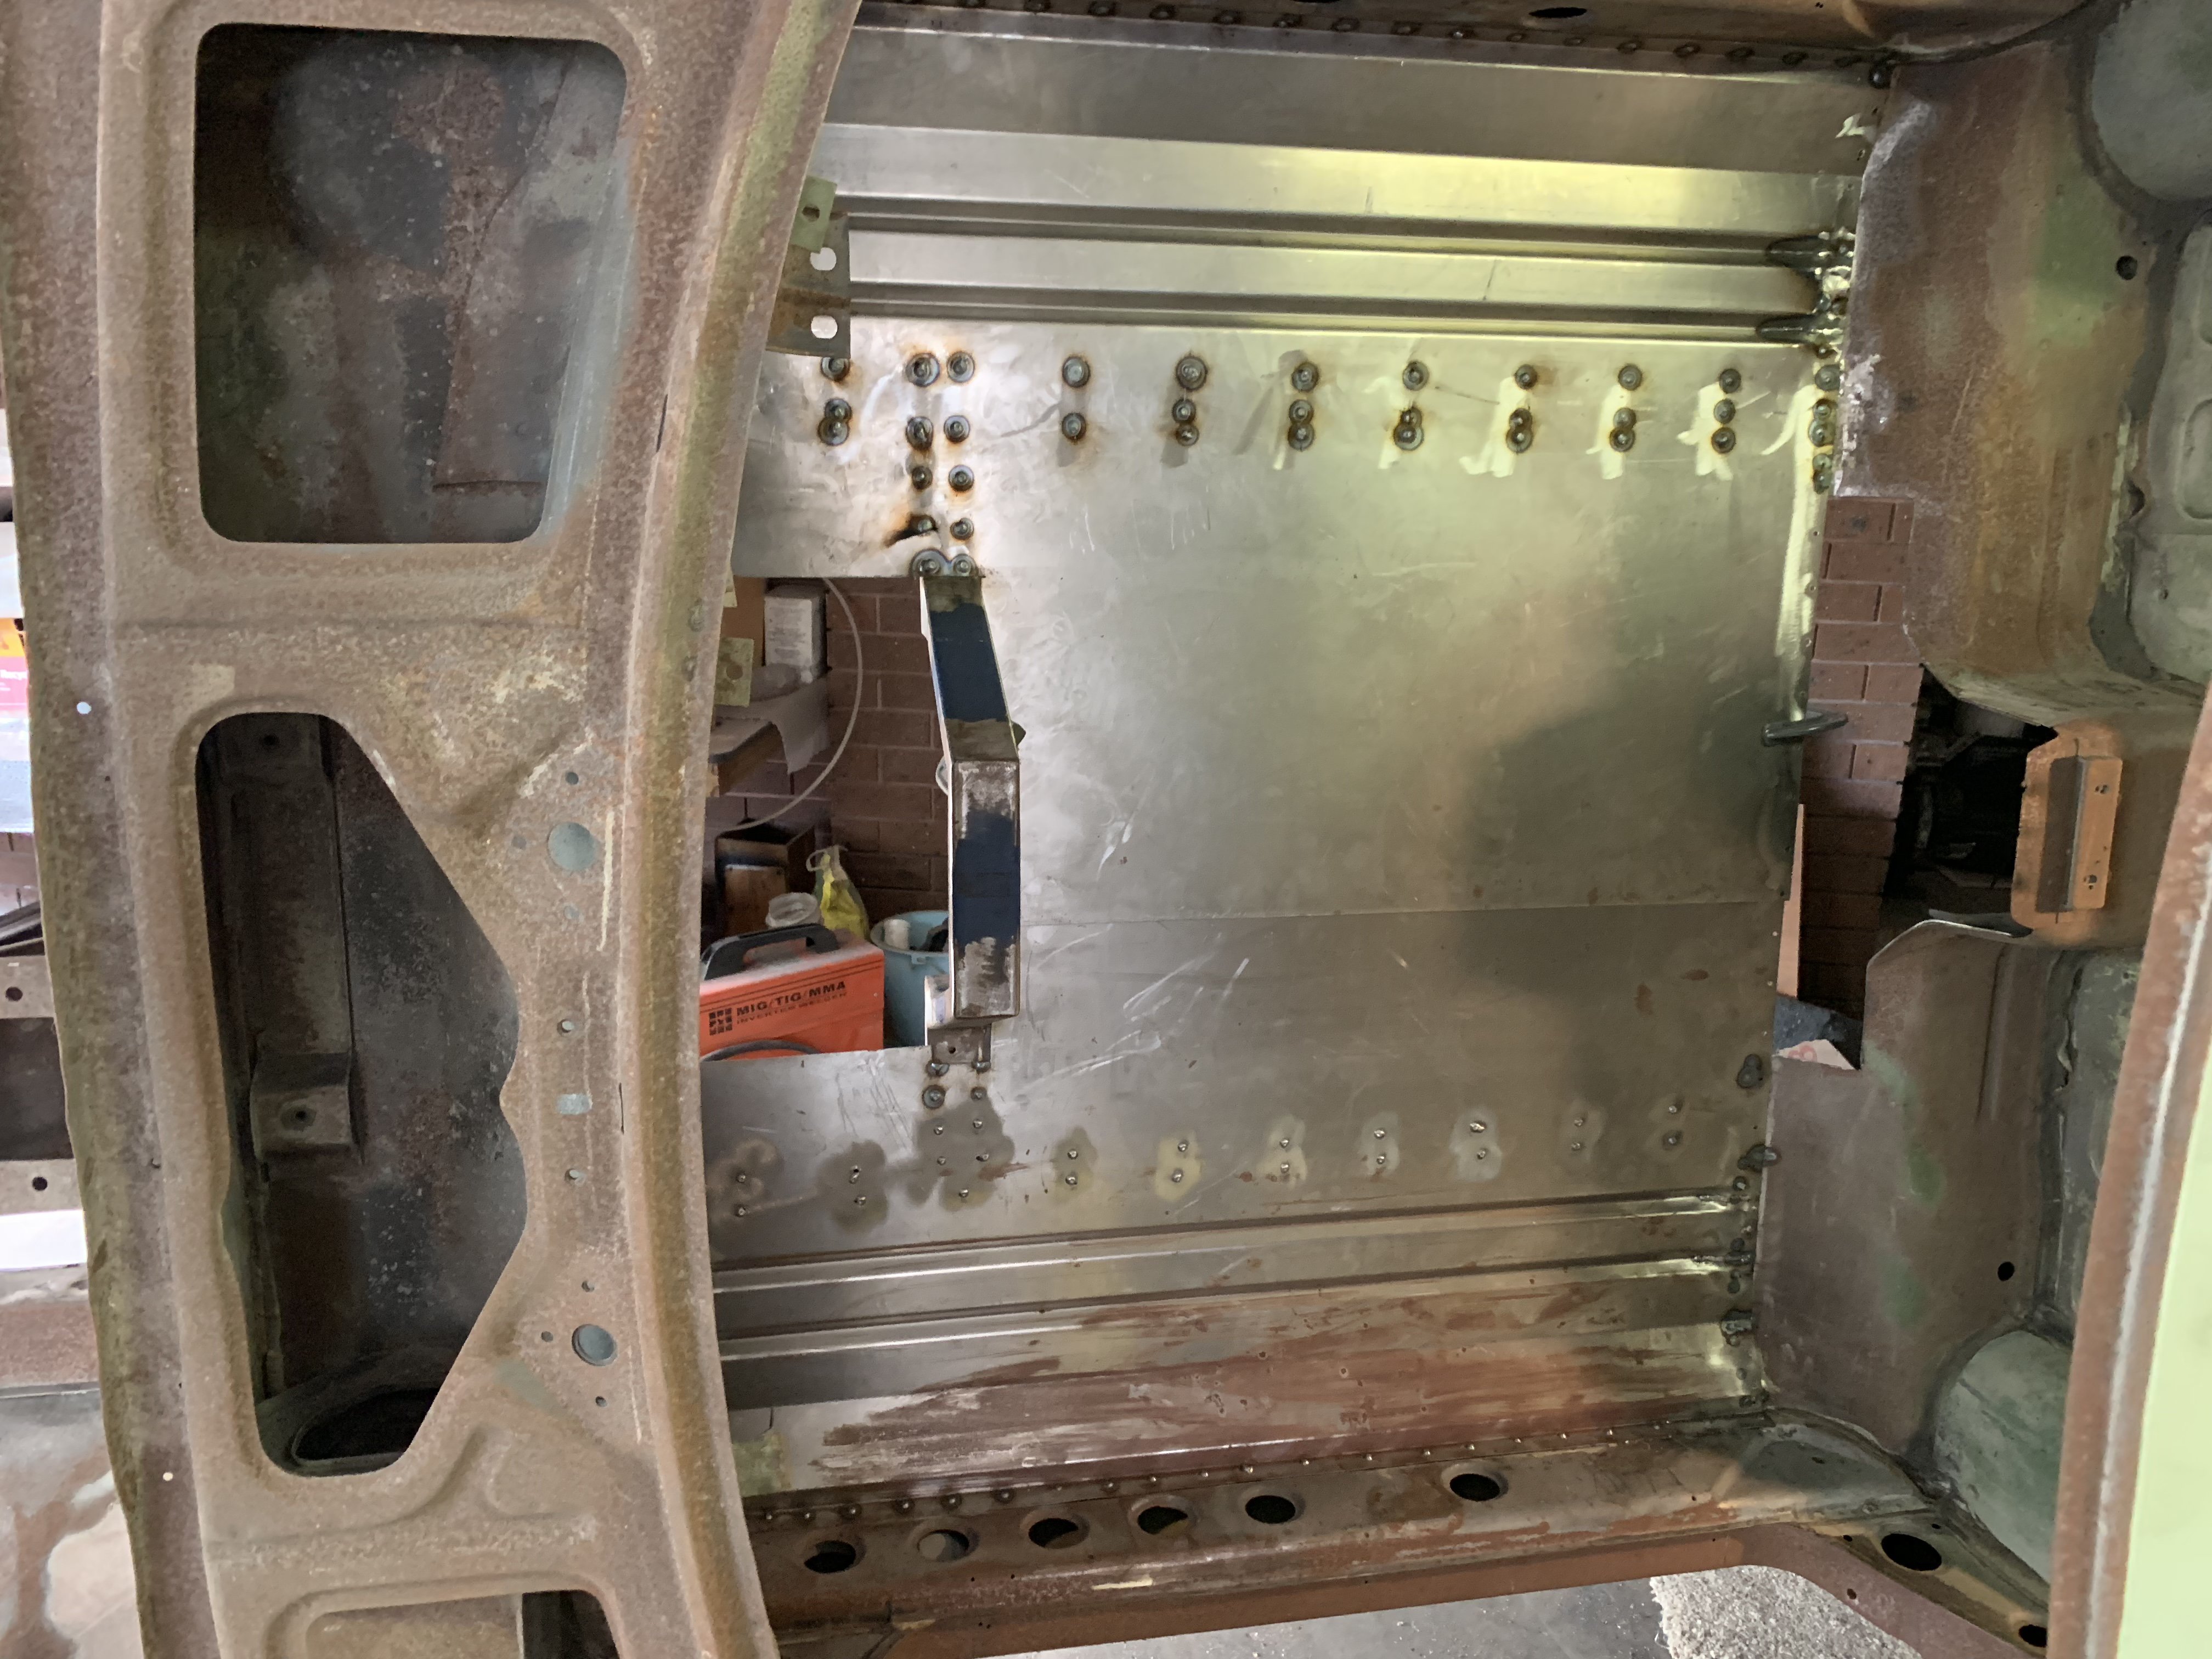
Sirpent replied to Sirpent's topic in S30 Series - 240z, 260z, 280z
1975 2 seater with what we call over here the Californian floor pans due to the provision of a bulge for the cat converter of the day and a very irregular metal pressing check back when I have the pans this isn’t as hard as it looks -
Sirpents 260Z / C32 AMG Powered RS30 - Australia
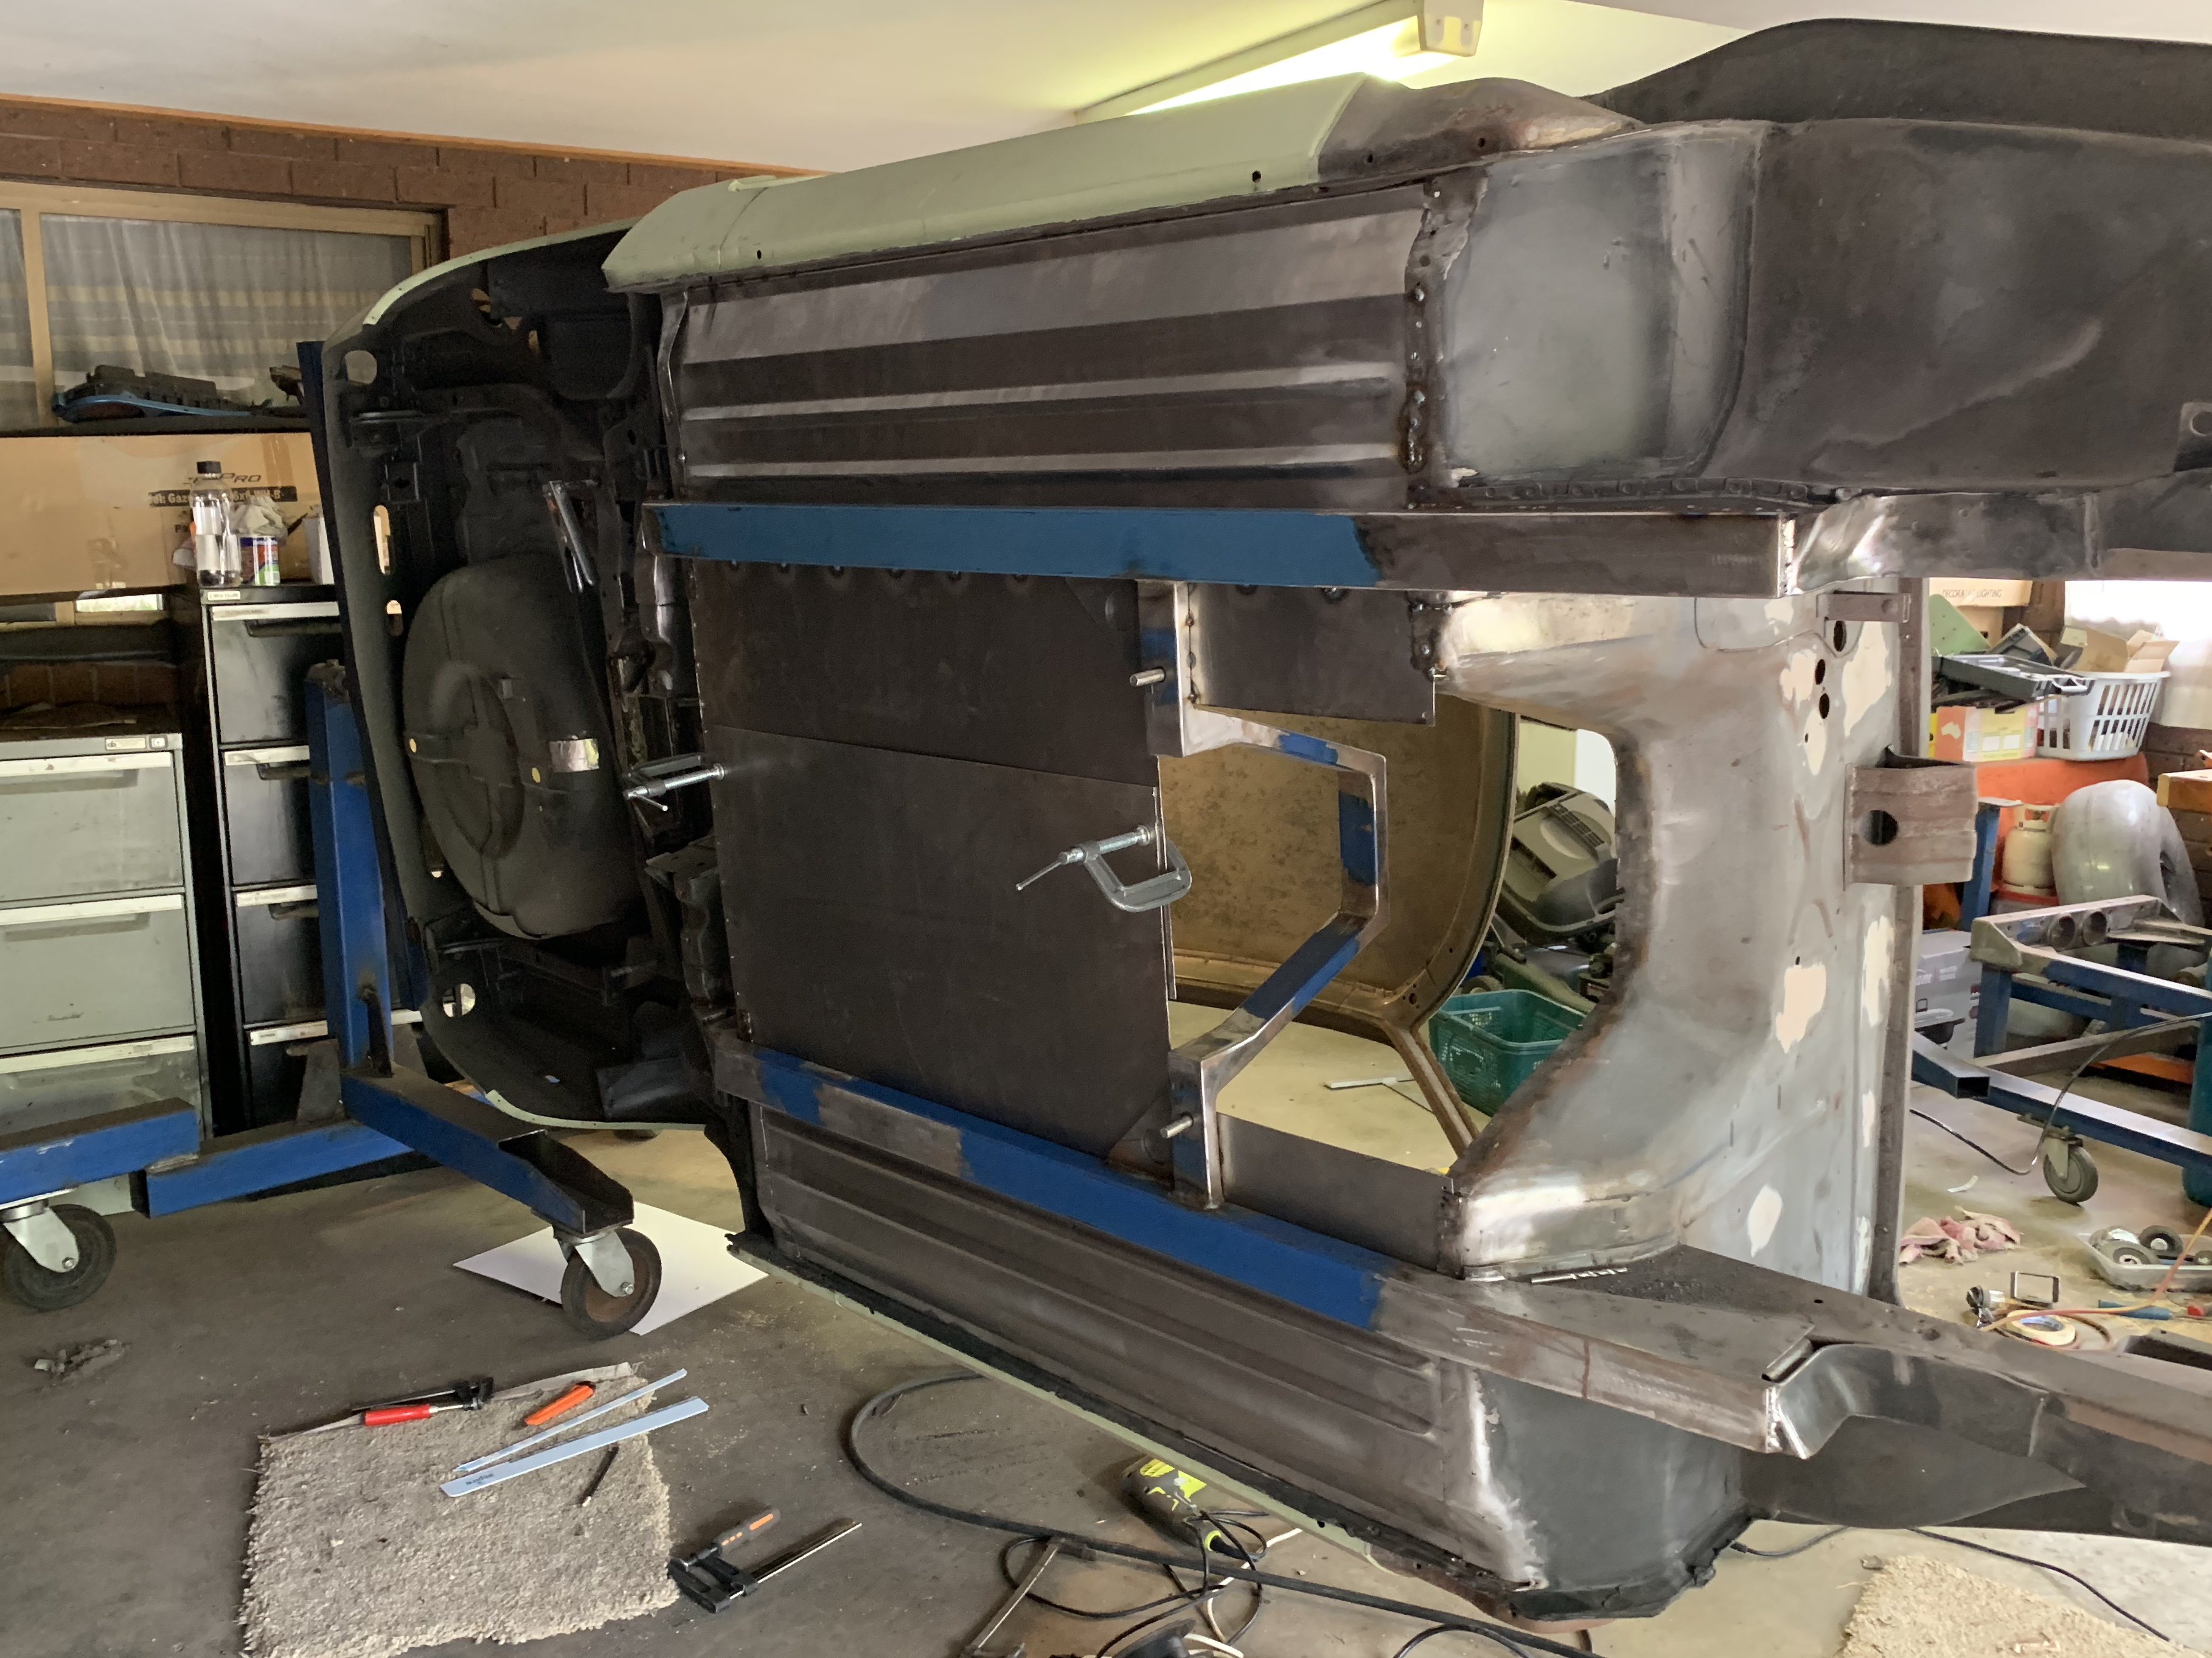
Sirpent replied to Sirpent's topic in S30 Series - 240z, 260z, 280z
Time on the rotisserie today making a new lock mechanism cars upright now ready the pans