Sirpent
-
Posts
229 -
Joined
-
Last visited
-
Days Won
1
Content Type
Profiles
Forums
Blogs
Events
Gallery
Downloads
Store
Everything posted by Sirpent
-
As always, Sensational work even if you did rip off one of my idea's LOL
-
I'm sending mine to the steel recycling yard after being totally demoralized by the craftsmanship of this last post..................Incredible work !
-
Sirpents 260Z / C32 AMG Powered RS30 - Australia
Sirpent replied to Sirpent's topic in S30 Series - 240z, 260z, 280z
And the Tin man has some new bling to be fitted Very happy with the fabrication, bring on the weekend
-
Sirpents 260Z / C32 AMG Powered RS30 - Australia
Sirpent replied to Sirpent's topic in S30 Series - 240z, 260z, 280z
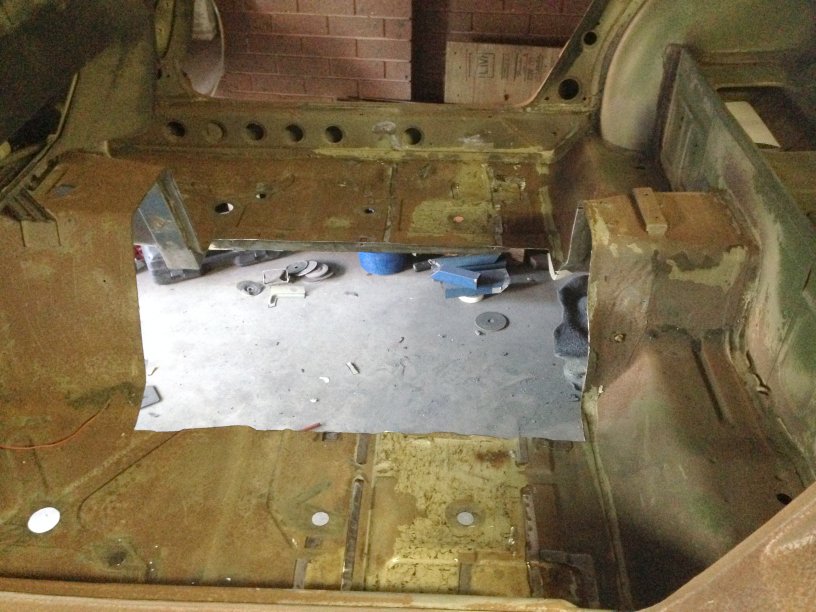
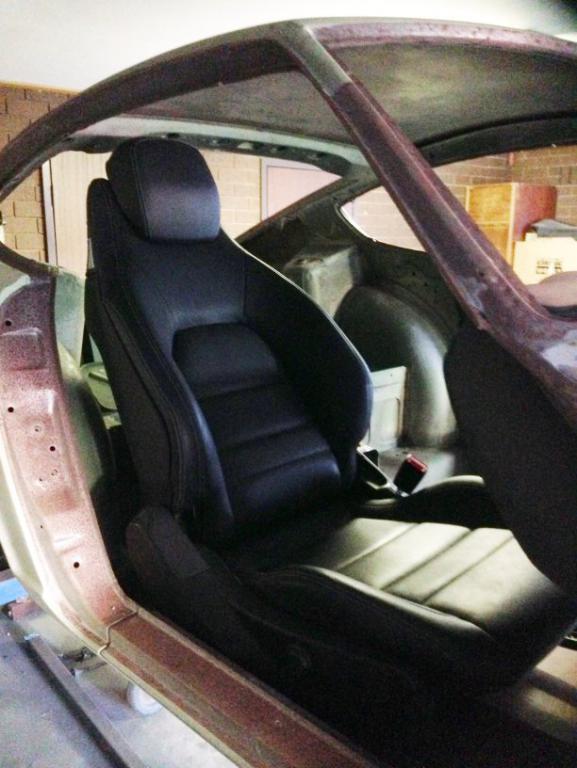
Small but tedious preparation for the new tunnel which is being fabricating at a metal fab shop from my model and will be ready for pick up this coming Thursday. Today was taken up with removing the 2 seat mount reinforcements on each side of the car, tedious to say the least but mission accomplished. I sat a flat board over the cavity so as I could sit the drivers seat in place just to judge how it will all come together and so far looks the part. Next weekend, tunnel goes in followed by new seat rails which will go from each sill panel inward to the the upward sweep of the tunnel. Cheers John
-
2 months Ollie ! No updates only means rust is setting in !
-
Too long between updates ! Whats happening Buddy ? Don't hold out on us !
-
Sirpents 260Z / C32 AMG Powered RS30 - Australia
Sirpent replied to Sirpent's topic in S30 Series - 240z, 260z, 280z
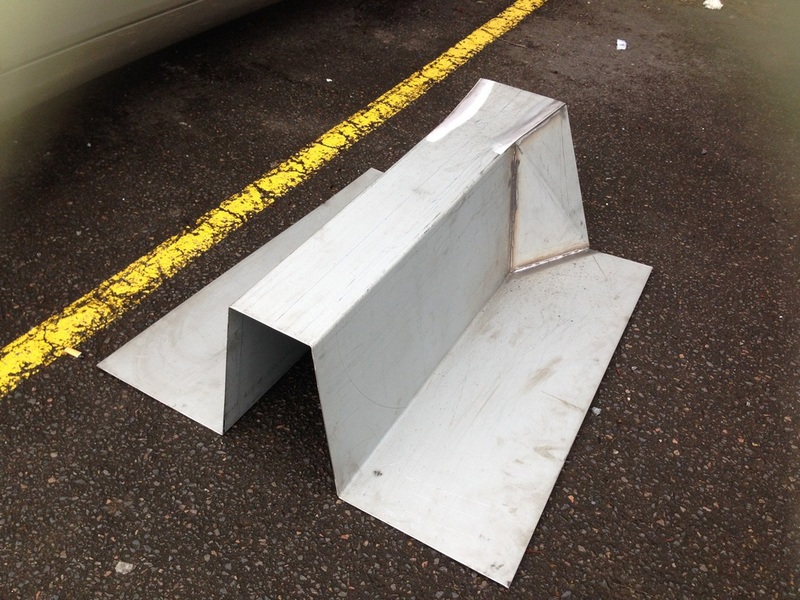
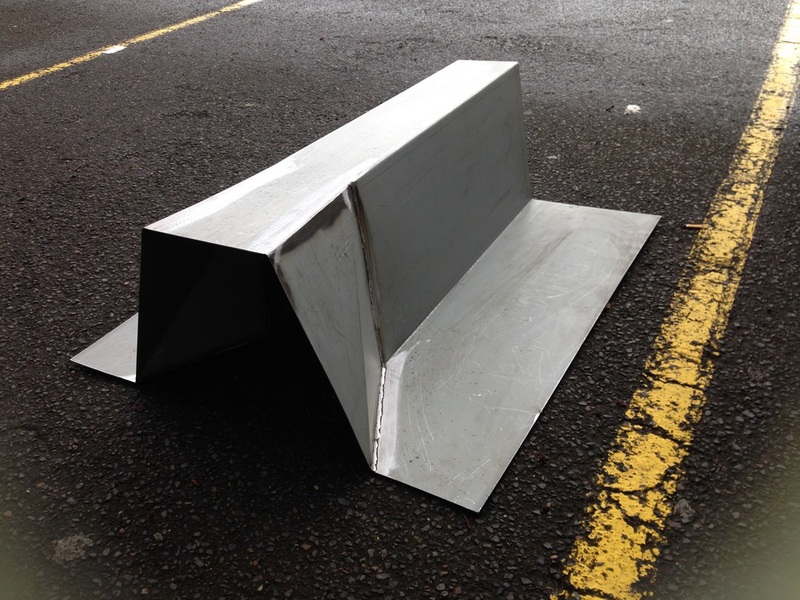
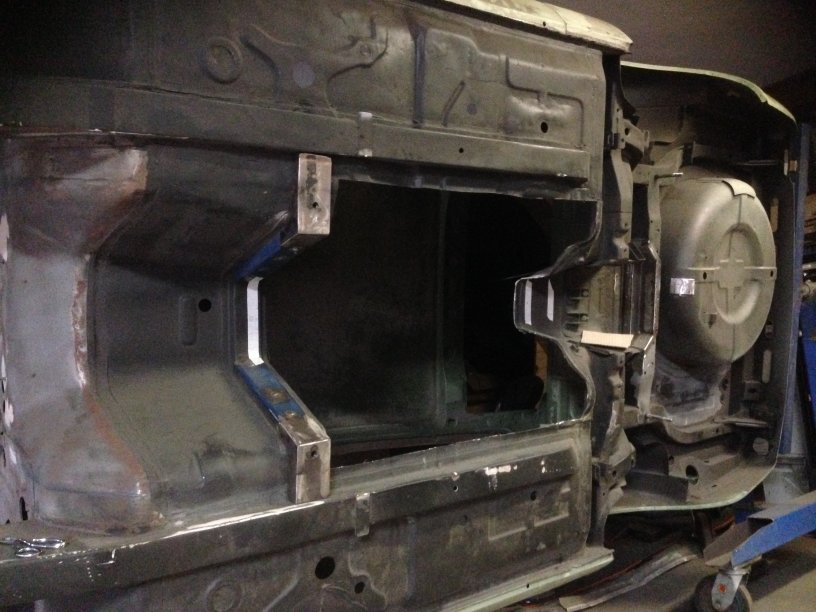
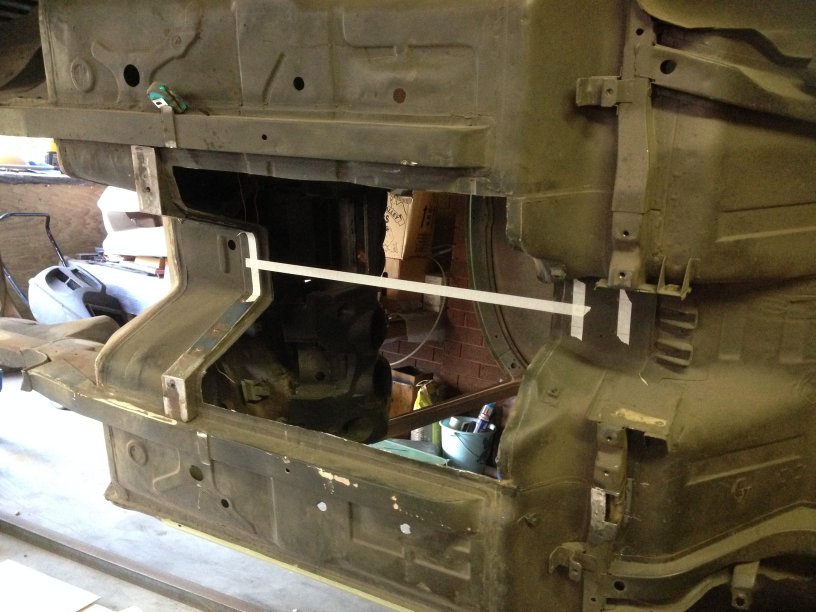
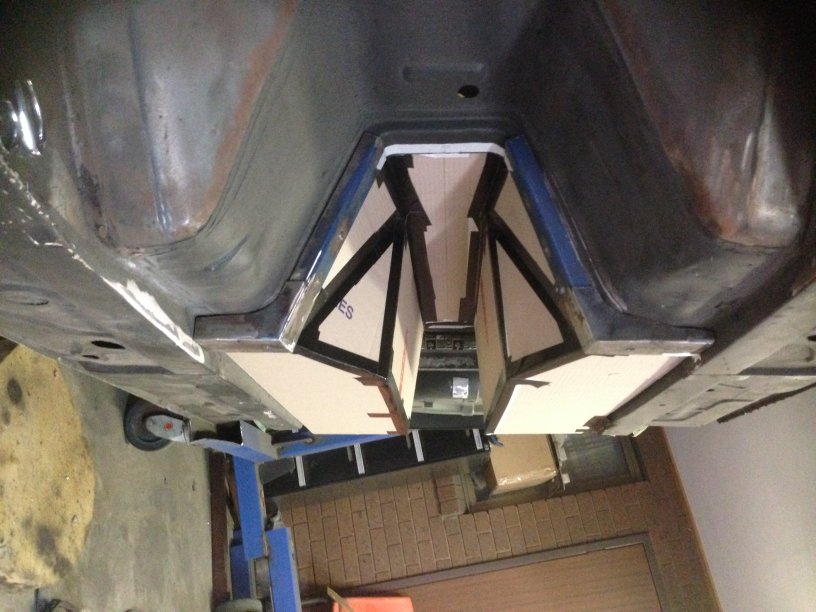
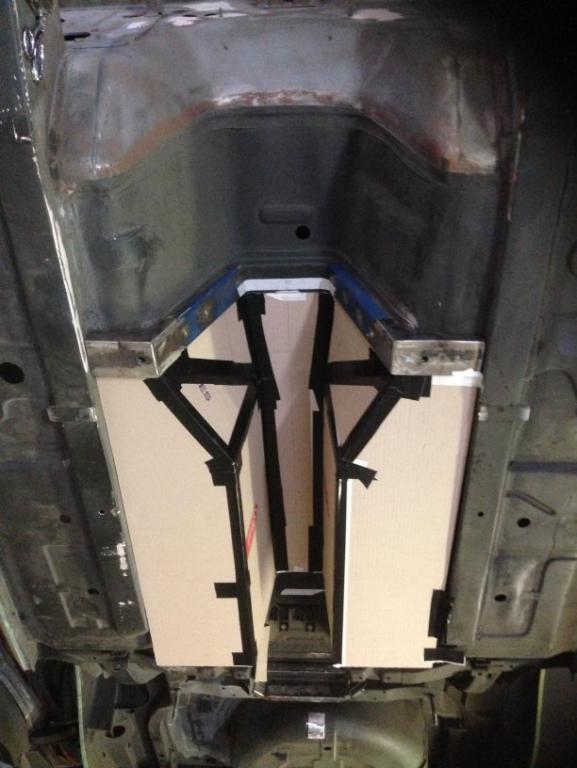
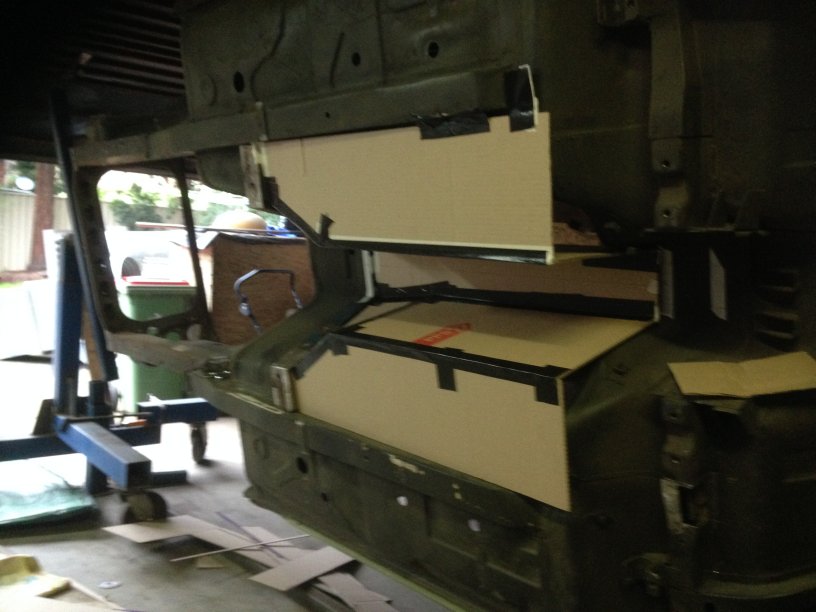
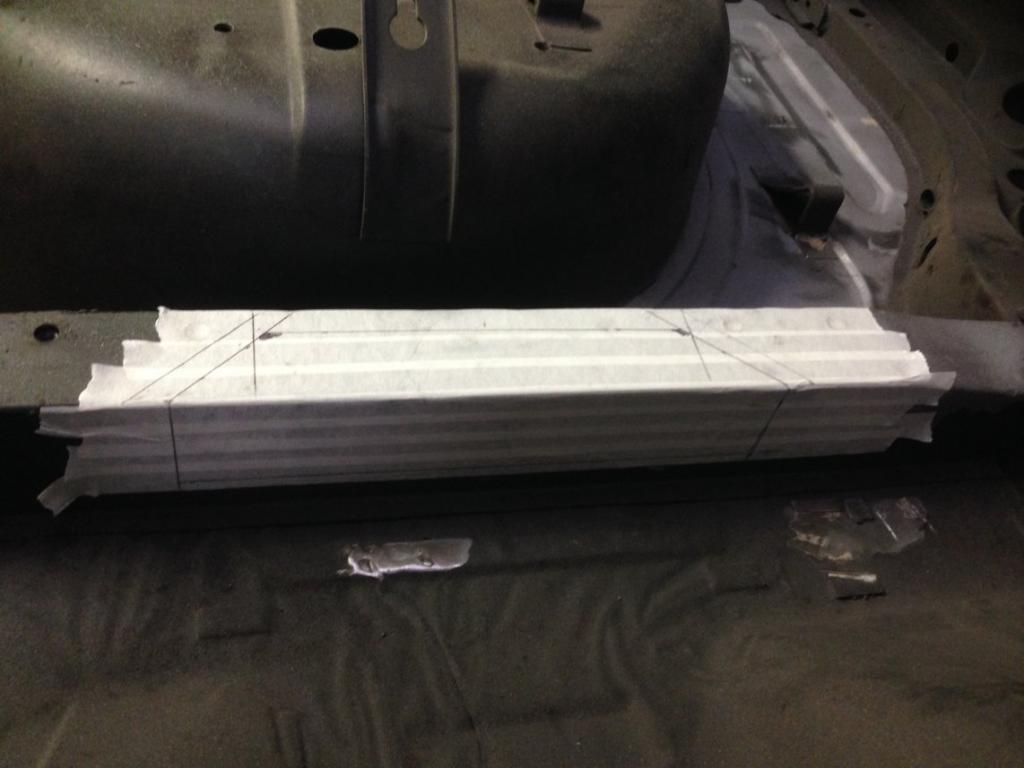
Soooooooooooooo Been a very busy past few weeks with work and associated travel, so the Zed took a break from me. The seats I purchased are everything I wanted accept for the fact that they are around 5 c's wider at the base, and horror shock (not really) they didn’t want to nest in the car. Much contemplation, thought, waking up in a cold sweats, and finally I took to the floor with a 1mm cutting disc and removed a good meter by 650 section of the tunnel and floor. Why you ask, well a few reasons that I had concluded during the past 2 odd weeks. Ø I needed more room to mount the seats. Ø The cat converter hump was to tedious to section and rework Ø The floor did have a few pinhole sized rust spots Ø By adding a new pan in thicker gauge between the rails, I would strengthen what is probably the weakest section of the car. So, much CAD (cardboard aided design) work later, I came up with this new 3D mock-up which will be fabricated by a sheet metal shop in 14 gauge and then will slip into the new Flintstone’s void I created and weld into place. I know, madness, but point out one thing I have done that wouldn’t have me committed to a psychiatric ward by any purist S30 lover. Cheers John
-
Nup Probably around 40 pounds a piece, but hell the car will be pushing 400Hp and 500Nm of torque so no big deal
-
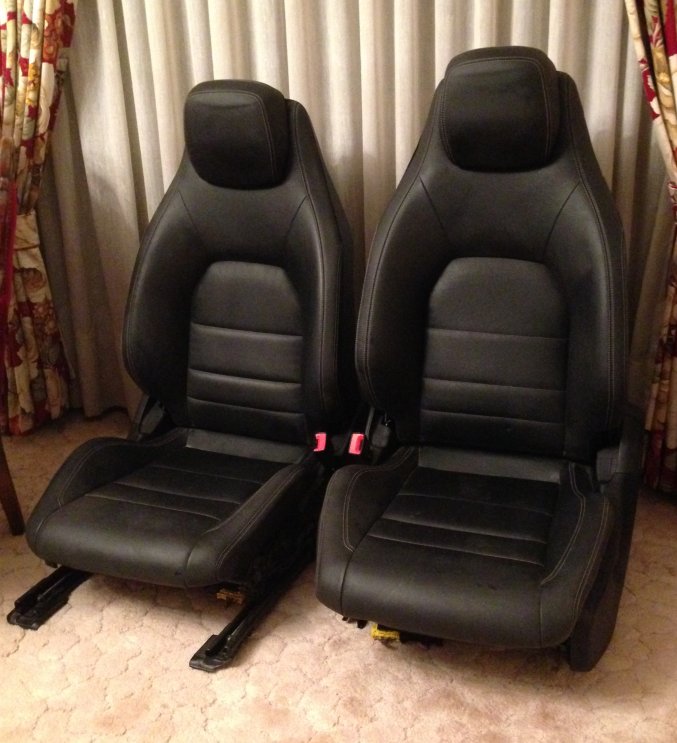
Just picked up my new saddles out of a 2013 W204 C-Class Mercedes Coupe
-
Sirpents 260Z / C32 AMG Powered RS30 - Australia
Sirpent replied to Sirpent's topic in S30 Series - 240z, 260z, 280z
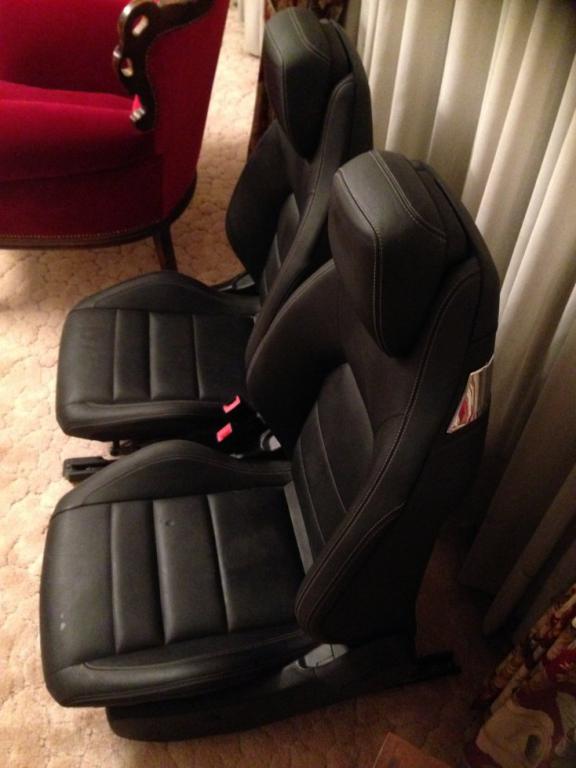
Seats arrived today and hell yes they are ultra comfortable ! Looks like they have B[_]M warmers and full electric adjustment via togle switches on each side Problem is they also have side airbags so they will need to go. Will sit them in the car on Saturday but looks like mounting will be simple, damn Germans God bless them LOL
-
Stock Car Mafia's '78 280z LS2 Build
Sirpent replied to Stock Car Mafia's topic in S30 Series - 240z, 260z, 280z
One regret I have is that my conversion will never have this rasp pitched appeal, that sound brilliant with no back popping................ Well configured and well done. -
Sirpents 260Z / C32 AMG Powered RS30 - Australia
Sirpent replied to Sirpent's topic in S30 Series - 240z, 260z, 280z
Thanks Buddy -
Sirpents 260Z / C32 AMG Powered RS30 - Australia
Sirpent replied to Sirpent's topic in S30 Series - 240z, 260z, 280z
This is my EOFY (end of financial year) gift to myself, paid for today, should be in my hot hands tomorrow. No not the whole car, but the seats (Actual photo) c/o a W204 C-Class Coupe that was written off (totaled)
-
Sirpents 260Z / C32 AMG Powered RS30 - Australia
Sirpent replied to Sirpent's topic in S30 Series - 240z, 260z, 280z
Thanks Buddy I am YouTube walk around vid -
Sirpents 260Z / C32 AMG Powered RS30 - Australia
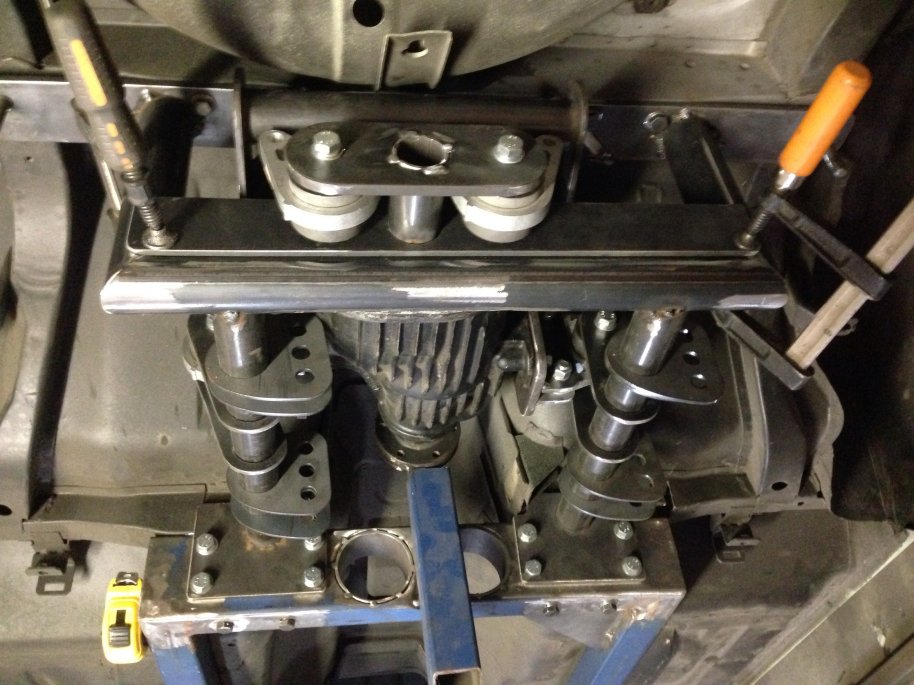
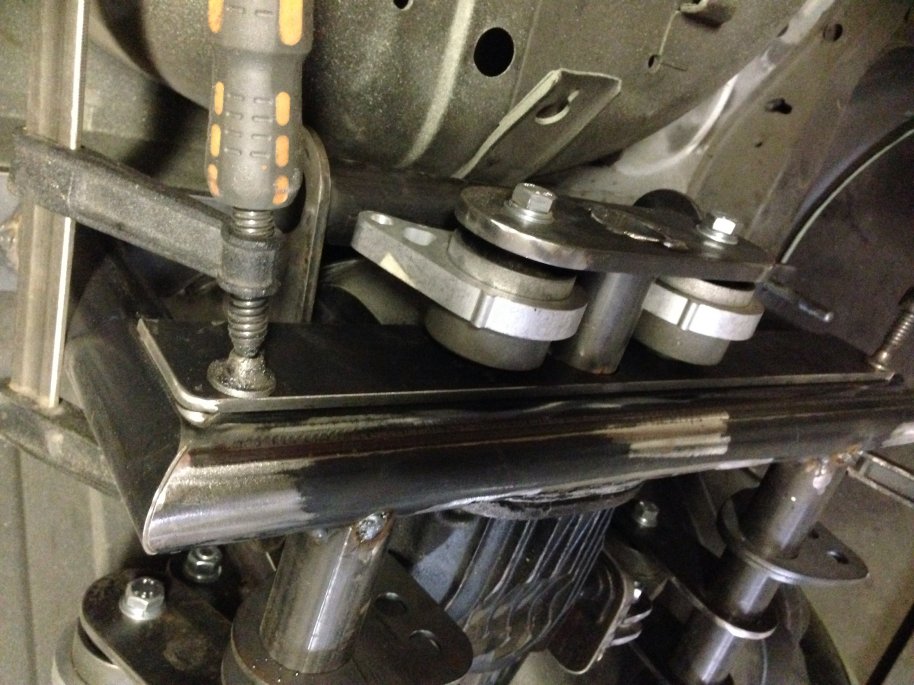
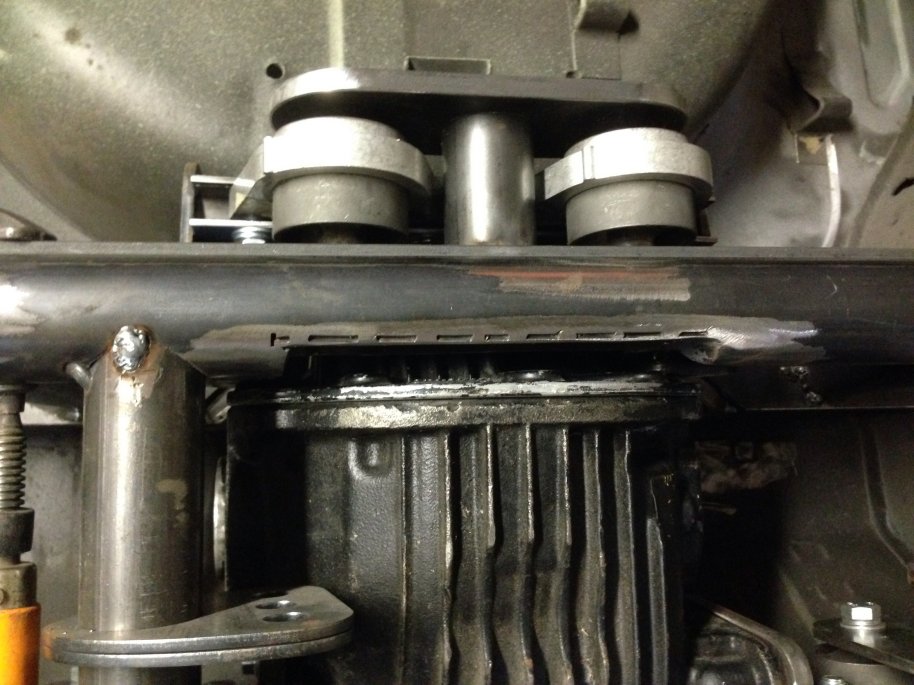
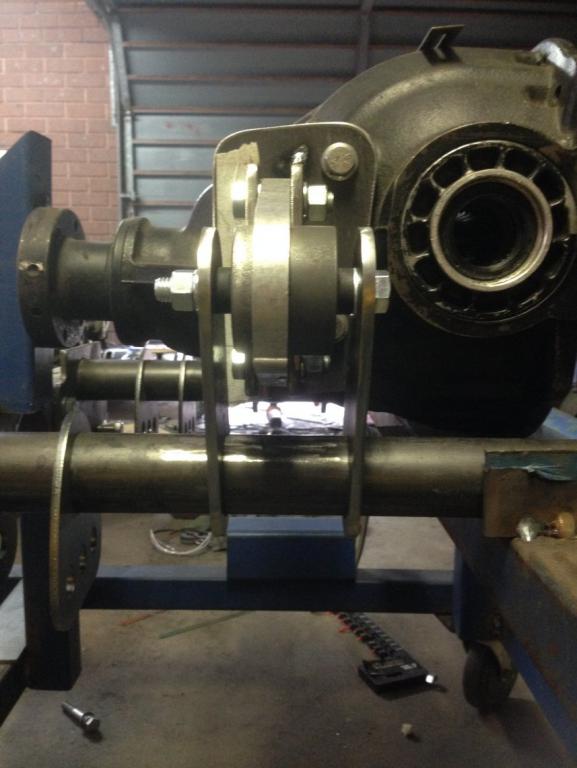
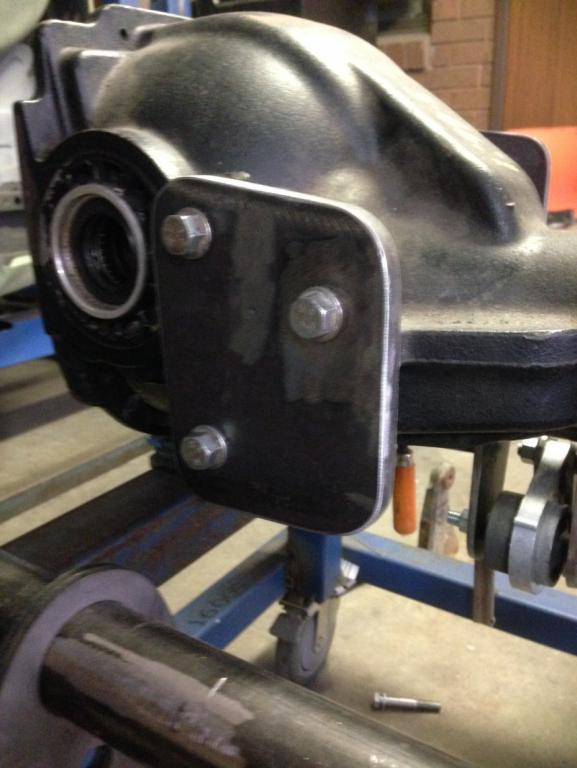
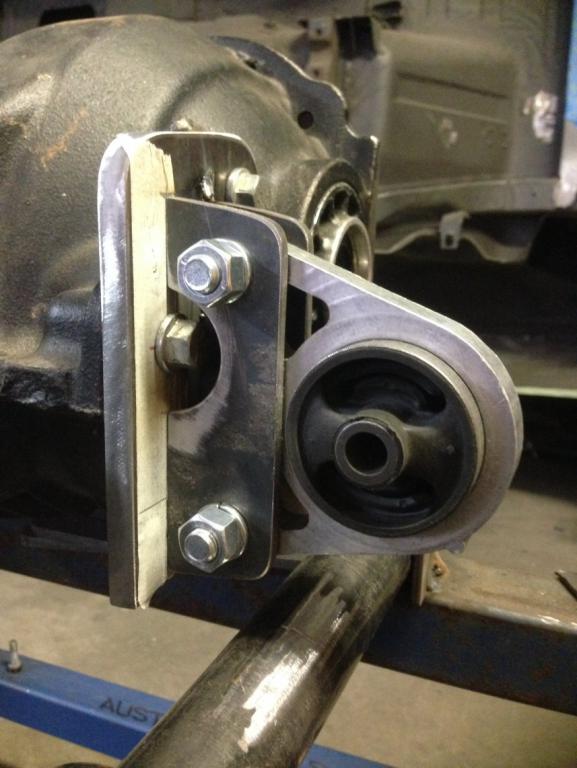
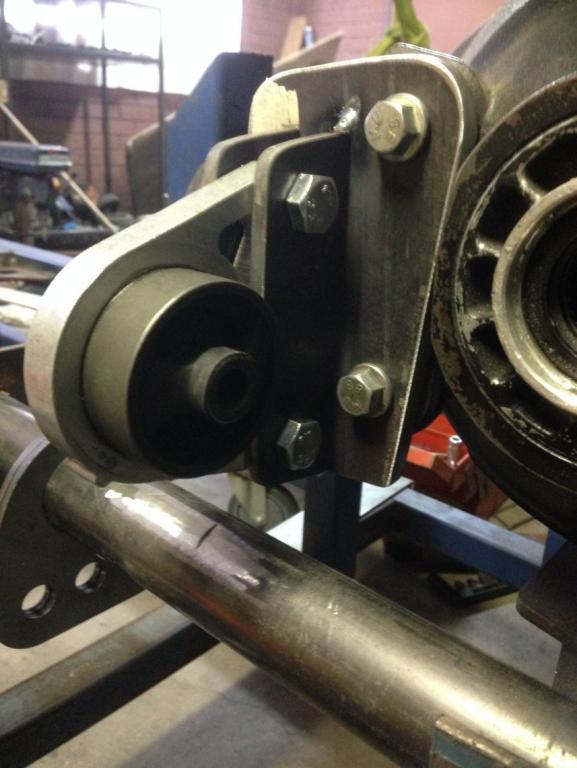
Sirpent replied to Sirpent's topic in S30 Series - 240z, 260z, 280z
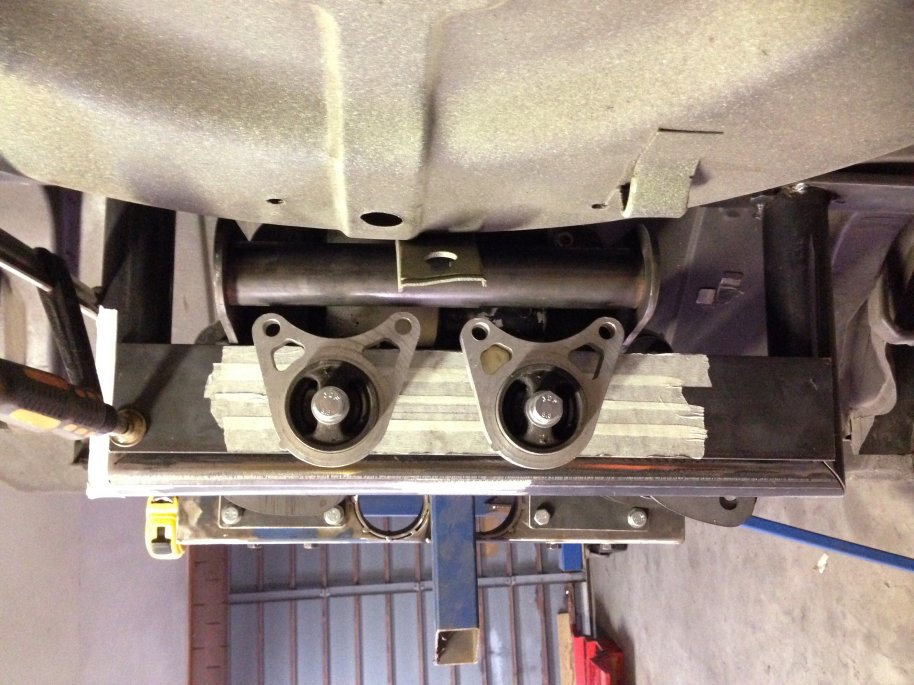
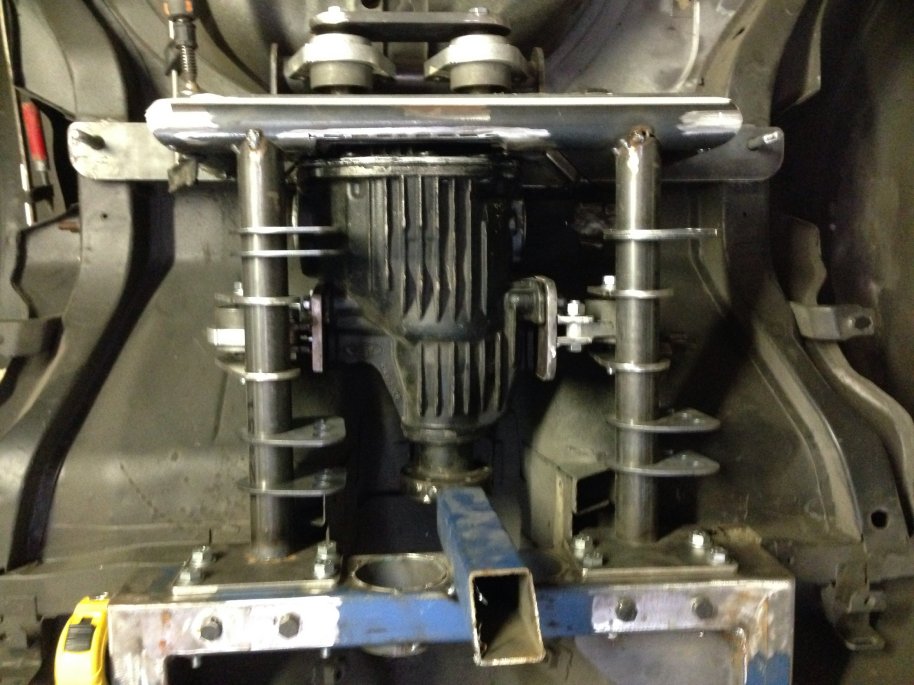
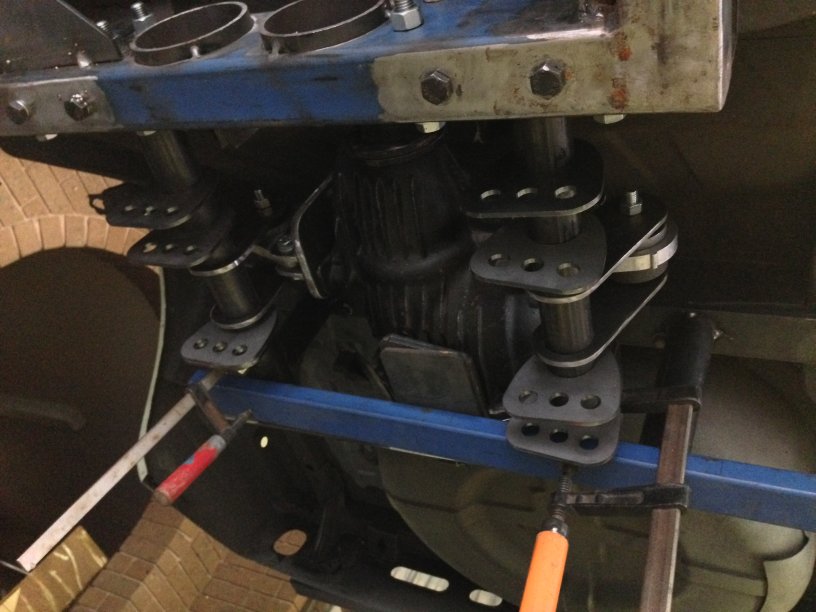
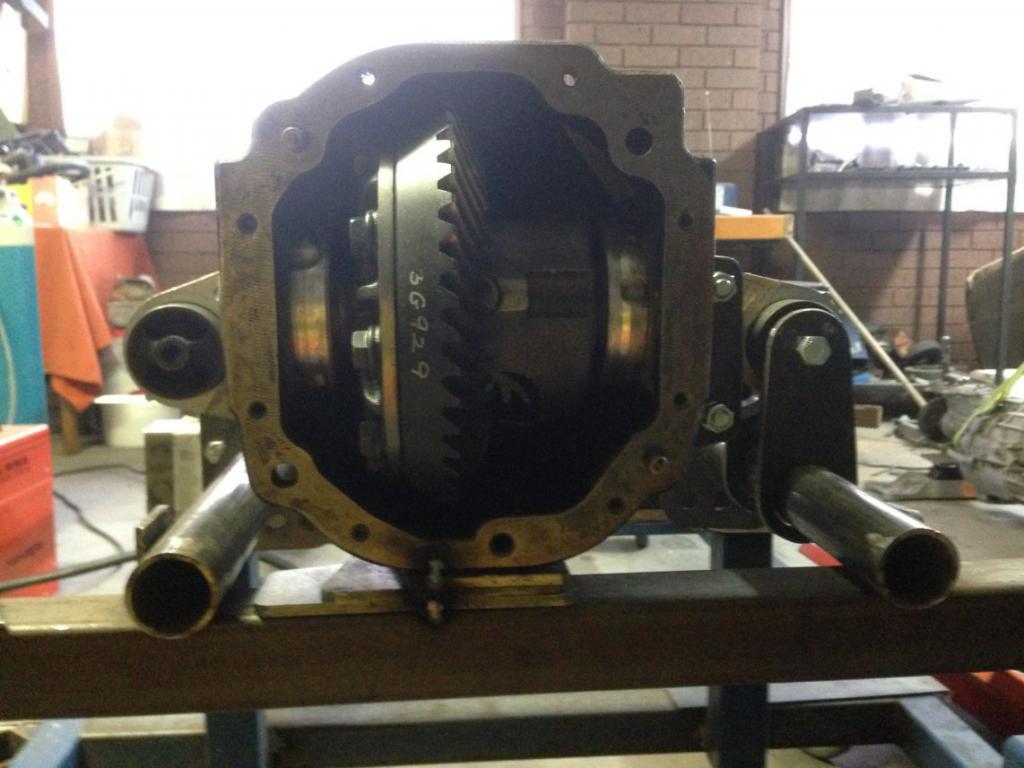
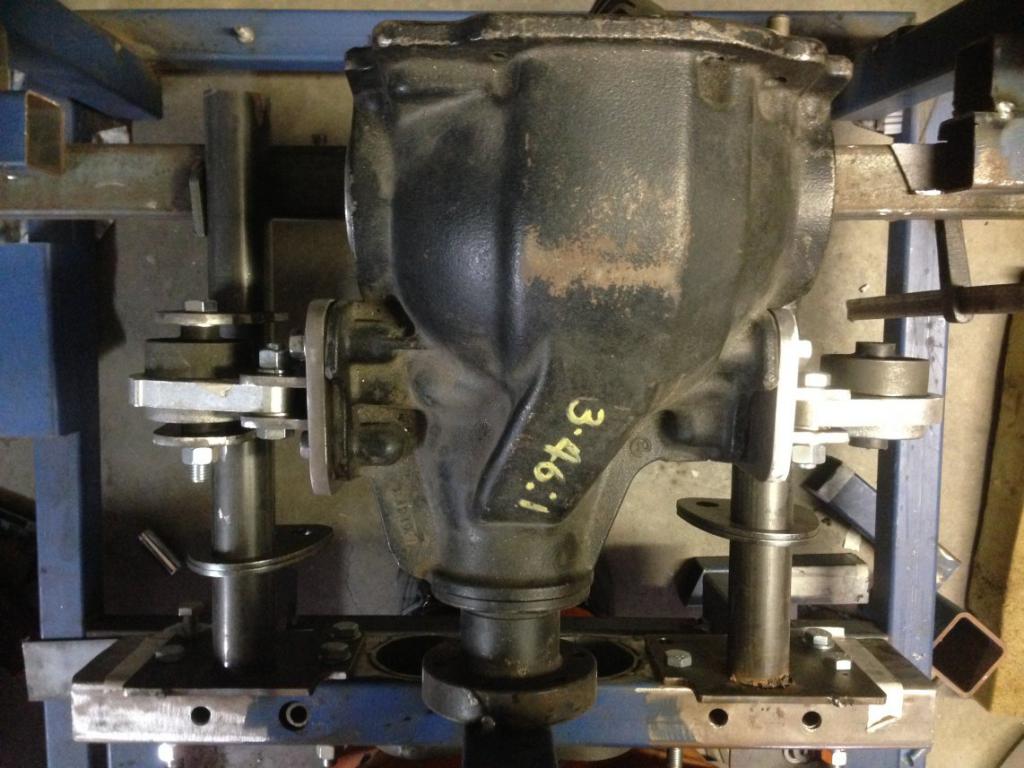
So better part of today fabricating the final 2 rear differential mounts Went a lot smoother than I anticipated and before any of you say "You could of lined the mount bolts up better" there was a reason for doing so, as the 2 arms on the alloy mounts that the bolts pass through are different lengths and therefore I had to rotate one so as the outer angles on each side matched. The rear plate connects via a tube to the rear cradle so as to close the mounts into twin plate assy. Tomorrow will involve spot welding the upper RHS mount onto the tube section and rounding off the corners. Next weekend, the true test comes when I bolt the engine and trans back onto the chassis and trolley assy and attempt to raise it 40cmm up to the body and see what all the clearances are like. Failing any major surgery to the shell, it all comes out again to have a competent welder mig and tig all the joints and gussets on the trolley. Cheers John
-
Sirpents 260Z / C32 AMG Powered RS30 - Australia
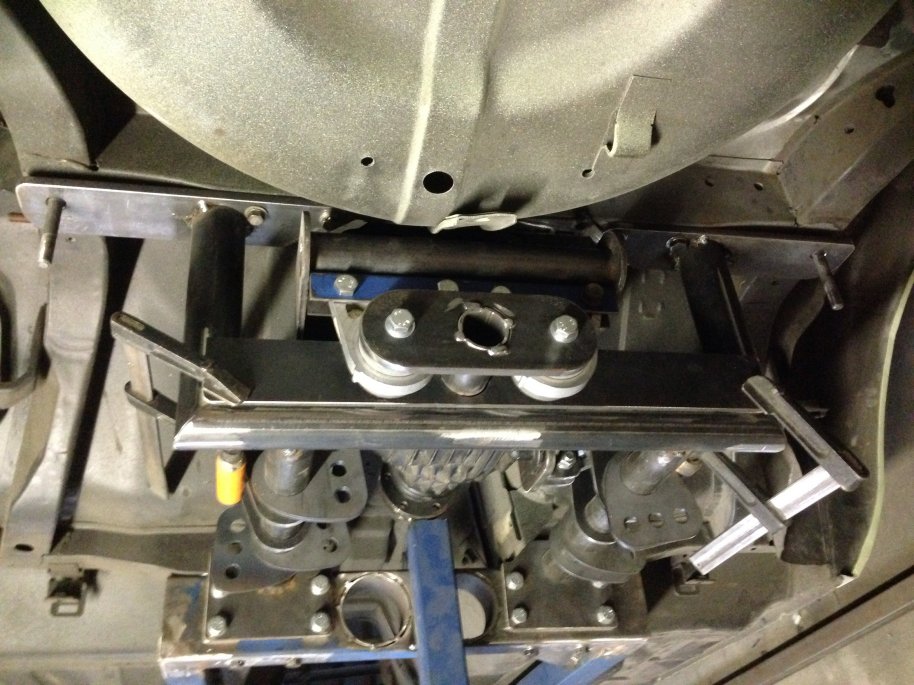
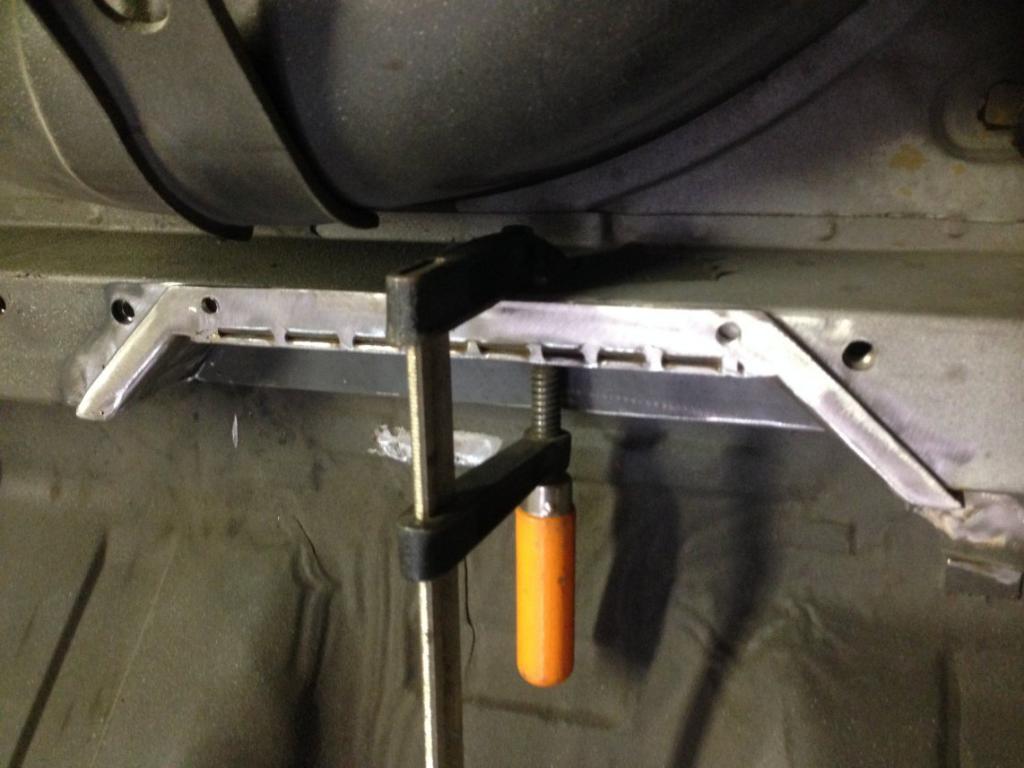
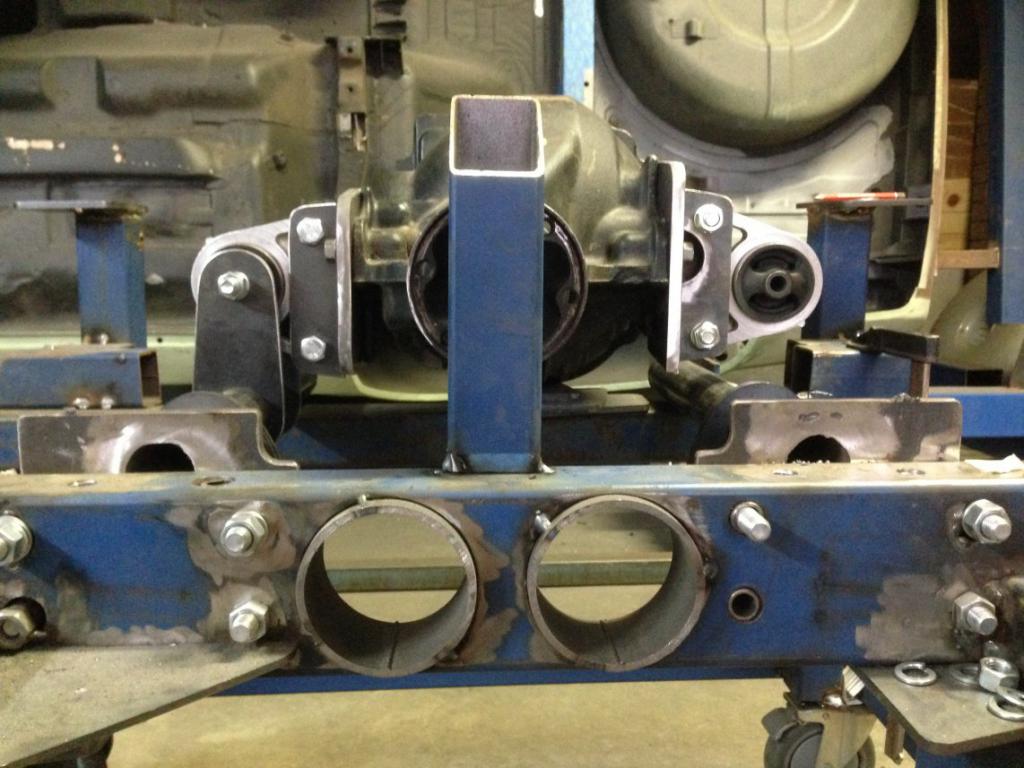
Sirpent replied to Sirpent's topic in S30 Series - 240z, 260z, 280z
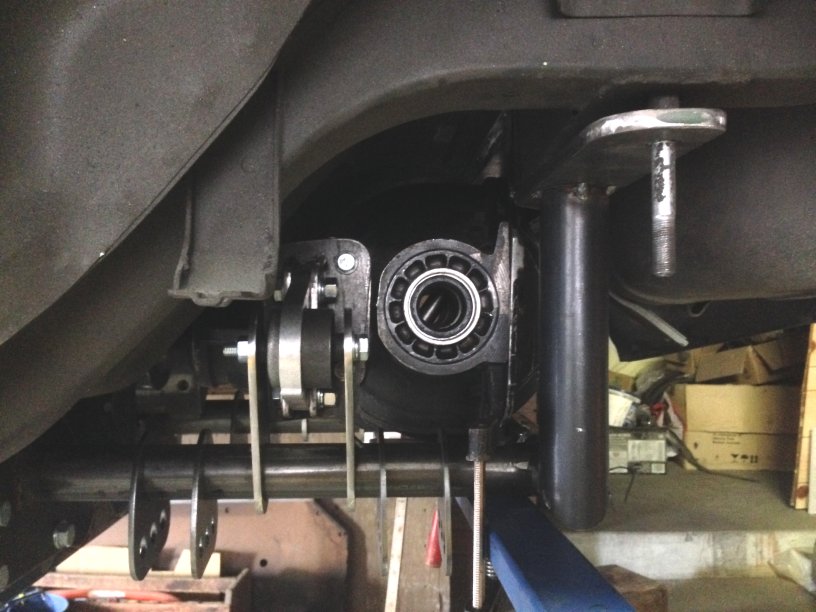
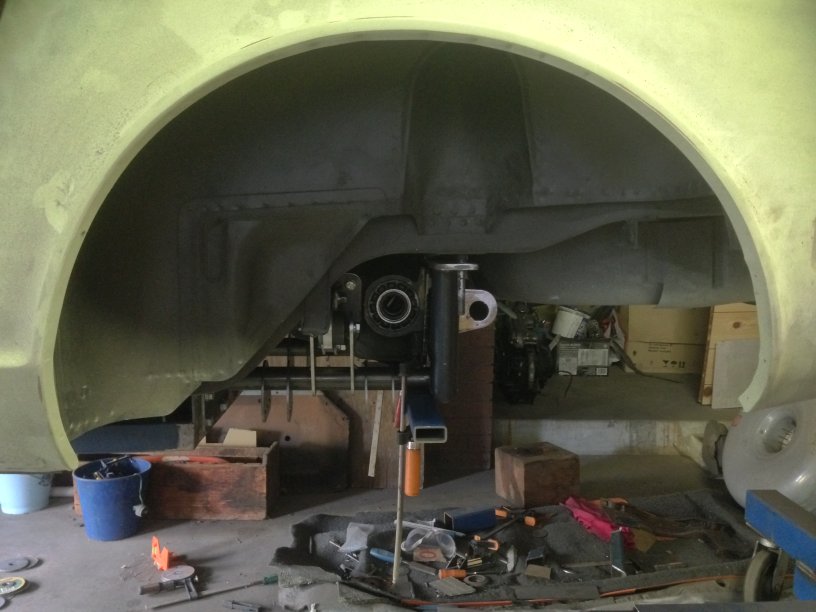
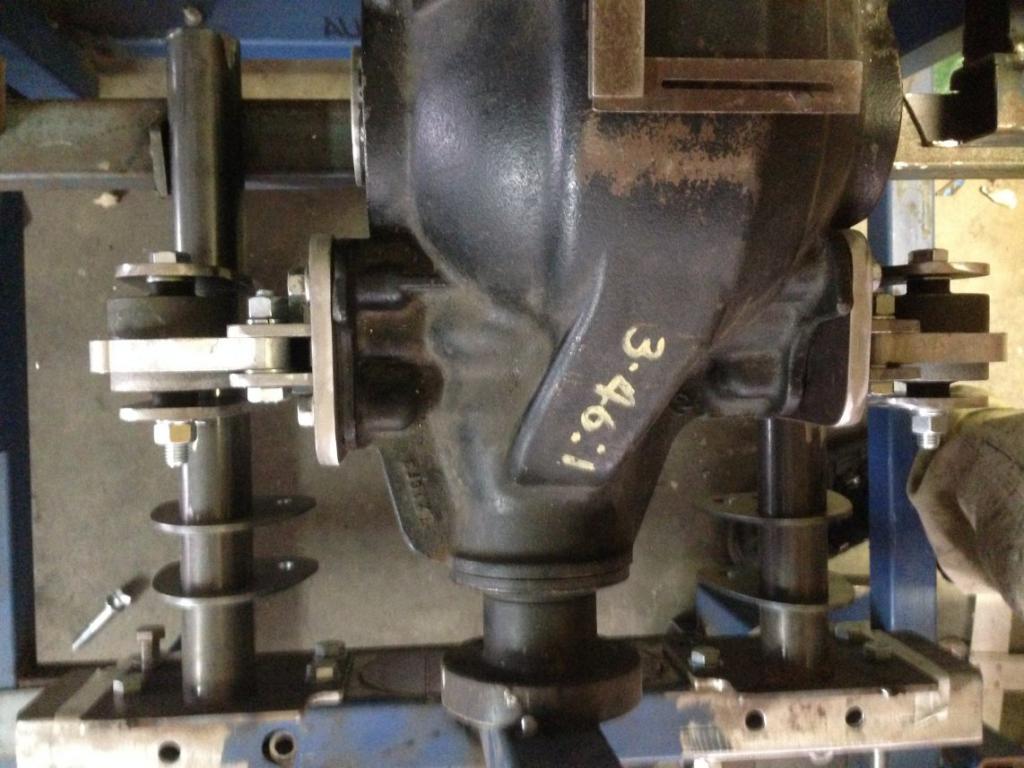
This weekends effort Diff is now nested with the chassis on the car, and all said clearances are great and looks like I got all the alignment and axle positioning spot on. Pardon the blue support RHS in the photo as its a temp support for the diff until the final 2 mounts are added. All that's left is to #1 Build the brackets for the last 2 rearward diff mounts #2 Drop the entire chassis out #3 Bolt in the motor/trans #4 Marry the entire chassis back into the body #5 Check clearances and adjust any sheet metal #6 Drop it all out again #7 Have all the final welding done #8 Ring the engineers to come out and cross my fingers Till next week John
-
Sirpents 260Z / C32 AMG Powered RS30 - Australia
Sirpent replied to Sirpent's topic in S30 Series - 240z, 260z, 280z
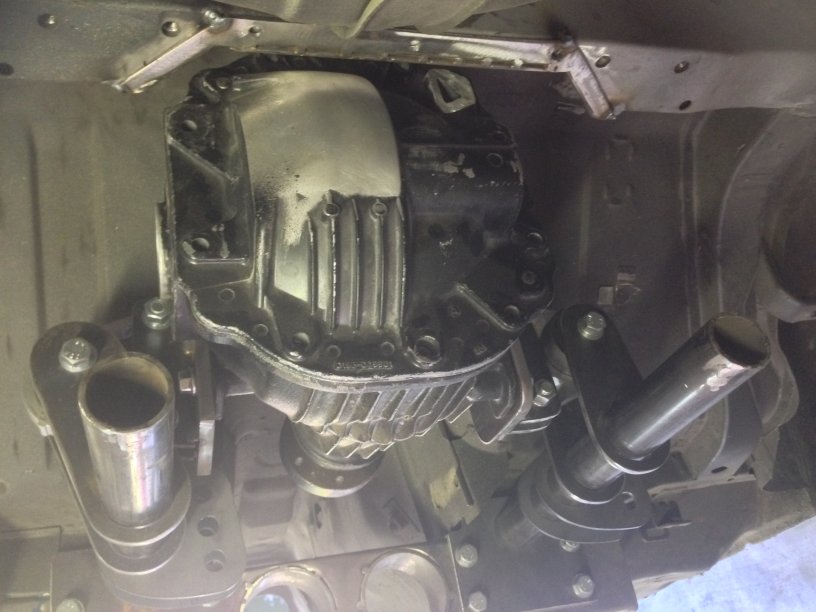
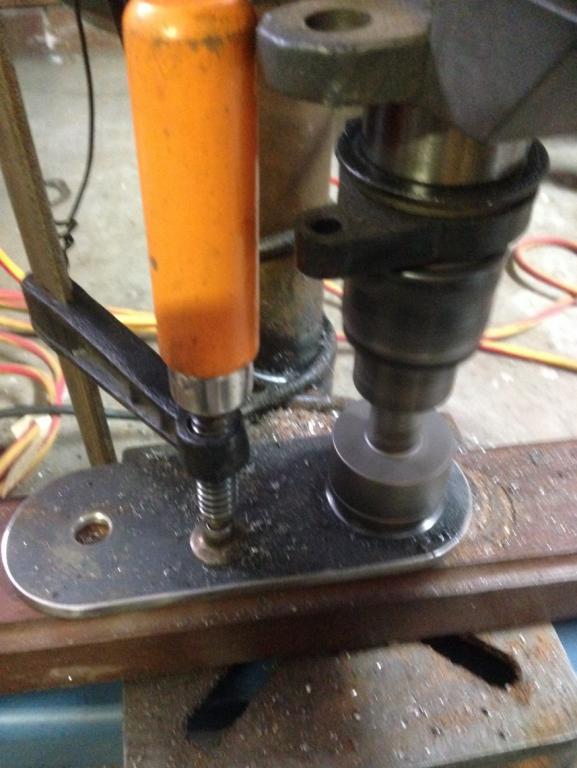
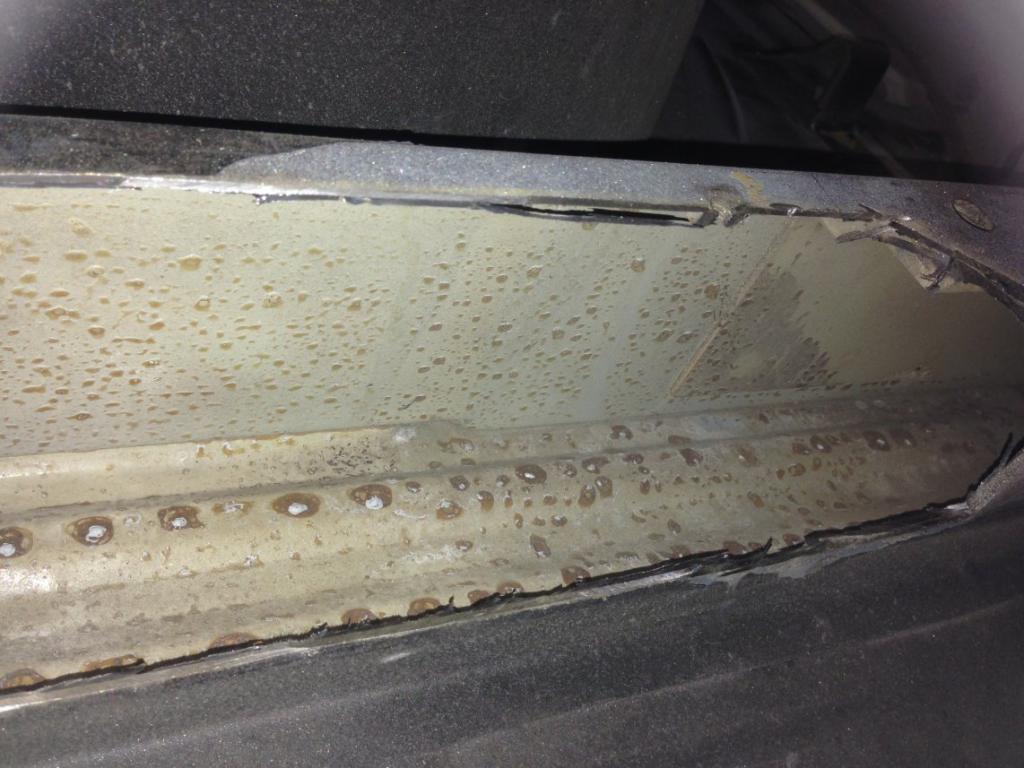
OK, So one day a wek now devoted to the car and I intend sticking to it. Today, #1 Finished the second set of uprights for the passanger side diff mount. #2 Final alignment and welding of the brackets #3 The pretty mount circular access point I cut into one of the mounts didnt work, so Mr Grinder made short work of that. Will go back and linish it off to look half respectable later. #4 Did the final piece of surgery to the rear moustache bar cross member #5 Was very pleased to see the state of the inners once cut away, no rust and clearly the factory etch primer looked great #6 Slotted in the diff recess / reinforcement set up and it just slipped in and sat there happily Next week, chassis back on the car, then the rear diff cradle bits, followed by mounting the diff and finishing off the last of the diff mounts at the rear of the diff. Cheers John
-
Hi Buddy First, sorry if my last post offended in any way, it was meant to be humorous, not sarcastic. Second, my bad as I didn't realize that 240Z;s exported to the States didn't have a sway bar fitted on the rear until I did some research before writing this post. Was just trying to watch out for you, if it did indeed have one and it had slipped your mind while fabricating. John
-
Bhagwan Kardish Disepyon May I ask a question, a stupid one of you ? Unless you are going to use a reversed sway bar as seen on the Arizona set ups.................. WHERE THE HELL ARE YOU GOING TO MOUNT THE ORIGINAL ? Because as the great F1 Murray Walker used to say "Unless I am very much mistaken" You seem to have blocked off the pathway at each rail end to be able to fit it back !
-
Farrrrrrrrrrrrrrrrrrrrrrrrrrk ME ! Strong enough ? Help Strengthen !!!!!!!!!!!!!!! Are you kidding ???????????????? And makes mine look like Schiest !!!!!!!!!!!!!!!!!!!!! Why dont you put these into production along with the rest of the bling you are making ? I doubt you would keep up with the demand ! As always "I hate your splendiferous work"
-
Happy to help if you can reciprocate when the time comes
-
Sirpents 260Z / C32 AMG Powered RS30 - Australia
Sirpent replied to Sirpent's topic in S30 Series - 240z, 260z, 280z
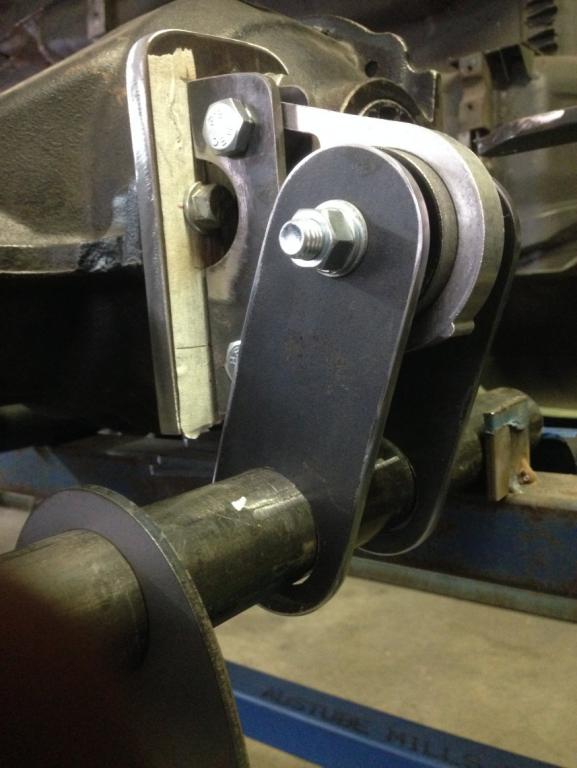
Only half a day available this weekend to get some more done, and I managed to trim both diff mount plates down and make a start on the second passenger side mount. Now that I have it set at the same height and position relative to the LCA tube, I can measure up the 2 uprights and fabricate them next weekend. Cheers John
-
73Fairlady's 240z Build *heavy pics*
Sirpent replied to 73Fairlady's topic in S30 Series - 240z, 260z, 280z
Awesome build, will definately be following to see the end result.............Great work! -
Well that was my dosage of "Z" Porn for the day. I will be following this in the future! Thanks jpndave
-
No excuses Olli ! Pull your finger out ! Just kidding, looking forward to my next dose of "Project Zeta GT"