
Miles
-
Posts
2374 -
Joined
-
Last visited
-
Days Won
29
Content Type
Profiles
Forums
Blogs
Events
Gallery
Downloads
Store
Posts posted by Miles
-
-
picture?
-
You didn't mention what type of headers you have.
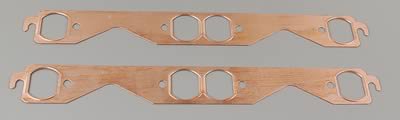
But you said that the headers are circular which suggests that you have block hugger style headers such as Hooker etc........................................
I have Hooker block hugger headers on my SBC 350. I have used the oval shaped header gasket for about 16 years.
For example: https://www.summitracing.com/parts/mrg-5917
Other examples:
https://www.holley.com/products/gaskets/header_gaskets/parts/10891HKR
The attached picture is what I am currently using with my round port Hooker headers.

-
2 hours ago, LLave said:
I totally understand. I am considering wiring a manual override switch to a relay, just in case. But maybe that is a tad paranoid?
Actually a few members have installed back up switches.
-
1 hour ago, LLave said:
Nice! Very HybridZ.
You should check out Delta Current Control as a way to control the fan. It has many advantages, like controlling inrush which is massive with some fans. That is how I am going to run my Taurus fan.
http://www.dccontrol.com/constant_temperature_controllers.htm
Thanks. I did look at this and other controllers. But I wasn't sure about the reliability so I stuck with the old fashioned relay and thermal switch. I am old school. My first car was a 40 Ford back in the 60s. Grew up on flat heads and small block Chevys. Now there is an idea - a Ford flat head in a 240Z........................
-
3 hours ago, Neverdone said:
I've now bookmarked this thread.
I was planning on getting a champion 3 row radiator and buying their two fan option, but now I'm totally just going to do this.
I'll see if I can make a CAD drawing of the shroud when I'm finished.
Question though: Good question
Why not just wire the grey/white wire to the thermal switch? You would have to provide 12v to the other side of the switch. See explanation and alternative approach below.
My bad explanation: I have my car wired differently then stock. Also, the Painless 70 amp relay kit is not designed to use a thermal switch ground. The Painless 70 amp kit is simply either turned on/off using a fan switch inside the car or the ignition. I wanted to use a thermal switch to ground and activate the relay so the fan didn't run continuously.
I use a solenoid activated electrical master switch (Hotronics) in my 240Z. The master switch kills all power when off. So it acts like an ignition switch powering up the car and all accessories.
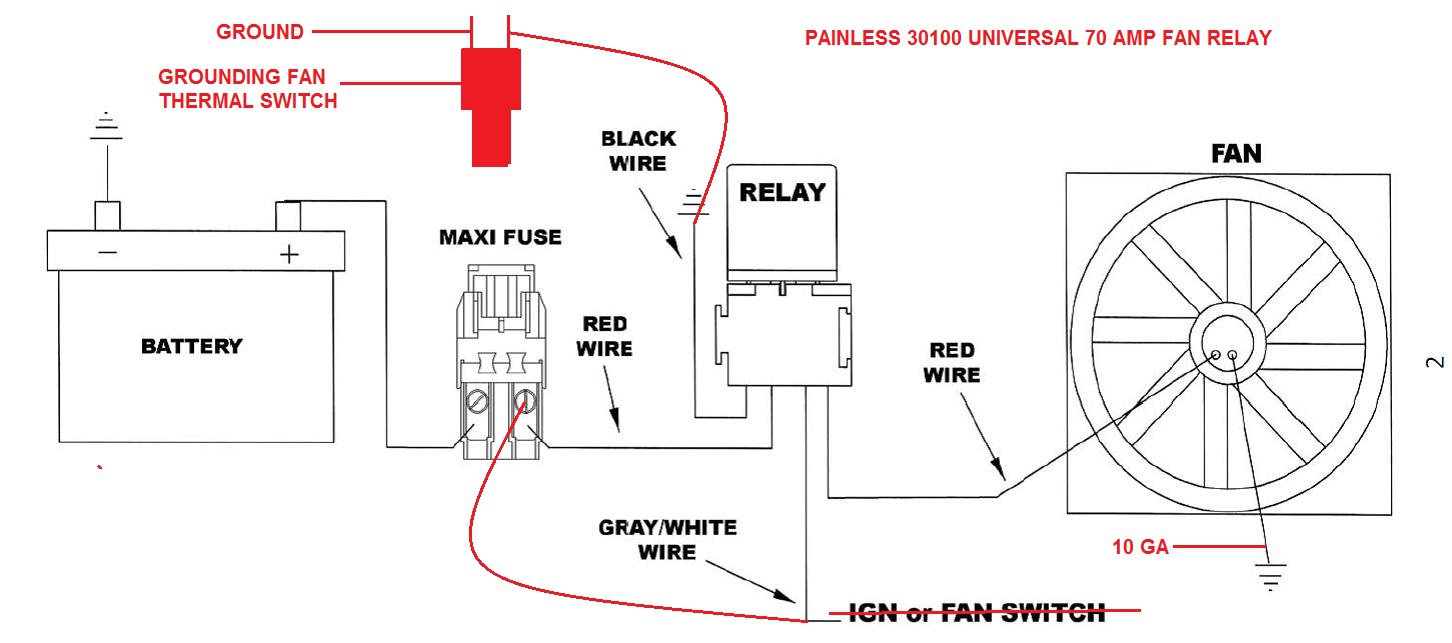
With stock wiring you could wire it as shown in the picture below. I didn't wire mine that way because I didn't want to run a wire to the ignition since my car has the master power off switch that kills all power. This allowed me to wire the relay trigger (gray/white wire) directly to the relay power source (maxi fuse) that is only energized when the master switch is on (like turning on the ignition). It made running another wire to the ignition unnecessary. The relay is activated when the thermal switch closes and grounds the relay.
Painless 70 amp relay kit wiring alternatives:
- If you want to use the Painless 70 amp relay kit with a thermal switch and use the ignition switch as the trigger you could wire the relay as per the 30 amp Painless relay kit pictured below.
- If you do not want to use a thermal switch to trigger the 70 amp relay, you can wire the trigger wire (gray/white) to either the ignition switch or a separate fan on/off switch. I preferred using a thermal switch to ground the relay so the fan would only run when needed.
Here is a link to the Painless relay kits. Note the manuals with each kit. http://www.painlessperformance.com/webcatalog/fanc
-
On 6/19/2018 at 3:02 PM, Neverdone said:
what gauge wire did you use to wire the thing up?
The Painless fan relay comes pre-wired. The power wire is 10ga. So the ground wire for the fan I installed is also 10ga.
WIRE SIZE
AMPERAGE WIRE GAUGE
2 22 AWG
3 20 AWG
5 18 AWG
10 16 AWG
15 14 AWG
20 12 AWG
30 10 AWG
40 8 AWG
For wires over 20 feet go one larger wire size.
Note: All of the 30 amp Painless fan relay kits are wired to work with their grounding fan thermal switch. The Painless 70 amp relay kit is not designed to work with a grounding fan thermal switch. The Painless 70 amp relay kit is wired for the ignition switch or a fan switch to trigger the relay. I wired the relay to allow a grounding type Painless fan thermal switch to trigger the relay. When the thermal switch turns on, it grounds the relay which closes the relay and energizes the fan circuit. Not a problem if you are comfortable working with relays. You could do the same thing using a 70 amp Bosch relay and some wire. See atch drawing.

-
6 hours ago, Neverdone said:
Does the Volvo fan really need that 70amp relay? Almost all other relay kits come with a 30amp fuse.
Yep. The Volvo fan amp draw spikes at 60 - 70 amps (momentary) and then settles down to about 30 amps. Even though a relay is rated at 30 amp doesn't mean that it will not overheat/melt at some point under continuous use. The 70 amp relay is insurance for those 110 deg days in the California heat.
Other considerations are a quality fan thermal switch and relay, maxi fuse, appropriate wire size, ground and alternator. I upgraded the alternator from 70 amp to 100 amp.
-
1 hour ago, marinez said:
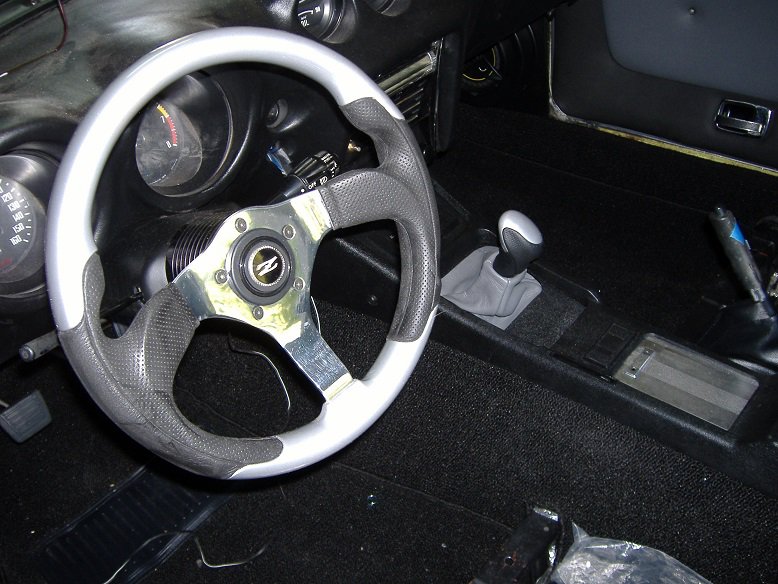
Augh. Finally got stuff in one place, need to move exhaust on drivers side. I'm using stock manifolds. If I post pics, you guys want to weigh in on best location?
You are using the stock Chevy rams horn manifolds? Depending on the engine mounts used, the stock manifold may not clear the steering shaft.
Do you have a picture of the engine mounts?
-
29 minutes ago, Chickenman said:
Check with WilWood. There is a recall on some of their MC 's. https://www.wilwood.com/Pdf/Recalls/RDCONL-17E030-0986.pdf
Recall was on 7/8" tandem cylinders, but I've heard reports of some of the 1" cylinders failing as well. Happened to my buddies Camaro with a WilWood 1" Polished MC.
This was my third failed 1 inch Wilwood MC. I bought a 15/16 replacement from Arizona Z Cars.
The fan/shroud/radiator combination is working perfectly. The temp gauge stays between 170deg and 185 - 190deg in traffic on hot days.
-
My latest cooling solution.
-
-
You are way ahead of the game.
Hope you can post pictures of the trans install.
The only other thing that comes to mind is to check the balance of the new flywheel. My flywheel was off right out of the box. Also, I had a bad experience with the shop that shortened and balanced my driveshaft. After cutting the driveshaft, they welded the shaft back together off axis which caused a high speed vibration. Had to pull the driveshaft and take it to another shop to correct the problem.
-
Do all of the exterior lights come on?
If not, which lights are out?
-
Do you know that you have to dent the body to allow clearance for the clutch arm?
Do you know about drive line phasing?
There are a lot of details about the 240Z V8 conversion you need to know before you start the project.
Purchase and read the JTR V8 conversion manual. You can buy it here: https://jagsthatrun.com/collections/jtr-v8-conversion-manuals/products/copy-of-v-8-conversion-manual-for-volvo-200-series
JTR also sells many of the conversion parts you will need e.g., mounting brackets, hood bracket, speedometer drive gear (goes in the trans), etc.
-
Note: you should purchase the JTR Z V8 conversion manual. And research HybridZ before doing the swap. The parts listed below are what I used.
1. T5 transmission: The WC T5 transmission is tilted 15 degrees towards the driver. The 15 deg tilt is absolutely no problem, I have done two. Unless you want to make a special transmission mount, you will need an 89 Camaro T5 bell housing, driveshaft, flywheel, clutch pressure plate/disk, throw out arm, throw out bearing, clutch slave and a 7/8" clutch MC. Note that there is a V8 and a V6 version of the T5 transmission. They have different spline counts. You will need the V8 version.
2. Bell Housing: 1989 -90 bell housing for V8. Verify that the pivot ball is in place as that part is NLA.
3. Flywheel: 158 tooth flywheel: https://www.summitracing.com/parts/zzz-50-6516
4. Clutch Kit: Zoom High Performance Clutch Kits HP1675-1A https://www.summitracing.com/parts/zzz-hp1675-1a/applications/
5. Clutch Hydraulic Components:
- Camaro Clutch Slave: Napa sells the Camaro clutch slave. https://www.napaonline.com/p/NCF73110
-
Clutch Master Cylinder: Both Tilton and Wilwood make 7/8in. clutch master cylinders. The Wilwood unit is more compact allowing use of a larger brake booster.
- Tilton 74-875U: https://www.summitracing.com/parts/til-74-875u
- Wilwood 260-10374: https://www.summitracing.com/parts/wil-260-10374
6. Clutch Hose and Fittings:
- Hose: -3 A/N SS hose. Length TBD
- Roll pin to A/N SS line adaptor Russell 640281 (connects -3 A/N SS line to the Camaro slave): https://www.summitracing.com/parts/rus-640281
- MC A/N SS -3 A/N line to 1/8in NPT adaptor Earls 961603ERL (connects -3 line to the MC): https://www.summitracing.com/parts/ear-961603erl
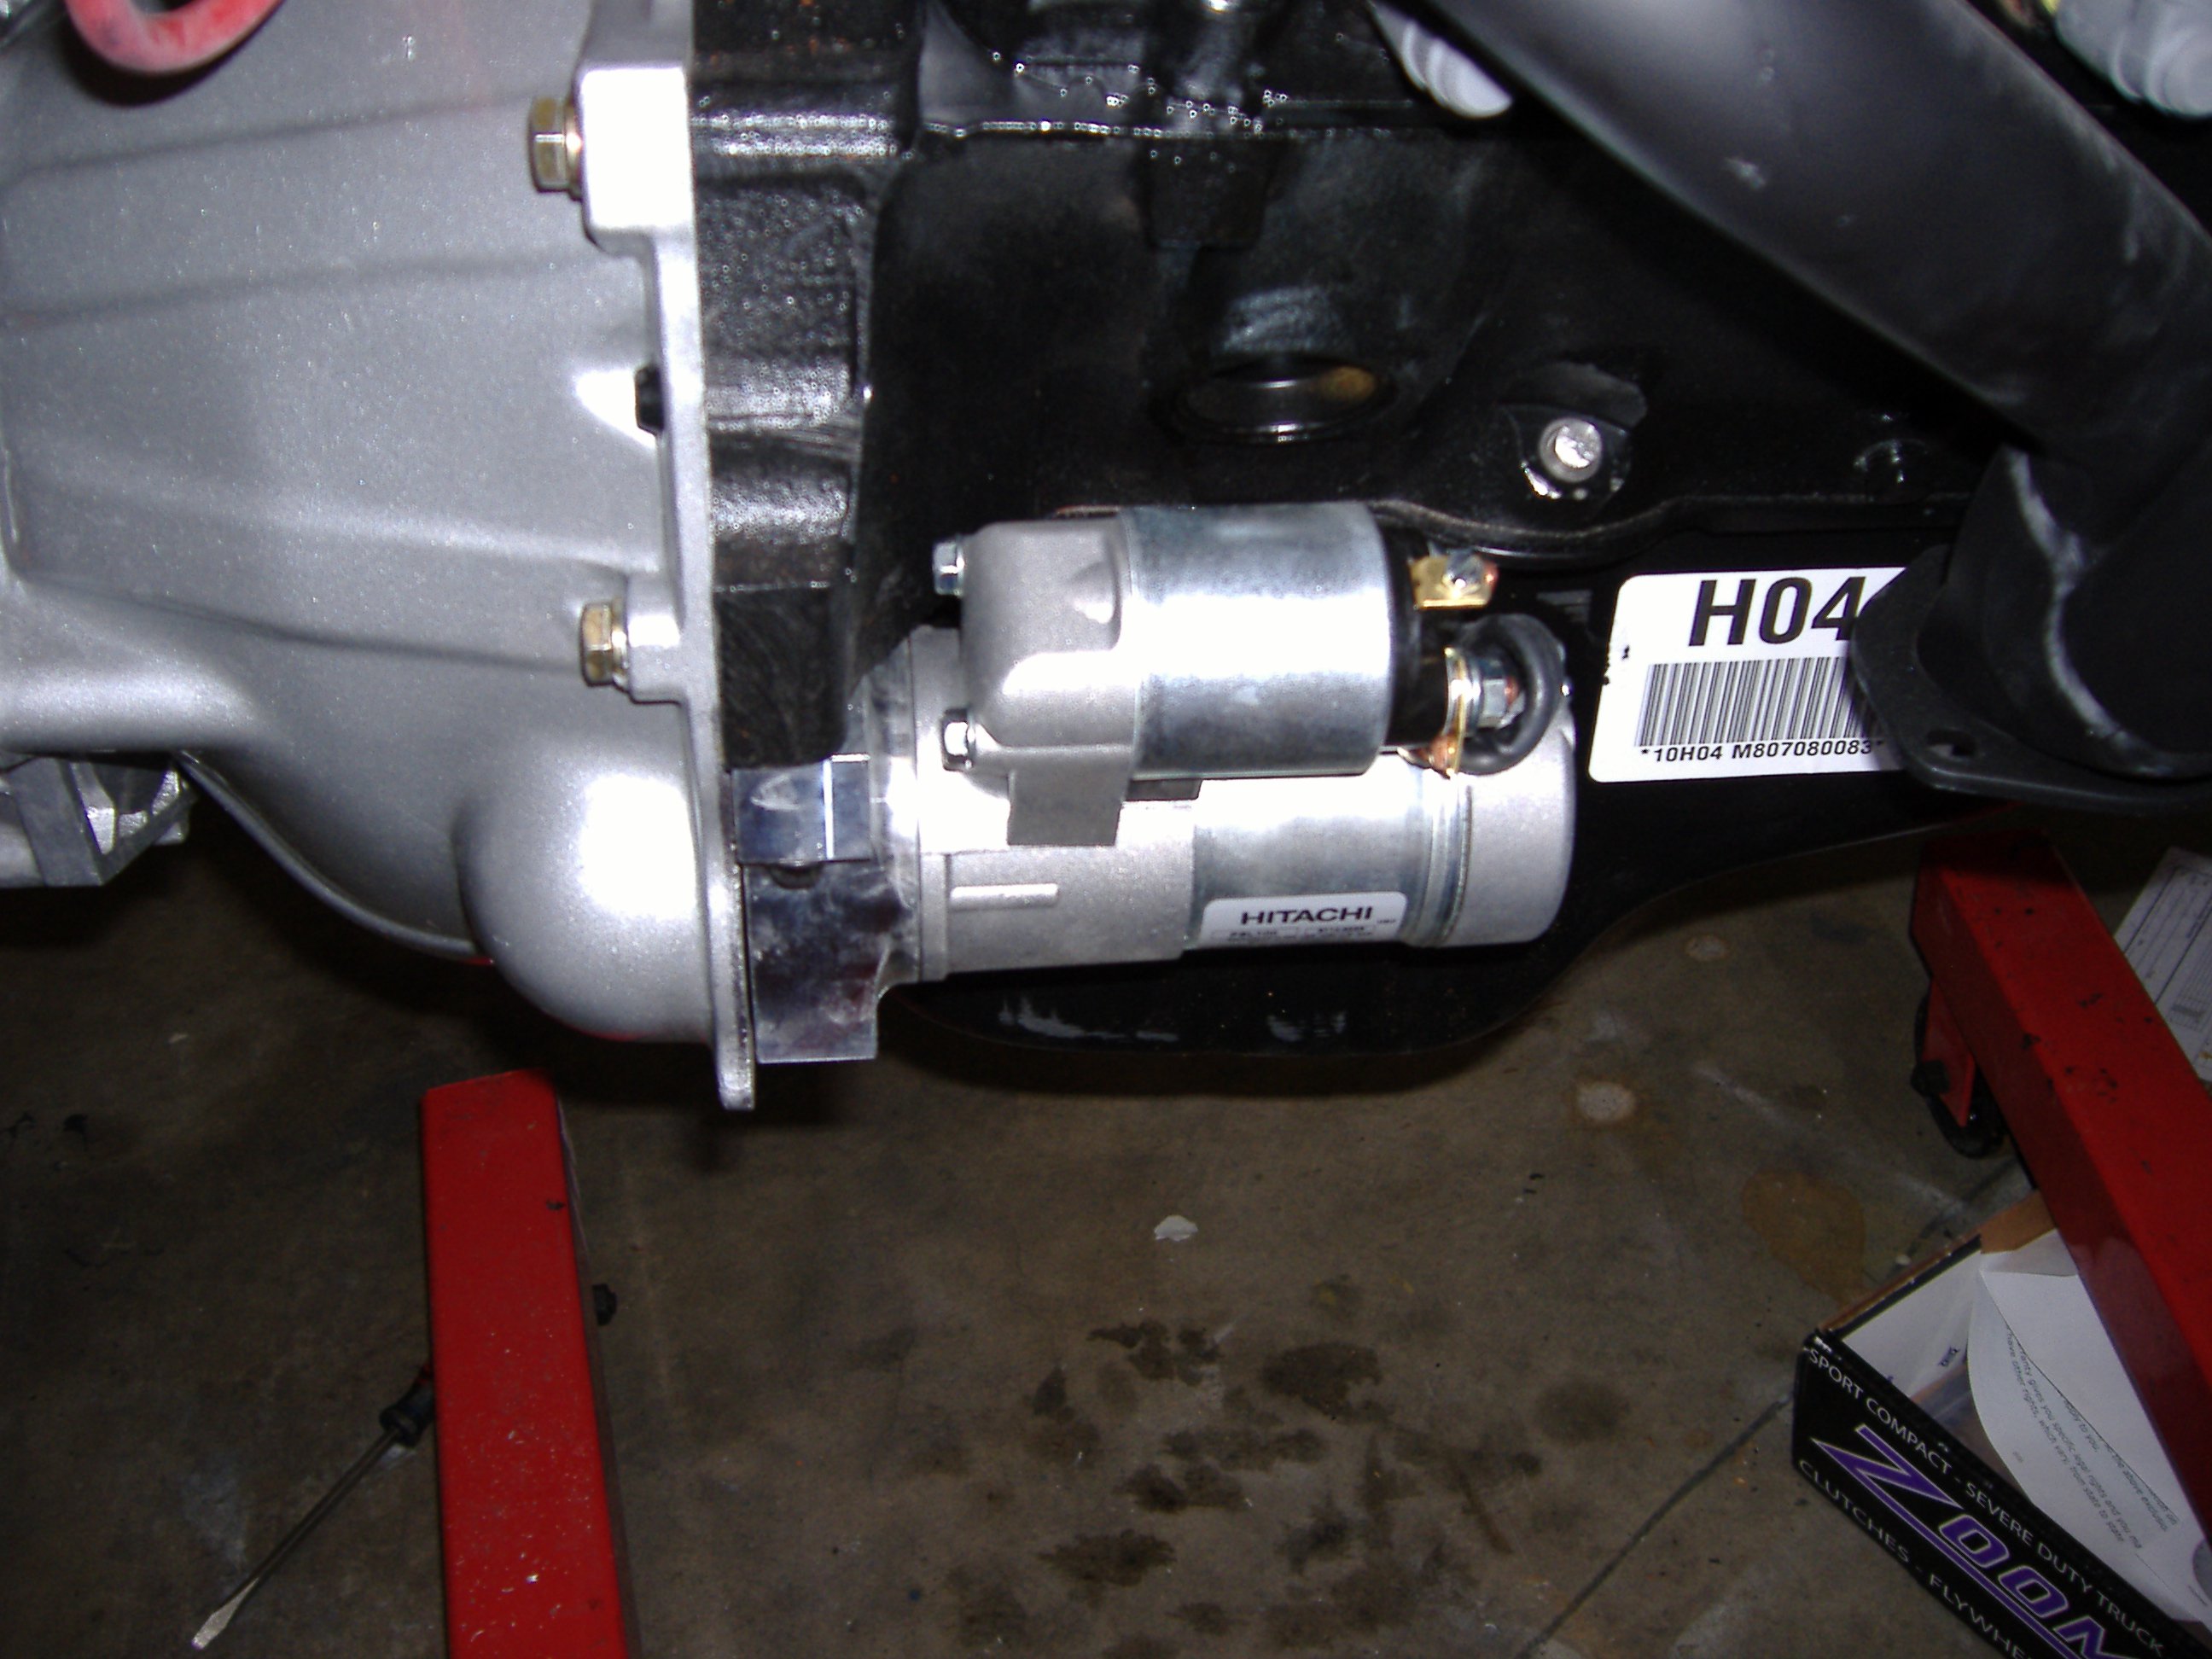
6. Starter: Hitachi gear reduction starter or similar unit.
-
Her asking a dog question is a testimony to the high regard people have for the HybridZ community.
I've seen a look in dogs' eyes, a quickly vanishing look of amazed contempt, and I am convinced that basically dogs think humans are nuts.
- John Steinbeck
-
Dogs didn't evolve to live in apartments. They need to be outside where they can be dogs and get exercise - a lot of exercise. They are also social (pack) animals, and become anxious when left alone. The shock collar is not the solution.
If you keep your dog in the apartment and don't do the right things to help him thrive he will become fat and neurotic i.e. you will have a fat dog that is depressed/anxious and barks a lot.
Your choices are:
- Take a class on dog behavior and
- Move to a place suitable for dogs
If you are not prepared to learn about dog behavior, exercise him every day and provide your dog with a proper environment then give him to someone who does.
-
You can buy directly from Carbotech to save time. Might be cheaper too.
-
35 minutes ago, seattlejester said:
I show $150-$170 for the CTS411 912 or 913 from THMotorsports. I doubt they would charge $300 for shipping, I think my last package to sweden was about $50.
Very reasonable price for stock pads and shoes:
https://thmotorsports.com/carbotech/carbotech-ax6-brake-pads/g-57700.aspx
-
year, make, model?
-
Another spindle pin video:
-
Intake leak = lean sag upon opening throttle. Fix the leak first. Many many recent posts on the problem you are having.
-
Move this thread to the suspension forum. He posted in the FAQ.
forums.hybridz.org/topic/128915-new-bushings-car-is-sitting-too-high/?tab=comments#comment-1203946
-
Don't expect many answers as you posted in the wrong forum. There is a forum specifically for this question.


.jpg.f49f6319c15431c12602b271df182afe.jpg)
.jpg.4af8258bfbc9ec5fdd4742dc7e31e896.jpg)
Clutch pilot bearing removal
in Toyota L6 Forum
Posted
The grease approach only works if you get a good seal around a pilot bushing as with a SBC. On my SBC projects the grease technique worked on the pilot bushing well enough sometimes to move the bushing out enough to get a puller on it. Sometimes I had to chisel a groove in the bushing and then collapse it to get it out. None of this will work with a bearing.
Try a different puller. Failing that, you may have to pull the flywheel and take it to a machine shop.