
Miles
-
Posts
2374 -
Joined
-
Last visited
-
Days Won
29
Content Type
Profiles
Forums
Blogs
Events
Gallery
Downloads
Store
Posts posted by Miles
-
-
Not getting email follow up reply notifications.
Topic following notification is toggled on.
-
Not enough information.
Basics:
- year and model of car
- Modifications to said car
- How is the car driven - daily driver, race etc
-
Thanks.
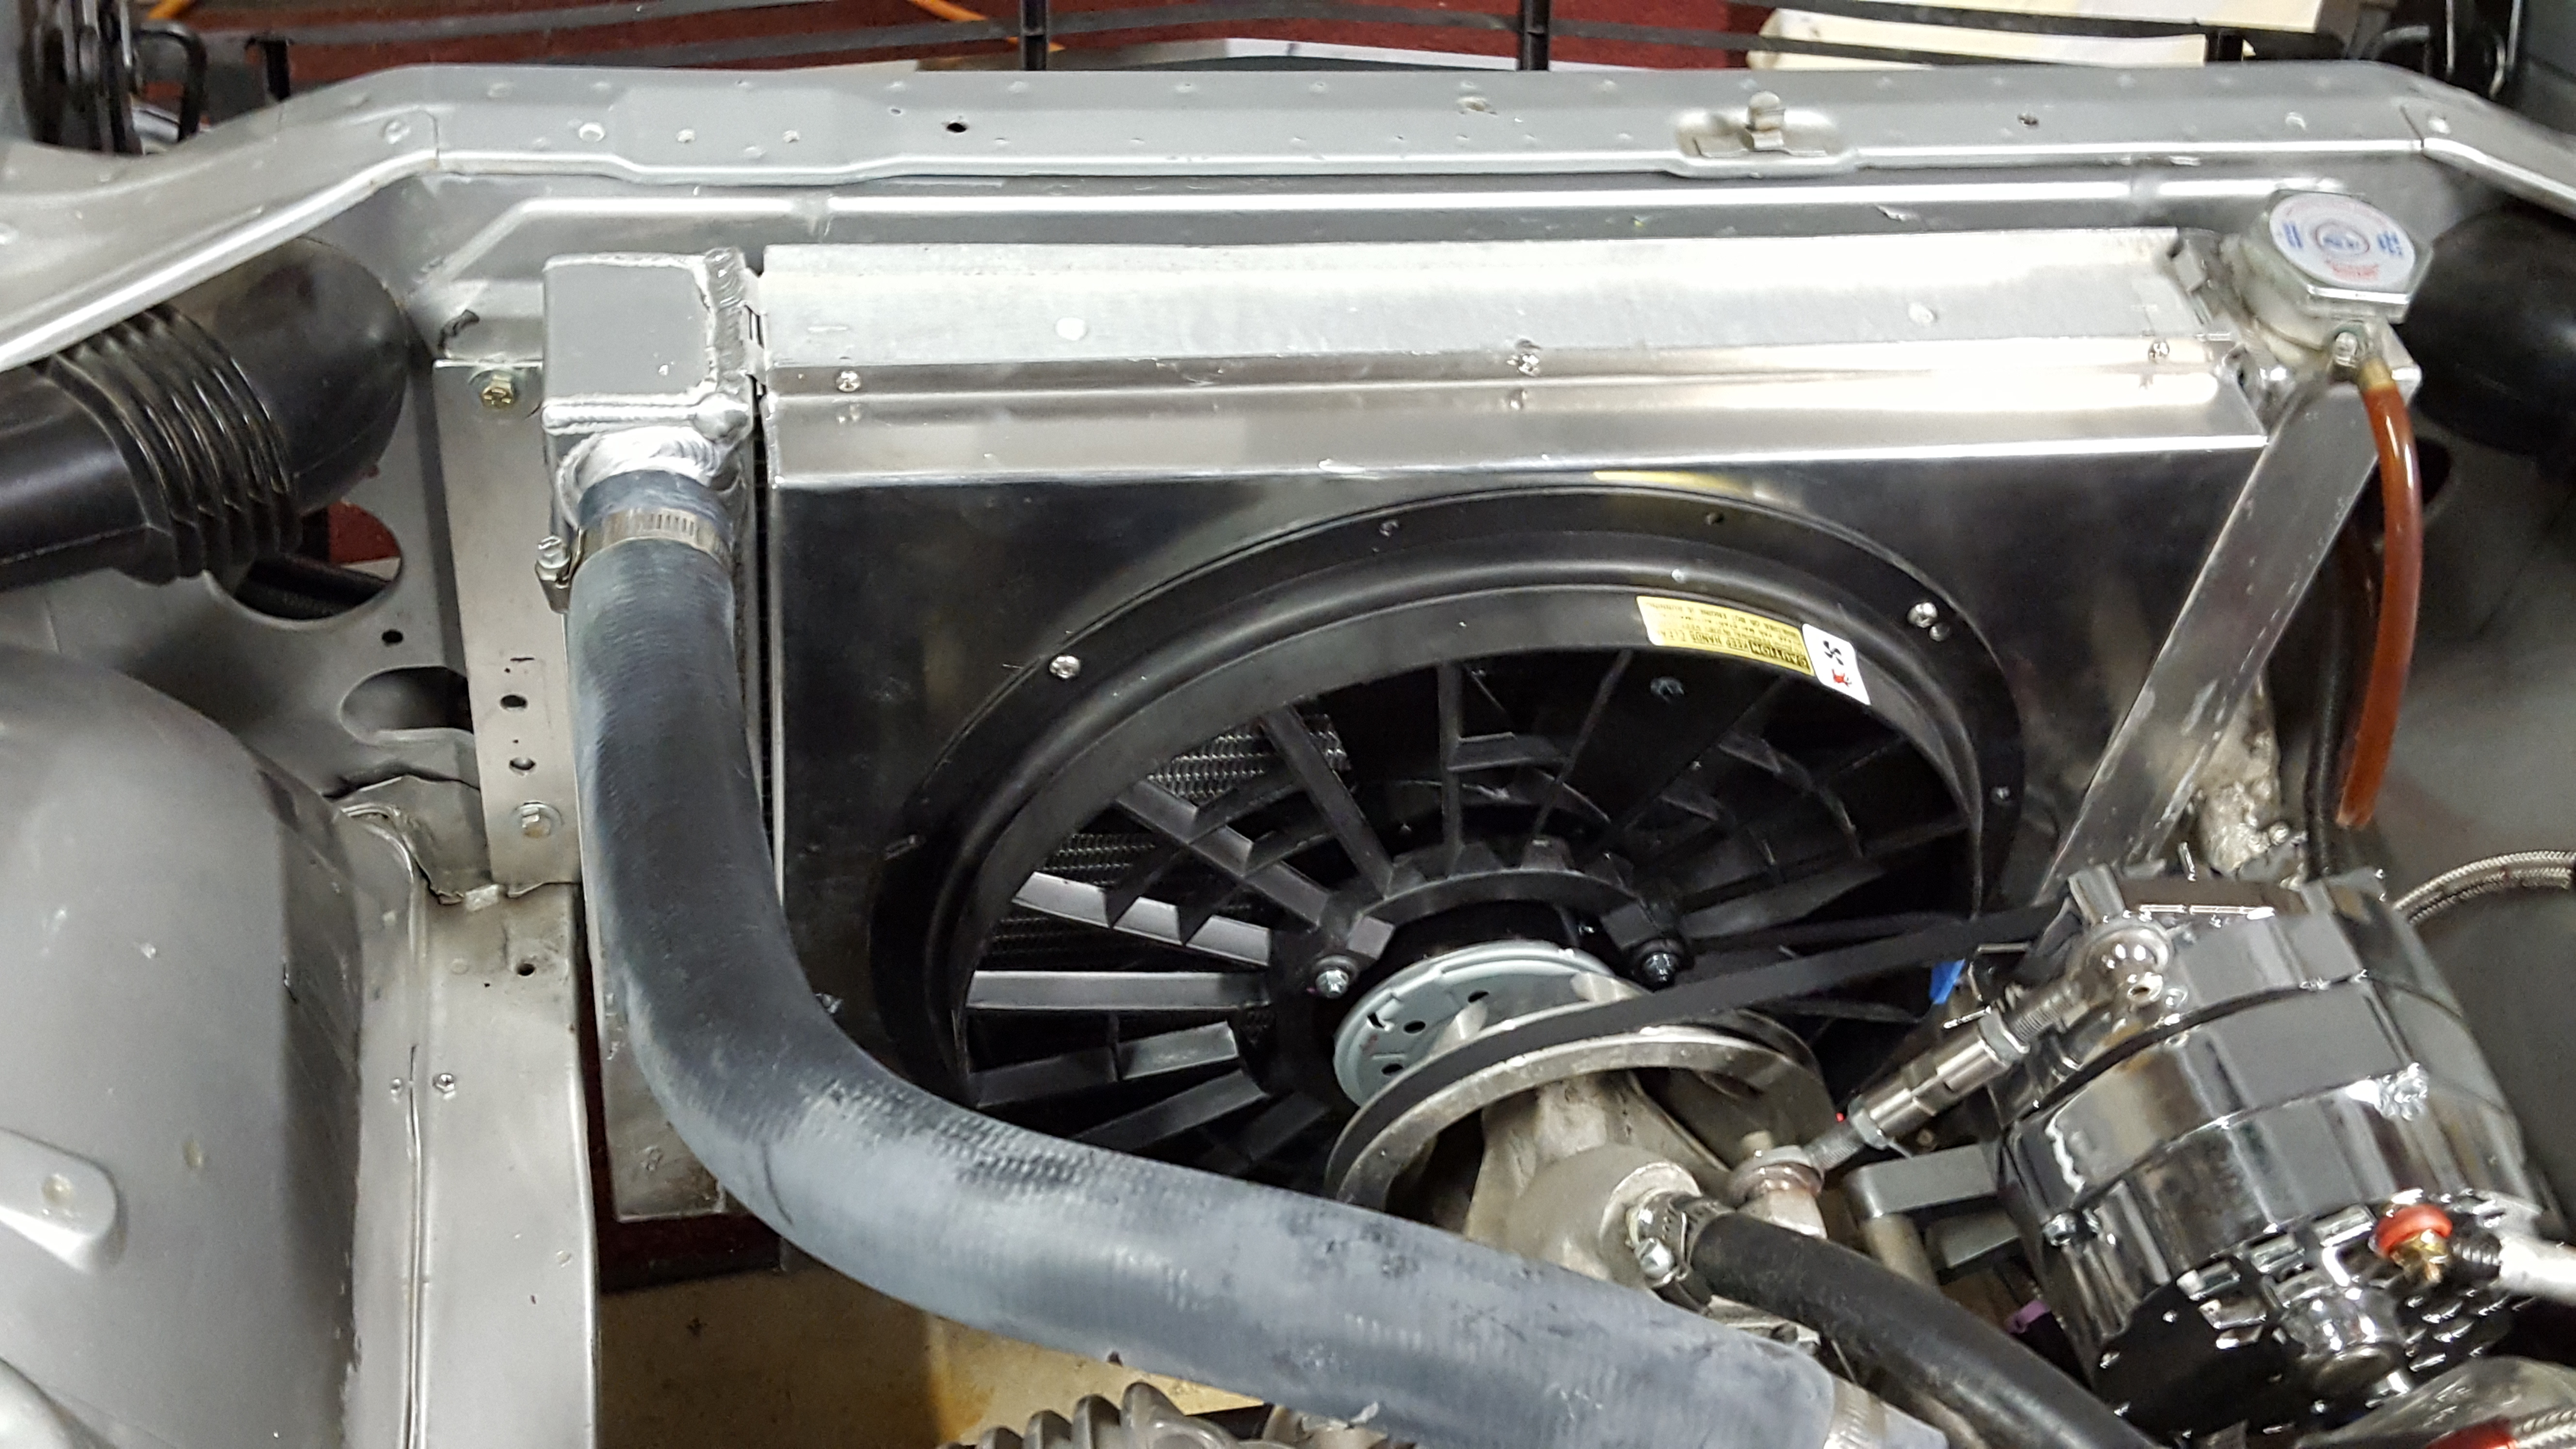
Didn't pay much attention to the Taurus fan so I can't compare it with the Volvo. But from what I read, it uses the same fan motor.
Works great. As soon as the gauge hits 185 deg F the fan kicks in and then off at 170 deg F.
I was going to do a long road test but my Wilwood 1 inch MC failed today.
-
My experience with the Wilwood 1 inch MC has not been good.
I have replaced three of them because they leaked right of the box. Now number four has failed.
Wilwood should recall this product.
Dave at Arizona Z Cars has 280ZX MCs and sells them for $129.00. Just ordered one.
-
94 -97 Volvo 850 electric fan
Source: Summit Racing
-
Dorman Electric Fans 620-883 $141.97
-
Painless Performance 30100 Electric 70 amp Fan Relay Kits p/n . $49 Comes with Maxi Fuse.
-
Painless Performance p/n 30111 Fan Control, Thermostatic, 185 Degrees On/170 off (grounding) $47.9 Works perfect.
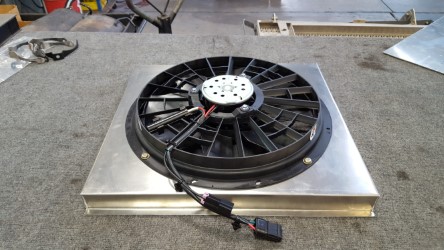
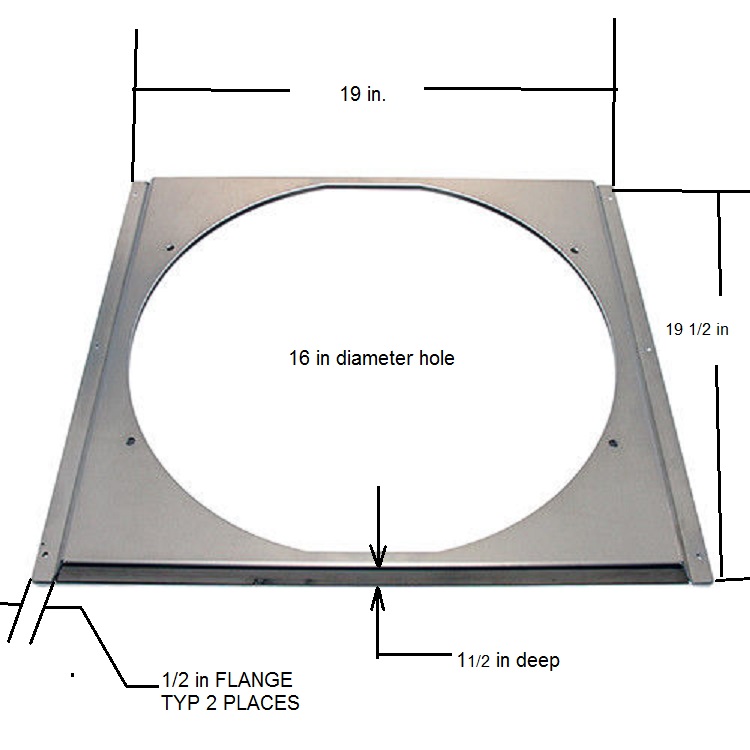
Custom 19" H x 19.5" W x 1.5" Deep aluminum shroud by Mike Tolle Fabrication, Sacramento, Ca.
Replaces failed Flex- a- lite Black Magic fan on Arizona Z Cars radiator.
Note: All of the 30 amp Painless fan relay kits are wired to work with their grounding fan thermal switch. The Painless 70 amp relay kit is not. The Painless 70 amp relay kit is wired for the ignition switch or a fan switch to trigger the relay. I wired the relay to allow a grounding type Painless fan thermal switch to trigger the relay. When the thermal switch turns on, it grounds the relay which closes the relay and energizes the fan circuit. Not a problem if you are comfortable working with relays. You could do the same thing using a 70 amp Bosch relay and some wire.
Painless website: http://www.painlessperformance.com/webcatalog/fanc

-
-
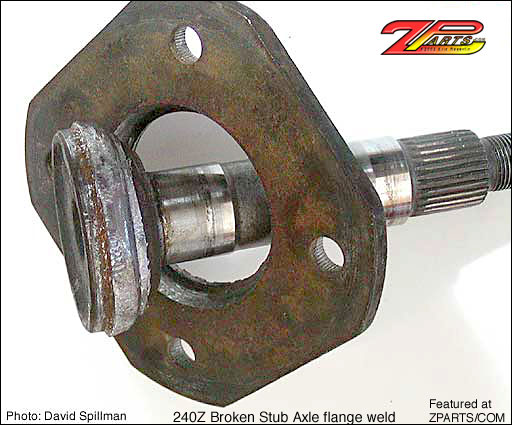
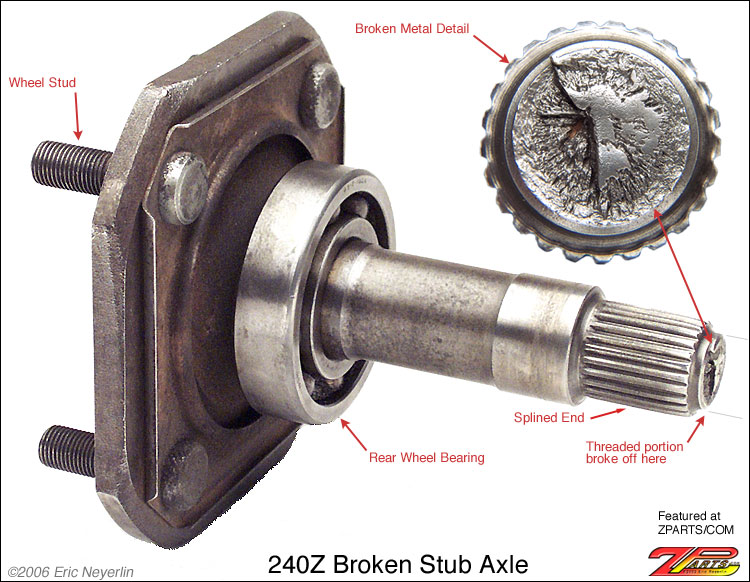
There are other weak points to consider in your build plan.
The stub axles typically fail in two places, the tire mounting flange breaks off or the axle breaks where the threads meet the splines on the axle. See pictures.
The flanges are easily warped which can cause problems with disk conversions. I had this problem when I did the Modern Motor Sports 240SX rear disk conversion. My rear brakes were dragging due to the warped flanges wobbling against the pads. Tried machining the flanges, but they were were too far out.
When my Z was stock the driver's side stub axle broke while pulling away from a stop sign. Very loud pop when it let go.
The solution to the above problems was the stainless steel stub axles now available from Modern Motor Sports. No more problems.
http://www.modern-motorsports.com/stub-axles.html
-
Wilwood or Tilton 7/8 clutch MC works with the stock Camaro T5 slave cylinder. I have used both.
I prefer the Wilwood MC as it is more compact.
The Camaro slave cylinder uses a roll pin connection to the hydraulic line. Summit/Jegs etc sell a roll pin to AN adapter so you can connect stainless braided -3 AN hose to the clutch MC.
-
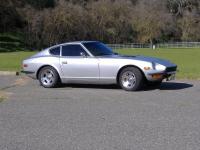
Two projects: 1972 240Z SBC V8 with Camaro WC T5 transmission. Mild cam. 290 -300 HP range. Both cars daily drivers.
- My first 240Z V8 project (2001) I used a stock Carquest clutch kit. Pedal was smooth and light. No problem.
- For my second 240Z SBC V8 PROJECT (2009) I used a Zoom Kevlar clutch kit from Summit. P/N HP-1675-1A. Haven't had a problem.
Flywheel resurfacing and Balancing:
- Used flywheels should be resurfaced and balanced.
- New flywheels should also have the balance checked . The balance on my new flywheel for the second build was off.
Driveshaft:
Select a quality driveshaft shop to cut and balance the drive shaft. One driveshaft shop I went to cut and welded the driveshaft off center causing vibration above 60 MPH. I pulled the driveshaft and took it to a quality driveshaft shop for rework. All is well.
-
-
You do not have a proportioning valve problem. You have a MC push rod issue. The "distribution block" is called a brake switch and all it does is turn a light on if the front or rear brake circuit looses pressure. Leave it alone. You do not need an adjustable proportioning valve unless you will be racing and experimenting with brake pads. The brake set up you have is biased towards the front (70% F - 30% R). So reducing rear pressure will make your brakes perform worse.
Your brakes are locking up because the push rod that goes into the MC is adjusted too far out. It should be adjust so that it just about touches the bottom of the depression on the end of the piston. The rod is preventing the piston from fully retracting which is causing the piston to cover the fluid return ports for the tanks. So each time you you step on the brakes you are filling the calipers, but the fluid can't flow back out.
Do the following:
- Relieve the pressure by opening the MC bleeders. Keep the wrench in the car.
- You don't have to remove the MC. Just remove the two nuts and pull the MC away from the booster and push it aside.
- To adjust the push rod, hold the rod with needle nose pliers etc and use a small wrench to turn the adjustment nut inward a bit. NOTE: If you pull the push rod too far out you may drop the reaction disk into the bottom of the booster and your brakes will not work until you replace it. You will be sad.
- The push rod on my MC is about 13 to 15 mm out as measured from the tip of the adjuster to the face of the spacer block.
- Staying close to home drive the car and brake several times and drive around. Note: if the brakes are dragging (dragging = push rod too long) or if the pedal travel is too long (long pedal = push rod too short).
- If the brakes lock up, use the wrench you used on the MC bleeders and relieve the fluid pressure.
- Drive home and readjust the push rod one or two turns: Turn in (shorten) if brakes drag/lock up or Turn out (lengthen) if brake pedal is too long.
- Repeat until it is perfect. Write down the measurement of the rod each time you adjust it. Save the final measurement.
-
 1
1
-
I have installed two new OEM hood release cables in two 240Zs and noticed that movement of the cable is "notchy" i.e., pulls smooth, then hangs, then smooth, then hangs etc. Noticed this before cable was installed in the car. The problem seems to be a mechanical defect in the metal tube next to the handle.
I have been meaning to add a back-up cable for about 16 years. My hood just got stuck closed so I will be installing a backup release cable and an after market hood release cable.
-
Keep the plugs in order and do a compression check.
-
Download a Factory Service Manual (FSM) for you car. Check Hybridz or Google it.
-
Injectors are electrical-mechanical solenoids. Making noise is expected as each injector is energized.
-
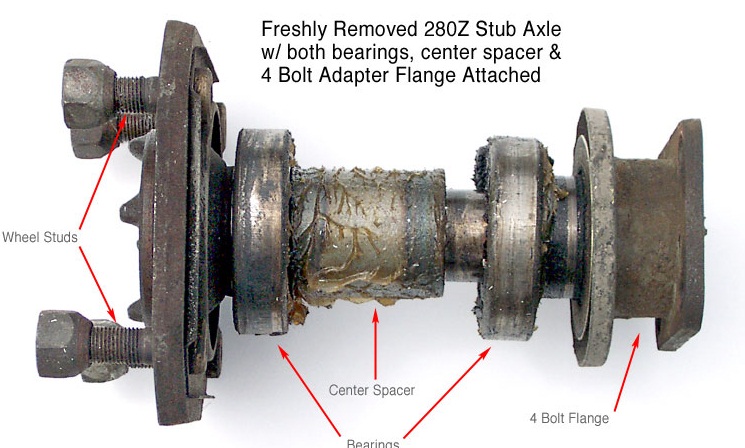
I did not measure the spacer. I don't know what the length is supposed to be anyway. Does anyone have that measurement? See my post above.
I think the seal is seated because when I have the flange installed without the nut it turns free enough.
When torqued down, the nut pulls the entire assembly together causing an improperly seated seal to rub. Been there many times. Adding more torque on the nut usually does nothing. Pull the axle and use an old bearing as a drift and tap all around the seal/bearing to seat it. Listen and you will hear a change in sound when the bearing is fully seated.
The second I put the nut on and torque it a bit is when it gets tough to turn.
When torqued down, the nut pulls the entire assembly together causing an improperly seated seal to rub. Been there many times.
So I'm looking looking at a spacer replacement? Not as long as the PO didn't change them or the hubs. See post above for instructions.
Is there a difference between the length of spacers drivers side to passenger? Not unless the PO changed the hubs. Never seen this on unmolested 240Zs.
-
Be sure that the grease seal and the inner bearing are completely seated. You may have to use a an old bearing as a drift and tap them into place.
Also see: http://www.atlanticz.ca/zclub/techtips/rearwheelbearings/index.html
http://forums.ctzcc.com/viewtopic.php?t=7307&highlight=&sid=a22e20007238292ecb090456230f708a
Assuming there were no issues before changing the bearings, the inner spacer would only be a problem if a PO had mixed up spacers somehow.
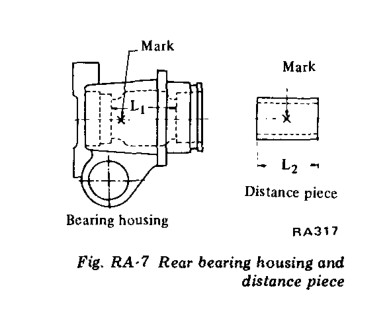
See atch picture from the FSM
-
The 280z booster has a different mounting bolt layout then the 72 240z. I have one on my 72 240z. Have to re-drill the firewall mounting holes. Works good with the 1 inch Wilwood MC too. Many threads on this in the brake section.
-
Why not post your photos here?
Also, for old posts just edit the post and add the pictures you want.
-
CFM in = CFM out
-
Try a 280z hood. My 240z with SBC and headers creates high engine bay temps. With a 3000 cfm fan you can feel the hot air blasting past the driver's door while sitting at a light as air exits the hood vents. Some people have installed fans under the 280z hood vents.
-
Ztherapy.com
-
-
Member since 01. New topics looks about the same.
-
You are right, they look a little chewed. They look particularly bad with the diff supporting the weight of the car as shown in the pics. I agree that they should be freshened up.
Driveshaft is brand new from Driveshaft Shop Specialists. I would assume that the rumble would always be present if something were welded off axis, but it is always worth taking a look to verify. I'll check the run out. Check balance too.


NOT GETTING EMAIL FOLLOW UP REPLY NOTIFICATION
in Site Support
Posted
OK