nismo kid
-
Posts
529 -
Joined
-
Last visited
-
Days Won
4
Content Type
Profiles
Forums
Blogs
Events
Gallery
Downloads
Store
Everything posted by nismo kid
-
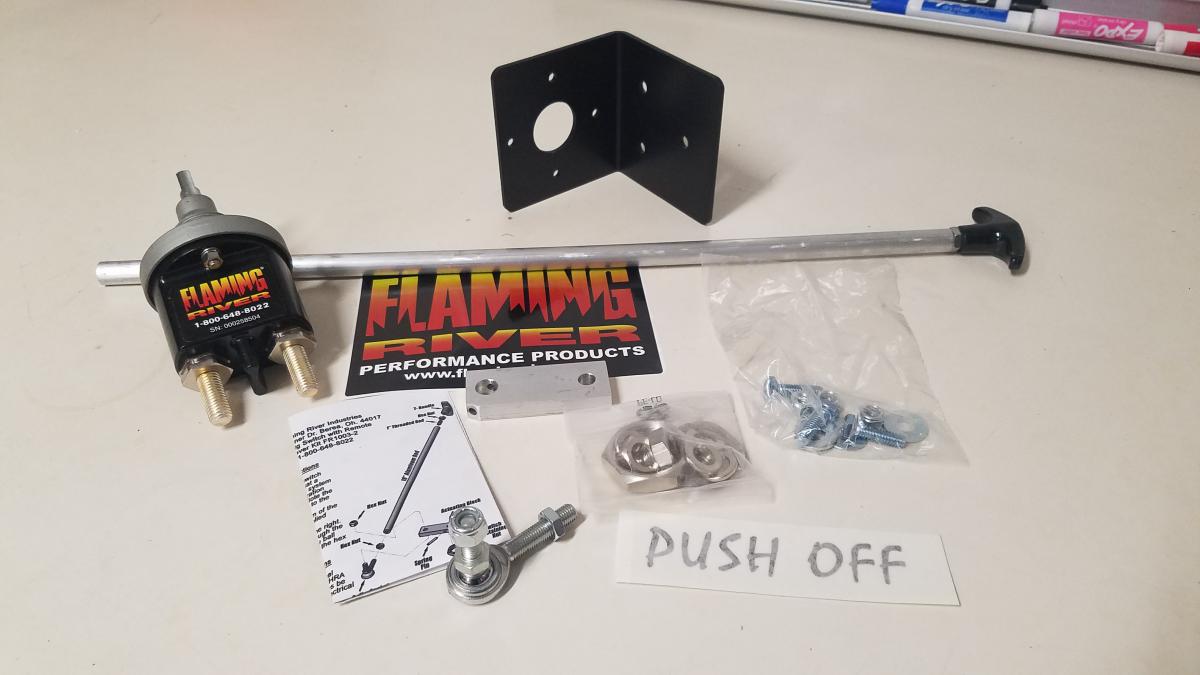
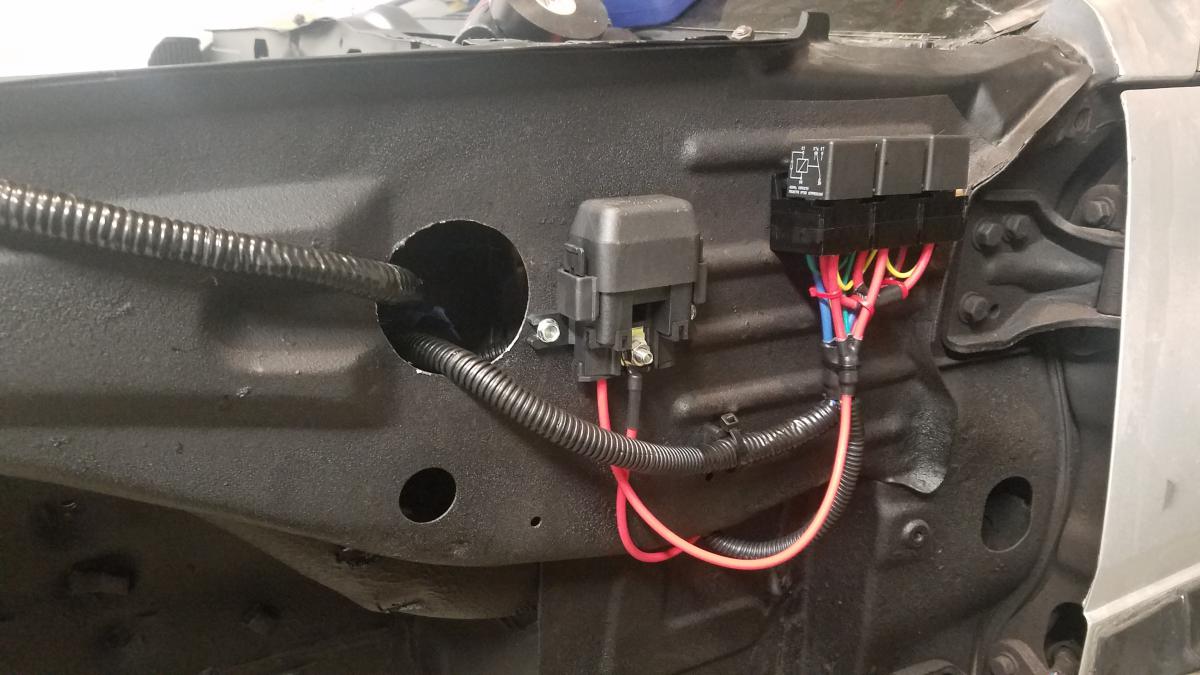
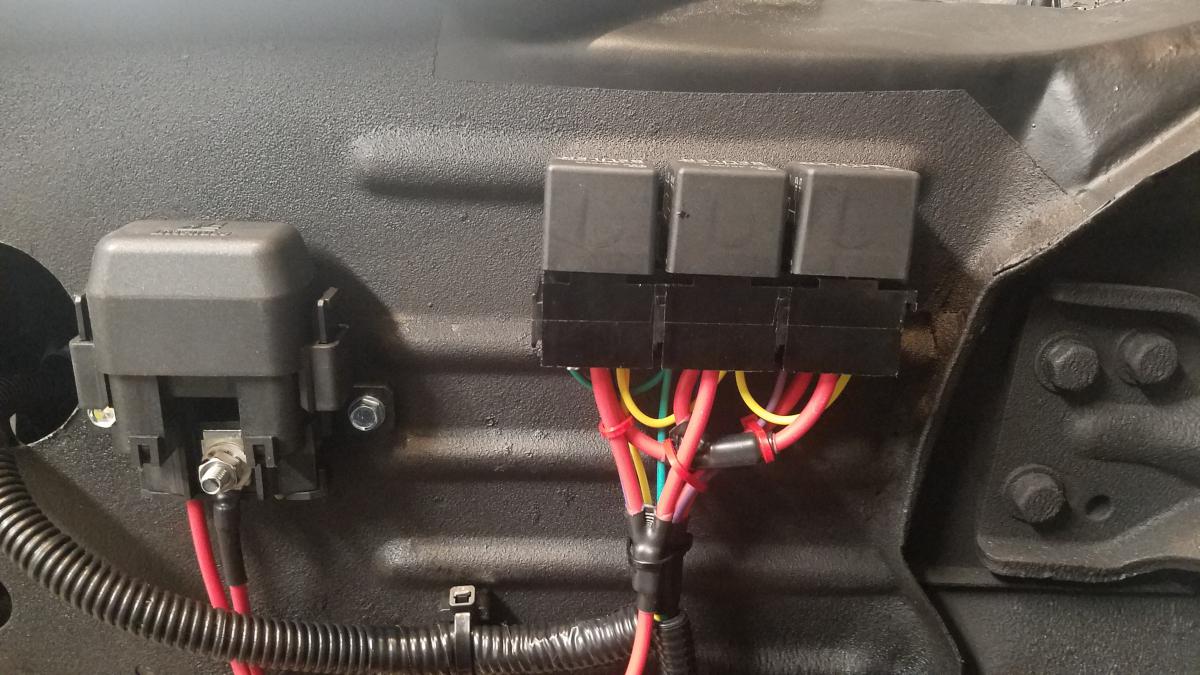
While the entire fuel tank fiasco was happening I started the electrical. It began with mounting the battery in the back. Originally I planned to keep the bottom of the spare tire well but, the battery just wouldn't sit where I'd like. So it had to go. ( I still have plenty of sheet metal work to do. It'll be covered in future updates). Now I place the battery where I want. Or so I thought. The bracing for the tow hook would need to be modified, so the battery could be secured to the frame. Instead of doing that the battery was moved forward a few inches. The battery bracket I used was the Chassis Unlimited "FUNCTION" Group 34 / 78 Optima Battery Side Mount. Got it powder coated too. I added 1/4inch steel plates on either side of the frame for added strentgh. I used grade 8 3/8inch bolts to secure the battery/bracket to the frame. A Flaming River FR1003-2 Big Switch w/lever kit was also added to the mix. I tried my best to follow NHRA rules even though I never plan to run @ a NHRA track.( My local track is IHRA). I did a small mod to be able to hide the hole for my cutoff switch. I'm now able to remove a trim piece under my passenger taillight to expose the hole for the cutoff switch rod. That way when I'm driving on the street or at a meet I don't have to worry about people messing with the cutoff switch. With the battery now secured it was time to make/install panels for my fuel pump relays & fuses. I also mounted 2 Bue Sea breakers. ( 100amp for starter & 200amp for alternator). 2awg was used for all battery& alternator wiring. Below I have also uploaded a wiring diagram of the main + & - wires in my setup.

-
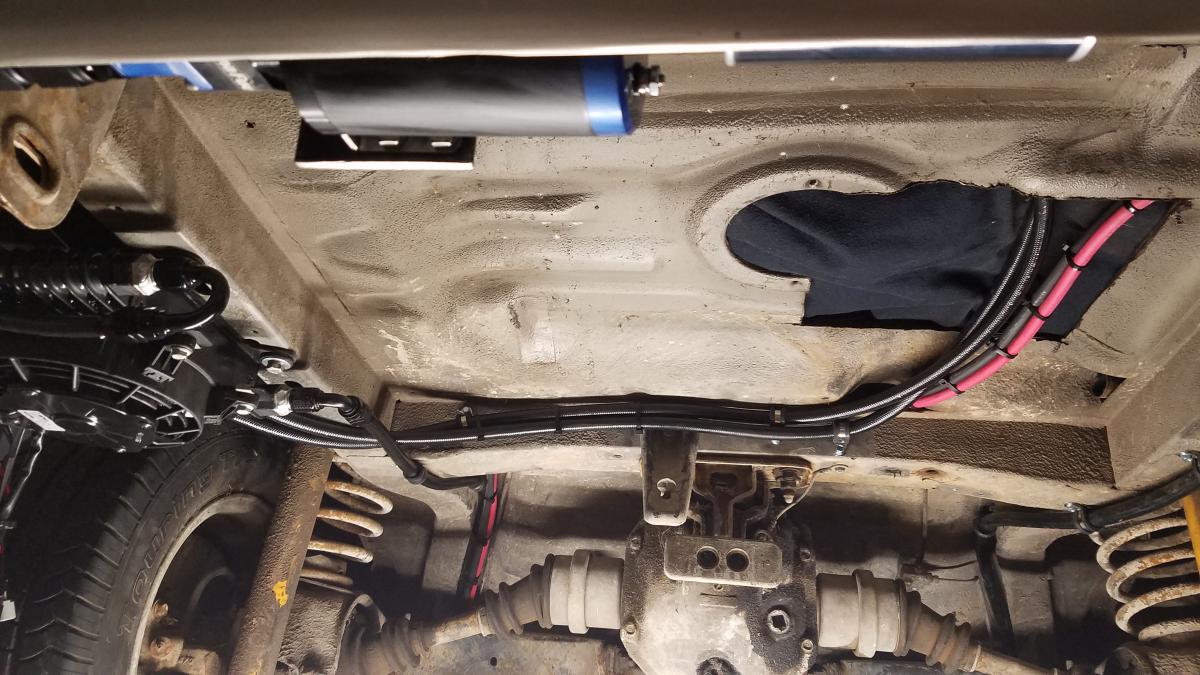
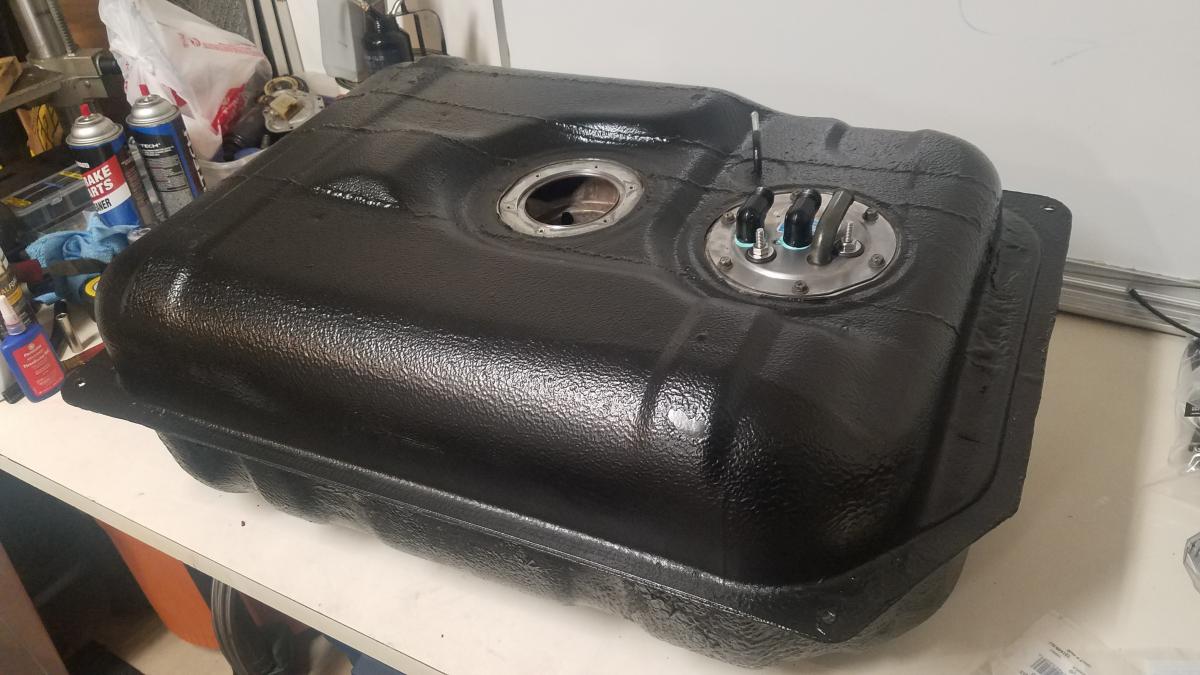
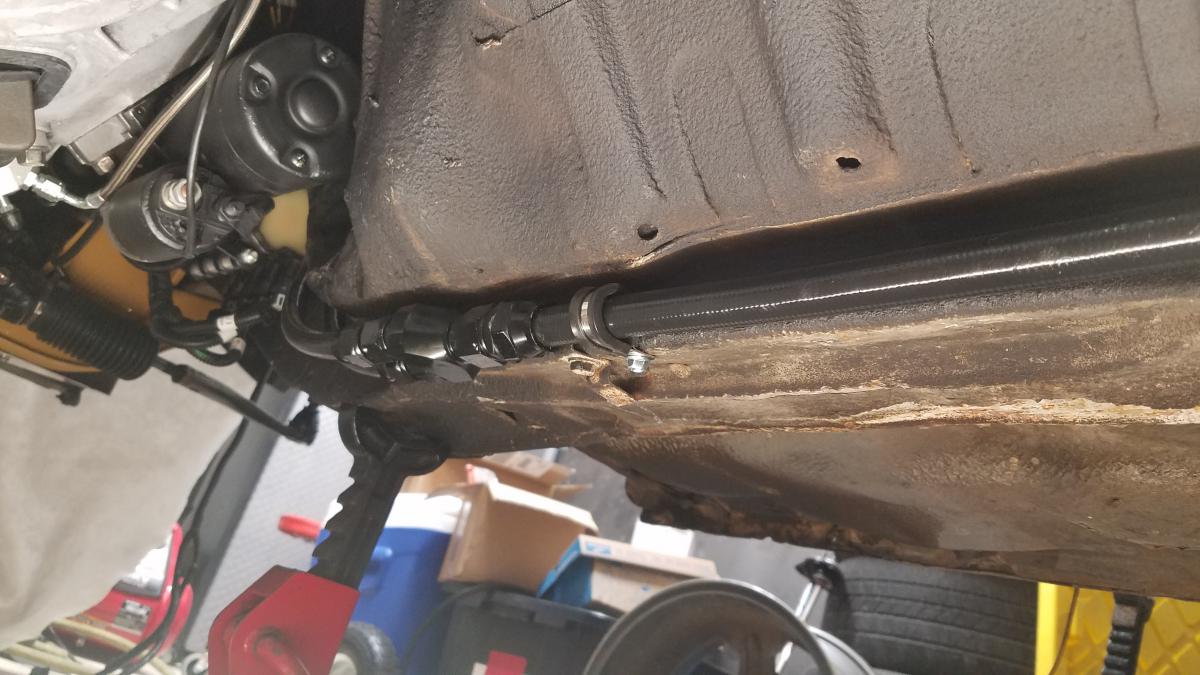
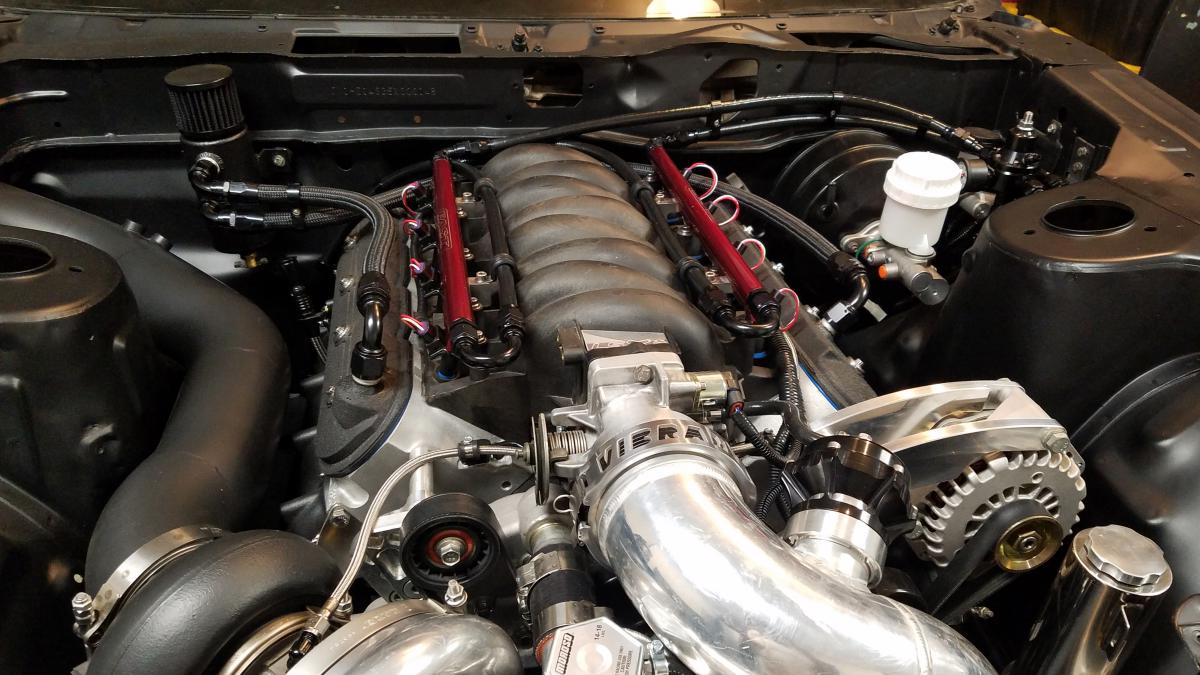
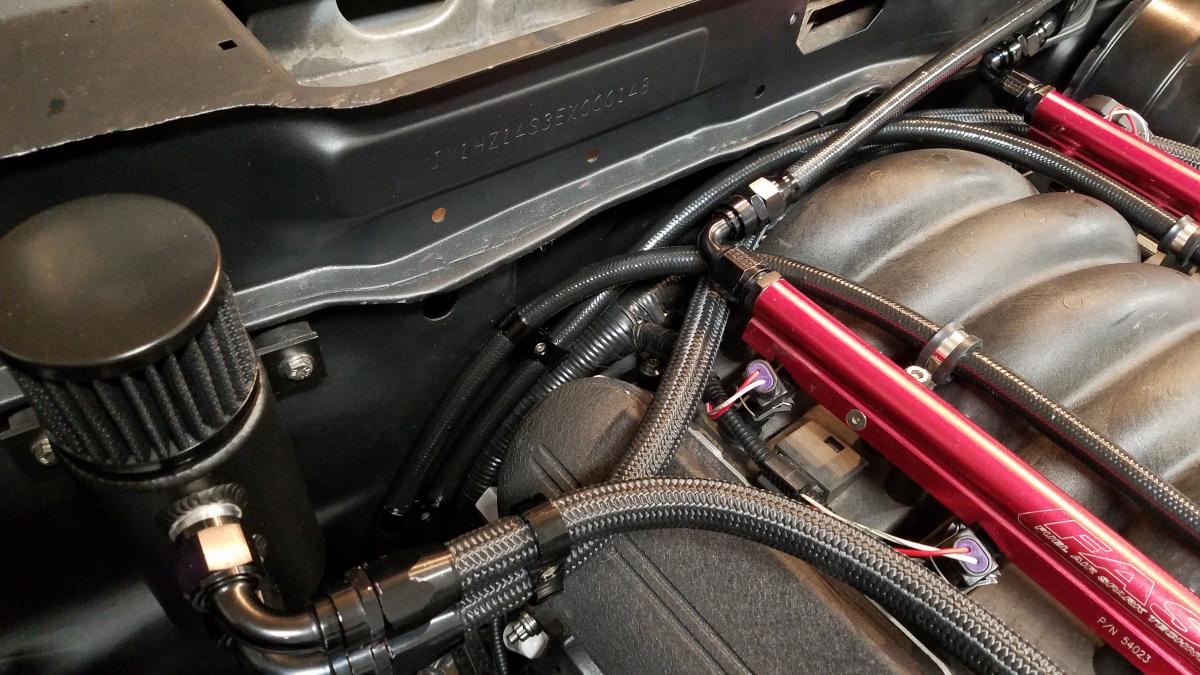
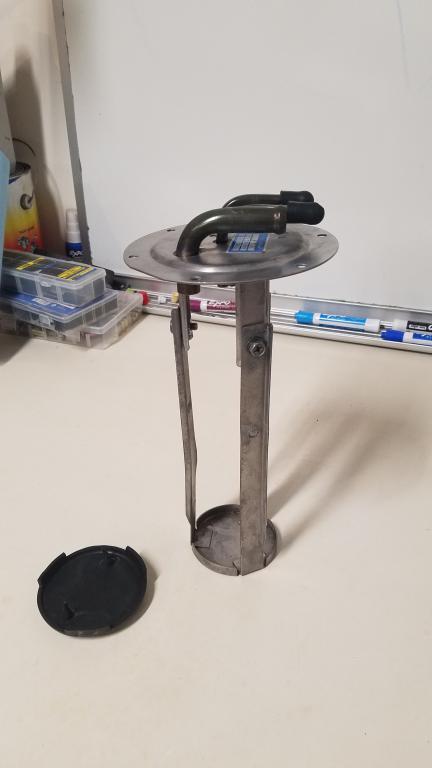
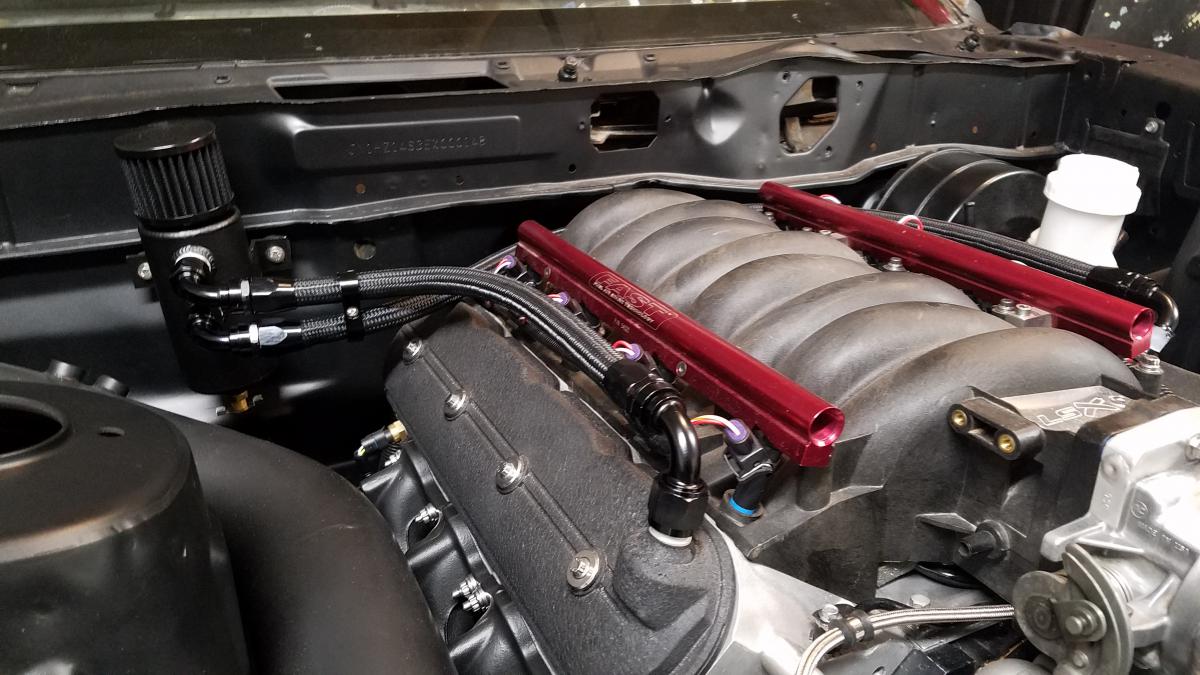
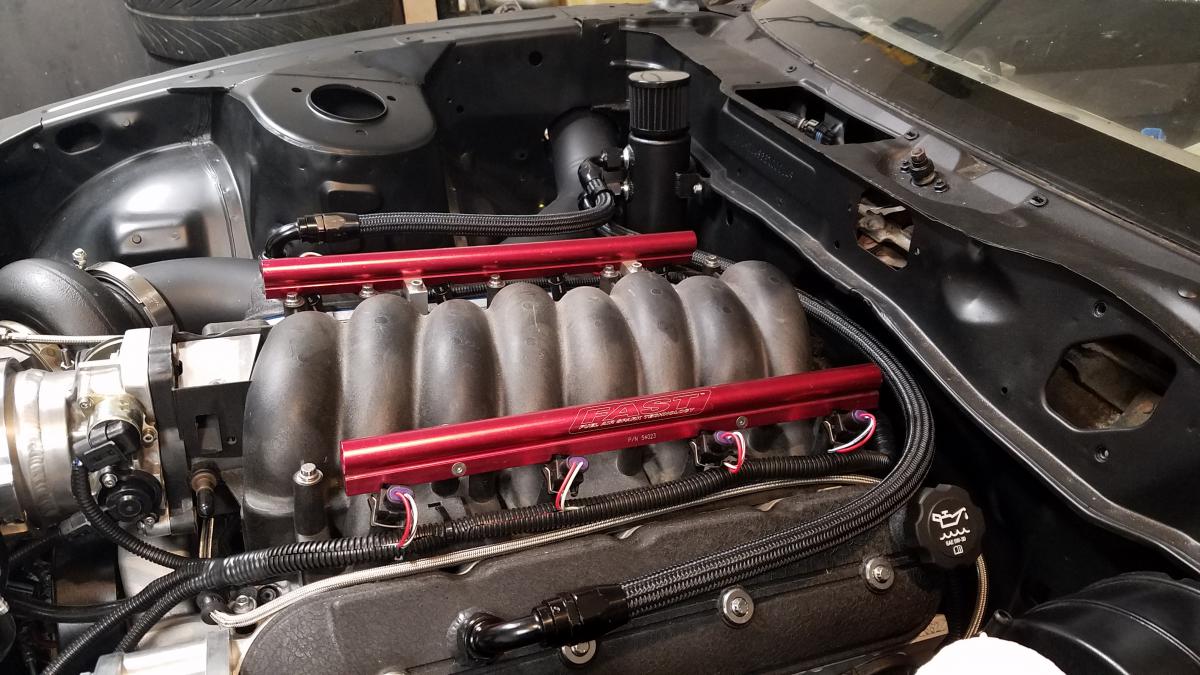
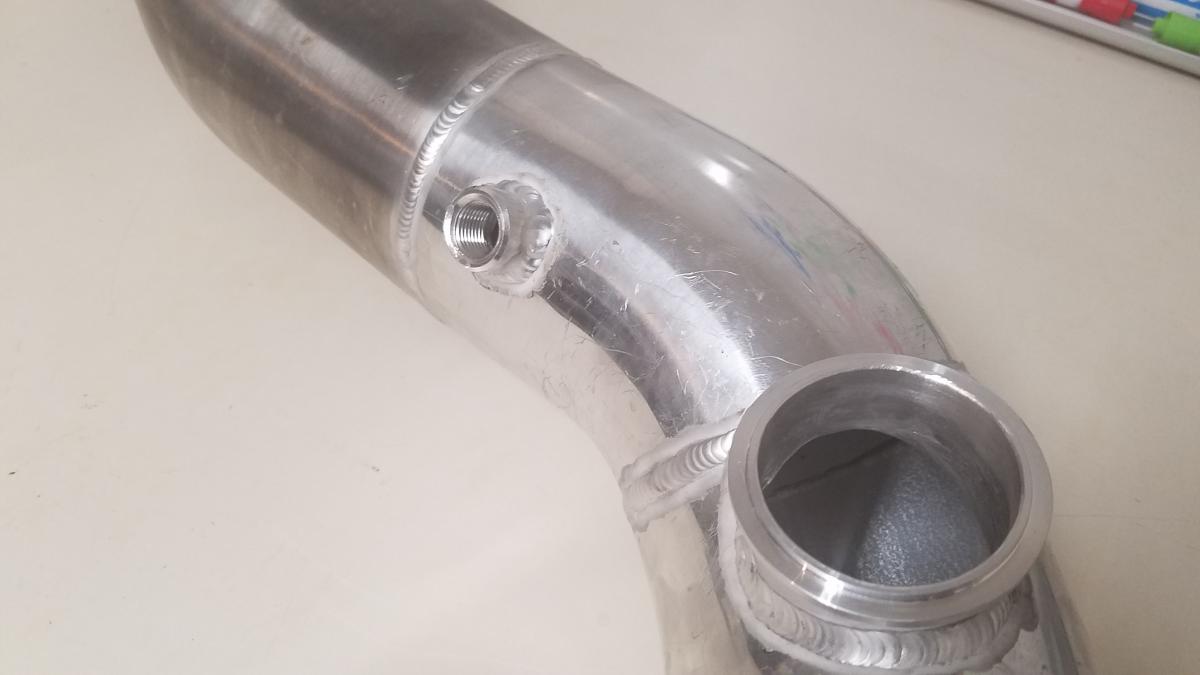
Now a issue I ran into with the fuel hose included with my Walbro 450 & fuel hose I found at autoparts stores it was only rated for E85 internally. The exterior was NOT. I used Gates 27097 Submersible 3/8in Fuel Hose. Which is fully E85 submersible. At most of my local parts store it's basically 32$ per ft. Amazon had it for 21$ per ft. The Walbro 450 was installed on to the fuel basket. The Walbro 450 have 10ga positive & negative wires to the fuel hat. (Walbro said the wires in the tank are sufficient for the short run they have. The problem is outside the tank is where most run too small of wire for too far causing voltage drop.) I also Cleaned up my sending unit using white vinegar. The Walbro 450 is assisted by a Magnafuel 4303 external fuel pump. The 4303 is fed using the -12an fitting on the surge tank. A 100micron stainless steel fuel filter is used pre pump & a 10micron stainless steel post pump. Per Magnafuel's recommendations. As for the wiring 6awg was used for both positive & ground. (Note I do plan on making brackets to support the fuel filter too but the parts didn't come in time for this update) Fragola PTFE fittings & 6000 Series PTFE Lined stainless hose with black covering was used for every hose assembly in my fuel system. -10an was used for post pump side up to about 1ft away from the passenger side firewall. At this point it splits into 2 -8an hoses to feed the F.A.S.T fuel rails. The banks continue to stay separated all the way to the Magnafuel MP9950B-BLK FPR. A -8an return from the FPR makes its way back through the B&M 70298 Hi-Tek 10in x 7-1/2in Heavy-Duty Cooler paired with 350cfm Spal Fan. Then the into the surge tank. Which has a -8an overflow returning fuel to the stock tank. To measure fuel pressure I added Marshall Instruments CWB00100 Liquid Filled Fuel Pressure Gauge directly to the FPR. (I plan to add a sensor for dataloging) Here's pics of fuel system along with a diagram I made depicting how it's laid out.
-
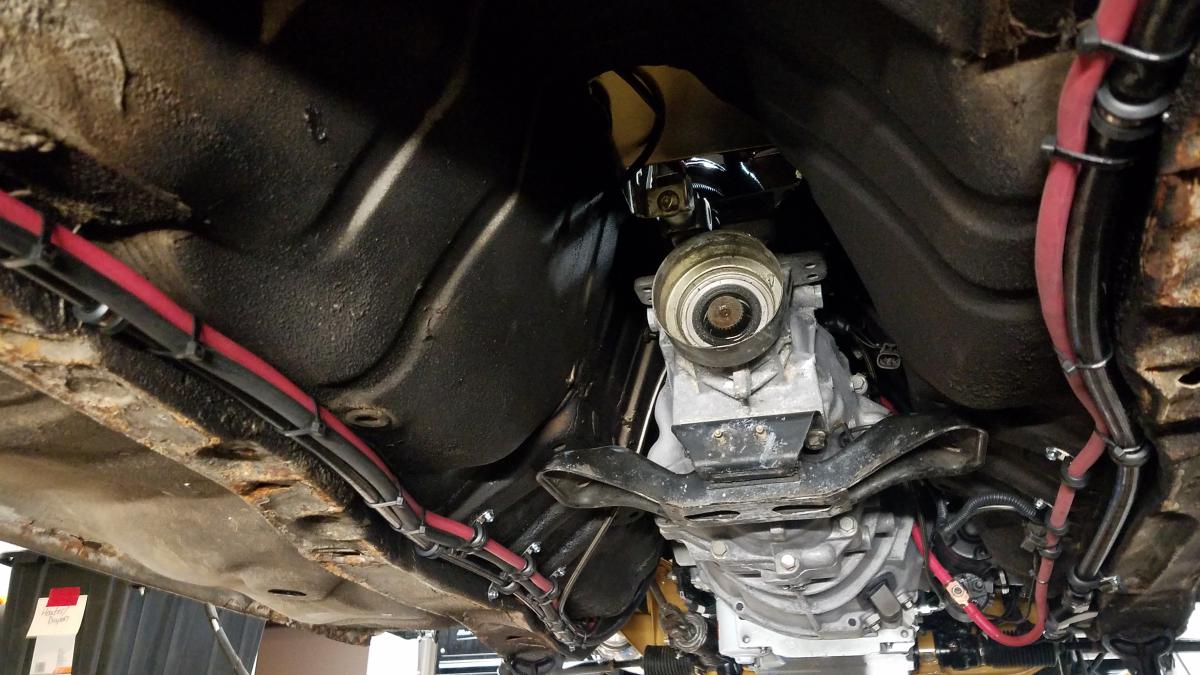
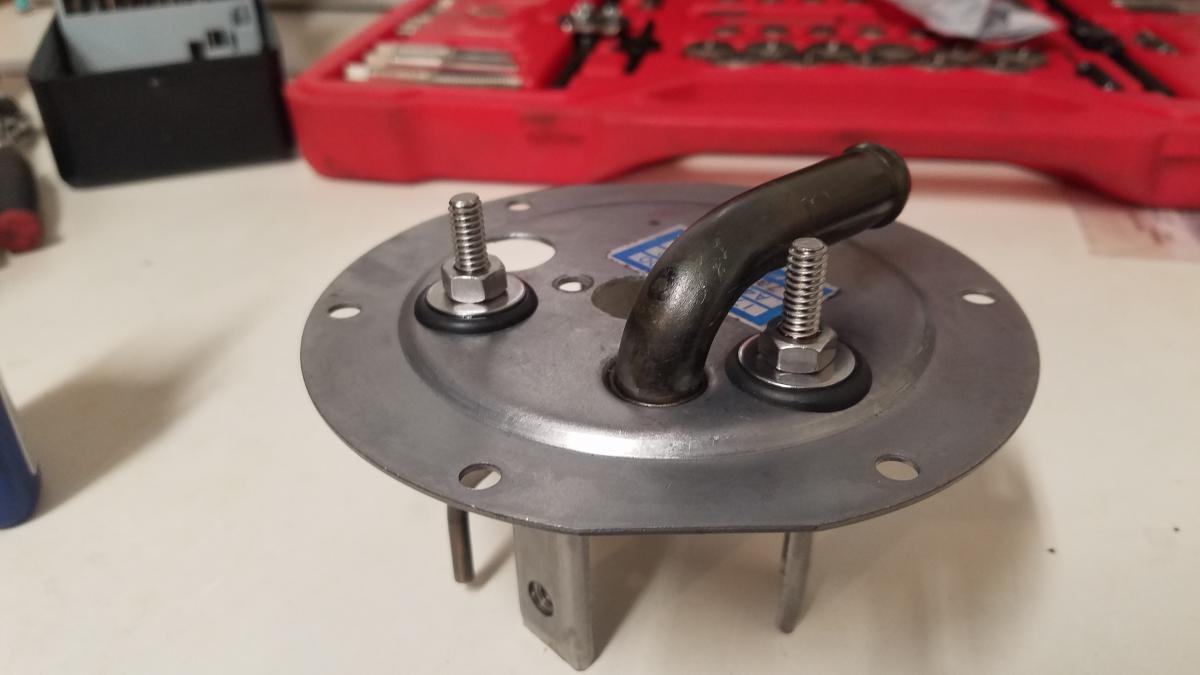
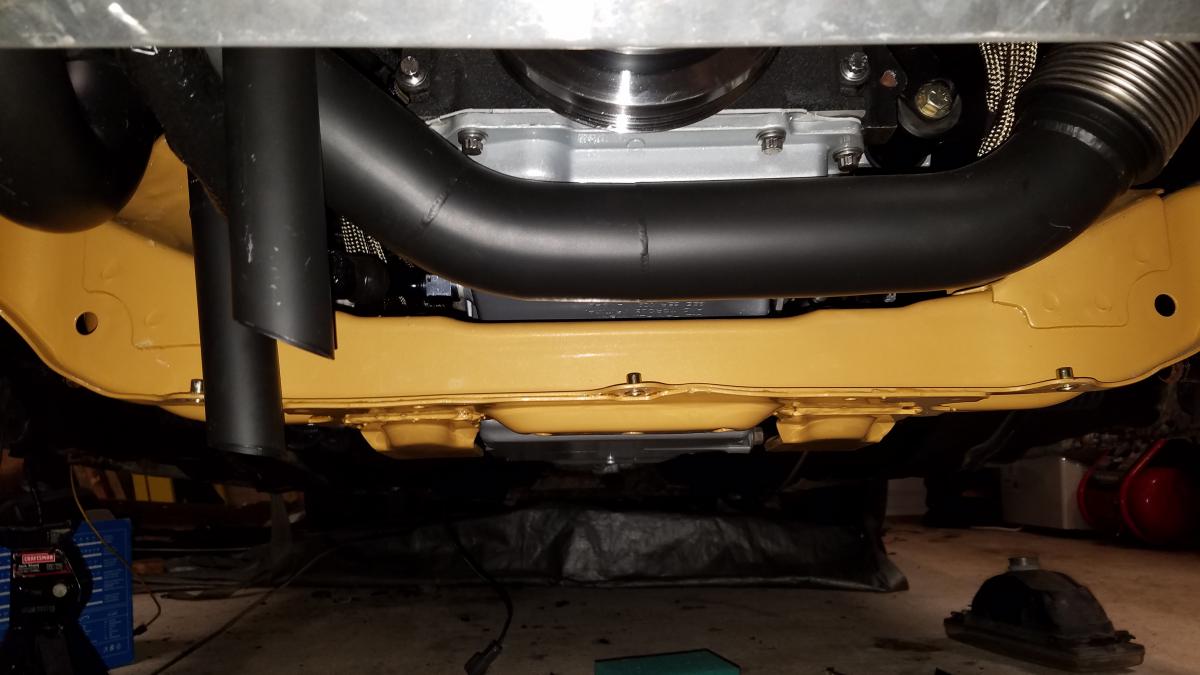
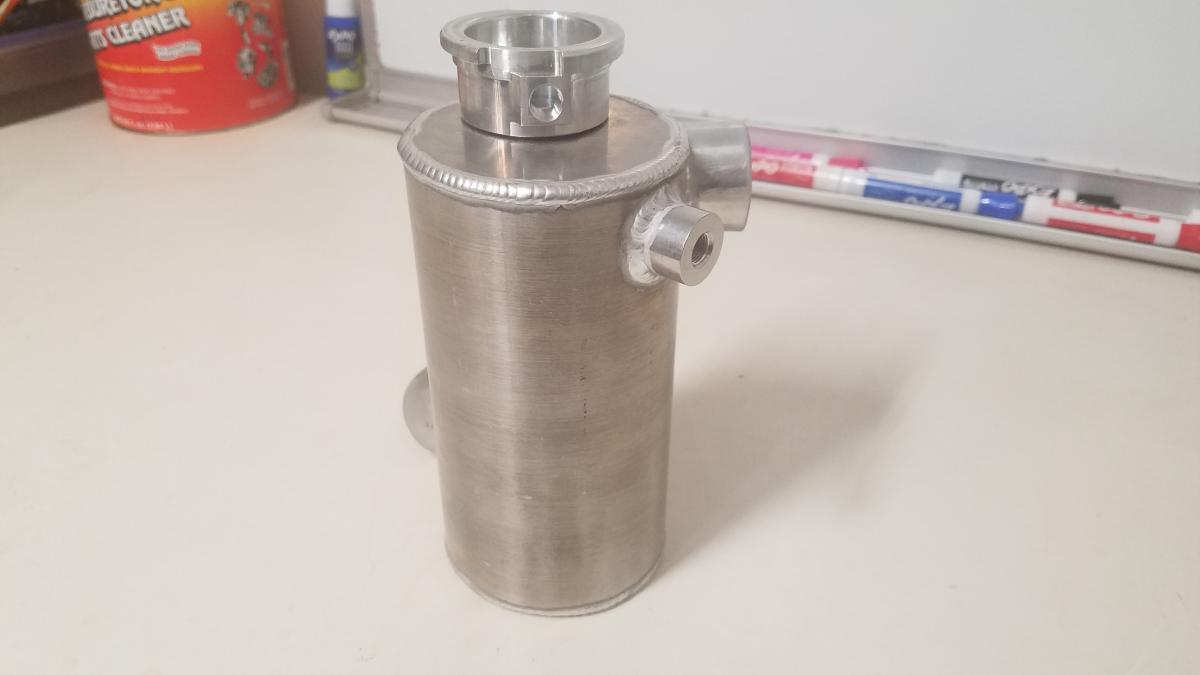
To fit the surge tank I cut out the entire tool tray are which had succumbed to "typical" Z31 rust which is highly common in that area. ( I still have plenty of sheet metal work to do. It'll be covered in future updates). The surge tank would need something to feed it, so a Walbro 450 was chosen to be installed in the tank. Thought it would be best to have full -8 in & out. PTFE washers & Gasoila E-Seal Pipe Thread Sealant with PTFE Paste was used to ensure a good seal.(pics of bulk head in next section). I was having trouble finding small wiring bulkhead terminals. The only place I found that carried some was in Australia. My quote with shipping, tax, & customs fees was almost 90$. Couldn't bring myself to pay that for basically 2 bolts. So I made my own. In the pic I included the Lowes part numbers I used. (None of my local Homedepot stores carried all the parts I used)
-
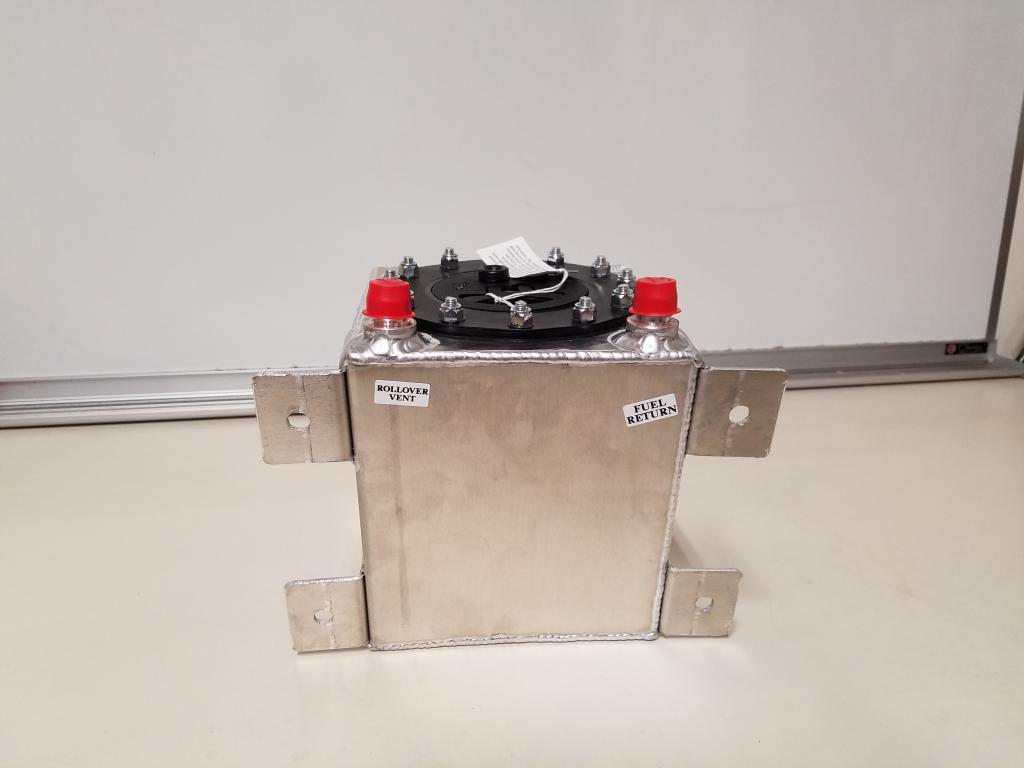
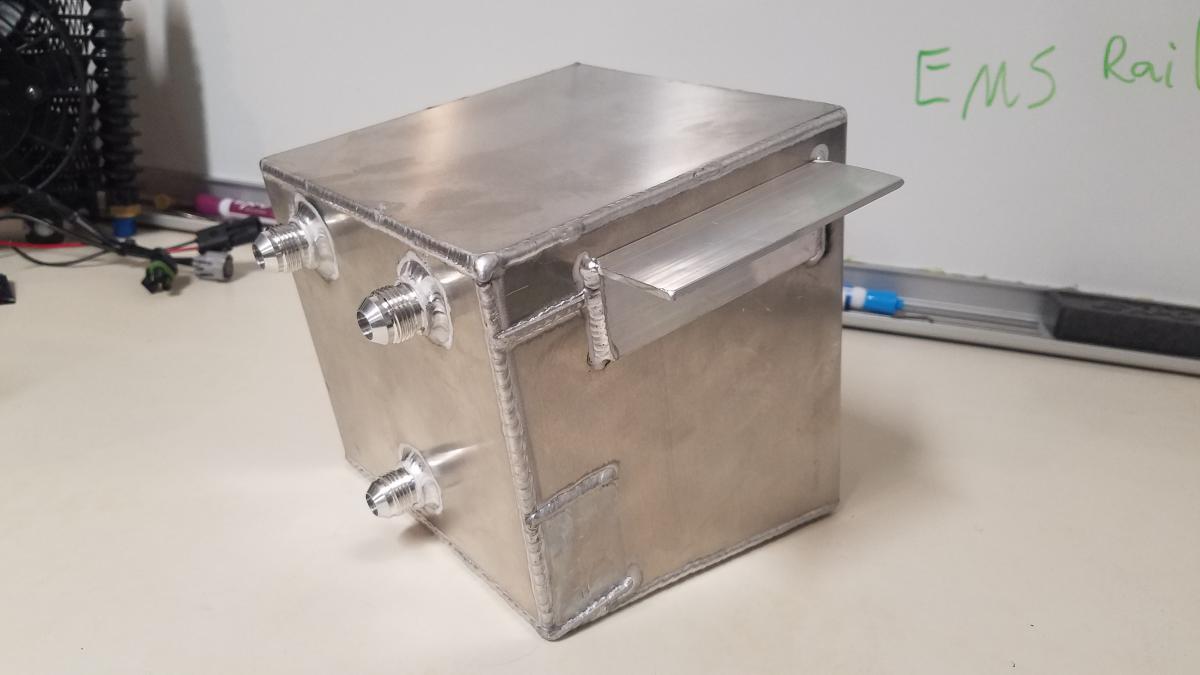
While waiting on the fuel tank I continued to make progress. I drew up a few rough drafts on paper, then chose the "best" option in my eyes. I was adamant about retaining the stock fuel tank & filler neck. So I chose to run a "surge tank" setup. Dual pumps wouldn't fit my fuel basket. The risk of having a pump fail under WOT causing a lean condition wasn't appealing to me. On the other hand adding a sump to my tank wasn't either. It would mean having my fuel pump hanging down real low. Not wanting to break the bank I started to search around for a budget surge tank solution. None really appeared to meet my "requirements". Until I found a RCI 2010A 1 Gal fuel cell. RCI actually has a Ebay store & the sell certain products in an auction format. I won mine for 12.68 shipped! That's almost 100$ off. It didn't have enough bungs which is no problem. The catch was I didn't know how much psi they were rated for. Well RCI informed me all their fuel cells are rated/tested to 1 psi. No biggy. I already mocked it up & wasn't feeling how far it hung down. So I had planned to shorten it aways. Funny thing was the tank held almost 1.25 gallons prior to modification. Now it holds exactly 1 gal.
-
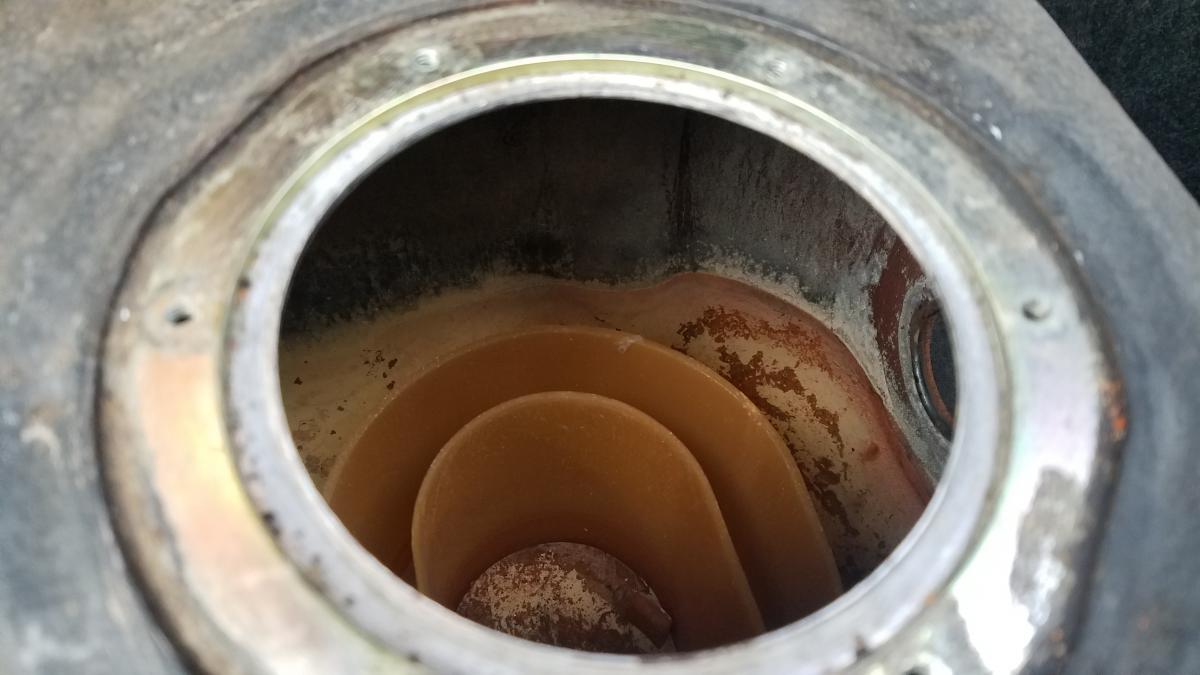
This is a Major update! #1 on the list was finishing up tackling the fuel system. The fuel tank was in need of a cleaning so I took it to a radiator shop for a acid bath, cleaning, & reseal. I was quoted 2-3 weeks. Unfortunately it was misplaced/lost during it's stay. Normally that wouldn't be a problem. But sourcing a good condition fuel tank is getting harder & harder these days. 99% of Z31 parts are NLA from the dealer. They are also becoming scarce at the junk yards. Not that that matters all my local junkyards punch huge holes in all fuel tanks. I went there on my 1st day off once I heard the news. I spent over an hour searching their facility for it. Eventually I found it near a scrap container under a bunch of used radiator cores. (Thank you baby Jesus). At the end of the day I was taken care of/compensated for the hassle.
-
Thanks man!
-
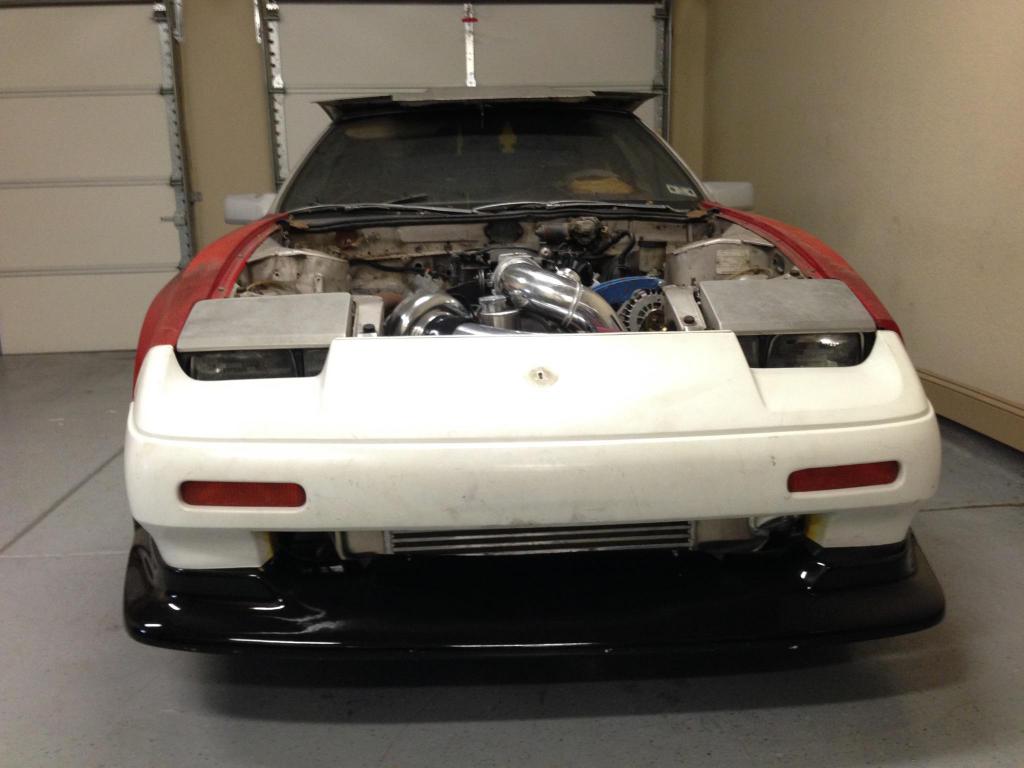
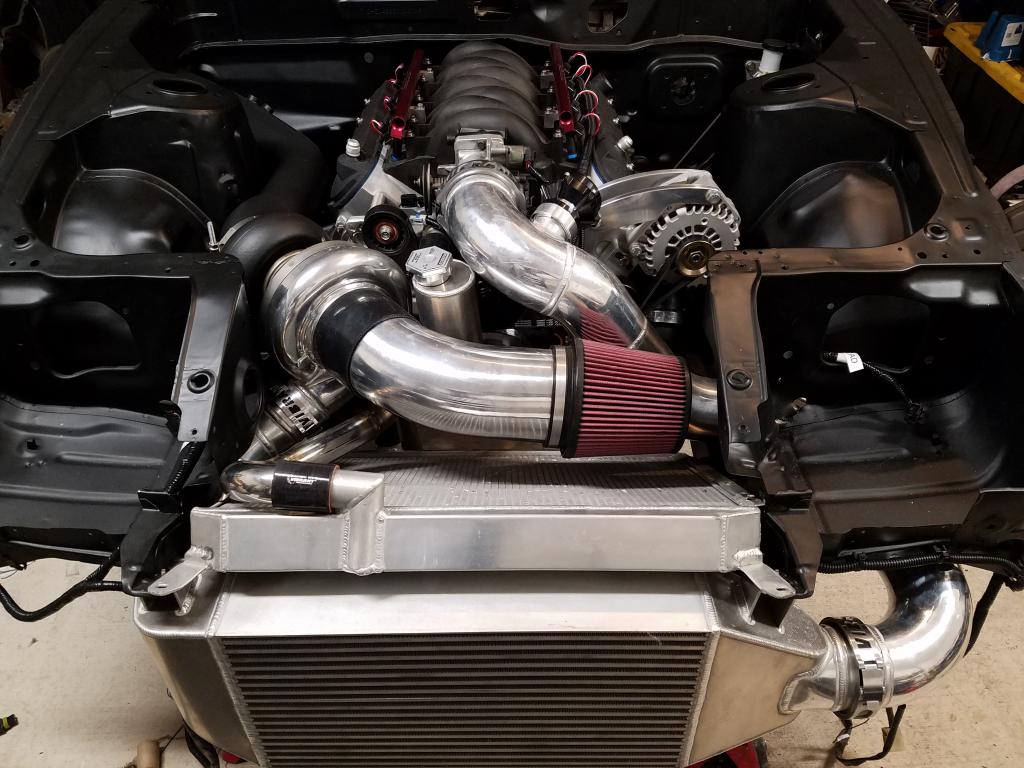
The final item which is small, was finally getting some clamps for my intake tube. I'm intrigued to see what my IAT's will look like. If they're sky high I'll be making some changes. But only time will tell. Thanks to all for following, visting, & commenting on my build thread. Sorry this last update to so long to get posted. I hope to have another pumped out well before summer time. Take care guys & gals.
-
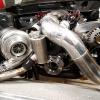
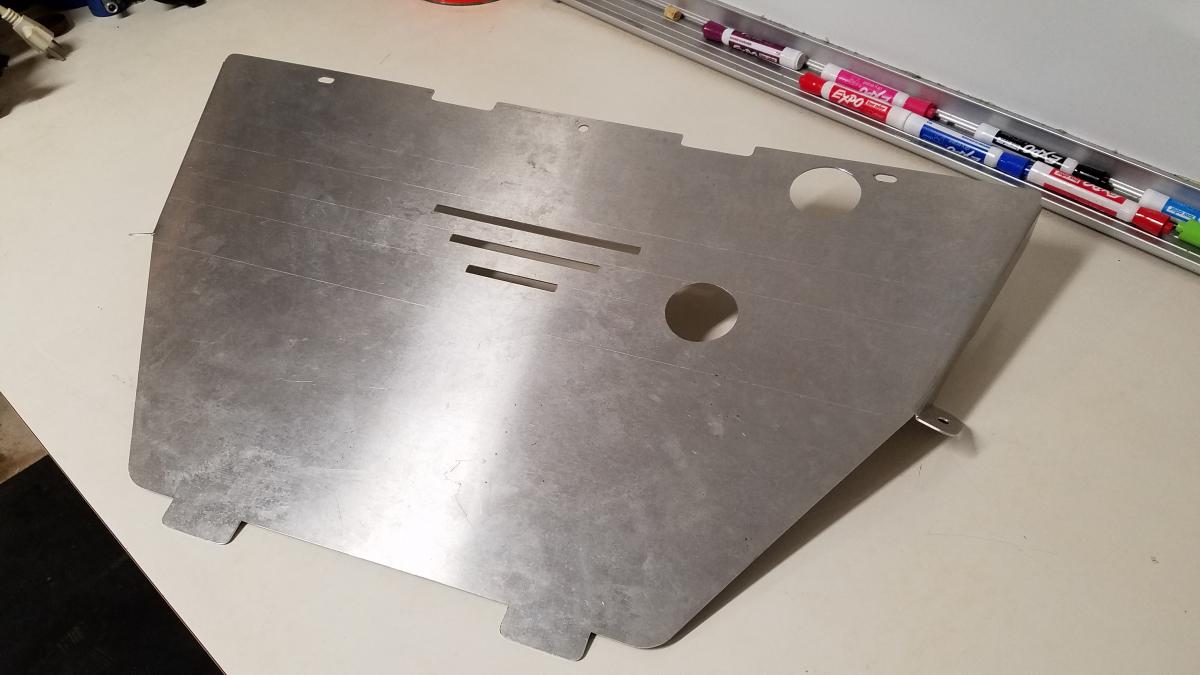
Next thing I got done was the installation of a aluminum splash shield. After some slight modifications to clear my wastegate dumps it fit nicely.
-
I noticed the lack of a dipstick in my engine bay. I don't know why I hadn't noticed earlier. lol I installed a Locking Lokar dipstick. Having seen dip stick blow out a few times I didn't want to take my chances. The price tag seemed excessive for a dipstick but it's a quality product.
-
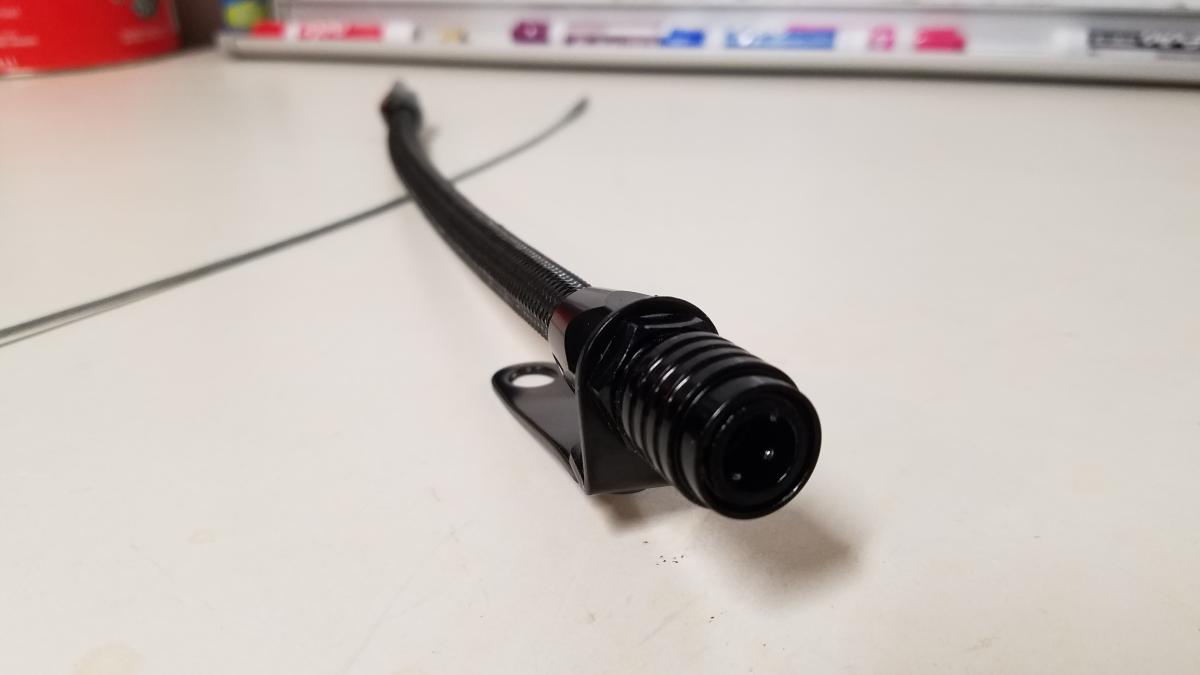
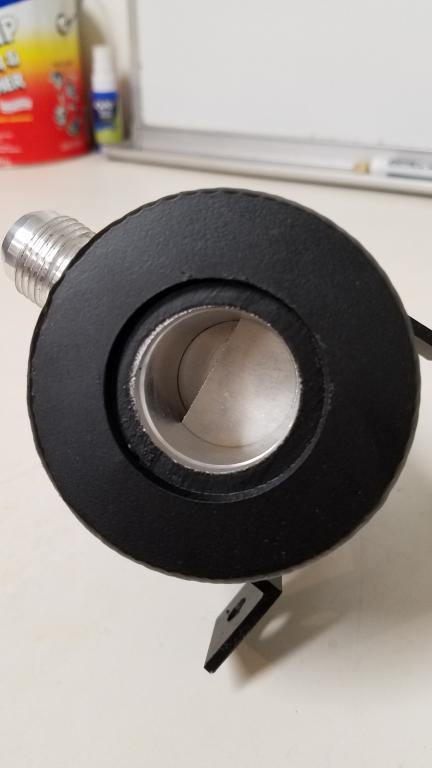
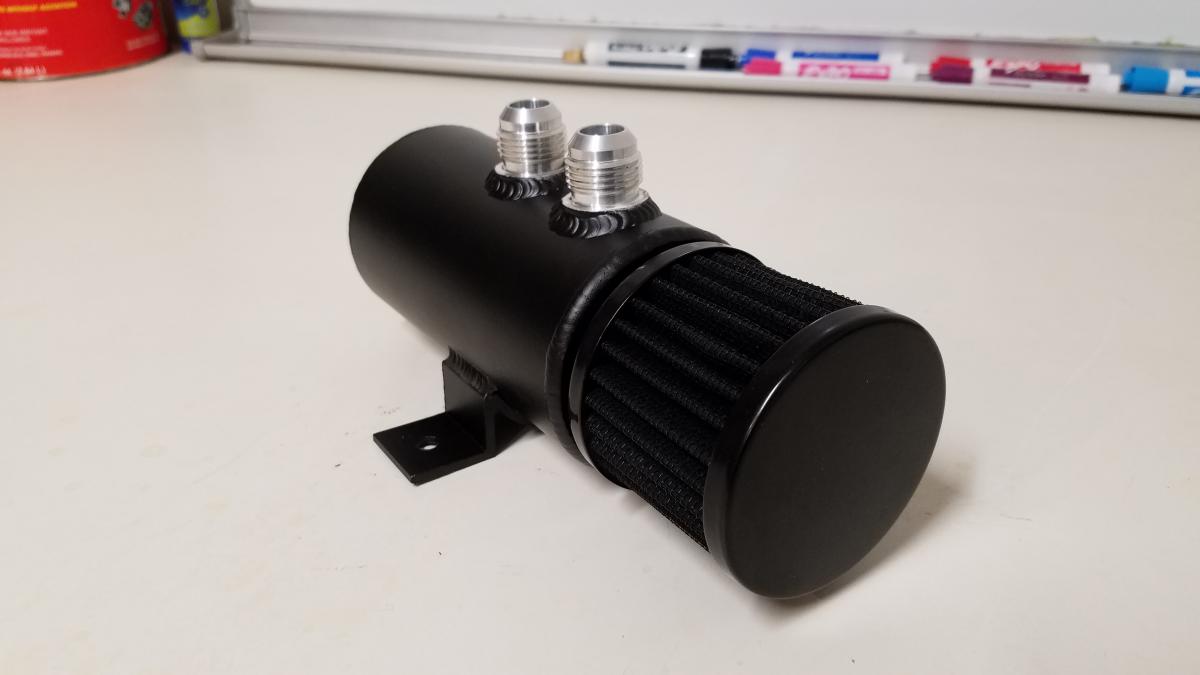
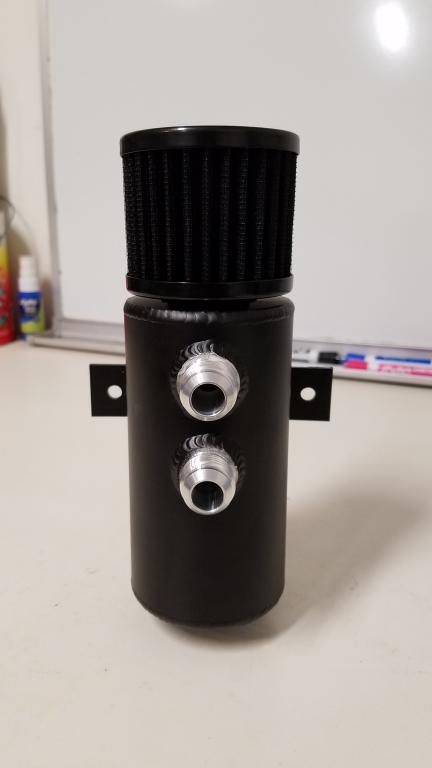
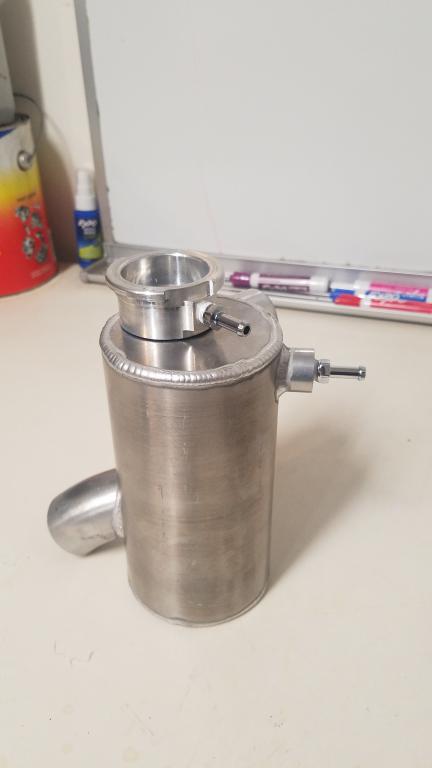
Up next was addressing crank case ventilation with the installation of a catch can.
-
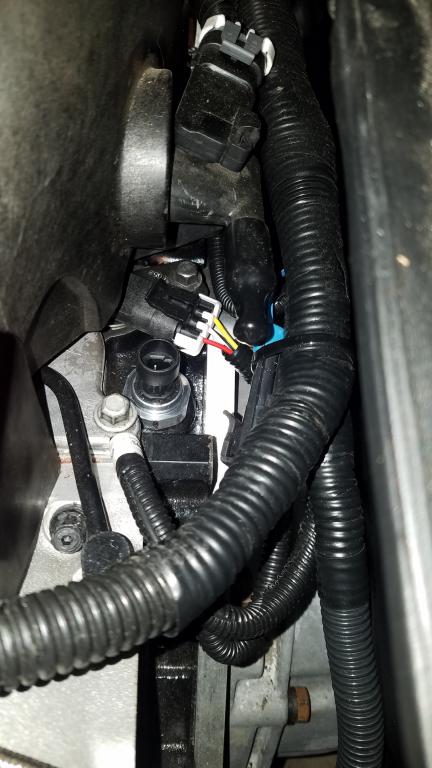
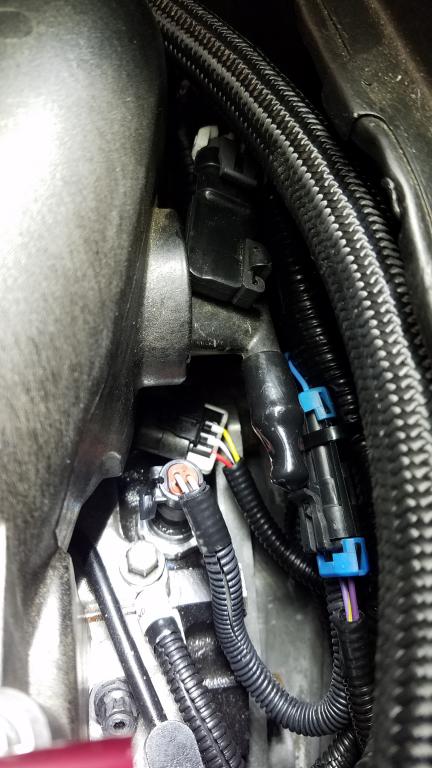
With coolant system out the way I could wire up & install the last few sensors/components.
-
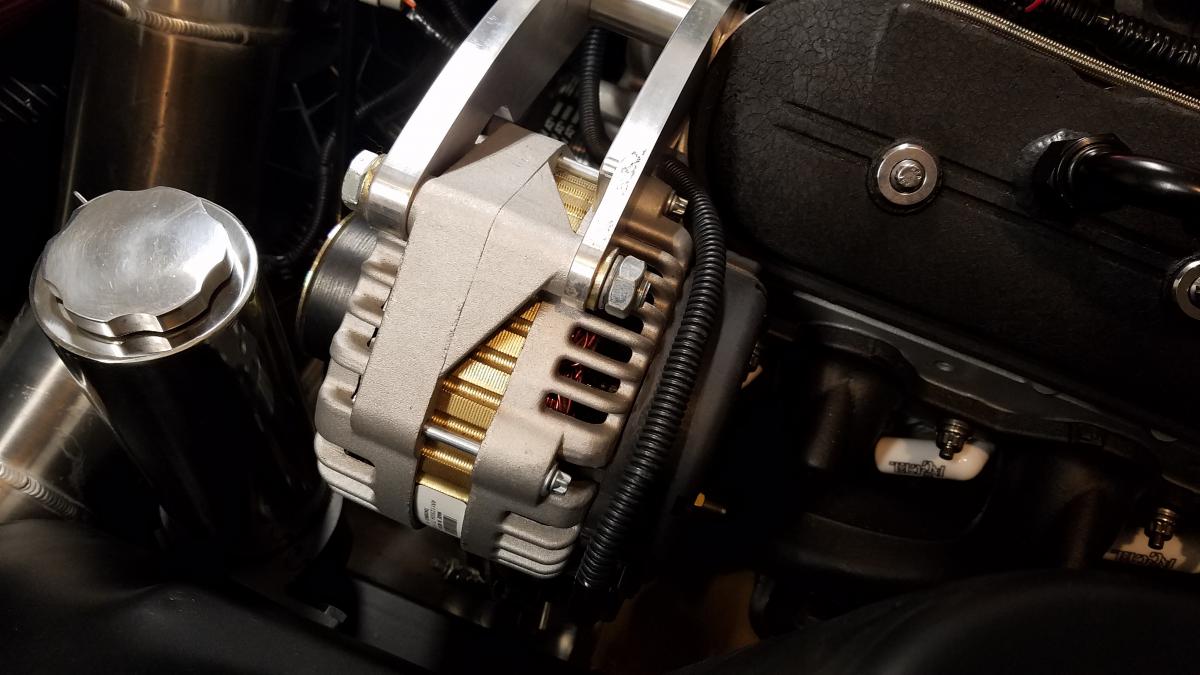
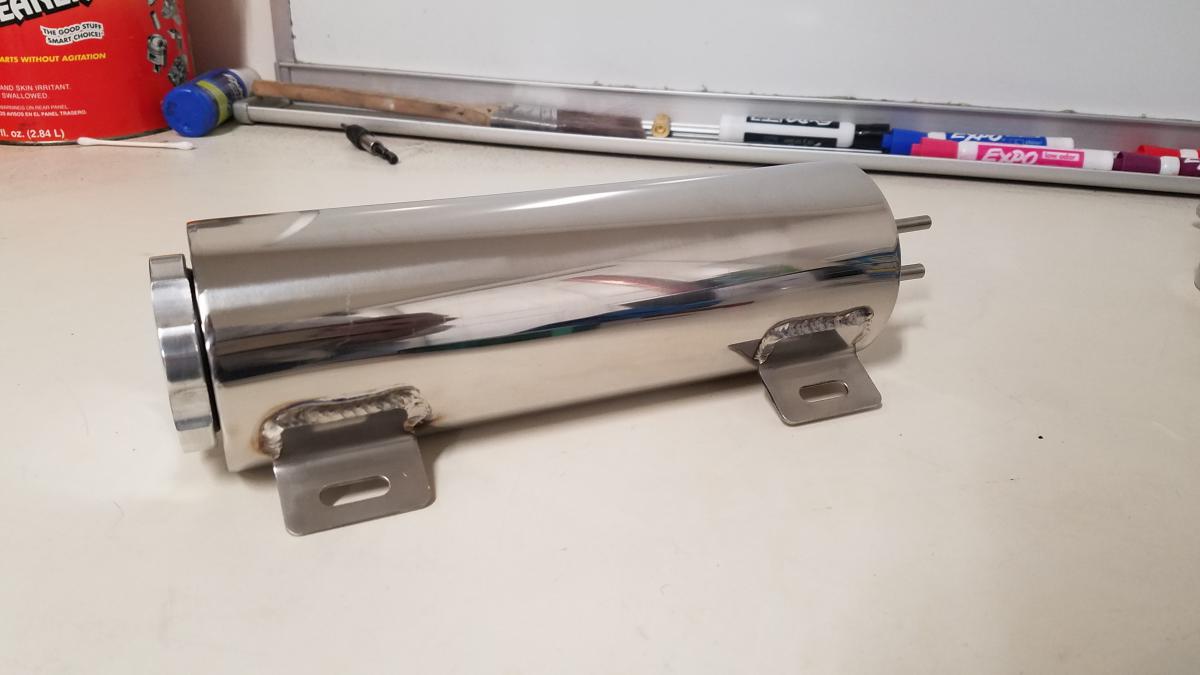
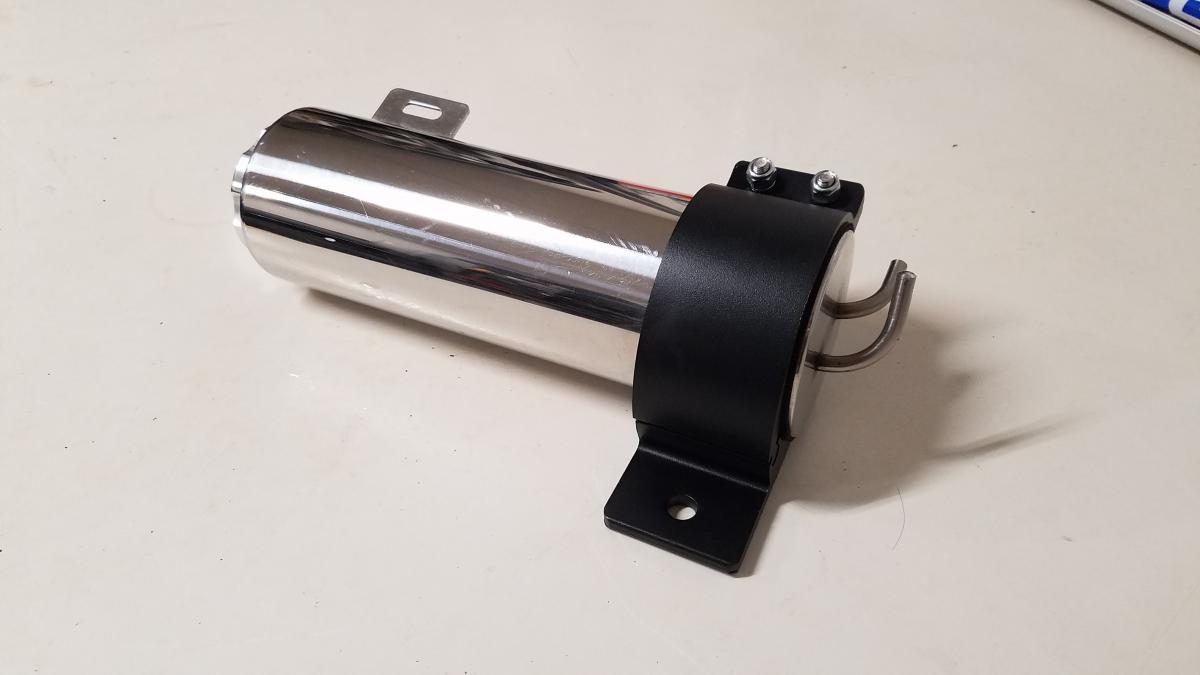
The last couple pieces of the coolant system puzzle was installation of a coolant overflow reservoir & hooking up the steam port vents.
-
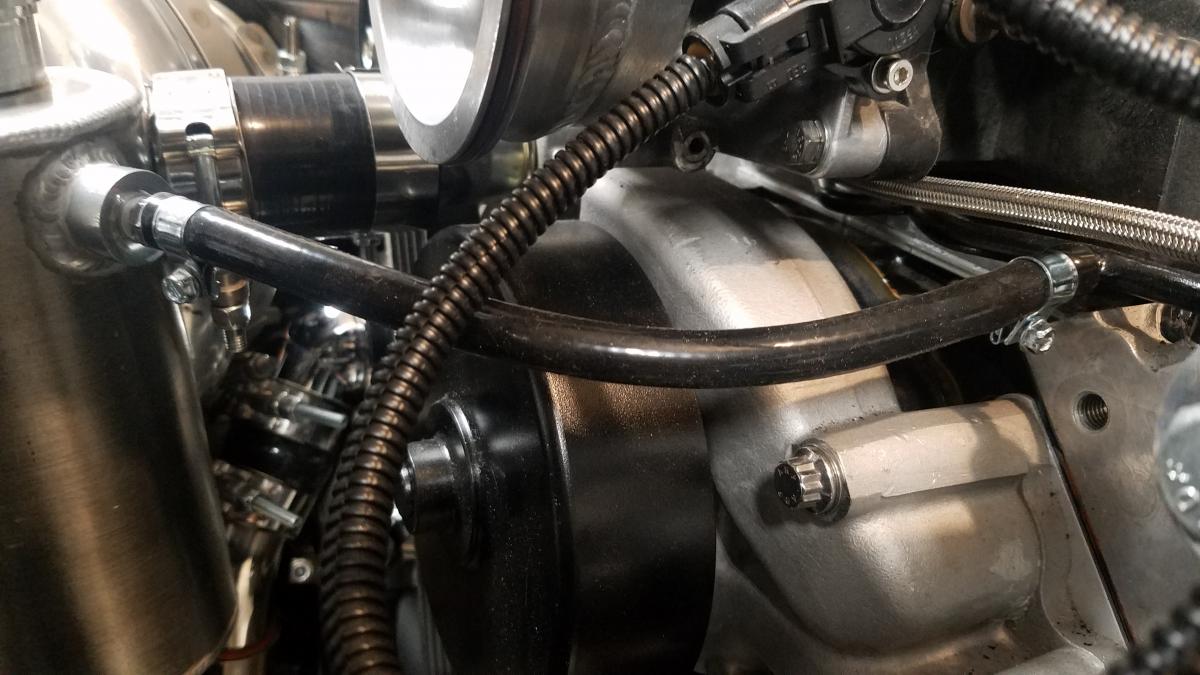
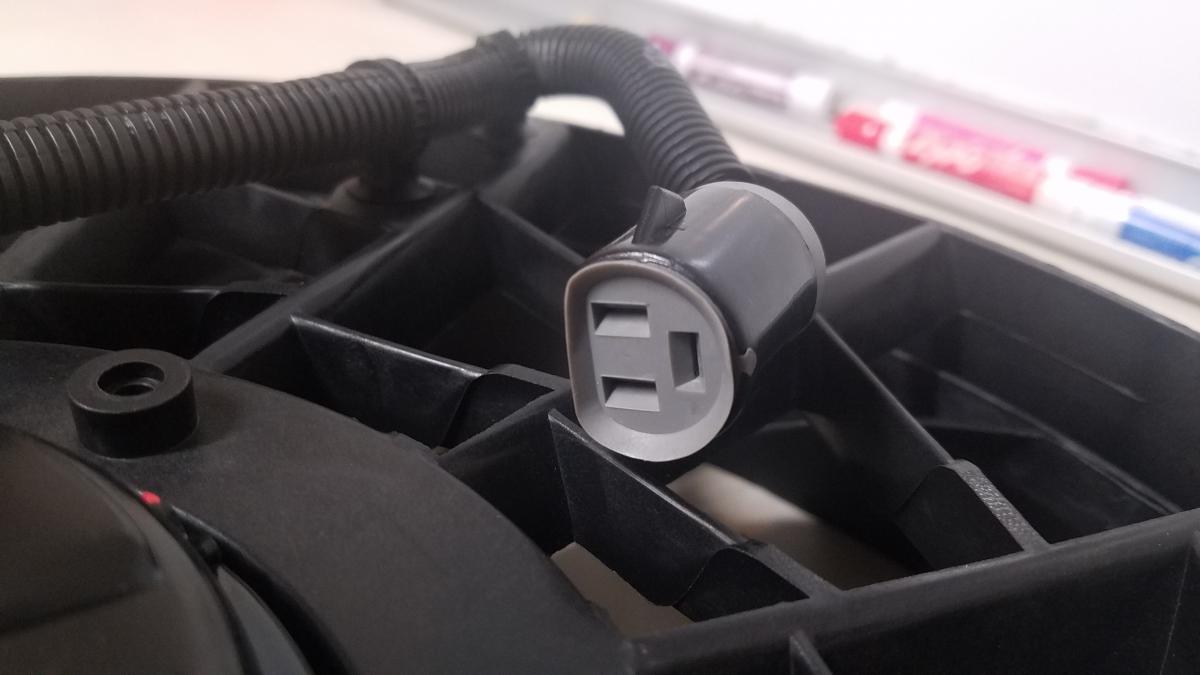
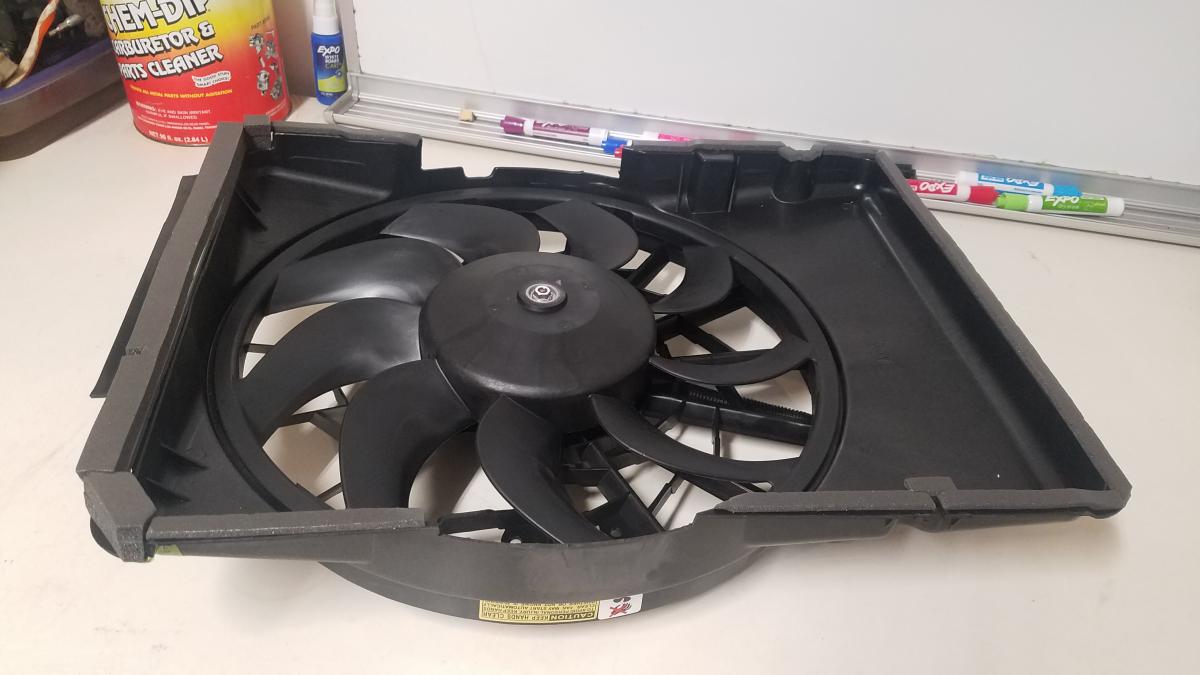
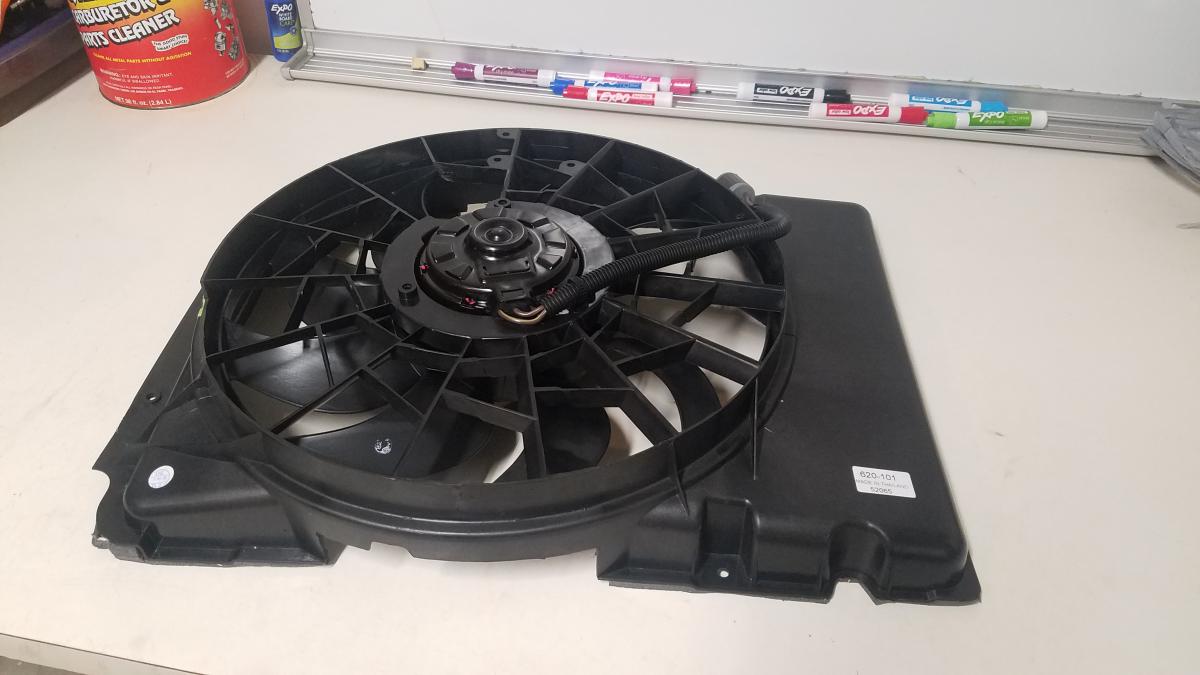
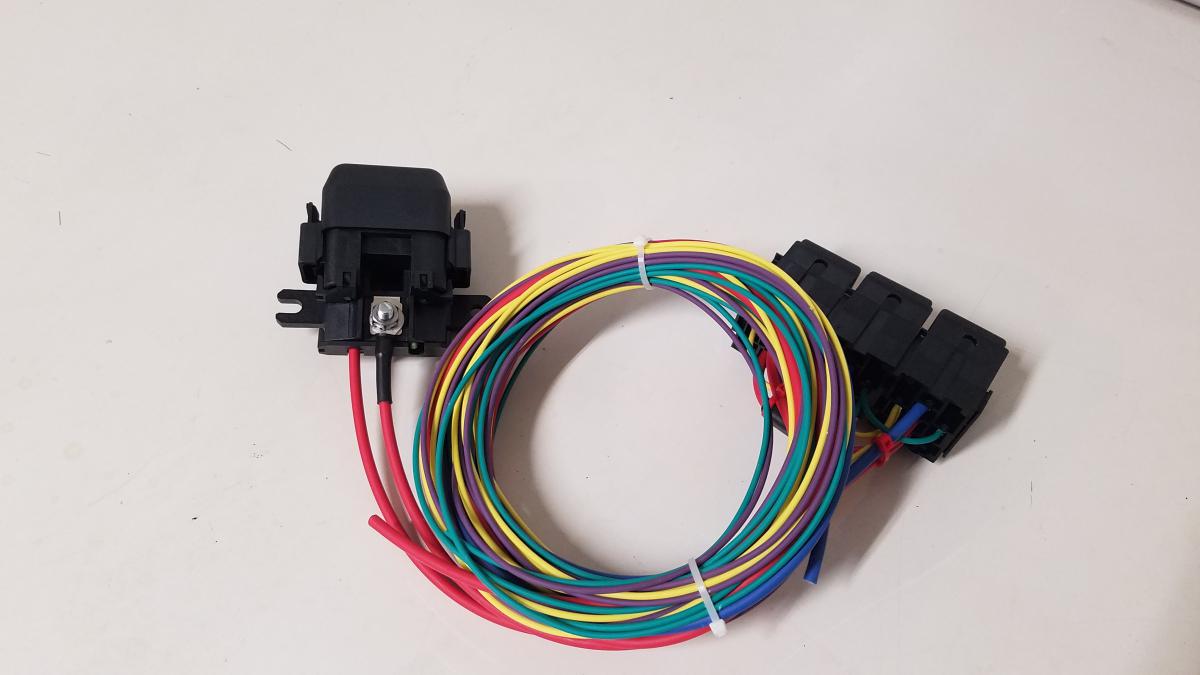
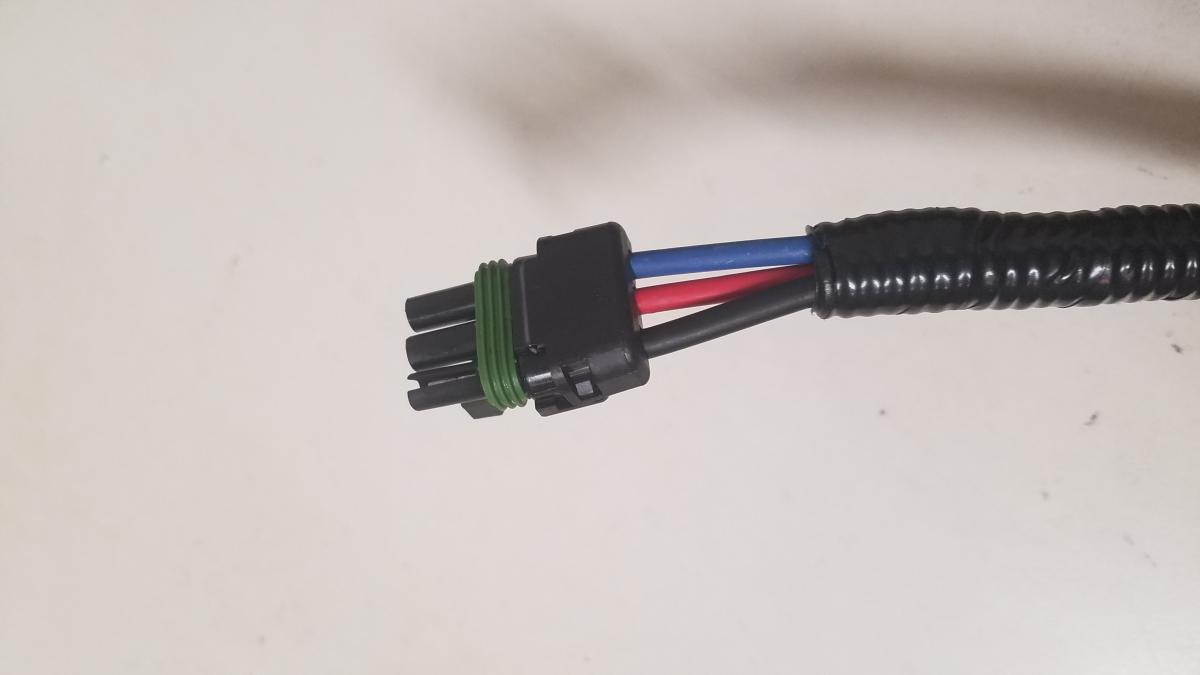
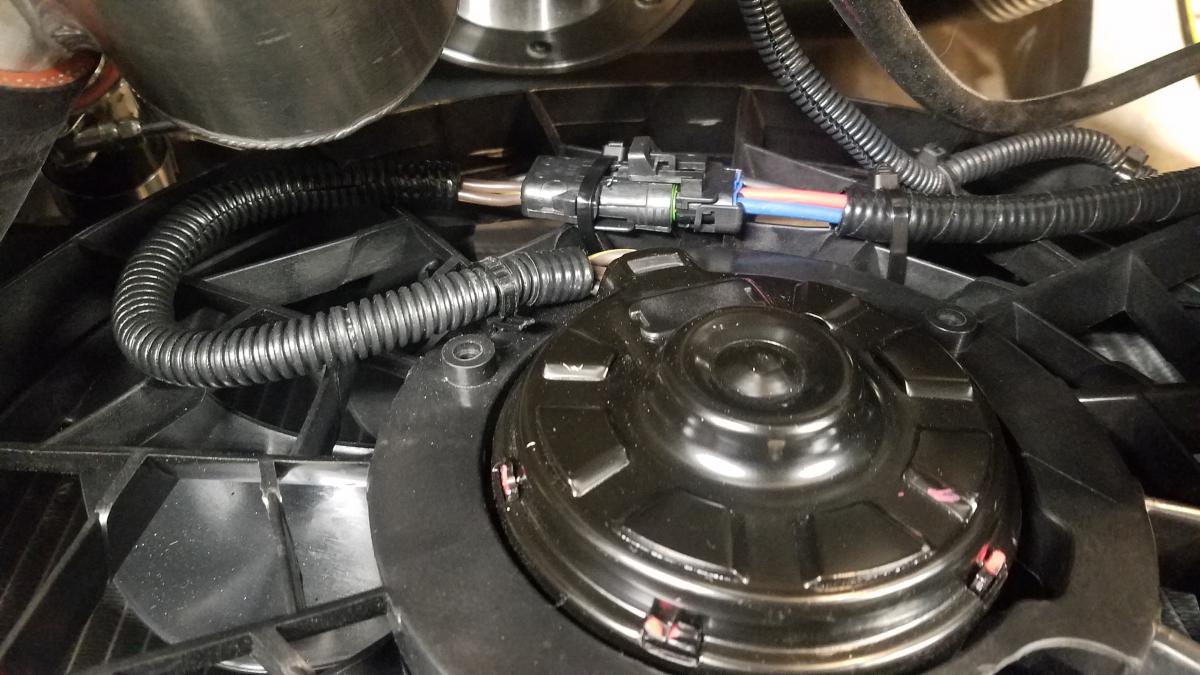
Followed by a Taurus 2 speed electric fan & Hollister Road Co. Relay kit. Had to modify the fan shroud a little bit to fit. It also had a plug you can no long buy the mating connector for. So I opted for a different style weather pack connector. If I have any cooling issues I'll make a replacement shroud the covers more surface area. I'm confident this setup will be more than efficient enough to keep the car cool. I've had great success with this fan in the past.
-
Began focusing on how to keep the engine cool. So I Installed a 186F thermostat & all coolant tubing.
-
Got the IAT & Swirl pot bungs welded up.
-
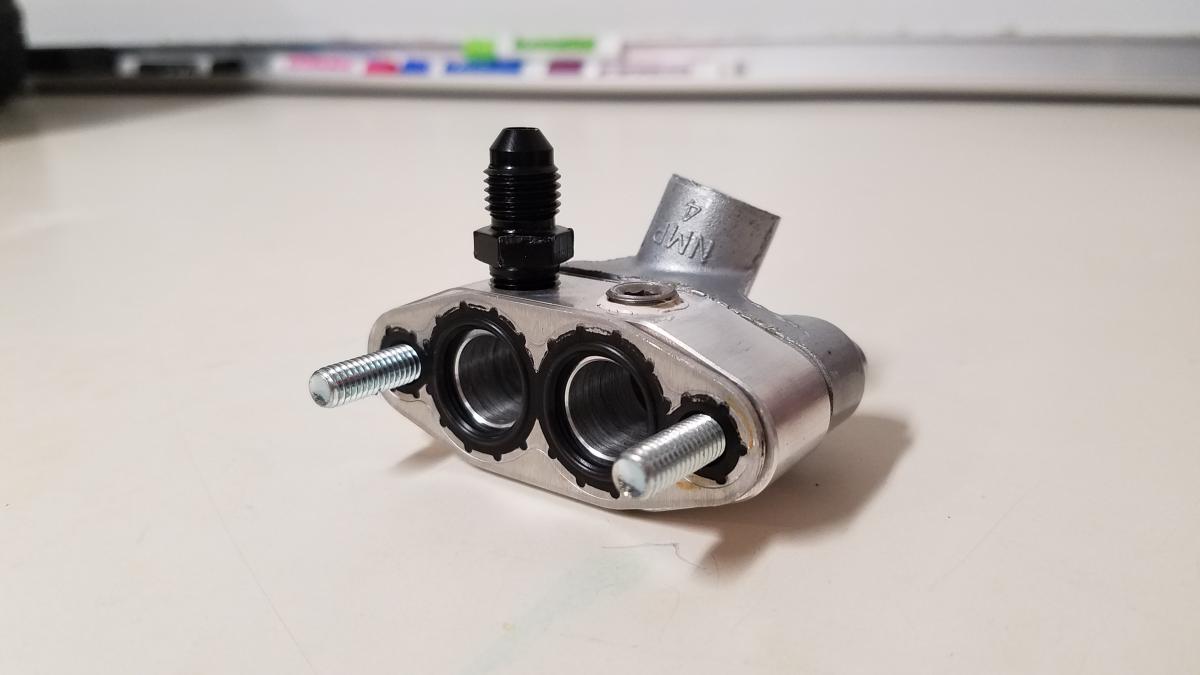
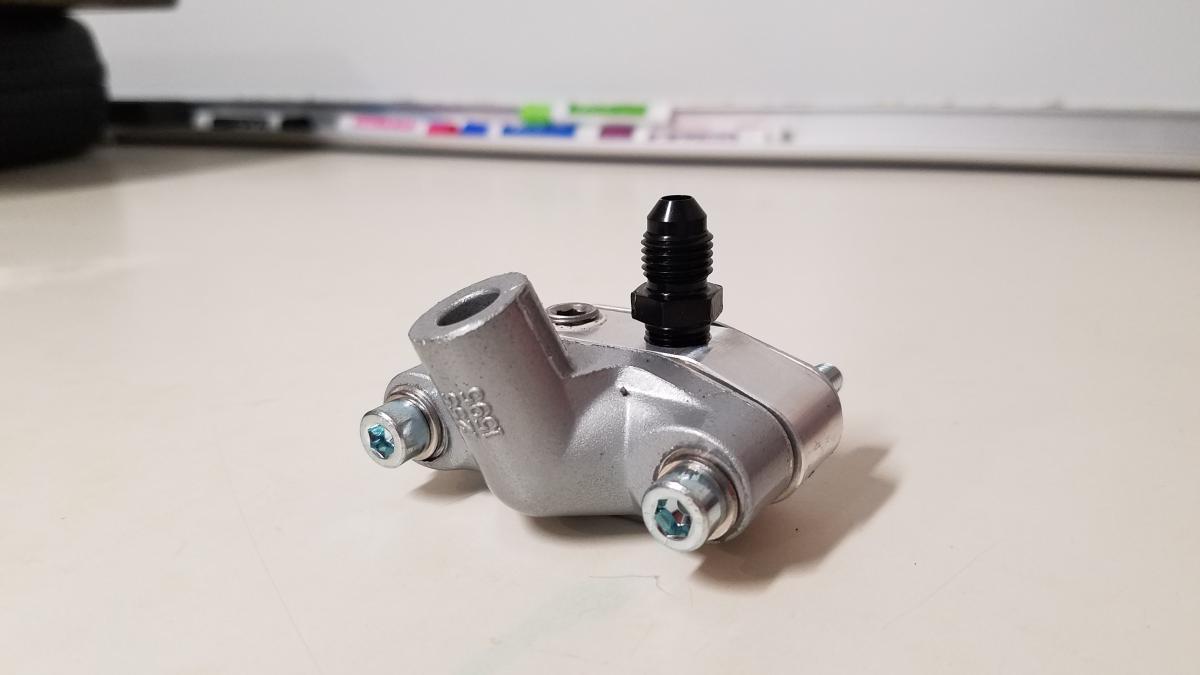
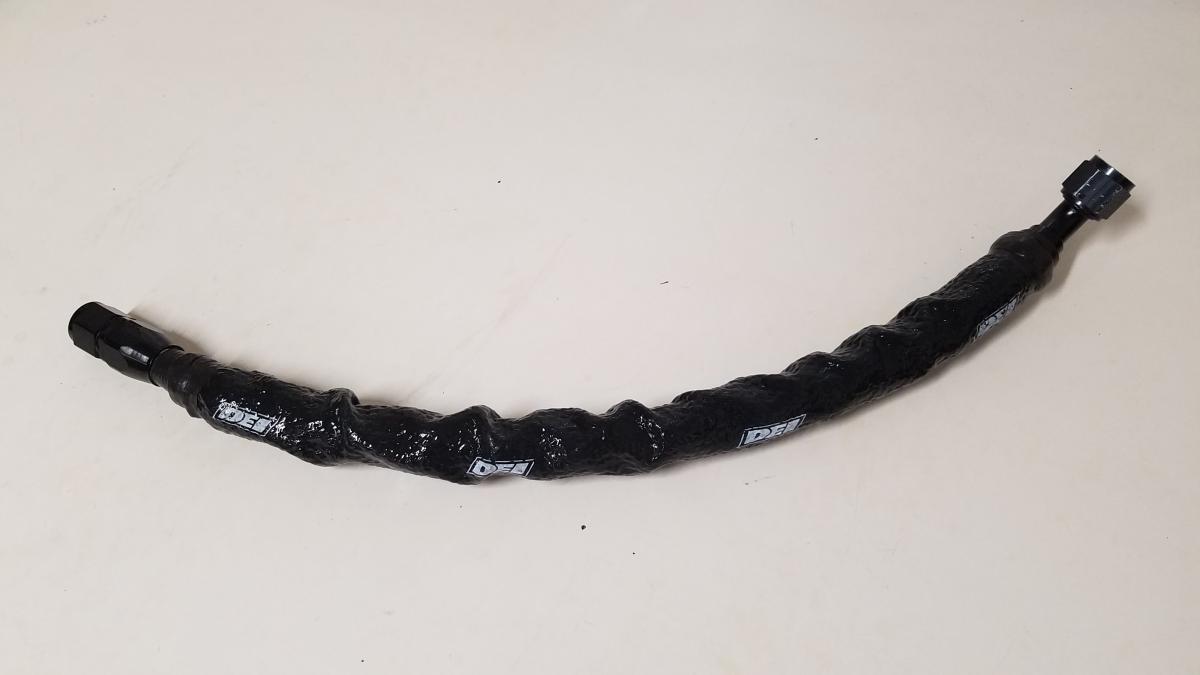
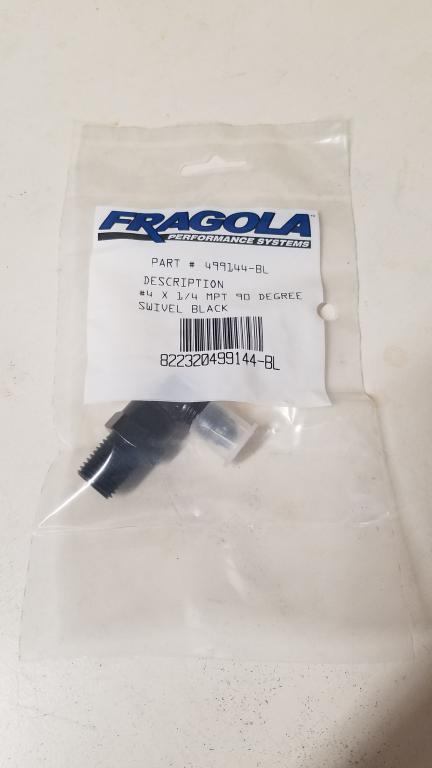
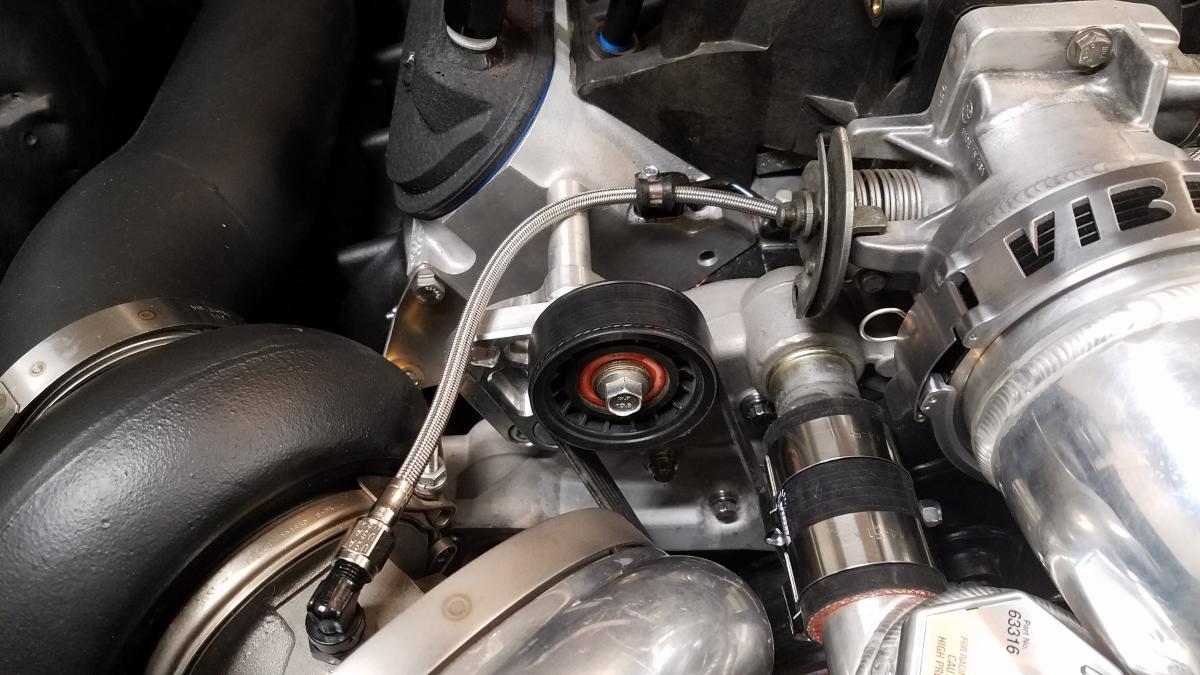
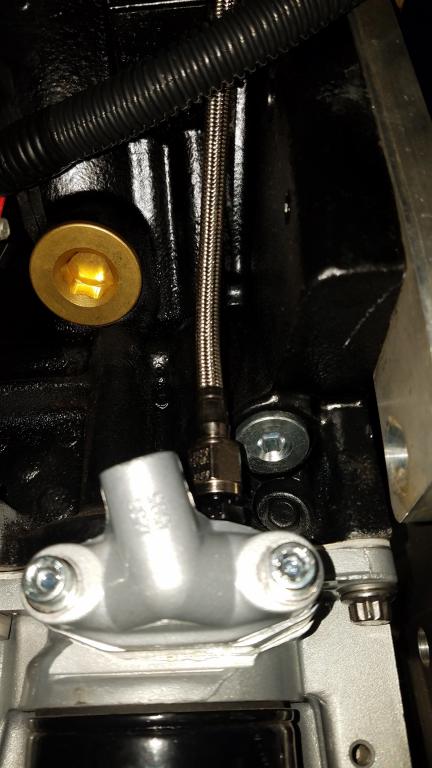
I tackled the turbo feed & drain lines next. DEI Firesleeve was used to protect the turbo drain.
-
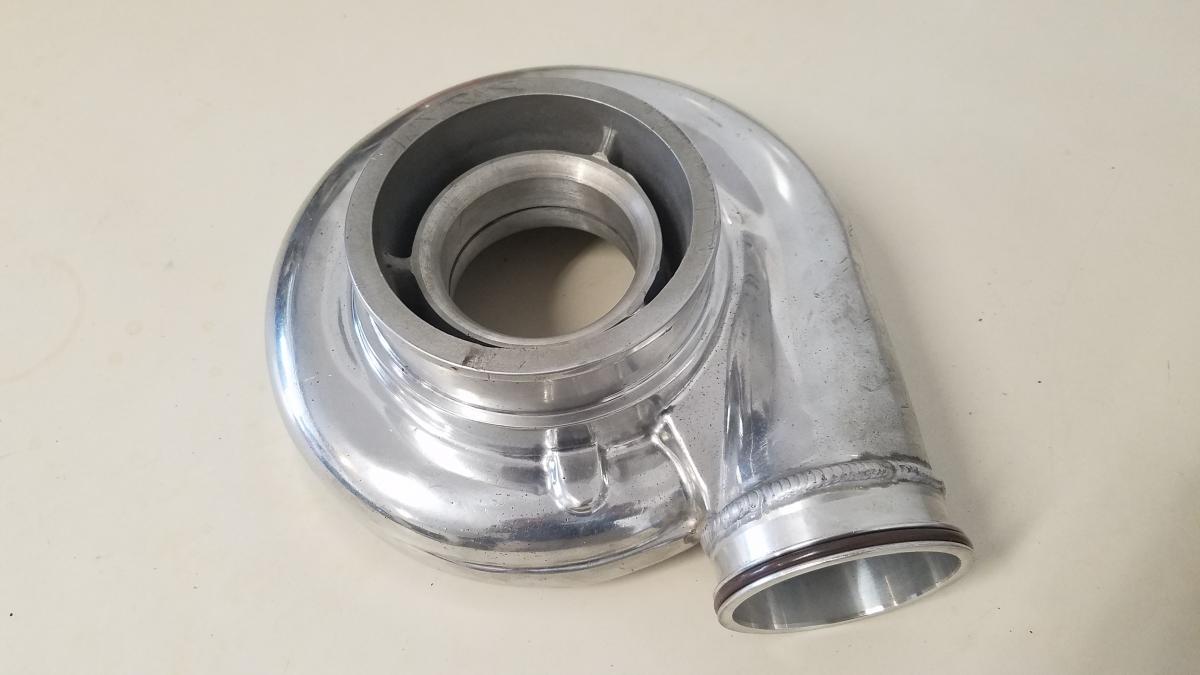
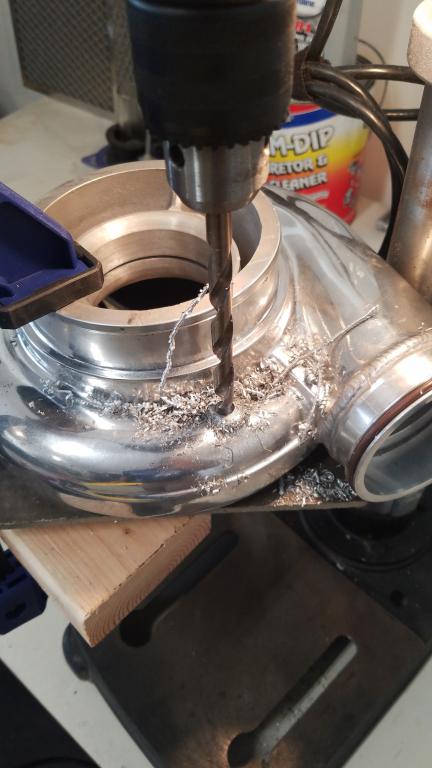
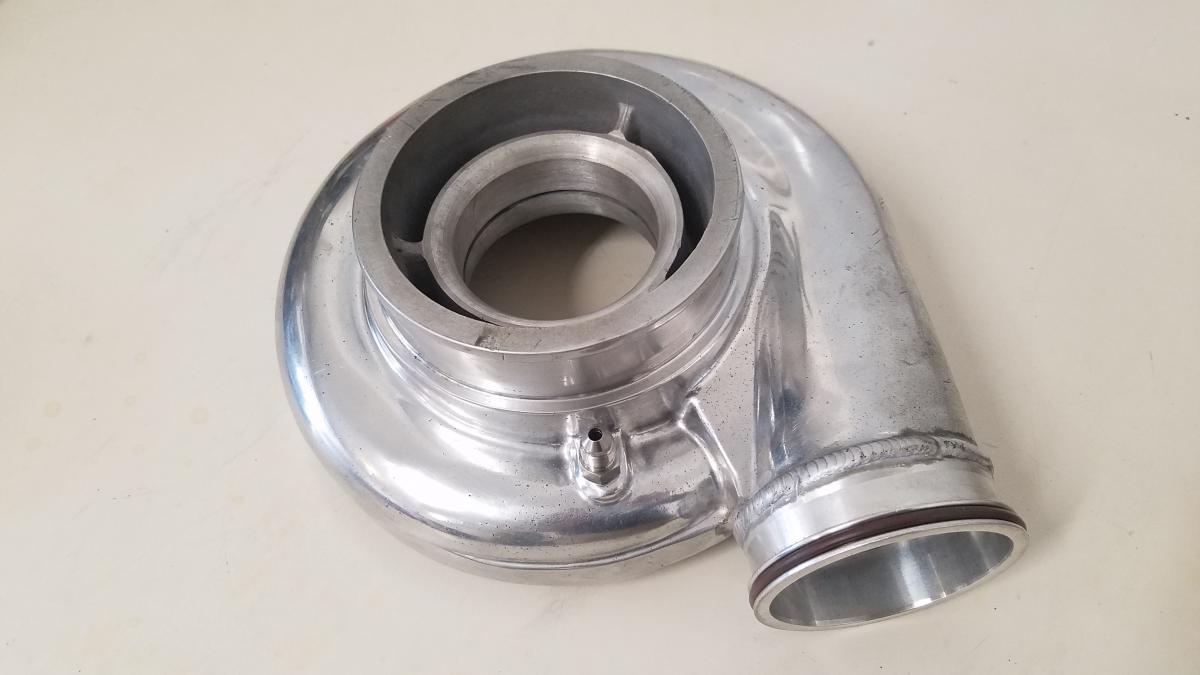
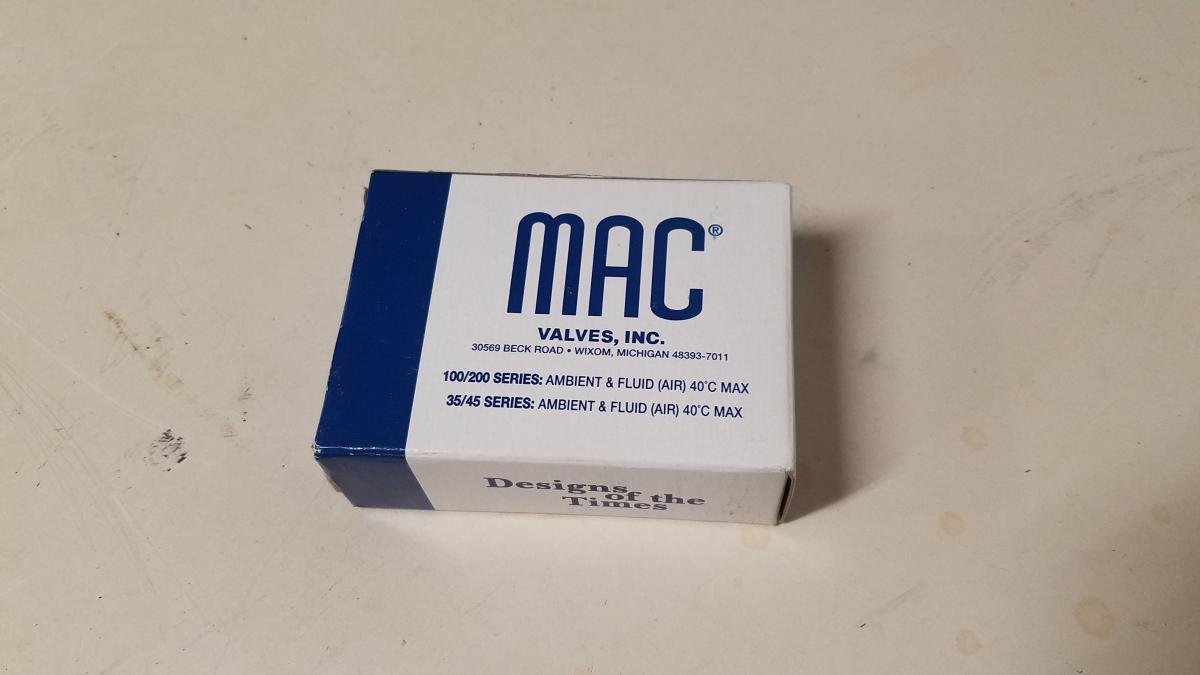
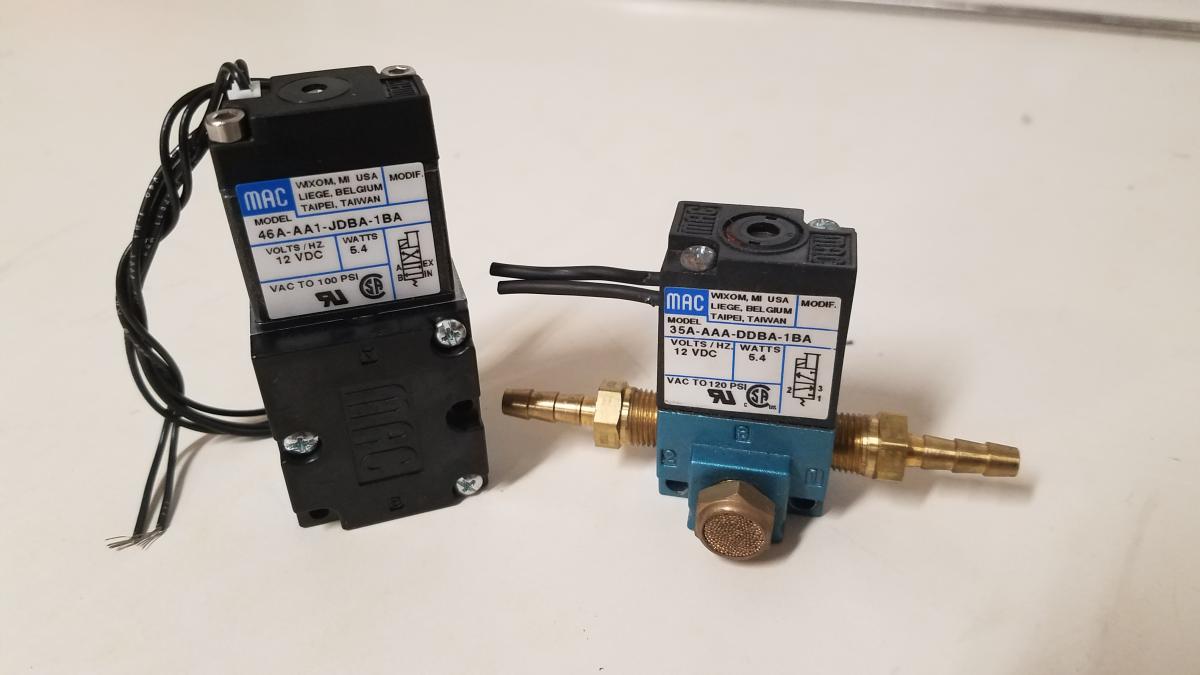
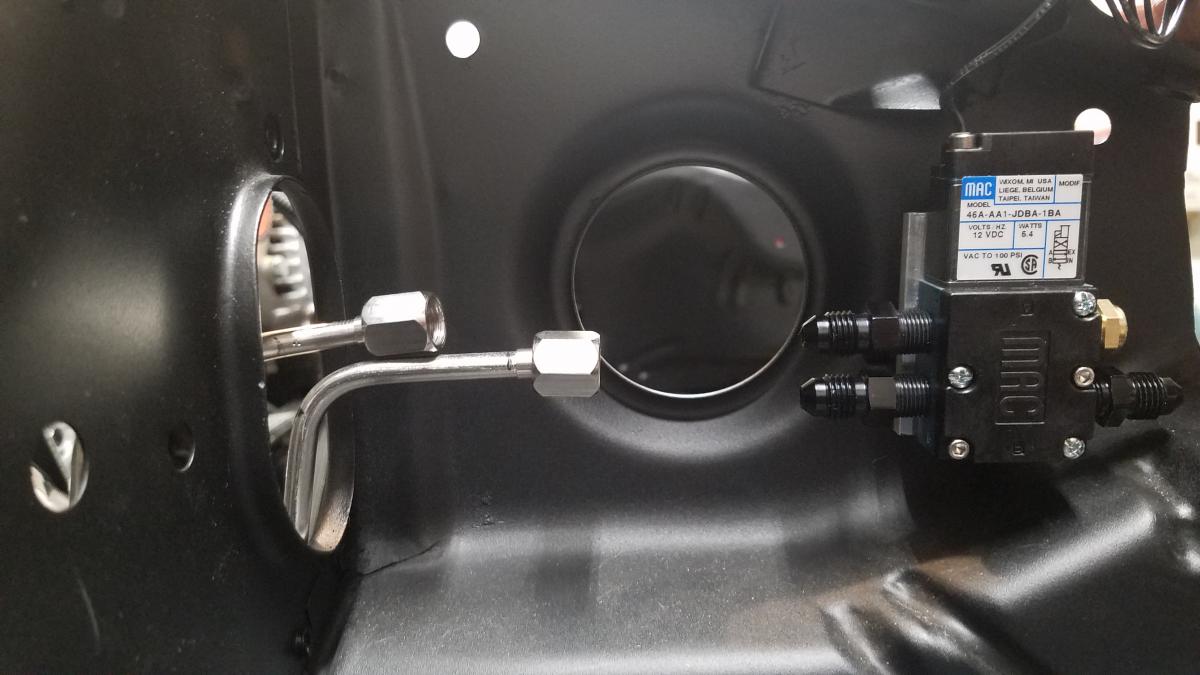
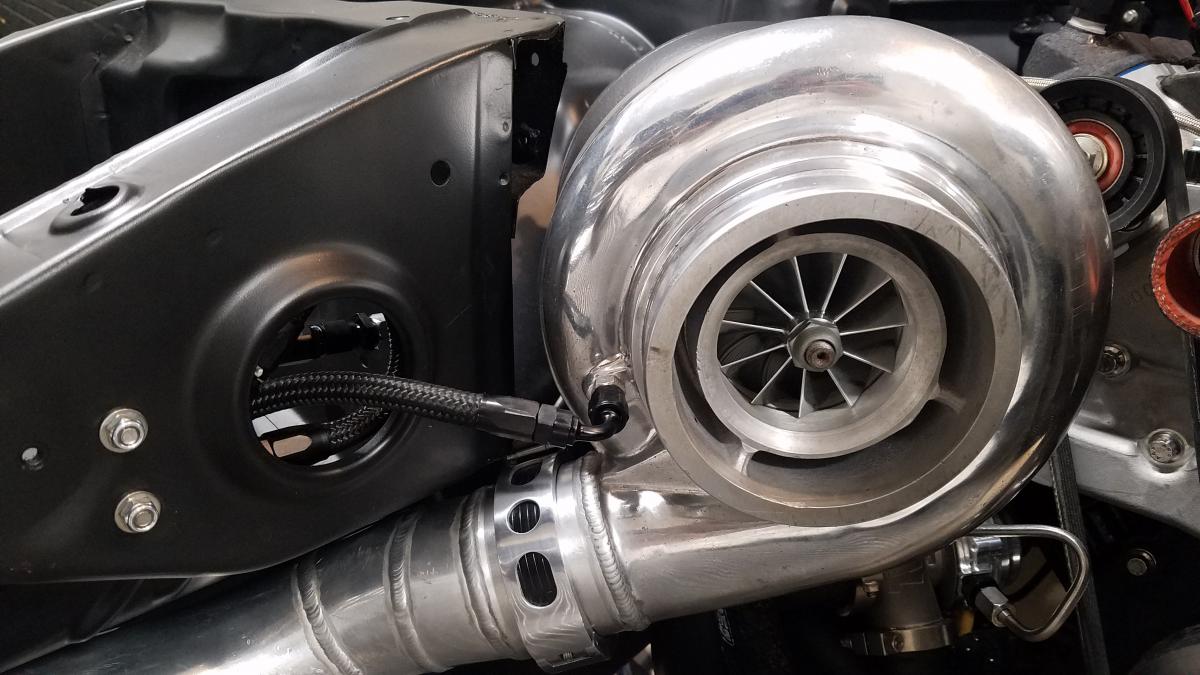
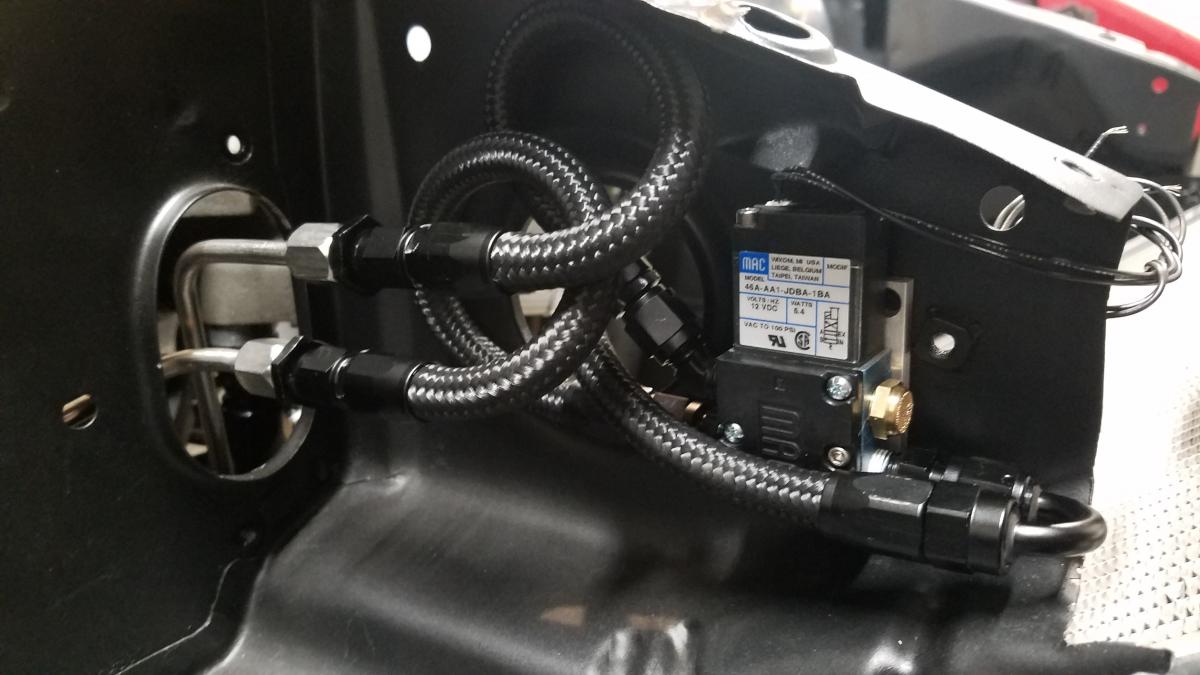
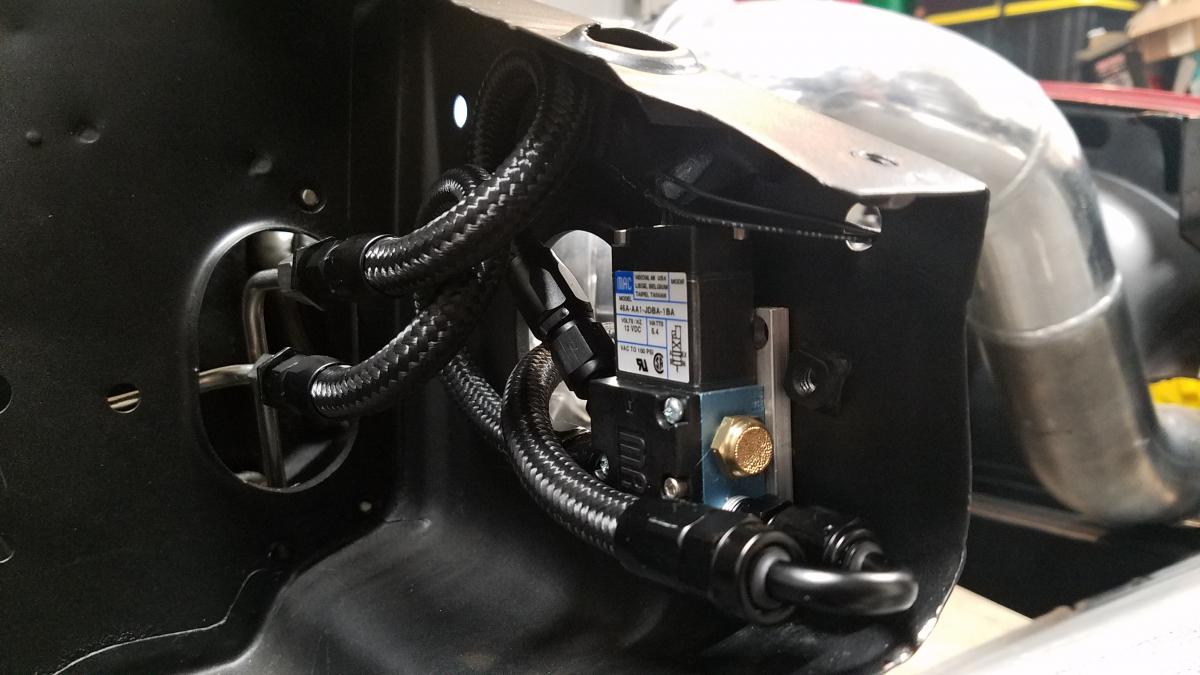
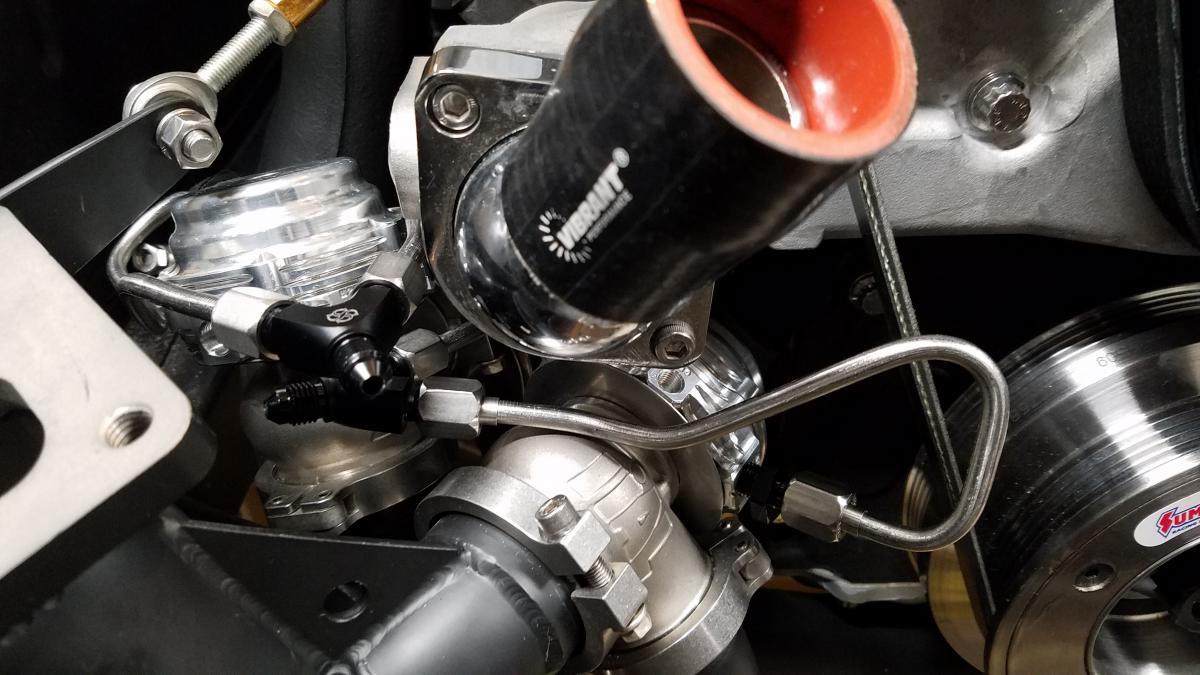
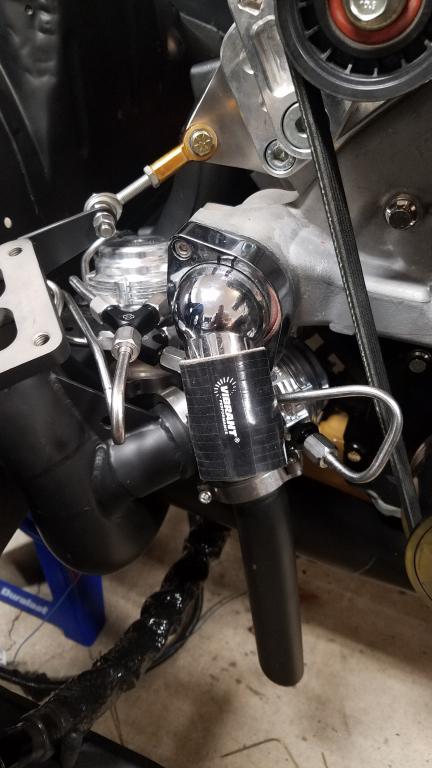
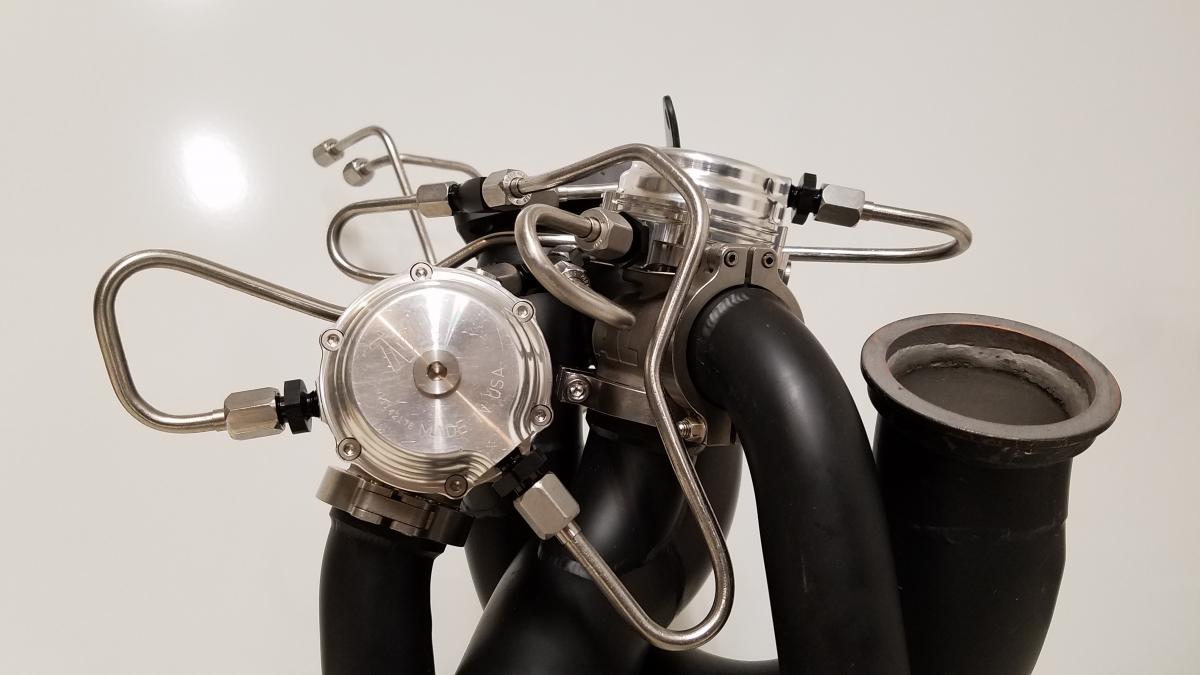
Next I mounted my 4 port Mac Valve & tapped my compressor housing for my boost reference signal. Tied it all together with some 4an hoses I made.
-
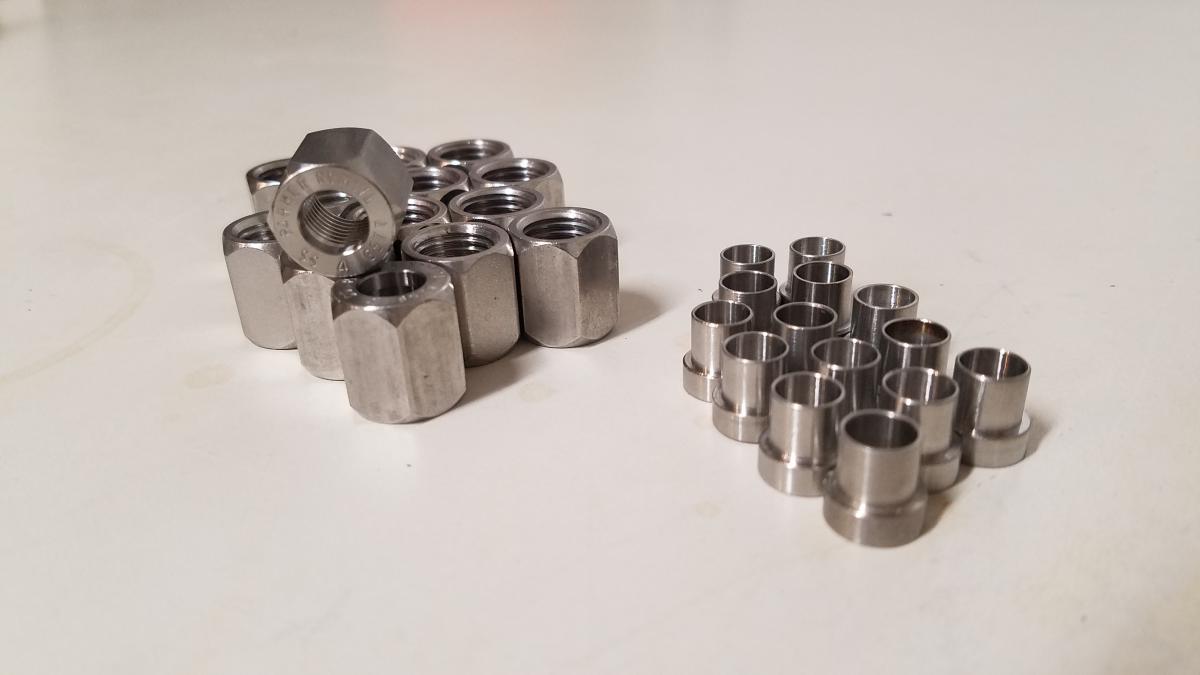
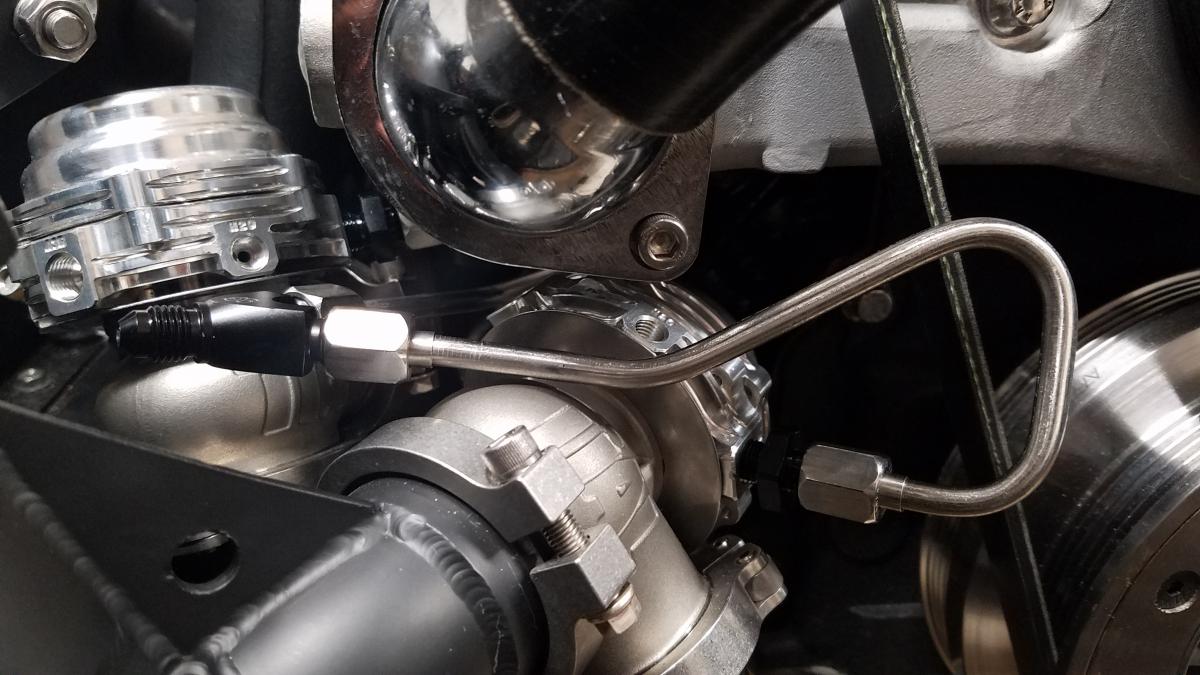
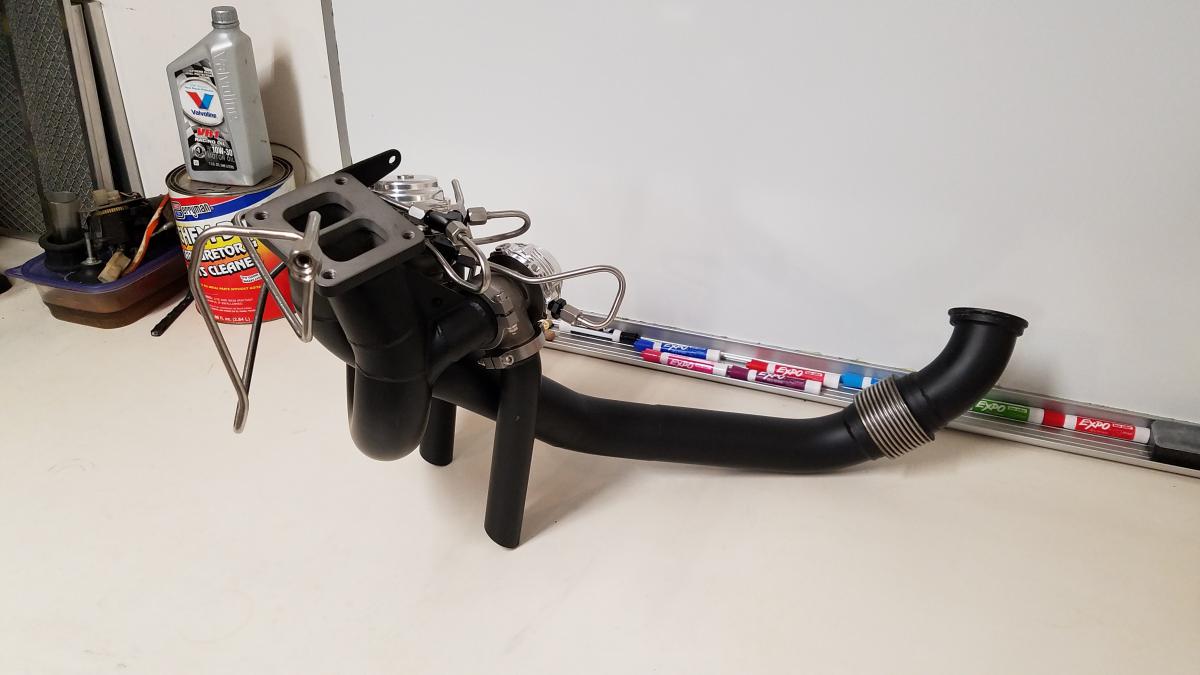
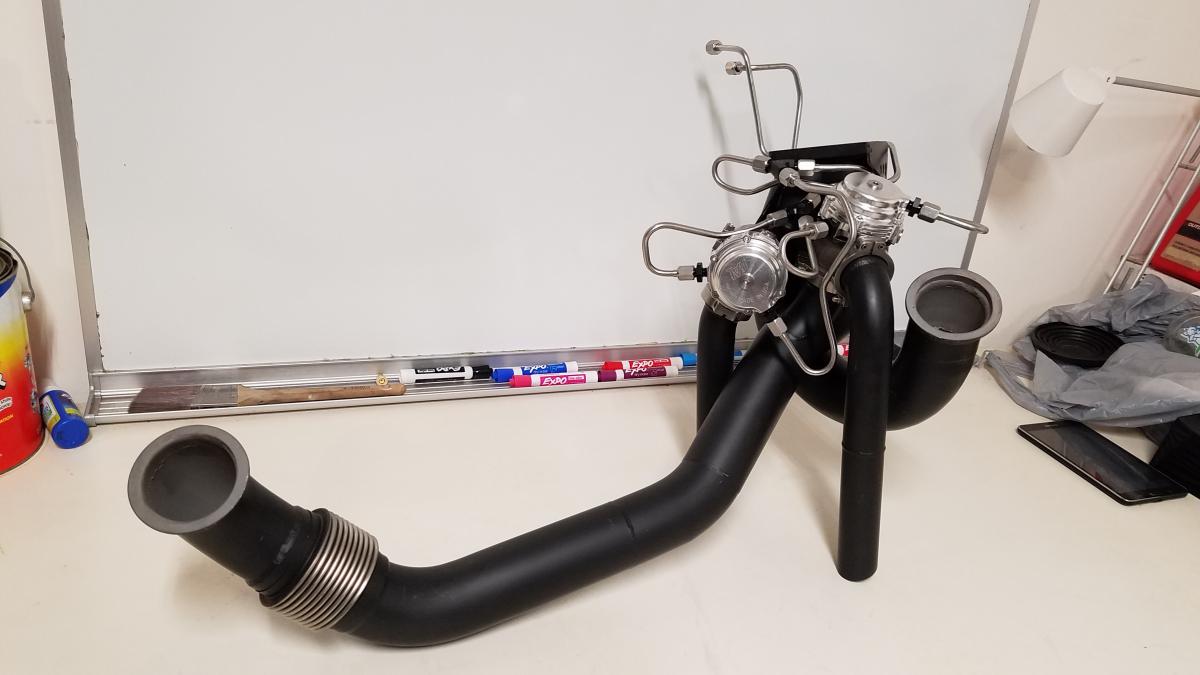
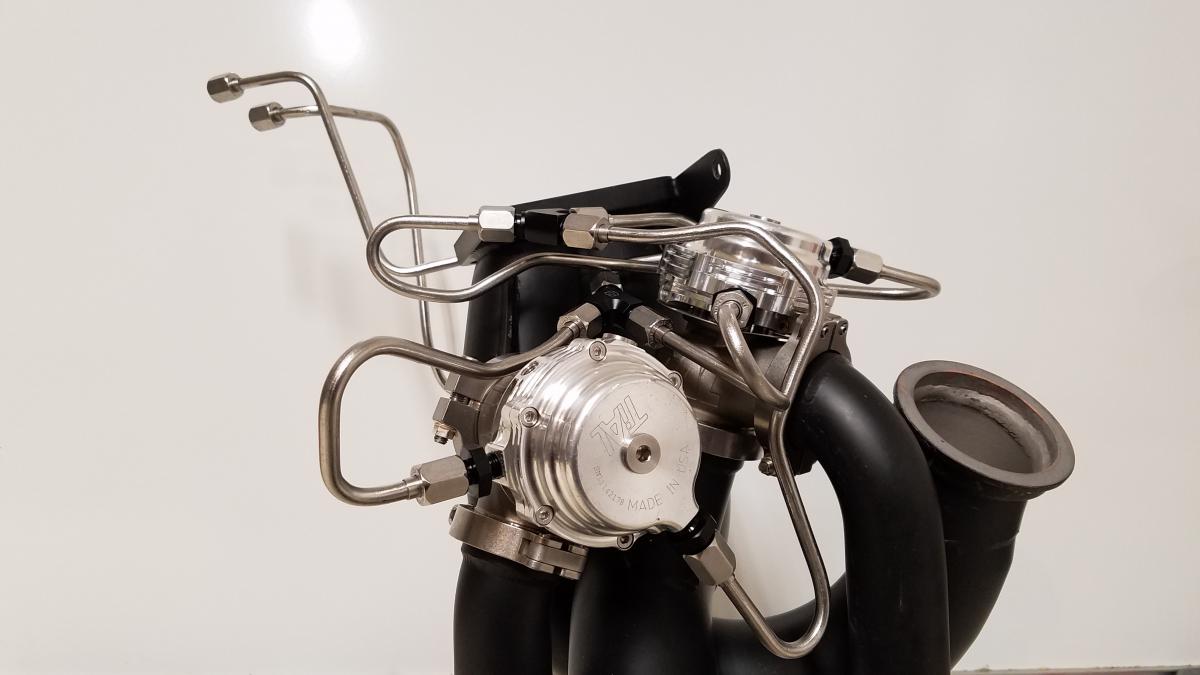
Luckily I had switched to the quick disconnect V-band clamps, so install & removal was a breeze. I already had a rough idea where the boost solenoid would be located. With all the tooling figured out, I began to fabricate my hardlines. I used 1/4" 20ga Stainless Steel tubing. Paired with Parker 4 an/jic tube nuts & sleeves. It took a decent amount of time but, I couldn't be happier with the end result.
-
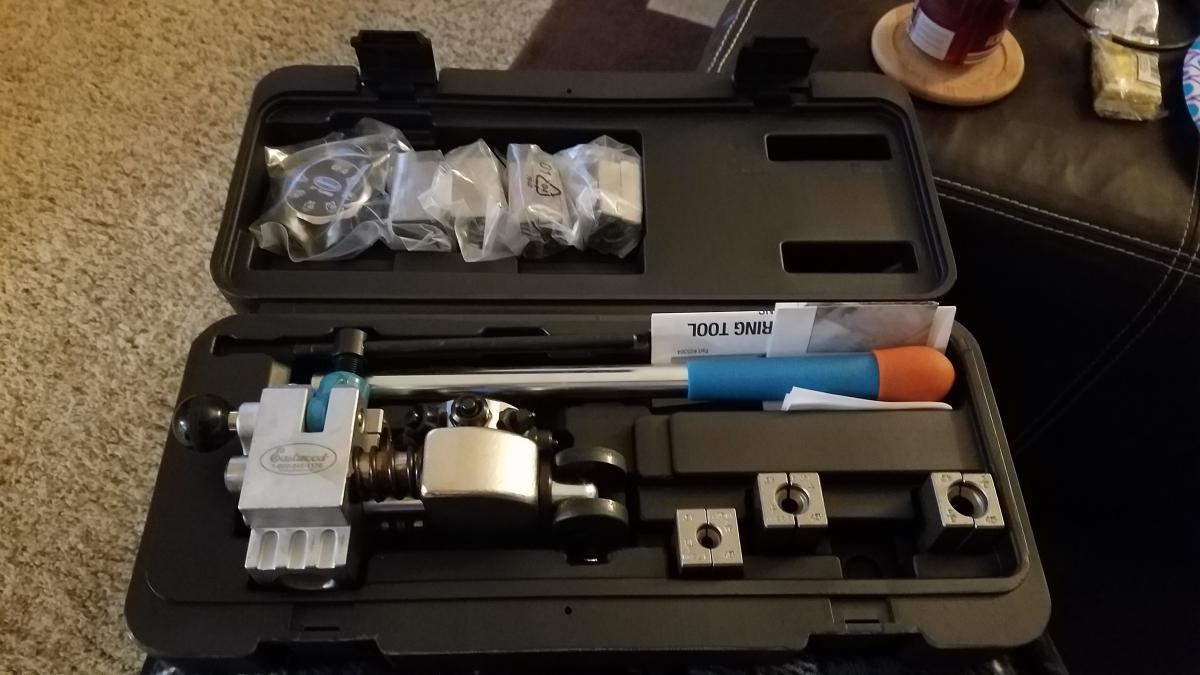
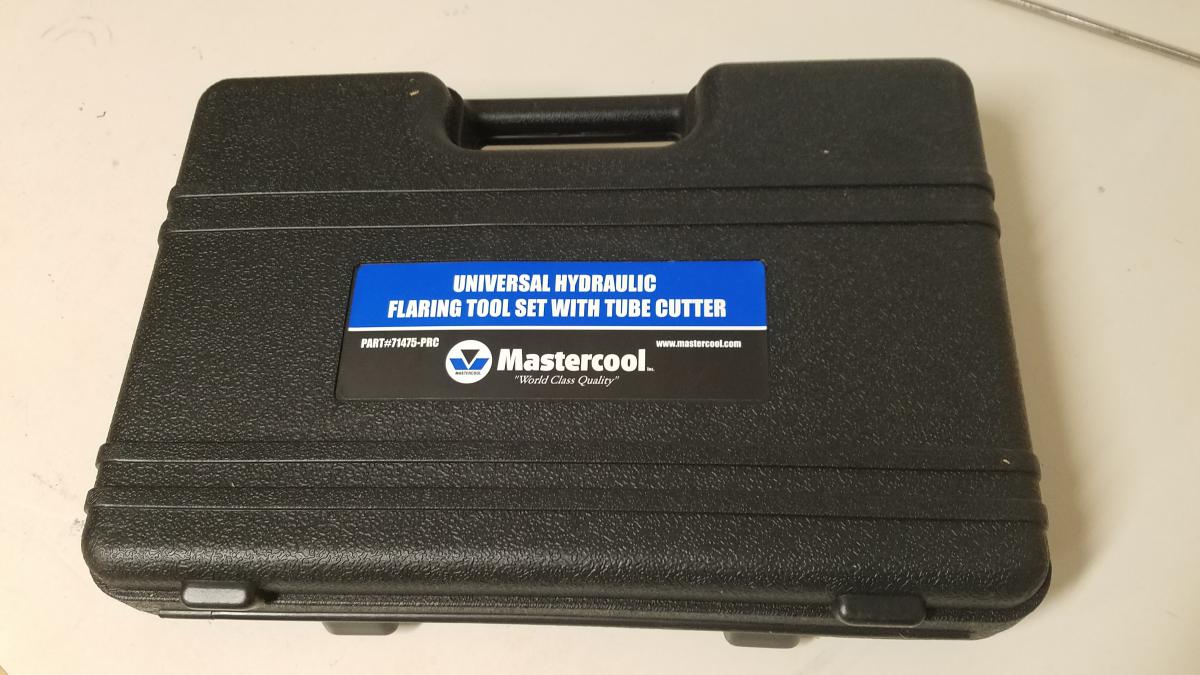
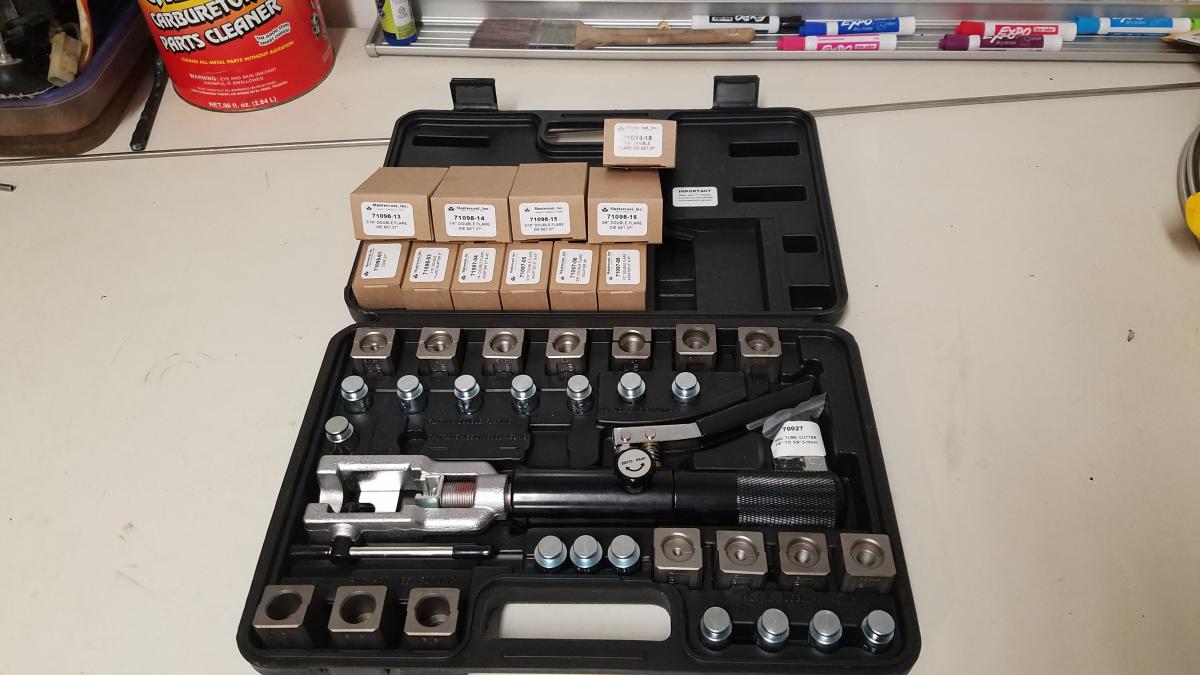
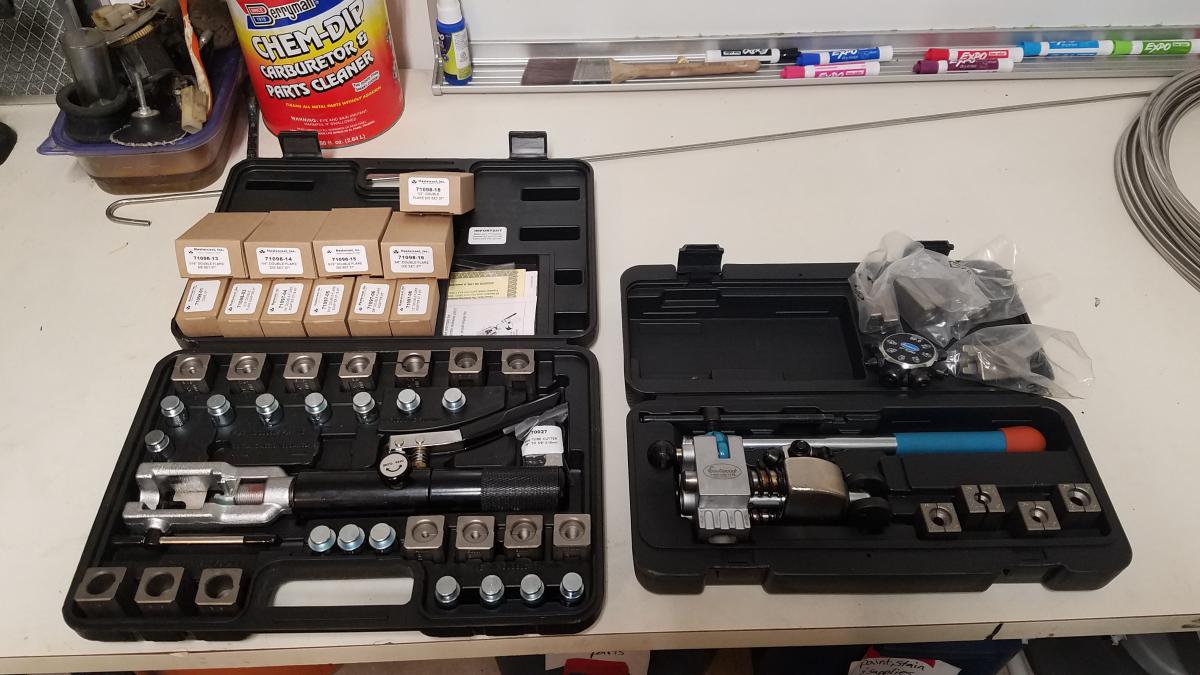
I knew I was going to make plenty of flares. So my cheap 37degree flare tool needed to be replaced. I originally purchased the eastwood professional flare tool & 37degree dies. It was a stout tool. Tried it out & it worked flawlessly but, seemed to leave more to be desired. Well of course a week or so later the Mastercool hydraulic flare tool went on sale. The reviews made it sounds like the best thing since sliced bread. So I purchased & received the Mastercool hydraulic flare tool. For comparison I flared tubing with the Mastercool & Eastwood tools back to back. They both flared steel, aluminum, nicop tubing with equal amount of ease. When it comes stainless steel this is where the tools differ. The Eastwood flare tool took more time & effort to flare the the stainless steel. Flaring the stainless steel was smooth as butter with the Mastercool unit. It took almost no effort. There's no comparison when flaring stainless steel. The Mastercool tool is superior by far. It does more types of flares, & more sizes than the Eastwood unit. If you're on the fence about what flare tool to purchase buy the Mastercool hydraulic flare tool. The price is a hard pill to swallow but you'll be blown away by the Mastercool unit. With that said I sent my Eastwood back for return. I also picked Eastwood debur tool. Which I couldn't be happier with.
-
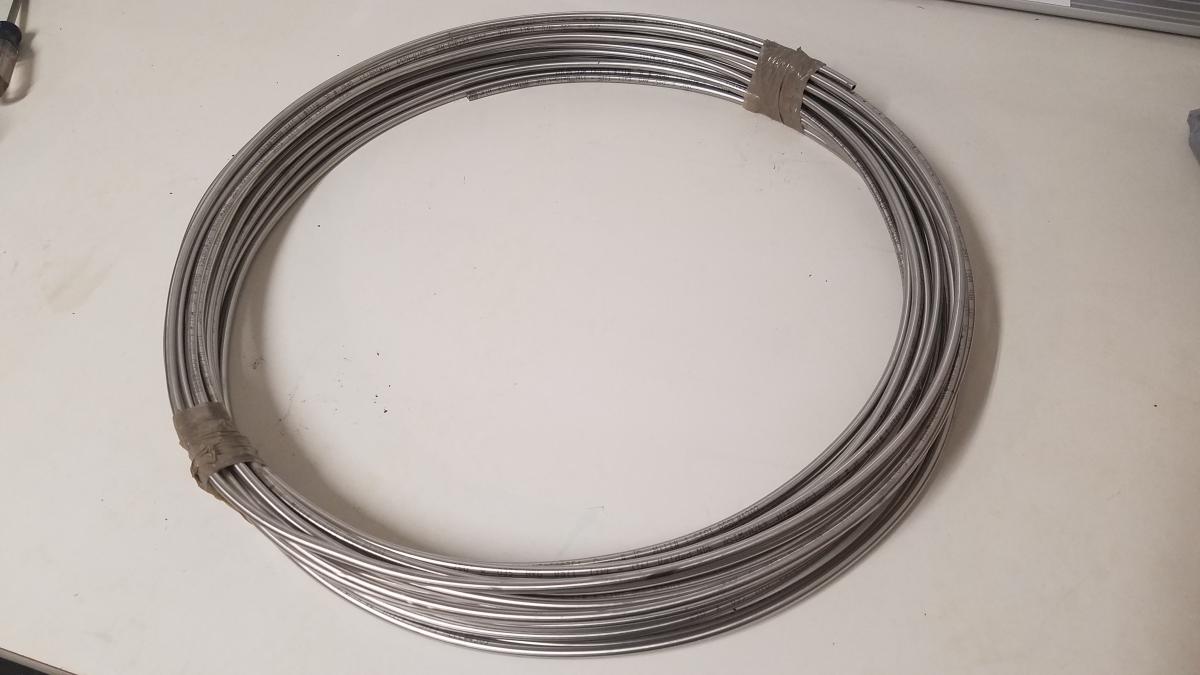
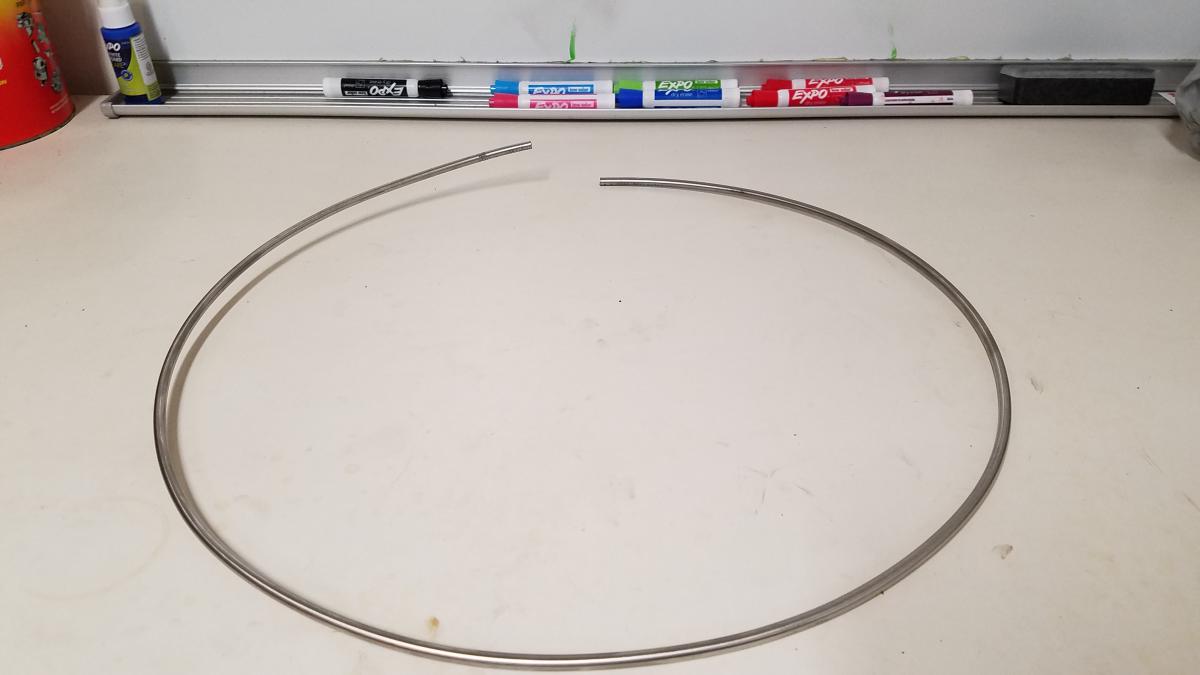
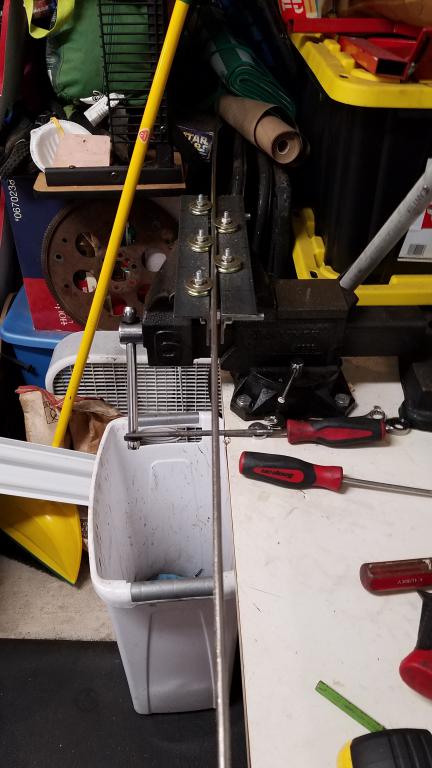
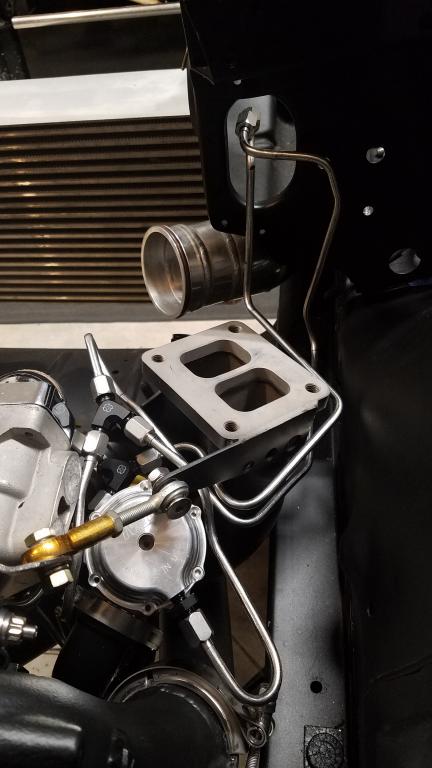
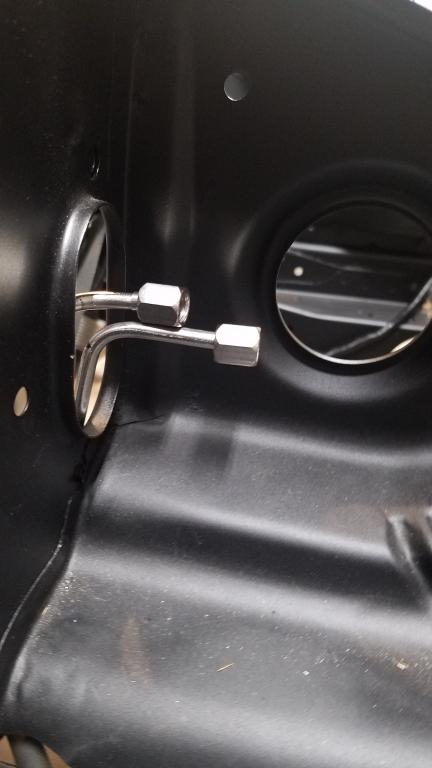
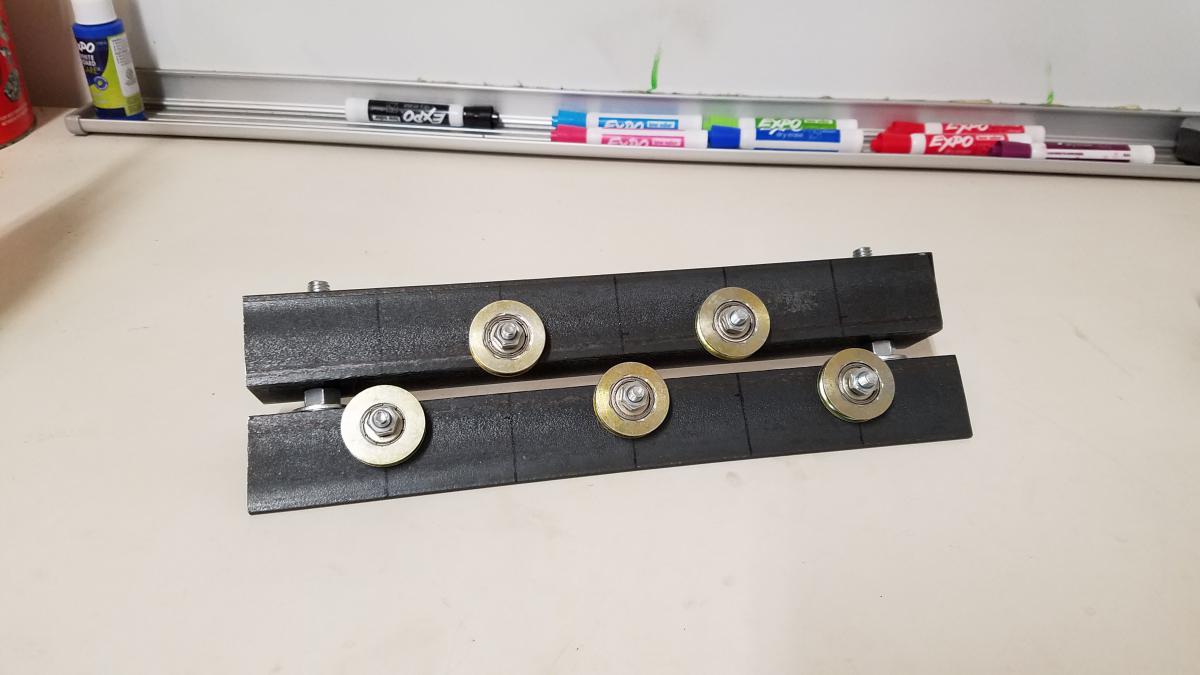
Figured I'd go ahead & tackle the wastegate signal lines. I hadn't had great luck with hoses or the push-to-connect stuff on previous builds. The push-to-connect tubing would melt. The rubber/silicone does the same, collapses or just blows off. Not saying it doesn't work I just hadn't had greatest luck with it. So my final decision was stainless steel tubing with an/jic fittings. The search began for tubing. All the straight sections were decently priced but shipping was outrageous. Coiled tubing was the answer to keep the cost down. Staying in spirit of budget friendly I made my own tubing straightener. Off shelf units cost upwards of 150-200$. My solution came in around 20$. It isn't the prettiest but it works. Here's some pics of it.
-
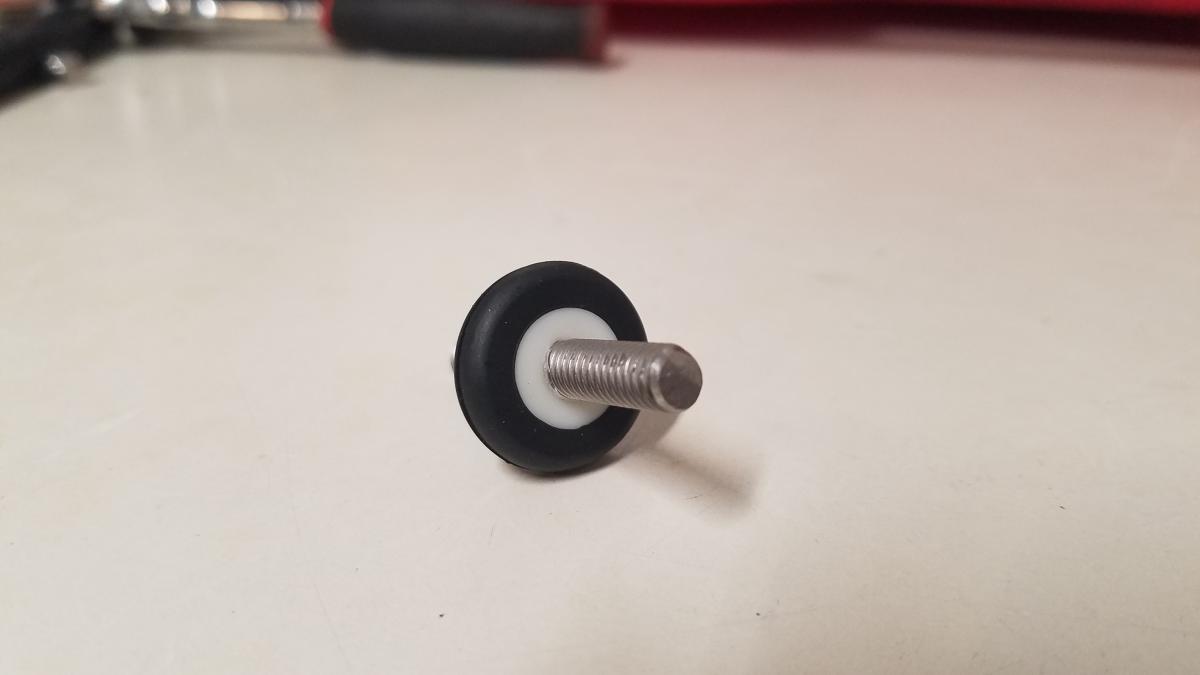
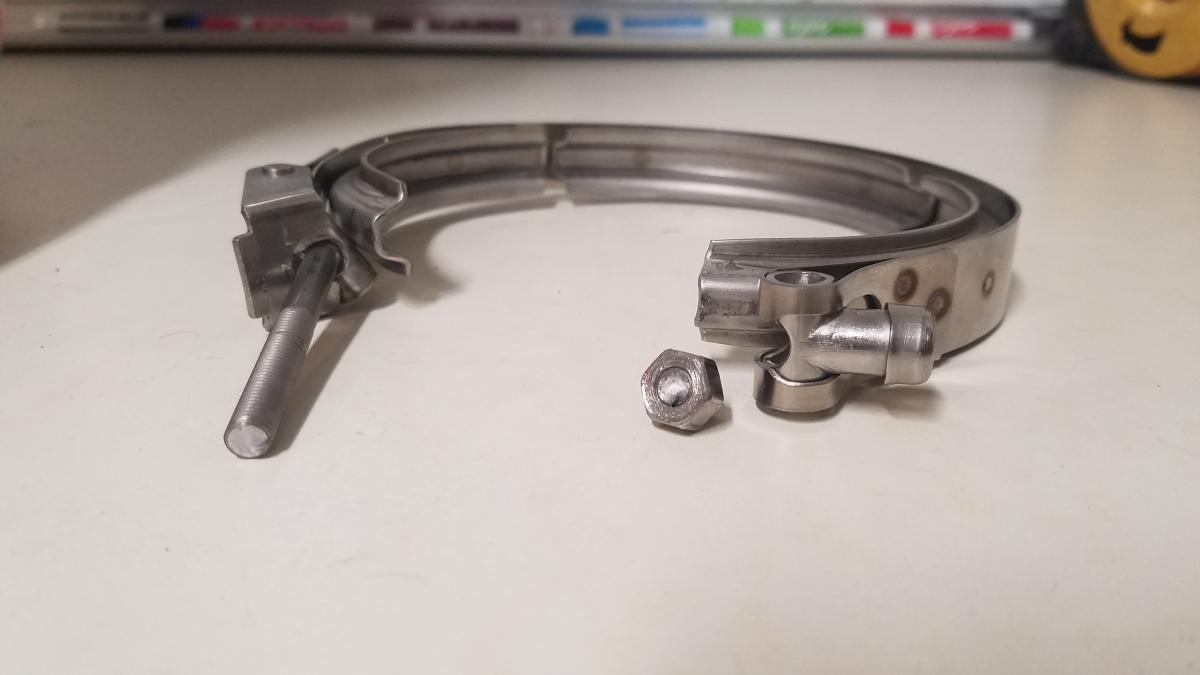
Just a fair warning lube the threaded "bolt" prior to install. I normally do but I forgot to on 1 of them. Which cause this failure the 1st time I removed it. Another tip is to weld some Stainless Steel threaded stock to replace the threaded rod portion of the V-band
-
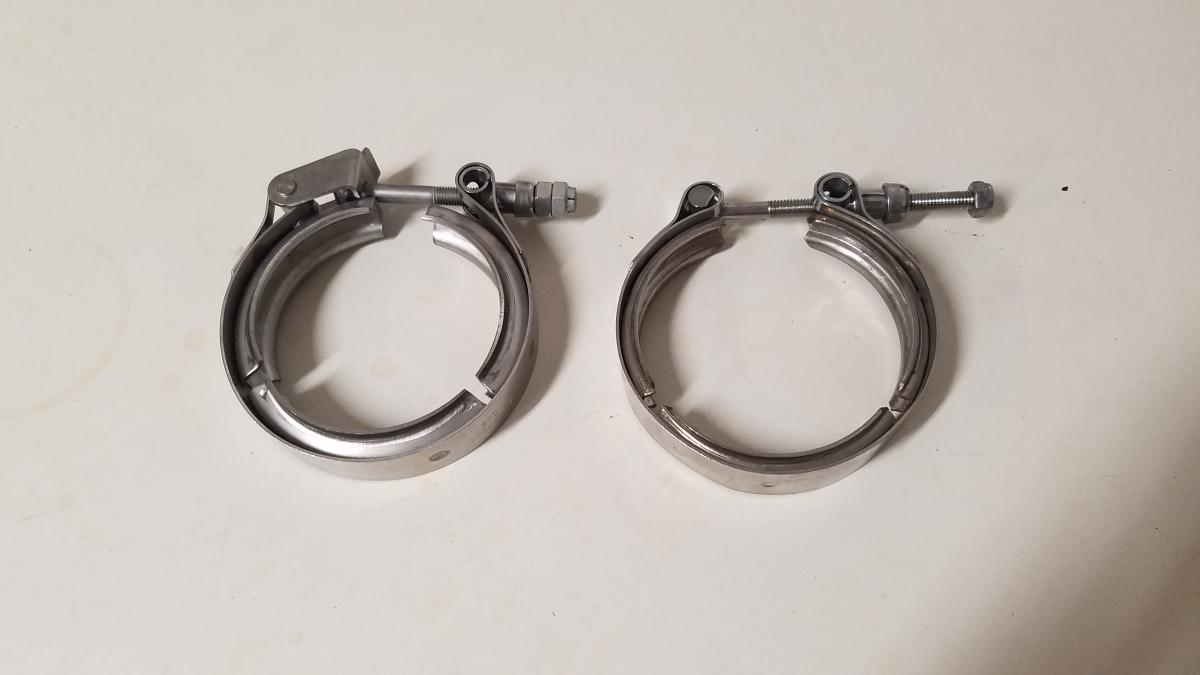
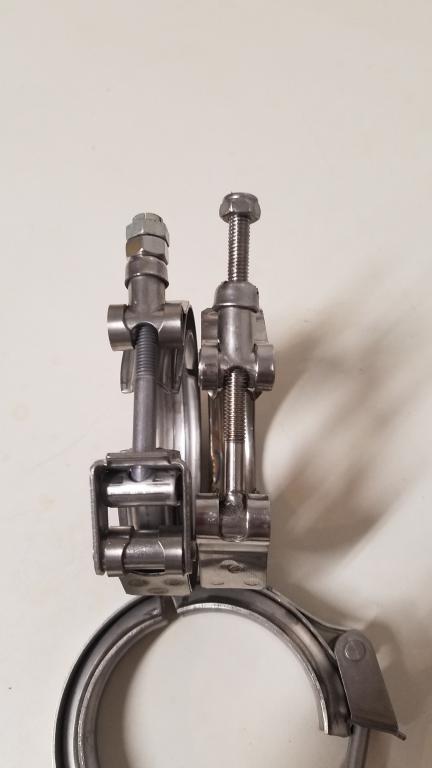
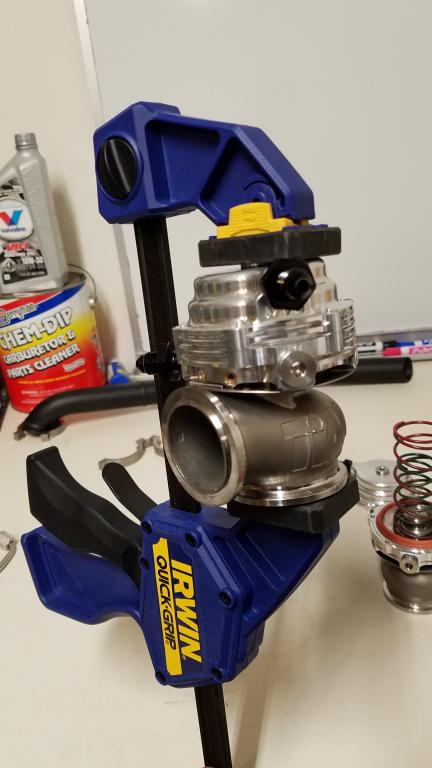
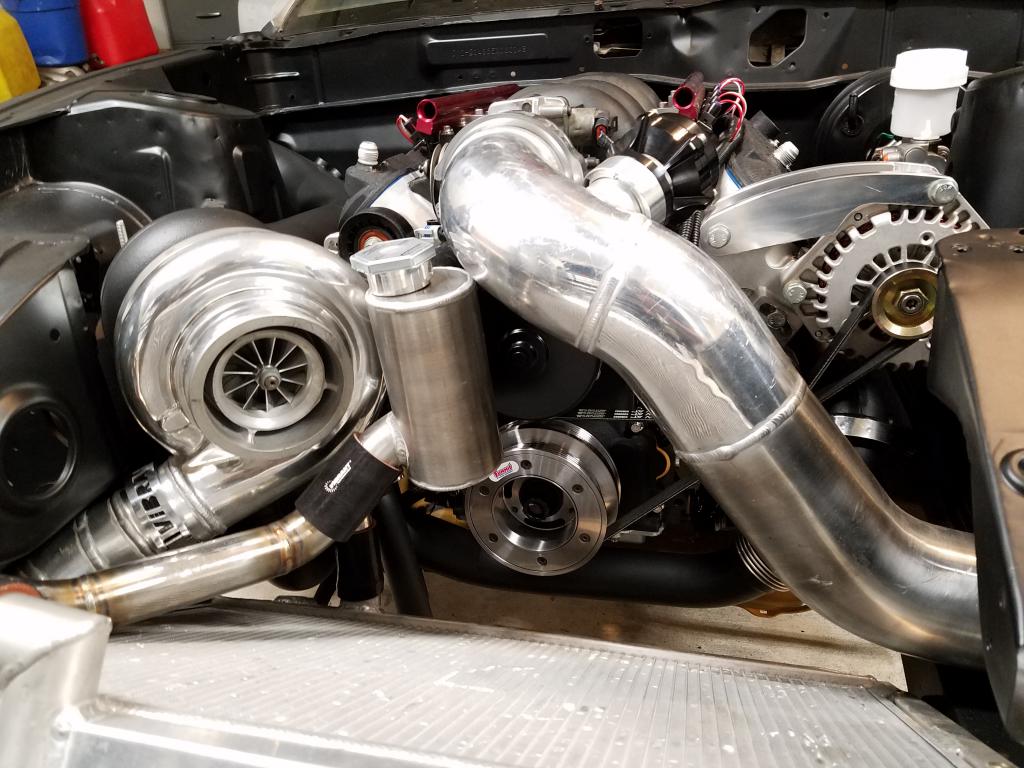
To make removal/installs go much faster, I opted for some vibrant quick disconnect V-band clamps.
-
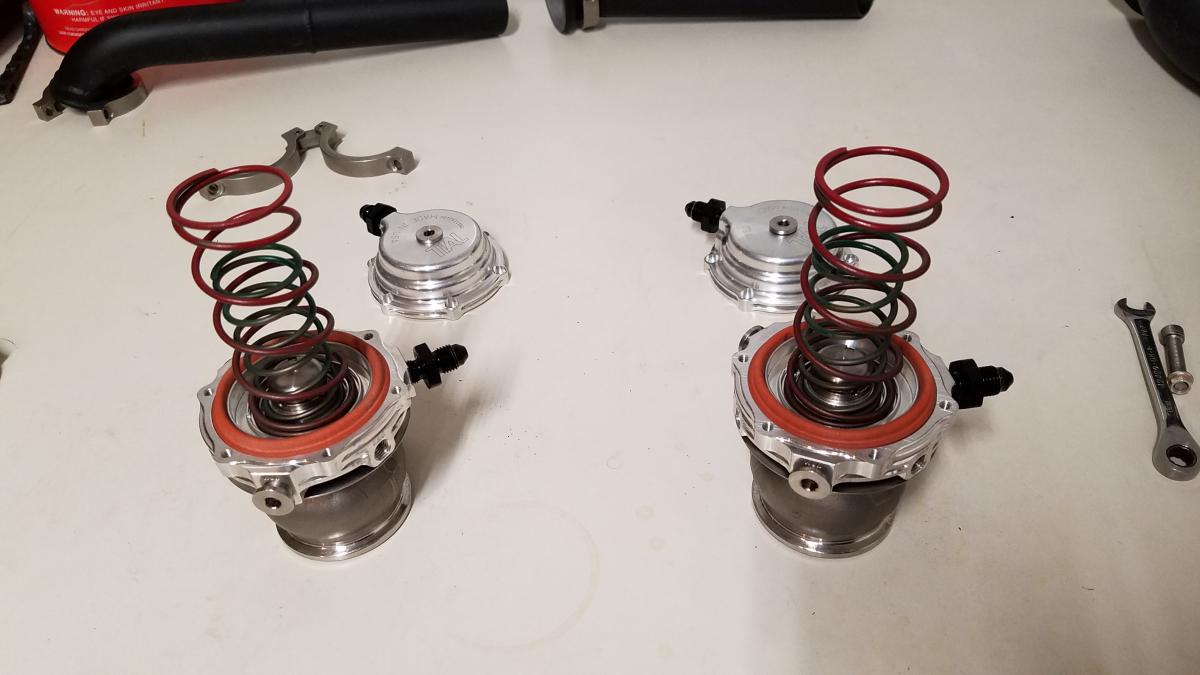
Woo Hoo! A post holiday's update. I hope everyone had a fantastic holiday season. This is one of, if not the busiest time of year for me. Got the regular holidays plus my daughter's birthday. Which is exactly 1 week before Christmas. Makes for a busy finish to the year no mater how much preparation is done. With the holidays out of the way, I finally got sometime to spend in the garage. To kick this update off I removed the kit to gain access to my wastegates. That way I could install my wastegate springs. I paired the green & red springs which should net me around .7 Bar/10.15 Psi.
-
My slow crawl of a build
-
Nah. I meant to put Swype not swipe. A Samsung way of word input. It's not everyday I see a modded datsun. The guy hadn't even heard of the forum before. Also posted this so he could see my build.