
Dragonfly
-
Posts
674 -
Joined
-
Last visited
-
Days Won
1
Content Type
Profiles
Forums
Blogs
Events
Gallery
Downloads
Store
Posts posted by Dragonfly
-
-
Nice Bike, Iam thinking about getting a Harley or something or building a bike from scratch a friend of a friend builds bikes for a living so I can atleast get cheap used parts If I do a fair bit of my own work I can have a pretty decent bike for under 7000 cad all used parts of course.
If you build your own used parts or not you are going to know absolutely everything about that bike and since you have someone who builds bikes for a living near by you can have your work checked out for you as you go. That would be quite cool but beyond anything I would want to take on.
Thanks for the compliments guys.
Dragonfly
-
In my Z I have had my speedo tapping on 140 mph although I can not say that it was accurate. On the California Speedway in an IROC car with me behind the wheel I was doing 160 mph, same location same car with the instructor behind the wheel and me in the "pasenger seat" I got to see what 175 mph felt like... when the wall seems to be no more than mere inches away and moving by at 175 mph it tends to put a little pucker in ya (if you know what I mean).
Dragonfly
-
nice. im a gixxer man myself but still a nice bike
I rode my buddy's gixxer once and since I know my limitations I am willing to admit that it was to much bike for me, but I love the way they look.
Dragonfly
-
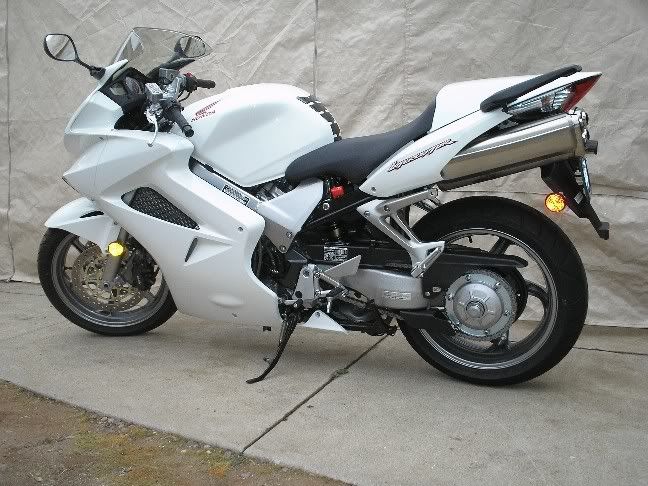
I have been looking for awhile now for a new bike and I finaly found the deal I was looking for on the bike that I wanted. This is a 2006 Honda VFR800 non ABS Interceptor, I bought it used off a guy who managed to put all of 384 miles on it. Seems the rest of his family wasn't happy about him having a motorcycle so he let it go for $2500 less than he paid for it (he paid cash), the seller also threw in a tank bag and a brand new Aria helmet.

This is what I got for $7995... What do you guys think?
Dragonfly
-
Do the intake and exhaust swap. I ran mine for several years with a F54 block and a P90 head using round top SU's and a 3 into 2 header and it felt virtualy the same as the L26 that used to live in there. I doubt if you will notice a differance in power but you will have a running Z again. BTW if you have the P90 head it has the hole cut out in it for the mechanical fuel pump so no mods needed.
Dragonfly
-
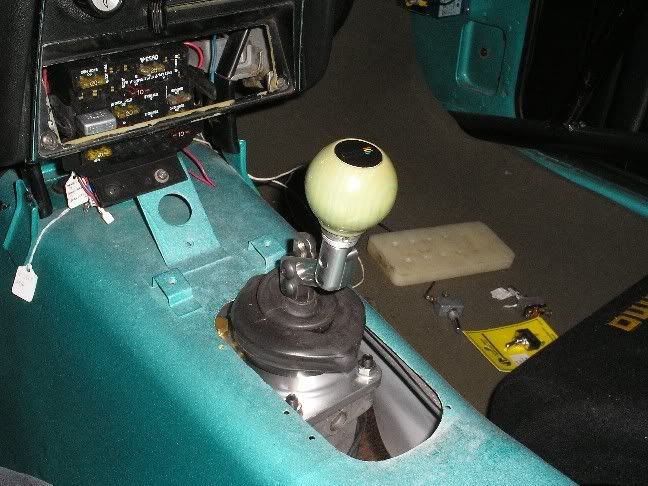
dragonfly, is your shift knob glow in the dark?
Odd question for this thread... but no it does not, it is wood that has been dyed green.
Dragonfly
-
Dragonfly, what happened to the whale tail? Still have it laying around somewhere?
No it was sold before it even came off the car. It was an original whale tail from a 280ZXR that found its way into the wrecking yard many many years ago.
Dragonfly
-
Those are the eBay ones. On eBay they were selling for $75 + 15 shipping.
Those are still v-belt though, not serpentine. Now that I think about it I think ZRaceProducts has ones thats a damper and serpenting belt but it's like $420...
Mario
Yep, they also have the other pulleys that you would need.
Dragonfly
-
Dragonfly,
What hood pins are those and how did you mount them? Any pics?
They are some cheepies from Pep Boys ($10 for a set of two, stainless steel). I made an "L" bracket out of steel and bolted it to one of the existing bolt locations for the stock hood spring at the front, at the back I drilled a hole next to the adjustable stop as you can see in the pic.
It is not a close up but you can see both front and back.
The fronts will change when I build my radiator shroud but that will be a new set of pics on a different thread.
Dragonfly
-
As far as I know none of these LCA's have been stressed to failure (distructive testing) nor can I myself say exactly what the depth of physical testing was done vs calculation testing. As far as the need for on car adjustagle LCA's go it is a case of what the general populace has been asking for. Katman I am sure you are correct about how often these adjustments will be made, I just had these adjusted and I honestly do not expect them to be adjusted agian untill I manage to smack up my car (crosses fingers and knocks on wood).
"Ah, I see. I stand corrected. Still rather have the adjustment at the inboard end where the loads are smaller and the resolution would be greater, but clever if it works as you say." I like the idea of making the adjustment on the inboard side. Clever yes but if I remember correctly Jerry actualy got the idea for how to build the adjustable portion of these LCA's from some friends of his who build trophy trucks and are using this same system.
I personaly do not like being the center of a point / counter point especialy when many of those involved have considerably more knowledge than me but I will say that I have absolute full and complete faith in these parts as well as every other part that ZRaceProducts has built.
Dragonfly
-
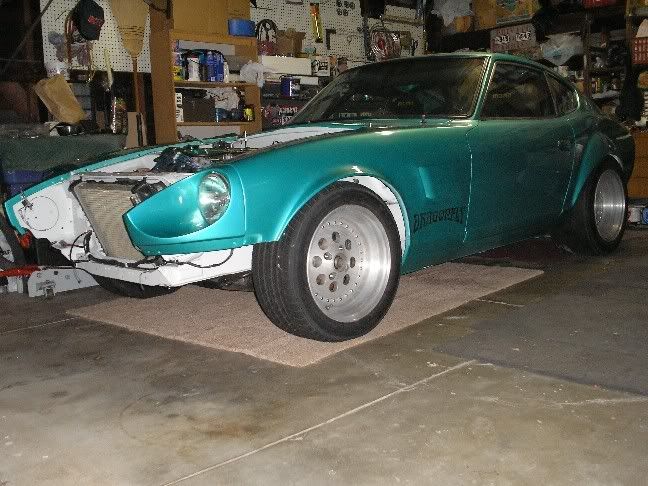
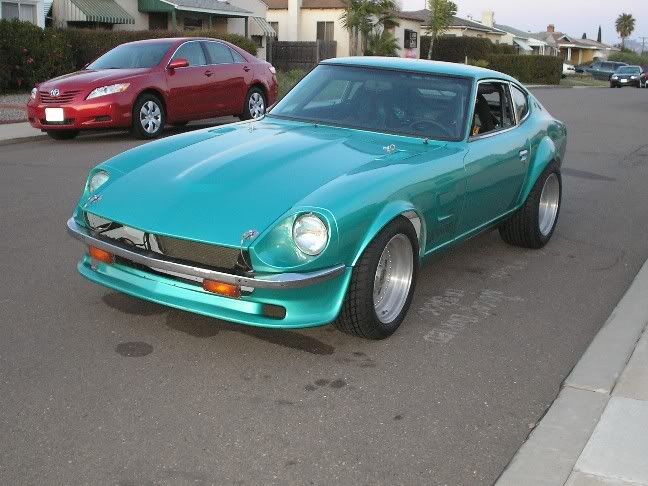
Here is a before picture.
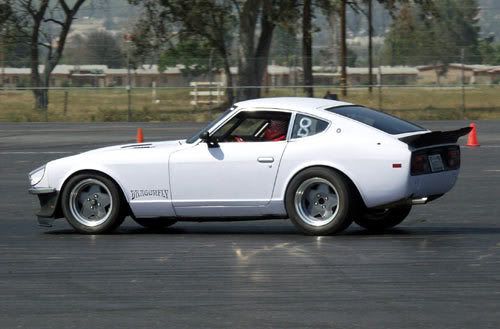
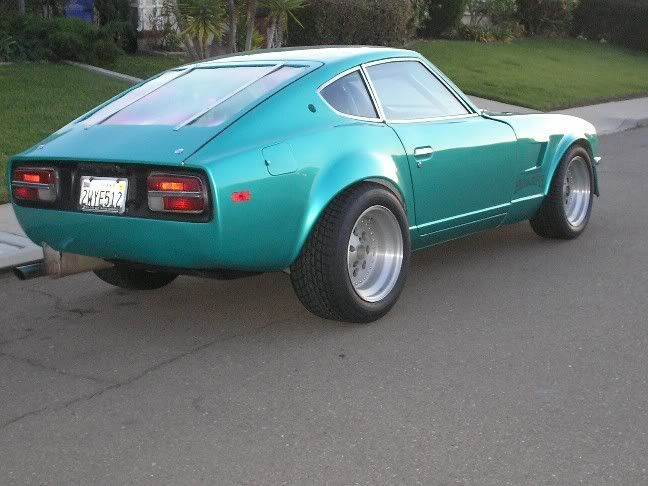
and here are a couple of after pictures.
That is my wifes new Camry in the background of this picture. BTW the spot that looks like something is leaking from the car... well thats a stain on the road from the neighbors truck.
Dragonfly
-
Did Fabcon engineer these parts or simply fabricate them? Has there been any engineering done on them? I think this is a valid concern. I thought the same thing when I read that, breaking a lower control arm could be... well... very hairy. We've had this discussion before. It always goes the same way, folks comparing the stock piece's strength. (where's Mike Kelly?) The stock arms are damn strong, flexy maybe, but weak, even after thirty years... no. The last guy who made up some front lower control arms and posted on here, the discussion got so out of hand the thread got deleted. And don't get me wrong, I feel just like Jon, there are far to few folks making parts for our cars and we need to support them. And these things look TRICK! I want them to be good, I want to buy some. (I must use stock arms for my class though) I am just curious to know if an engineer looked at them.
Dragonfly, BTW... the underside of your car, the unibody itself, it is very clean.... NICE.
An engineer by the name of Bruce who works at Fabtec was involved with the building and testing of the first few prototypes as well as the design and building of the jig, these things are way over built. As far as the "if you break it you get a new one free" thing goes it is not a concern of anyone at ZRaceProducts that the LCA will fail and cause an acident, rather the statement is intended to be taken as if you over extend your capabilities at triple digit speeds and slam your car into a concreate abutment (or just total your car for whatever reason) these LCA's will be salvagable parts or in other words they will be some of the very few things on the car not broken.
I am not sure if Jerry (owner of ZRaceProducts) will allow me to take pictures of the building and assembly of these parts but if he will I will post them up for you guys.
Just to let everyone know I truly do understand the skepticism, as Mike Kelly can tell you if you ask him I actualy purchased a set of Arizona Z's LCA's before Jerry had finished building his and my thoughts were "Arizona Z has a well built and proven LCA why should I buy these others by ZRaceProducts?" then after Jerry finished building several sets and the testing was completed he brought a pair over to my house and let me make a direct comparison to the Arizona Z LCA's... well I imediately put my Arizona Z LCA's up for sale and sold them to Mike so I could by the ZRaceProducts LCA's. At that time I still had several months left of work on my car and Jerry started talking about making his LCA's on car adjustable, we put our heads together and came up with the design in use now, Jerry ran the design past Bruce and got an OK on it and I installed the first prototype on my car which is what the pictures are. I will be putting some track time on these in the very near future and letting everyone know what I feel about them under every situation I can possibly put them into.
One last thing for now... I will be at the West Coast Nationals (Motorsport) with the car for both the race school on Saturday and the show on Sunday, anyone who would like to see these in person just look for the green car that says Dragonfly on the side.
Dragonfly
-
They have them listed... This is from their site.
Our custom arms are constructed with all 4130 chromoly. main frame 1 1/2" and 120 wall chromoly tubing, interframe is 1", 120 wall and 3/16 interplate, all chromoly. Also using FK 7/8" male spherical rod ends. These guys are truly the hottest thing on the block. Quality contructed for strength and durability. Weight: 34.0 lbs. / pair
Price: $680.00 / pair
Shipping: from $36.95
Those are the non on car adjustable LCA's, they look almost identical but require the spindle pin to be removed in order to adjust them.
Dragonfly
-
Hmmm... I would have liked to have been at that alignment shop because I watched my car being aligned using Modern-Motorsports adj. LCA's and it was completed in minutes and the tech was amazed at the ease of doing it.
LARRY
I really wanted to be there and take some pictures as well but unfortunately it did not work out that way for me. I asked about how everything went and what he thought of the LCA's, he told me that the rear was easy and only took a few minutes but the fronts were a PIA because it seems my inner tie rods are on their last legs and he had a tough time getting them to within spec. Looks like I will be getting new inner tie rods real soon and I am going to replace the outers at the same time as well just for good measure.
I have seen pictures of the MM LCA's but I do not recall how they are adjusted. I have also seen Ross' work and I would be full of **** to say that his products are any less than top notch, but I personaly like the over all look of the ZRaceProducts LCA's better.
At this time they are still a prototype and there has not been a price set for them. I am not sure what you are asking when you say the inner bushings but I am going to guess that you are refering to the bushings were the LCA's attach to the underside of the car, if that is the case mine are poly but they did not come with the kit. Jerry has Delrin that he has been talking about machining bushings from to add to the kit although he may make them an option for the kit that you have to pay extra for... at this time there have been no decisions made.How much? Are the inner bushings poly?Dragonfly
-
ohh !
I like this! Do they have a link?!
At this time there is no link, these are still in the prototype stage and my car is the lab rat, but you can find everything that is available from ZRaceProducts here http://www.zraceproducts.com.
1 tuff z I do not have any pictures of the individual components but each piece is machined on a laith, sleeve, collar, and hex rod (adjusting nut), everything is pre assembled and tested then put together a piece at a time and welded. Right now my car is at the shop getting a 4 wheel alignment, when I pick it up I will get comments and opinions from the techs doing the work and I will post up that info.
cygnusx1 The original design was done by Jerry (owner of ZRaceProducts) then tweeked, adjusted and tested by Fabcon in San Diego. Fabcon also helped with the design and building of the jigs used for making these LCA's. I can assure you and everyone that these pieces are well engineered and there are no corners cut.
As a side note anyone who is in the San Diego area and who would like to go by ZRaceProducts and take a look around just drop me a PM and I will set it up.
Dragonfly
-
Well you guys are making some fairly good guesses but you are giving the set screw way to much credit. There is a sleeve inside the control arm but the sleeve is a custom machined 3 piece assembly made up of a threaded sleeve, a machined collar and a welded nut. The sleeve is inserted into the tube of the LCA then the collar is inserted and welded into place then the nut is welded to the sleeve where it extends out of the LCA tube and collar, the set screw is nothing more than a threaded hole in which grease is added to the assembly to allow ease of adjustment, then the screw is snugged down to help insure nothing moves when you lock down the lock nut. BTW the sleeve has a set screw ring machined into it so the sleeve will not be deformed by over tightening the set screw.
These LCA's like the others made by ZRaceProducts will be replaced for free by anyone who manages to break one as long as they return the broken one with pictures of the car and an explination of how it happened.
Dragonfly
-
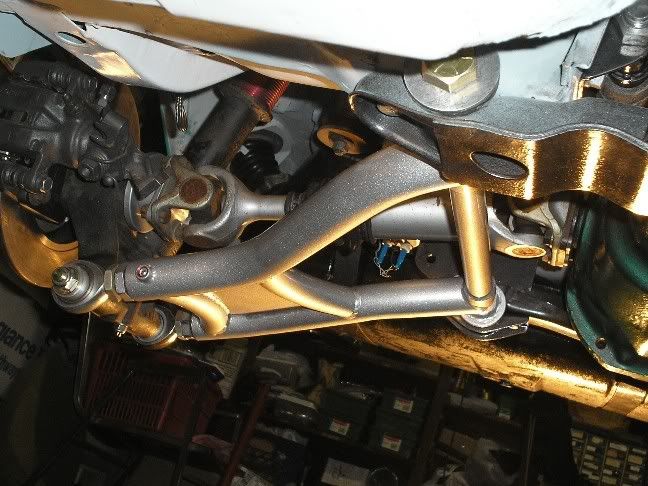
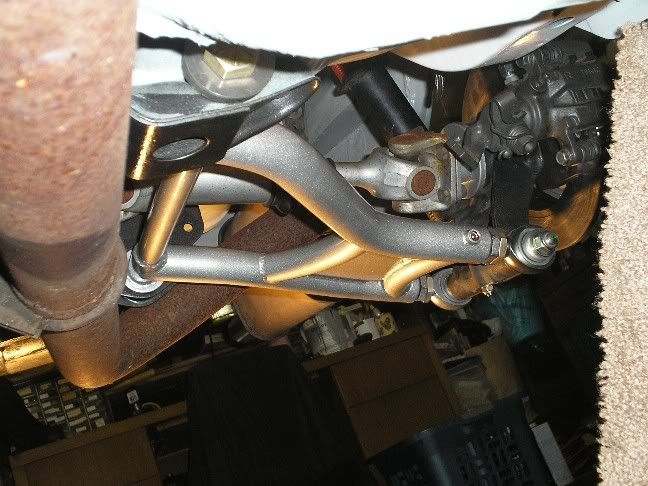
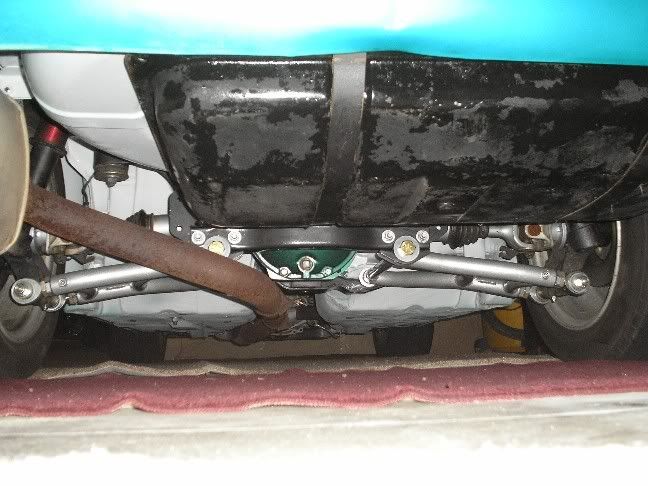
A few more pics from another angle.
Back on the ground and ready for a 4 wheel alignment.
Dragonfly
-
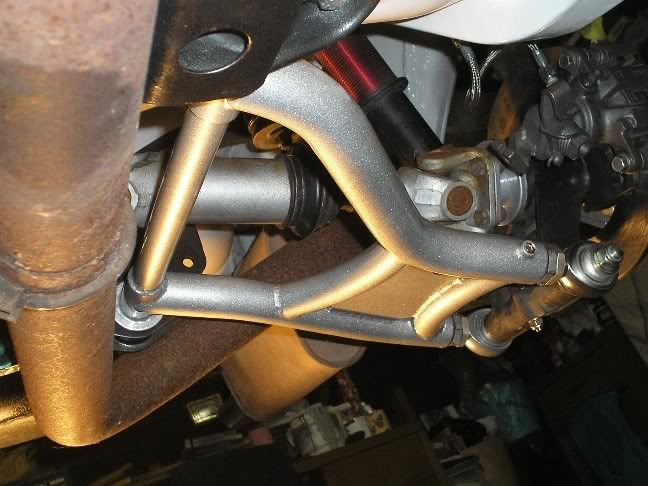
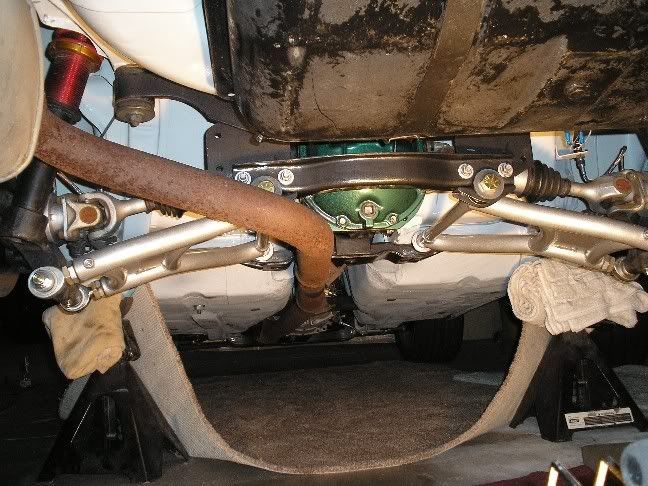
I just received and installed my new on car adjustable LCA's from ZRaceProducts.
This is what comes with the kit (except for the holder I have everything on).
Here they are installed on the car.
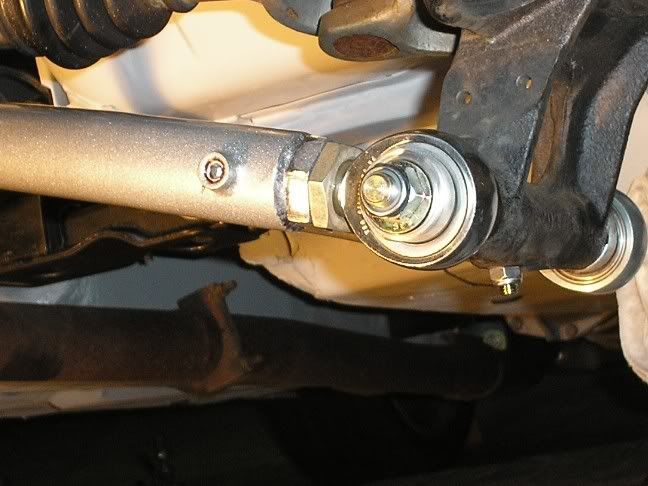
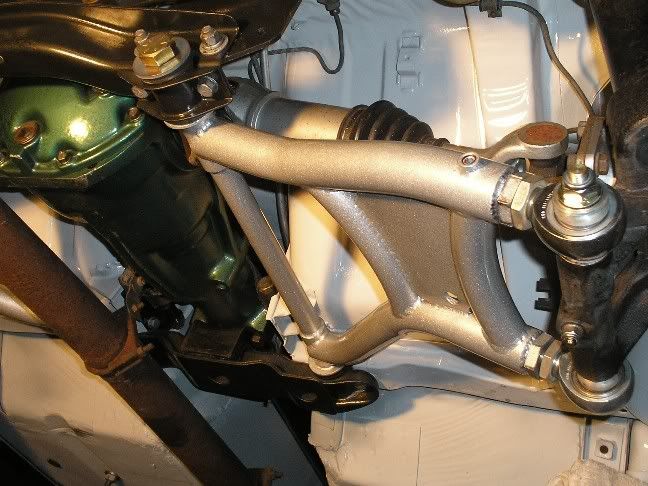
In this pic you can see the adjusting nut, lock nut and set screw that are used to adjust camber and toe, BTW that is a 7/8" Spherical bearing.
Another installed pic.
Dragonfly
-
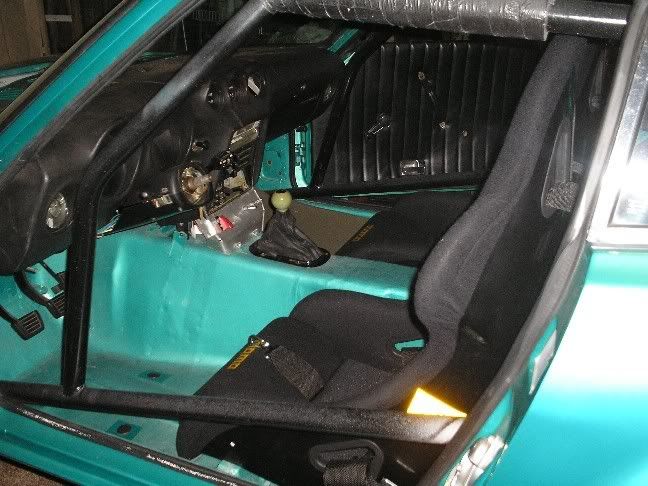
Dragonfly, looks nice. I like the uncluttered look. Also like the shift boot Doesn't your leg get hot? On my road racer my driving shoe melted to the tranny tunnel after a 30 minute session. I've since put that aluminum faced 1/2" fiberglass firewall insulation on the tunnel. I'll post some pics.
Thats pretty toasty... I guess I have been lucky although my leg gets warm I have never had it get to the point that I would call it hot, BUT I have not put it on the track for any 30 minute sessions either. I use the car for autox and drag racing so it gets a breather and chance to cool off on a regular basis.
Looking forward to the pics.
Dragonfly
-
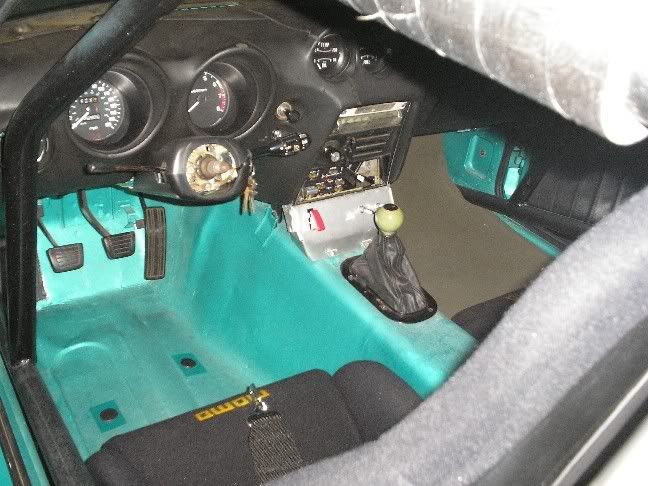
Here are a couple of better shots of mine.
Tim... wow... maybe its just me but I don't remember your cars interior looking quite so good the last time I saw it.
Dragonfly
-
I am in favor of the molded in flares painted body color myself.
Dragonfly
-
If the engine is newly rebuilt (sounds like it to me) is there a coating of break-in lube on all the bearings and cam/lobes. If you have been turning the engine over by hand while doing other things you may have rubbed a lot of the break-in lube off without providing any oil. Check what you can see and coat as needed what you can reach.
Dragonfly
-
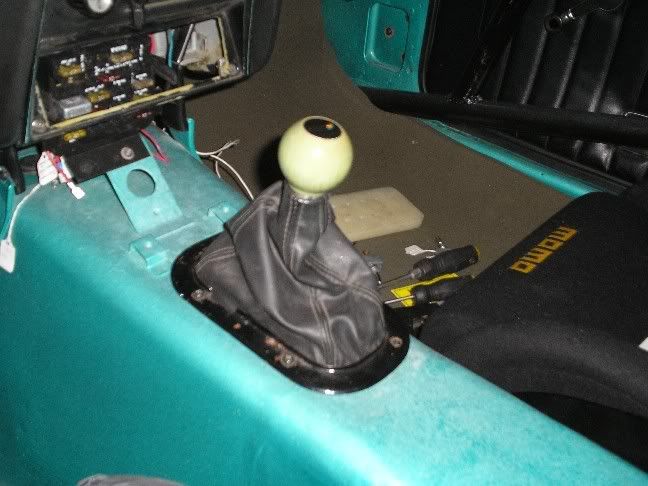
Just a shot of my ripper shifter here but I will see if I can take a better picture tonight.
Dragonfly
-


Clutch master and slave "my experiance"
in Drivetrain
Posted
Since I am now on my 3rd clutch master cylinder (and it works now) I am going to let everyone know what I have learned. I started out with a stock 5/8" clutch master and a stock 3/4" clutch slave, with a stock clutch that works great... but I am not running a stock clutch. The stock clutch needs aprox. 3/4" inch of travel at the slave to disengage the clutch, my new clutch needed about 1.2" of travel from the slave to disengage the clutch. After doing a lot of reading about what others had done to overcome this problem I went out and purchased a new 1" Wilwood master cylinder, this was master #1...
Master #1: I had enough travel at the slave but the pedal effort was extream, after about 15 miles of driving with this setup I managed to bend my clutch pedal and bend the master cylinder actuating rod (from master to pedal) into the shape of a "J". A couple of days after that I was at the Good Guys car show and Wilwood had a booth there and I had the chance to talk with one of thier techs about my problem and he told me that my problem was not a volume issue but rather a stroke issue and that I needed to go back to a 5/8" bore master but with a 1.4" stroke and he gave me a part number for the master cylinder I would need... #2.
Master #2: It arrived a few days later and I did not get a chance to open the box for about 3 days because of other things going on. When I opened the box I imediately noticed how much this master looked like my stock master. I laid the two side by side and took a few measurements and found that they were dimensionaly identical including the stroke. Before putting #2 on the car I called Wilwood and asked to speak to an engineer, I was given over to a tech rep who when confronted with my situation asked if he could call me back after talking to a real engineer... #3.
Master #3: After being called back and talking to the tech rep and the engineer this is what I learned: I will explain this in a manner in which I hope everyone will understand. When a system is designed it is done so with a small bore master using a long stroke and a larger bore slave that uses a shorter stroke, this allows you to have a moderately light pedal with engagement adjustability throughout the range of the pedal. When this system is modified as in the case of increasing the force of the clutch and requiring a longer travel from the slave you need to increase the size of your master cylinder bore or the length of stroke or both in order to increase the stroke of the slave. Since the length of the stroke on most masters is no longer than 1.4" it was necesary for me to resort to a 3/4" bore in my master with a 1.4" stroke which provided me with a 1:1 bore and stroke ratio, since I only needed 1.2" of stroke on the slave I now have .2" of room to adjust the pedal (thats not much) and the pedal effort is noticably greater than stock but definately less than I had with the 1" bore master.
I will be putting this setup through its paces over the next few weeks before Motorsport and then I will be racing at Motorsport on Saturday and showing the car on Sunday. Any one who is going to be there on either day is welcome to come up and say hi and take a look etc. I will keep you guys posted.
Dragonfly