Samurai7one
-
Posts
117 -
Joined
-
Last visited
-
Days Won
1
Content Type
Profiles
Forums
Blogs
Events
Gallery
Downloads
Store
Everything posted by Samurai7one
-
Seems like there were a few Datsuns at SEMA this year. Things are changing. - long video on the FuguZ & interview with "Han" - short video FuguZ driving @ 12:18 @ 4:17 & 8:22 @ 3:06 & 6:42 & 8:47
-
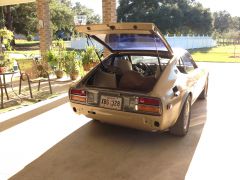
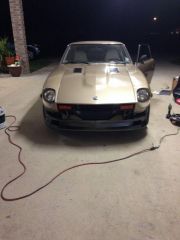
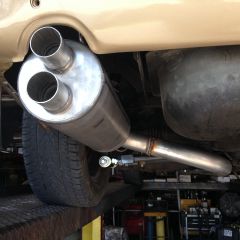
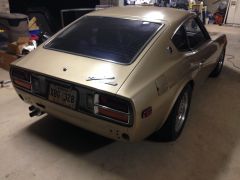
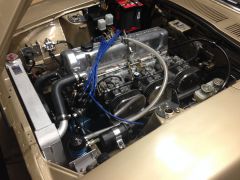
more pics: Runs really strong. Idles well and screams once on the main jets. Its the transition that needs to be fine tuned. Lots of reading to do here. I have about 3 hours of driving on it now and it just seems to get better every time I drive it. handles like a go-kart. I got the 5K springs front and rear on the BC coilovers and I like the ride with dampeners set all the way soft. Took a chance on the muffler, Its perfect IMO. The sounds this thing makes are intoxicating!!!
-
From the album: My 1977 280Z
-
From the album: My 1977 280Z
-
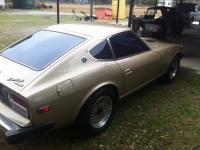
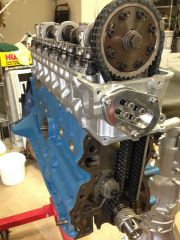
Finally got my Z on the road after months of abusing myself to (mostly) finish the project on schedule. I couldn't be happier with the results. Now time to begin ordering jets so I can tune my carbs. L28 ITM Flat tops P90 shaved .080" Crane Cam #168-0012 Kameari Tensioner Kameari adj cam gear Arizona Z cast AL oil pan Harata Intake Mikuni 40PHH carbs MSA 6:1 ceramic coated header 2.5" exhaust Gibson round muffler #758216 T3 adj LCAs front and rear (gtx2 front setup) BC Coilover conversion Rear Maxima disc conv. Upgraded alternator 15" Southern Ways
-
From the album: My 1977 280Z
-
From the album: My 1977 280Z
-
From the album: My 1977 280Z
-
From the album: My 1977 280Z
-

Lessons Learned - Crankshaft Repair Sleeve
Samurai7one replied to Samurai7one's topic in Nissan L6 Forum
Gareth, I have about 1/2" of crankshaft aft of the oil seal. The sleeve takes up half of that leaving me 1/4" of crankshaft for the flywheel to wrap around. I have a lightweight flywheel not a stock one, but it laps over the crank shaft 1/8". No problems for me. The sleeve could have been initially installed further forward also. I don't know about the gasket behind the seal trick but it seemed like I could have just not driven the seal all the way to the bottom of the groove and that would have put me over virgin material. My crankshaft was only lightly scored. I probably didn't even need a sleeve, My machine shop said "it's probably fine", I just really don't like rear main seal leaks and I have a fascination with making money disappear. -
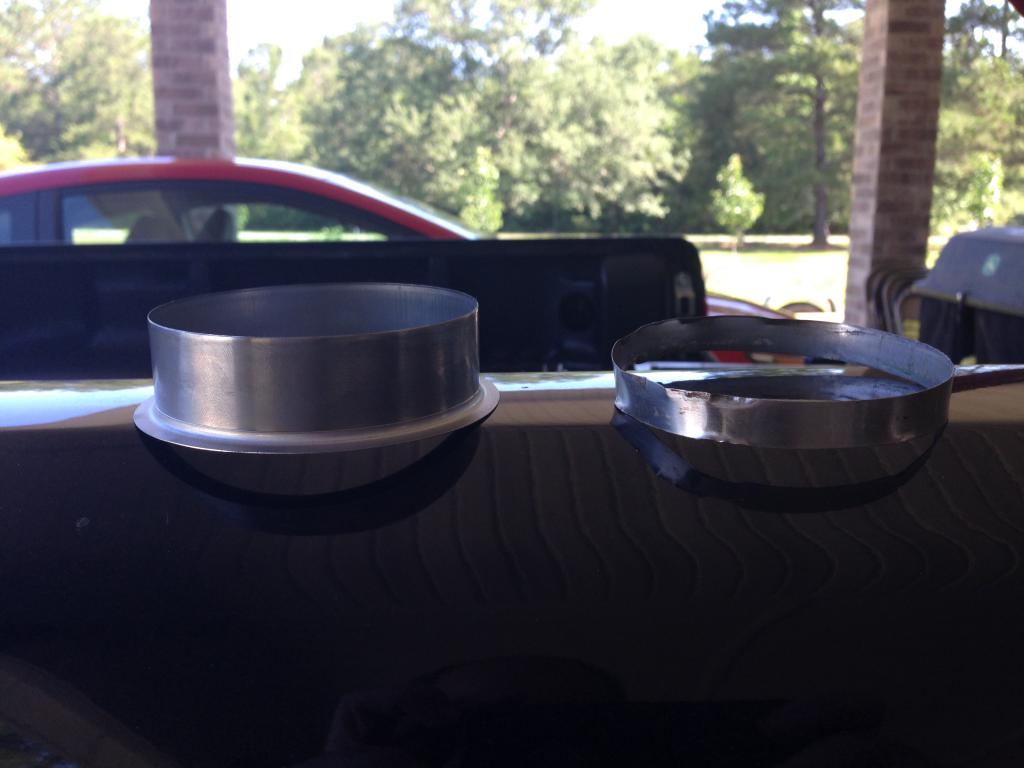
Unused NATIONAL on left / Previously installed SKF on right I ordered a sleeve for the rear crankshaft seal. I first ordered the SKF brand sleeve from Rock Auto. I was shocked to see how narrow it was. I tried to line it up on the crank so it covers the inner spring seal side and the outer wiper side. maybe it only needed to be on the spring seal side - i don't know. I got it centered with the seal and it had maybe 1/16" or less hanging out of each side. Making matters worse, when the flange is torn away it leaves the edge wavy. so, i took a small hammer and tapped around the edge to get it flat. I was not happy with this and was left having a mental battle within my head about leaving it alone or not. I eventually came to the conclusion that I am better off fixing it right while the engine is on the stand, than in the car. On the second try I ordered the National brand sleeve from Rock Auto. Take a look at the picture, you can see how much wider the national is than the SKF (although note that the national sleeve shown still has the flange attached). The flange on the National sleeve tore away much cleaner then the SKF brand, but not perfect. I just, very gently, tapped it down anywhere it was raised up. but, it probably wasn't necessary, since the sleeve is so wide, the torn edge is far away from the seal. My 2 cents: if you need a crankshaft sleeve, buy the National brand.

-
The store name is "green leaves" I really like their heat shield also. cheers
-
Dat, I asked the same question a couple of months ago when I received mine. Here is what I asked and the reply I received: I received the intake manifold it is very nice. I have some questions: 1. What direction does the manifold gasket go? It has a large metal flange on one side of the gasket, does that metal side of the gasket face the head? 2. Do you recommend any sealant on the gasket? 3. In the package were two aluminum plugs, a small one and a large one. What are those used for? Thank you for your contact with me. The answer is as follow. 1. Metal side atatches to cylinder head. 2. No sealant is needed . 3. Those plugs are for fuel hoses. You use if you want to plug the end of fuel hose. Thank you. That is from a Japanese seller of those intake manifolds. This is their website: http://www.gl2007.com/usa_product.html
-
Just an update FWIW, I brought my pistons/rods to a automotive machine shop and the guy looked them over. He felt two that he thought were a problem the rest were in his opinion "just fine". He had an electric induction heater for the rods which brought them to the perfect temperature and held it there. he pressed the pins out, ran a hone in the hole, cleaned it, reheated and pressed the pins back in. took him just a few minutes for each one. I was impressed.... So now I'm back on track with putting my engine together. It cost me $40 dollars and was well worth the peace of mind. I talked to the guy (Frank) for some time, he seems like he really knows what he is doing and his shop was A-1. I will bring him more work in the future. shop: C&F Automotive Machine Shop 1105 Avenue H Westwego, LA 504-341-3334
-
The wrist pins fit perfect prior to installing them through the connecting rods. I also installed one at a time so the pins where kept with the pistons as they were delivered. I put motor oil into the piston holes prior to installation. Maybe the piston material mushroomed out a bit around the hole.
-
I bought some ITM flat top pistons to install in my L28 build. I intend to use the stock existing connecting rods. I installed the wrist pins that came with the pistons and about half of them are not free moving. the ones that are free just flop side to side, good to go. the other ones I have to move them by hand. it doesn't take a lot to move them but the difference between the free and not-free are significant enough for me to be writing this right now. If I take my map gas touch and put on the piston on the material adjacent to the wrist pins for about 2 seconds the whole thing loosens up nicely and flops right over. This makes me think that maybe its ok once the engine was warm, but... what about the warm up period? hmmm. Additionally I had a very difficult time getting the wrist pins centered in the piston. Its close but IDK if its good or not. It seemed like the pin would move all at once in 1/8" increments, maybe its the press I was using, it was sort of used and abused. I did use the torch to heat the rod to help things along. After pressing too far , back in forth, back and forth, I got them within 1/6"ish of center. The pins cannot stick out far enough to hit the cylinder wall. So, in your opinions: -are the wrist pins a problem? -how centered do the wrist pins need to be, accepting that they will never be exactly centered anyway? Or should I take my box of parts to the machine shop..... again? Thanks guys
-
I have the Felpro rear main seal set. should i use sealant on the side seal itself? I know i need some at the corners of the block, but on the side seals themselves should I coat them in sealant? The felpro kit has the U shaped black rubber seal with the flat metal shim that goes in behind it. Thanks!
-
How to determine if a P90 head has been shaved?
Samurai7one replied to Samurai7one's topic in Nissan L6 Forum
thank you! -
How to determine if a P90 head has been shaved?
Samurai7one replied to Samurai7one's topic in Nissan L6 Forum
I measured roughly 108mm. sorry I only have a small metric caliper & it only goes to 100mm so I had to split the measurement. I know...Its so lame. 108mm = 4.25197" I promise to buy some decent measuring tools soon. -
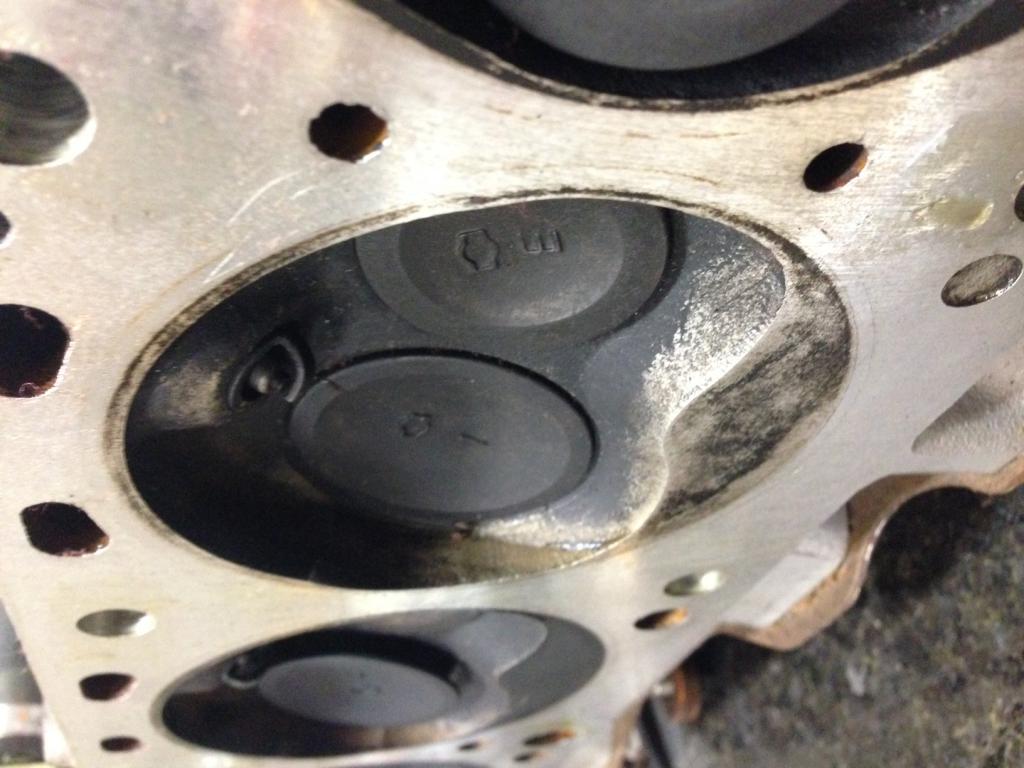
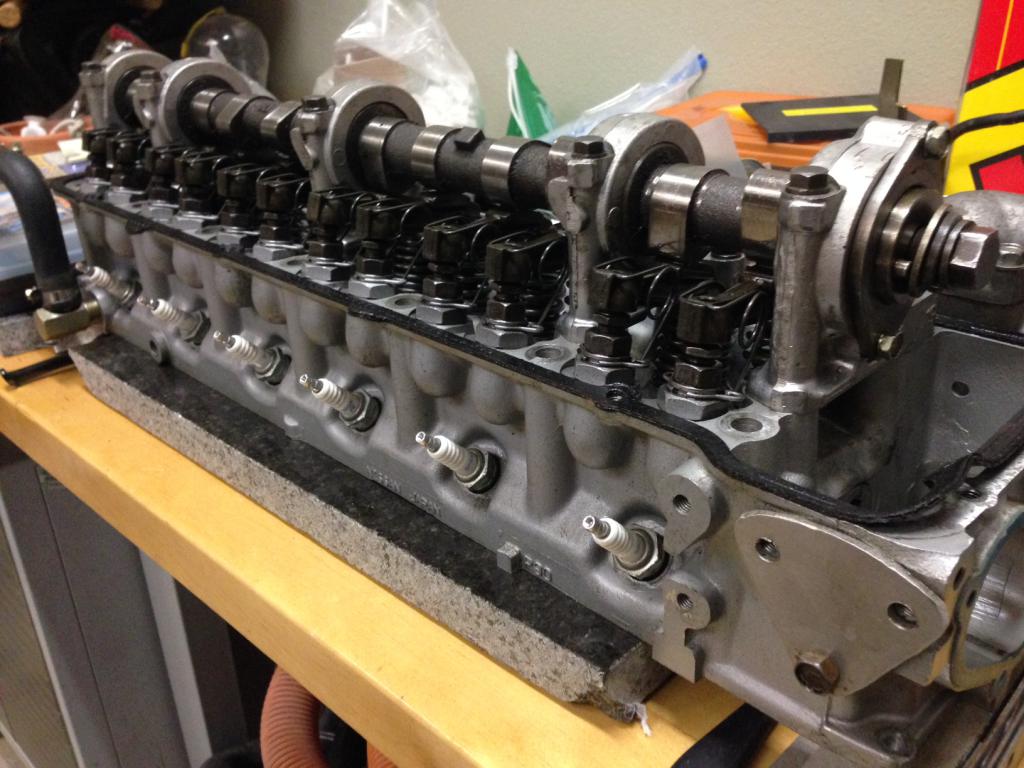
So, I got a couple of parts motors (L28s) Ive been sitting on and waiting (3 years) to get to a point in my life where I can start to build my motor. I guess I have reached that point, so I have started to tear down the two motors. I have two L28s, one has a spun bearing BUT, it also has a wealth of desirable parts on it. Such as: a Kameari timing chain tensioner, adjustable cam gear, lightweight flywheel, cast aluminum oil pan, flat top pistons, and what looks to be reworked or like new P90 head. Because of the specific parts this motor has on it, I am expecting that the head was probably shaved in order to increase the compression ratio. Why would anyone put all of those parts on a NA motor and not spend a few dollars to shave the head (maybe future turbo plans)? So I guess what I am looking for is an easy way to determine if the head has been shaved. I know I can CC the combustion chamber, but is there a more simple method, such as measuring the height of the head itself? Pictures are attached, maybe some of you guys can just take a look at the chamber shape/size and tell. Thanks in advance!
-
From the album: My 1977 280Z
-
Wheel Show! Post your pics of you wheels
Samurai7one replied to k3werra's topic in Brakes, Wheels, Suspension and Chassis
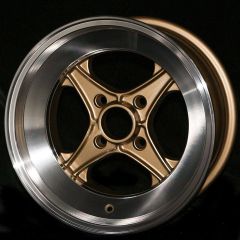
Anyone see the new ROTA XO4 wheels? They are not on the Rota homepage yet, but a simple web search will find them. (5x8 4x114.3 -10 is available) -
Rota Shakotans.... anyone running them?
Samurai7one replied to ComicArtist's topic in Brakes, Wheels, Suspension and Chassis
Mal_tiempo, Got any pIcs of the -offset Aliecias yet? Anyone else have some new Rota Shakotan pics? Thanks, I'm really liking both of these wheels.