Jump to content
HybridZ

timbo1jz

Donating Members
  • Posts

    204
  • Joined

  • Last visited

Everything posted by timbo1jz

  1. your in for a ride!! its all the little things that make it hard! getting the motor in is the easy part!!! LOL!!
  2. hey guys im back! had some family things to deal with but I am focused on the z again. Got the new .58 housing on the turbo and it is perfect! the car is sooooo fast and gets great traction with the gear ratio that I am running. My brake booster died and I need a fiberglass hood and then I think I am ready to roll.
  3. So my new exhaust housing should be here any day!!! Going with a .58 as opposed to my .82 that I have now with the p trim wheel. I am looking for more fun rather than big number and my cams should help out on the top end.
  4. when the motor was in my supra, i had a smaller t3/t4 turbo and a 4.3 ratio diff, so it was a big difference. I talked to my turbo guy and we are going to change the exhaust housing to a smaller one to make it spool faster.
  5. Hey, so I took my girlfriend for a ride around the block and the car is stupid fast!! But the thing I don't like is that the turbo I am using has too much lag. With the q45 3.5diff ratio it is not very friendly for the street with this turbo. Gonna change it out or I even have thoughts of selling the beast!
  6. did you put the clutch disk in backwards? had the exact same symptoms with my rb20 when I did that.
  7. you got rid of the z? That makes me sad . You were an inspiration to my build man and gave me so much good info! Thanks for your help, and at least your building another bad ass project!
  8. correct because the one that goes to the intake manifold has the pcv valve in it so it operates under vacuum, but when you boost the engine the manifold has pressure and the pcv valve closes so pressure doesn't enter the valve cover. The other side has the elbow that goes to the intake, because their is no pressure going to the valve cover, just a vacuum under boost so their is no need for a pcv valve one the intake side, thus thats where the catch can should go.
  9. Because I wanted to keep the PVC valve which is on the other valve cover.
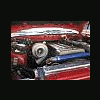
  10. Well I got my oil catch can in and mounted finally. Hardly any room for a vacuum source on the intake since my filter is mounted on the turbo, so I tapped it into the hard plastic of my intake filter with a bulkhead fitting. I then modified the 1jz valve cover for a -8 bulkhead fitting and used a NRG catch can with AN fittings and hoses. Works great, here are some pics. Don't mind my battery clutter as it is only temporary as my battery took a crap!
  11. I thought the 1jz swap would be really easy, but it ended up being a huge pain in the ass. Getting the motor mounted in was the easy part. All of the other fitment issues and little things are what make it a hard swap. Also the fact that swapping a high horse power engine into a stock 70's car suspension and drivetrain is a bad idea, so you have to make sure your chasis/suspension will hold up to the swap, and that gets very expensive. I definitely would have gone the RB route, but I already had the 1jz motor.
  12. the seats are surprisingly comfortable, and ill try to get some pics of the mounts I made pretty soon. And yes that is a push button start where the cigarette lighter used to be. Good eye!!
  13. my thoughts are that I don't really care. The seats have obviously been tested in accidents before they sell them, so I am not worried. I still have my seat belts holding me in if the seat breaks.
  14. yah, its a zeitronix wideband under the afc. As far as the dash goes, I made it. Just a full dash cap with autometer gauges and so forth.
  15. Here are a few pics of my NRG fiberglass race buckets and 4 point camlock harness's. Also got my dash done. Here are some pics-
  16. well, after finishing the dash and all, I finally got around to installing some seats. I didn't end up using the recaros that I had because they did not hold you in well enough. So I ended up getting a set of NRG race buckets and they are awesome!!! They weigh practically nothing and just barely fit into the Z. They were a pain in the ass to install, but were well worth it in the end. I also went with the Nrg 4 point harness with the cam locks. Anyways, almost done, just got a few little things to work out, then I will be ready to rock and roll. Here are a few pics-
  17. gonna be rolling around flat black for now, but plan on painting it orange when it comes time.
  18. hey guys, got the dash done finally, after going through the BS of moving into a new house. Still need to tuck up the extra wiring though. Decided to keep the stock speedo to see how well it would work with the 1jz trans cable. anyways, I plan to take this beast for a very short ride this weekend with no hood or doors to see what happens!! Here are a couple of pics-
  19. Sorry I haven't posted recently because I just moved. I got the datsun over to the house now and have been getting a lot done. Currently installed autometer guages in the dash, cleaning up the wiring, bled and finished the brakes, ECT... Almost done just a bunch of little things left! I'll post some pics of the new stuff in a couple of days- Tim-
  20. I have a 74 with a 1jz/ r154 also with the MM Q45 setup but I just did my best to eye it out the best I could. Seems to be fine, but I just got it running and haven't drove it yet so I can't be any help.
  21. mounting the 1jz in my car was the easy part. All of the other little things that go along with it make it a complicated swap and very expensive if you do it the right way. No point in driving a car with a fast motor that can't handle the power. Thats why you need to address the brakes, chassis, suspension, ect.....
  22. I had the same alternator problem with my swap. I just put a volt meter on the battery and jumped each one of the 3 wires one at a time until the alternator started to put out 14 volts. Mine ended up being the black/yellow wire, but that is on a 1jz.
  23. the painless harness is a bit of work to wire into the factory datsun switches and such, but its not too bad. its more time consuming than anything. Anyways, here are a couple of quick vids- http://s176.photobucket.com/albums/w178/timbo1j/?action=view&current=260zzz257.flv http://s176.photobucket.com/albums/w178/timbo1j/?action=view&current=260zzz259.flv
  24. Well, finally got the beast started up!!! The motor runs great even though it sat for over a year. Wiring took a little longer than usual because I am using a painless harness for the interior, but in the end will be better with all new wiring. I have a couple of startup vids that I will post later today!!
×
×
  • Create New...