

jacob80
-
Posts
1035 -
Joined
-
Last visited
-
Days Won
1
Content Type
Profiles
Forums
Blogs
Events
Gallery
Downloads
Store
Posts posted by jacob80
-
-
Perhaps, yes. Maybe they have these nuts at my local Nissan dealership, I'll give them a call. Also, you linked me to the nuts for a 280zx Turbo. Will these work for these 280z 27 spline stub axles? Is there a difference?? I see that there is a different nut available for the non-turbo 280zx as well....
-
Really? These are brand new nuts from modern motorsports, only went around the block with them. You still think I should replace them? For what reason?
-
Okay, well I've made yet another discovery. Somehow, the threads on my passenger side stub axle got messed up, bad. Lets just say, there are no threads, but somehow the nut was still holding on. Luckily, I have an extra set of 280z stub axles, so I will be taking the old one and having them transfer the bearing and wheel studs because the previous owner installed longer ARP studs that do not work with my wheels. The nut on that stub axle looks okay, but I will double check before I reinstall and will probably end up making another video. I also ground down the end of the CV axle to make clearance for the cap. I did the same thing to the stub axle, as well, taking of 4mm of the threads. Hopefully I will have allowed enough clearance so that I can keep my caps on and perhaps the ticking noise will have gone away. I will keep you guys updated!
-
I just would not feel comfortable at all going that route. I know our WRX only uses silicon to seal the pan, but man, I don't really feel like experimenting and having to pull it off a third time, you know? I think I'm going to try and put the permatex high tack on the block surface and the pan surface and let it set up for about five to ten minutes then set the gasket on the oil pan and like z ya said, just get the bolts hand tight and let it sit for an hour or so then torque them. I've had great success with the Permatex high tack stuff. Let me know if you guys have any other suggestions, thanks!!
-
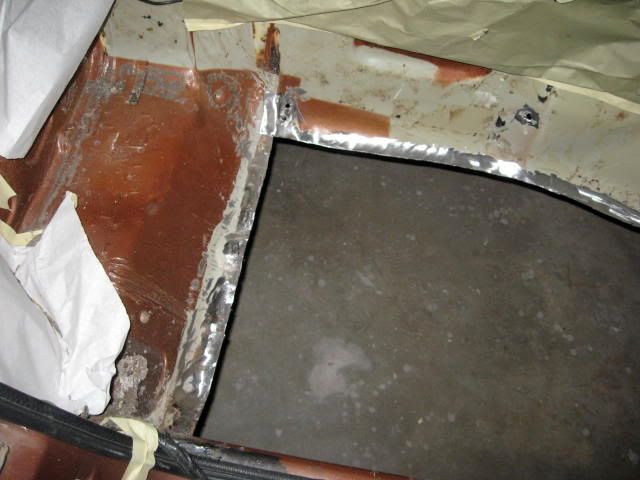
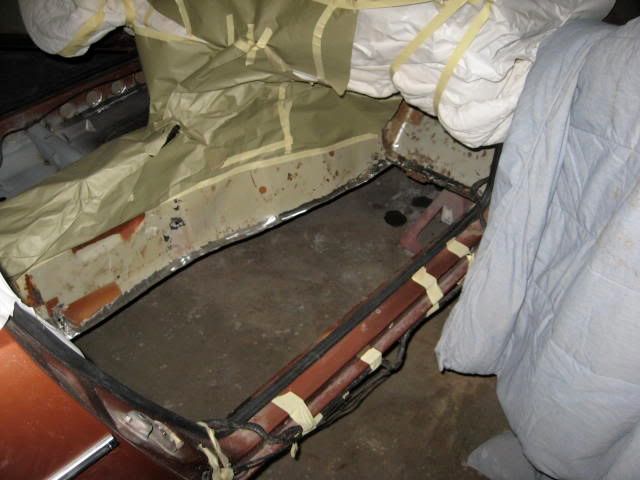
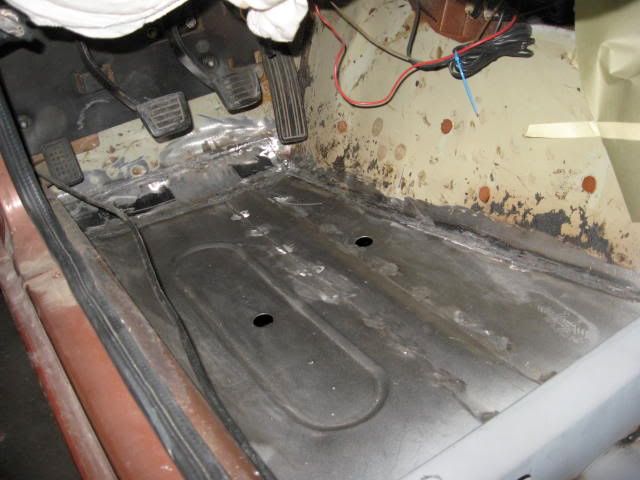
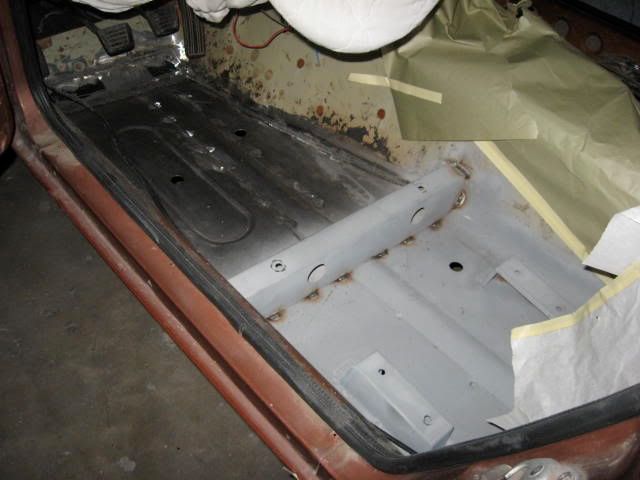
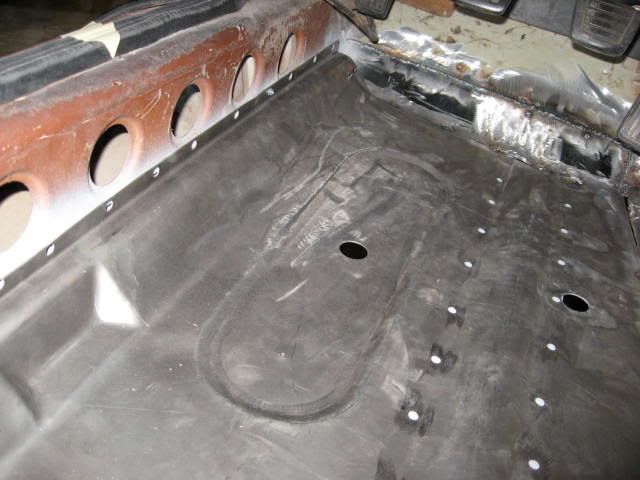
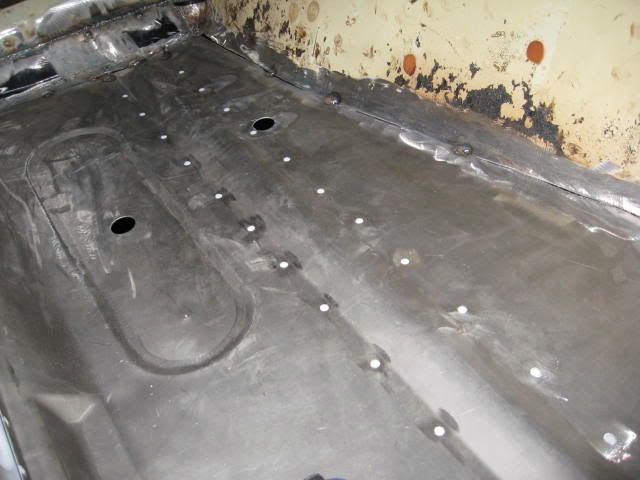
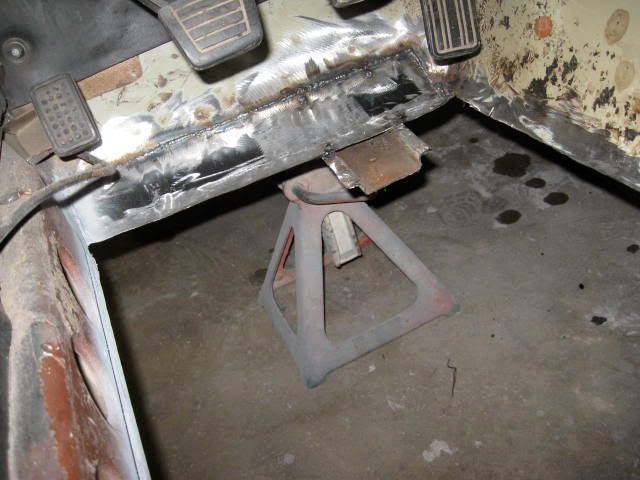
I just had the floors in my car replaced by a body shop in Omaha, Nebraska. I will tell you right now that the Zedd Findings floor pans do have a fitment issue regarding the side that comes up to the rocker. The angle of the original floors is not as extreme as the angle of the Zedd Findings floors. It works, it just won't be where the originals were. This is something that should be addressed when they are stamped, but they are not. Another thing is that the drain holes are not identical to the original floors, not that it matters much but I assumed these were replicas. Also, I ended up buying all new seat brackets from John at Bad Dog Parts. These pieces are of much heavier gauge, but he does not include the bracket that runs between the two rears, which doesn't necessarily present a problem as far as I'm concerned. I, too needed the extra meet up front under the pedals as my area up there was damaged, but for whatever reason, he didn't extend it all the way up there.

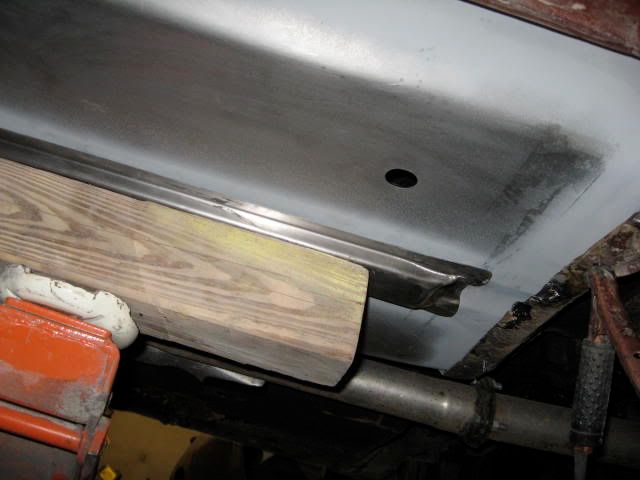
This is the photo that shows how much higher this side comes up on the rocker panel vs. the stock location:
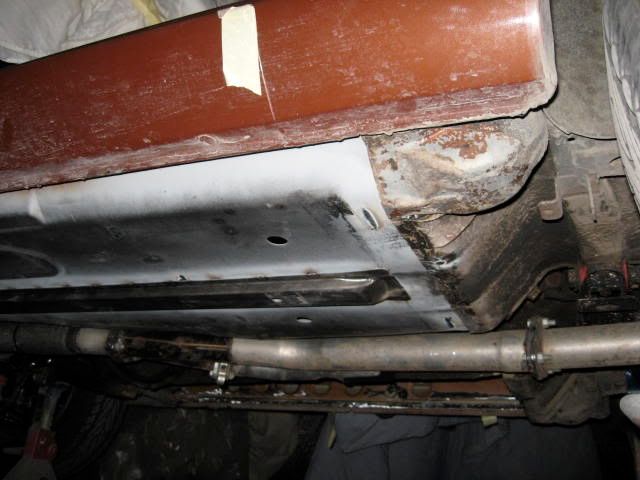
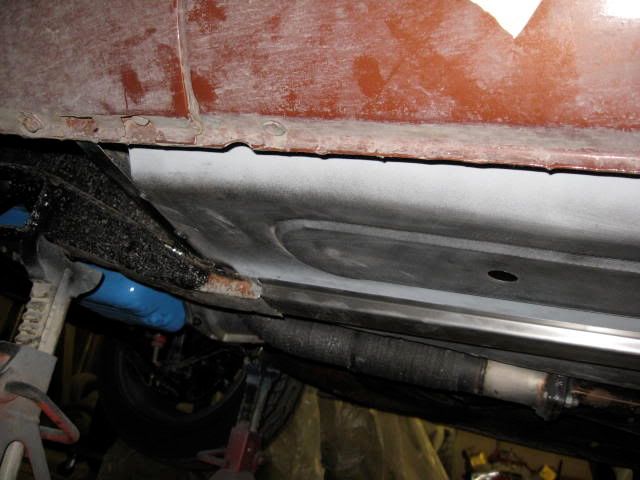
Patch that had to be custom made:
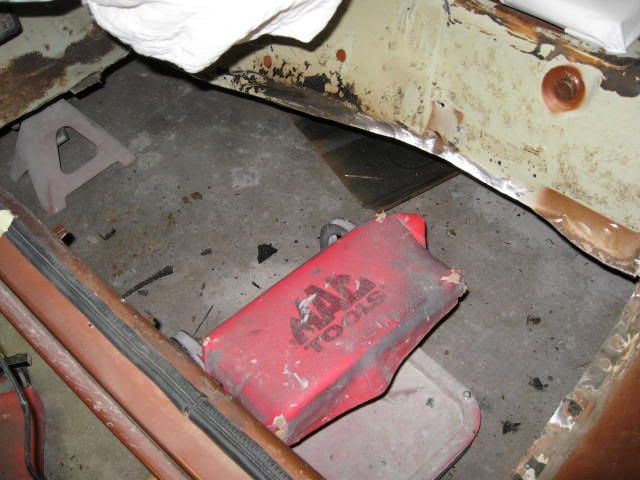
I have more photos if you need something specific.
-
You sure you NEED a 2mm head gasket? Give Rebello a call and see what they say, because you will end up spending a lot on a 2mm head gasket when you may not need to.
-
Why does it seem that no one buys an aftermarket lsd like a KAAZ from a 240sx and swap it in ? Did any one try it . I would have a good deal on one and i want feed back a little ?
They do, its called a Quaife.
-
I would define the perfect daily driver as something that is cheap, easy to maintain, and availability of parts. Often times, a Honda comes to mind, or perhaps a Chevrolet Cavalier. My friend had a Cavalier that never died on him, and he beat the hell out of that thing!
-
Looks like I will be doing this tonight:
Well, I grinded off about 5mm off the end of the CV and that looks like all I will need. Dan was right, a little grinding here and there and it fits without a problem, at least on my setup. I took about 4mm off the stub axle (couple thread still showing on the nut) and 5mm off the CV (end cap removed).
Just to make sure everything was going to be okay, I took the spring out and moved the suspension through its travel. You get the most binding from the CV to the axle at full droop, not compression. A little gasket sealer on the companion flange to the CV and it's a done deal.
The picture with the nut in between the outer CV and the companion flange is the suspension on the end stop (full compression). You can see gap between the stub axle and the CV actualy get parallel, thus creating an even larger gap.
It would be nice to have known about this before I actually put everything together and tried it. I wonder how many people have success just slapping everything together and having no problems? Could this be the cause of my ticking sound I'm getting??
-
Also, when I installed the CV shafts, the caps did pop off a couple of times from me trying to wedge them behind the adapters so I could bolt them up. Its almost as if the wheel side of the shafts are maxed out when you install them, which makes me think how much room it even has (or lack there of) to contract/extend. Little concerned, hopefully you guys can help me out. Thanks!
-
The car is at stock height, not lowered. Are you saying that the caps being mangled like this is actually a normal behaivor? Could this be causing the ticking noise I'm hearing?
-
I've just added a couple videos that will help explain what is going on and my newest discovery. Hopefully I just have something out of order and no serious damage!
-
Not to hijack this thread, but are you supposed to fill the differential until it starts coming out and thats when you know its full? Also, what fluid is supposed to be used in the CLSD vs VLSD R200 rear ends?
-
Nice! Looks good!
-
Hey guys,
Just getting my car back together and will resume tuning shortly. One thing I did notice within my tune is that when I keep the car at a low kPa and keep increasing RPMs, right when I reach ~3000 RPM the car starts stuttering. There is no detonation, but a stutter. Is this cause by the ignition map being too retarded? From what I gather, if I have too much advance, it would detonate. I know I'm not going lean because when I step on it at the same RPM but obviously higher kPa, there are no problems. Thanks for your help guys!
-
Yup, I got it all figured out. The Fidanza is drilled for 225mm and 240mm pressure plates as far as dowel pins. I had them relocated at my local machine shop. Thanks!!!
-
And that is what I did!
I took the flywheel down to the machine shop and it looked like he pulled them out with a slide hammer for $7.00. Then, while I was in there, he said it would be silly not to resurface it for an extra $12.00, so I did and she hooks up like a mother now, thanks guys!!!! Now I'm just dealing with some rear end noise...grrrr!!!! -
Okay, sounds good. Do you have any experience with the Permatex "High Tack" stuff? Seemed to work very well on my front cover gasket as I have no leaks. Also made it damn near impossible to pry off my valve cover gasket! No leaks there, as well.
-
Okay, cool, I'll try that. I also forgot to mention that the interior is out of the car, so some noises that I am listing here may be normal but are only evident because I have the interior out. I've also removed all undercoating as well and painted the bottom of the car with POR-15 paint.
-
Hey guys,
Well, I've just installed my new clutch, Ron Tyler mount, VLSD R200, CV axles, modern motorsports CV axle adapters, and 27 spline 280z stub axles. Everything came together great! Last week, I took it out for a test drive and noticed a couple things. Here is the verdict:
1. There seems to be a constant sound that sounds like a small air leak (obviously not an air leak) that seems to be coming from the rear end, I may be wrong though. This sound does not sound abnormal however, but was not present previously. Perhaps it is from the new differential and mount. The sound seems to become less and less as I slow down, as well.
2. The rear drum brakes seem to be dragging inconsistently. How do I adjust them? I thought last time I did this that all you do is pull the e-brake a bunch of times and it will adjust itself. Should I just tweak the cylinder in a little bit to where they are just not dragging?
3. This is my main concern. There seems to be a constant "tick tick tick" coming from the rear. I want to say that something may not be tight, but I'm not sure. What is the best way to approach this? I'm thinking about pulling the CV joints on the stub axle side and trying to tighten the stub axle nuts even more and then tighten up the CV bolts some more to the modern motorsports adapters. I did shorten the CV shafts as described by modern motorsports, so perhaps something just is loose cause the wheels to be a little wobbly.
Any help is appreciated, this is my very first drivetrain upgrade, so bare with me!
Thanks guys!!UPDATE-VIDEO LINK:
-
I just called Advance Auto and had them order a Fel-Pro $6.00 oil pan gasket. Is this gasket okay to use with the silicon sealer? If so, which sealer should I use, specifically? I really do not want to do this again. Thanks!!
-
Yes, I focused specifically on obtaining the correct torque across all bolts and keeping the surfaces clean. I do have a drain hose setup that may be causing some problems as well. I had an AN fitting welded onto the tank, but when it came time to install the hose, the fittings would not fit as I wanted them to, so it is partially binding and putting some pressure on the pan itself. I plan on cuting off the AN bung and running the stock drain return line (metal piece with a small piece of hose connecting it to the pan. Specifically what silicon did you use to seal the pan?
-
Hey guys,
Well, right now I"m pretty fed up with this damn motor and how it just wants to piss oil everywhere. About three weeks ago, I installed my second oil pan gasket just to have it leak again. Oil seems to be coming from the front crossmember area and soaking it with oil and leaving a six inch wide spot in the last two days. This happened after I retorqued the bolts to 7 ft. lbs. When I installed it, I put a thin layer of gray permatex on the gasket and let it sit for about an hour. This was recommended to me in another thread from a member that has said he did this and has never had a spot of oil leak. Am I doing something wrong here? Please share your experience with your oil pan gasket, and if you've been successful, what you did to apply it. Thanks!!
-
Add a track with left and right turns
Just joking, never really watched auto-sports, I don't like watching any sports for that matter, I would rather go out and do it.
Touché.


New Drivetrain installed, but noise has followed
in Drivetrain
Posted
Also, is the part number for this the SKU number (43262-L28ET)? If not, what is it?