-
Posts
588 -
Joined
-
Last visited
-
Days Won
4
Content Type
Profiles
Forums
Blogs
Events
Gallery
Downloads
Store
Everything posted by Kevin.pk
-
http://www.improvedracing.com/tech/LS-oil-pan-dimensions.php F-body ls1 oil pan is probably most common used for S30 swap. The LS3/ls2 Corvette oil pan is shallowest and probably the best option. The LS3 Camaro pan is 1" deeper than the LS1 f-body pan. I wouldn't use it.
-
Some new parts came in. As soon as it warms up in Dallas, I'll get started putting it all on. Techno Toy Tuning Bolt in Camber Plates Techno Toy Tuning Coilover Top Plates 300lb/in springs Steering Rack Boots Camber plates will be installed up front. Rear will get done later, but think I need to source some stock strut tubes for the rear. I may end up being too low after removing the stock isolators for the plates (struts are currently sectioned).
-
Upgraded the clutch to a Monster Stage 2 and 18lb flywheel. Didn't really take much in terms of pictures. Clutch drives pretty much like stock. Still breaking in though. Motor pulled and back together
-
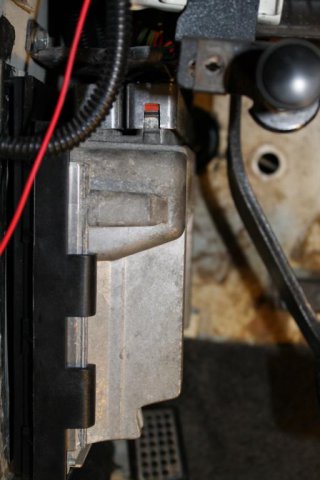
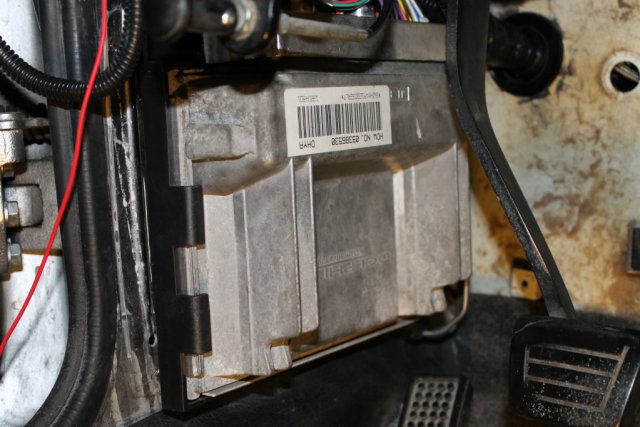
I mounted my PCM in the stock 280z computer location with a PCM bracket out of an s10 if I remember right. I did not use a factory harness, so I don't know if it would be an option for you.
-

Koni Gland Nut Loose(?)
Kevin.pk replied to Bob-omb's topic in Brakes, Wheels, Suspension and Chassis
Wrong gland nut for 280z strut tubes. I did the same thing ordering the smaller size. Think it was listed wrong somewhere on this site. Correct part number is :PN 73.25.00.025.1 Size should be m52x1.5 -
Spotted a car that I recognized from Hybridz in recent Speedhunters article It is member emwhyr0hen's car. http://forums.hybridz.org/topic/69340-project-vq-is-underway/ Looks like they are deconstructing the car and reverse engineering the setup to build the same setup in the blue Z car. The mounts look similar and the routing of the intake piping to the cowl is the same. Think it's actually the engine out of the white car being put into the blue Z. http://www.speedhunters.com/2014/11/rocky-auto-where-the-magic-happens/#chapter-the-house-that-rocky-built They obviously have every right to do what they want with a car after the buy it. Kind of interesting seeing cars built stateside turn up across the Atlantic.
-

Fitting issues with 15x9 15x10 -28 offset?
Kevin.pk replied to pacemkr's topic in Brakes, Wheels, Suspension and Chassis
Pictured below in Rear only: 15x10 -29 with 235/50/15 toyo r888. Regular ZG Flares I have coilovers but almost 100% certain these would fit without them. -
This is really simple and basic install but thought some other folks might like it. Bought a usb charging outlet/panel from amazon: http://www.amazon.com/gp/product/B00IRJH8CE/ref=oh_aui_detailpage_o01_s00?ie=UTF8&psc=1 I popped out the small square port in between the fasten seatbelt and defogger lights. The hole did have to be opened up. If you have a pristine center console, this would be a hard pill to swallow, but mine is beaten up so i had no problem opening up the hole some. Wiring is super simply. Just supply switched 12v and ground to the two spade connectors on the back and you are done. The front panel has a fairly obnoxious blue light that is on all the time. I intend on painting over it, but there is a rubbery cover for it when not in use. Installed one in my daily as well. (shows the light on)
-
This is really simple and basic install but thought some other folks might like it. Bought a usb charging outlet/panel from amazon: http://www.amazon.com/gp/product/B00IRJH8CE/ref=oh_aui_detailpage_o01_s00?ie=UTF8&psc=1 It comes with a mounting plate but can be pulled from that and just use the circular portion as seen in the picture above. This very well could be installed in the dash in place of the cigarette ligrher outlet but I like the idea of keeping the cigarette outlet for a more universal 12v outlet. So this got installed in the center console. I popped out the small square port in between the fasten seatbelt and defogger lights. The hole did have to be opened up. If you have a pristine center console, this would be a hard pill to swallow, but mine is beaten up so i had no problem opening up the hole some. Wiring is super simply. Just supply switched 12v and ground to the two spade connectors on the back and you are done. The front panel has a fairly obnoxious blue light that is on all the time. I intend on painting over it, but there a rubbery cover for it when not in use. Installed one in my daily as well. (shows the light on)
-
I should make it. Ill give you a shout when I head out there.
-

Add another LS HybridZ to the list. We have ignition.
Kevin.pk replied to dreco's topic in Gen III & IV Chevy V8Z Tech Board
Glad to help with the idle issue. Wish I was going to be in town this weekend or I'd try to make it to cars and coffee. Sounds like we could have a decent showing of some LS powered z cars. -

Yet another rear drum to disk conversion option!
Kevin.pk replied to Nigel's topic in Vendor's Forum
I've probably have 1000+ miles on my kit. Happy to report no issues. Parking brake works great. Hoping to put them through their paces on a track soon. Great kit. -
A/C is a wonderful thing. Got hoses crimped and system charged. Made a bracket for the Drier. I wasn't happy with the two little straps that Vintage Air provided. Bracket is just some left over 2.5 exhaust split and a couple tabs welded on to tighten it around the Drier. All buttoned up. Trinary Switch wired. Fan relay got moved to the lower condenser bracket.(used to be mounted where the drier is now) System Getting charged
-
Hoses and fittings came today. Have the drier and Condenser mounted and started to mock up all the hoses. Lines coming off the compressor Condenser and Drier mounted with hoses mostly in place. Had to make a small notch on the driver's side of the core support for the Condenser to fit. Need to make a matching bracket for the other half of the top of the condenser. Running the #8 and #10 lines along the bottom of the condenser. Got a little carried away trying to make the lower bracket look nicer. Hoses are run through the fender horn. Early cars have this area already open, but I guess they blocked it off on '78 cars. I had to cut open this section to pass the hoses through.
-
Compressor installed. Took a bushing made for a lawnmower idler pulley and cut it down to install smooth idler pulley. Pulley is installed where one of the long f-body alternator bolts are. Ordering up hoses and fittings and hoping to have everything buttoned up sometime next week.
-
Just piecing together the A/C components one by one really. Vintage Air Gen 2 Mini underdash unit from summit $469.97 Vintage Air standard control panel from summit $50.00 Vintage Air Drier w/ Trinary Switch From summit $58.97 12"x24" Condenser from ackits.com $61.51 Sanden SD7 7176 compressor from TBIproducts.com $165.00 A/C compressor pad Fittings #8 and #10 for Compressor from TBIproducts.com $20.00 I've only got ~$40 tied up in the mount for the compressor at this point That puts the total so far at $865.45. All that's really left to purchase are the hoses,fittings,and charging the system with refrigerant.
-
Piecing together the rest of the A/C system Compressor, drier, and condenser pictured. Compressor is a Sanden style SD7 7176 unit. . Making my own mount for the A/C compressor. Mounts similar to the JCI bracket but it is a different compressor. Need to pick up some more material to make a piece that mounts to the front mounting ears. Current piece is just some scrap that i cut up. Before I trimmed off the top section and mounted in the car. Trimmed and mounted up on spare block/head
-
May have gotten a little carried away with the plastidip.... The hood is just in primer and don't know if i would want to paint it black permanently, but really wanted to see how the black looked on the air dam.
-
Decided to play around with some plastidip.
-
New rear brakes!! Received my kit from the thread in the vendor forum today.http://forums.hybridz.org/topic/113199-yet-another-rear-drum-to-disk-conversion-option/ Bolted up one side. Still to need to do the passenger side and the parking brake. Bought calipers from rockauto. They were $211 for the pair. Rotors were purchased from amazon for $70. All in everything was a little more than $600. Calipers are from a 2004 jaguar vanden plas. Rotors are from a 2008 mustang gt. Bye bye drum brakes. Bracket and centering ring installed. Caliper and rotor installed
-

Yet another rear drum to disk conversion option!
Kevin.pk replied to Nigel's topic in Vendor's Forum
Received my kit today. Bolted up one side. Still to need to do the passenger side and the parking brake. Everything went together smoothly so far. Great kit Nigel! Please make more quality parts that I can buy. Bought calipers from rockauto. They were $211 for the pair. Bye bye drum brakes. Bracket and centering ring installed. Caliper and rotor installed -

Large 17" tires, 295 and above...... no more
Kevin.pk replied to texis30O's topic in Brakes, Wheels, Suspension and Chassis
what size are you looking at? there are several options in 315/35/17. checkout tirerack.com -
Haven't had bumpers on my car for 10 years.. (5 with it actually on the road) Always planned on 240z front bumper though. Never had a problem with police or inspection. Inspection doesn't check for bumpers, just lights, parking brake, horn, wipers and brake check.
-

Yet another rear drum to disk conversion option!
Kevin.pk replied to Nigel's topic in Vendor's Forum
Looking good! can't wait -

Anybody buy a JCI kit recently?
Kevin.pk replied to socorob's topic in Gen III & IV Chevy V8Z Tech Board
i'm guessing this is specific to the A/C install. Is it for the Idler in this pic? (not my car. borrowed pic from old post by savage42)


