dogmeatk
-
Posts
23 -
Joined
-
Last visited
-
Days Won
1
Recent Profile Visitors
2430 profile views


dogmeatk's Achievements
")


-
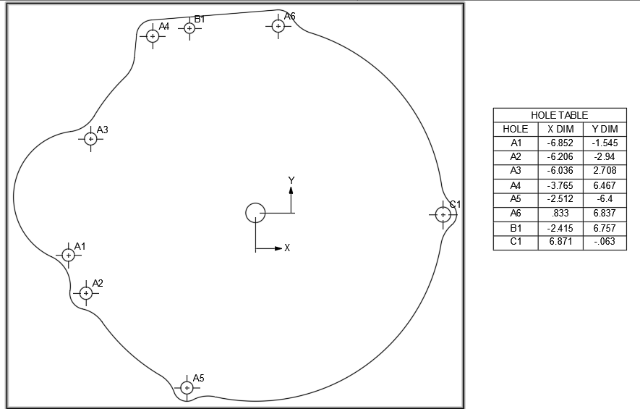
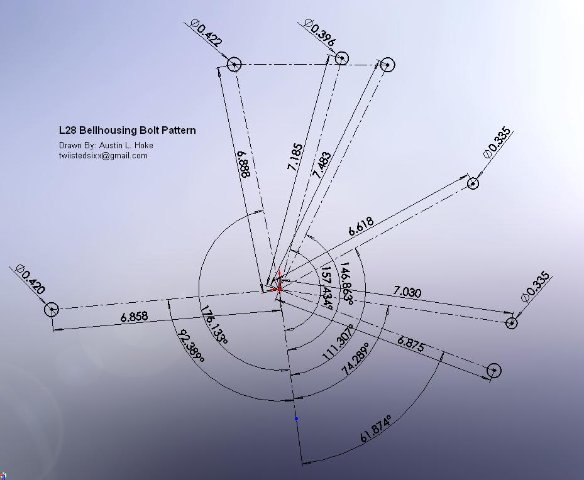
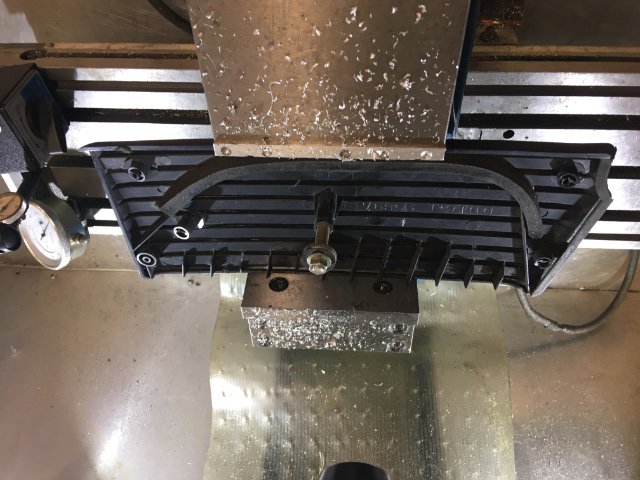
I decided to measure the bellhousing plate instead. Attached are my measurements. I machined up a test plate and it fits great. L28 Bellhousing Plate Measured.dxf

-
Looking into verifying the below and adding the lower holes, will upload when complete
-
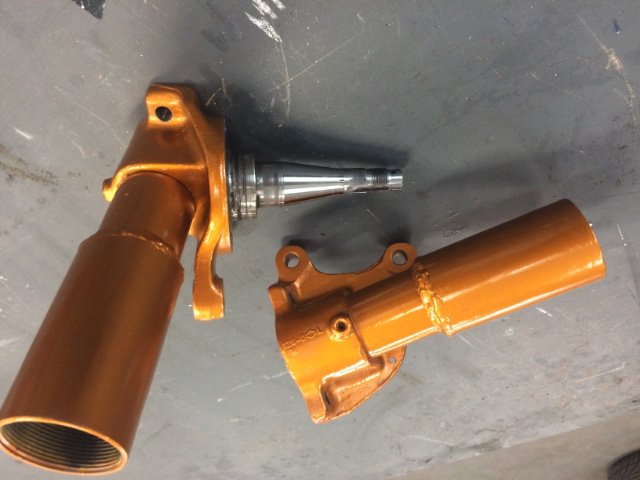
The main sensor you will have to figure out is Cam Position. The easiest solution is to use the 280ZX Turbo distributor because it has an optical trigger wheel, but those are getting rather hard to find. You have to swap the trigger wheel to one from the MegaSquirt Vendors. There are some third party Z vendors that offer Crank-pulley-mounted VR sensor solutions, but you have to then mount a cam angle sensor anyway because you have to be able to tell the speeduino when TDC is triggered. I opted to build my own sensor using a hall-effect sensor because I couldn't find any reasonably priced plug-and-play optical sensors that were rated for the engine temperatures. The hall-effect sensor is also more resistant to EMI in the engine bay, as logic is handled in the sensor as opposed to at the ECU. I gave up on buying "motorsport" grade wiring and just got some Molex connectors pre-wired to 48" pigtails from McMaster.
-
simplicity and reliability, ZX turbo track toy
dogmeatk replied to stupid_fast's topic in S130 Series - 280ZX
@stupid_fastawesome build brotha! whats the latest word? -
And now with 100% more blow off!
-
wow @G-Tech that looks super clean with the rectangular holes glassed in! I thought about doing it, but hate working with fiberglass so much that I passed for now. I might fabricate some inserts at some point. As far as adhering the side skirts, I am still on the fence about whether I want to drill into the fender/quarter or fabricate my own set from aluminum. I am also having trouble with the thickness of the fiberglass flange that goes under the door. Mine is crazy thick near the front and I have trouble getting my doors to close even with adjusting the hinges to the reasonable limit of the other door panel gaps. I searched for many months for a urethane kit for the S130 but ultimately never found anything viable. I would pay real good money for a urethane kit with this design.
-
I got the Type II from MSA below. The front and rear bumper covers fit great with a little trimming. The side skirts are a nightmare and I would not recommend buying them. They both flare out tremendously on the fender and the quarter behind the door and there is no way to mold them "in" for them to sit flush with the body. https://www.thezstore.com/page/TZS/PROD/classic02a02a/50-1512A
-
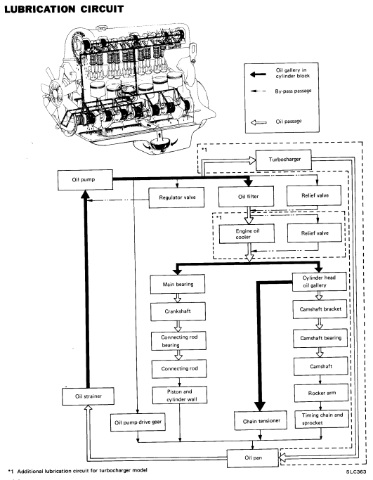
In digging into the FSM, I noticed that the oil feed line to the stock turbo is ... not filtered at all ? Is this an error or is this true? Is there any deliberate reason for this? I would think that engine contaminants are not great for turbo bearings. I would like to filter the oil feed but now I wonder about the Nissan engineers and whether they had a good reason for it. Maybe the pressure drop from the filter is more of a risk than particulates?
-
Does anyone familiar with the 280ZXT know if the stock turbo was supported by a bracket to the block? My Saab had a steel bracket to isolate the cast manifold from dynamic forces applied by hanging the turbo directly off of it. Seems like a smart idea to avoid cracking the cast manifold. I finally added my missing turbo and am wondering if I am missing a bracket or if they just never came with one. I searched for pictures but didn't find much from the underside of a stock setup. If there was one, does anyone have a picture of the mounting points?
-
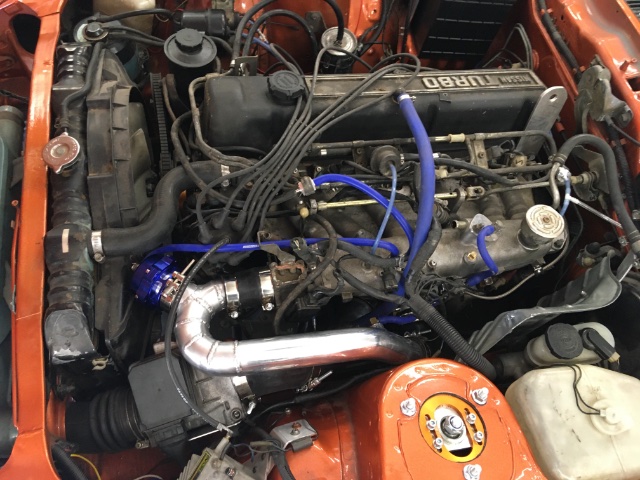
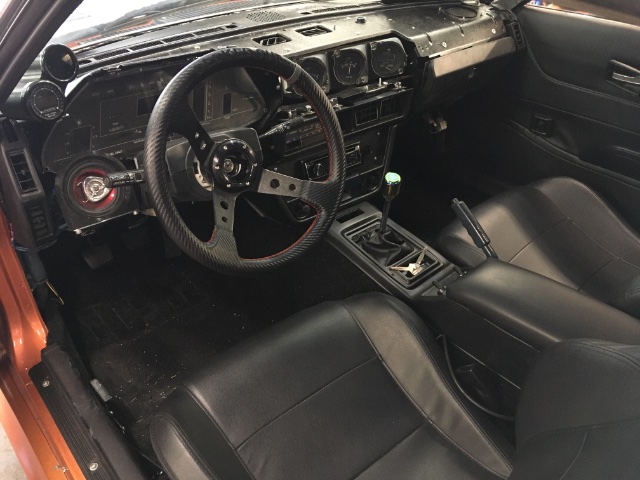
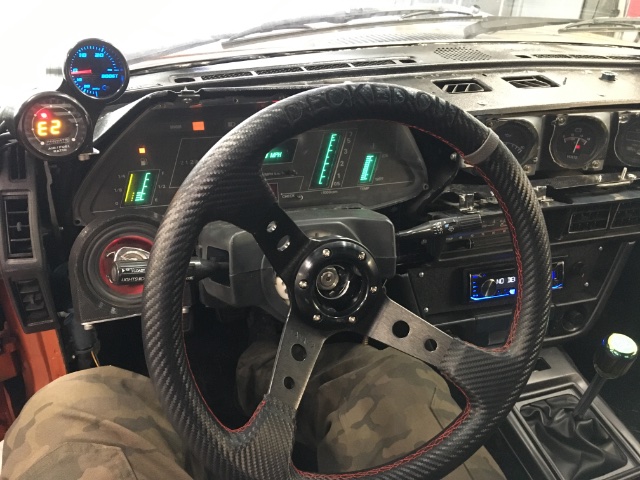
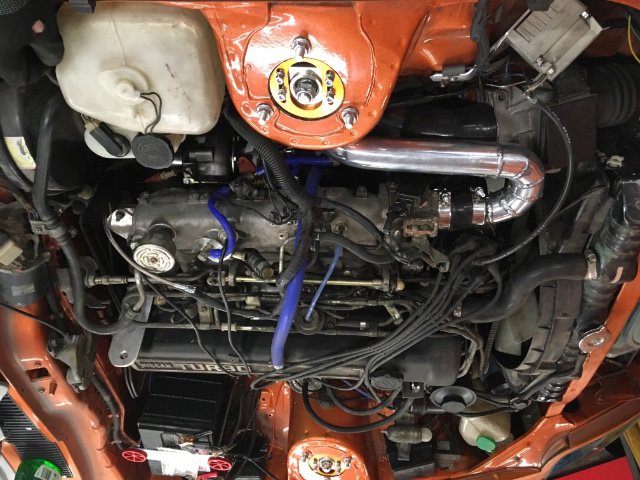
Cleanin up the bay an interior shot added boost, wideband cluster and relocated the dreaded front speaker to a more accessible location!
-
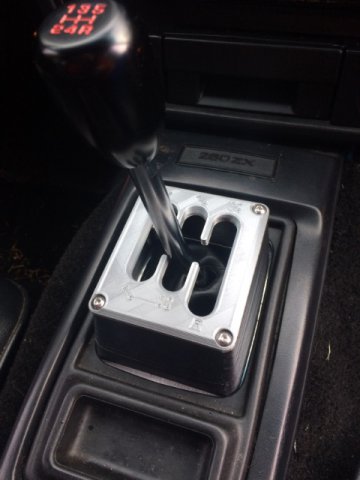
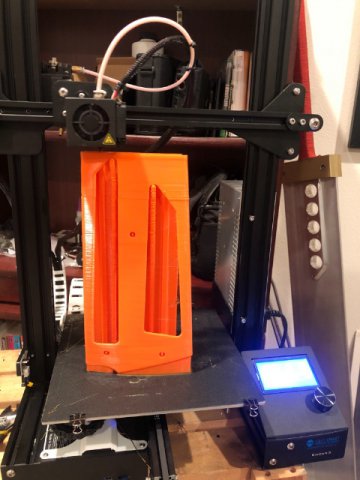
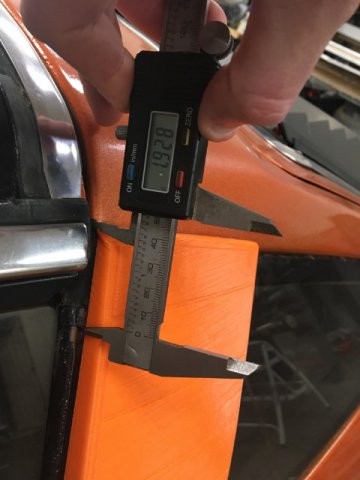
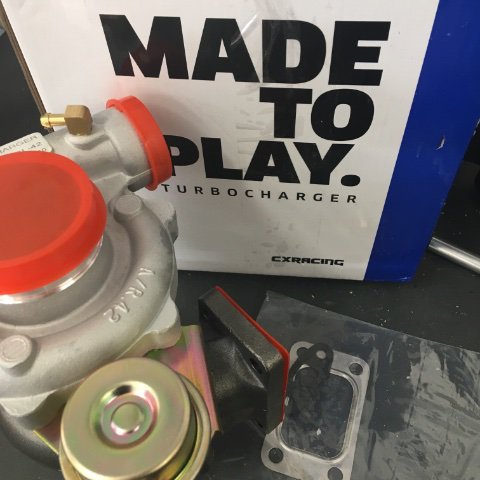
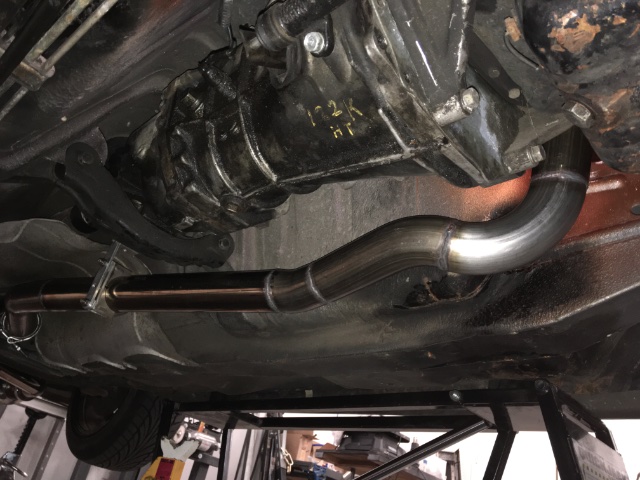
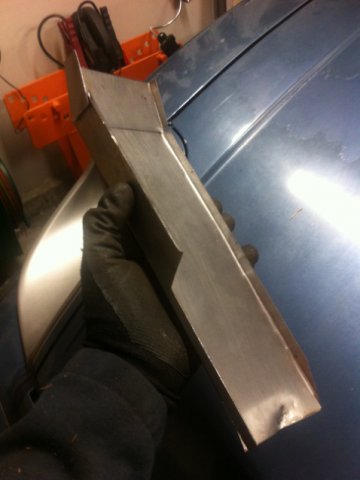
I think this is about the time I sold the grey "parts" car. It was running so nicely that I couldn't bear to strip it for the interior. I did screw around with a funky idea for a gated shifter on the Z. When I was younger, I used to play this arcade game at GameWorks that was a Ferrarri challenge game and it had a gated shifter and it was so cool, I thought I could get it to work on the Z. Turns out the S130 gearbox does not have enough shaft movement at any "reasonable" height for it to have distinct gates. This 3rd prototype did work, but only until I bolted it rigidly to the tunnel. I got rid of it soon after and moved on. A pic of my "peeding" rods. My side panel was cracked and also I do not dig the look. And also I did not appreciate the additional trim piece above it. So I stick it in my "CMM". And by that, I mean my self-converted CNC mill. First test-fit print Third iteration on the car .. measuring clearance note for rev 4 to be printed in ABS. After dragging my temporary exhaust on some speed bumps, I set to tucking it under the car further. I guess I have some explaining about what is to come next. Well, I bought a L28ET motor off craigslist for this car, but it was very bare. It had no turbo, no distributor, no ECU. I set about getting the car running with all the NA gear I had on hand and it ran quite okay with some hacking! I made a custom exhaust with a T3 flange (lol). It was basically a super low-comp NA motor that I was just using to power it while I finished the bodywork. Once I dragged this temporary exhaust on my way out of the grocery store, I hacked it off. As I was planning how I was going to re-weld it, I decided I might as well finally get the turbo so I only have to re-design the exhaust one more time! I had a fancy ball-bearing unit in mind, but then I realized it didn't have an internal wastegate and aint nobody got time for external wastegates. I thought I would give China's finest a try (anyone notice a trend here?) and went with a CX design from the 1980's. I was a Classic Saab 900 Turbo guy for many moons before cash for clunkers and have always had fun with these old-school T3 journal bearing units. I am going to only run a few PSI of boost until I finish my speeduino rig and get bigger injectors (still rocking 185's haha) so I hodge-podged and fabri-cobbled this together.
-
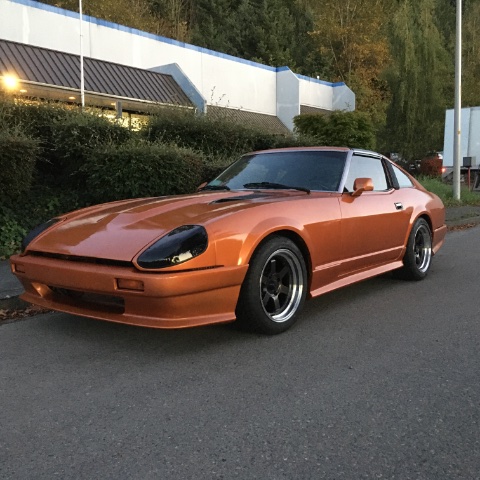
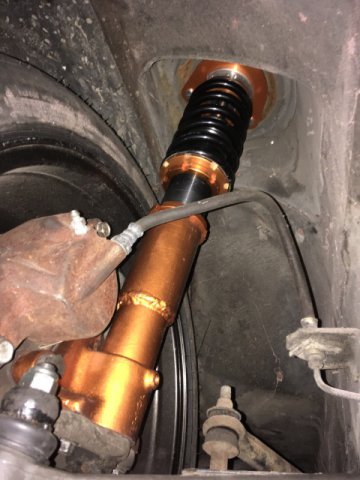
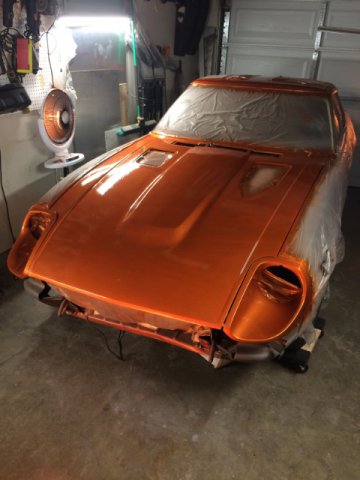
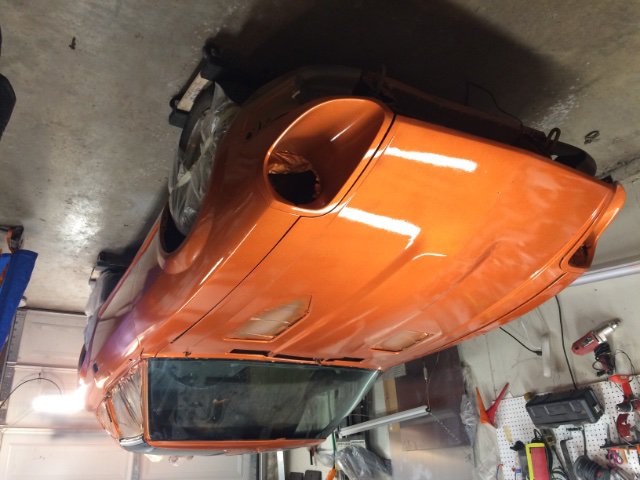
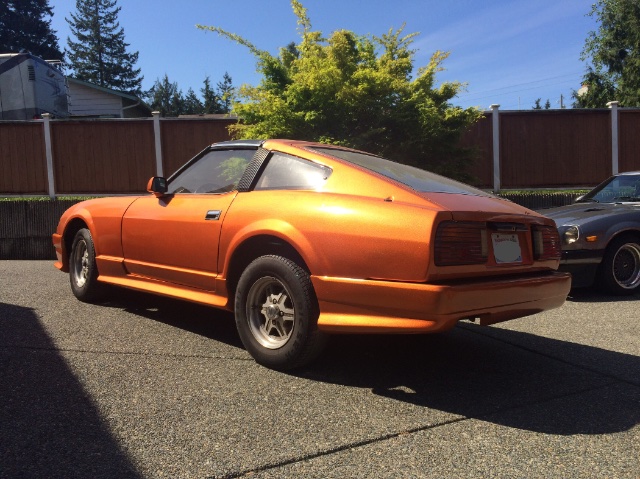
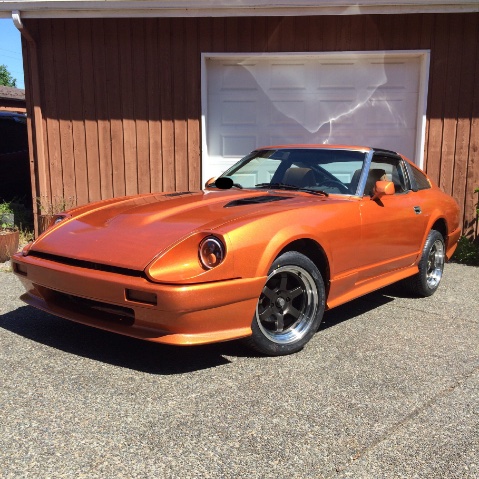
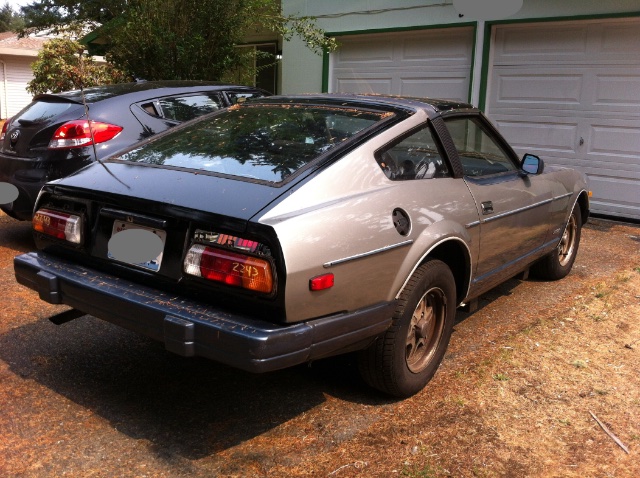
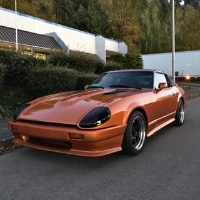
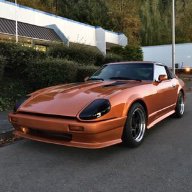
At some point, I started the paintjob with the engine bay. The pain is from Eastwood and it's called Malibu Sunset. Then I did the body in stages due to my limited space at the time. I shaved the bump strips from the side of the body, along with the side marker holes. Then I slapped on a MSA Body kit and painted that too. The side markers are now LED strips in the gaps between the body kit and the body. You can't see them when they are off, the blend into the shadows of the body lines. Then I put on some new wheels and head lights. It looked rather gross with the stock ride height. IMG_5306.MP4 And then I slapped together some S13 maxPeedingRods ... or whatever they are called and machined up some adapters for the rear and chopped my front spindles and did some weldy weldy on them. And then ended up looking much more sorted.
-
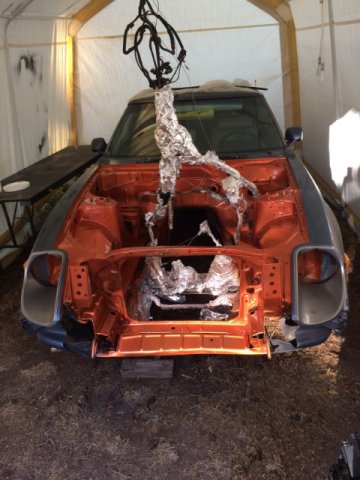
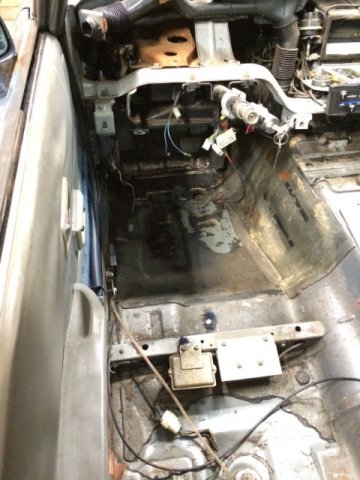
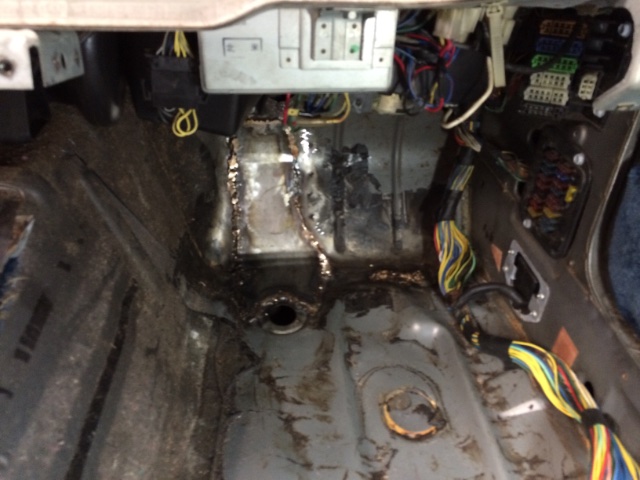
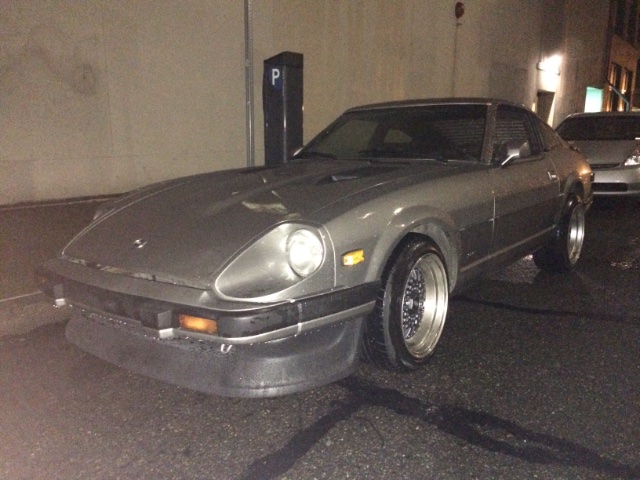
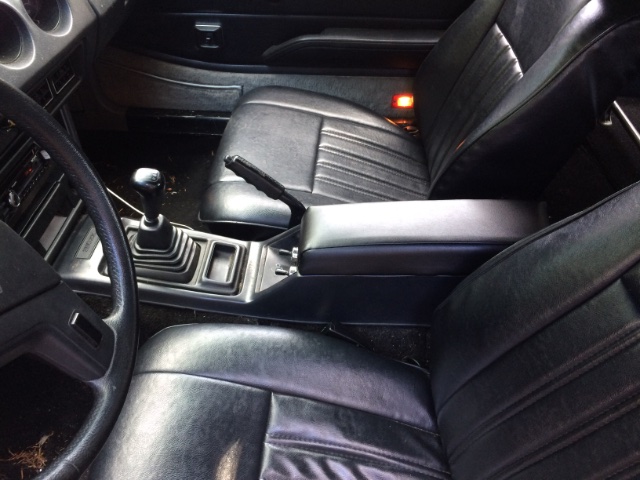
This S130 has been my dream to build for almost 2 decades. I have always been a S130 guy, but started my Z journey with a z31 50th AE when I was in high school because that’s what I could find in my price range. Now I can fully realize this dream build! I am going for a reliable street daily driver with mildly improved performance but mainly just modernization. I have been working for quite a few years already and have started various sub-projects that may be of interest to other S130 people. This is one of the bastard models of the Z families so more sharing and development is helpful to all! The car is an 83 NA. I can’t remember when I bough this car, but my earliest picture is in 2015 when i started the rust remediation! Somehow lacking any starting pictures Of the external car ... the earliest pictures I found of the outside are after I had already tackled most of the exterior rust and painted those areas black. I was toying with the idea of alternative tail lights and grabbed some datsun tails from a junkyard to see how they looked. SiBr’ed some patches onto the floor pan. As the car was torn down, i found a sweet deal on a parts car with a seized motor. Since i needed the Motor out of my build to paint the bay anyway, I slapped the NA motor into the grey car and drove it around for a few years. I original bought the parts car to rob the black interior from once I finished the body work. I sewed up this center console pad to make my elbow more comfortable.
-
tioga, this thing is rad! Where did you poach the distributor pedestal / stem from, a L28 turbo distributor? Those seem to be getting harder to come by.