dmoralesbello
-
Posts
254 -
Joined
-
Last visited
-
Days Won
3
Content Type
Profiles
Forums
Blogs
Events
Gallery
Downloads
Store
Everything posted by dmoralesbello
-

LED light in glove compartment
dmoralesbello replied to Bob_260's topic in S30 Series - 240z, 260z, 280z
Thanks Bob! I was about to change the polarity of the wires reaching the glove box light tomorrow! Like DJwarmer I also have a set of LEDs left over from my dome light when I changed to COB. You've made my life just a little easier. -
280Z Restomod Progress
dmoralesbello replied to dmoralesbello's topic in S30 Series - 240z, 260z, 280z
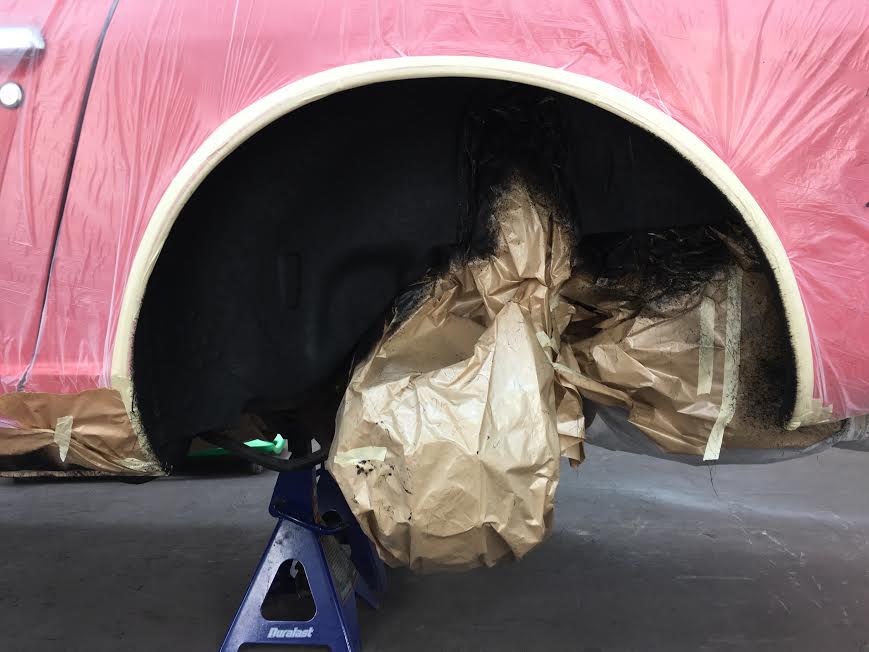
Thanks Kev! The Konig wheels I'm using are actually 16x7 with Goodyear Eagle Sport 225/55/16 rubber. and they did rub slightly both front and rear therefore front and rear fenders got rolled professionally. -
280Z Restomod Progress
dmoralesbello replied to dmoralesbello's topic in S30 Series - 240z, 260z, 280z
Painted black the inside of the airdam last night in preparation for installing it today.
-
280Z Restomod Progress
dmoralesbello replied to dmoralesbello's topic in S30 Series - 240z, 260z, 280z
Here's an update on the headlight bucket extension mod that we started a while back but are only now in the process of installing. A 3"extension was welded in and a "pocket" for the LED ballast was incorporated into the back of the bucket. After finishing off with black anticorrosive paint a 0.5" hole was drilled on the engine side of each bucket, fitted with a rubber grommet, the OEM wires were fed through and the LED ballast placed in its pocket and held with 3M double stick trim tape. The Autopal headliamp with the LED light installed has the cooling fins protruding from the back plus the ballast but fits nicely into the modified extended bucket. The remaining installation is SOP. The intensity, quality and focus of the light emanating from the LED bulbs is excellent and the final look is very close to stock. -
280Z Restomod Progress
dmoralesbello replied to dmoralesbello's topic in S30 Series - 240z, 260z, 280z
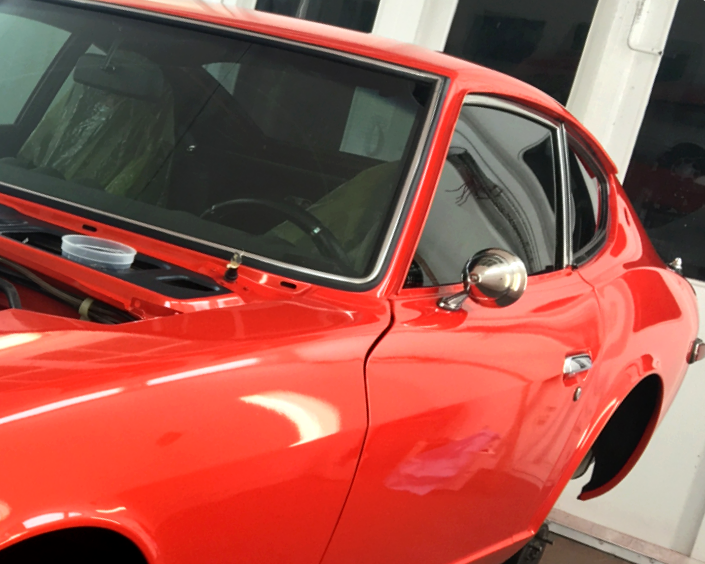
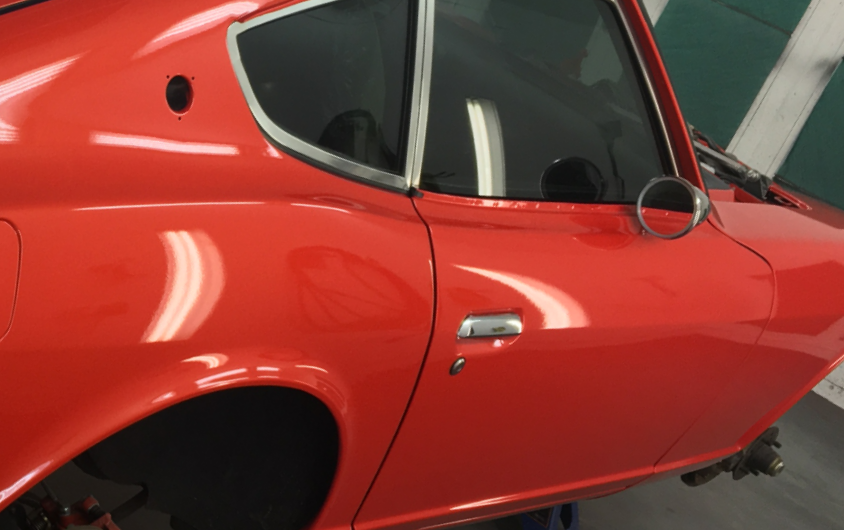
After buying 2 sets of mirrors (OEM black plastic and Vitaloni black plastic as well) I finally decided to mount these stainless steel bullet mirrors from the UK. I will also be swapping my original 280Z black windshield wipers for a nice set of earlier Z silver "wire" wipers. The idea is to eliminate all the black accents of the later Z for the more vintage silver/chrome look.
-
Hi Christine, I should have something to report by middle of next week. My build has slowed down considerably but I'm pushing it along as much as I can without becoming a total PITA.
-
280Z Restomod Progress
dmoralesbello replied to dmoralesbello's topic in S30 Series - 240z, 260z, 280z
It's been very frustrating waiting for things to happen with my 280Z. The paint shop has been really busy and it seems like they're giving new projects preference over my "old Z". Anyway, the undercoating is finished so the build should advance further this week. I will keep posting. The material used for the undercoating was : 3M Body Schutz Rubberized Coating Black 08864 and 3M™ Scotchgard™ Autobody Coating,7277. Here are the links for the products: http://3mcollision.com/3m-body-schutz-rubberized-coating-black-8864.html http://3mcollision.com/3m-scotchgard-autobody-coating-7277.html
-
I haven't spoken to the vendor hoping that once I test it, it will function well and (as usual) most installations require some degree of adaptation or fabrication. It's not easy to explain but the new steering column that comes with the unit has 2 universal joints. Given the electric motor must weigh close to 10 lbs, these joints allow the column to sag by pivoting on these joints. I didn't photograph the installation due to the space restriction but you might get a better idea if you check out their webpage and see the different parts to the unit.
-
I installed the Z Powersteering electric kit in my '78 280Z which is still undergoing restoration. I haven't had the chance to drive it on the street (only inside the body shop) so I can't comment on how well it works yet. What I can report is that it was a full day job to install and a VERY tight fit in my Z. Because of how heavy the unit that sits under the dash is I even had to construct a steel brace to keep the unit from sagging. I'm just hoping all that work was worth the effort once I drive it. I'll make sure to report back on it.
-
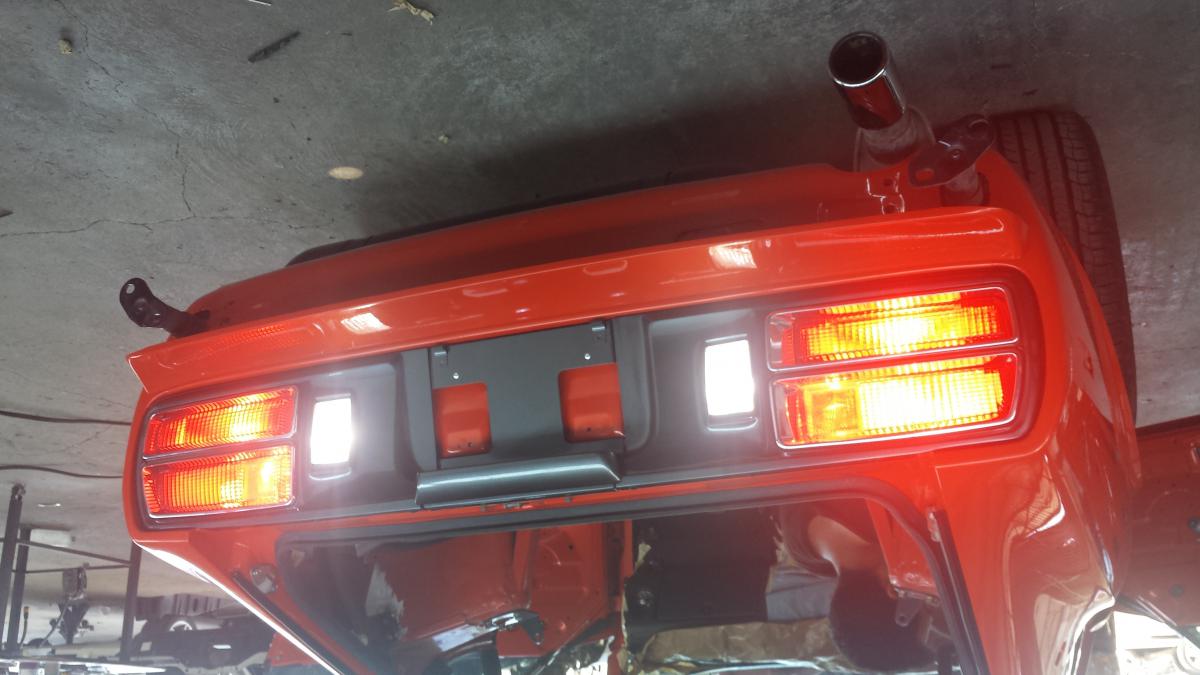
Here's my butt with all LED lights and freshly painted surround panel.
-
Need advice for seats and seat belts. New foam inserts?
dmoralesbello replied to ZMONSTR's topic in Interior
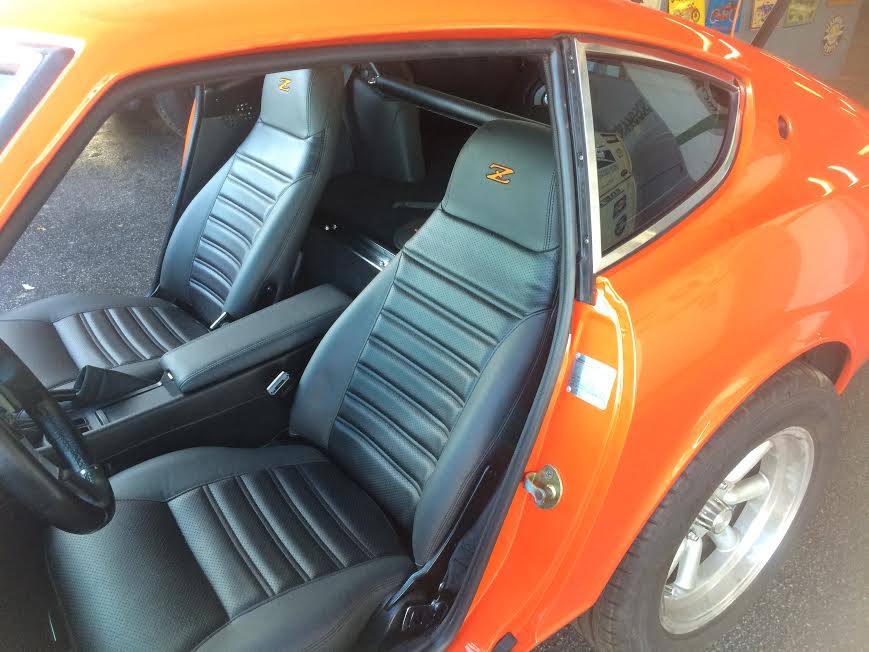
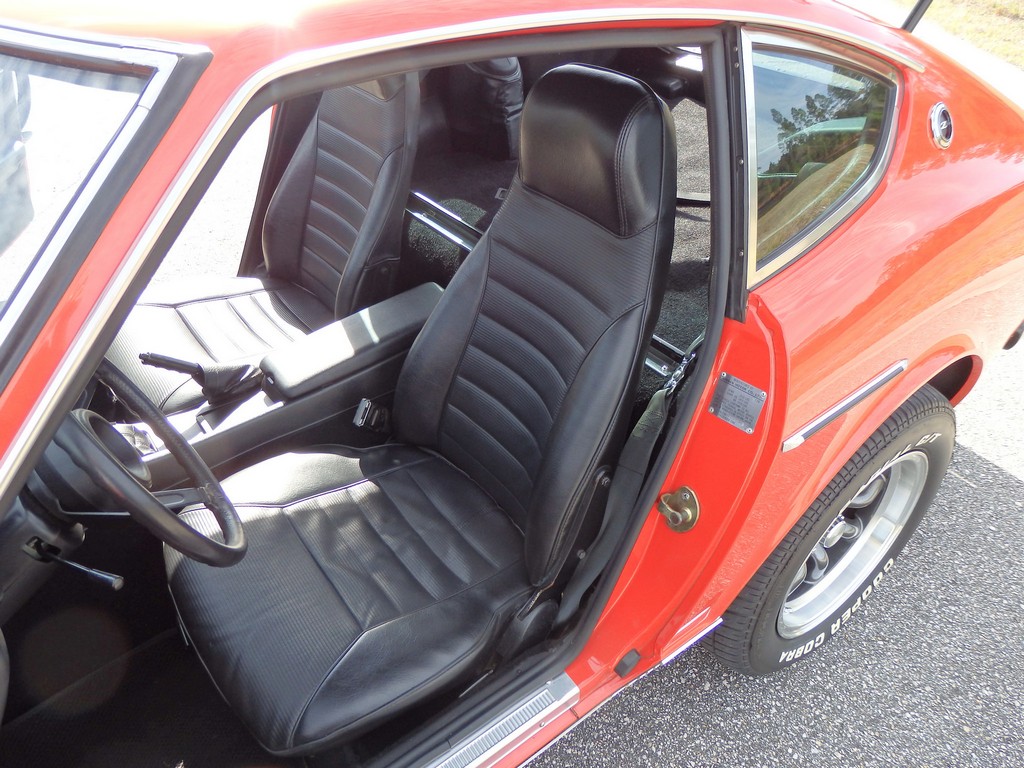
I think it all depends on what kind of driving you'll be doing in your Z and how much you want to stick to an OEM look. For true ergos and support your stock seats are definitely not the ticket but for cruising they are fine with new foam inserts. I bought the new foam from MSA and had my upholsterer manufacture new covers that were similar to the original 280Z seats. I'm very happy with the results. They almost look stock and are much more ergonomic and comfortable than the originals. Definitely not cheap though. Original seats: New custom seat covers with MSA foam:
-
280Z Restomod Progress
dmoralesbello replied to dmoralesbello's topic in S30 Series - 240z, 260z, 280z
I'm certainly enjoying the ride! Thanks. -
280Z Restomod Progress
dmoralesbello replied to dmoralesbello's topic in S30 Series - 240z, 260z, 280z
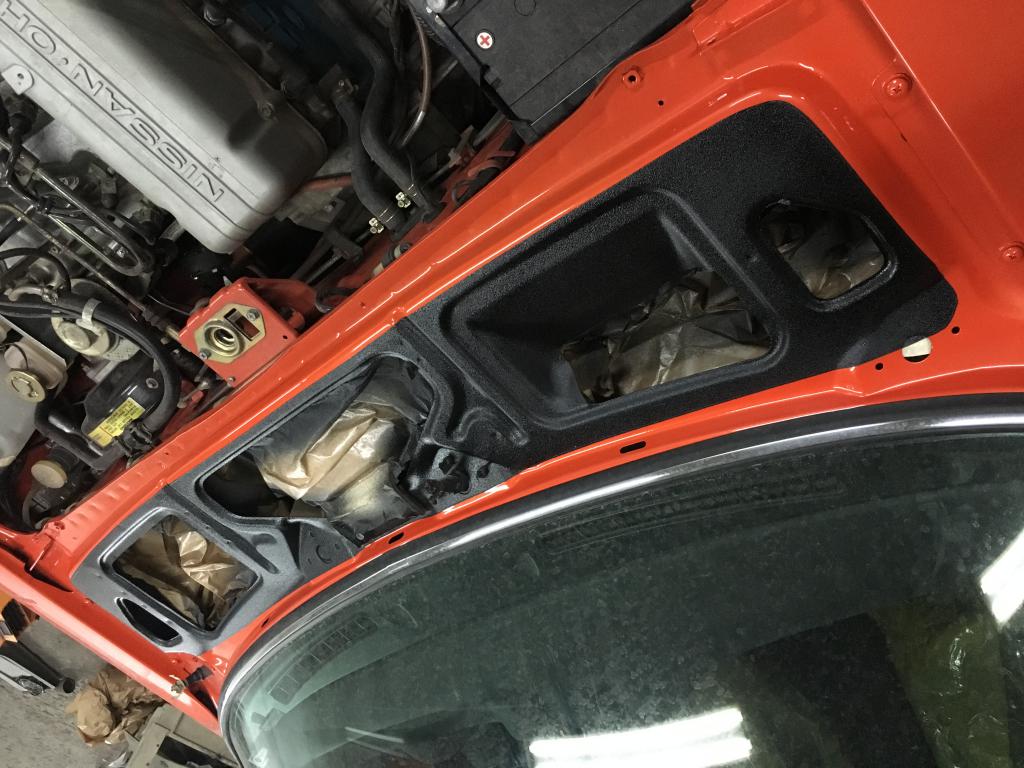
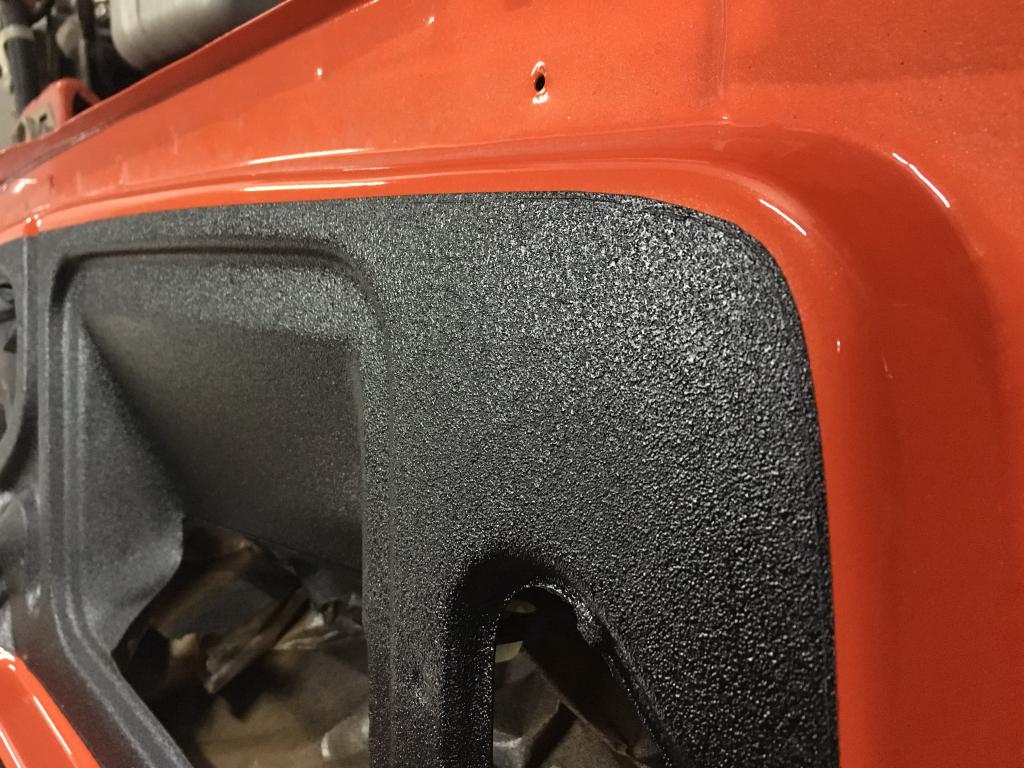
We decided to coat the area underneath the windshield wiper cowl (that was half ass painted grey at the factory) with textured anti-corrosive black. Should give a nice background contrast once the cowl is installed again. PS: Sorry I can't seem to flip the upside down pic.
-
I've not had good experiences with California Datsun.
-
280Z Restomod Progress
dmoralesbello replied to dmoralesbello's topic in S30 Series - 240z, 260z, 280z
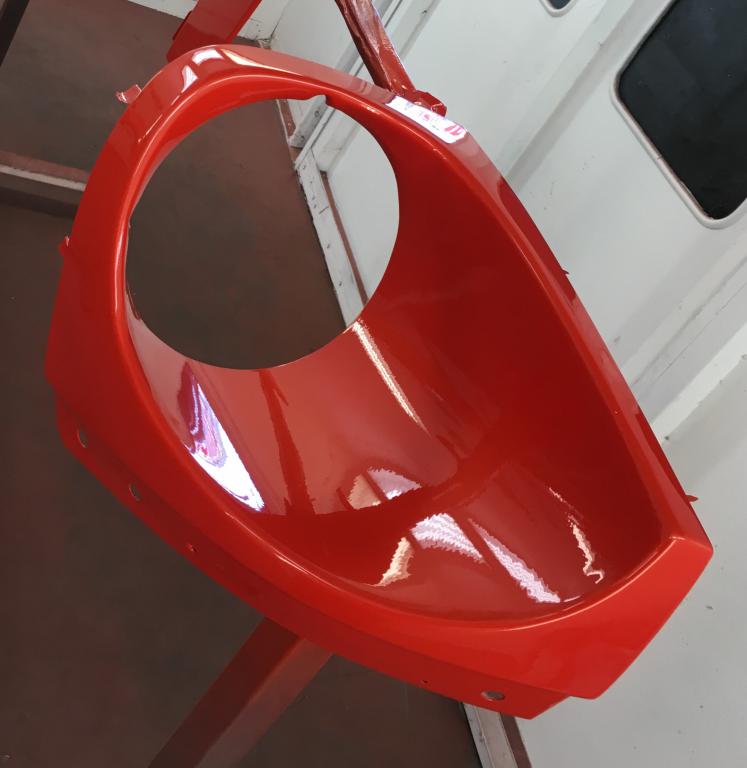
Video of the front air dam freshly painted in Lamborghini's Arancio Argos Pearl. This is a 3 stage process (base color, pearl, clear coat) and coincidentally the base color is virtually identical to the original Datsun 110 code paint. -
280Z Restomod Progress
dmoralesbello replied to dmoralesbello's topic in S30 Series - 240z, 260z, 280z
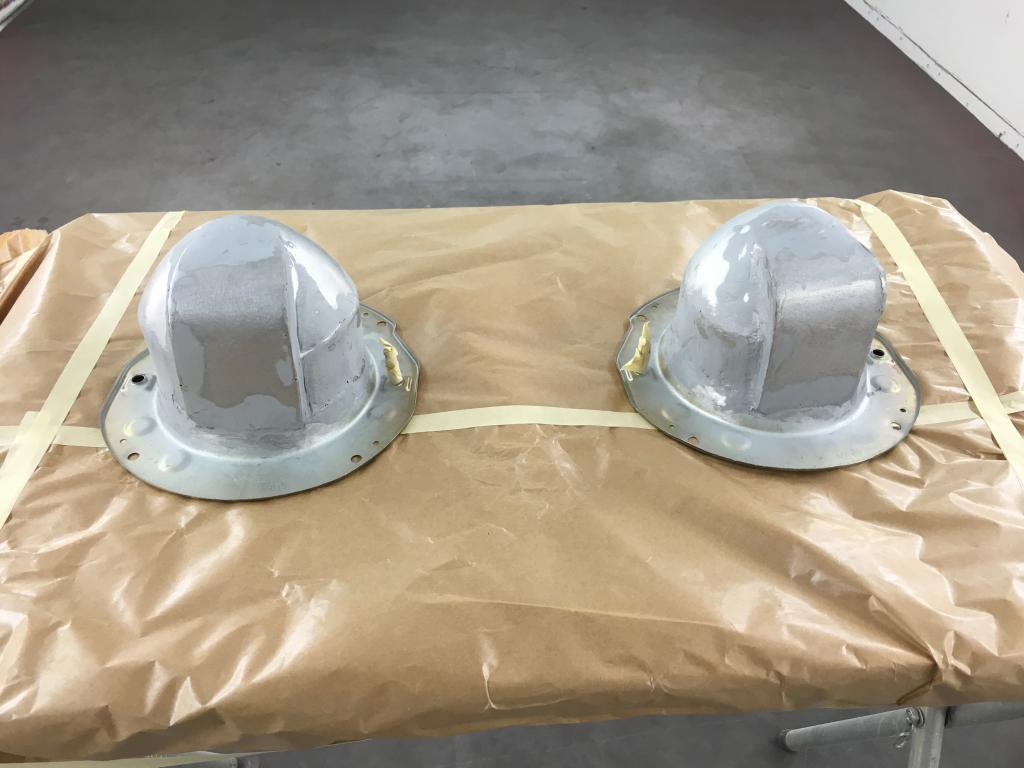
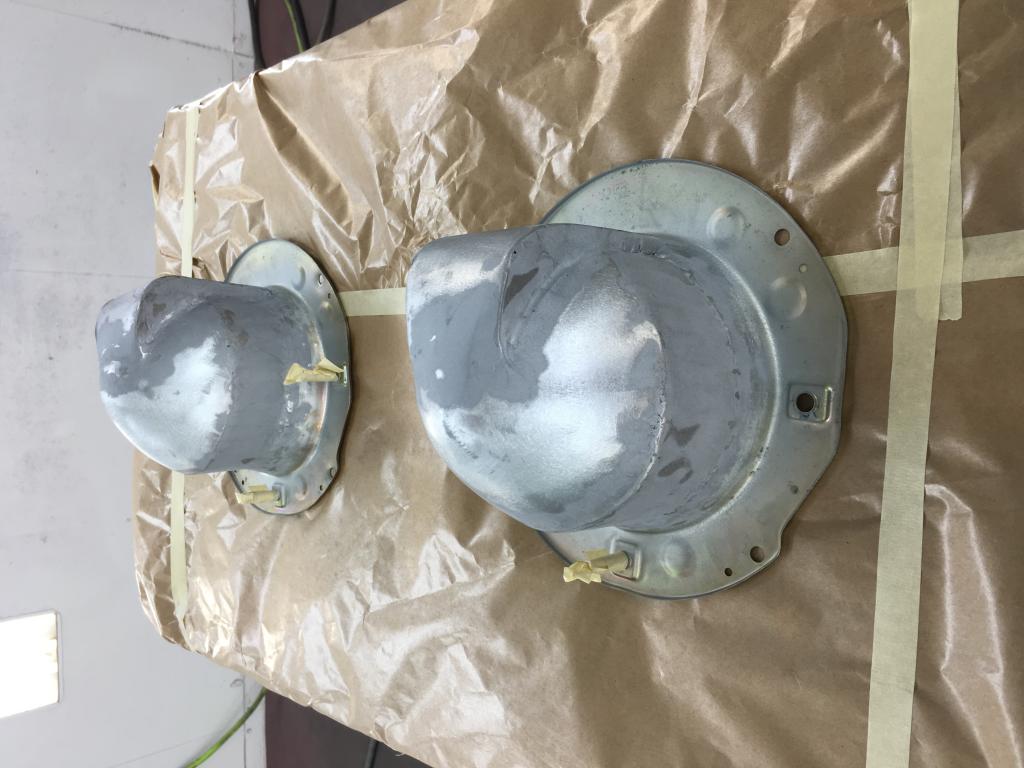
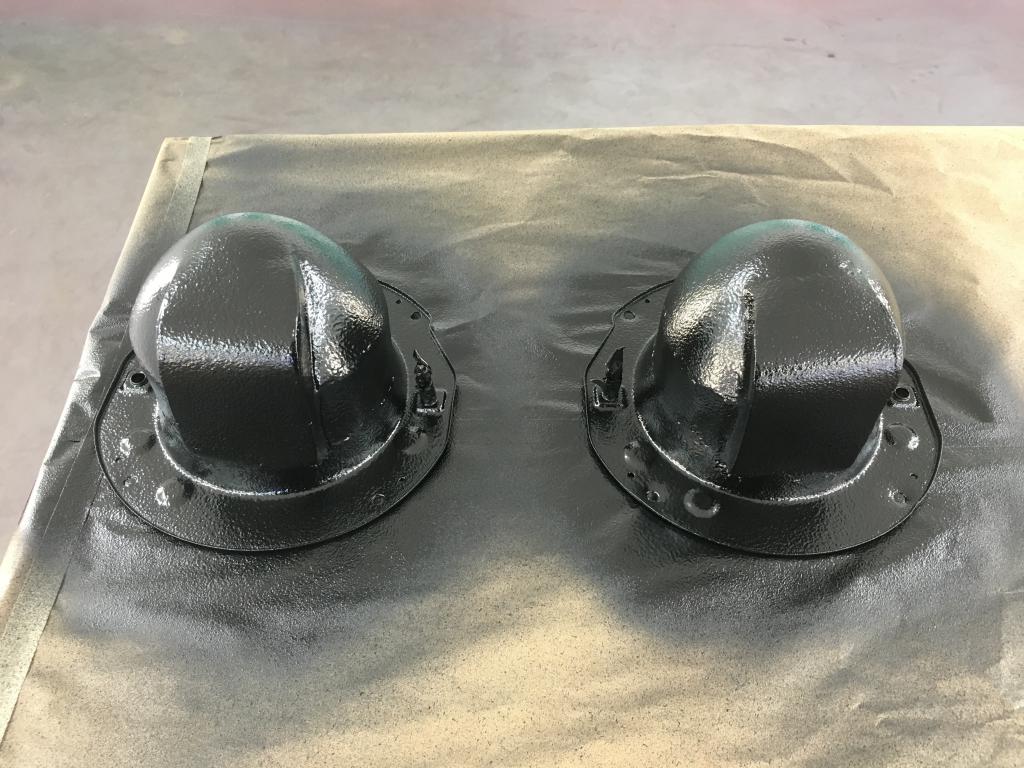
An update on the lengthened headlight bucket mod that we came up with in order to fit the longer LED bulbs and ballasts: OEM buckets were cut transversely at the base and a 3 inch metal strip was tack welded between the parts. A "pocket" was created to fit the ballast and tack welded as well: The modified buckets were then finished off with All Metal filler, sanded and given a couple of coats of zinc paint: and then 2 coats of black undercoating: Will update again with final assembly with LED bulbs and headlamps.
-
280Z Restomod Progress
dmoralesbello replied to dmoralesbello's topic in S30 Series - 240z, 260z, 280z
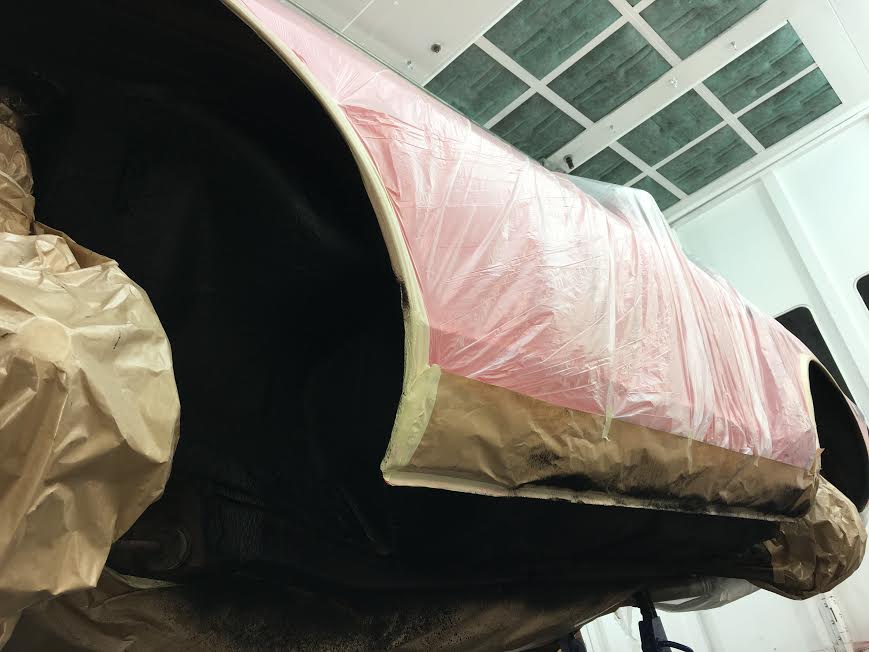
A few more shots of the airdam prep and paint:
-
280Z Restomod Progress
dmoralesbello replied to dmoralesbello's topic in S30 Series - 240z, 260z, 280z
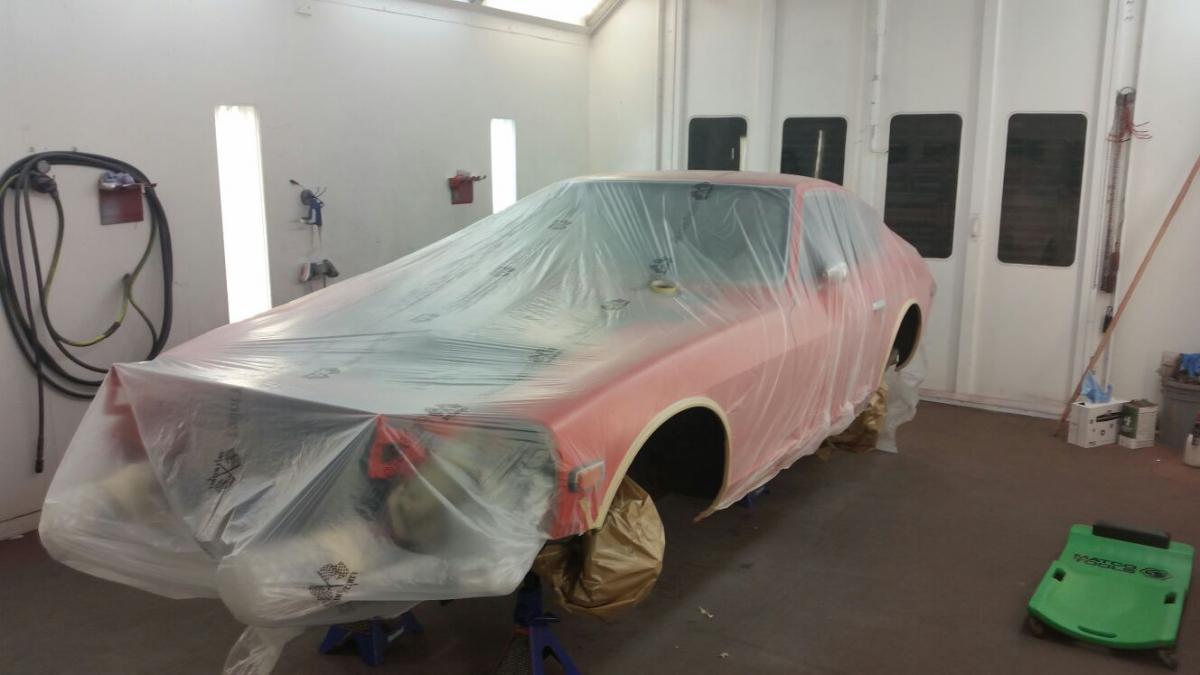
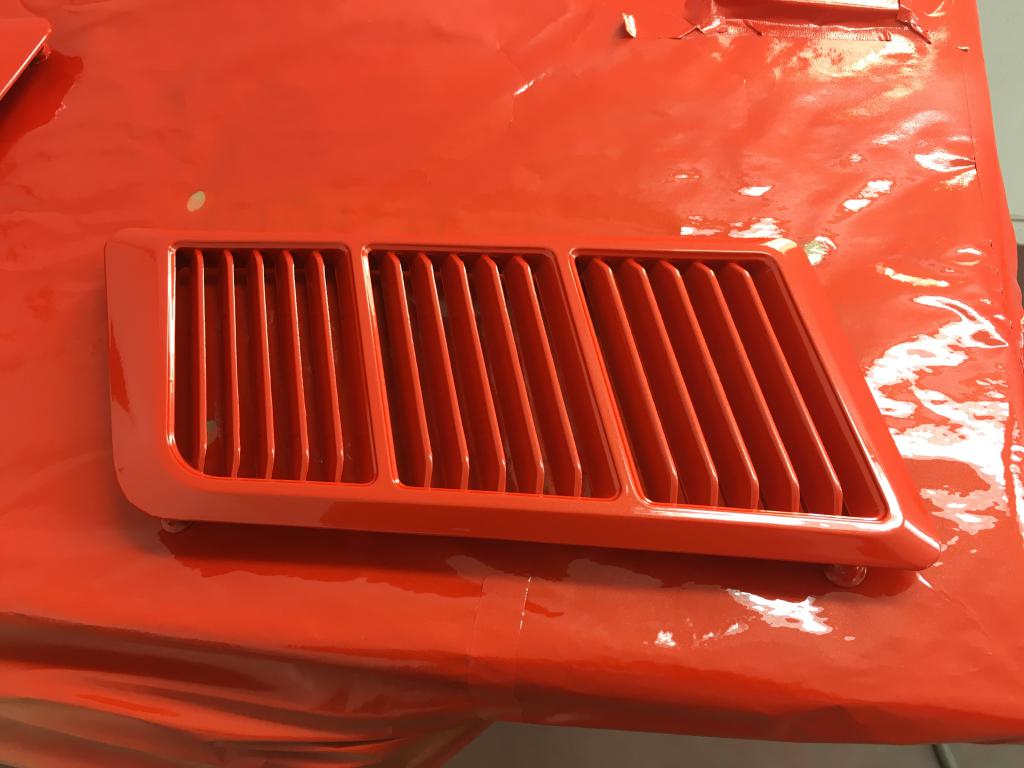
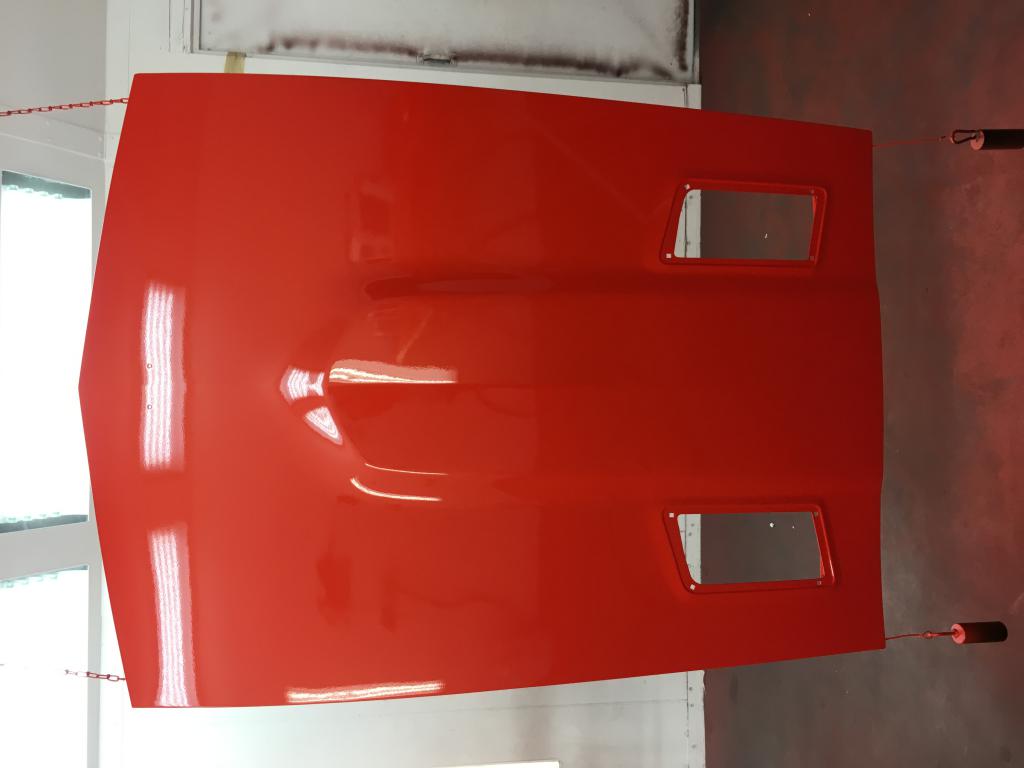
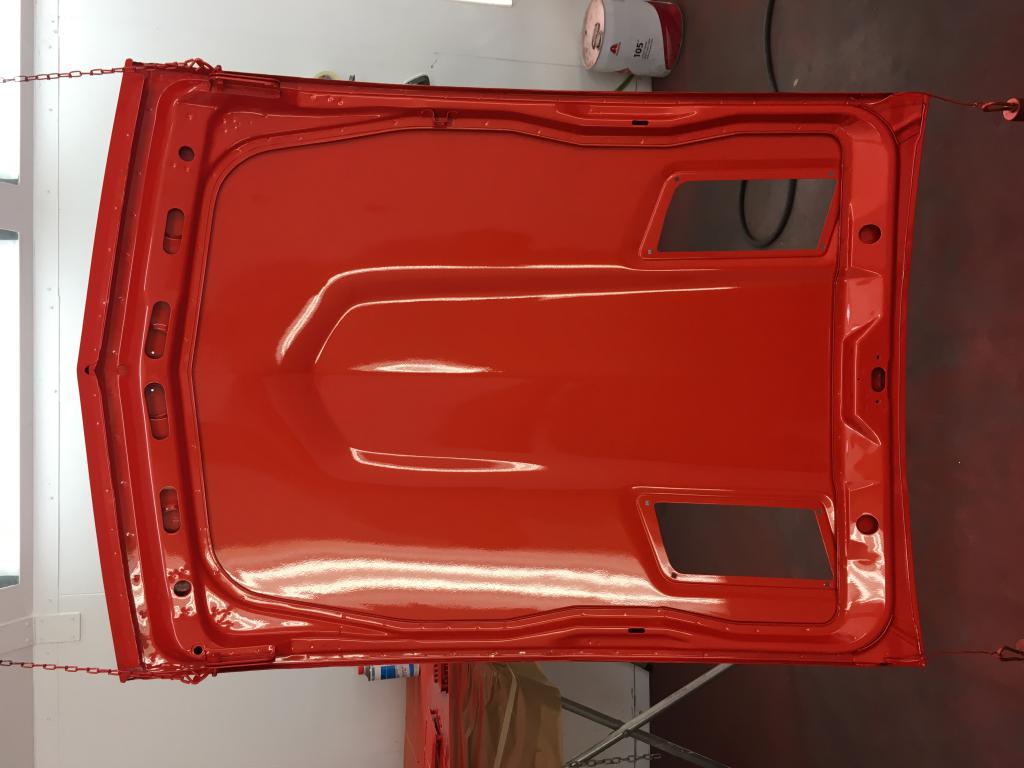
Fresh three stage paint on the remaining body pieces went on today. Took lots of pics just to remember how labor intensive this whole process is BUT it sure is worth it when you see the final result.
-
280Z Restomod Progress
dmoralesbello replied to dmoralesbello's topic in S30 Series - 240z, 260z, 280z
The remaining body pieces that still need painting are prepped and going in the booth today for that shot of orange. Hopefully these will go on the car tomorrow .
-
280Z Restomod Progress
dmoralesbello replied to dmoralesbello's topic in S30 Series - 240z, 260z, 280z
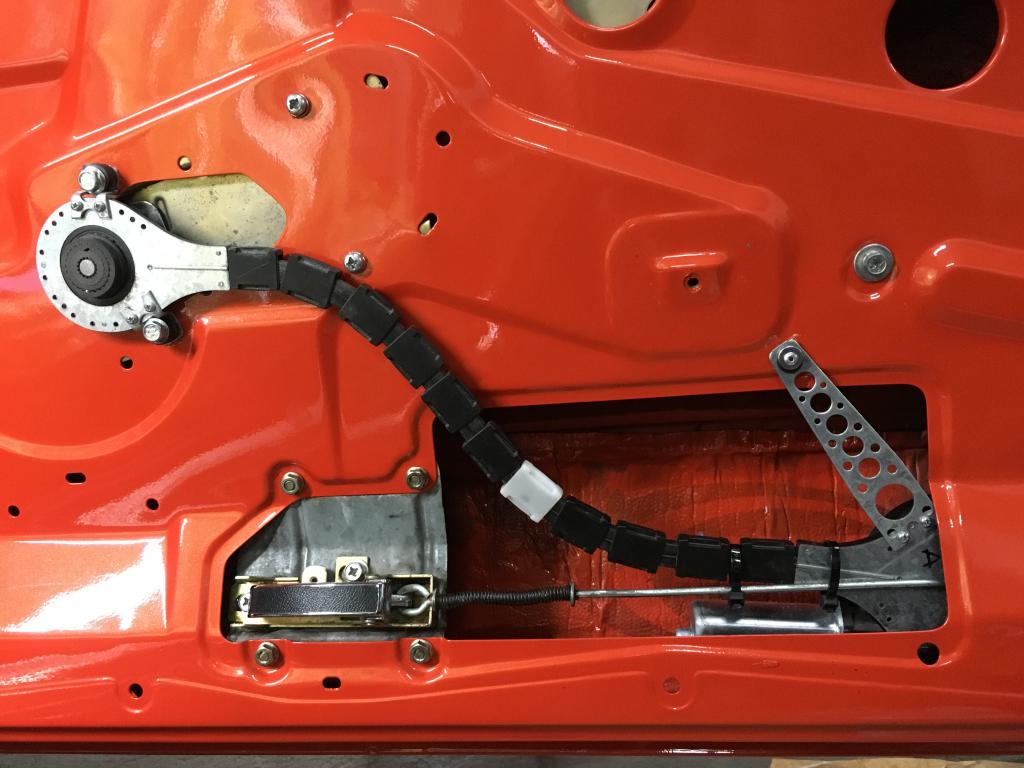
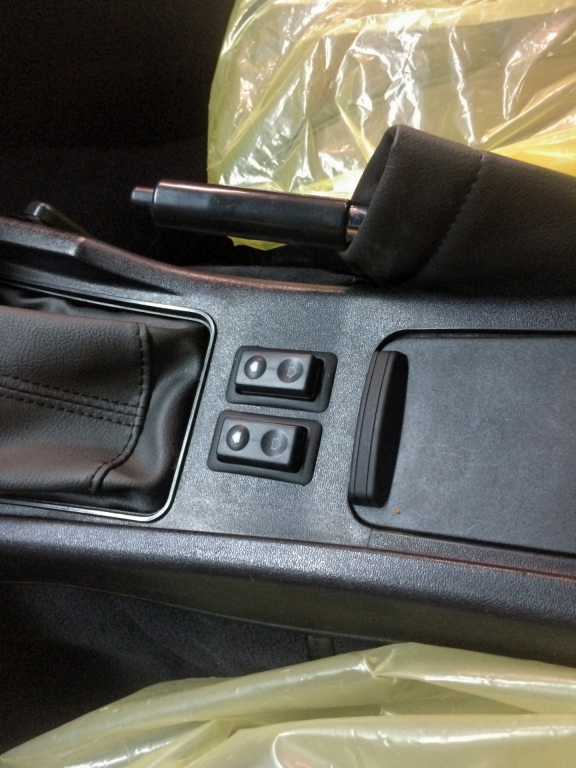
After a long 4 weeks wait the project is moving along again. Had to play with the placement of the power window motors so there would be minimal torsion on the belt mechanism in order to get the best speed in the window movement. The pics show where we finally mounted the motors and that it's almost a straight line to the window crank. I was surprised by how quiet the motors are and the speed is similar to an OEM system. Switches went in the center console behind the shifter.
-
Nice clean look. No emblems!
-
Mystery fuel warning light
dmoralesbello replied to dmoralesbello's topic in S30 Series - 240z, 260z, 280z
Great information! Definitely expanded enough. Thank you so much. -
New member, Wanted to say Hi
dmoralesbello replied to buff_n3rd's topic in S30 Series - 240z, 260z, 280z
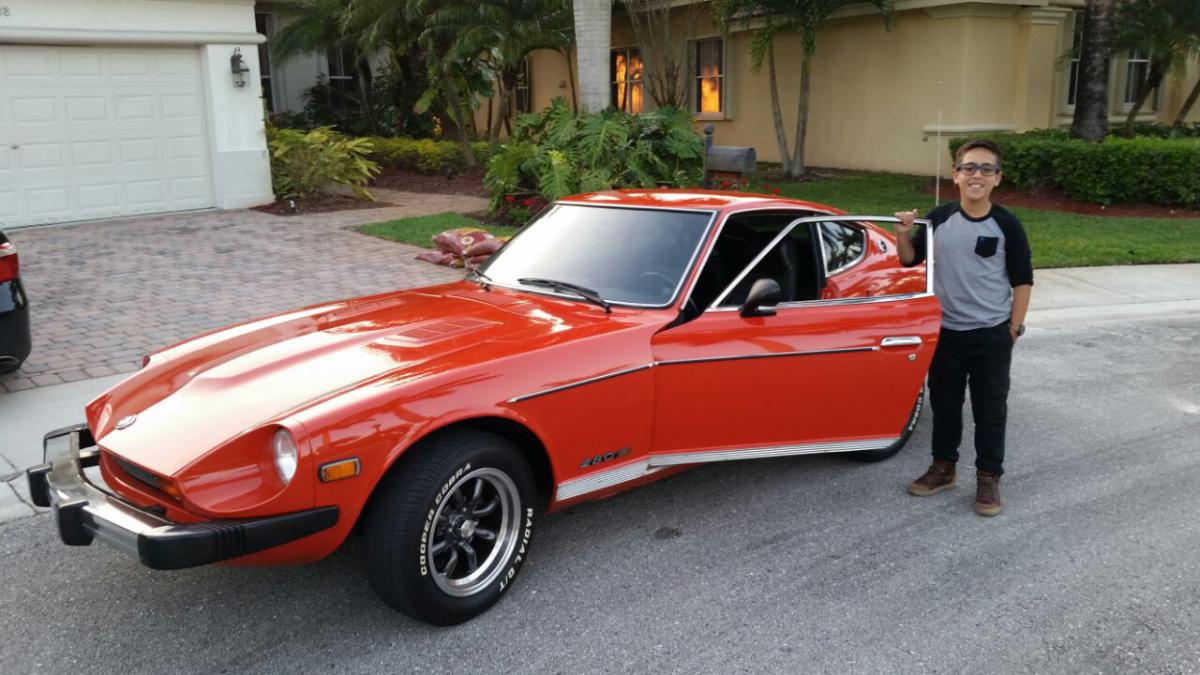
Welcome and congrats! One of the things I've enjoyed more about working on my Z is getting my 13 year old son involved in the decision making and the wrenching. These memories will keep forever for both of us and the understanding is that the Z is OURS, not just mine.
-
Mystery fuel warning light
dmoralesbello replied to dmoralesbello's topic in S30 Series - 240z, 260z, 280z
Please expand. -
Mystery fuel warning light
dmoralesbello replied to dmoralesbello's topic in S30 Series - 240z, 260z, 280z
I had this topic running on the Classic Z forum as well and one of the members figured out that it actually comes form a 1975 Z. It fits into the bottom center square slot. In 1976 it was moved to the top right rectangular slot by the ac vents and a blank plate was put in it's old spot.