Noll
-
Posts
12 -
Joined
-
Last visited

Noll's Achievements
")


-
Not sure how much of this may be applicable, as my 260z has 240z carbs swapped on and all the smog/anti-backfire/etc stuff deleted, but here's how it is on my car: I ran the vacuum advance to the port on the front carb, would be easy to just slap a T-fitting in there if that's already occupied in your case. that and the brake booster are the only things using vacuum in my case (the line ziptied to my re-located breather hose just has a bolt in the end and goes nowhere, was the cleanest way I had to block that one off at the time). It's been a hot minute since I looked into it but I BELIEVE that you want the advance getting vacuum from one of the carbs directly as hooking into the balance tube can cause way too much advance. My setup probably also looks a bit funky because of the aforementioned carb breather stuff; as I don't have the stock airbox I decided to go overkill and route the breathers all the way around to the p/s of the block so they wouldn't be dumping gas on the exhaust manifold if they did overflow.
-
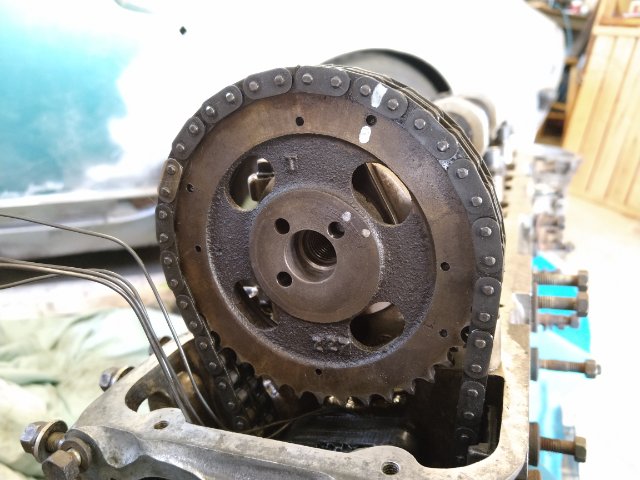
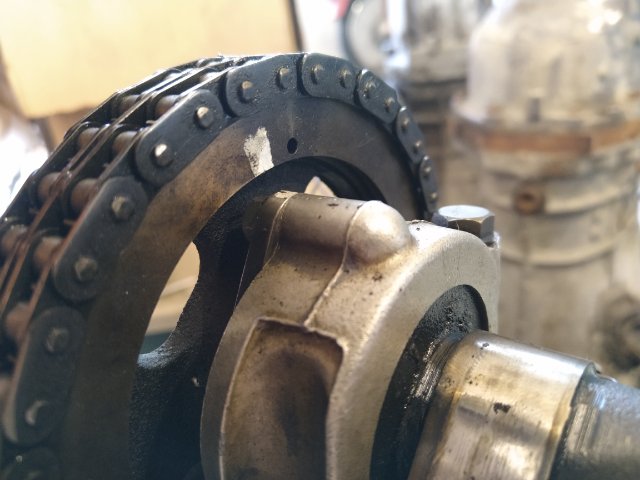
Thanks! Just trying to make it a bit easier for other peeps doing the same as I did, I had to trawl through lot of old forum pages and nearly-dead websites for a lot of stuff when I was looking it up haha. I have a full forum thread with a ton of stuff documented over on Ratsun ( https://ratsun.net/topic/71982-project-theseus-a-74-260z/page/31/ ) - didn't have an account here when I started on the car or I'd have made it over here to o(I suppose I could still but 4.5 years of work in one big dump might be a bit odd lol). Keep in mind I knew very little at the start of the build (bought the car on my 19th birthday) and was teaching myself to weld for like the first 1/4 of it all. @juggernautjoee ah that sucks, hopefully HG or at worst the head as opposed to block issues . Handy tip for being lazy like me - mark the orienting hole that the cam gear is in on the front (there are 3 to accommodate for chain stretch, so don't want to use the wrong one), the chain, and the back of the gear and first cam tower and you can do the whole head pull/reinstall without having to touch the front cover or set timing (as long as you use a wedge to the chain doesn't fall off the tensioner inside the cover).

-
No problem at all! Yeah, that would be a solid way to go for sure; I'll probably end up doing the same at some point for the same reason (and I also plan to go EFI at some point probably with a surge tank, so double the reason)
-
The 260z fuel pump and interlock systems are a fun time for sure, been there done that with mine. There are two fuel cutoffs - one is the alternator as you say, and the other is (for some reason I have yet to figure out) a starter cutout. They're in-line, so if one triggers for some reason no voltage gets to the fuel pump. The 2nd cutoff relay kills the pump while the starter is cranking and a lot of people bypass it (was done on my car long before I got it, jump GW to BW on the relay plug and bob's your uncle). Assuming the starter cut relay isn't acting up it's either going to be the alternator safety cut or a wiring issue most likely. I did some tracing of the harness when I was troubleshooting some fuel pump and interlock stuff (interlock being related to cranking not fuel but was working on both at once); if you follow the neon blue wire (multiple colours in the real harness, just did that in the drawing for continuity) back it should give you some spots to check for voltage at plugs etc. you may need to right click>view in new tab to see the full size You can also disconnect the pump entirely and splice in some hose to just go tank>lines>mechanical pump>carbs for testing purposes, they added the electric pump to try to stop vapor lock IIRC; the car will run fine on the mechanical pump only. Edit: oh, and in case it helps, here's how I mounted my aftermarket electric pump. Basic square bracket that bolted to where the stock one went, rubber isolators, and a U bend from some nicopp hardline. Probably 1/4 the weight and size of the stock massive bracket.
-

Toyota front brake upgrade - still relevant?
Noll replied to fusion's topic in Brakes, Wheels, Suspension and Chassis
Makes sense! All depends on what your goals with the car are. The wheels on my car are Rota Kyushas in 15x8+0, although there are a good few options in that size from various brands. Not sure on the weight unfortunately, but they didn't feel super heavy when I unboxed them. And yeah, I feel you on the serviceability front, my car had been sitting over a decade and was in terrible shape when I got it (no joke, the only exterior panel I haven't replaced is the roof, and have done floors, rockers, seatbelt mount areas, half the firewall, much of the engine bay, etc), so I was basically starting from scratch in regards to suspension/brakes/etc - all needed totally redone one way or another. -
Toyota front brake upgrade - still relevant?
Noll replied to fusion's topic in Brakes, Wheels, Suspension and Chassis
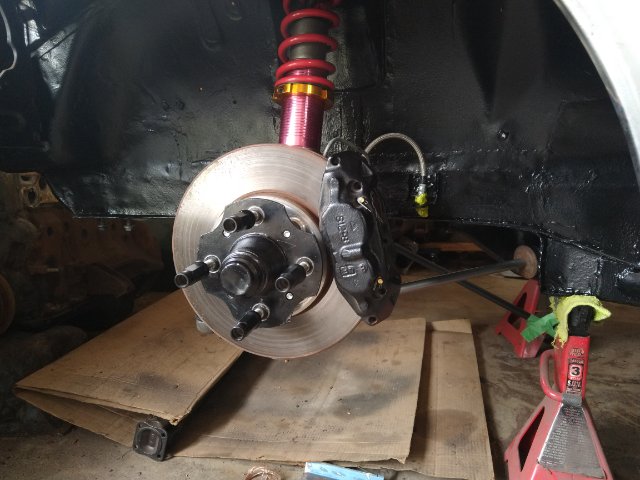
In fairness, in that hypothetical situation (trying to just upgrade the brakes) none of the latter is required. 4 lug 15" wheels work just fine with the 4x4calipers/300zx rotors (14" might just fit depending on the wheel but no personal experience), and as mentioned above the bias works out nicely with 240sx calipers in the rear and deleting the stock drum brake bias block (or a aftermarket bias adjuster is really no biggie to add). No need for 5 lug, beefier axles, etc unless you're making way more hp than stock, and 5lug won't massively change backspacing unless you're completely replacing the rear suspension with something off another car. IIRC you can even fit 15x8 +0 wheels without coilovers (just) although I built my own coilovers for other reasons. Obviously not directly related to OP's needs here, just talking about the brake upgrade in general Source: my car .
-
240z SCCA vintage race car, restoration
Noll replied to AydinZ71's topic in S30 Series - 240z, 260z, 280z
Looking good! If you find you still don't have the desired height, if you happening to be running T3 camber plates, they make 1" riser blocks that drop right in: https://technotoytuning.com/nissan/240z/riser-blocks-camber-plates -
240z SCCA vintage race car, restoration
Noll replied to AydinZ71's topic in S30 Series - 240z, 260z, 280z
@AydinZ71 Aha, that makes sense. Easy enough mistake to make, good thing the culprit was found. We've all been there with one thing or another I'm sure. It shouldn't be TOO much of a pain to fix as long as you have the old cutoff sections still; if you have an old stock strut insert lying around, it can be handy to put it in the housing as a guide as you weld to make sure it all gets welded in straight (just make sure to drill a hole or something to make sure there's no pressure in the old strut first; compressed gas and heat isn't good for obvious reasons). -
Noll changed their profile photo
-
240z SCCA vintage race car, restoration
Noll replied to AydinZ71's topic in S30 Series - 240z, 260z, 280z
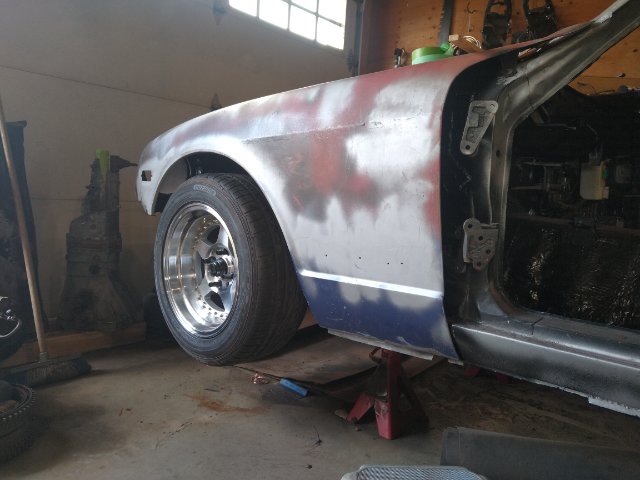
Out of curiosity, how much did you initially section out of your struts when you shortened them? The full extension of the strut shaft dictates max droop travel, so depends on the length of the strut body and how far the shaft will travel in it. I followed the guide here, cut 1.5" from the fronts and 1.75" from the rears. Used 240z front struts in the rear and Toyota Ae86 rears in the front (IIRC anyway, I can dig up specifics on my build thread over at Ratsun if desired). http://dirtys30.blogspot.com/2011/04/how-to-240z-ground-control-coilovers-w.html This plus getting rid of the stock giant rubber isolator in favor of weld-in T3 camber plates resulted in about a 3" drop vs stock, my rear wheel sits here at full droop (225/50/15's - 23.9" diameter) for reference: Approx location of my coilover perch seat (can measure if desired): Given how high yours is sitting, did you cut more out of your strut bodies? Would explain the difference. -
I'll try and have a look soon, it's likely to be $$$$ though from canada due to the length of the panels.
-
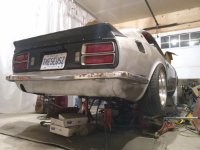
FWIW this is what the OEM guards looked like that came off my 260z. I won't be using them (going to delete the mount holes as at least in my case they ended up being rust traps); I'd offer them to you but I'd imagine shipping from Canada would be $$$$. Fatter end towards the front, p/s shown here IIRC: