-
Posts
5399 -
Joined
-
Last visited
-
Days Won
58
Content Type
Profiles
Forums
Blogs
Events
Gallery
Downloads
Store
Everything posted by RebekahsZ
-

My Dream LS7GTZ.......project underway
RebekahsZ replied to cobramatt's topic in S30 Series - 240z, 260z, 280z
In B-ham for business. After my meeting, I hope to visit Kirk Racing and figure our where Barber is. If I deliver the Valentine's goods well on Friday night, I will see you on Saturday. -
Don't forget to buy that wife some flowers-valentines day is upon us. 1800flowers is not as fast as Summit or Jegs!
-
Believe it or not, 4,000 pounds total with car and trailer together per a truck stop scale. I don't put anything else on the trailer, everything else goes in the truck. I moved the car around so that it would add 500# to my rear truck tires over the weight of the rear truck axle empty. Last year I tried putting 35# in the fronts, and lowered the rears to 25psi to try to get the fronts to wear as much as the rears. Have been playing with air pressure to get the fronts to wear evenly across the width of the tire. I will work on finding somebody with corner weight scales.
-
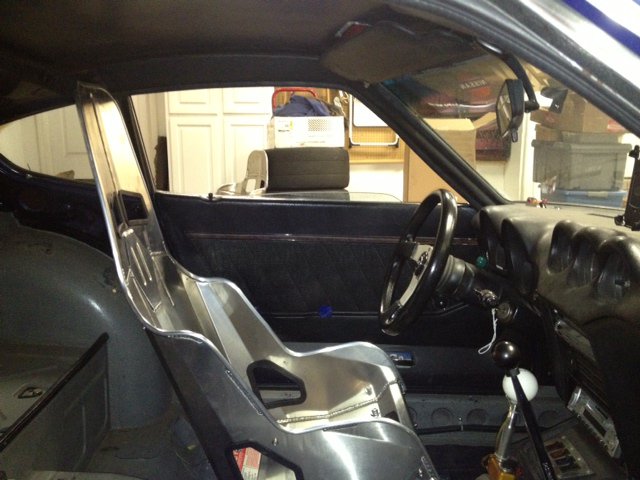
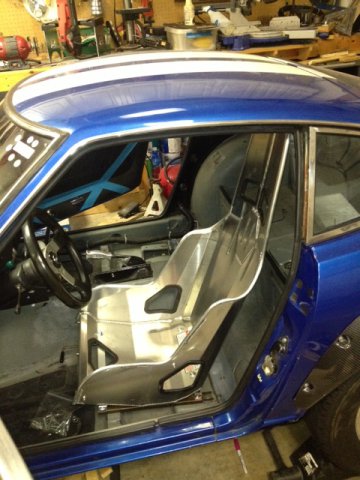
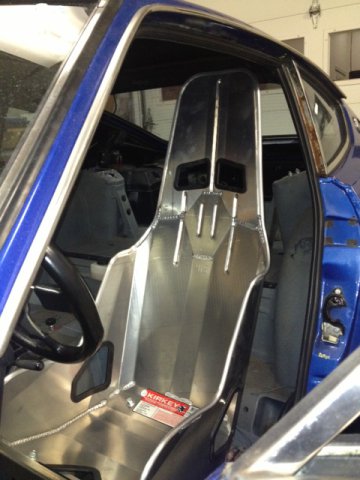
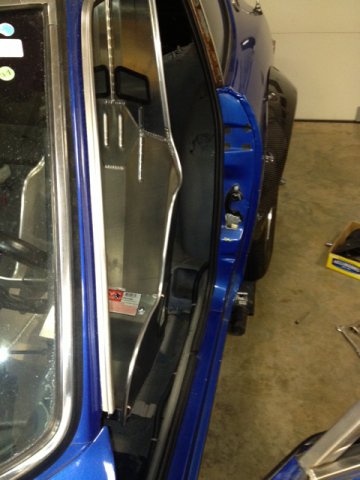
I LOVE having hybridz friends over. Next time you BETTER stop by. The only thing I don't like is how high the back is. I wonder if I could modify that without un-SFI-ing my car?? I may try to contact Kirkey about it; I know they do some custom stuff. The seat is for all-around: street, drag, track-day, SCCA autocross, ECTA standing-mile. Upcoming door bars dictate a narrow seat, drag dictates light-weight, autocross dictates lateral support, ECTA dictates metal construction. The Kirkey meets all those requirements. I really like that the upholstery snaps off, so if I have any cockpit welding done, the whole seat doesn't need to be removed to avoid welding burns. The seat is actually pretty comfortable in metal without upholstery-if I ever do a roadster, i might just put a drain hole in the bottom of the seat and the floorpans and say "screw-it" to a top.
-
The Z31 CLSD is bullet proof. I did extra clutch "upgrade" on mine and the only drawback is that it bangs hard on low-speed turns, like pulling away from a stop sign. I haven't run one with only the stock clutch pack. I beat mine up really badly and it takes it like a trooper.
-
Thanks for the reality check. I wonder why it seems that I have to replace two tires a year...actually two tires a summer, since that is when I do my all my trailering. A set every five years would be a relief. I will try to rotate more often, perhaps then I'll stretch it out a bit. I seem to wear radials out just as fast as bias ply. I wonder how that fancy trailer loads on uneven terrain? jhm-I like the custom trailer-getting some good ideas from this thread. I can load with 6' ramps and I used dropped axles. But, I can't open the door once loaded, hence the need for the winch-I winch it every time, which takes a while, but I feel safer doing it that way. I also wish my dovetail was longer. Also, my car is not very low, so that helps a lot. I also did not paint my airdam, since it smacks the ramps occasionally-I consider it a wear item.
-

Emergency Electrical Power Shutoff Location
RebekahsZ replied to RebekahsZ's topic in Ignition and Electrical
Finally obtained an ON-OFF decal that isn't an advertisement for somebody. I got it off Summit and it is a Moroso decal, but it was easy to trim the "Moroso" off of it. In order to avoid having a sticky sticker on my rear panel, I made an aluminum circle out of some thin stock that I had laying around and stuck the sticker on that, then installed the assembly on the post of the switch with an additional nut. Here it is. Will wire all this next, but it will be at least a few weeks, maybe a month before I get to it. Be advised, this is an NHRA-legal decal, location and switch, SCCA requires more elaborate decals, and I think they want a different location too. -
Kirkey Pro Street Drag seat arrived yesterday and I mounted it last night. Only alteration I had to make was to double the height of the front adapter/cross brace. The front of the Pro Street Drag seat is about an inch higher than the IRR seat. That additional spacing was also required to clear the slider mechanism. Once done, it feels great. The upholstery is coming from another warehouse and should arrive today. The upholstery makes a significant difference in these seats, and I use a lumbar cushion as well, so my final report should be ready tonight. These seats are very tall and I expect poor clearance between the very top of the seat and the top of the roll bar to ultimately limit my ability to slide back on the adjusters very much, but I think, while it will be close, that it will work out fine. The AutoPower seat back brace has a bracket to attach to the back of the seat-that bracket is flat, while the seat back is curved. Something ELSE to modify. Building a racecar is a lot like stepping in gum... Hoping to have car at roll bar builder next week-maybe I can get him to remake or modify that bracket. Shoulder belt holes look to be just about perfect to allow placement of the harness bar directly behind them-the seat fits my height pretty well. When I put the upholstery on, I need to wear my helmet too, to be sure the seat is low enough....
-
Looks like a standard, used Z31T (300ZXT) unit, which has 12mm ring bolts-3.70 is a factory ratio for these. If you want a cleaned up, used R200 CLSD with a 3.70 ratio, buy it. I don't know for sure, but I expect that their bearing inspection consisted of turning the pinion flange and feeling for roughness (that's all I do); they may or may not have disassembled it. To check lash, they put a run-out gauge on it after opening the cover (it is usually fine). I have 2 of these and none of them have had any observable ring gear wear-that metal is tough-they all look brand new inside. If you want to swap the CLSD carrier into a 3.54 diff, it is a simple afternoon project once you have all the parts clean and on your work bench. Is it worth the price-I dunno...depends on what your time is worth. It takes a hard day of scrubbing and scraping to clean all the goo off of a 40 year old diff. It takes another day to paint it. The pinion seals on these diffs are usually fine, but if you want to use your existing driveshaft, you might need to swap the pinion flange with your current unit, which takes an air impact wrench and sometimes a gear puller if it is stuck. You will need to order some side-axle seals, which are special order from your local parts store, usually stocked at the warehouse at the "hub," a day or two away. The going rate for these units on hybridz is about $750; one shows up in the classifieds every 2-3 months. I have seen them sell on ebay for as little as $500 and as much as $1250. Shipping is usually $80-100. If two day's work cleaning and painting is worth $200, this is a fair purchase. If you are putting this in an S30, you want a smooth rear cover instead of the finned one, and you will need an R200 mustache bar (saw one on ebay the other day). If you are watching every penny, it is priced on the high side. I see nothing that looks fishy, no reason not to trust the advertisement.
-
Its not always the same wheel.
-
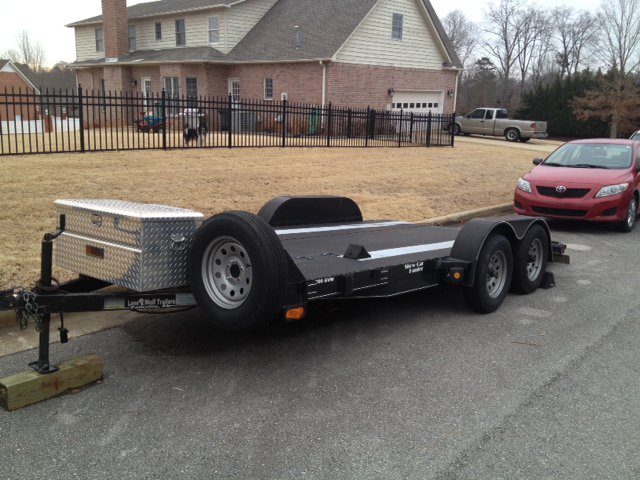
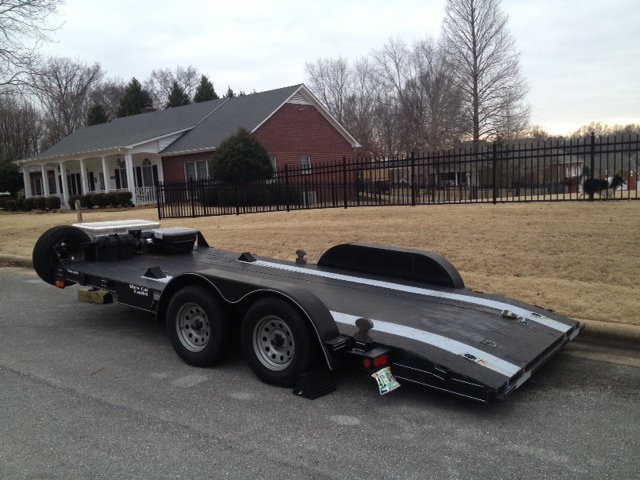
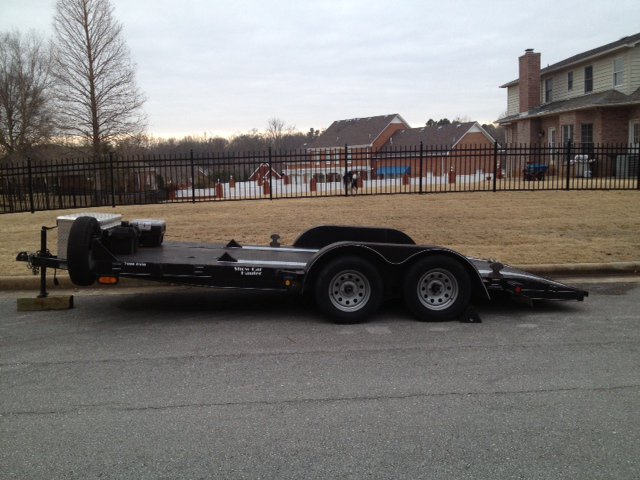
Any tips to stop eating tires? Friends tell me that it is a dual-axle thing - that when going around corners, the rear two tires are just sliding (and wearing out).... I was thinking about running 2 taller front tires with a higher load rating, and shorter enough tires in the rear to get them off the ground-kind of use them as emergency or secondary wheels. I loaned my buddy my trailer to take his Corvette to a show 6 hours each way, and it came back with one bald tire. It trails straight, doesn't pull funny or shimmy or sway. I have trailed it at 80mph without any trouble, the tires just wear really fast. Thoughts?
-
If the car is mostly a street car, I would use a VLSD. So long as both tires are on surfaces with equal traction and your front tires are pointed straight, you really don't even need a LSD-if traction is equal side to side, both wheels will turn. There is a NOS-equipped 280z on this website that runs 9s in the 1/4 with an open diff.
-
Just depends on how often you pull that sucker. Pull it a couple of times for suspension mods, and you'll start to like the little bit of play in the bore of the hub ears. Think about it, your front LCAs are just mounted on a bolt-no locking pin there! Measure your spindle pin with a tape measure and you will have the length you need. The metal sleeve on the bushing is what you tighten up to-the movement is in the rubber. If you look at your spindle pin, there isn't any wear on it-just corrosion-that's why it is so hard to disassemble. Same story in the cast ears of the hub. If it is too hard for you to emotionally tighten a bolt up against it, use a lock washer or a nylock nut, or a second nut as a lock nut. That way, you don't feel like you need to really crank it down too tightly.
-
At what rpm do you guys set your shift light?
-
1) How often to change oil on an autocross car that really only gets driven at autocrosses (6 minutes a month)? 2) How often to change oil on a low-compression, pump-gas drag car (30 passes a month)? What I have been doing, is changing the oil and filter each spring (before the season starts) whether it needs it or not. It usually has some color in it by then. Car gets most of its mileage (or hours) from April to October, then it is on jack stands all winter. Any real reason to change it more often than that?
-
My local hardware store or Fastenall doesn't have aything that big in-stock. Sunny Z is a corn farmer, so his hardware store has stuff for tractors and combines. You guys just get out a tape measure and order up the appropriate length bolts, nuts and washers from McMaster Car or boltdepot.com. A picture will just look like a big ass bolt.
-
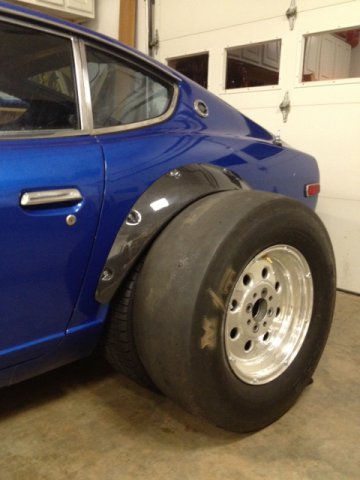
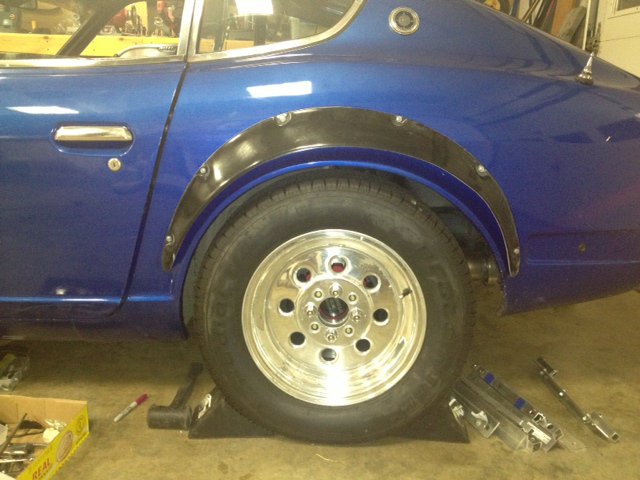
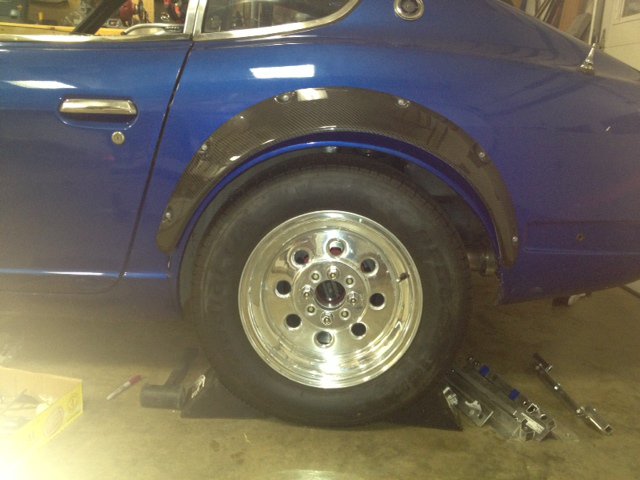
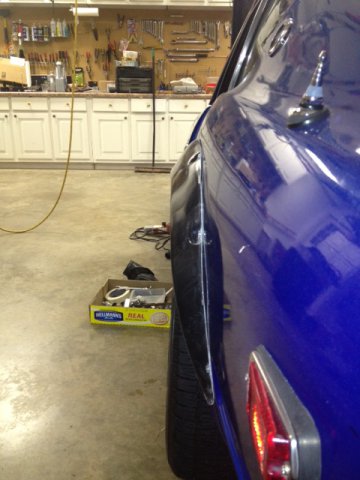
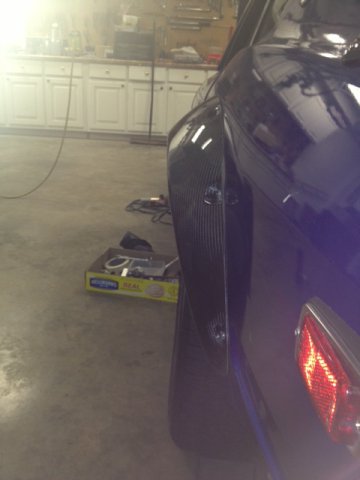
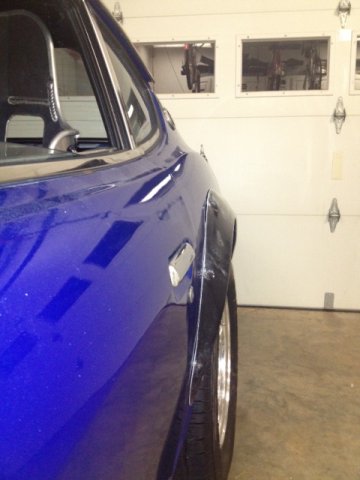
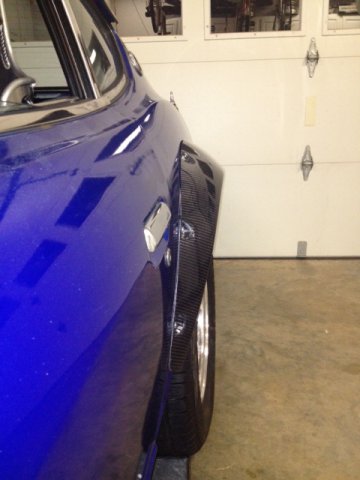
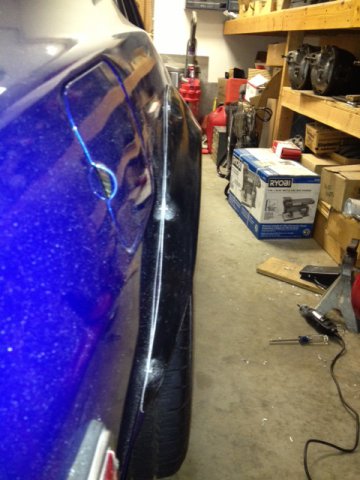
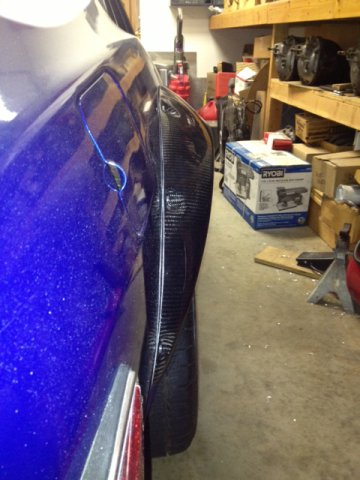
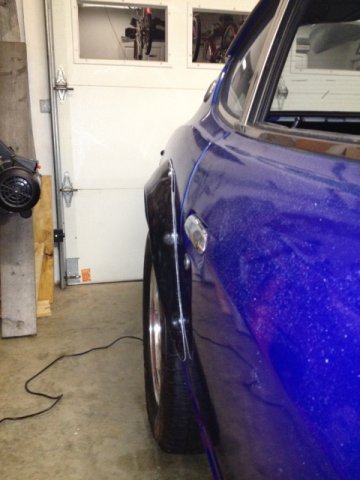
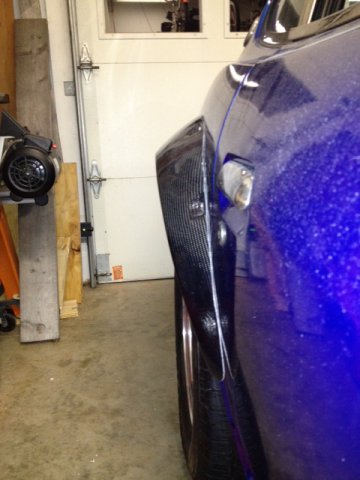
I am working on some rear flares for my 240z to mount some big ask rubber 28X10.5X15 MT ET Drag on either an 8" rim or 10" rim for drag racing. With my LS2, even with 245/45/50 Hoosier A6 tires, I can only floor the car when it is pointed in an absolutely straight line at the autocross, so I'm going to be increasing the size of my rear autocross tires as well. This thread pertains to REAR FLARES ONLY. Tired of all the hassle I have experienced trying to get tires to clear the rear fenders, I went straight to the mountain top and bought some ZForce Productions BAMF Carbon flares. Working with other racers who have had to cut, then cut again, to relieve tire rub, I am going for a max resection of inner and outer fender. Once I mounted my BAMF flares, I stood back and said "Dang, those are some huge bubble flares!" So I started doing research to try to find out if I would have the option of mounting a more narrow ZG flare using the same mounting holes, should I decide to step it down a notch. Called around. Justin at ZForce Productions tells me that the MSA flares share bolt holes with his. He and I tried to get some of those, only to find that MSA has a 3-5 week backlog of orders waiting to be filled and the sales rep admitted that they get lots of flares returned for quality trouble. Just about that time, forum member shakotan_culture lists on the vendors forum that his business jpngarage.com is selling ZG flares and has them in-stock ready for shipment. He talks to his fiberglass guy, and what do you know (?), his flares are supposed to share bolt hole pattern with the ZForce BAMF flares too. So he makes me a deal for a pair of fiberglass rear flares. They arrive promptly today and I got right to work. I use a cutting burr on a dremel tool to drill the holes in fiberglass or carbon flares because drill bits crack them. I put mounting holes right in the center of the mounting recesses on the jpngarage.com flares, and sure enough-they fit using the same bolt holes! I did have to very slightly slot a couple of the holes. There are some issues with all flares. I thought the ZForce Productions flares were thin-the jpngarage.com flares are thinner. Both brand flares got a little bit of finish rash in the shipping box, or in the factory where they are made. Both sets of flares were very carefully packed, so I bet it happened before shipping. If your car is a museum piece, you will want to carefully sand and paint them. My car is a race car, so I'm just going to put some undercoat on the backside so they don't shatter when a rock hits them, then bolt them up, honestly they are fine. Seems all flares need a little flexing to "fit" the contour of the fender arch. The gel coat of the jpngarage.com flares developed a lot of very fine gel coat cracks in the areas that I had to flex the most. I'm not spending two seconds on this on my car, but if you had a show car and you painted these, I don't know if that would be a problem. I have heard of "flex additive" for composite parts-might be a good idea to use some of that on these flares. OR, mount them without flexing them any. I will use fender welting to hide any imperfections in the flare to fender fit, but I will tell you that in that regard, both of these flares fit similarly-anywhere from zero gap to 1/8" maybe, which with all the bondo in my fenders, I think is pretty darn good. I will not be sanding mine to try to achieve a better fit-the time-to-reward ratio doesn't favor sanding. Also jpngarage flares are not marked for driver or passenger side-in my case, the screw holes dictated which fender I put on which side. So, here are some pictures. Before anybody says a bunch of garbage about how high these flares are mounted, realize the purpose of my flares: to clear big tires. When I'm all done with winter mods, I will lay frame using my coilovers for a photo shoot (so everybody can go "oooh, ahhh, that car is so low"), then put it back at racing ride height (which is pretty high) and go get my annual alignment. This is not a low-rider. In all honesty, I do wish I had mounted the flares 1/2" to 1" lower. And, the driver side is about 1/2" further back than it should be (oops!). When using a plumb bob to find the center of my axle, I neglected to put the car level on jacks-I just jacked up the back. That rake created an artifact in my center measurement. Next car will go on 4 jack stands with a level rocker panel. The conclusion is: If you think that you will ever want wider flares in the future, the jpngarage.com flare is a good flare that allows the opportunity to go to wider flares in the future while avoiding the need to re-drill your fenders for mounting screws. They were very competitively priced and I am happy with the quality and very happy with the customer service at jpngarage.com
-
For the 240z side of that question, I have separated the floor/tunnel seam at the back of the floor over the diff. I have cracks in my a-pillars and c-pillars but those existed before the swap. When I launch hard, the rear upper corner of my doors slaps the door frame and chips the paint occasionally. Other than that, I'm good for the moment.
-
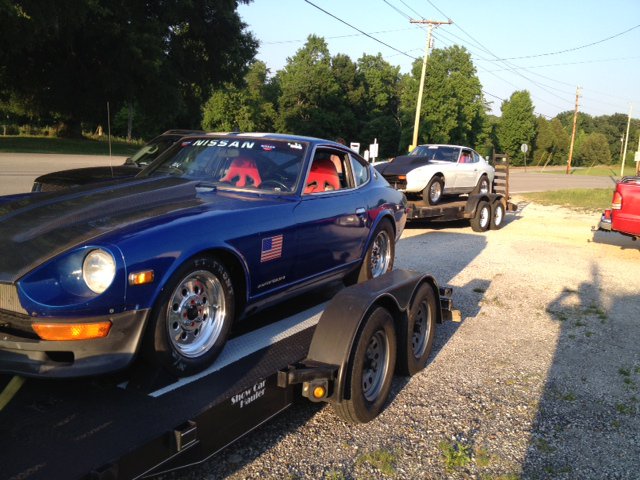
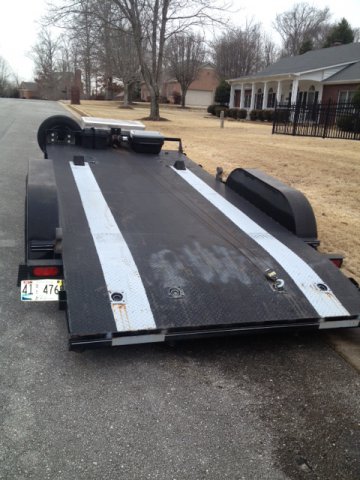
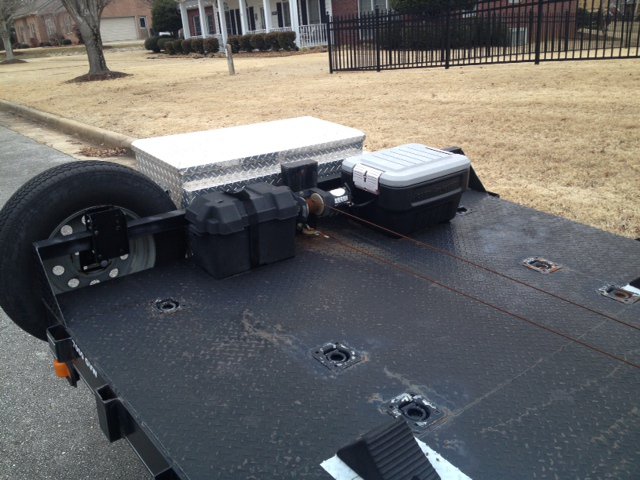
Post pictures of your Z-car hauler, if you have one. I will add mine on an edit. I'm hoping somebody has a lighter approach than my budget trailer, which is, I think, heavier than I need for the Z. Also hope to learn something about the pros and cons of going from a dual axle trailer to a single axle trailer (Even after three alignment checks from three different shops, my car has a voracious appetite for tires). Please refrain from any "trailers suck" comments-I'm planning to expand my racing range beyond the point that I want to be calling my wife to come and get me. Besides, she doesn't know how to hook up the trailer and doesn't want to learn.
-
SOOOOOO many great things to say about that build (I just went thru all the pictures). A few issues that I see: Is that a 240 or a 280Z (?) from the turn signals and the floor pans, I think it is a 280, and the transmission tunnel in a 280 is so much wider that there is no comparison. I promise I'm not trying to cause problems, but a part made to fit a 280z jig might not fit a 240z. Whereas, if you go the other way: use a 240z jig, things should fit the 280z fine. We saw this with the last long tube header group buy. Secondly, I guess proximity to floor pans is always going to be an issue with lots of tubes around the footwell, but with block hugger headers I have no floorpan heat issues at all, even with bare metal floors. I DO have a very hot transmission tunnel, however, further back where my 3" pipes are close to the wall of the tunnel. I also don't understand why the top radiator hose is so contorted, when someone who obviously has skills as a tig welder is available-move that hose over within the top tank! But, I'm not certain-can the inlet go anywhere within the top tank, or maybe it has to go on the far driver's side? It would be better if that inlet tube could be relocated, then that cool cold air intake would look like a symphony. There are so many terrific things to say: I LOVE the fuel pump placement, especially with the dual pumps-that is freakin' fantastic. I also like the simplicity of running flexible fuel hoses from front to rear-it eliminates a bunch of fuel fittings (the place where leaks happen) when compared to using a combination of solid and soft lines. I am a big fan of the model 74 clutch master cylinder over the model 75, because the 74 has a master cylinder bleed port-really comes in handy. But the 75 does look cleaner. I really like the transmission mount and all the exhaust clearance it gives. That being said, the kit pictured in the photos requires a lot of welding, whereas the JCI kit bolts in without any welding at all. If I were of sufficient resources to just drop my car off at Hawks Third Gen to have them do all the fabrication work, I think in the end I would have a better machine than the one I have built in my garage using the JCI kit. Its the difference between a skilled fabricator and the hobbyist with basic lefty-loosy, righty-tighty skill set like me. I'm a fan of both kits, and I now want a supercharger! I wonder if Hawks Third Gen would be willing put together a simple 9-inch kit for us (please, please) that somehow could preserve stock floorpan configuration? That would force me to become a 2-Zcar household with one for turns and one for straights (no gender preference intended). Maybe if we prove a worthy market-everybody go spend some money!
- 16 replies
-
- ls1
- ls1 motor mount
- (and 4 more)
-
As much as I like JCI (and I do) we need a couple of guys to thoroughly document the Hawks Third Gen swap. Maybe the guy will discount you if you do a writeup? For what it is worth, JCI is easy to work with, talks on the phone directly to you, ships fast and stands by their products. The only issue with the JCI kit is no long tube headers and poor 240z exhaust clearance thru the trans crossmember. No one seems to have a clean, simple, cookbook method for marrying the engine harness to the chassis harness. We all seem to do that differently. I am fine with block huggers because they are so easy to install.
- 16 replies
-
- ls1
- ls1 motor mount
- (and 4 more)
-
Stay away from the tepees. My wife and I froze our asses off 20 years ago. Still remember the pain of being so cold.
-
Stay stock clutch.
-
Send a PM to EvilZ. He is trying to sell a set of CCW 17s with tires for $2500. It's a good deal.


