

Dudeboy
-
Posts
677 -
Joined
-
Last visited
-
Days Won
2
Content Type
Profiles
Forums
Blogs
Events
Gallery
Downloads
Store
Everything posted by Dudeboy
-
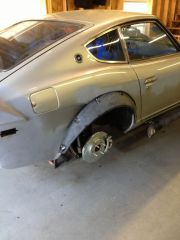
From the album: Dudeboy LS1 Z
-
From the album: Dudeboy LS1 Z
-
From the album: Dudeboy LS1 Z
-
From the album: Dudeboy LS1 Z
-
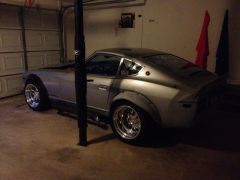
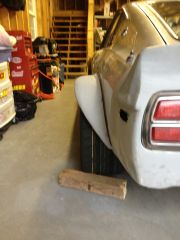
It was a bit of work for a few inches but it was worth it. Next year I will look at coilovers and I have a lot more room to lower the height. For now, get it running, painted and enjoy driving.
-
From the album: Dudeboy LS1 Z
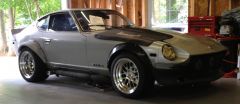
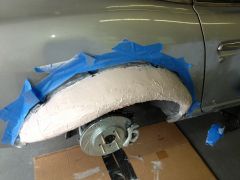
I finish extending the flares out. The shape came out well, but I could have taken some more time on the finishing. I have a painter lined up and he came by and took a lot what he has to work with, and indicated it would not be -
Over the last 2 weeks I have been extending and re-shaping the BAMF ZG flares. I knew the offset would be tight without coilovers and as you see with 17-11 wheels and 315-35/17 NT05 tires stick out past the flares. I used Tap Plastic foam, Fiberglass mat and cloth, Tiger Hair reinforced filler and Evercoat lightweight filler. Tomorrow, I will be sanding and spot glazing/putty to good enough condition for the body shop. I was able to build the flares up and extending out about 2.75 inches - a lot a work for a few inches !
-
From the album: Dudeboy LS1 Z
So, over the last two weeks I have been foaming, fiberglassing, sanding, grinding, shaping and making fares wider. I will fill and sand enough Evercoat to have it ready for the body shop. -
From the album: Dudeboy LS1 Z
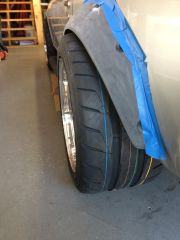
With the offset I chose for the wheels, and the 315/35-17 my wheels were wider than the flares. I went through three scenarios and plans to make the flares wider. So, over the last two weeks I have been foaming, fiberglassing, sanding, grinding, shaping and making fares wider. -
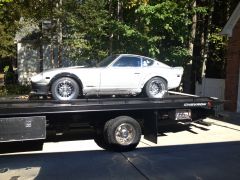
Clive, I can go back even further on the yellow car !!! Several years ago at the Motorsport Auto show in Cailfornia that I went to the car was red then !!! Rocky Auto and Common Snapper are two (shops) internet websites I look at from time to time to see what they are building. The domestic exporting has been going on for a while with hot-rods and low-riders. But, to make the claim of building ???? This will be interesting to see as time pass.
-
Check with Dave at Arizona Z Car. That is where I purchase mine a couple years ago. dave@arizonazcar.com
-
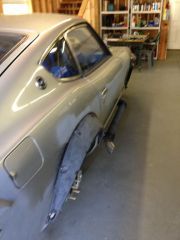
Thank you Joe, I was on a roll and life took me away from the garage !!! Installed the BAMF ZG flares the last two nights after work. I will start from the front of the car and go back and start tightening and make sure I did not miss a wire or bolt --GETTING CLOSE !!!!
-
From the album: Dudeboy LS1 Z
-
From the album: Dudeboy LS1 Z
Cutting the body for ZG flares is a task. I had Austin Hoke's Flare install kit and a nutsert tool. I got a good workout the last two days putting these flares on. -
Domsz, Thank you - it seems I have been at it so long I would do quite a bit differently if I were to do another Z.
-
Great build and choice in wheels ! I almost thought I was reading my time spent on my Z and tire choice--I am even doing ZG flares today and tomorrow.
-
Progress, Interiors done- I need to re-inspect dash wiring. I purchased Nitto NT05 tires, 315/35-17 and 255/40-17. Put wheels on and removed jackstands, and it has been 6 years since the car was on the ground !!!! I put the BAMF ZG Flares on measured and blue taped about 50 times until it was just right. Sunday, will be cutting and drilling. Next, get a battery, anti-freeze, fuel and INSURANCE. I have a quote from Hagerty insurance that will be in place before I go down the driveway. I have checked out some local painters and few in other parts of the city, and I will cross that bridge once I get it up and running.
-

From the album: Dudeboy LS1 Z
I finally purchased some tires and can measure for the ZG flares. Tires are 315-35-17 Nitto Nt05, 255-40-17. Boze wheels, 17- 11, 17-9.5 - The offset puts the wheels real close to struts. No coilovers, Tokico 280 spring and strut update. If I lower at least 1 inch- 2inch, I will have to re-do the exhaust. I may visit that later. -
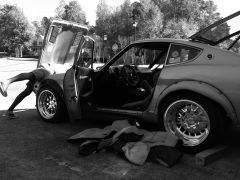
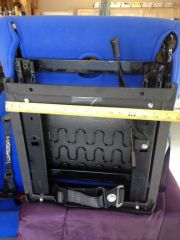
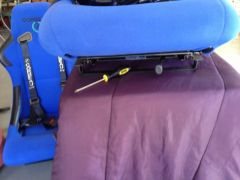
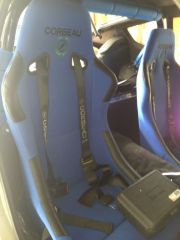
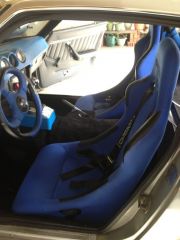
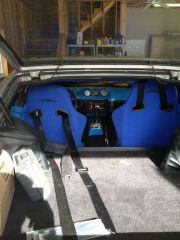
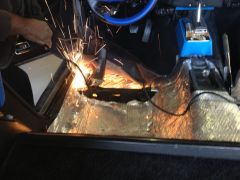
Finally, got the seats re-install tedious but not difficult. I am 6 ft. and weigh 200 lbs, I am wide in the shoulders. I have the Corbeau Forza seats, which are narrower than the Forza II. Second I did not utilize the sliders recommend by Corbeau for a Datsun 280z. I had the initial 280z sliders, and I modified the front to bolt in the stock location and I never like the seat height when I was driving the car before I started the engine swap. So, I have Corbeau Forza fixed back seats, the universal 2.5 inch sliders, Highest grade 5/16- 3 inch nuts, bolts, washers. I removed front stock mounting location on the passenger side, on the driver side I removed the front and rear stock mounting locations. The angle grinder with a 4.5 inch metal cutting blade to cut through the mounts easily. Made three cuts across the top, and then across width wise. Put grinder blade back on and clean the edges. I took the “BFH†sledge hammer to the catalytic converter hump on the driver’s side. I welded in 5/16x2x 13 or 14 inches thick steel to the floor for the driver side. I only welded in a piece on the front location on the passenger’s side. I got in at like my seat height now ( Not driving yet !!!!) What would I do different? 1. Remove the passenger rear stock mounting location. I did not realize how much of a difference it made in the tilt/height. 2. If you use the seat sliders that are made for a 280z, cut all the stock mounts out and maybe use boxed 2 inch height x 13 to 14 inch wide steel welded in the stock location. It possibly would give you strength and a neutral seat height. 3. Do all the seat stuff if possible, before you install carpet. I had to pull the carpet out and find seat locations, bolt in, remove seats, lay down carpet and cut X’s in the carpet to stick bolts through, put the seats back in ! This was the most tedious part. *****IF you are bolting seats to the floor and welding on the passenger side, the fuel lines are on the passenger side****I upgraded my fuel lines and I measured twice before I drilled on the passenger side. My dad, all 76 years old was working the angle grinder !! http://forums.hybridz.org/gallery/album/1218-dudeboy-ls1-z/ A created a album with some of the photos that may detail what I did not write clearly.
-
From the album: Dudeboy LS1 Z
-
From the album: Dudeboy LS1 Z
-
From the album: Dudeboy LS1 Z
-
From the album: Dudeboy LS1 Z
-
From the album: Dudeboy LS1 Z
-
From the album: Dudeboy LS1 Z