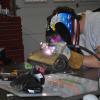
240hoke Posted September 27, 2005 Share Posted September 27, 2005 Hey guys, My tail lights like just about every body elses were really dark. Anyway I desided to clean them up and im really happy with the results. First of all just polishing the outside doesnt do it, soot fills up the inside of the tail lights and makes them look really dark. 1.) Carefully go around the lense with a screwdriver prying it up out of the plastic housing. Go very very slowly here, dont want to crack anything. A helper is a good idea. Once they are free clean up the gluee from teh lenses. 2.) Once the lenses are off you can really see the soot built up on the inside! I used 409 to clean the soot out. 3.) Polish up the lenses with a plastic restorer, I used 3M marine clear plastic restorer, You can get it at west marine or any boat store. 4.) Wash the lenses again to get all the polish off and let them dry 5.) Use a adhesive to glue the lenses back together. I chose to use a genral contractor adhesive (subfloor adhesive) jsut because I had it around and it bond pretty much anything. 6.) Arent they pretty?? This was the best housing, from teh passenger side, you can see the soot buildup here, not nearly as bad as teh drivers side. Here are the lenses all cleaned up and ready to be glued back into place. Here is a before and after picture. and another Hope this helps some people Quote Link to comment Share on other sites More sharing options...
EvilRufusKay Posted September 27, 2005 Share Posted September 27, 2005 Wow nice job!! They look great!! Quote Link to comment Share on other sites More sharing options...
240Z_Master Posted September 27, 2005 Share Posted September 27, 2005 You sly dog Austin you! Quote Link to comment Share on other sites More sharing options...
Guest ON3GO Posted September 27, 2005 Share Posted September 27, 2005 this kid has way to much time and money on his hands lol. love you always austin mike Quote Link to comment Share on other sites More sharing options...
JMortensen Posted September 27, 2005 Share Posted September 27, 2005 I've heard that you can put them in the dishwasher to clean the insides. Never tried it, but that's the rumor. Quote Link to comment Share on other sites More sharing options...
78zlt1 Posted September 27, 2005 Share Posted September 27, 2005 Nice Info, Looks much better almost new. I found an easy way to get the lens seperated from the housing, I set my oven (a regular kitchen oven I use for powdercoating) to about 200 degrees or so and put the taillight on a piece of cardboard on the middle rack , after about 20 to 30 seconds pull it out and test prying up the lens the heat softens the caulk, you may have to keep popping it in the oven till it softens enough to get the lens off easily, after the lens is off clean the goo out of the housing with a small screwdriver , popping it in and out of the oven to keep the adheasive soft. Quote Link to comment Share on other sites More sharing options...
Kennysgreen280zt Posted September 27, 2005 Share Posted September 27, 2005 Im mid way doing mine as well. I was thinking of spraying some of that crap "chrome" spray paint in there to cover the soot in the drivers side housing. I used WD40 to clean the soot off of the lens them self, it worked out pretty well! Quote Link to comment Share on other sites More sharing options...
240hoke Posted September 27, 2005 Author Share Posted September 27, 2005 Ive heard of throwing them in the oven as well, alot of honda guys do that to seperate the headlight housings so they can "black out" the inside. Just gotta be carefull not to let it get too hot. My friend ruined one of his headlights setting the oven too high go figure lol. Quote Link to comment Share on other sites More sharing options...
giorgio61 Posted October 8, 2009 Share Posted October 8, 2009 How I did my 240 tails: 1) Remove the chrome strip, a one way lock washer in the back of the housing must be removed, is deep in a recess of the housing, if you break it, and you probably will due to where its placed, don't worry, the trim can be glued back. 2) Just place the tailight under the kitchen faucet and let the hot water run for a few minutes, it will soften the sealant enought to pull the lens off. 3) Wash, clean and polish the lens I used a drill mounted polishing wheel and some turtle wax, if there are deep scratches, sand with 600 grit all the way to 1500 grit then polish at slow speed and constant movement otherwise you will burn the plastic. 4) On the bottom of the housing and the bottom of the lenses there are two drain notches, these should have a small piece of foam to keep the inside free of dust. If they are damaged or missing, get a foam paint brush (the throw away kind) and cut small pieces to fit the notch and deep enought to get caught by the lens but not compressed too much that it will not drain ant humidity insude the housing. 5) go to Home Depot and in the roofing section there is a metal roof seam sealer, Its a roll of a white sticky mastic tape about 1/2 in wide (its rolled onto a disposable waxed paper strip. (I will try to get the SKU from the Depot) its only about $5.00 6) Apply the sealer onto the lens edge all the way around except where the notches are. 7) Make sure everything is clean and free of debris, bring the lens to the housing align and press then clamp with your hands around the edges as hard as you can (don't press against a hard surface, you will break the housing or lens) 8) Clean and polish the chrome trim (use a chrome polish such as Flitz) 9) Glue trim piece back on. I used double faced foam tape the kind used on auto trim available at any auto parts store (it usually has a red protective tape, but ask anyway) Quote Link to comment Share on other sites More sharing options...
cygnusx1 Posted October 8, 2009 Share Posted October 8, 2009 Nice Austin, you should have posted this about a month ago while my tail lights were out! Now they are back in and apparently, dirty as heck. Big difference in the before and after. Quote Link to comment Share on other sites More sharing options...
Kennysgreen280zt Posted October 8, 2009 Share Posted October 8, 2009 Nice Austin, you should have posted this about a month ago while my tail lights were out! Now they are back in and apparently, dirty as heck. Big difference in the before and after. He posted it 4 years ago... Quote Link to comment Share on other sites More sharing options...
cygnusx1 Posted October 8, 2009 Share Posted October 8, 2009 OK then I'll yell at giorgio61 for bringing it back a month too late. It's not one of those things I even thought about doing until I saw this thread tonight. I suppose it's not a bad idea to clean the rear end after 30 or so years. I've been married so long, I don't even look for dates anymore! Quote Link to comment Share on other sites More sharing options...
giorgio61 Posted October 8, 2009 Share Posted October 8, 2009 Yell away my friend!...just trying to improve an old recipe. Quote Link to comment Share on other sites More sharing options...
cygnusx1 Posted October 8, 2009 Share Posted October 8, 2009 LOL. Thanks! Quote Link to comment Share on other sites More sharing options...
giorgio61 Posted October 12, 2009 Share Posted October 12, 2009 5) go to Home Depot and in the roofing section there is a metal roof seam sealer, Its a roll of a white sticky mastic tape about 1/2 in wide (its rolled onto a disposable waxed paper strip. (I will try to get the SKU from the Depot) its only about $5.00 I got the info on the tail light assembly (lens to housing) sealer. Its called Roof Strip Mastic and it comes in a whooping 45' roll but its only $4.98 at Home Depot SKU 714021. Anyway I found its also great to seal loose rubber body plugs, hold screws in the screw driver and a many other uses! Quote Link to comment Share on other sites More sharing options...
giorgio61 Posted October 12, 2009 Share Posted October 12, 2009 Here is a couple of pics of the stuff Quote Link to comment Share on other sites More sharing options...
SoCalJack Posted October 17, 2009 Share Posted October 17, 2009 Awesome thread! I am definitely going to do this Quote Link to comment Share on other sites More sharing options...
Recommended Posts
Join the conversation
You can post now and register later. If you have an account, sign in now to post with your account.