
HLS30-08077
-
Posts
180 -
Joined
-
Last visited
-
Days Won
1
Content Type
Profiles
Forums
Blogs
Events
Gallery
Downloads
Store
Everything posted by HLS30-08077
-
DZ-Start Push button Ignition Kits F/S again
HLS30-08077 replied to HLS30-08077's topic in Vendor's Forum
Hey Guys, I have about 15) DZ-Start kits left that are ready to build and ship. Prices are as follows...... #1) Standard DZ-Start is $260 shipped #2) Remote security option is an additional $25 ($285 shipped) #3 RFID option (1-keyfob) is an addition $40 (This option allows for remote Power door lock controls) ($300 shipped) (Free shipping is in the lower 48 (U.S.A.) $10 extra for Canadian orders If you're interested in one (or more) I can take Paypal to wolfin32z@yahoo.com Leave a message to seller, telling me what the payment is for and where to ship it when they are ready. Email me if you have any questions that haven't been answered here at Ratsun. **NOTE** This is the last run. I will no longer be making or offering these. Once these are gone, they're gone. Get them while you can. Thank you to all involved, previous and future customers as well. Dave -
DZ-Start Push button Ignition Kits F/S again
HLS30-08077 replied to HLS30-08077's topic in Vendor's Forum
First, What is this all going into...???? I can do the DZ-Start with the RFID for $300 The RFID kit will allow you to use the key fob to lock/unlock the doors, horn honk with a relay and light flash with another relay. I can sell you the set of correct door lock actuators for $20 and as for power windows, I would highly suggest the SPAL Deluxe power window kit (p/n 33000030) $116 on Amazon) and the 2 switch harness (p/n 33040122) $35 on Amazon -
DZ-Start Push button Ignition Kits F/S again
HLS30-08077 replied to HLS30-08077's topic in Vendor's Forum
The RFID version would be the one you want then. It can control the door locks (using relays) and also has outputs for light flash and horn (siren) honk. It can be programmed to instantly lock/unlock the doors and enable/disable the button at the same time. -
DZ-Start Push button Ignition Kits F/S again
HLS30-08077 replied to HLS30-08077's topic in Vendor's Forum
WOW!! That's like 15+ years old!!! Go ahead and install the Alpine alarm like normal, BUT........ Use the "Starter Kill" wire (Ground when Armed) wire. Connect it to the Orange disable/enable wire on the DZ-Start. You'll still have alarm function and when you arm the alarm, you'll disable the DZ-Start. (Disarm the alarm to Enable the DZ-Start again) Hope that's what You're asking for, Dave -
DZ-Start Push button Ignition Kits F/S again
HLS30-08077 replied to HLS30-08077's topic in Vendor's Forum
The RFID system I use can be attached to any style of DZ-Start. I can prep one for you and send it with the T-Taps to tap the DZ-Start harness and instructions for everything else. The PKE (RFID) only comes with 1) keyfob, but if you want another or a replacement, they are available online. I can take care of that. $40 shipped Let me know, Dave -
Painless harness to Z column harness (headlight combo switch
HLS30-08077 replied to georgiaz's topic in Ignition & Electrical
73' and up combo switch....... 10 ga Black.......................Ground wire for wipers, washer fluid wipe, Headlight Hi/lo beam (over to the turn signal switch) White/red..........................Headlight power Input (+) Red...................................Headlight power output (+) Green/white.......................Parking light power in from fuse box (+) Green/blue........................Parking light power out from switch (+) Blue..................................Washer fluid input.....................................\\\ Blue/red............................Washer fluid output------------------------------->> button on end of combo switch Blue/white.........................wipe while pressing the washer button....../// Yellow/green.....................Wiper park (-) has to be grounded for wiper to operate (first click) Blue/yellow........................Wiper intermittent wiper timer (not active unless yellow/green is grounded. Yellow/black......................Wiper Low speed (-) Red/blue...........................wiper High Speed (-) 70' to 73' Turn signal switch Solid red or black single wire that connects to the combo switch.........Headlight Hi/lo beam input ground wire. Red/white...............................Headlight High beam negative wire Red/yellow..............................Headlight Low beam Negative wire Green....................................Turn signal input from 2-pin flasher Green/yellow..........................Brake light input wire (+) from the brake pedal switch Green/black...........................Front Right turn signal output White/red...............................Rear Right brake / turn signal output Green/red..............................Front Left turn signal signal output White/black............................Rear Left brake / turn signal output 74' to 78' Turn signal switch Same as 70' to 73' but no Green/yellow brake input and no front (green/red and green/black) turn signal wires. 74' and up have separate brake and turn signals in the rear, which is why the 70' to 73' have 6-wire switches, versus the 3-wire switches on the 74' and up. The 74' and up brake wire goes directly to the rear brake lights. Not through the turn signal switch -
DZ-Start Push button Ignition Kits F/S again
HLS30-08077 replied to HLS30-08077's topic in Vendor's Forum
And what is this crap...???? "An Error Occurred" "You have reached your quota of positive votes for the day" I've never used the "LIKE" button before but apparently 1 like is the max.....?????- 26 replies
-
- 1
-

-
- DZ-Start
- Push button
- (and 1 more)
-
DZ-Start Push button Ignition Kits F/S again
HLS30-08077 replied to HLS30-08077's topic in Vendor's Forum
Well I am a Vendor of sorts. I'll be a donating vendor if these start to move. Already got a couple inquiries but nothing solid yet. Then again, it's only been a few days. Dave -
DZ-Start Push button Ignition Kits F/S again
HLS30-08077 replied to HLS30-08077's topic in Vendor's Forum
I haven't been on or posted in a while. Years maybe. But then again, I've been busy with life. I get the occasional 240Z electrical question but that's it. No reason to donate to the cause. But like I said. If any units sell due to this For Sale Ad. Then I will donate accordingly. -
Have you considered this...????? http://forums.hybridz.org/topic/126999-dz-start-push-button-ignition-kits-fs-again/
-
DZ-Start Push button Ignition Kits F/S again
HLS30-08077 replied to HLS30-08077's topic in Vendor's Forum
To the Admins.... If any units sell, due to this thread, I will donate accordingly. -
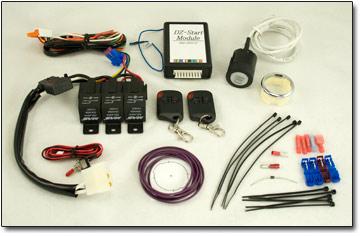
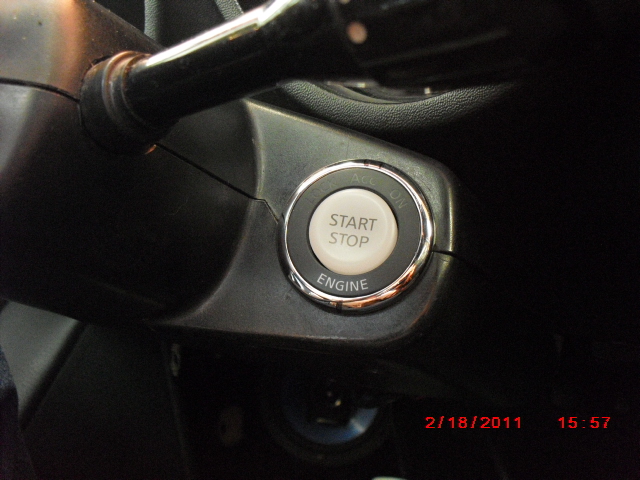
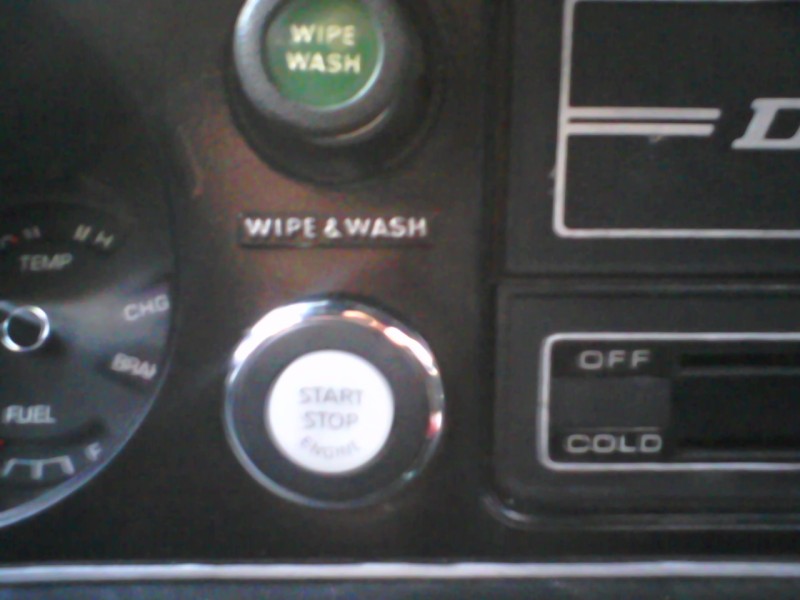
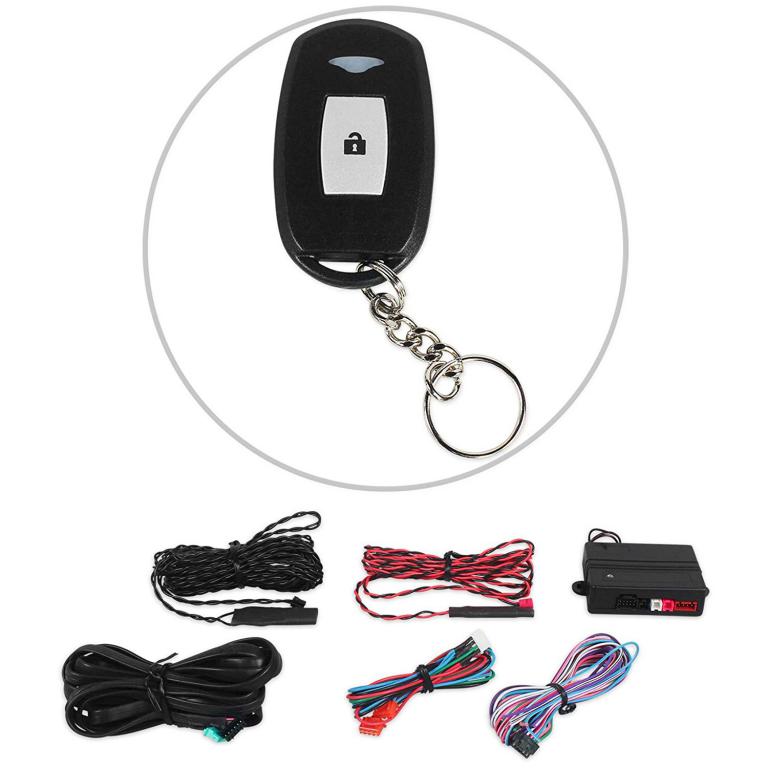
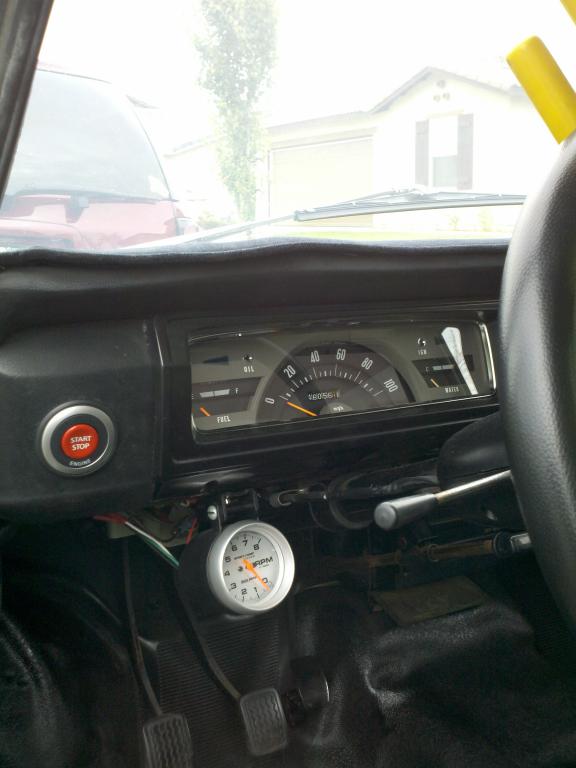
I'm making the DZ-Start again!! Same push to start ignition kit that MSA used to sell. I made them and sold them to MSA years ago. I had no plans to do it again but enough people from multiple sites showed enough interest that I finally dropped the hammer and decided to do it one more time. The other thread is locked so here's a new thread. I tried to run a "For Sale" ad but I need to be a donating member. Can't Donate if I don't sell any, right? I now have 56 boards left to fill future orders...... These vehicles all use the same ignition switch and wiring order. And the DZ-Start will plug right into them..... 1968-1973 510 1970-1978 240Z, 260Z, 280Z 1979-1983 280ZX 1972-1973 1200 (B110) 1979-1982 210 (B310) 1978-1981 510 (A10) 1977-1981 810 (Bluebird) 1982-1983 Maxima (910 Bluebird) 1979-1982 310 (N10) 1977-1983 200SX (S10) 1979 Datsun 620 1980-1982 Datsun 720 Subaru 1982-1987 Brat 1986-1987 GL 1980-1984 DL 1980 GLF 1980 GL 1980-1987 Standard The Datsun's without this style switch can have the DZ-Start wires reorganized to make them plug and play The DZ-Start is a true Keyless ignition button kit. remove your ignition switch, plug the ignition connector into the relay pack, connect the ground wire to the dash, the brake wire to the brake pedal switch, connect the coil wire to the coil (-). Plug it all in to the control box, mount the button where your ignition key used to go (open it up by 1/16") and you're basically done. Flashing "LOCK" button gives visual on the security. The remote option gives you 2) ON/OFF remotes that disable the button from functioning. The RFID option gives you a single remote for a true hands free security option that enables/disables the button as you approach or walk away from the vehicle. All kits come with a toggle switch to disable the button and The Basic kit also comes with a security wire that can be tied into almost any basic or advanced alarm with "Starter kill" option that works with your alarm So here's the new pricing. $260 for the standard $285 for the remote option w/ 2) remotes $300 for the new RFID option w/ 1) fob Shipping is included in the prices (in the US) The Red GT-R button is readily available on eBay for about $45 +/- $5 I do not carry them, so if you want that, buy the kit then buy the extra button on eBay. Let me know, Dave wolfin32z@yahoo.com

-
Help, MSA no longer sells Cowl Induction Hoods :(
HLS30-08077 replied to mistafosta's topic in Body Kits & Paint
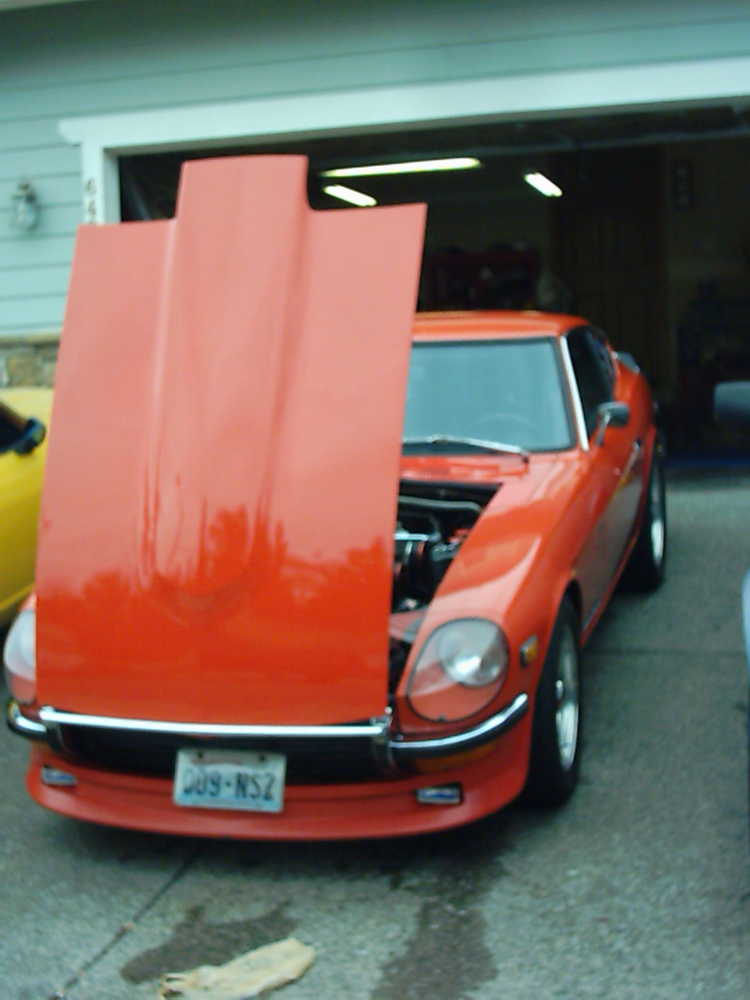
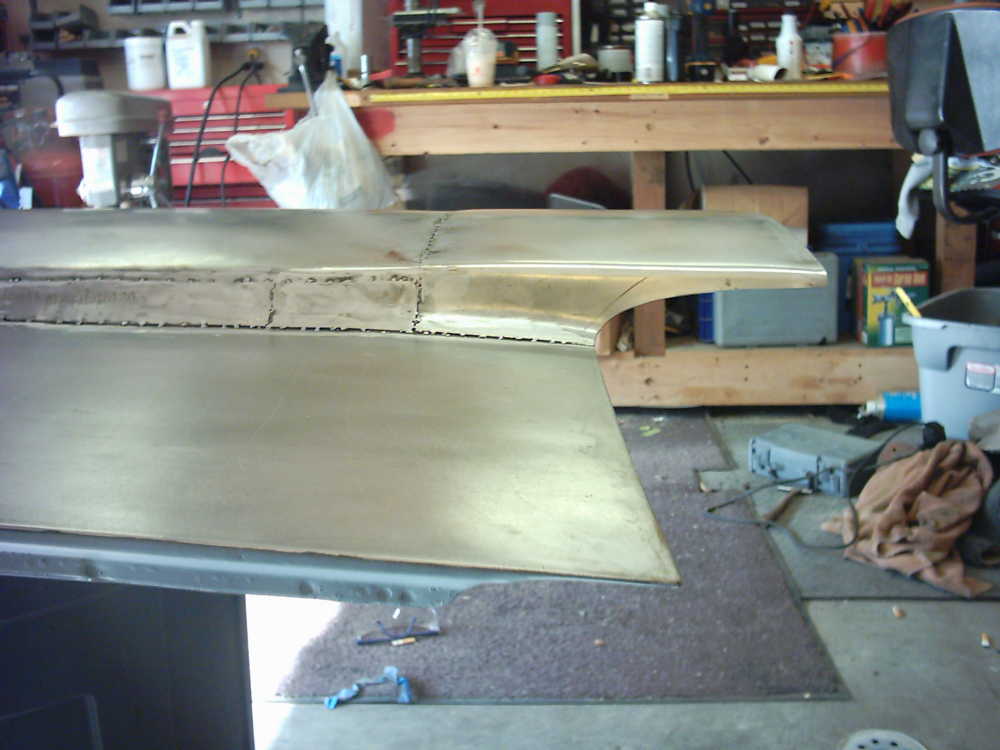
The best ones I've seen are the hand made ones. I made mine a few yars ago, cut the hood open, lifted it a bit, filled in the cut, extended the hood over the cowl, welded and body filler (glass and plastic)then painted it.
-
Finally got an Answer for ya. ($170 and it contains EVERYTHING, including free shipping in the Lower 48 states) Almost completely Plug and Play, Just 3 connectors and 3 wires. The other 3 wires are optional. Check this out and let me know what you think...... http://forums.hybridz.org/index.php/topic/98889-daves-new-startstop-button-ignition-system/ Dave
-
Hey Guys. Been a member for a while now. And every time I look up "Push button Ignition" I find everything on the S2000 button. And everytime there is a complaint or wiring issue or something falls apart. I got tired of it and decided to do something about it. Check this out and let me know what you think...... http://forums.hybridz.org/index.php/topic/98889-daves-new-startstop-button-ignition-system/ Dave
-
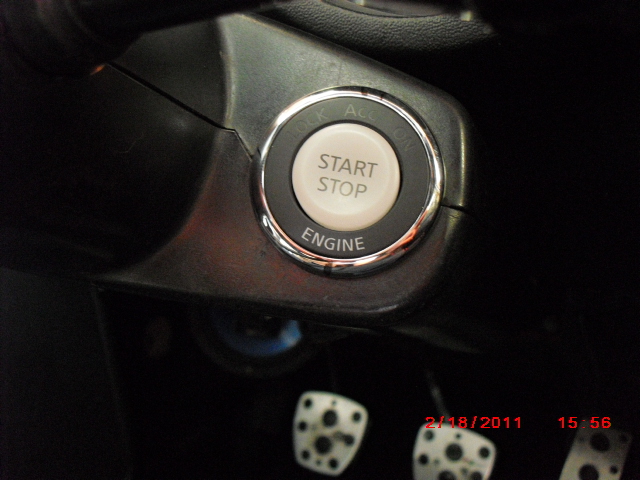
So Back on the subject of Push button ignitions..... Does anyone on this site know of any 240Z owner who has installed a Nissan Maxima or Altima "Pust to Start/Stop" button.??? I ask because Me and a friend (who designs circuit boards) have designed a circuit that takes all the operations of the Nissan Maxima switch and allows it to operate the same way in the 240Z as it would or does in the Maxima and Altima. It plugs directly into the 240Z's ignition plug (for power to the unit and output of the relays.) It uses an OEM Nissan Start/Stop ign. switch (P/N 25150-1AA0B) The Control unit has inputs for the tach, brake switch (for starting), Door pin and parking light inputs to light the switch at night or apon entering the car. Outputs to control the LED's on the switch for ON, ACC and LOCK Alarm input to dissengage the box with an alarm or toggle switch and light the LOCK LED The Door pin and parking light wires will be tapped using a standard 3M "T-Tap" The Brake switch is tapped using a wire with 1 male and 1 female bullet connector, so nothing is cut. The Tach wire goes out thru the speedo cable hole and hugs the left fender over to the coil and the + ? wire is tapped (must be a Pulsed signal to tell the circuit that the motor is running, and the next press of the button will shut the car off, instead of engaging the starter with the motor running. #1 press of the button turns on the ignition and Acc. #2 pressing the brake pedal at the same time as the button will start the car as long as the button is held, or until the Pulsed tach signal tells the starter to dissengage, due to the motor turning. With the motor running, the #3 press of the button will cancel all operations, shut the motor off and turn off all the relays (same as key off and out) Pressing the button to turn on the ignition and Acc, and pressing it again without pressing the brake pedal, will shut the switch back off. http://video.cardomain.com/VideoPlayer.aspx?id=2202506 So I guess this post is to ask any and all "has it been done?" and "What would you expect to pay for this full everything included, plug and play kit??" Just feeling the waters here folks.
-
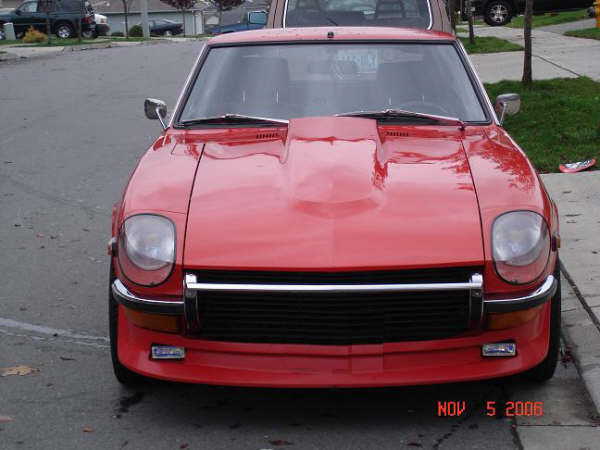
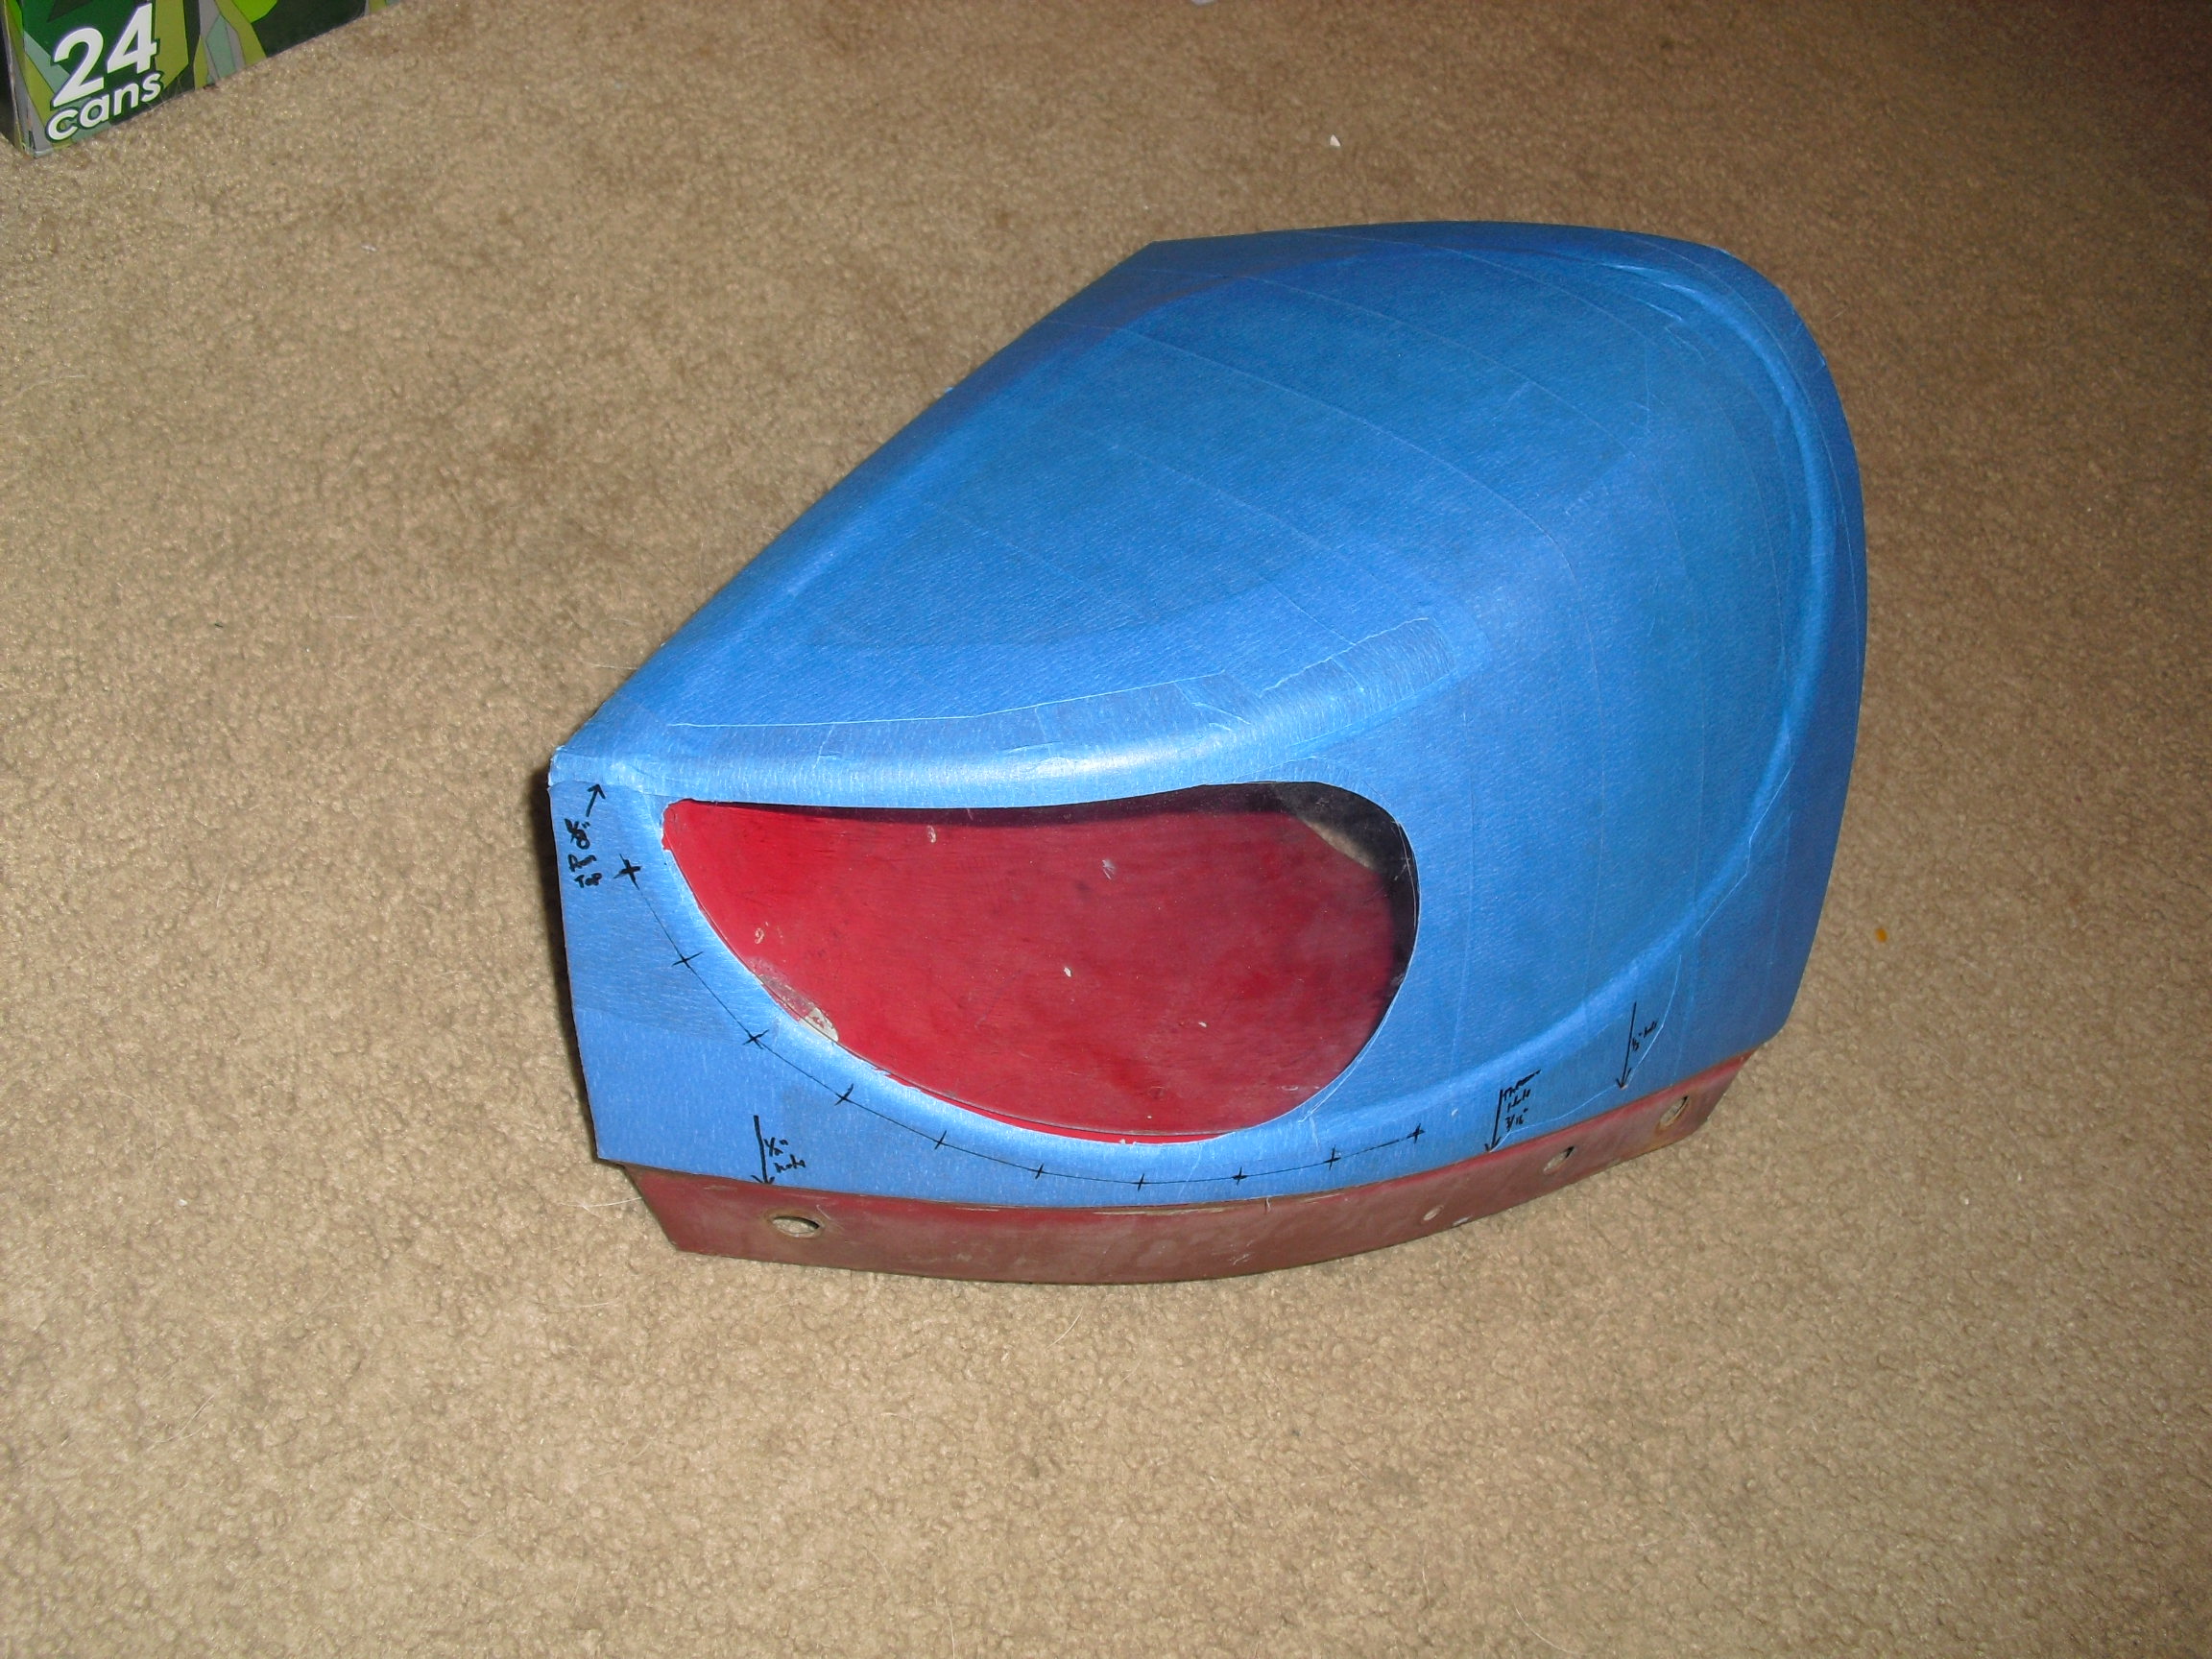
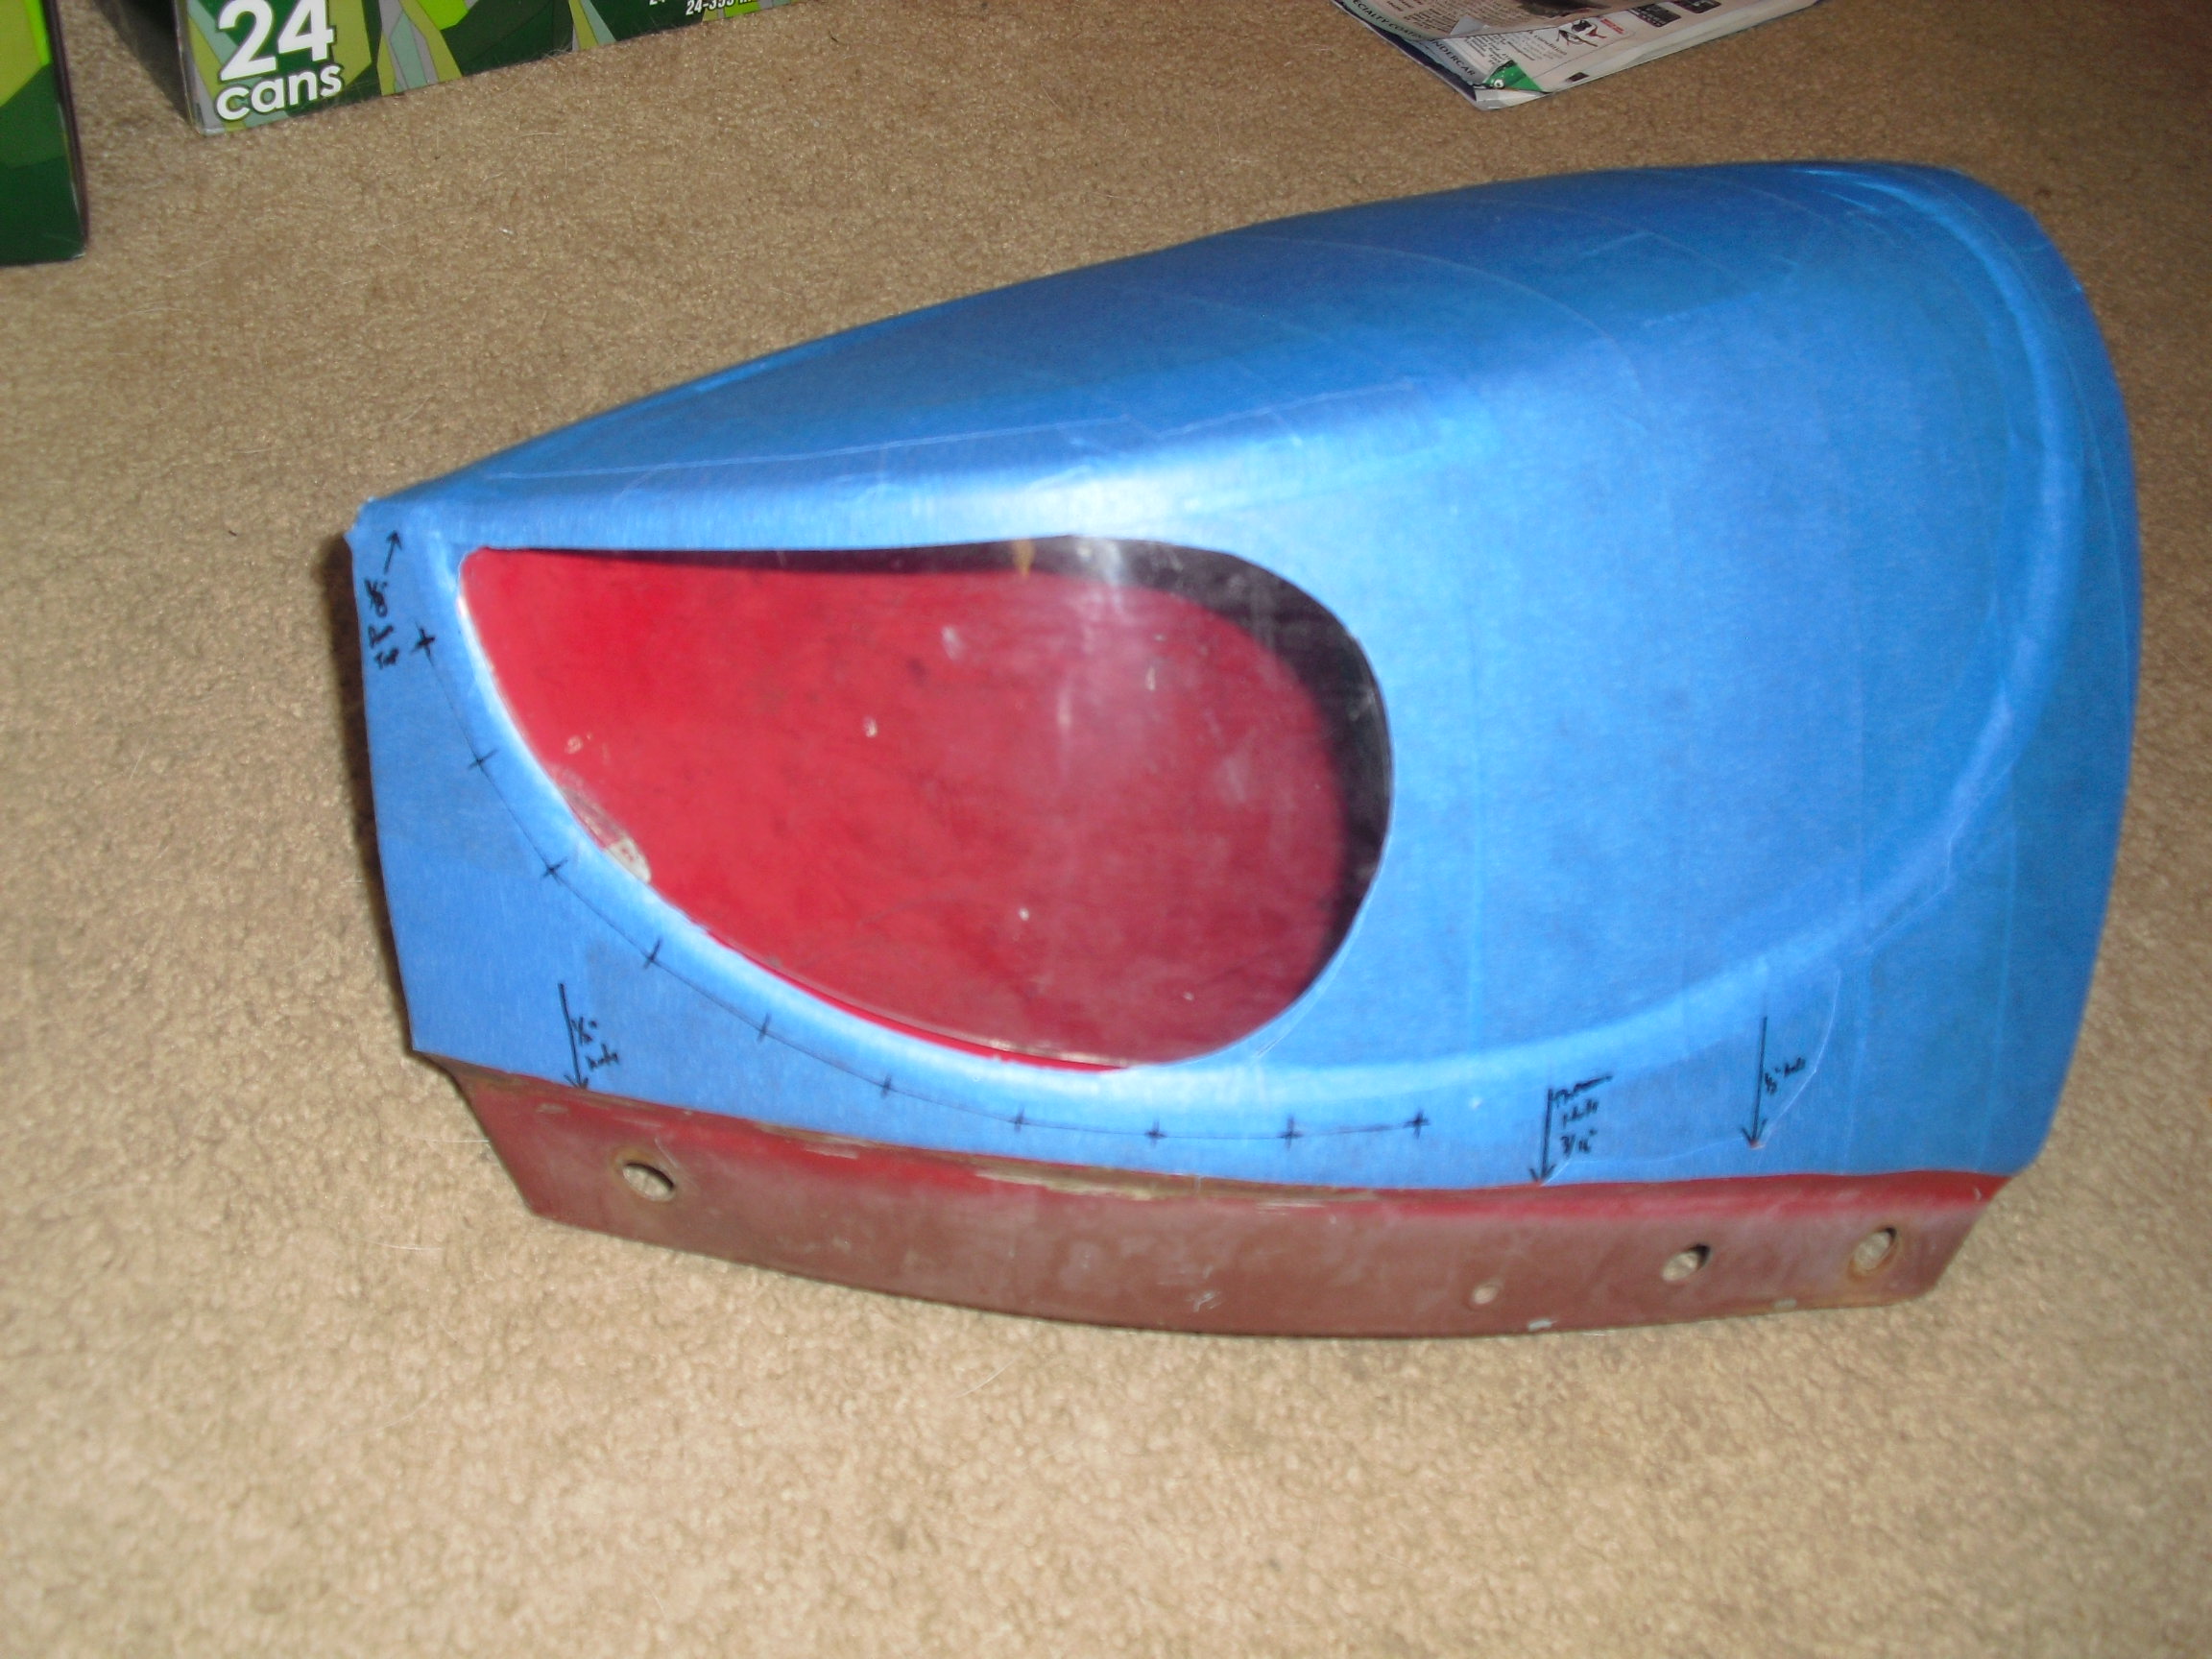
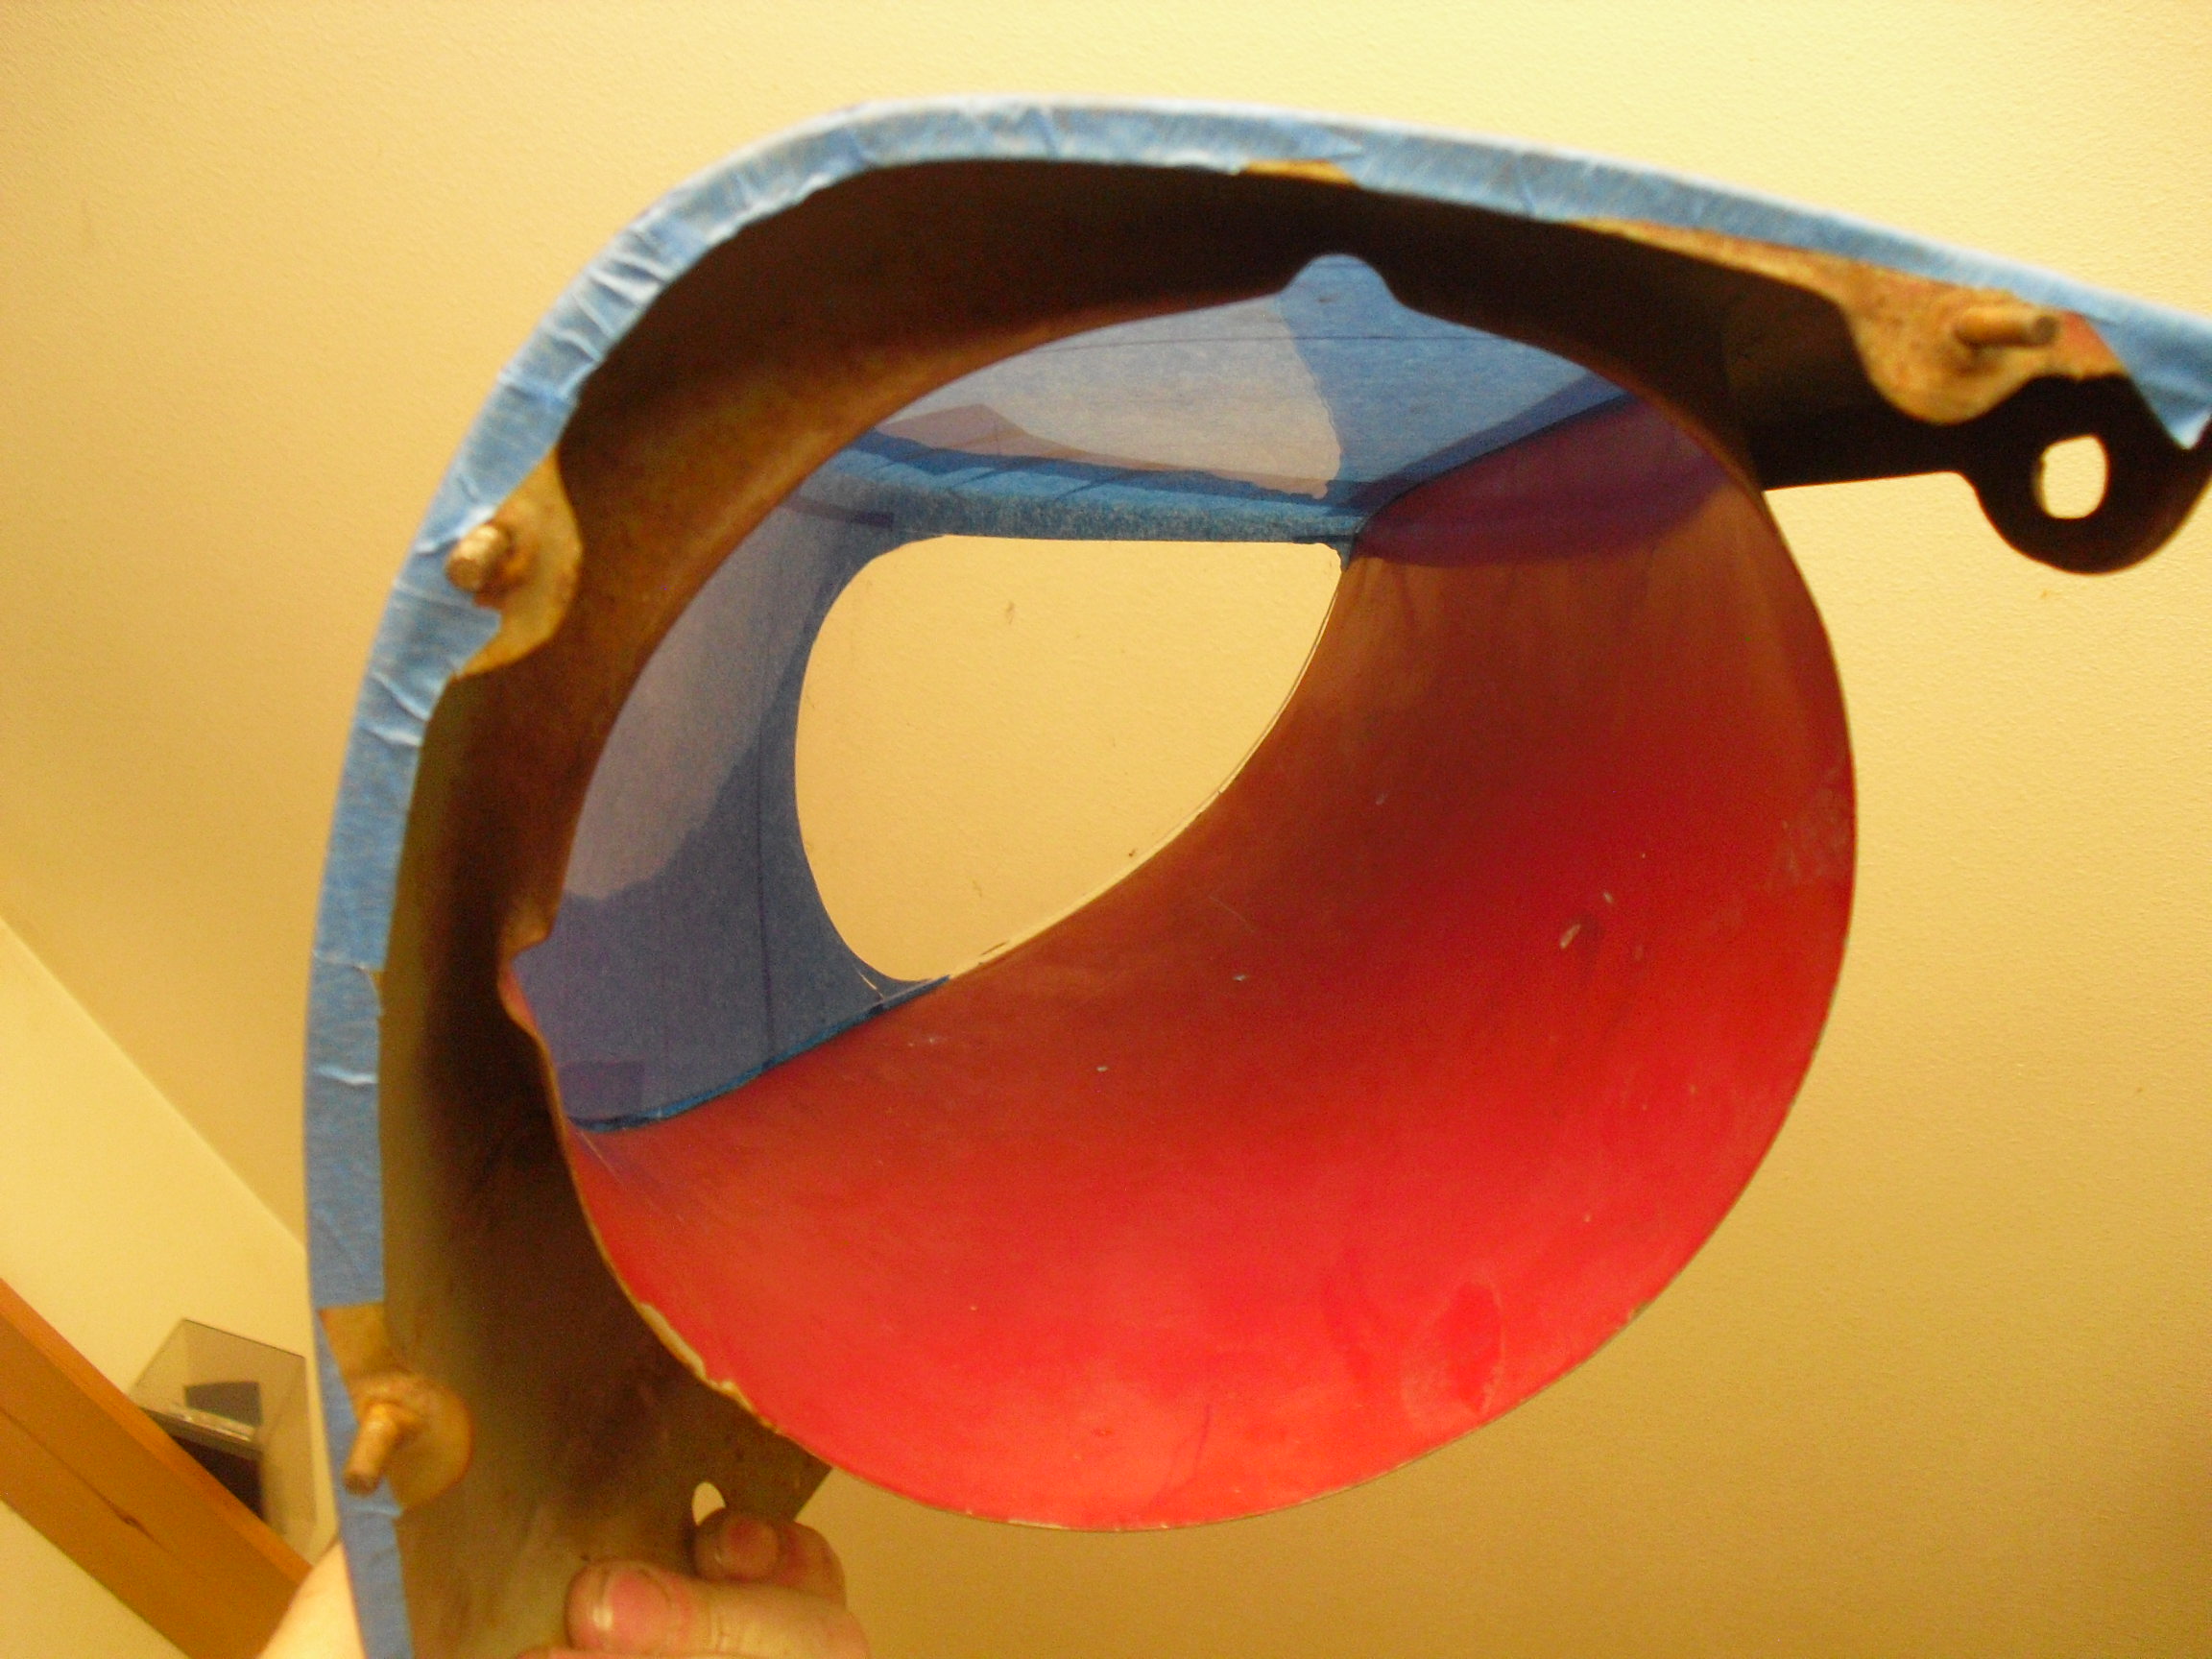
Along the same lines, I'm doing an HID retrofit into the 260Z project car. but instead of using all these failed attemps at good projector lenses and housings inside a 7" glass or composite bulb assembly, I've decided to take a different aproach. There's always seemed to be a waste of space in front of the headlights of our S30's. And I've always liked the idea of Projector HID's in our older cars but it always looks funky, to me at least. So I'm gonna retrofit a set or TRS FX-R (Acura style) BiXenon D2S Projectors into the actual bucket, rather than into the headlight area. So the assembly will sit in front of where the headlight normally sits. The bucket will be boxed off in the same shape and form as the Clear and smoked headlight covers that we are all familiar with. Either fiberglass or metal for the shell and a clear lexan or Plexiglass or Acrylic lens in the front tear drop shaped area of the shell. I'll be using D2S 5000K bulbs, 35 watt ballasts and D2S adaptors to use with the more commonly available ballast. I also need to make a custom relay harness for the hi beam actuator. No big deal, just allow the hi and low beams to continue the power to the ballast but allow the hi beam to drop the hi beam sheild in the projector housing. Easy cheesy. I'll also have TRi-R Chrome bezels and I've already installed 5mm Yellow leds into each of the 6(each) flat holes, you can see the bezels below. I'll use the yellow LED's for Turn signals, easily seen with the headlights off. Here's a couple clues to what I'll be using and a moch up of the headlight bucket, using blue painters tape to get an idea of the shape I'm going after. You can see in the 3rd picture that there is plenty of room for everything that'll be needed. So what do you guys think? Dave
-
Race car electrical, what to buy?
HLS30-08077 replied to JMortensen's topic in Ignition and Electrical
Definately go with the 2 ga wire. I might be able to get it cheaper, let me call "My Supplier" and get back to ya. I might be able to do the side mounts and silicone covers for less as well. Exactly how many circuits do you see yourself having in the Car? Add them up. Single wiper, ignition circuits, fuel pump relay, fans relays, Brake and guage lights, Headlights? etc. If it comes to 8, the 12 might be a better bet and will allow expansion if you add something else. If you add a High amp relay to the alternator power wire, the relay can be controlled by the Master switch. Shutting off the master in the rear of the car will kill power to the relay, killing any power from the alternator as well. I haven't done a race car in a long time so I'm not "UP' on all the new Safety gadgetry. I would suggest going with what is safe, recognisable by the safety teams when they inspec your car, and time proven (known to be good parts) I'll check on the power wire stuff and email or write it down here. Dave -
Pulling a small trailer with a V-8 Z?
HLS30-08077 replied to kamikaZeS30's topic in Miscellaneous Tech
Do you still have the hitch. I'm thinking about this one for my 240Z...... http://www.golittleguy.com/teardrops/models/rascal/ Little Guy Video -
Did MSA send you directions with the SCP or Sidemarker conversion plugs? I ask becasue I'M the one who makes and sells them to MSA. They don't buy a lot as compared to the Headlight and parking light upgrade harnesses but I've always wondered what they tell there customers.... The main idea behind the SCP is to make the front of your Z Safer by making the sidemarkers blink in tandum or oposite of the Under fender blinkers, so other drivers can see your turn signal. Ground ISOLATION is the key to everything working properly. I deal with this a lot when people write me and tell me that they don't work. I tell them to use a meter and isolate them completely from any grounds, they do so and write back to tell me that they work great. So what does MSA send in the form of directions? Or do they link you to a site with the info? Glad you're happy with it so far. Dave
-
Hella vs Cibie vs Bosch vs AutoPAL H4 Housings
HLS30-08077 replied to 240Z_Master's topic in Miscellaneous Tech
picked up a set of AutoPals for $30 +S/H And a set of 6000K HID's. got them both from ebay and they were US based company's so only 3 days to my door. only in it for $100 so I can't complain too much. I wouldn't anyways as they Rock!!. Obviously much brighter, cleaner and I can see things that my normal 90/100 H4's wouldn't light up. I obviously don't need my "Daves Headlight Upgrade Harness" in conjunction with the HID's cause they have their own ballasts and relay and are only 35 watts. The H4 Housings on my Red 70' are from "FantasticBuyz" on Ebay but I can't find them anymore. No real name on them but they have a Euro look with a solid round back (NO Diamond Cut Crap)and a Lined surface of Vertical and horizontal lines like a regular bulb. I use this with my HID's and the Autopals have the 90/100 watt H4's on the 72' Green Bean. I have no real opinion on either bulb housing as long as the price is minimal and they won't melt or distort my light too much. Dave
-
I ended up dropping the mount, and welding a dot of steel on the mount so when I tightened up the Poly, the weld caught the hole and kept it from twisting.
-
260Z seatbelt interlock. Defeat
HLS30-08077 replied to Pharaohabq's topic in S30 Series - 240z, 260z, 280z
I'll be using the Nissan Altima "Push-Button" Switch. Below is a diagram of the units wiring and how I'll be using it. Ignore the center section, it's experimental and I'm still working on it. Dave
-
So I used 3 different diagrams and the FSM to follow the Yellow wire. The Yellow on the VR is the same Yellow on the Alternators "N" connection. The Yellow wire is tapped and ran directly to the "Electric Pump Cut Relay #1". So If I inderstand this correctly... 1) The relay will still be powered from the Alternator, due to the yellow wire being tapped between the alt. and the VR. 2) The White and Yellow need to be connected to each other. The yellow will receive power from the white, which is tapped to the White Starter wire. So the Cut Relay always has a (+) signal. 3) The B/W and W/B need to be connected to each other using a diode with the Cathode (striped side) on the W/B wire. 4) the Black wire is a ground wire and can be cut short. 5) the B/Y goes directly to the Interlock which is now disconnected. BUT.... Connecting the White to the Yellow will make the Cut Relay STAY ON FOREVER. Both relays must work in order for the Fuel Pump to operate. The B/W from the ign. goes to the #1 relay, then to the G/W which goes to the #2 relay, which turns into a B/W again and to the pump. The #1 relay has a Black wire which is always grounded and the other wire is the Yellow. If I connect the Yellow to the white wire, which is connected directly to the battery (fusable link then the starter) then the relay will always be on, and possibly burn out quickly. So you see my delima. SO, Should the Yellow wire be cut from inside the harness and connected to the Alternators wire that sends a (+) signal when running? Or connect it to a relay that is only active when the Oil Pressure level is higher due to the engine running? Any advice would be greatly appreciated. I think I might be on to something, or just confused. Dave


.jpg)