-
Member Statistics
33295
Total Members5167
Most Online
All Activity
- Past hour
-

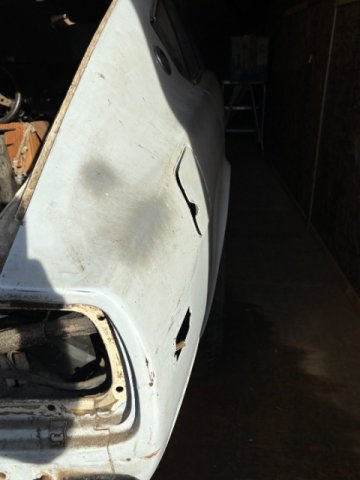
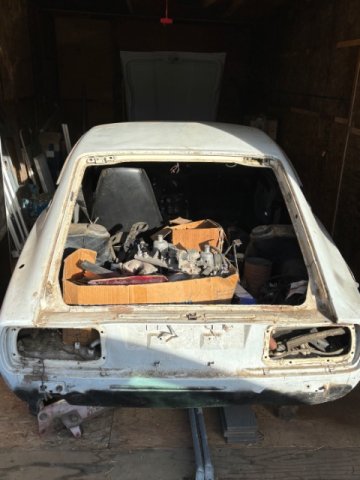
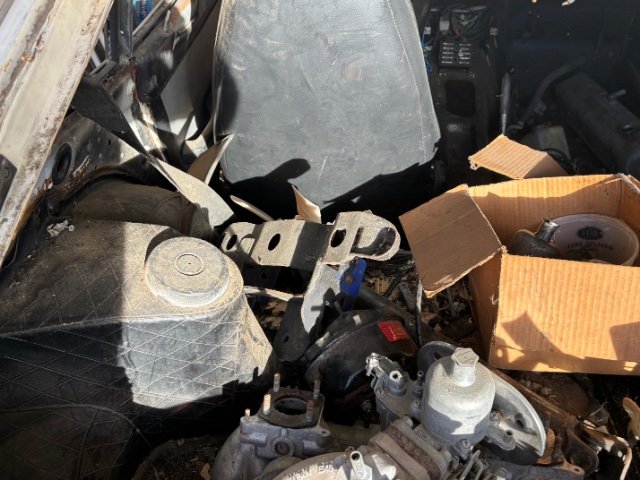
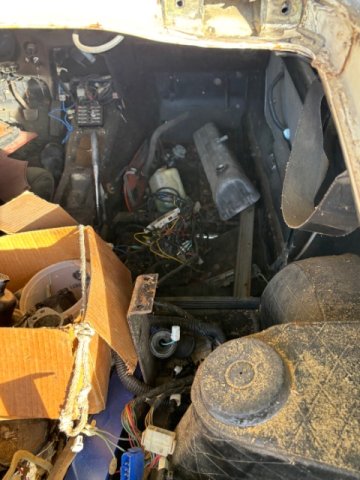
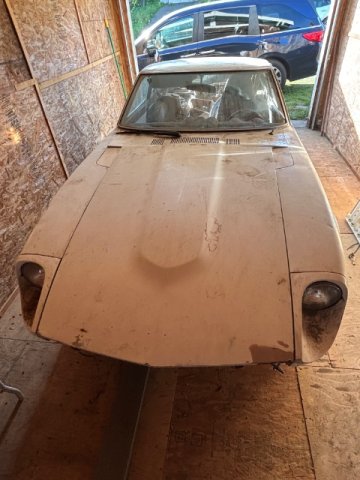
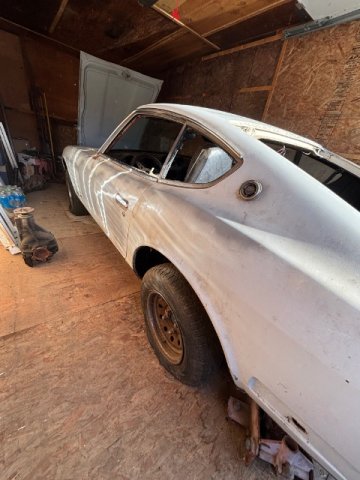
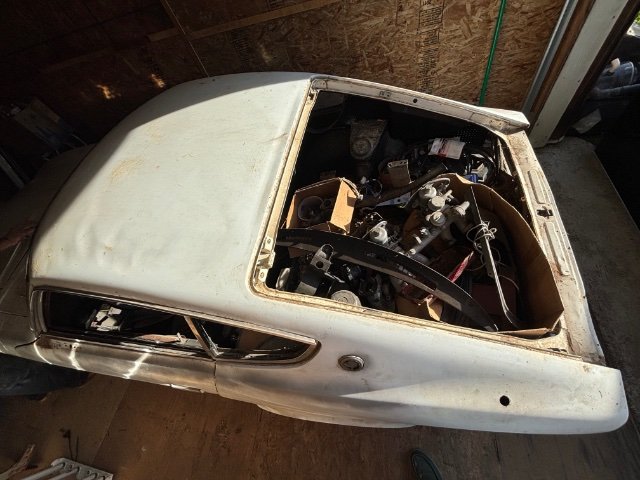
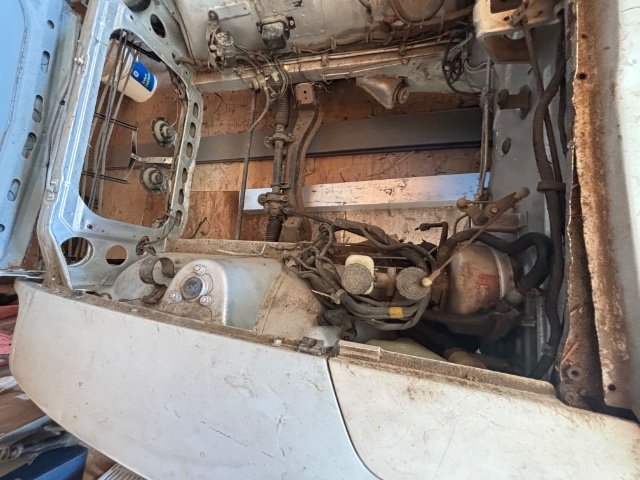
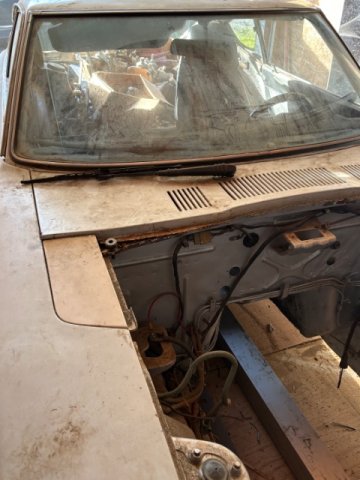
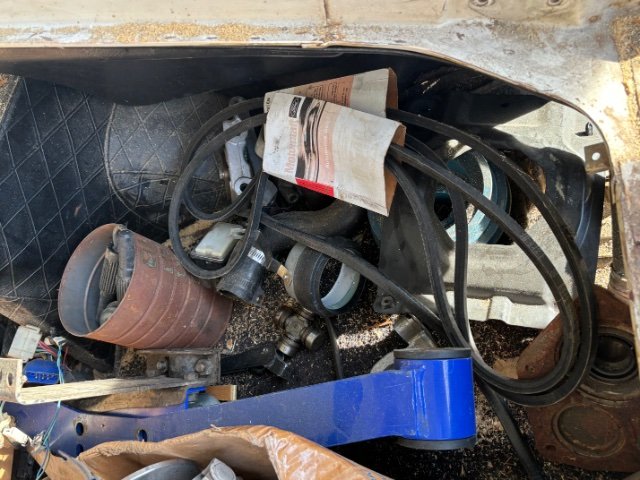
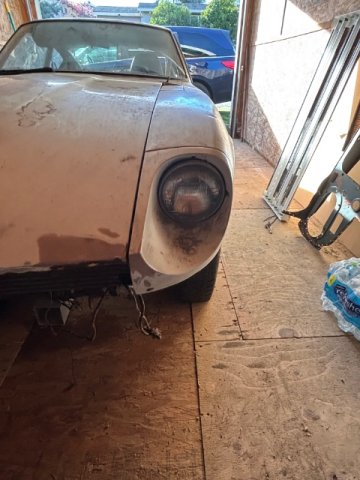
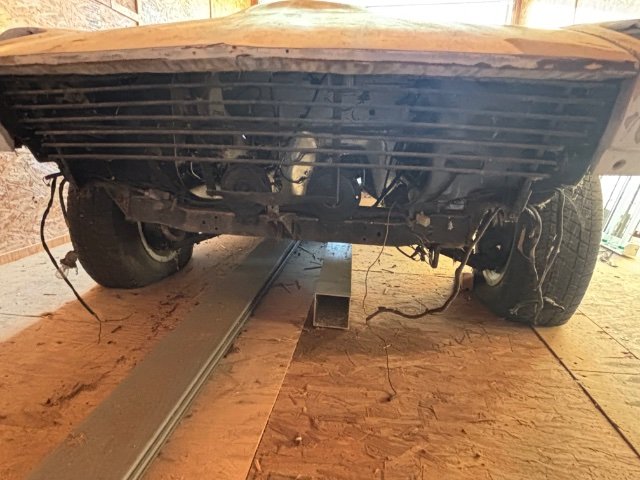
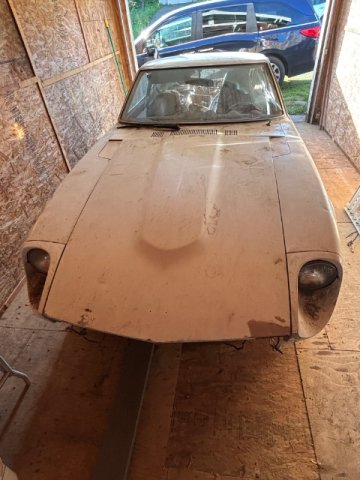
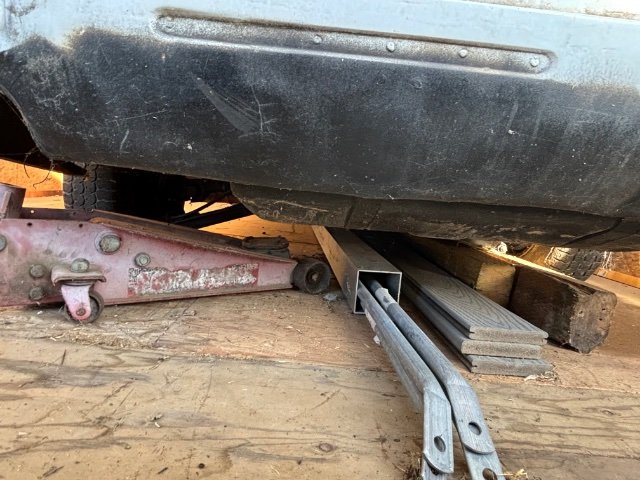
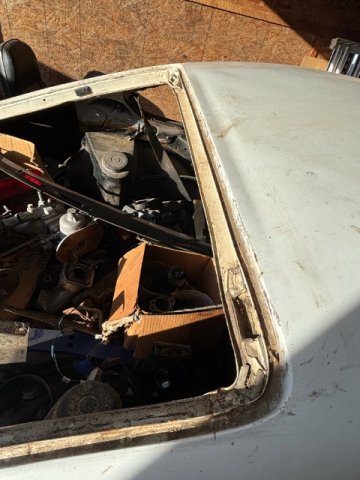
240z Barn Find Registration help
jhm replied to Btz white z's topic in S30 Series - 240z, 260z, 280z
Congrats...that shell looks pretty dang straight! As much as I hate to admit this, you'll probably get quicker/more responses to that particular question via Social Media. I can recommend some pretty good Z-car pages on FB, if you like. I wouldn't usually recommend FB for technical questions/discussions....but for an administrative question on a re-title, it might yield some good results for you. Again, welcome to the forum; and please keep the updates coming as your project progresses. What are your plans/goals for the car? -
240z Barn Find Registration help
Btz white z replied to Btz white z's topic in S30 Series - 240z, 260z, 280z
I can do App for Replacement or Transfer of Title with a new registration, looking for other experiences without a bill of sale, plate, registration etc. before walking in there. I did confirm not stolen or salvaged. -

240z Barn Find Registration help
Kennysgreen280zt replied to Btz white z's topic in S30 Series - 240z, 260z, 280z
I'd probably start asking questions at the DOL/DMV. Maybe see if you can figure out who was the last registered owner, or if there is a process to get a lost title/registration. - Today
-
Btz white z joined the community
-
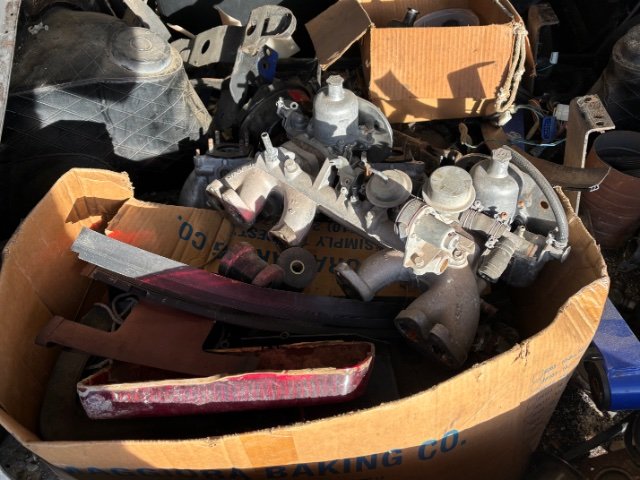
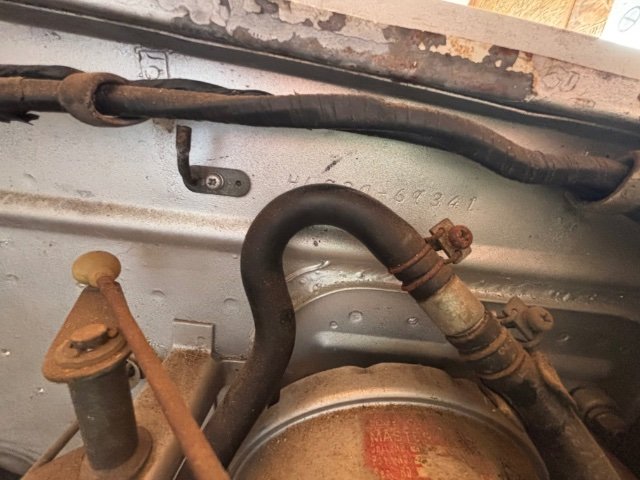
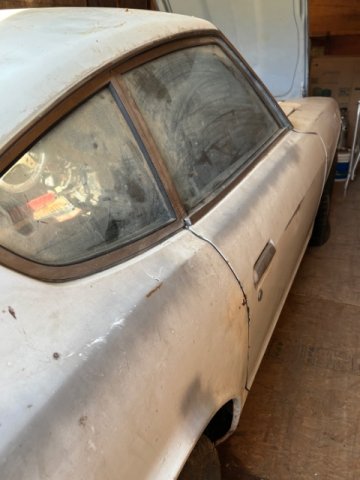
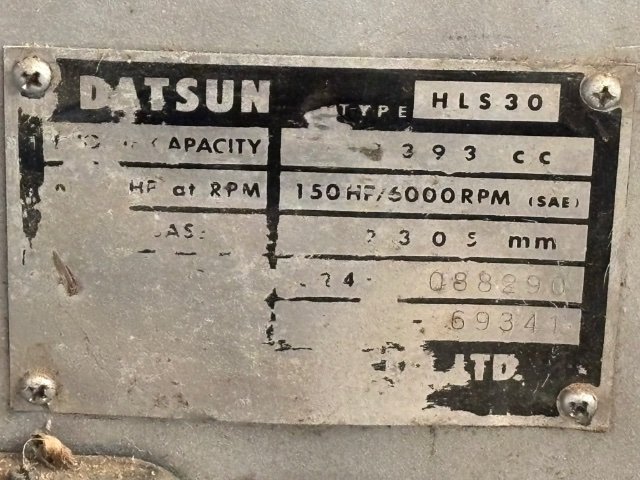
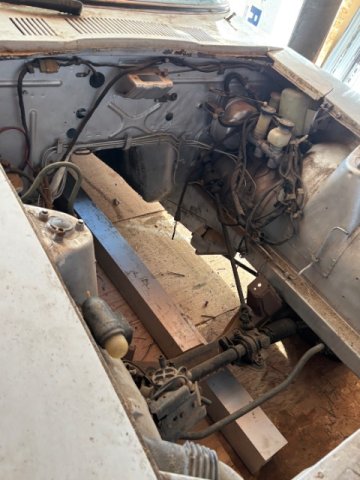
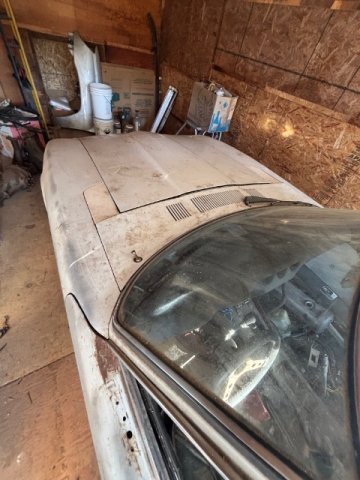
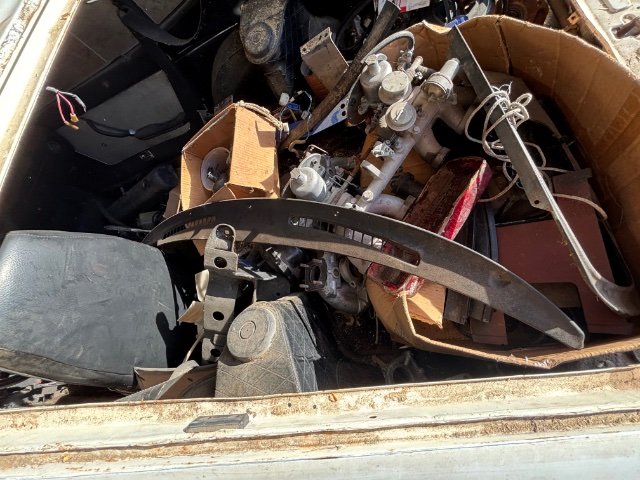
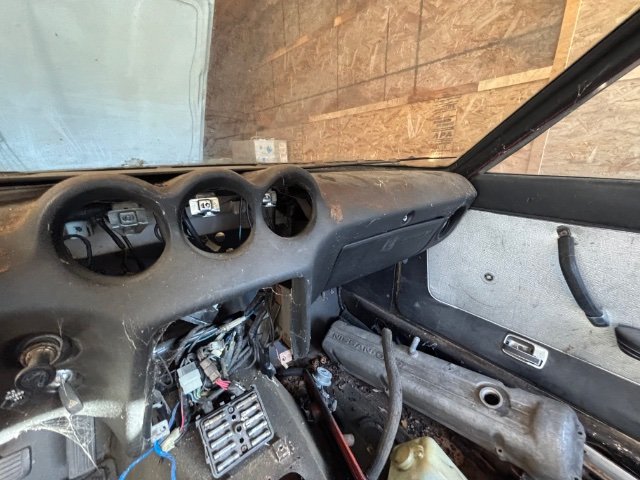
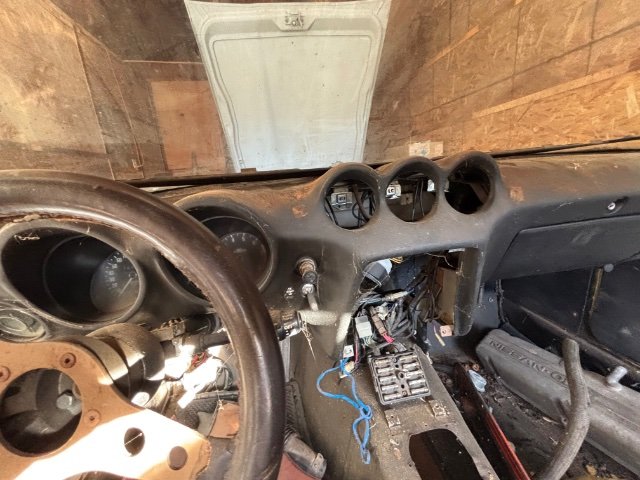
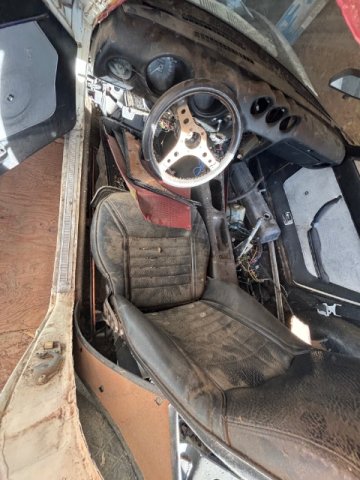
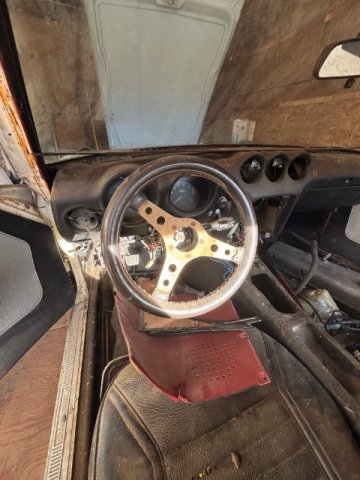
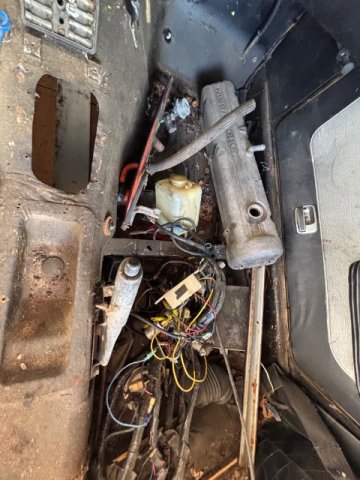
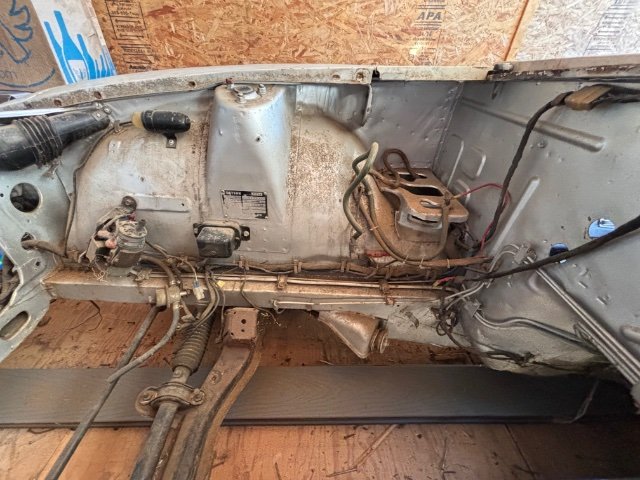
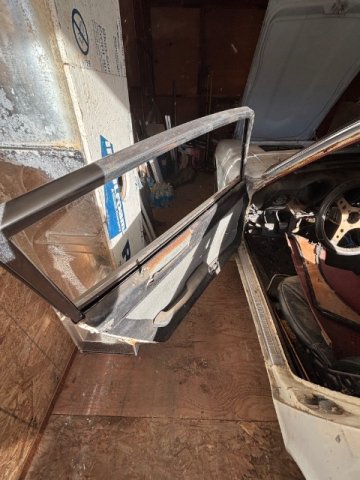
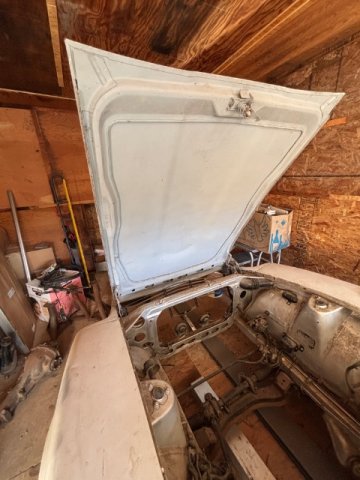
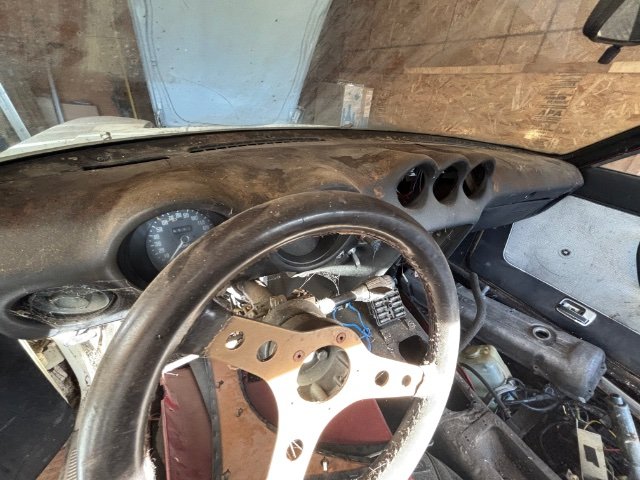
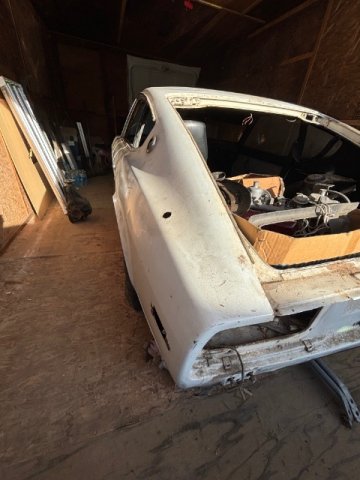
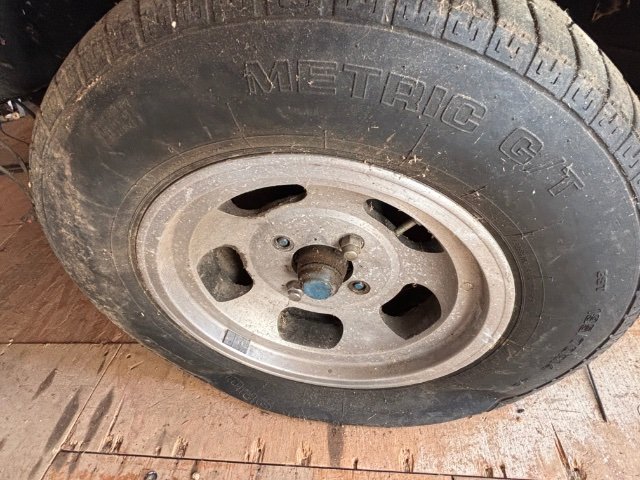
Hello, new user here, I’ve got a 1972 240z barn find, VIN: HLS30-69341, no registration or plates, looking for any interest or suggestions on reregistering non op at the DMV without being the clear owner…will add pics

-
.jpg.b34f27553f5960421801c8ab2cbf5db3.thumb.jpg.7889e8073010b6a0d8d6aae0626e768b.jpg)
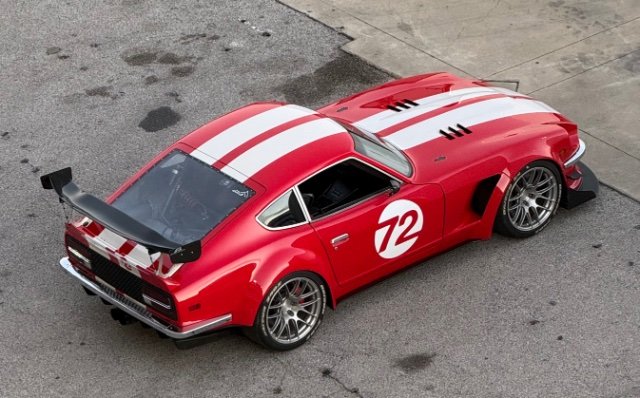
Progress on my insane VQ35HR 240Z project
G-Tech replied to markrolston@mac.com's topic in Nissan V6 Forum
That has got to be the best balance of Form and Function of a Datsun that i have EVER Seen!! Absolutely amazing!! -

Progress on my insane VQ35HR 240Z project
Jboogsthethug replied to markrolston@mac.com's topic in Nissan V6 Forum
Dang, that looks so tight, turned out amazing! So they printed the part but then used that to make a mold I'm guessing? That's not the actual 3D printed part? -

Progress on my insane VQ35HR 240Z project
markrolston@mac.com replied to markrolston@mac.com's topic in Nissan V6 Forum
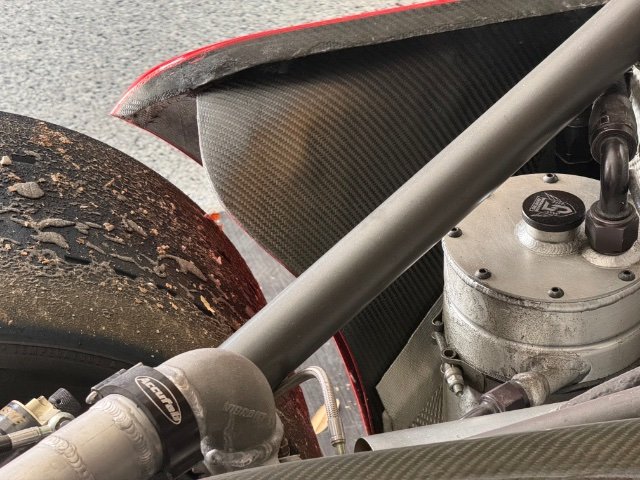
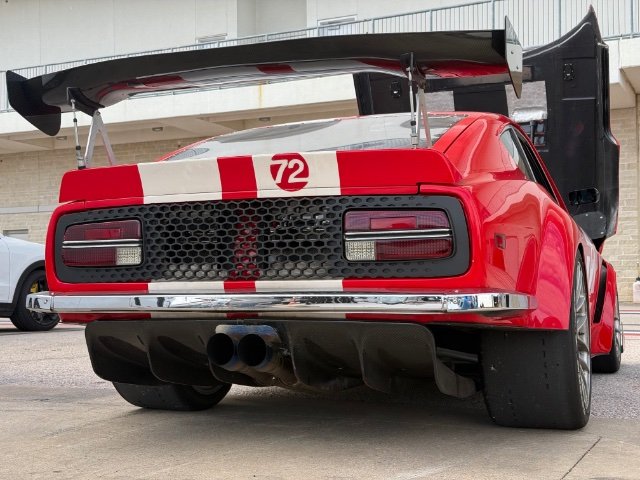
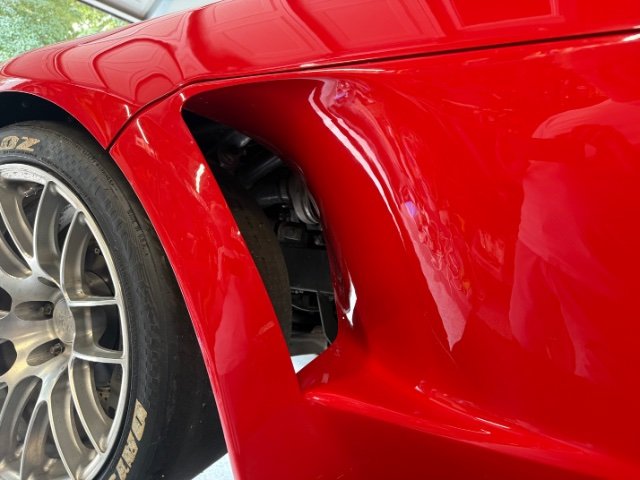
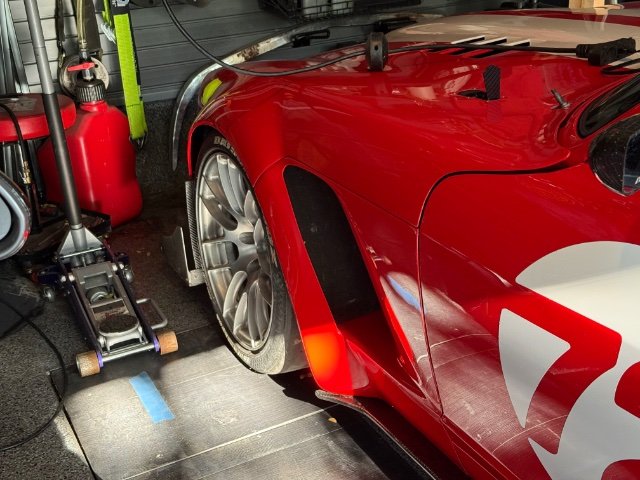
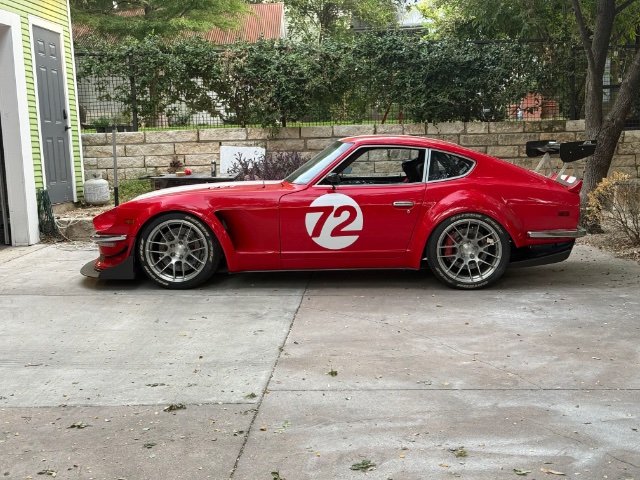
if anyone's still tracking this build I have what might be a last update since the car is mostly done (lol is it ever done?). I finally cad-designed the front fenders and then had a local shop 3D print the parts, then took that to a bodyshop to integrate into the existing fender part and paint it. After that I overlayed the inside walls of it with carbon fiber for added stiffness and protection. I also cut the lower part of the rear fenders and put in a horizontal cf winglet to better extract air. Overall I think it looks great and the resulting new parts helps downforce a ton by extracting air from the wheel wells.
- Yesterday
-
 nathans30 joined the community
 -
Appreciate the suggestion. Will take a look there; although I have to say our "350Z" sub-forum hasn't really seen much activity in the last few years, unfortunately. 🙁
-
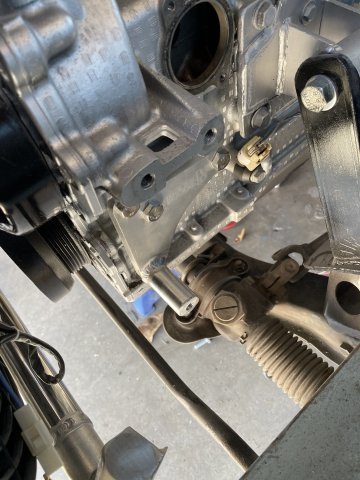
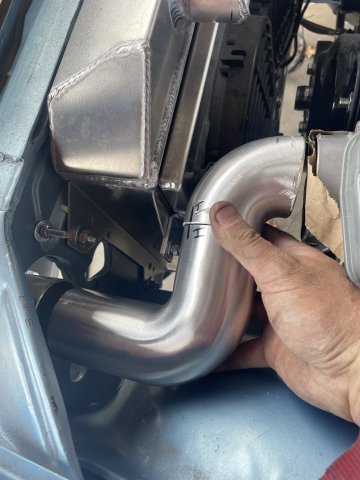
03-14-2026 ATLAS Z UPDATE: Since the intake was off, I went ahead and tackled the project I have been putting off. Modifying the Atlas Industries alternator bracket setup to work on my project. the mounting plate is 1/2" thick, and the alternator just wouldn't clear the frame rail, so after trying to cut the aluminum bracket down, I gave up and traced out the bracket on a piece of 1/4" thick steel and cut it out and drilled the holes out. I then used my Dremel to counter sink the holes so I could use the bolts and everything that came with the kit. I painted the steel bracket with silver engine block paint and the bottom bracket I had to trim 1/4" off of it. Then I was able to install he alternator (brand new AC Delco, nice unit), and then on to the fun part.....belt alignment. Using a straight edge, I had to keep working little by little shaving aluminum off the provided spacer and then lightly grinding the back of the nylon pulley and it turned out great! Then I went ahead and installed the fittings to use a 8AN line for the crankcase breather on the intake between cylinder runners 3 and 4, and I found that by leaving it black it is hidden and you cant see it, so that worked out better than I had planned. once the intake was tightened all down, it was time to finish the intercooler piping. The driver's side was VERY tight. I used two 90 degree sections and trial and error and cutting them down I was able to come up with a decent arrangement. so that piece, to be welded along with a frontal piece to weld a length on to eliminate some couplings were put together and I will take them to get them welded up then take all of the pipes to get powdercoated with the "polished aluminum" finish. I could get them polished.....but it would cost more......opinions? Lastly I put together the intake side, switching to a 4 inch coupling setup with the GM factory style MAF meter. it was 3.75 diameter, so I took some rubber strips that are adhesive on one side and ran a strip of it around the mating surface, and then I was able to tighten the hose perfect on it. I did have to use the 4 inch to 3 inch reducer on the end, as the engine has pieces sticking out that won't allow for 4" pe, etc. I have a 3" screen arriving soon which will be on the front and it should look pretty good. I will have to get inventive to add polished/chromed to it to get rid of too much black. maybe a very thin polished aluminum piece that wraps around it and can be fastened underneath? Anyway, here are some pics:
-
 nixkarz joined the community
 - Last week
-
Paneled paint jobs that give inspiration:
-
03-13-2026 ATLAS Z UPDATE. A week or two ago, I got with Joshua who runs JP fiber shop and advertises on most of the Z car pages a lot. He is located in the Dominican Republic and makes fiberglass and carbon fiber parts. He made my fiberglass smooth cowl piece. He began a project for me. To make a roof, partial quarters, doors and partial front fenders out of carbon fiber, but just a thin sin.....one that could be trimmed and bonded over existing steel. The idea I have is to make it look like a "Paneled" paint job. Since my 260Z is part american hot rod, part street rod, part sports car, and part Japanese classic, I have used ideas from each genre in this build. To achieve the paneled look, I have had John cut-in, 1 inch around the border of each panel, to include the front fender to door gap areas, and these outlines will be in the factory Nissan #305 light metallic blue, as the cut outs for the door handles and locks, parking lights on the front and rear corners, etc will also show the color "underneath". The body line is the cut off point for the side pieces. The front fenders will remain blue on the tops, with a black windshield frame and top, but a fiber panel is also going on the top. The job is almost completed and then he will mail it to me. I will bond it with the SEM 50 second panel bond epoxy. It is a love it or hate it deal. I fully expect most will hate it/think it looks stupid.....so there's no need to tell me, but I know you will. It is unique....the car becomes "art". here are some pics of the process of making hte panels and a few pics of random cars to show the paneled paint jobs that inspired this. I will be adding my gloss black flares OVER the carbon panels and a black roundel on each door with the number 7 cut out. Click below for video: Main Video 1.mp4
-
Looking for info on a lt4 swap. Any info or pics, builds etc. I'm running apex touring suspension front and back. Will the dry sump oil pan clear etc? What kind of fab work to mount it etc. I've Google my heart out and can't find nothing other than a couple pics of the top view of the ones I've seen
-
Check this out for chassis stiffening ideas. You're already ahead of the game, going with a full cage. https://imgur.com/a/chassis-stiffening-inspiration-R27sh
-
Thanks for the reply! Occasional tracking at best, mostly weekend street use, hence saving money with the pro torturing suspension. Roll cage already installed, figured may as well benefit from the stability and a little more weight. Chassis reinforcement is one of my main concerns. Think I need to do a lot more. I’ll def check out VA Engineering, thanks!
-
 seals84 joined the community
 -
What will be the main purpose of the car for you? What do you want the car to be? Seeing as you will be installing a roll gage, iMSA widebody kit and an LS big block for I suspect power and torque, you will mainly track the car and won’t be driving on the road. I like your choice of Apex over T3 but that’s my personal preference. But why the Pro Touring and not the Track Attack kit? Also don’t forget the basics of the build like chassis reinforcement, safety features and fuel delivery. These chassis are over 50 years old so if you plan to track and abuse them make sure the basics are good, rust free and reinforced. A good roll cage will do a lot together with the frame sleeves and some bolt on parts but things like seem welding the chassis will also help a lot. VA Engineering over here in the Netherlands has some great pictures on their Instagram of their cages and seem welds. The transform the S30 Z’s into period correct rally cars and yes they do get used like a rally car should.
-
 churchData2015 joined the community
 -
THANK YOU Sir. I am really enjoying this car.
-
Hi all! New to the forum. Early stages of my first Z build, hoping to get some feedback before my mistakes get too out of control 🤣. ‘73 240z powder coated chassis with roll cage. Has the frame rail sleeves. Will be doing more reinforcing. L76 6.0. Planning on replacing most everything but the crank. TR6060 and Ford 8.8. Full Apex Touring Pro front and rear. Apex steering rack and axles. Akebono brakes. BRP front sump oil pan. Leaning toward iMSA widebody kit. Corvette accessory setup, vintage A/C and electric steering assist. Want to be open to procharger in the future. Any advice on what I should be looking out for, or changes? Open to anything! Thanks in advance!
-
 Heavyball joined the community
 - Earlier
-
Jumping in here, I am also currently swapping my L28 to front sump and had a few questions. What oil pan are you using? I found a maxima diesel front sump pan. For drilling the dip stick tube, did you go through the oil passage the rear oil pickup uses? I extended the oil pickup tube rather than drilling the front one out, and I'm concerned the dip stick with interfere with the oil flow. Thanks!
-
My toy house 71 240, 83 280ZX turbo and my built 78 El CaminoSS.
-

SLA S30 Front Suspension Conversion
baby_Carlton replied to baby_Carlton's topic in Brakes, Wheels, Suspension and Chassis
Yes, the front strut tower reinforcement is connected thru the firewall. Attached is a photo that kinda shows it off, these are slightly old pictures taken by the welder prior to taking delivery. Cage has since been finished and had gussets added to the A-pillars. The fender braces from Apex are located inside the front fender outside of the driver cabin. I also have them, not sure if I'll end up using them, cage installer wasn't convinced they really do much other than maybe preventing the front wheels from coming into the cabin during a head-on collision. Plinth location is the deciding factor in how your door bars and subsequent firewall > strut tower bars will/won't interfere with your pedal box. My door bars are pushing right to the outer edge of footwell and angle up from the bottom of the A pillar bar to fit my left if needed. Not sure what pedals you're using but I have a Tilton triple master setup that's going in so the world is my oyster so to speak in terms of pedal placement. This dude's pedal setup looks super neato and I would like to replicate the adjustment mechanism.
-
Hey Dave, did you have any luck getting a driveshaft done? I had to have a custom one done here in Dallas. I’ll get you the name of the place if you still need it.
- 1 reply
-
- 1
-

-

SLA S30 Front Suspension Conversion
flatout replied to baby_Carlton's topic in Brakes, Wheels, Suspension and Chassis
do you have a photo of how the front strut tower bar goes thru the driver side firewall? I'm in the process of finishing up my cage and was considering running a few bars thru the firewall like yours but the driver side has more stuff (clutch master/pedal) in the way for a straight shot. I don't know how tall you are but i stayed just in front of the wheel well for the main hoop and its definitely a bit tight for seat position so up on the rear tube will be helpful for that. -
You are flying true this! Love to see your progress!
-

SLA S30 Front Suspension Conversion
Mitchel0407 replied to baby_Carlton's topic in Brakes, Wheels, Suspension and Chassis
I find the front strut brace very interesting, is it connected to the cage thru the firewall? I suspect this will mainly reinforce the strut tower from moving front to back. Will you also be adding a front strut brace for side to side reinforcement? I will be sending my 280z off soon for replacement 3mm (instead of 1,5mm) frame rails from Apex together with there front fender braces as they where not that expensive and my body shop won’t charge me extra for welding them. I wonder how different the fender braces will be in comparison. -
Good to have you back! Do you have some pictures of the cars and what’s been done to them?


-
Who's Online 3 Members, 0 Anonymous, 709 Guests (See full list)