-
Member Statistics
33276
Total Members5167
Most Online
All Activity
- Today
-
I have a 1972 240Z Chevy 350 small block with 3 speed automatic that I’ve been thinking about swapping for a while now. I’ve been thinking about getting a VQ35DE/HR. I don’t have a lot of knowledge and this will be my first time swapping anything as I bought the Z with the V8 in it. I’ve heard that if I want to swap I should just get another stock Z instead of swapping the V8. What I want to know is that would it harder to swap with a current V8 in it? And what are the parts that I need for a complete swap?
-
Reviving an ooooold thread but wanted to give it a try as this is the only case I found that somebody worked on getting a Bee-R rev limiter to work on a L-series. @GabeDiaZ27, have you managed to get it working? I got a Bee-R lying around but cannot find a way to wire it up to a L series running a ZX distributor...

-
Dash cap is on! next is gauges and center section install. run the wires so once installed the wires are right there and can be easily wired. Speedo is GPS. Speedhut gauges. Made in USA, cost is like sending a kid to college
-
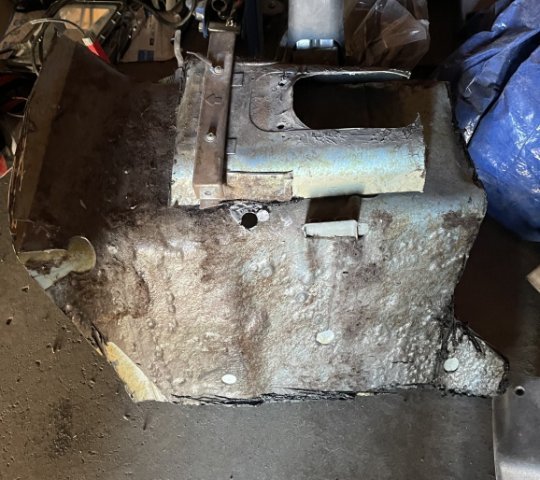
I removed the rest of the list of items so I could mount the car on the rotisserie. With the glass still in the car, the center of gravity is quite a bit higher than the other Z I restored. When I went to rotate the car body, it got away from me and flipped upside down even with me trying to hold it. Luckily there was no harm done, and after adjusting the height a bit, the rotation of the car is easy to control now. As you can see, the floors are bare metal. They have been like this for about 15 years, but the car mostly has just been stored inside, not driven. It has been a major item on my to do list for this car to address a few rust though areas on the floors and to repair the dented up frame rails and floor. I will also be installing some plates for the safety harness belts. It will be very nice to get the floor fixed up and get the floor protected from the elements again, finally. The original frame rails are pretty bashed in. And the right side one is missing several inches of length at the rear because it rusted and I cut it off years ago and did a partial repair on the floor panel at that same location. I am using both a spot weld cutter tool and a die grinder to cut through the spot welds. The die grinder bit I am using works quite well. Same for the spot weld cutter. I worked on removal of the right "back half" of the frame rail yesterday for about 2 hours. I am only about 20 minutes from finishing the removal of it. Then I will remove the driver side one.
-
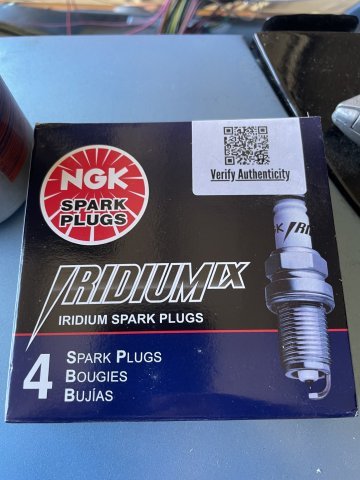
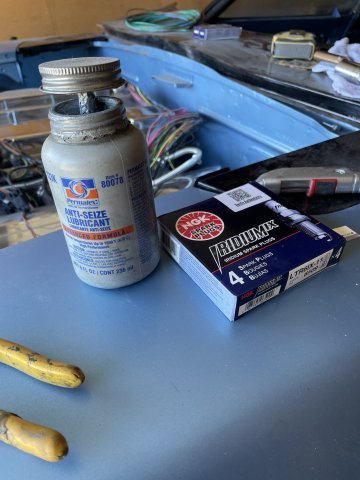
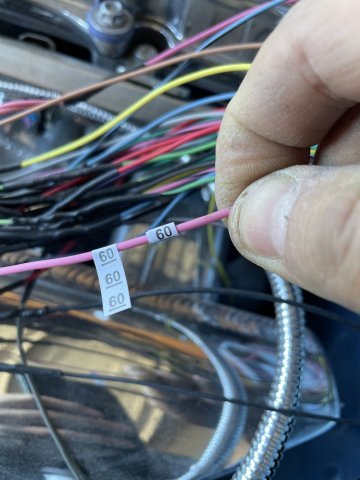
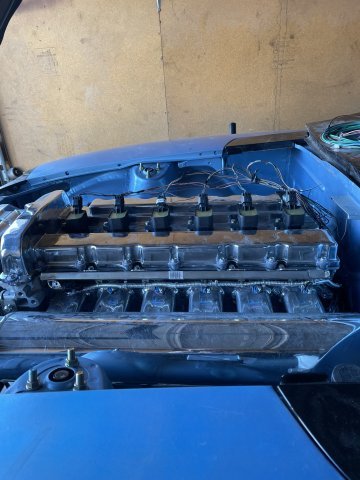
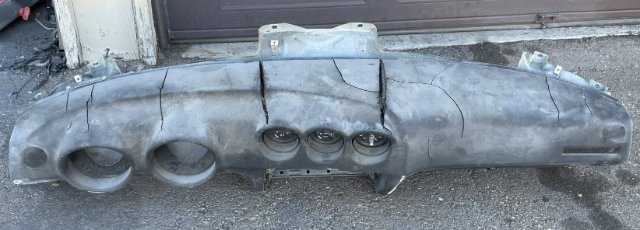
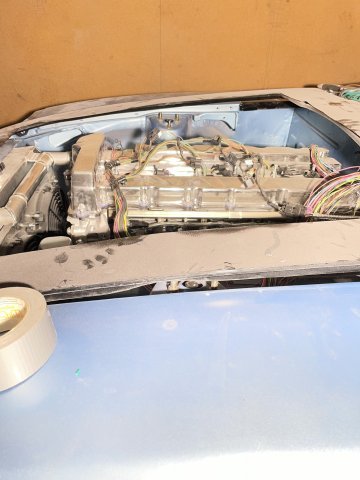
02-15-2026 ATLAS Z UPDATE: Started off pulling the plugs, putting the transmission in neutral and putting a wrench on the crank balancer. I wanted to ensure it turns over easily and thus I know that the trans is together correctly. It's perfect . I then swapped the AC Delco plugs it had for some NCK Iridium plugs as recommended on the 4200wiki pag., but put a daub of anti-seize on them. the old plugs were tough to get out! Dissimilar metals and all. Then I installed the coil packs and got them sitting in their flush. I then decided to grab the wire numbering book and start separating and numbering wires and then cut them at strategic points to cut back on the number of splices needed. after that I spend quite a lot of time pulling the wires out straightening them out, only for them to snarl again, So I then used tie wraps and not fully tight but enough to hold them and then I was able to separate them, move the majority of the wires that go on the driver's side over there just laying across the bellhousing behind the engine for now. Then I took some measurements to begin the process of making a trans mount. I then went ahead and drug out the dash and center console, and by a quick trial and error was able to cut out the floor of the console, leaving a lip around the edge so I can make a metal floor to put in there with some nice finished bolts and paint the metal, probably a matching hammertone black like the dash center I did earlier. Then I took the dash, the gauges, and the cover inside and then cleaned up the dash with Lysol cleaning wipes and then took the tube of Silicone the cover come with, and having done this before I remember how to do it. You want to ensure the silicone is in the places with direct contact, around the gauge faces in the deep pockets, etc. After that, it is a process of using duct tape and pushing to get the cover on tight and then the duct tape pulled tight to hold it tight overnight. It looks funny, but one of the last pics shows how I grabbed whatever was around with some weight to it to put on the top to assist the tape. Tomorrow I can pull the tape off and it will be ready for gauges, God willing. PICS:
-
I don't really want to. I want to make this work. Thanks.
-
@rand Did you ever find out the problem? I am in the same boat. If you remember...
-

ANOTHER Datsun Z/LS3/T56 Swap Thread
Ironhead replied to Ironhead's topic in S30 Series - 240z, 260z, 280z
Oh yeah, I know. But even without a helmet, I would rather bang my head on FIA padding than on a steel tube. -
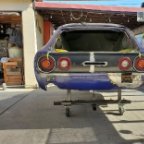
@Oki570Z Quite a bit of work. I wanted the tail ligths to fit like if tho it rolled out of the factory line.
- Yesterday
-
Some modern cars run CV joints but the transmission usually has a fixed output flange. I've never seen a CV joint slip yoke. What angle is the engine sitting out? can you get away with tipping it back a couple degrees?
-
Anyone have any experience getting a custom driveshaft with CV joints? That is the way forward for me.
-
steeper driveshaft angle. U joints will have a short life. Oh well!
-
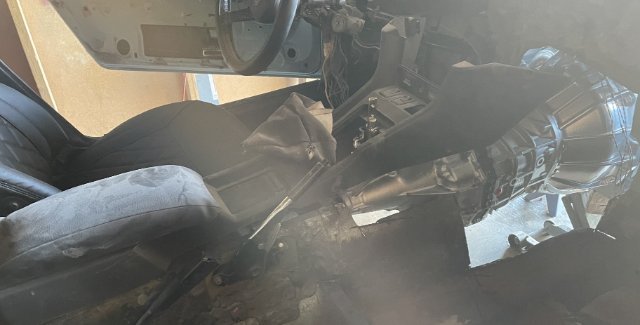
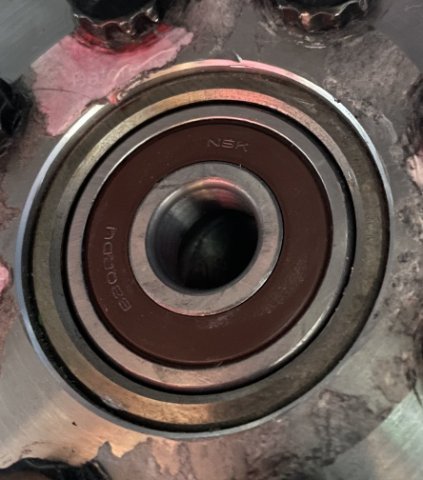
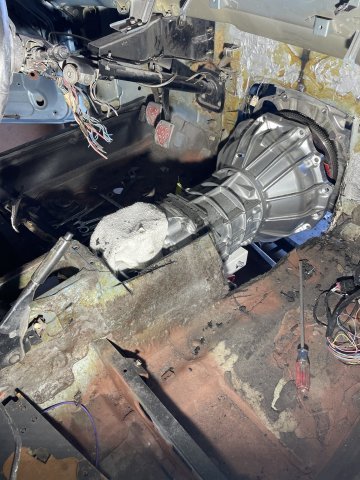
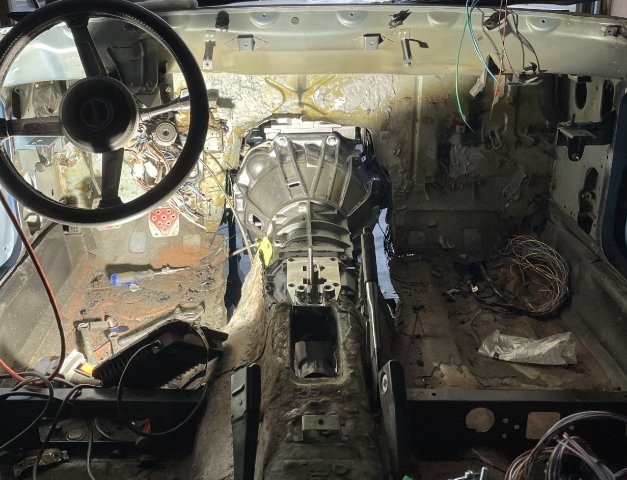
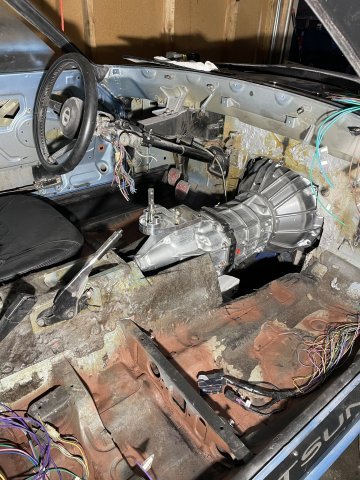
02-14-2026 Happy Valentines Day! Today I got the transmission in. Took a long time. I left the pilot bearing in the freezer overnight, and I was able to tap it in easy. After I installed the clutch and made sure to use the ARP lube on the bolts, I started prepping the trans tunnel. I had to cut off the factory trans ears and grind them smooth and gave them a quick coat of paint. Then the hard part started. After trying and trying, I realized the trans tunnel just wasn't going to let it happen.....so I started cutting it out from the firewall back about a foot or so, then more and more..... little at a time, as I needed the room. I did keep the pieces cut out, As I will cut and modify and have a mobile welder come and weld them back in AND while here weld a thick steel flat plate about 3-4 inches wide the trans area and passenger floors to add more reinforcement for the power level of the engine. I was able to use a floor jack and level the engine up, and now you can see in some of the pics, what it looks like level.....yeah, dusty but you can still see it. My center console will be modded with the center floor cut out leaving a small ledge on both sides so I can make a custom aluminum floor. The shifter mechanism will be left fully exposed, I love look. It makes the shifter throws SO SHORT! So, big day. All in, now need a trans mount underneath that will bolt through the floor into plates to hold it, the reinforcement plates across, and eventual console mod. I got VERY dirty! Cheers! PICS:
- Last week
-

ANOTHER Datsun Z/LS3/T56 Swap Thread
tube80z replied to Ironhead's topic in S30 Series - 240z, 260z, 280z
Back in the early 90s, I had the fortune to chat with an engineer from a IMSA World Challenge team. I had noticed they had done a ton of stitch welding to the shells and was curious if this was done for increasing torsional strength. He told me on the new shells they used saw no improvement from this, and they did so they could easily repair crash damage. He did say that for an older car it would most likely show improvements, but you'd need to test before and after to get any idea of the improvement, but he didn't expect it would be all that much. One easy improvement can be done by gluing in the windshield rather than using the stock style rubber gasket. I helped a friend do this on a 280 used for Chumpcar racing. With the stock seal the chassis would understeer and after it oversteered. From a feeling change it was like adding a triangulated front strut bar. @Ironhead I know you've accepted the risk of driving the car with the roll cage, but I did want to point out that FIA padding is meant to be used with a helmet, not your noggin. -

A 2026 SEMA SHOW 260Z Build all the way from Great Britain
toolman replied to toolman's topic in Body Kits & Paint
Part 6-Major Problem delays SEMA PROJECT A major problem occurred in using a late model 370z suspension into this SEMS SHOW car. Its wider size and different mounting points created a a major obstacle in this condstruction, https://www.youtube.com/watch?v=PhZrC-0JPWQ&list=PLi4p-ATl-NoVr3H2ww92Lj9Y8y -
hello im touching base about this to see if you have anymore info about silvermine motors kit a long with the adjustable control are set up for the r200. did you have luck?
-
ANOTHER Datsun Z/LS3/T56 Swap Thread
Ironhead replied to Ironhead's topic in S30 Series - 240z, 260z, 280z
I didn't post anything else anywhere about the build. It's difficult to quantify the effects of the stitch welds, partly because I hardly drove the car at all before tearing it apart. I can say now that the body shell is extremely solid, and does not feel like a 50 year old car, but that's subjective of course. The bottom line is that I installed more than three times the HP and torque the car was designed to handle, and I think it just makes sense to strengthen up the structure in any way you can. So I did the stitch welds in addition to beefier frame rails and an eight point cage. Of all of it, I'm pretty sure the cage would make by far the most difference. I drive it on the road without a helmet, but I do use a (snugged tightly) six point harness. I also have FIA roll bar padding everywhere that my head could possibly contact. Obviously the car is nowhere near as safe as any modern car, but I'm comfortable with the risk level. It's sort of like choosing to ride a motorcycle. You accept the risk, stop thinking about it, and enjoy what you're doing. -

ANOTHER Datsun Z/LS3/T56 Swap Thread
Woodruffhallz replied to Ironhead's topic in S30 Series - 240z, 260z, 280z
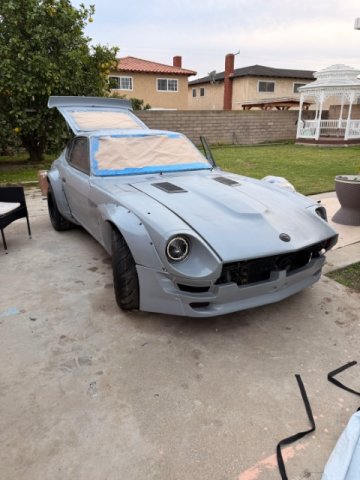
Awesome build! And highly informative. Do you have an IG or similar so we can see more? From your exp, were the stitch welds worth it? I want to do a 1JZ swap aiming for 450 hp. I’m adding F and R strut braces with the AE F/R subframe mounts. Frame rails are kind of a must, but drilling out all of those pinch welds gives me nightmares. Also, the engineer in me knows I need some sort of rear to front — top to bottom load path, but I’m also 6’3” and I want to safely drive the car on the road w/o a helmet. So l’m thinking a harness bar that bolts into the UPR/LWR seat belt locations would be better than nothing. pick of my build attached. Just painted this.
-
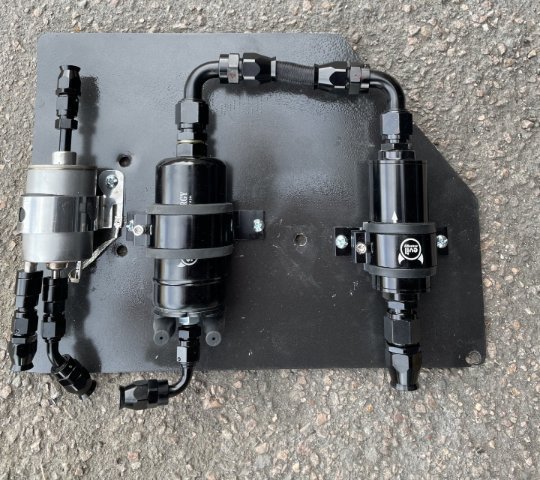
License plate light from Amazon arrived. mount and tie in and the electric for the back half of the car shell is done. fuel system still will have to be finished.
-

280z 1jz track build from a pile of parts
A to Z replied to flatout's topic in S30 Series - 240z, 260z, 280z
dedicated track car with this one seems like such a waste. I would hope you could get some plates on it and race it and drive it on the street. Turning out way too nice to relegate it to the track only. AWESOME! So glad to hear that. -

280z 1jz track build from a pile of parts
flatout replied to flatout's topic in S30 Series - 240z, 260z, 280z
This isn't just a track only build, just track focused, it will see plenty of street time. -
I'm actually a big fan of over building the chassis and breaks. I will deep dive into various part as I pull the ZX apart. What I don't use will get parted out. So, if anyone is looking for parts from this donor let me know. I got the car cheap, I'll let most stuff go cheap. The engine, trans, and diff are my main targets.
-
280z 1jz track build from a pile of parts
A to Z replied to flatout's topic in S30 Series - 240z, 260z, 280z
dedicated track car with this one seems like such a waste. I would hope you could get some plates on it and race it and drive it on the street. Turning out way too nice to relegate it to the track only. -
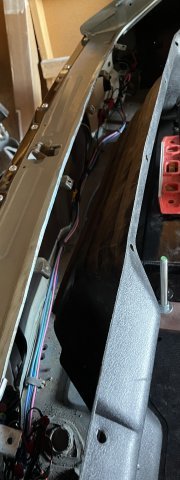
02-11-2026 ATLAS Z update: I got back half of the car all wired in except for a license plate light I am waiting for it to arrive. pretty cool LED unit I found on Amazon for 8 bucks. Got the headlights almost in. I always have a problem with this job. I had to break out the angle grinder and mod to get the driver's in....unsure so far far with the passenger one. Strange..... it REALLY fought me. I also got the 10AN line between my main filter and pump in, so it is ready for installation. PTFE lines take some work.
-
280z 1jz track build from a pile of parts
flatout replied to flatout's topic in S30 Series - 240z, 260z, 280z
Thank you. a bit overkill but im happy with how it came out. I hadn't planned on making them but no reason i can't. I can get some material and when i get some down time i could make another one.


-
Who's Online 1 Member, 0 Anonymous, 1459 Guests (See full list)