azcarbum
-
Posts
173 -
Joined
-
Last visited
-
Days Won
3
Content Type
Profiles
Forums
Blogs
Events
Gallery
Downloads
Store
Everything posted by azcarbum
-
Digital pics ROTA RBR Royal Hyper Black
azcarbum replied to madkaw's topic in Brakes, Wheels, Suspension and Chassis
I do like that color!!........ But I don't want to have to cut and bent the rear quarters. It just weakens it up to much for me. looks great though!! -
Update on the Gnose: Made allot of headway on the plug today for the mold. The composites company showed up early, and we trimmed and glassed a few things into position. We should begin mold construction by next week. I'm hoping that I will have our first production part made by early next month. Once all fitments and quality is checked and approved, I'll be taking deposits for orders. The kit will be available in both CF and FG............. Soon after if response is good with the kit, I plan on making a more aggressive "bolt-on" front air-dam, and maybe a version with a variance to the upper nose. I'll be keeping you informed, so stay tuned!!! B.

-
You'd have to see it up close. It has its own lines.
-
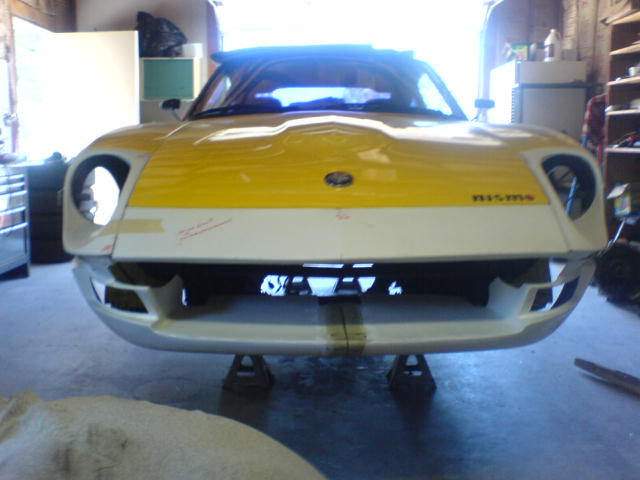
New photo's of lower nose panel in place. Will begin glassing for detail changes, and prep for mold making.
-
Just wanted to put an update in: So the lower chin is on the car as well.. Actually the most work was with the upper sections. The bottom went on and looks very good with little work. As for the composite company.....First composite company I looked at turned out to be a bunch of flakes. So after doing some further inquiring, I had another company come out and take a look at the project. I've decided to make the first molds of the stock kit w/ no mods. I've had alot of people inquire about the kit as is. Once I have the initial kit out, I'll work on making a different chin spoiler for it. I hope to have work biggining this next week. As I get further progress I'll post updates. I plan on taking photo's the whole of the process, so it should be really cool to see it take shape.
-
UPDATE: Well, I'm very excited after meeting with my composite's design guytoday. He too was loving the kit, and is excited to make it happen!! So what we came up with is the following: Hand laid production from a mold ( of course ) will be the easiest. We are going to use cross weave layer's unlike the original, which is just liad mat, single direction. This will result in a much stronger product while keeping the weight down. The hardest part in fitting the kit has been getting the bumper to fit correctly around the headlight bezels. To rectify this, we are going to make two parts to the kit... A top half and a bottom half. This will allow for a much better, NO HASSLE fitment of the top section. Once we have the top section completed, we will be test fitting. It will be a much stiffer and waAAYYY easier mounting process. NOW>> for the big new's.. the bottom half is going to get MODIFEID!! We are going to basicly make the #3 picture of the airdam that everyone likes so much, come to be!! It should be awesome when finished... I'm hoping to have the top section complete in the next 2-3 weeks. I'll keep you all up to date.
-
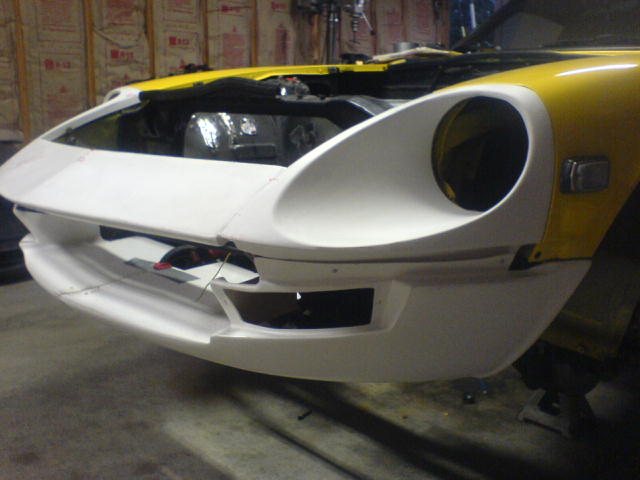
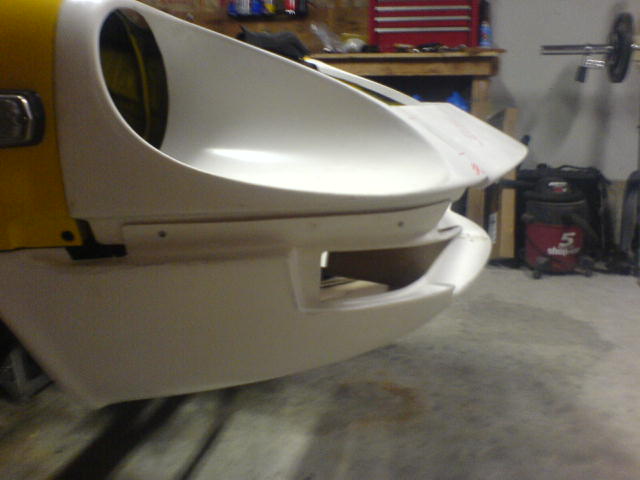
More updated photo's... Making some headway!
-
Well, since i had my motor out of my car and some time, I started going over the kit and install. I did find a few things i'm going to change on fitting. I did notice these changes I'm going to make: the inner mounting flanges on the light buckets required trimming to clear the back frame where the light bolt up. I'll have the flange molded slightly shortler and rounded. The inner flange that sits in the engine bay side needs to be slightly longer. Otherwise so far, the fit is surprisingly nice! I've attached photo's.
-
Oh... #3 Is going to happen... If it kills me. I want it on my car as well..
-
#3 is my fav as well.. I used that one on my site. PS::: look what i have in my garage.. just arrived!! It was a pain in the ass to get it here, but after about 2 months of haggle, she arrived... This is a Aritaspeed Gnose! I have a composite specialist who works mostly on aircraft, and him an I having been talking about this for a while..... No that I have the kit, he's going to help me with putting them back together. Then we are going to go through each peice to check the design, fitment/mounting, and quality issue's... then I'm having molds made.... I'll keep you all up-to date as thing come along. I think I may have him fab up the lower section like in pict. #3 since so many people seem to like it.. It would be much easier of a mold to make than the standard chin piece it comes with.
-
Question about Kameari Oil Pump
azcarbum replied to TurkishSquirrel's topic in S30 Series - 240z, 260z, 280z
Yes.. it bolts right up and does not require any mods. KAMEARI say's It gives you a more precise pressure than the stock units. full pressure is ~85psi. -
Finally getting some time to work on things, when I'm not finishing the damn garage (*note the new insulation )...... Intake and fuel lines are just about finalized. Today I jumped on the header. I welded the bung in place, and took the time to heat wrap the entire thing using stainless ties to hold it all together. Now it just needs some wrap coating and its done.... Once things are running and all figured into the equation, then I'll spring for a new coated header..... but for now, it'll work. Of course one thing led to another, and I decided since everything's torn apart anyway I'll get rid of the fusable links, and upgrading to the internal reg. alternator. Everytime I see these wires, it just blow's me away on how they spliced them together. After I get everything mechanical completed, then I'll be focusing on my EMS. Pretty well laid out for you with the Wolf3D system, so it should be plug and play. I'll post more updates as I get closer.
-
Dinking around on japan car sights... and WOW!! It shouldn't be long until we see one rolling down the streets of the US.
-
I to have not received emails??
-
If anyone ever needs a set, I can get them for about $400 once shipped to the states, and customer.
-
ebay search: japanese license plate.......... Walla!!
-
Shipping is the biggest reasons for high costs on true JDM parts! It's not like here in the states where we have several different shipping options to choose from. In Japan you have 1 inside the country (EMS), and then the taxes and such impossed on the companies to export is a killer!! The whole process of shipping anything larger than 60kg, and larger than the size limitations, takes a arm, leg, and most definitely a piece of A$# to accomplish for anything less than $300-500
-
Your correct on all account... The Camden is a Wet SC, the seventh injector is purely for Lubrication and tempreture control. I will be running a Wolf EMS system. It should fit under the hood, since the components on it now are not any higher than the Projection TBI system that was originally used. Of course I wont know until I have it in.
-
Well, I've made a little more headway on the project and thought I'd post some pictures. The mounting plate for the intake elbow/TBI is finished. It looks like everything will work perfectly. In one fell-swoop I have the idle-up system, linkage, TB, and TPS all in one. The 7th injector sits just perfect with the nose of the injector just inside and flush with the ID. Here you'll see the newest add on, individual braided fuel lines to each injector. They come out of a distribution block. The seventh injector will be fed by this as well ( line not shown.). I just need to made a bracket to hold the block in just about the position you see here. It's really exciting to see it come together piece by piece. Especially since I've been hashing out all the specifics and collecting the components for about 2yrs.
-
I see what your talking about. I personelly don't like the look, but its all up to the individual. I'll be running a intake out the front of the nose pretty much in the same position as the OE filter.
-
There's no doubt it can be done. The real question is why, and for what effect.. You can spend alot of money on things that don't help you any. You would never need 3 butterfly's for an intake on a L motor.... Infact, you would most likely run into mixture problems, especially off the bottom end. The required size of the TB is something that is tuned for your setup. Like alot of things, you can create issues by going to small, and to big without gaining anything. The 75mm shown on my setup, is way more than I'll ever need!
-
I'll be running just fuel to each injector from a distibution block i've found. With the WolfEMS system I'm using, I will have extremely fine control over Ign. and fuel, which will allow me to fine tune the entire system for maximum gains and reliability. The 7th injector is fuel also for cooling and lubrication of the SC. The Camden SC is a "Wet" style supercharger, and is not recommended running dry! Anyther hybridz member has been running it dry on his track car. He say's he hasn't had any problems with the SC, but his intake tempratures were around 300 deg... YIKES!!
-
Yes, the welds turned out awesome!! I found a local shop, and they only charged me $60 to weld both TBI elbow, and the intake manifold. Thats a dam good price in my book! The Injector bungs are a CNC unit made by SDS. They are $37 ea. which insn't bad. What makes them unique, is that they craddle the injector and seal it inside each unit. This way, as you said, I will run individual braided lines to each injector. They hold the standard 14mm GM injectors. I'm going to run 440cc for my setup.