azcarbum
-
Posts
173 -
Joined
-
Last visited
-
Days Won
3
Content Type
Profiles
Forums
Blogs
Events
Gallery
Downloads
Store
Everything posted by azcarbum
-
ZCC - Custom Tail Project (Rear Spoiler)
azcarbum replied to palauoriginal's topic in Body Kits & Paint
Wing will be fastened to the hatch by two bolts... -
ZCC - Custom Tail Project (Rear Spoiler)
azcarbum replied to palauoriginal's topic in Body Kits & Paint
Update: 07/13/10 Saw the tail last week, and he was starting on the mold! I will let you guy's know when we are ready to rock on these. I'm guessing it will be another month or so.. Need to get a few made so we can get out layup schedule planned. Thank you all for your great comments ... It's much appreciated when all the time is spent on a project like this. -
Yep.. the G pushes it out alot! Car is going to look great. I can't wait to see it completed........... What color you thinking?
-
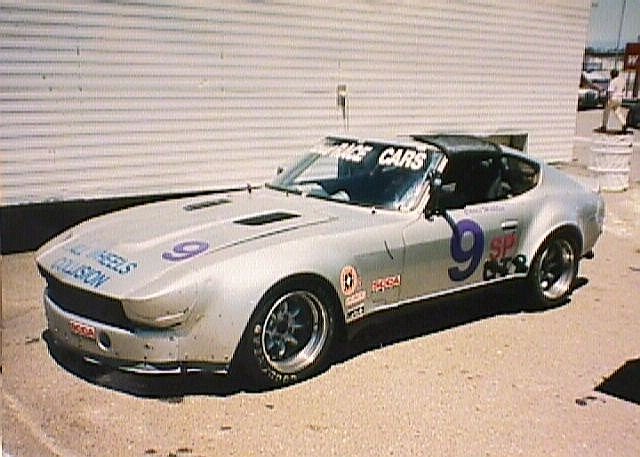
I just sent him the IMSA front airdam.. It can be modified to be used w/o the gnose *( See photo attached ).

-
Look great!!...... Can't wait to see it when completed. The IMSA was shipped today via FEDEX.. Should of received confirmation email.
-
ZCC - Custom Tail Project (Rear Spoiler)
azcarbum replied to palauoriginal's topic in Body Kits & Paint
UPDATE: 06/16/10 Tail is 99% completed, just have a few very minor details to take care of, and its mold time!! After seeing it this time, even off the car, it is absolutely the SHIZZEL!!..........On the car, it's sick!! The shape is so clean and crisp. Make sure to take note of all the changes to every leading edge, every tail edge, even the bottom matches the car perfectly. The tail tips are exactly what I wanted. They came out perfectly highlighting all the curves of the Z........ Everything is so nice, all I could do is bow to my new mold guy! No matter if done in FG or CF, this going to be series tail. What do you guys think?
-
THose are a different route to go, but the differeces are ZCC brackets bolt up in existing bolt locations, and allow for a large array of adjustment. Now I'm not sure i understand your post.. are you asking me a question? The brackets are a universal part, just made to "simplify" the installation of the early bumpers on the 280z with as little effort as possible. These can be used with the series 1 bumpers, series 2 bumpers, and I've even had a few customers use the 260z bumpers. Now as we've seen here, some cars will need a bit of customizing, as all our cars are not the same, and depending on what bumpers you use.
-
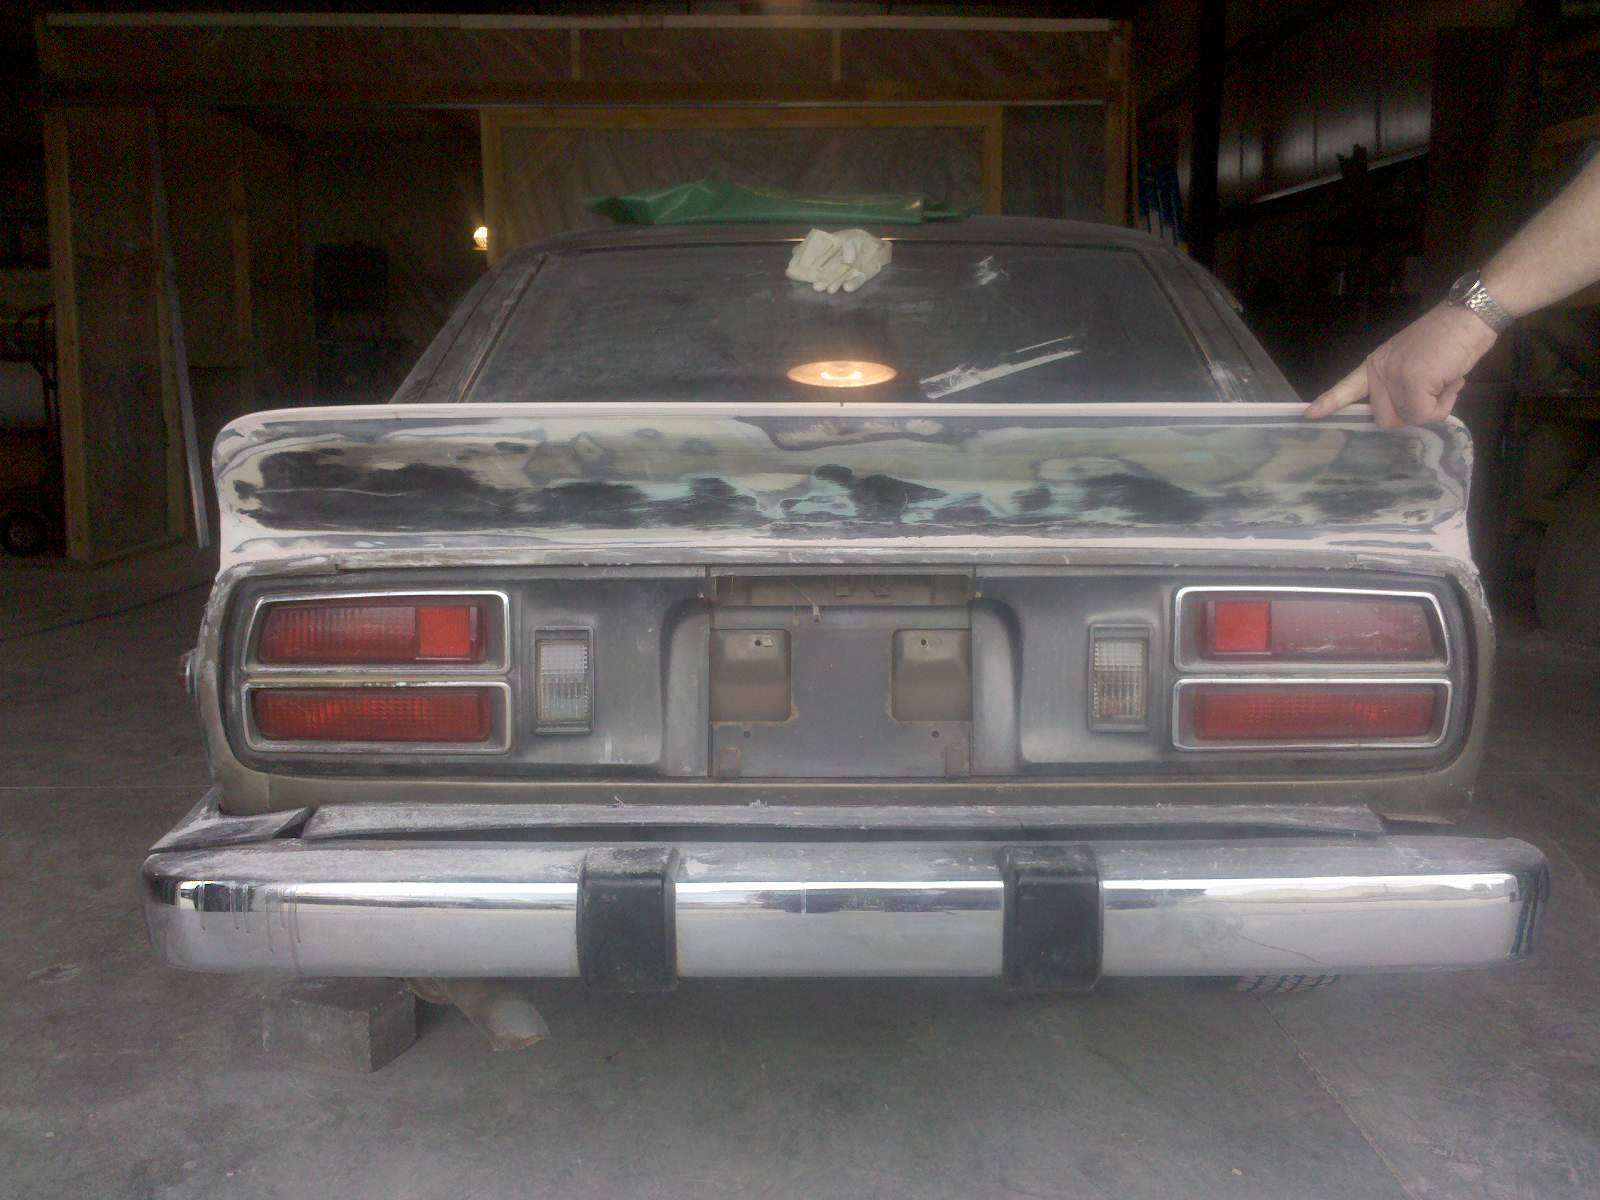
Hey guyz.. This thread was pointed out to me, and I thought I better jump in. Ransomnotes: Yes.. the 73 bumper is a different monster, and most who put the bumper on a 280z usually are using the FRP ones, which are whats available for the most part. Those are modeled after the series one. Because your using the 73 bumpers, it will require you to trim back the lip of the area you have highlighted in "white" under the turn signal light. It doesn't mean you have to go crazy and chop the whole bracke section out!!.......This is very easily done, either by cutting the small slot out, or by making a single cut with a hacksaw to the inside edge, then bend the tab downward and away from the bracket. I've done this an several cars to include my own, and your not hurting any vital support area of the car......... I wouldn't cut into the bumper bracket, as it will weaken it. The brackets are made to make custom installation as easy as possible, and with a good supportive design. But as with all custom work, sometimes little tweeks are require depending on the car, bumpers used, etc.
-
ZCC - Custom Tail Project (Rear Spoiler)
azcarbum replied to palauoriginal's topic in Body Kits & Paint
Just a quick update... Tail shape is near complete. Just a few final touch-up points, and we should be about there. When we get to laying up for the mold, I'll let you guys know. -
ZCC - Custom Tail Project (Rear Spoiler)
azcarbum replied to palauoriginal's topic in Body Kits & Paint
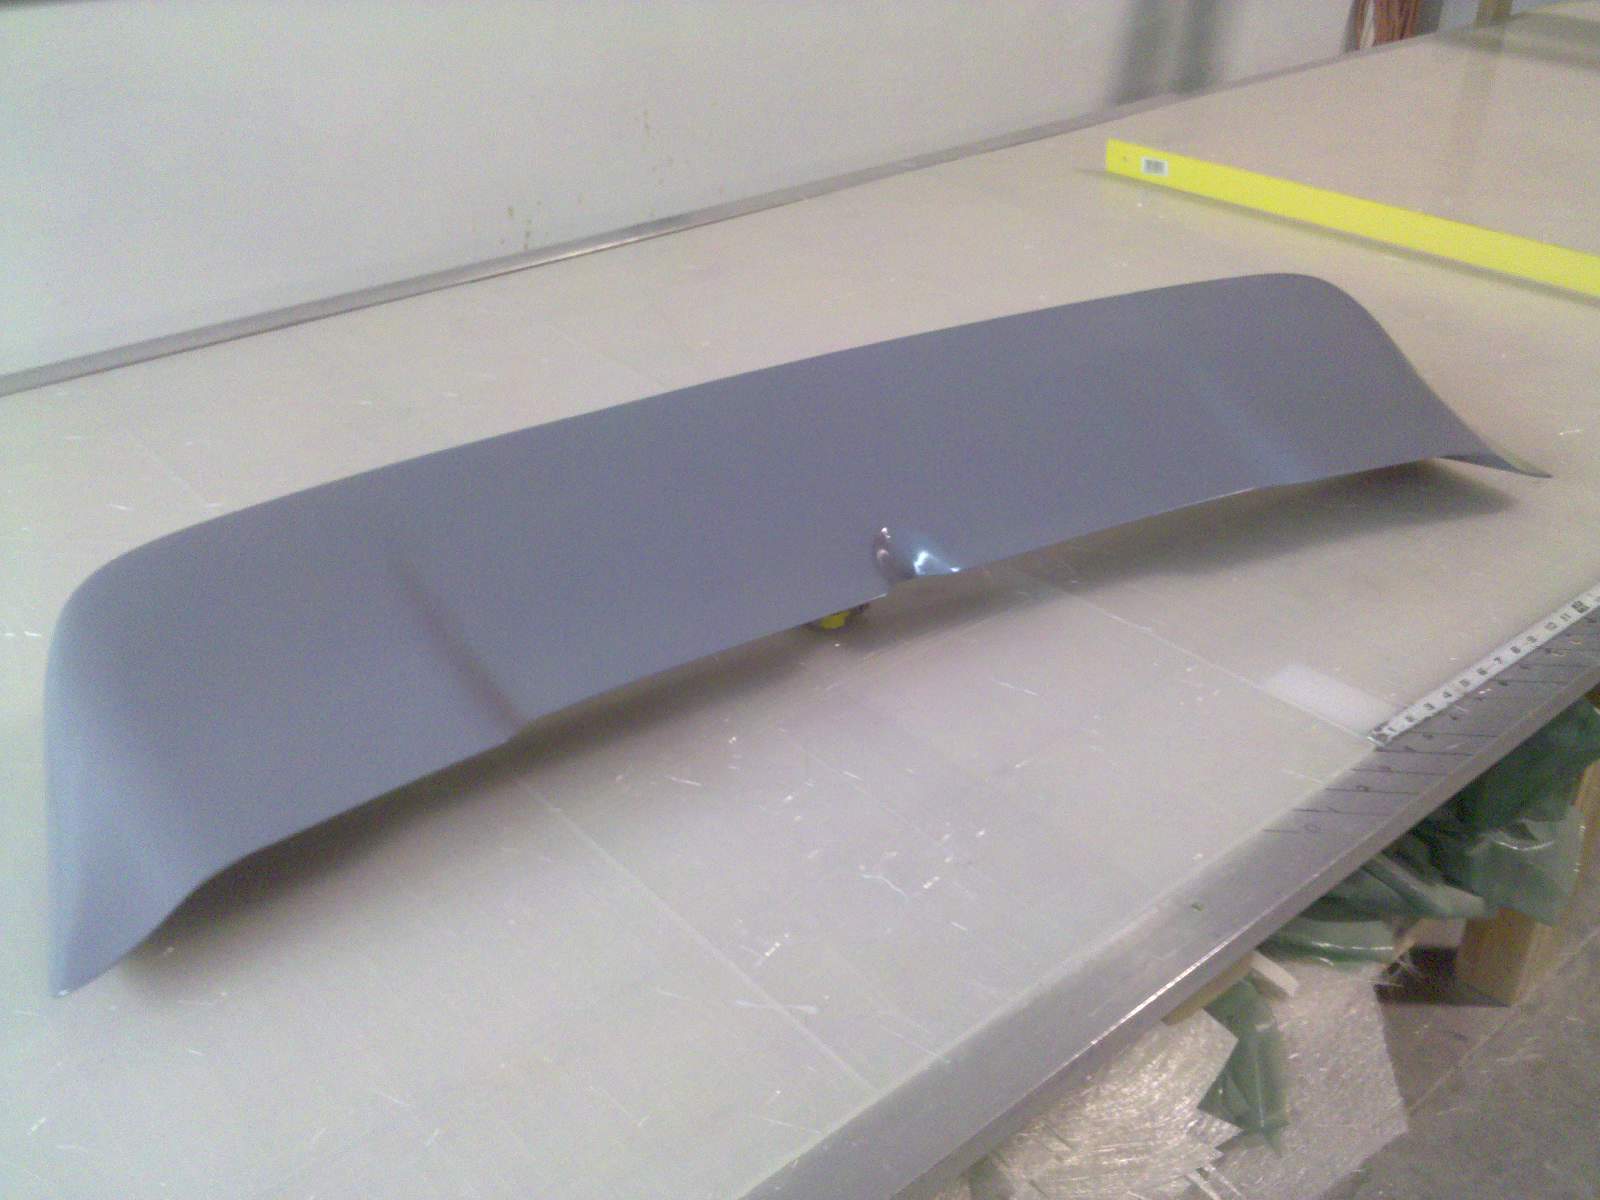
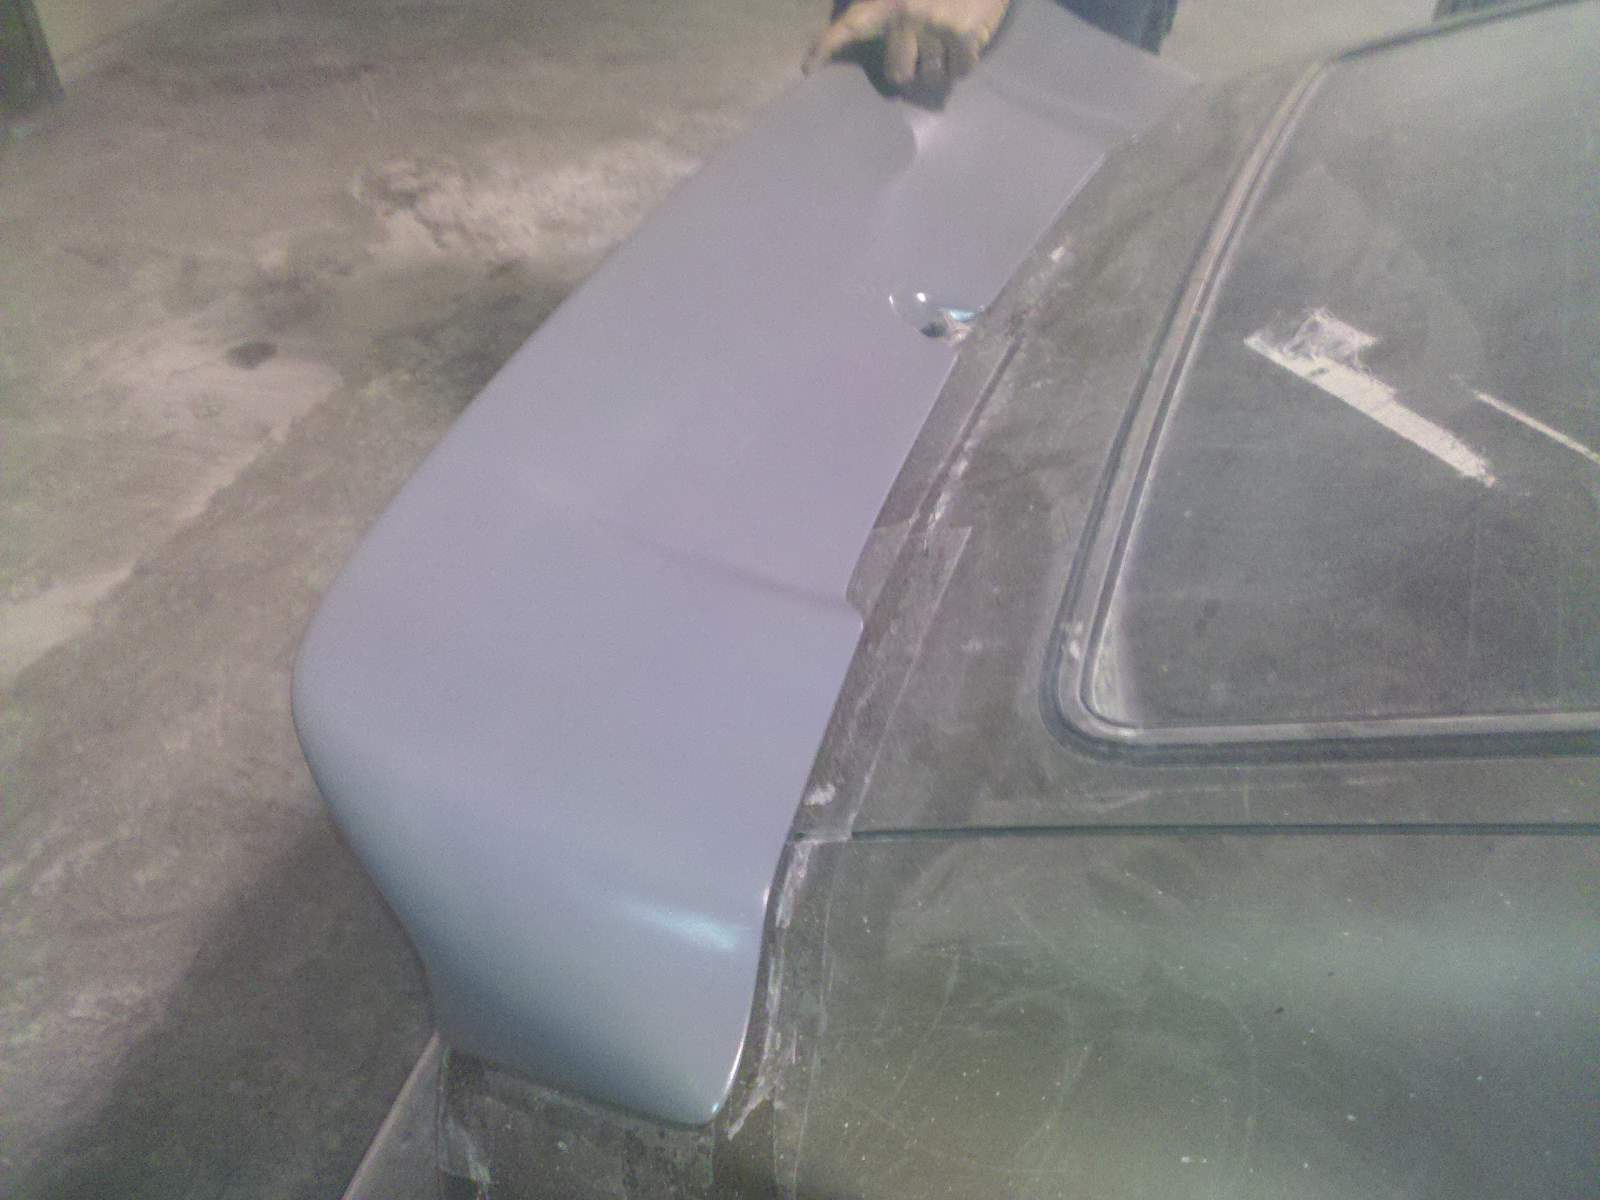
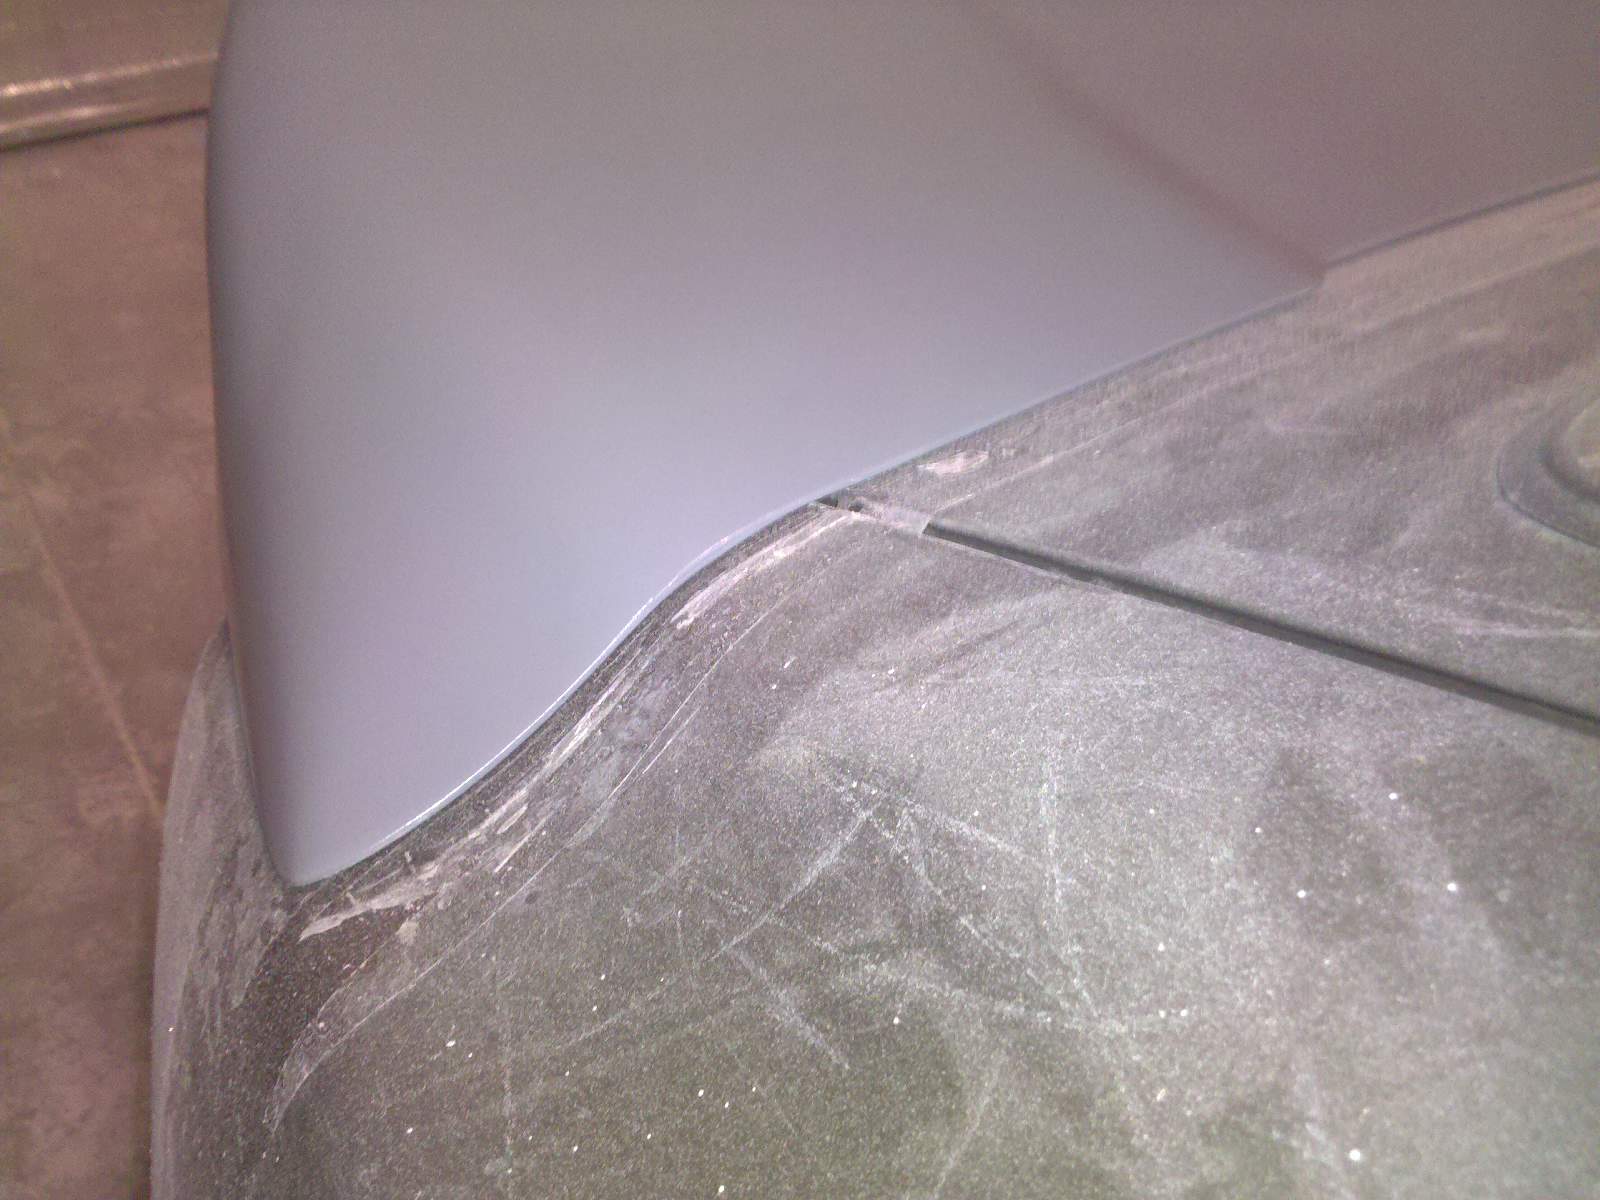
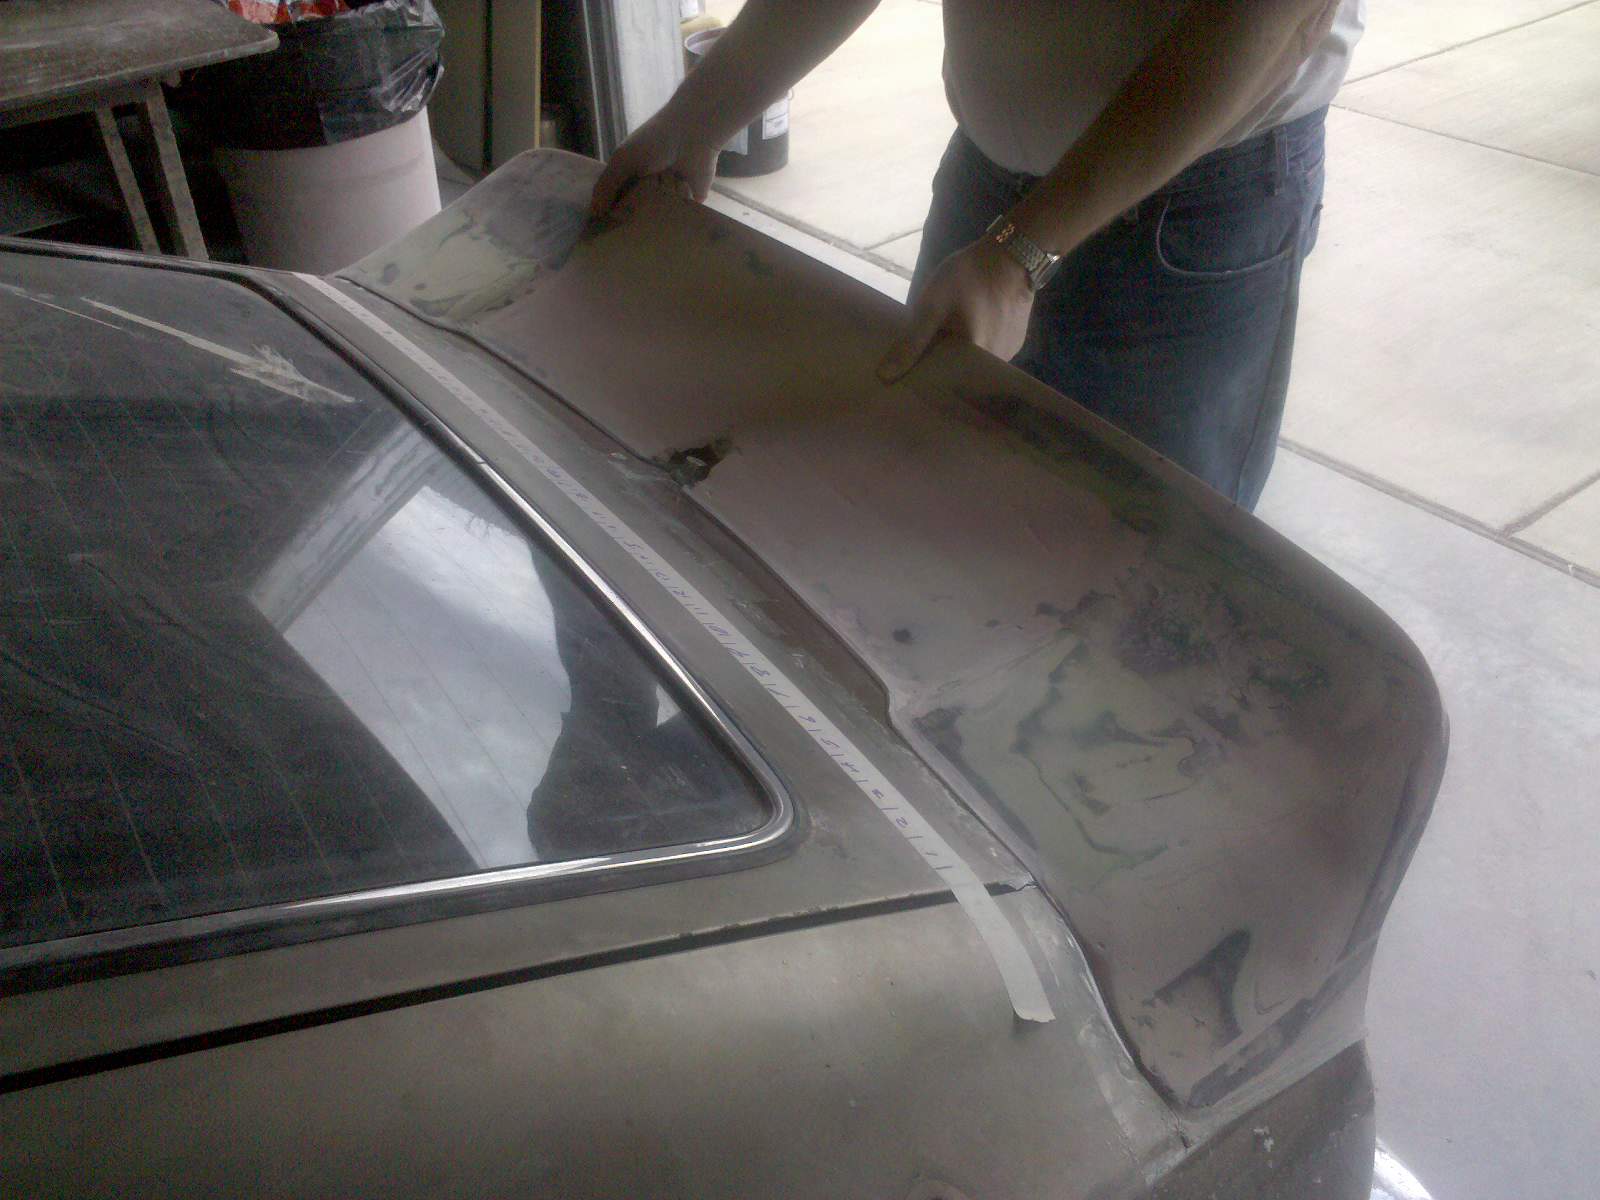
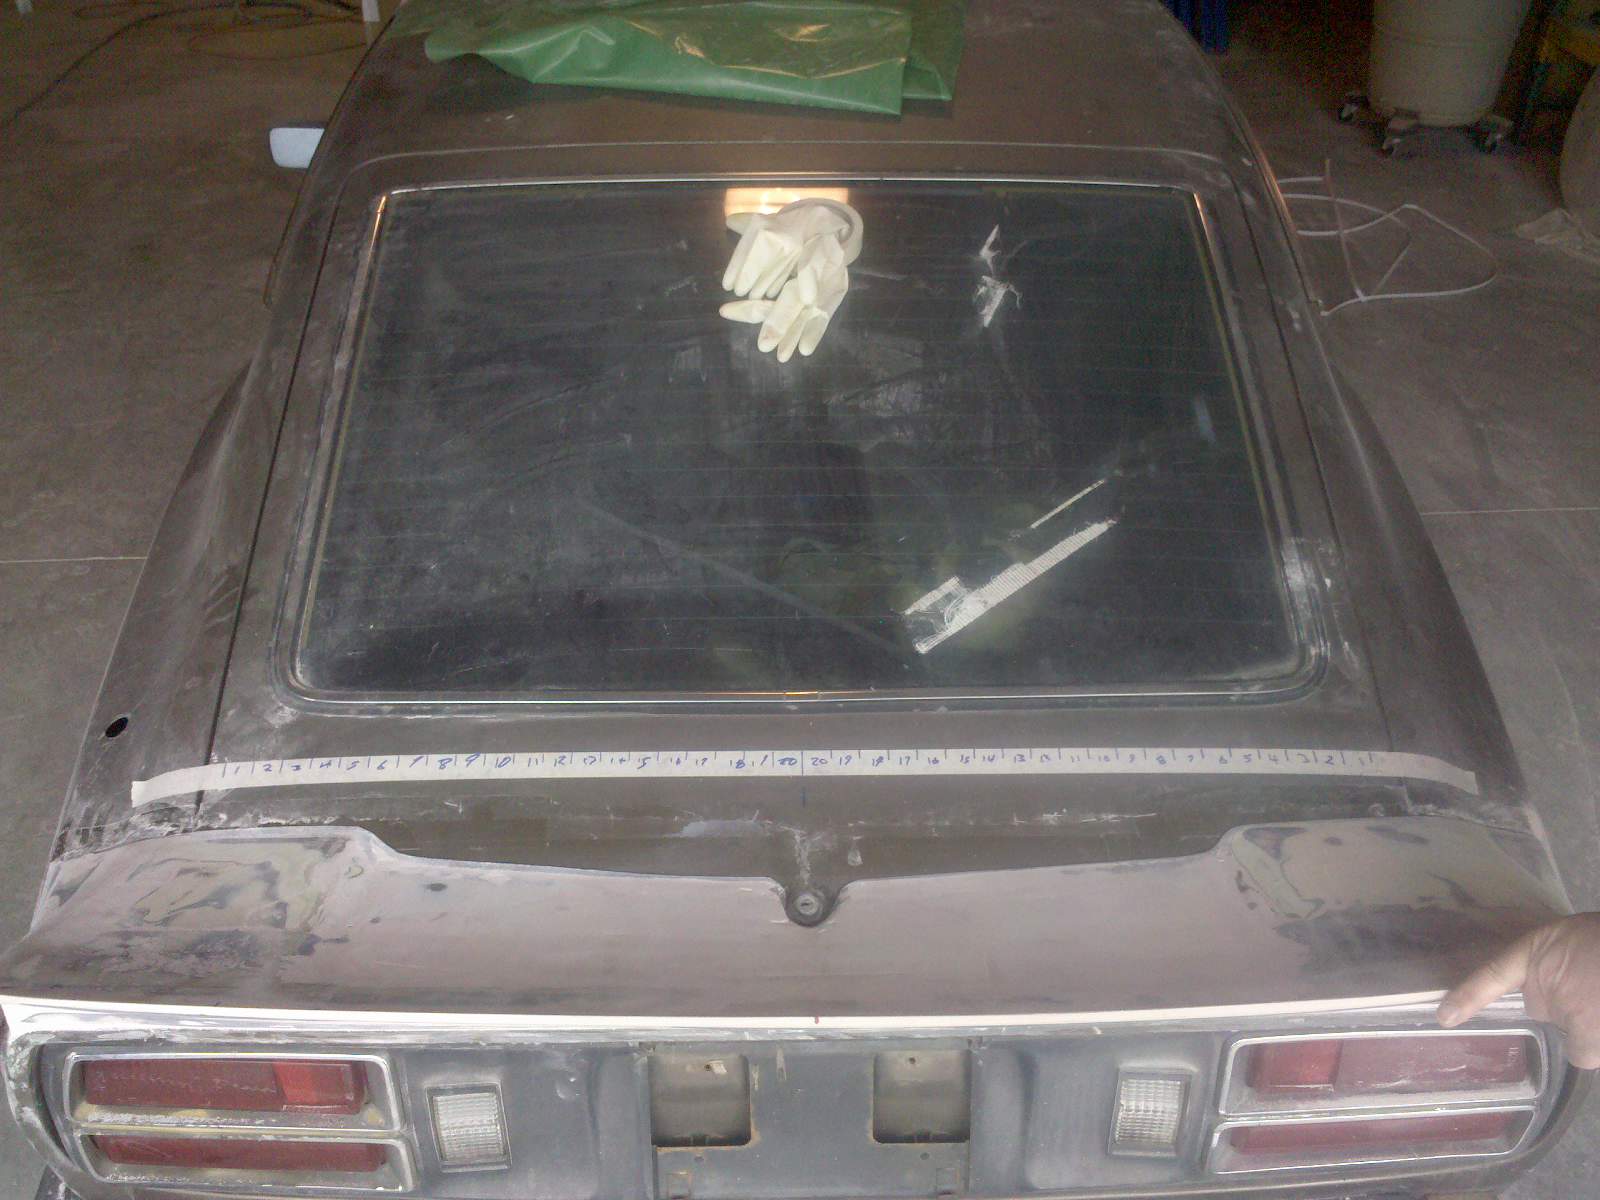
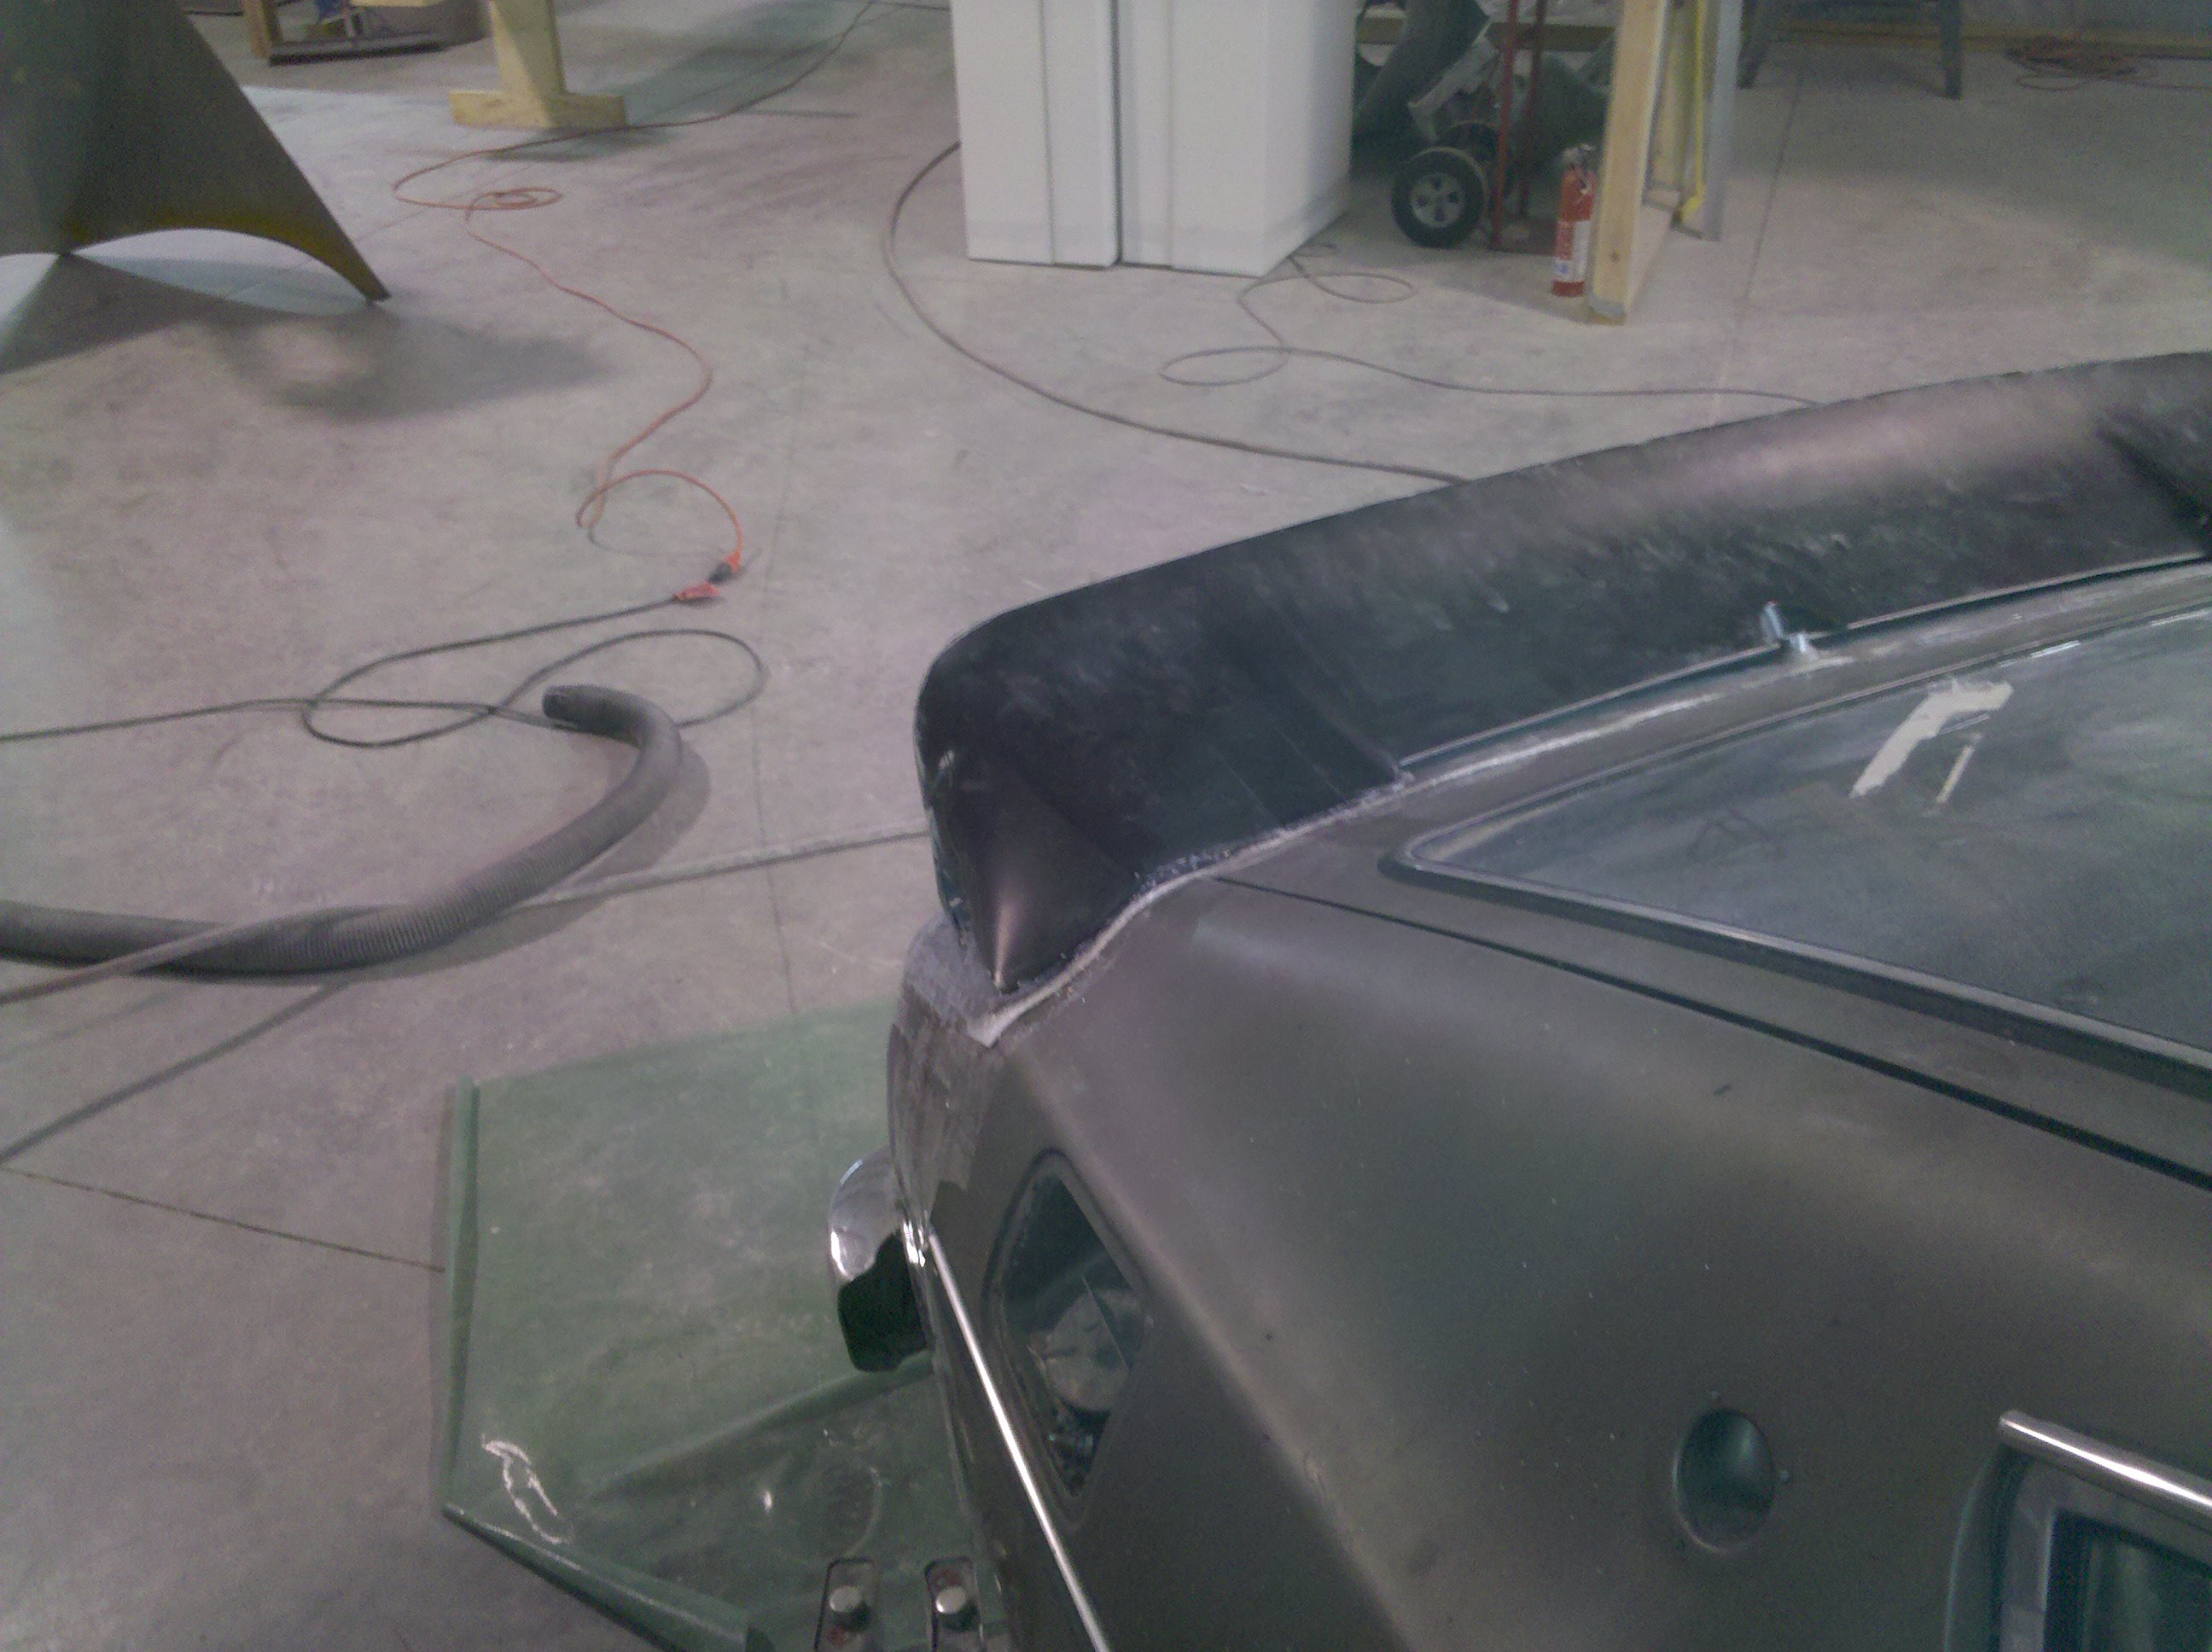
UPDATE TIME!!!.................... YAH BABY!! Tail is really starting to show the target shape changes we wanted. Note the following points when comparing the old shape to how it sits now. Outer egdes of tail are rounded Front edge to hatch is near flat ( lip removed ) Front tips/over fenders are extended out more, and now follow the curves of the car Top surface lines are smoothed out more Tail edge is thinner/sharper back edge of tail no ends at the hatch ( lip removed ) Because the back tail edge is gone, it now allows the tail to sit directly over the hatch button The over all shape is now much more fluent to the Z.. Very happy with how its taking shape. We are now working on the surfaces, making sure they are smooth and straight. I'll keep you informed as we make more progress. Brian
-
ZCC - Custom Tail Project (Rear Spoiler)
azcarbum replied to palauoriginal's topic in Body Kits & Paint
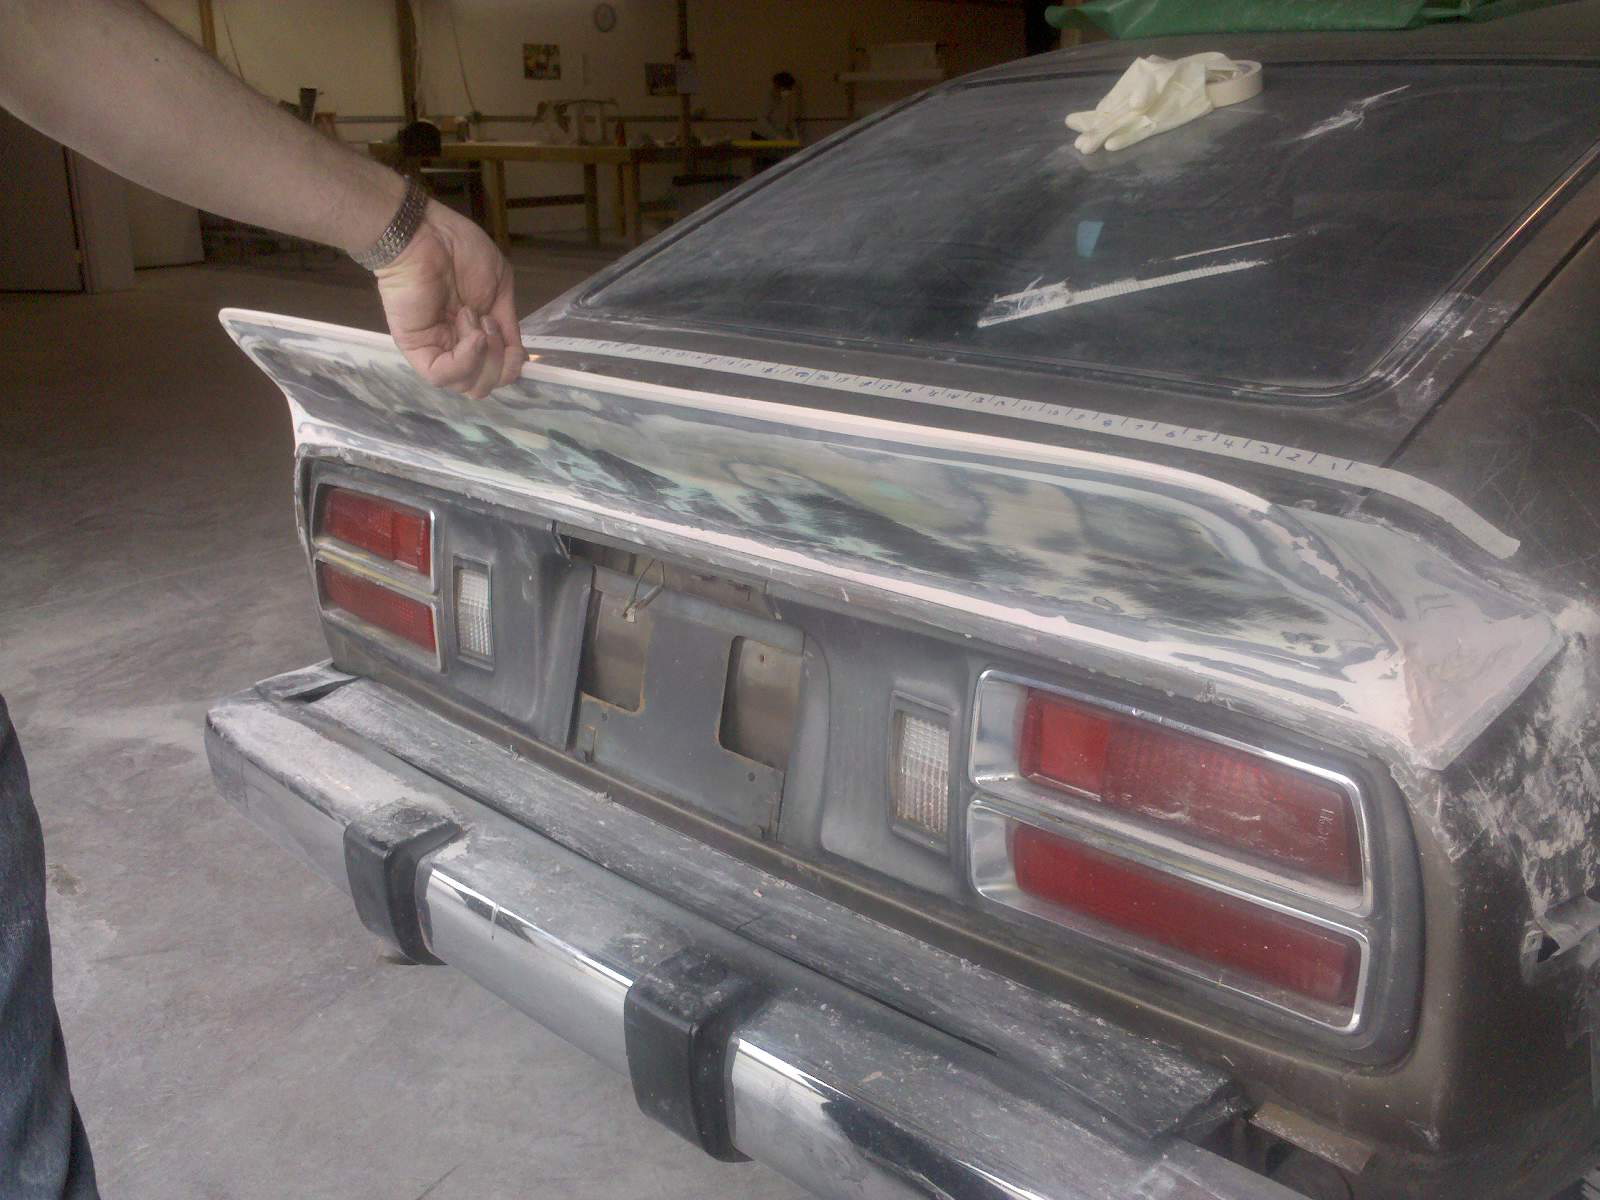
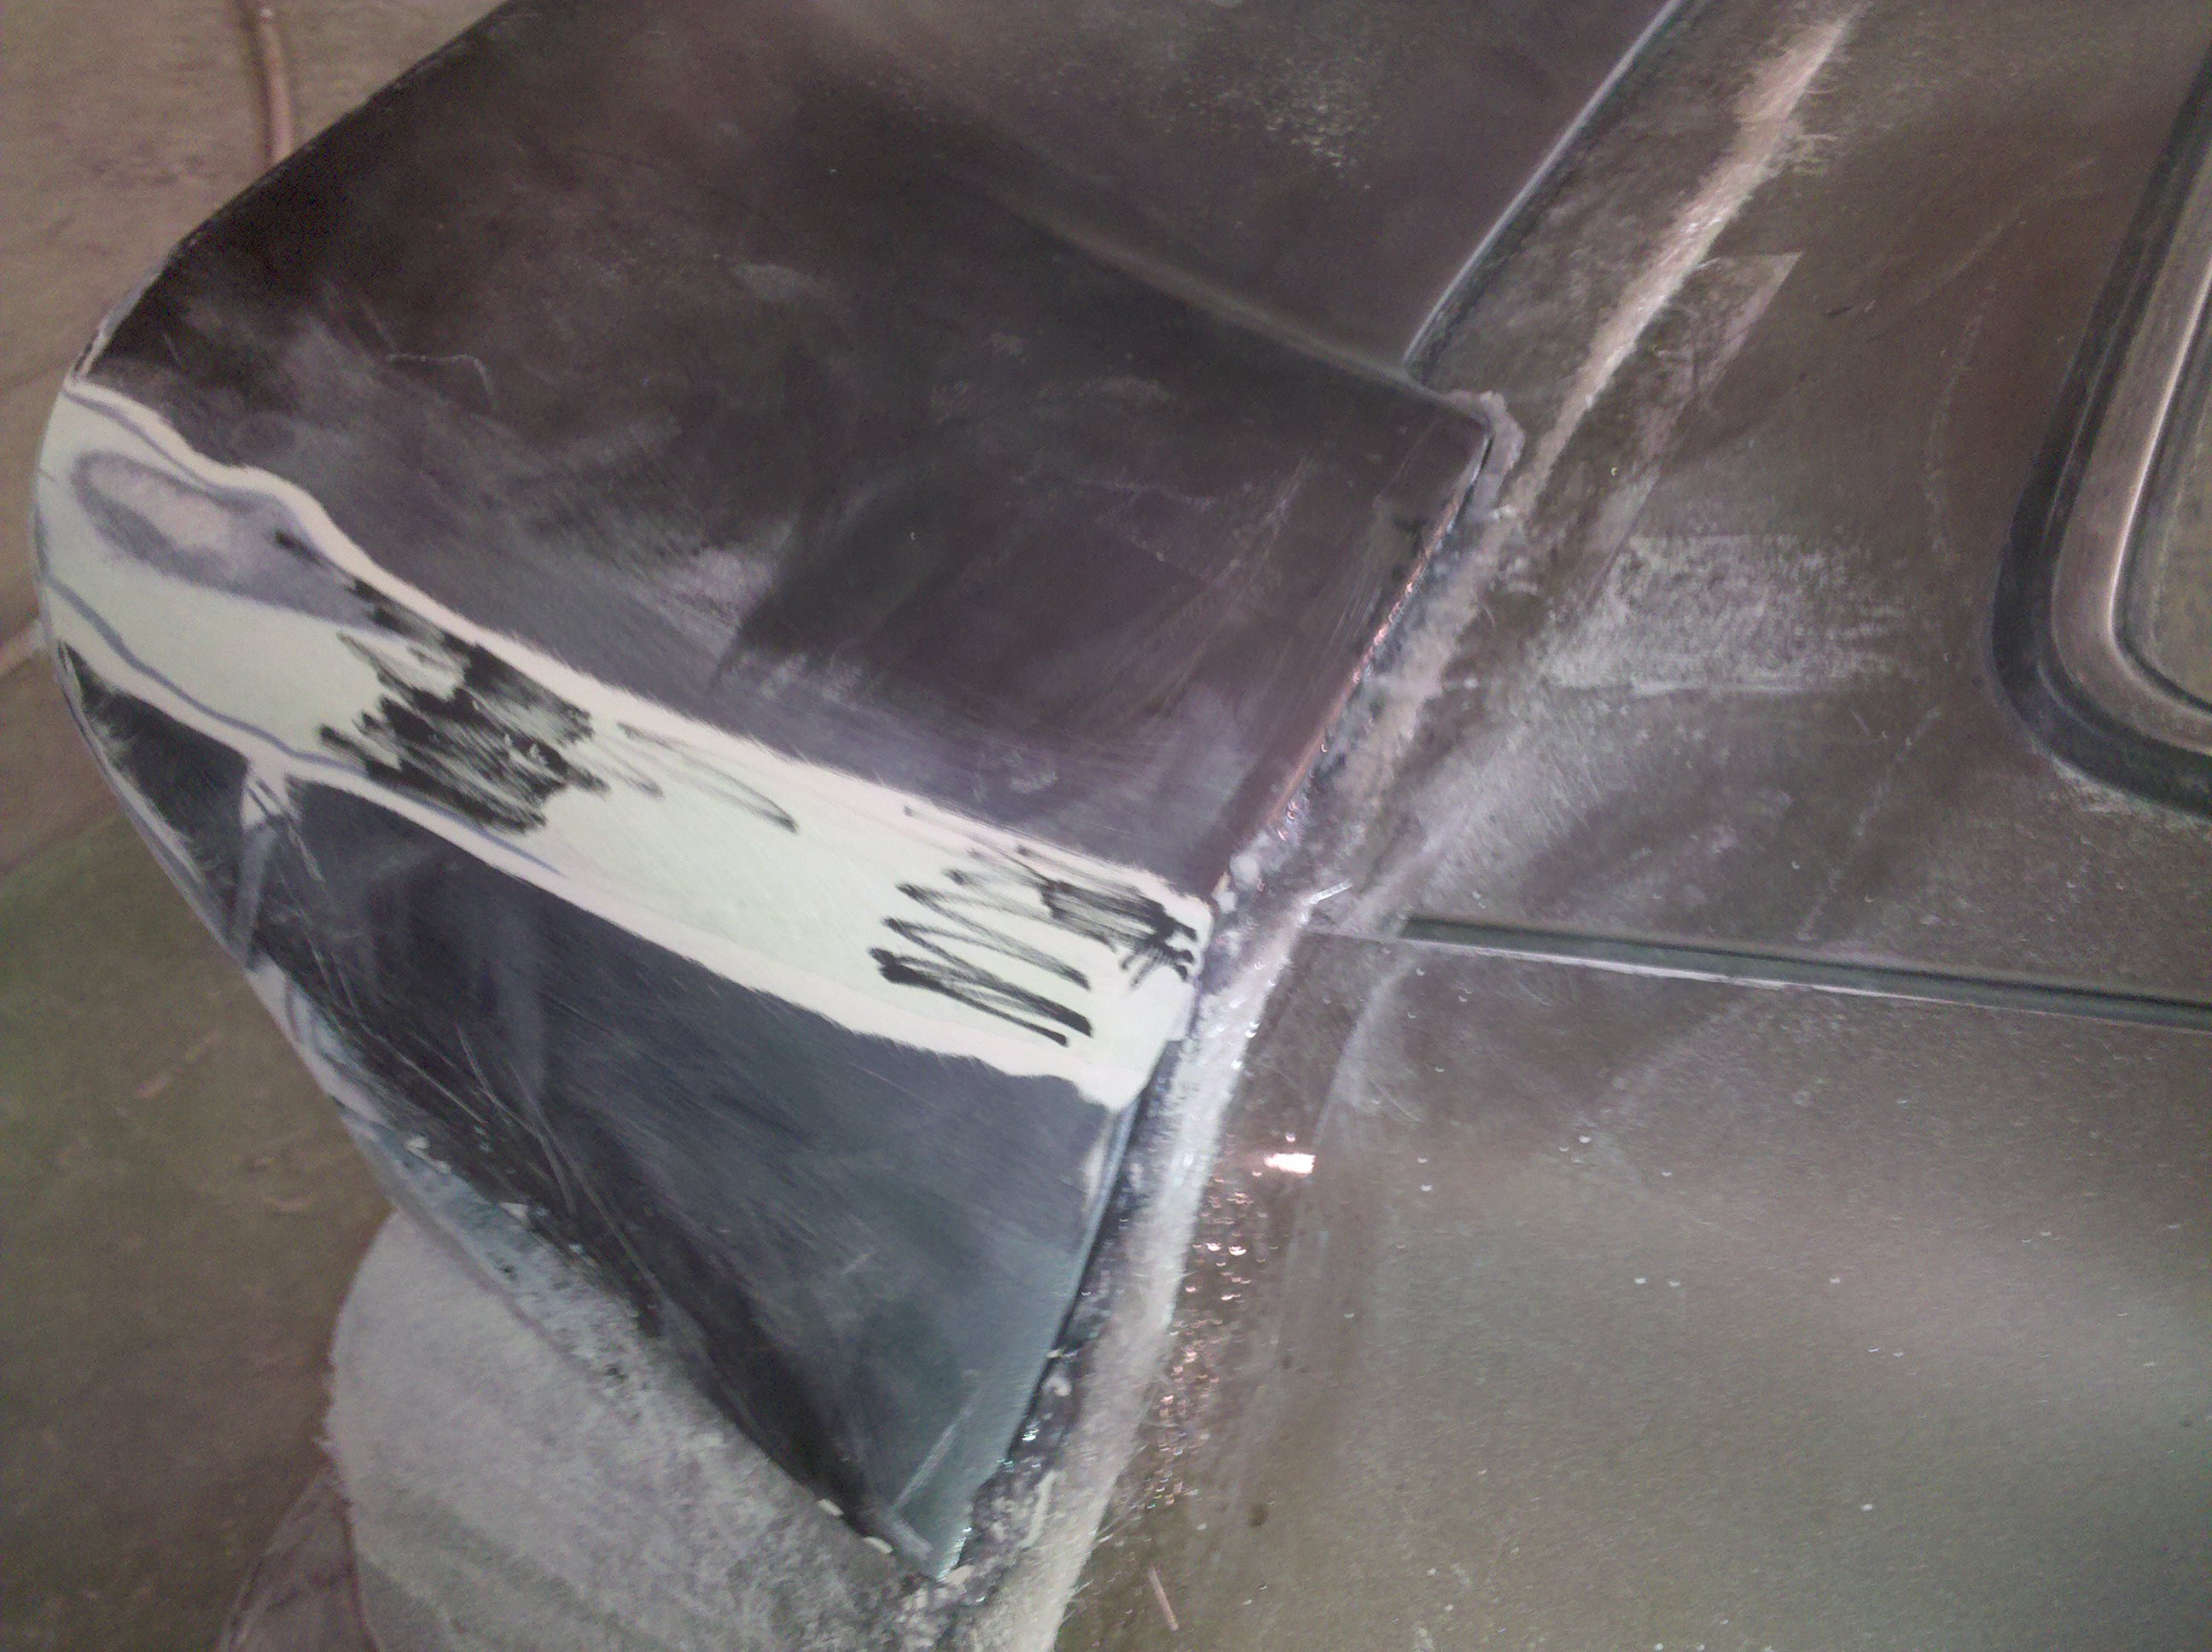
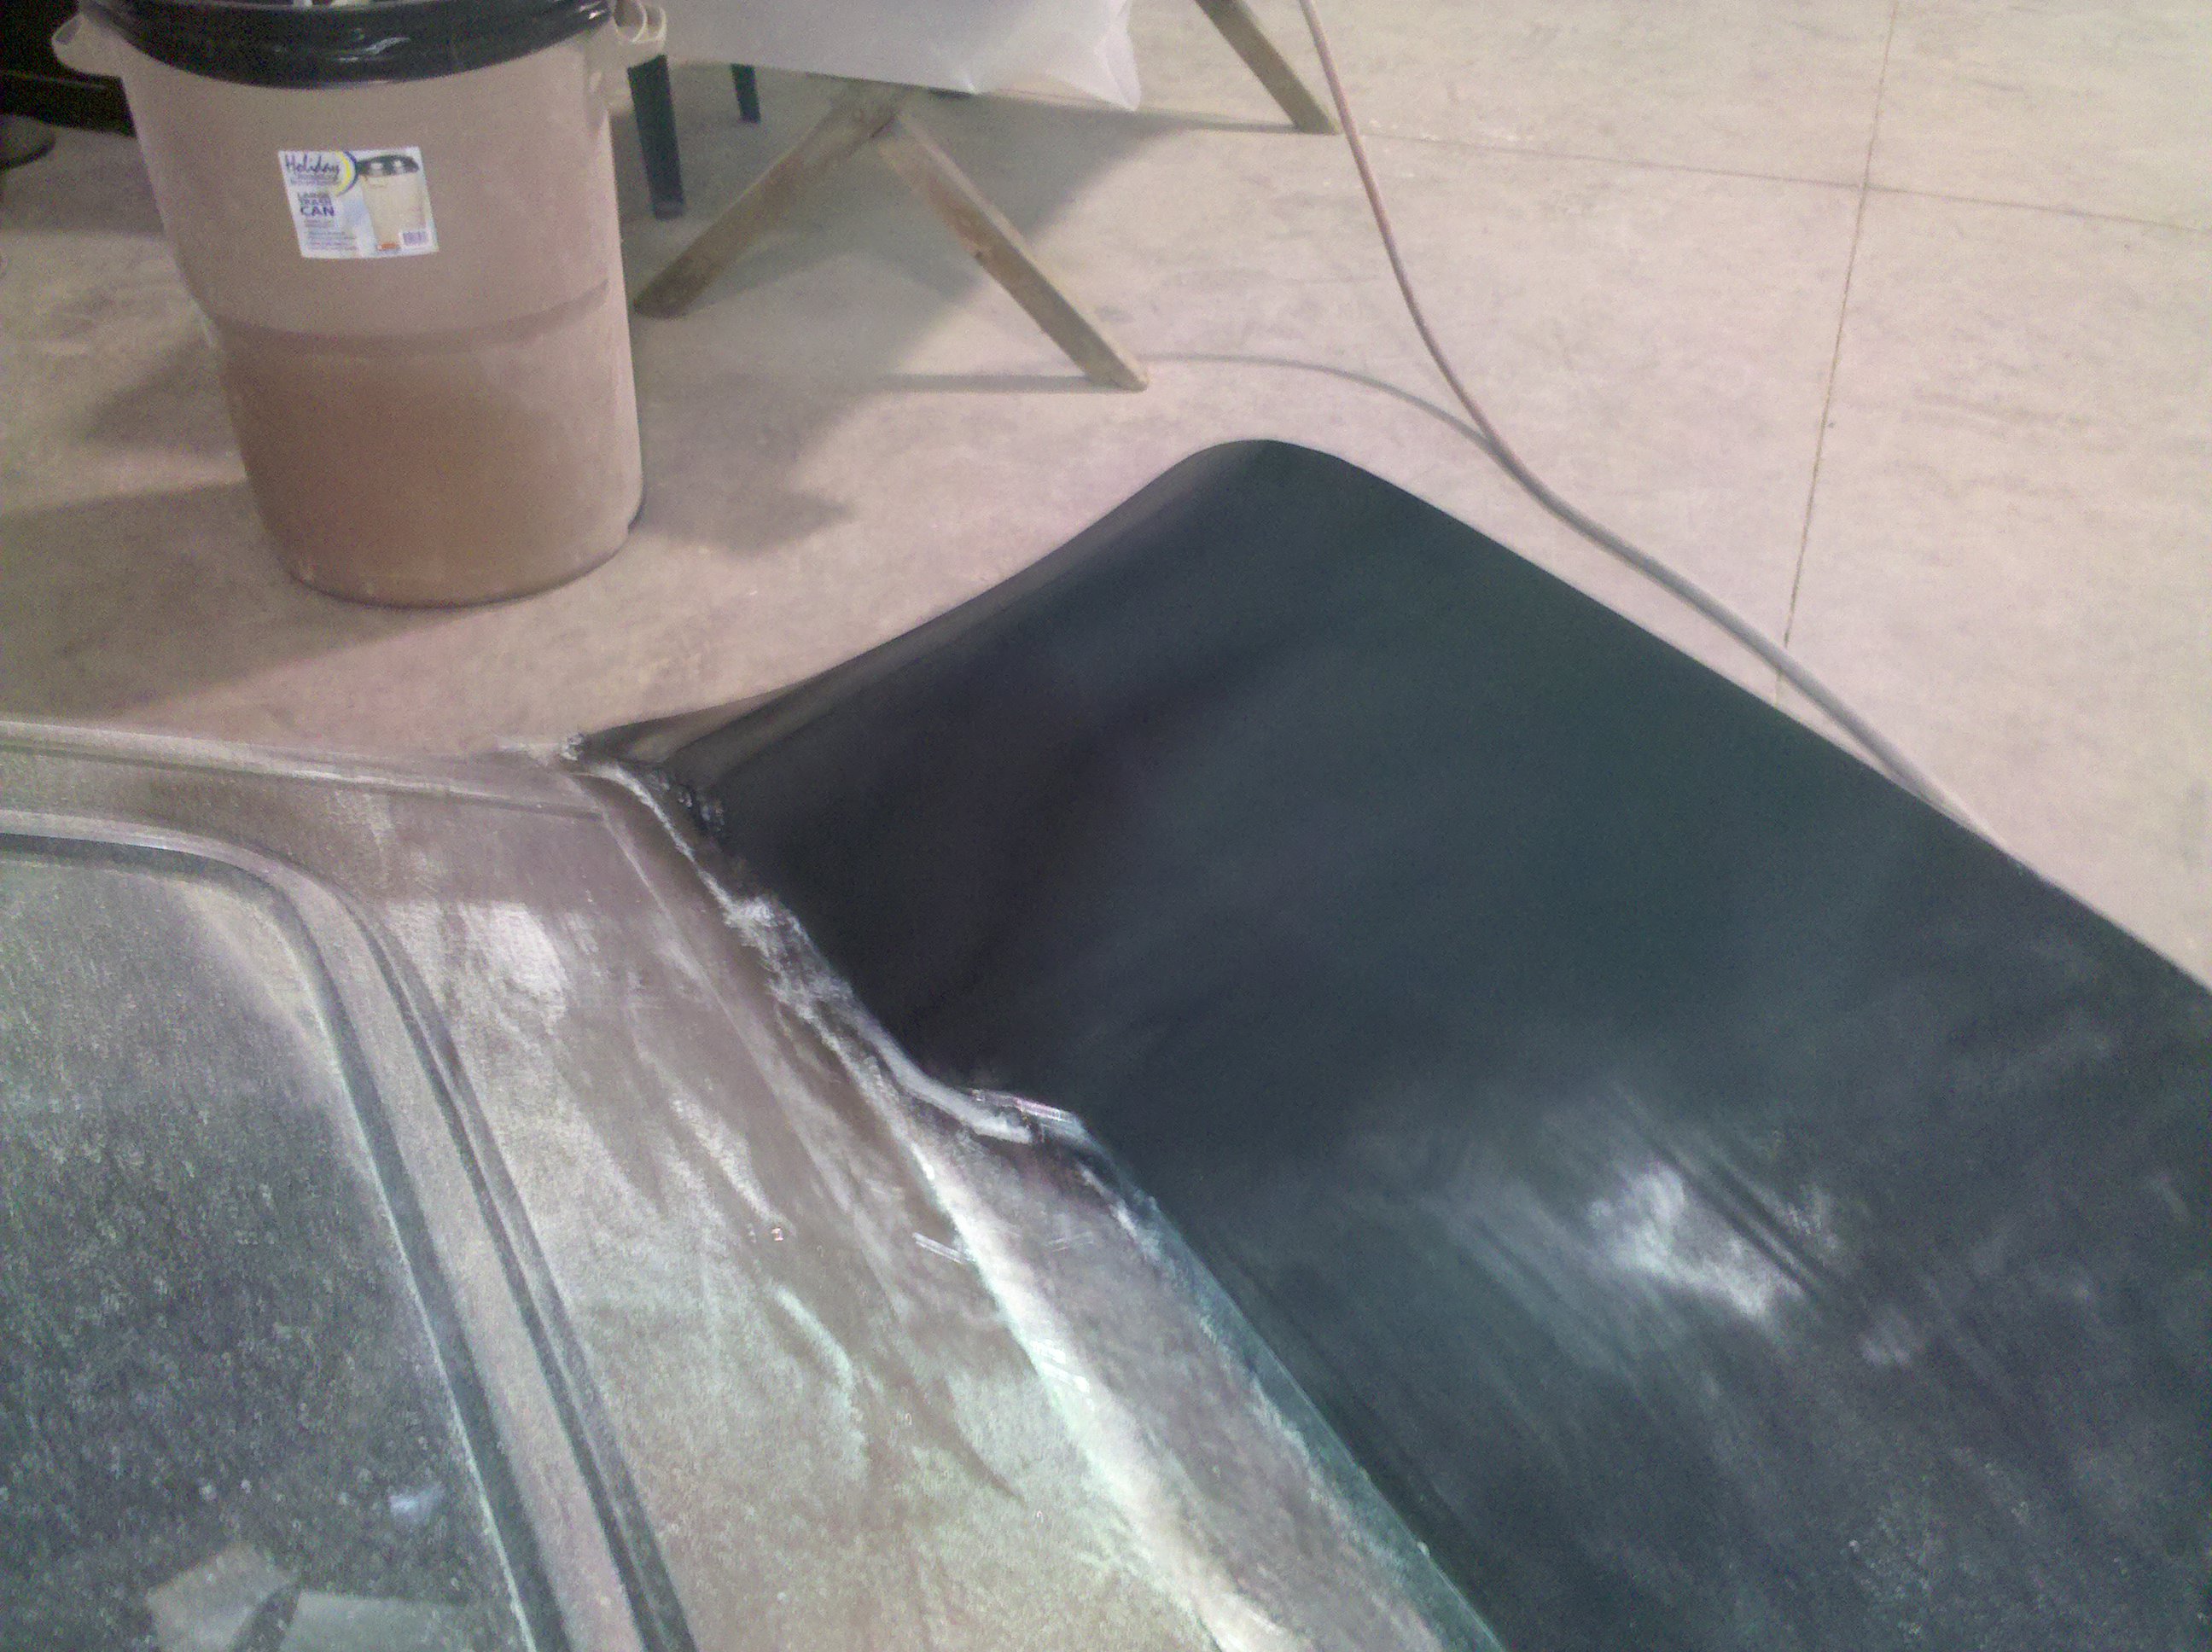
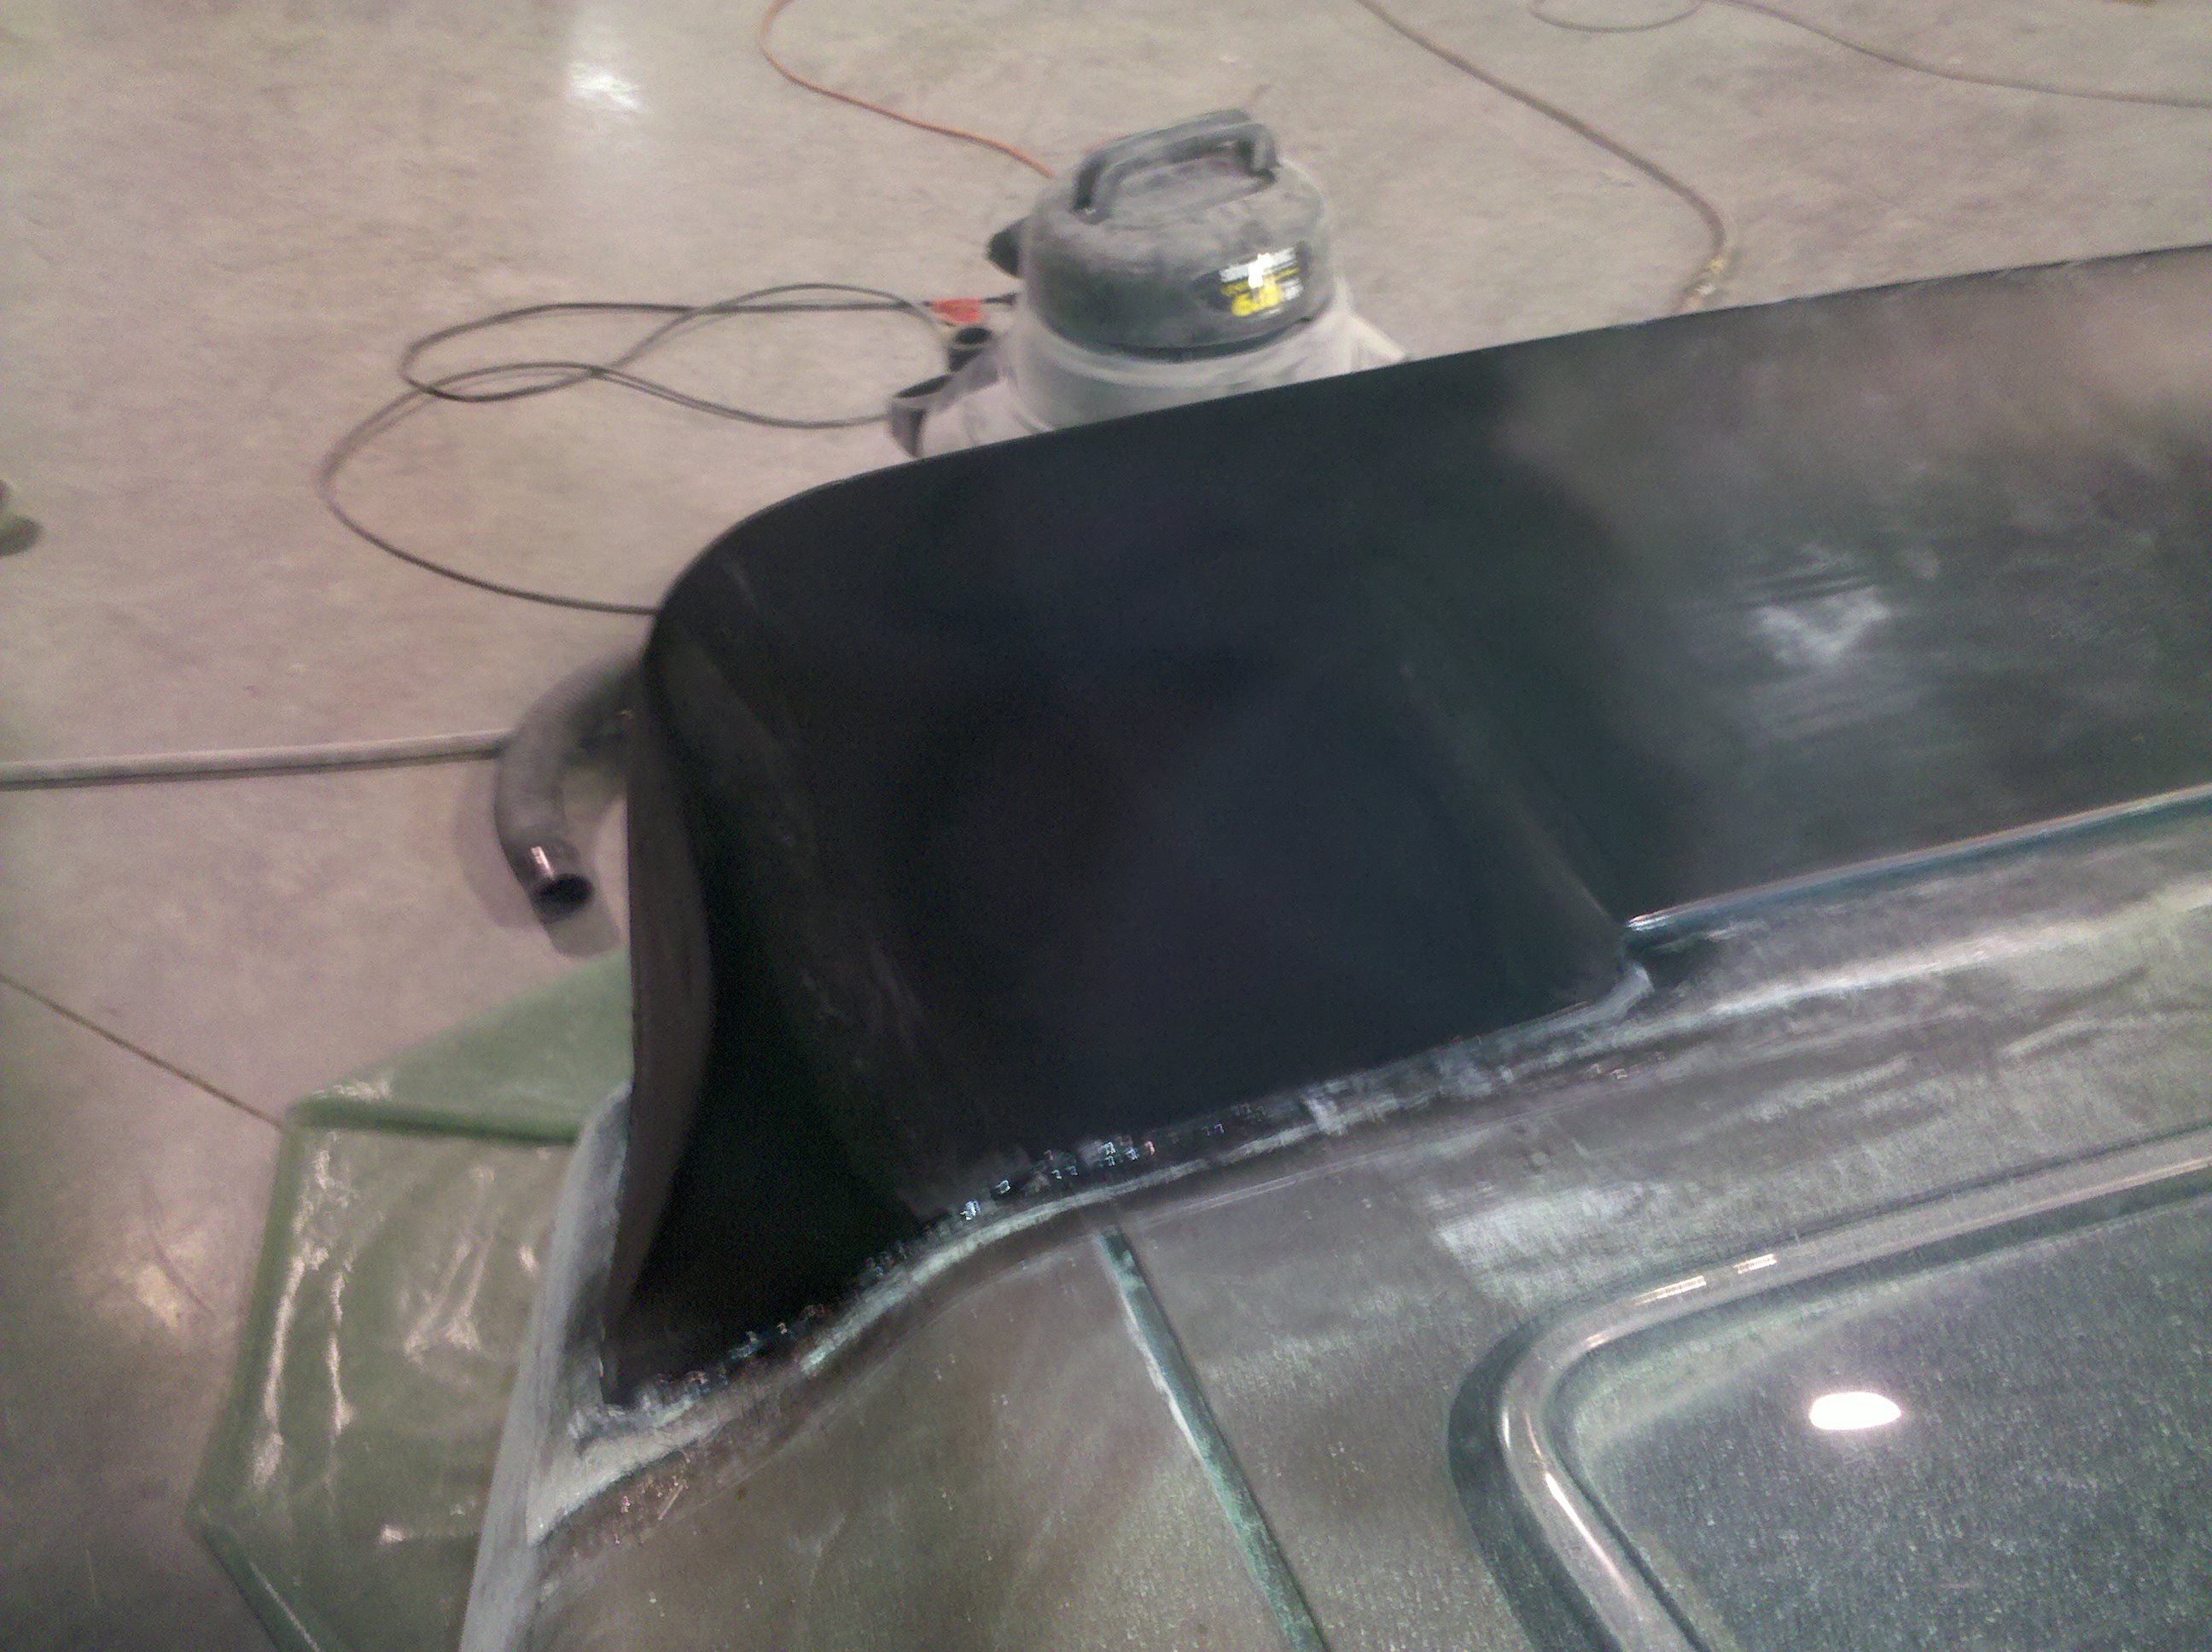
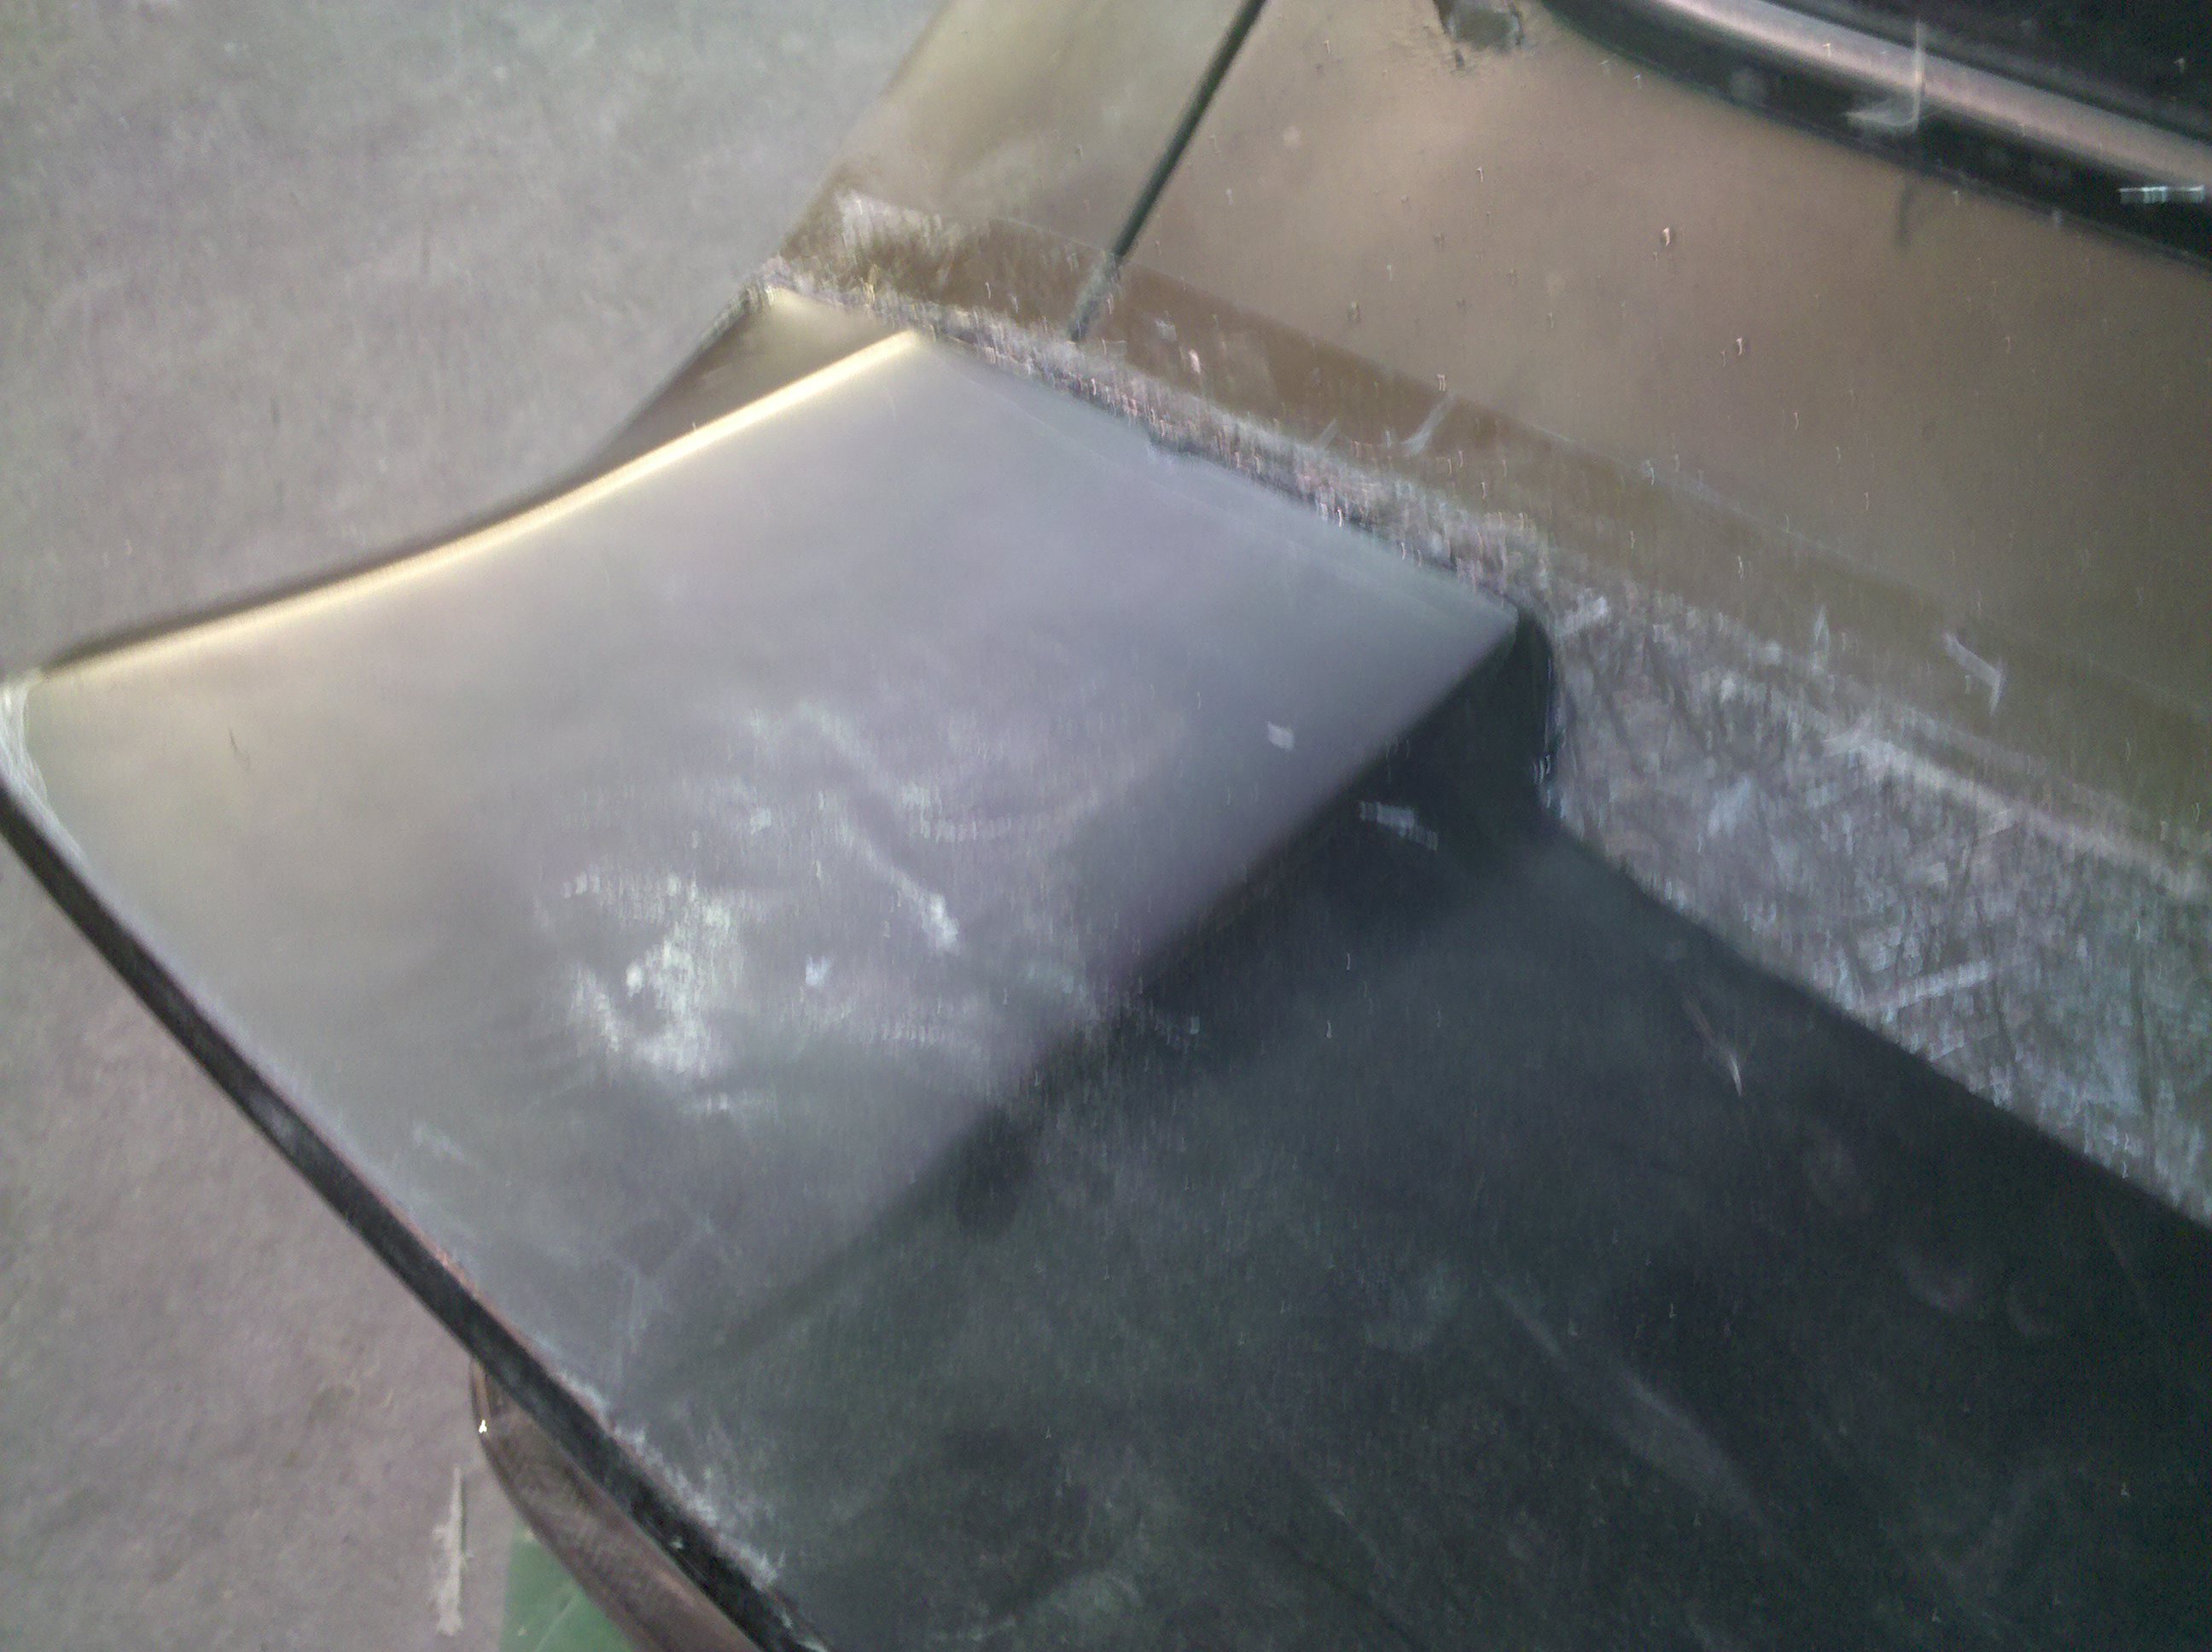
Hey guyZ... Work on the new Z-tail is in full works. I've attached photo's to help show the work being done. It's a bit hard to tell through the photo's, but its better than nothing ( I know how you all love Photo's, Photo's.. and more Photos) LOL. Here are the few points were working on: The end upper edge has been cut and rounded more ( hard to tell in photo, but I sware it has! The front edge is now near flush to the body.. 1/2" lip removed. The top detail lines are rounded ( smoothed out ), as not to be so sqaure. The outer edge that swoops down, is goig to be extended to meet the outer rounded corner of the car. It will be a very smooth "slide" if you will. This will help with the overall transtion of the tails areodynamics, and will hopedully allow me to work the back of the tail edges, to try to eliminate some of that 2X4 look. We've also calculated the weight of a CF tail, and are positive we can get it to around 3.5lbs with clear coat on it. The last photo shows the detail lines on top face of the tail being so abrupt.. The one before it trys to show the difference between the detail lines being smoothed out.
-
Hey all, thought I'd chime in.. NO.. this is not the kit I have. These are very different than mine. The kit he used is a later year IMSA kit, after they started strictor rules on tire/wheel sizes. That kit is 2" narrower than Z.C.C's. Z.C.C Front Fenders are complete fenders, those fronts are not fenders, but overlay's just like the rears. They do not have supports, nor a front box design where you can bolt up the headlight buckets. Also, the shape of the fenders are much more rounded in shape. Just wanted to help with clarifications between the kits. Love the work you did on the car... looks great!!
-
I can get JDM ones if your interested.
-
ZCC - Custom Tail Project (Rear Spoiler)
azcarbum replied to palauoriginal's topic in Body Kits & Paint
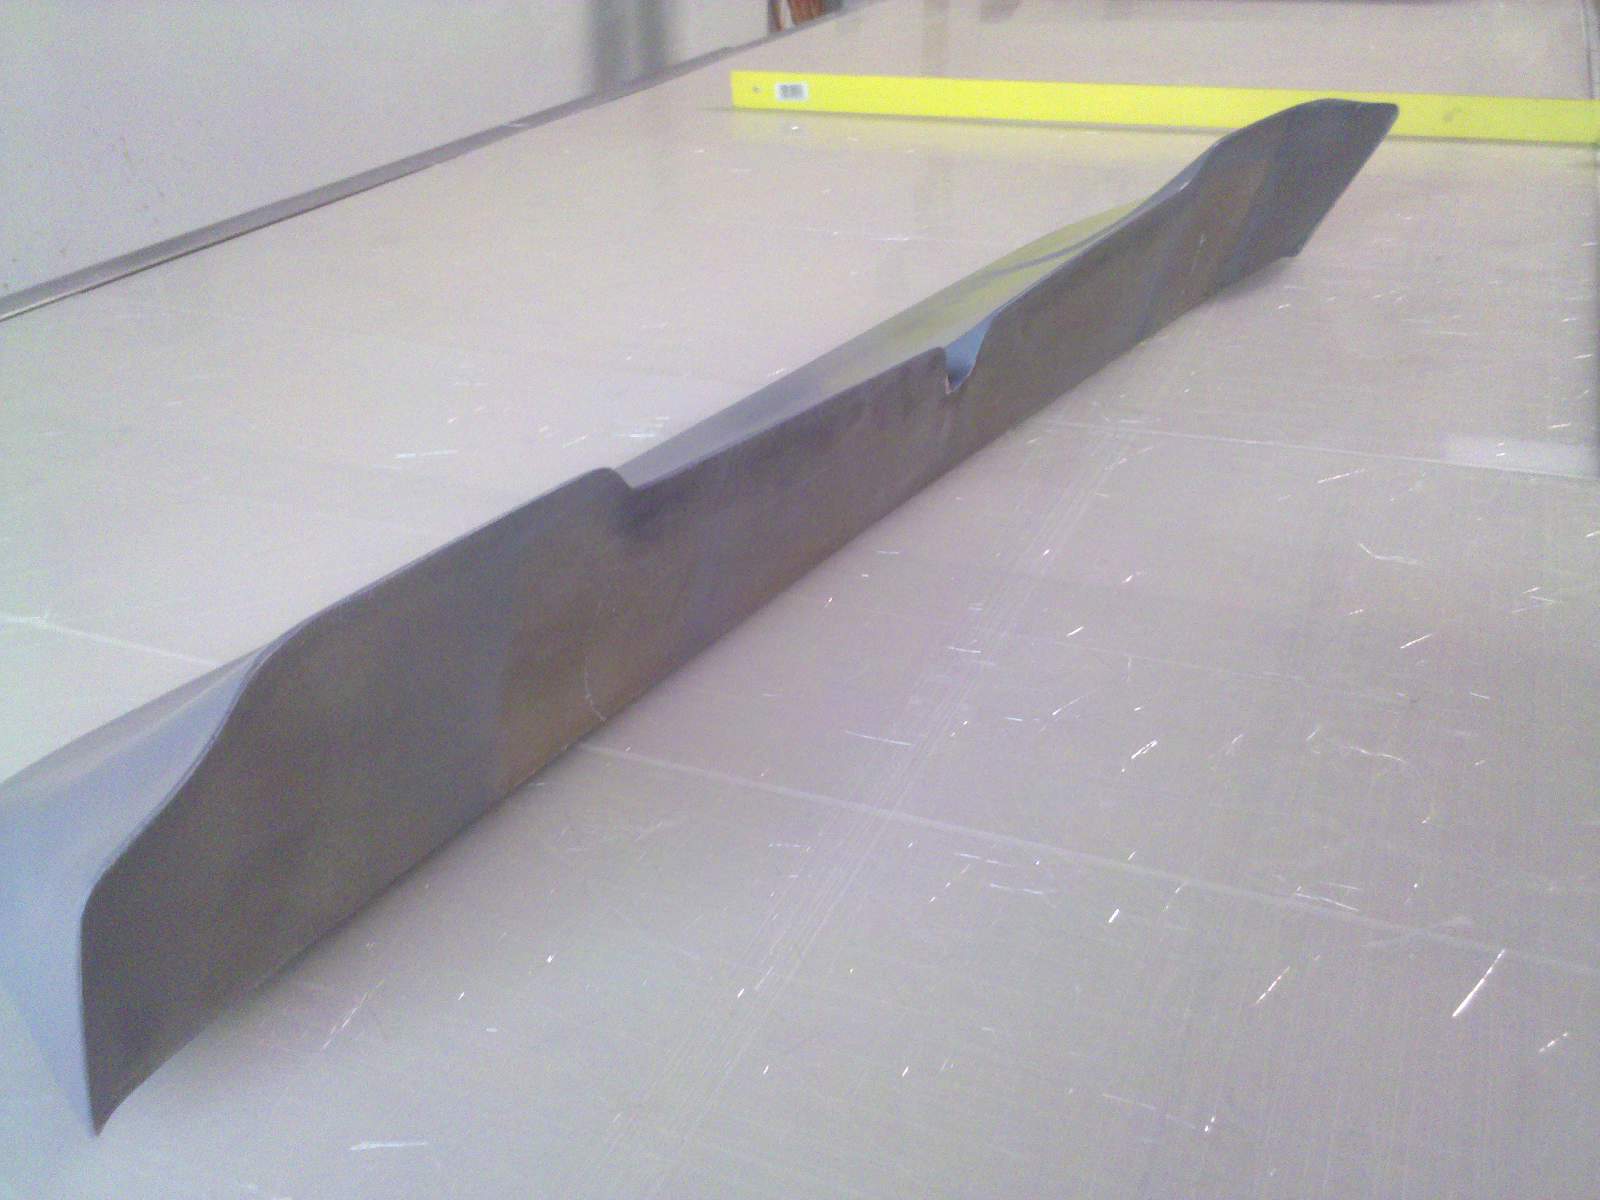
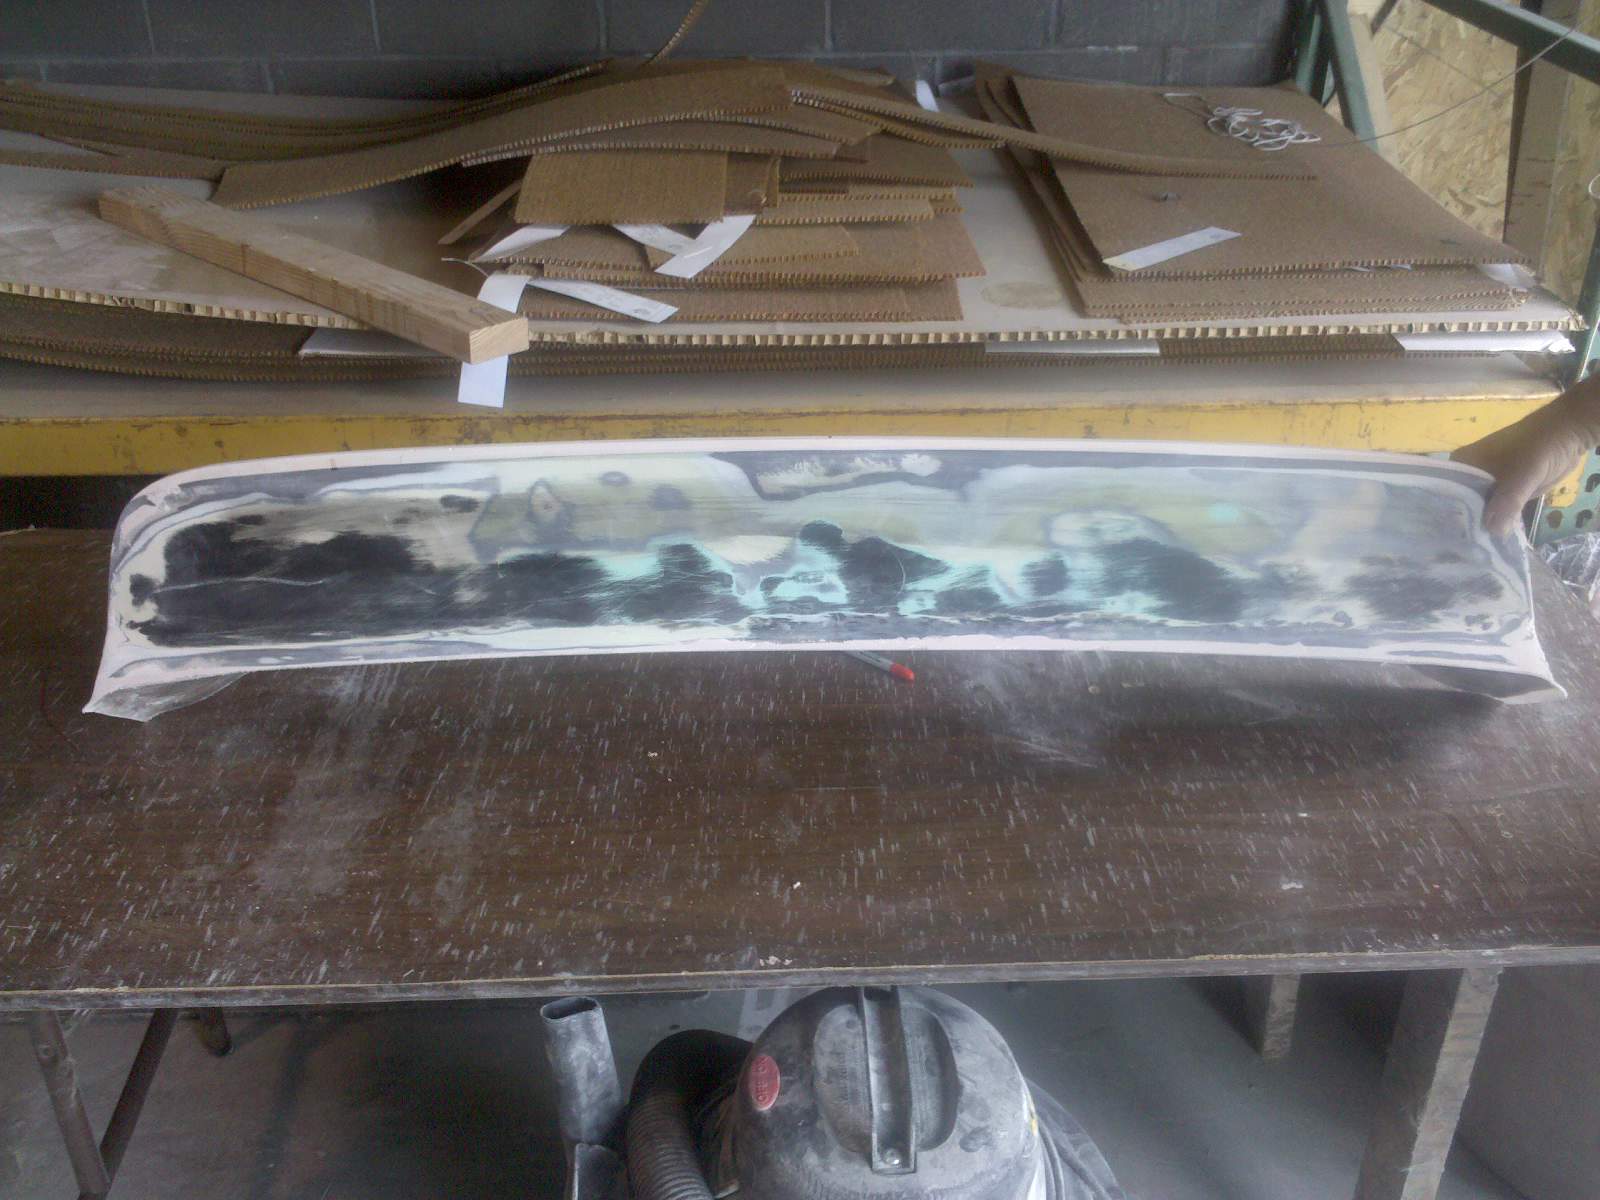
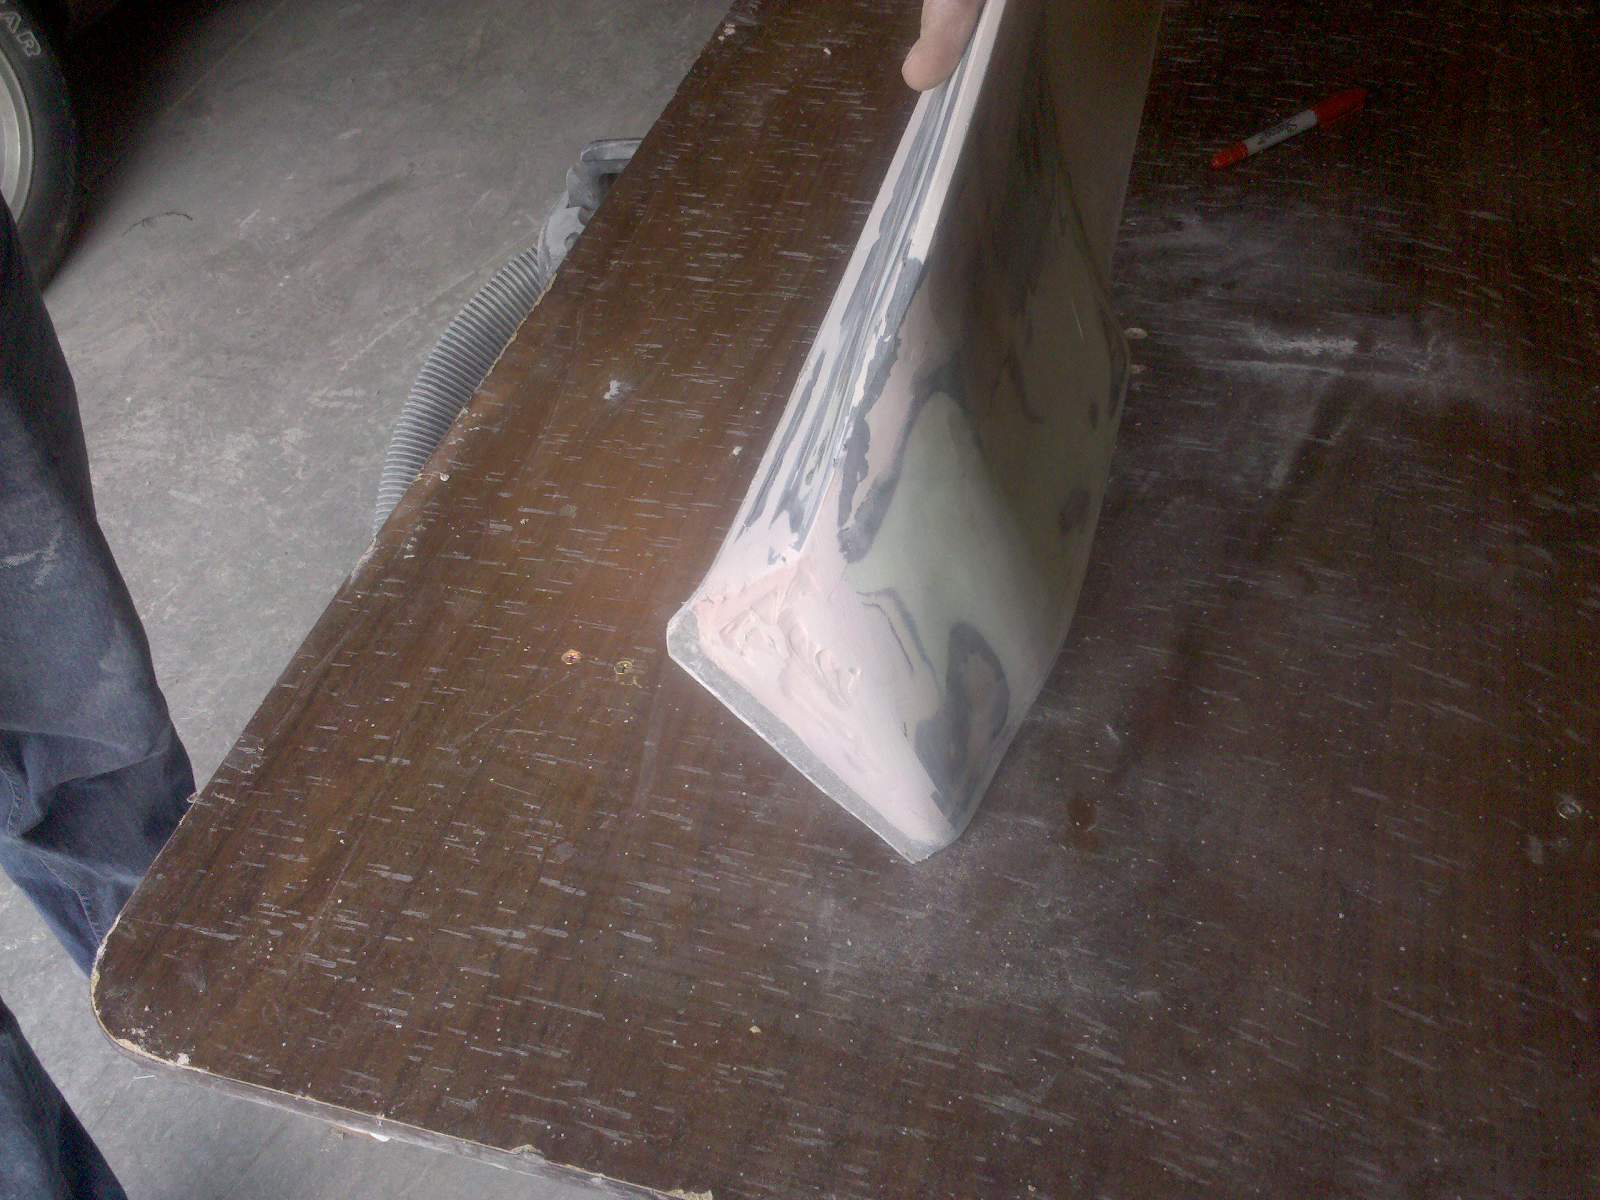
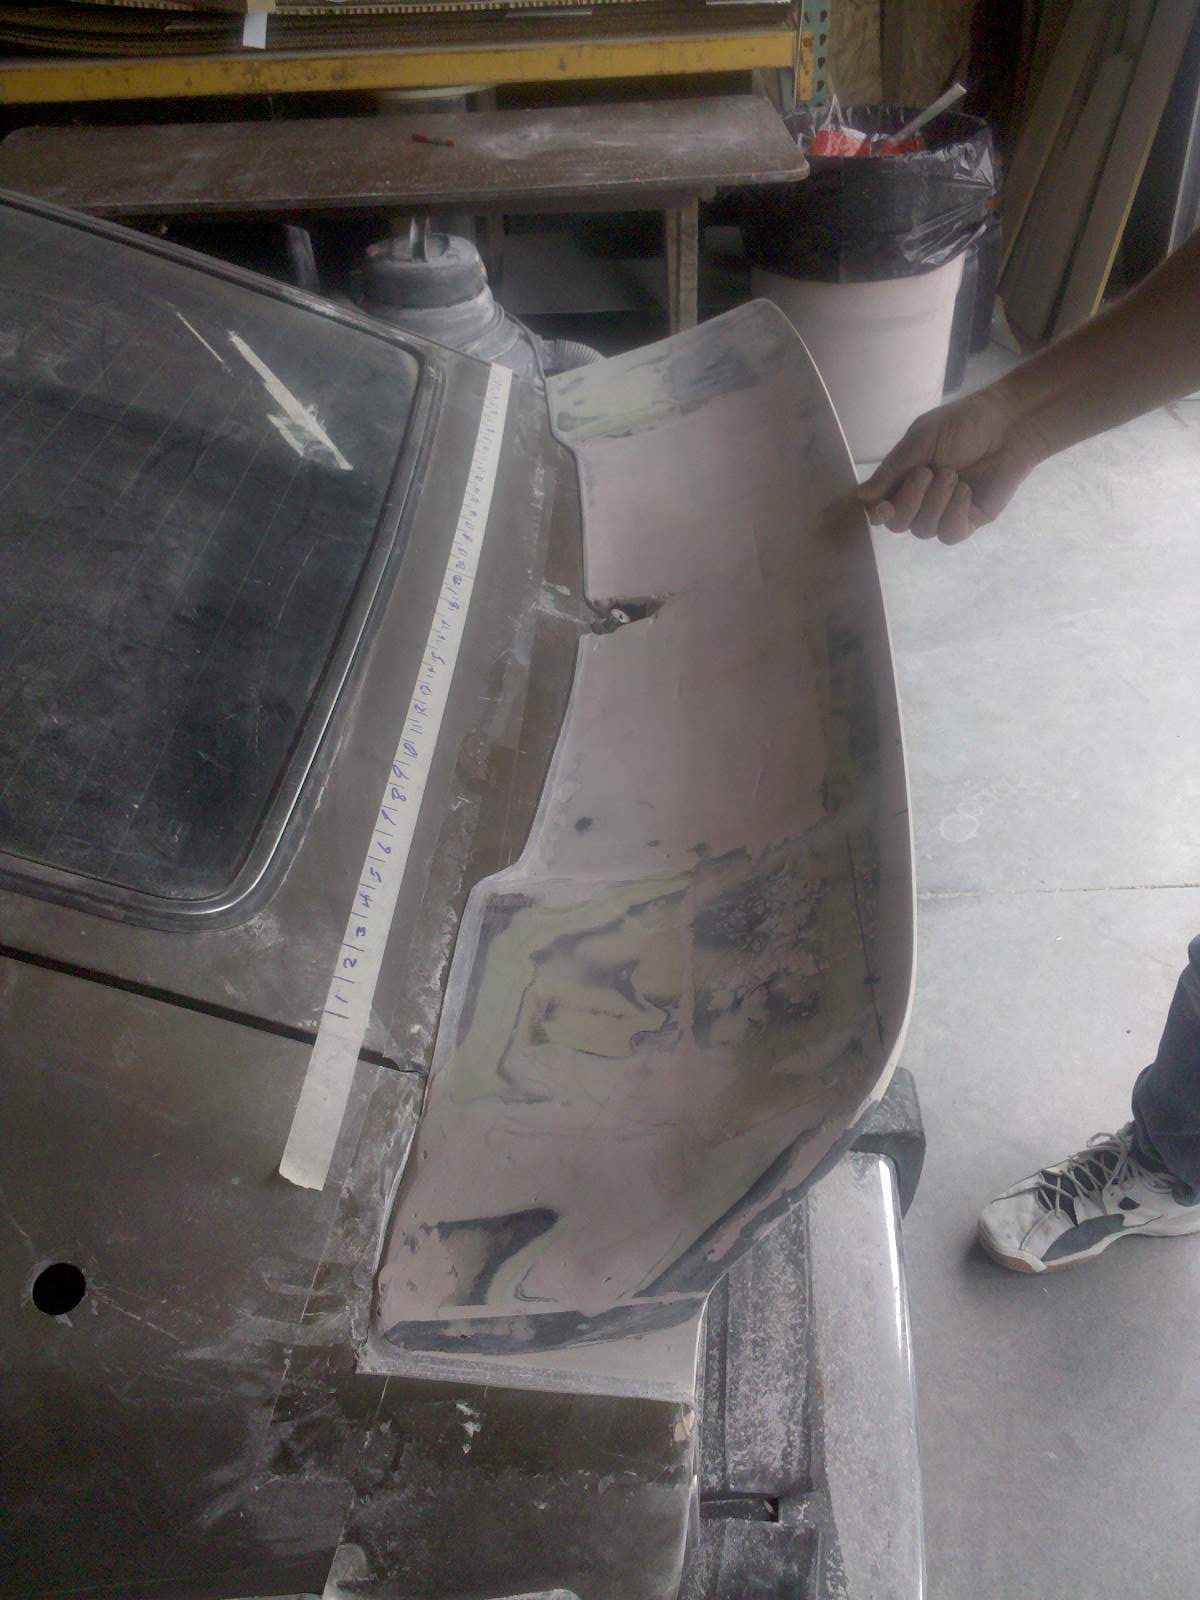
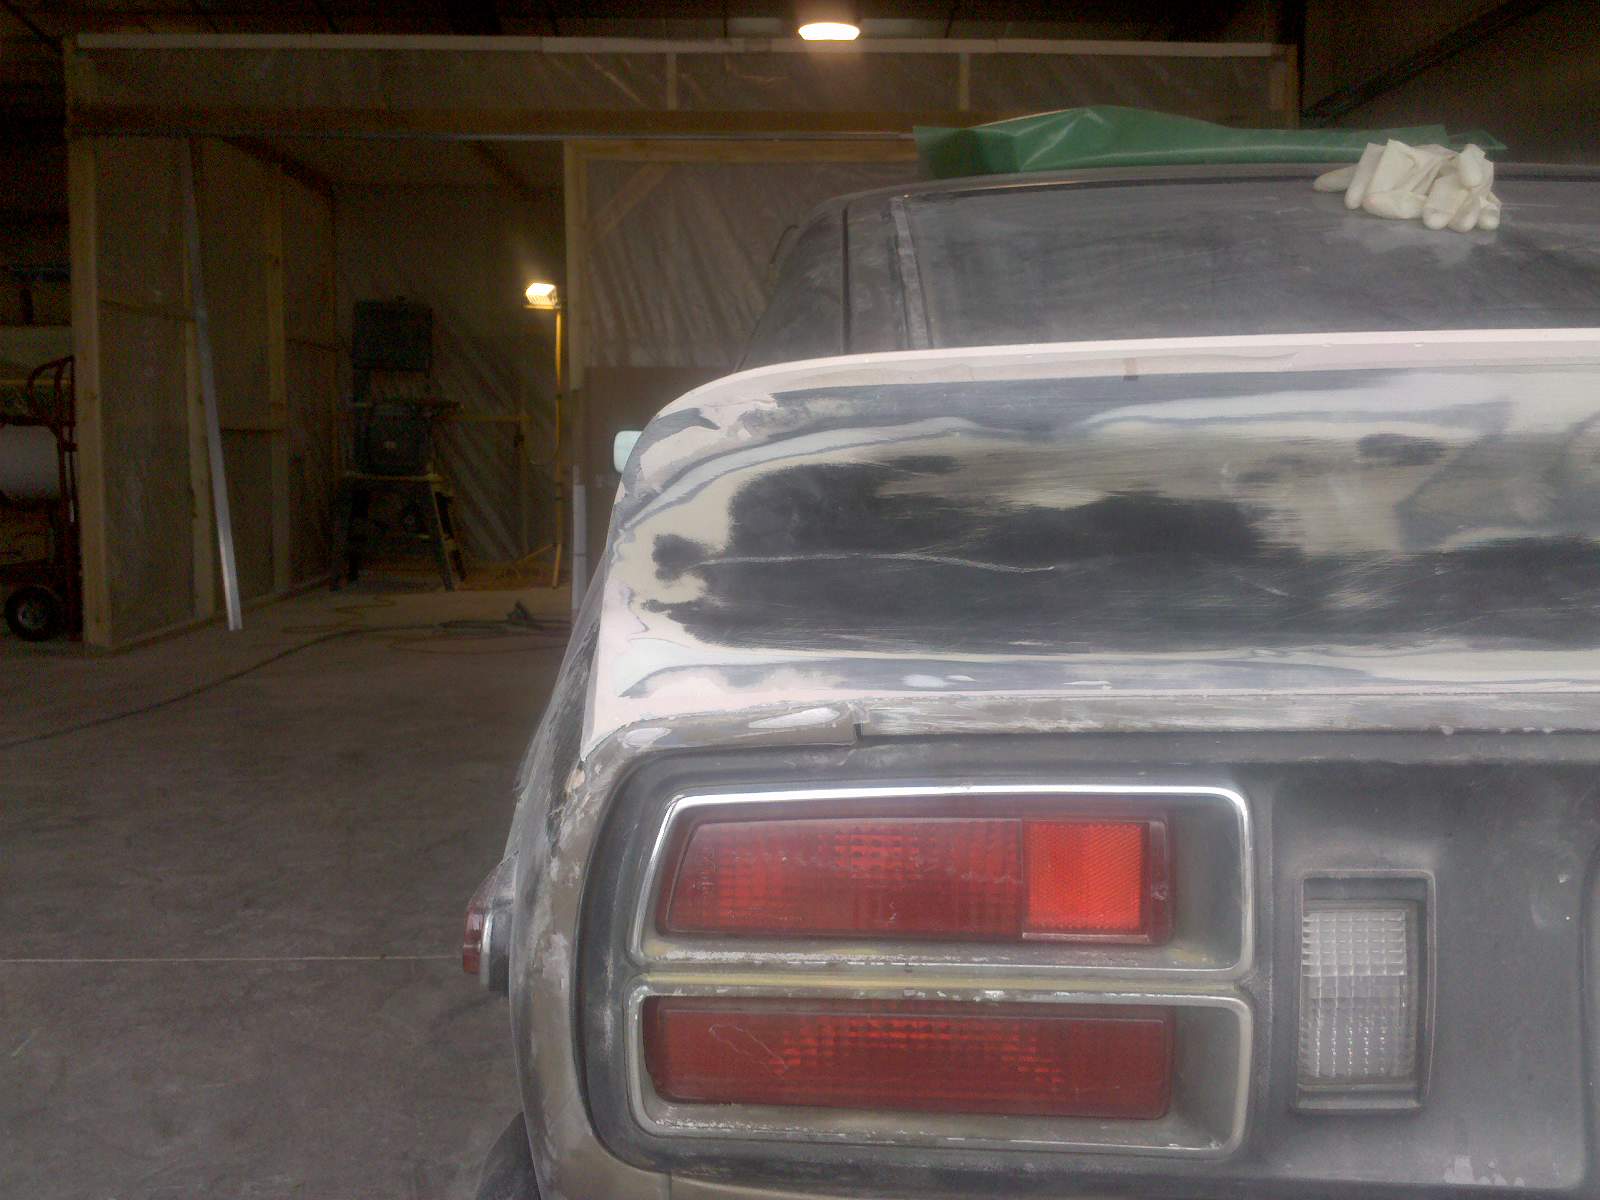
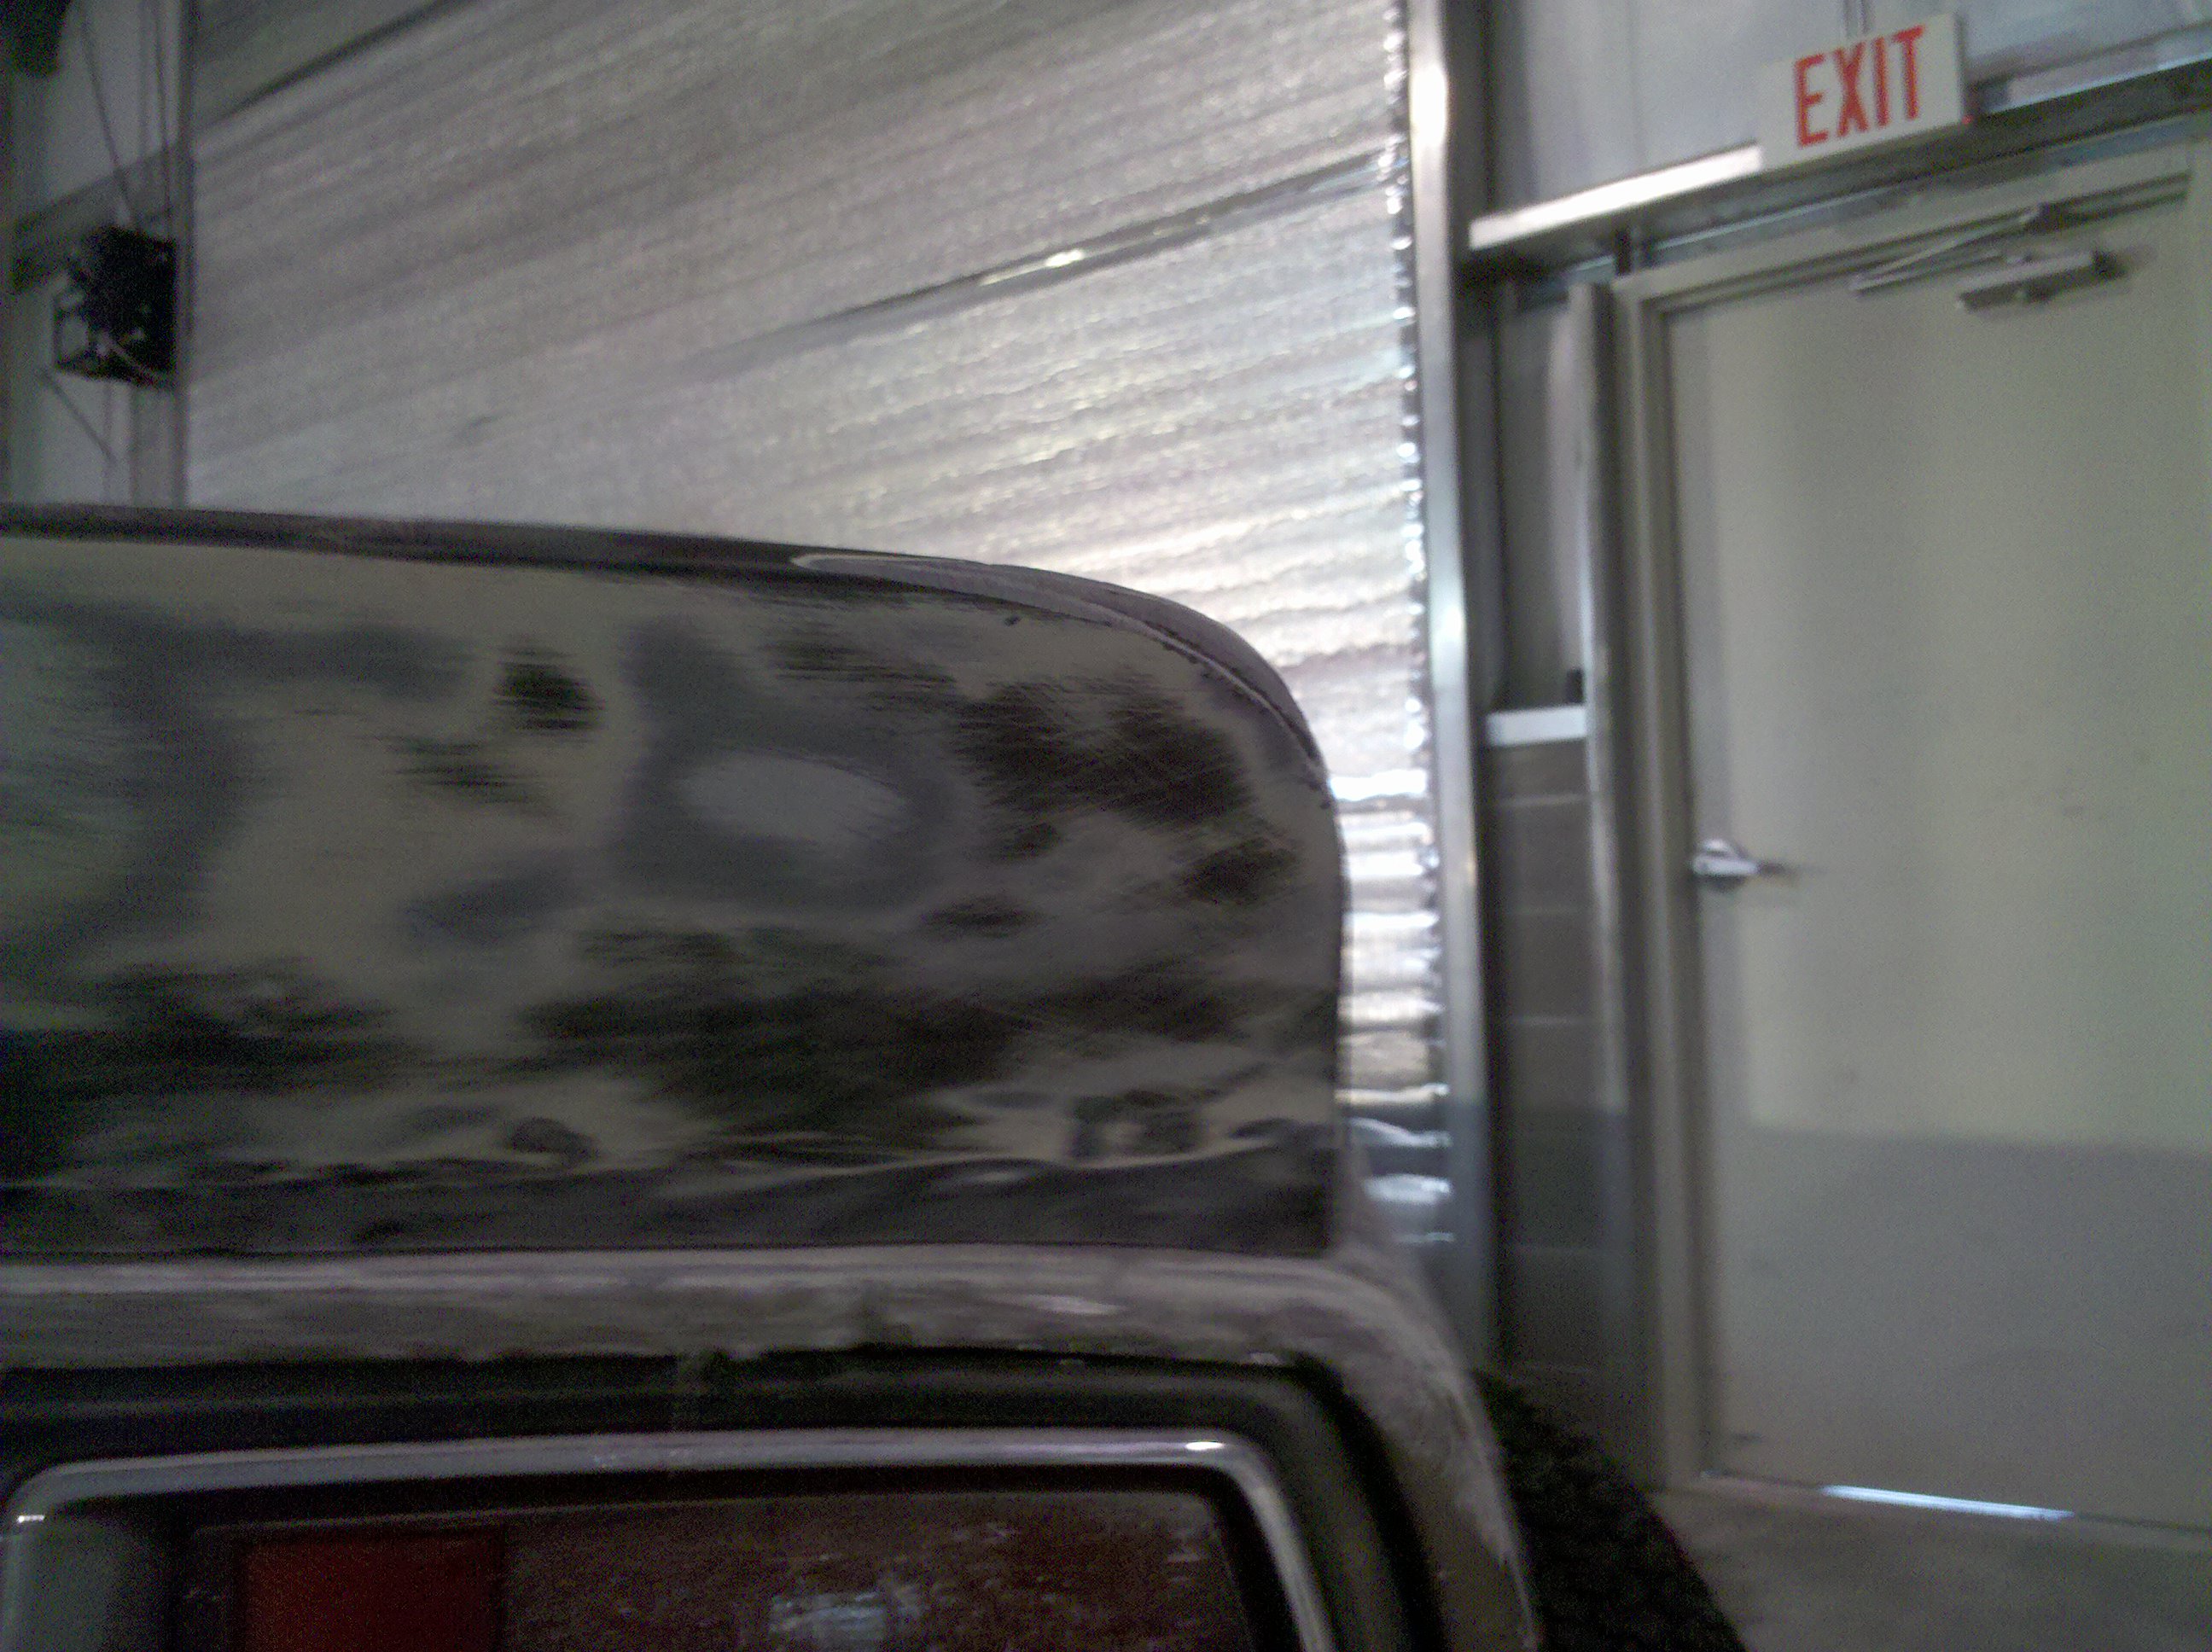
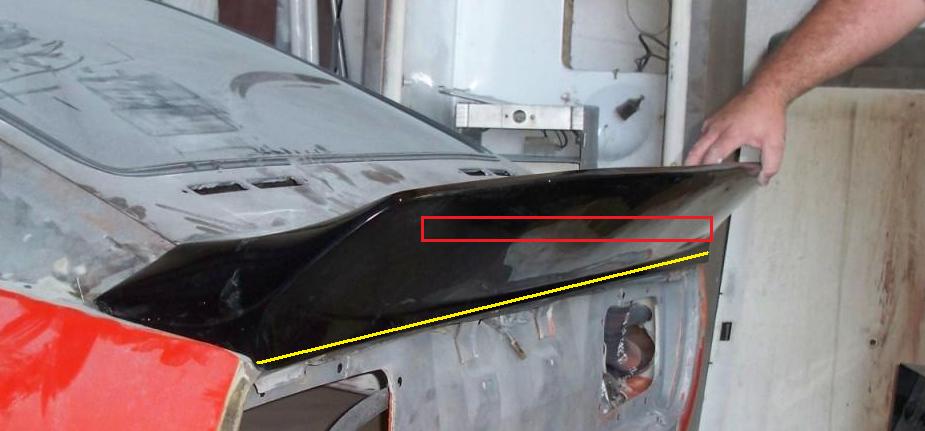
As for the commenet regarding the rear look of the tail.. "Plank". The tails rear section will be getting altered because of the mods being made. 1> ( yellow line on photo ) the lower 1/2" lip that extends down onto the edge of the hatch, that is being removed. Becasue of this, the outer edge of the lower tail will be reworked. This should eliminate some of that squired off look from that bottom side. This witht he rounded corners on top, will drasticly change things up. 2> ( red rectangle ) This whole area is being reworked because of the crapy shape *( note the waves all they way down the tail ).
-
ZCC - Custom Tail Project (Rear Spoiler)
azcarbum replied to palauoriginal's topic in Body Kits & Paint
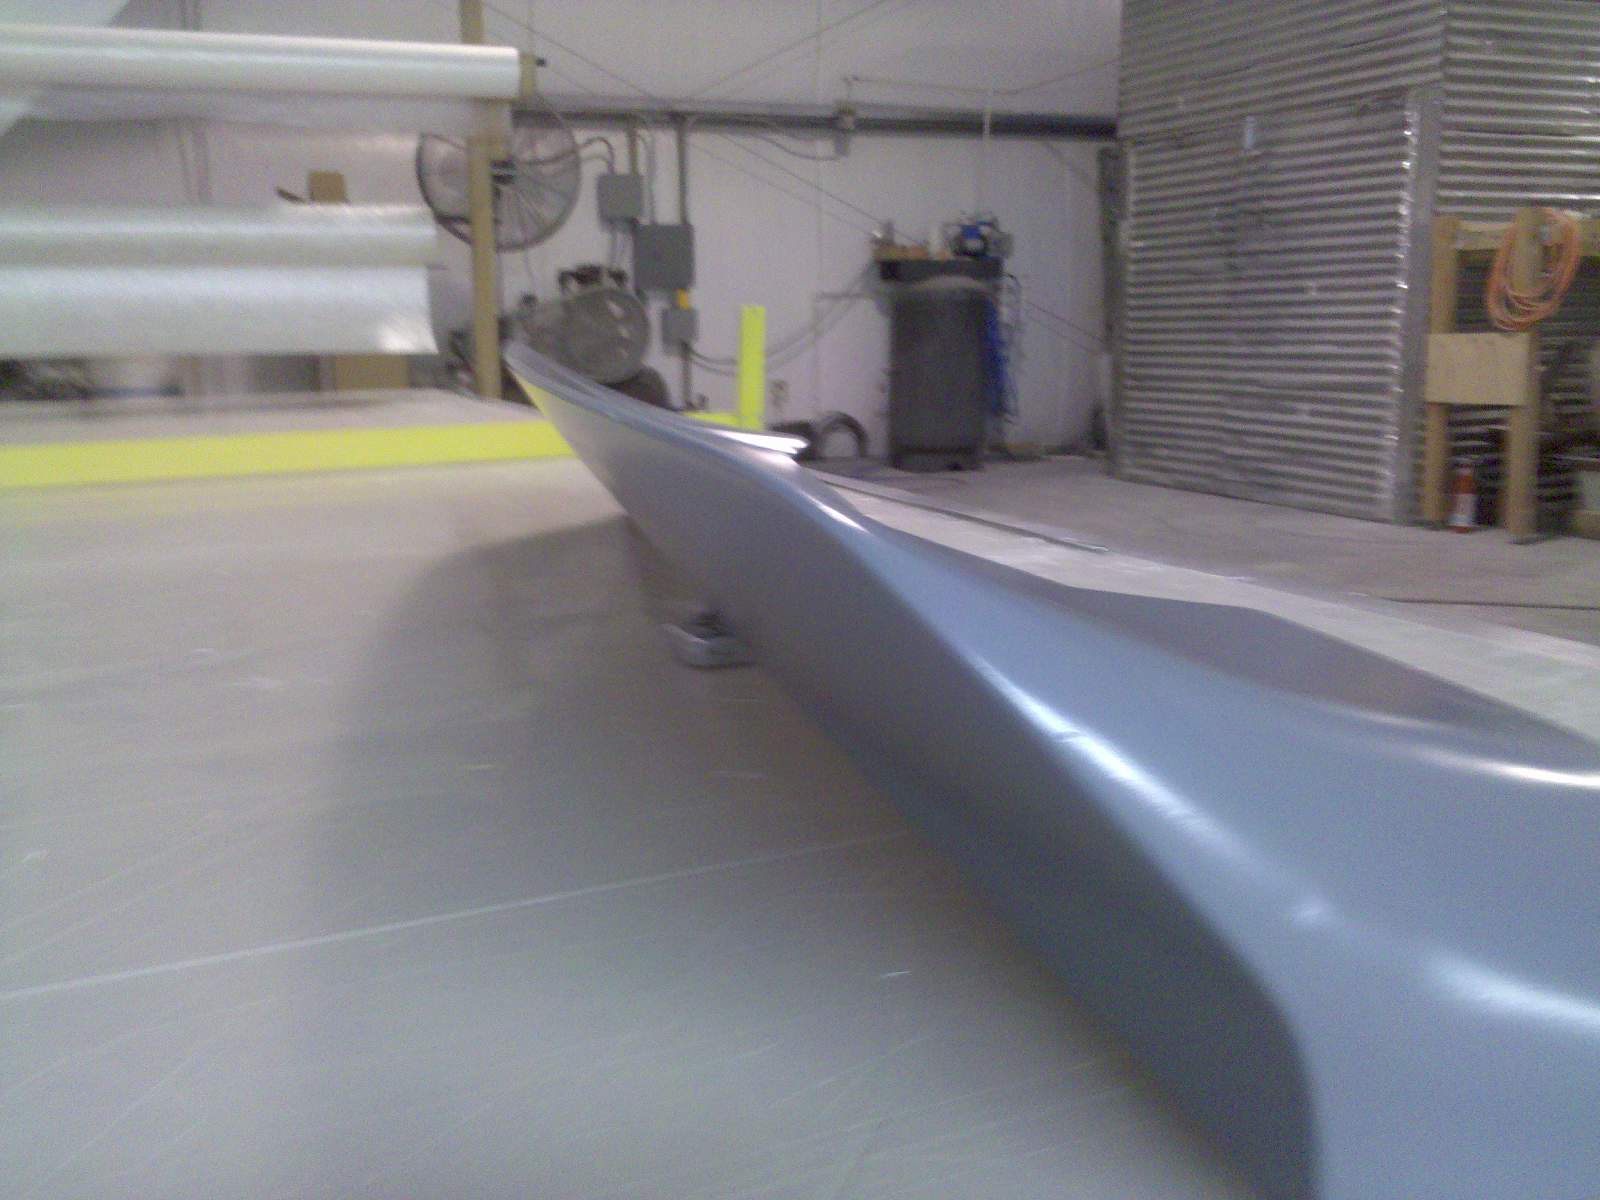
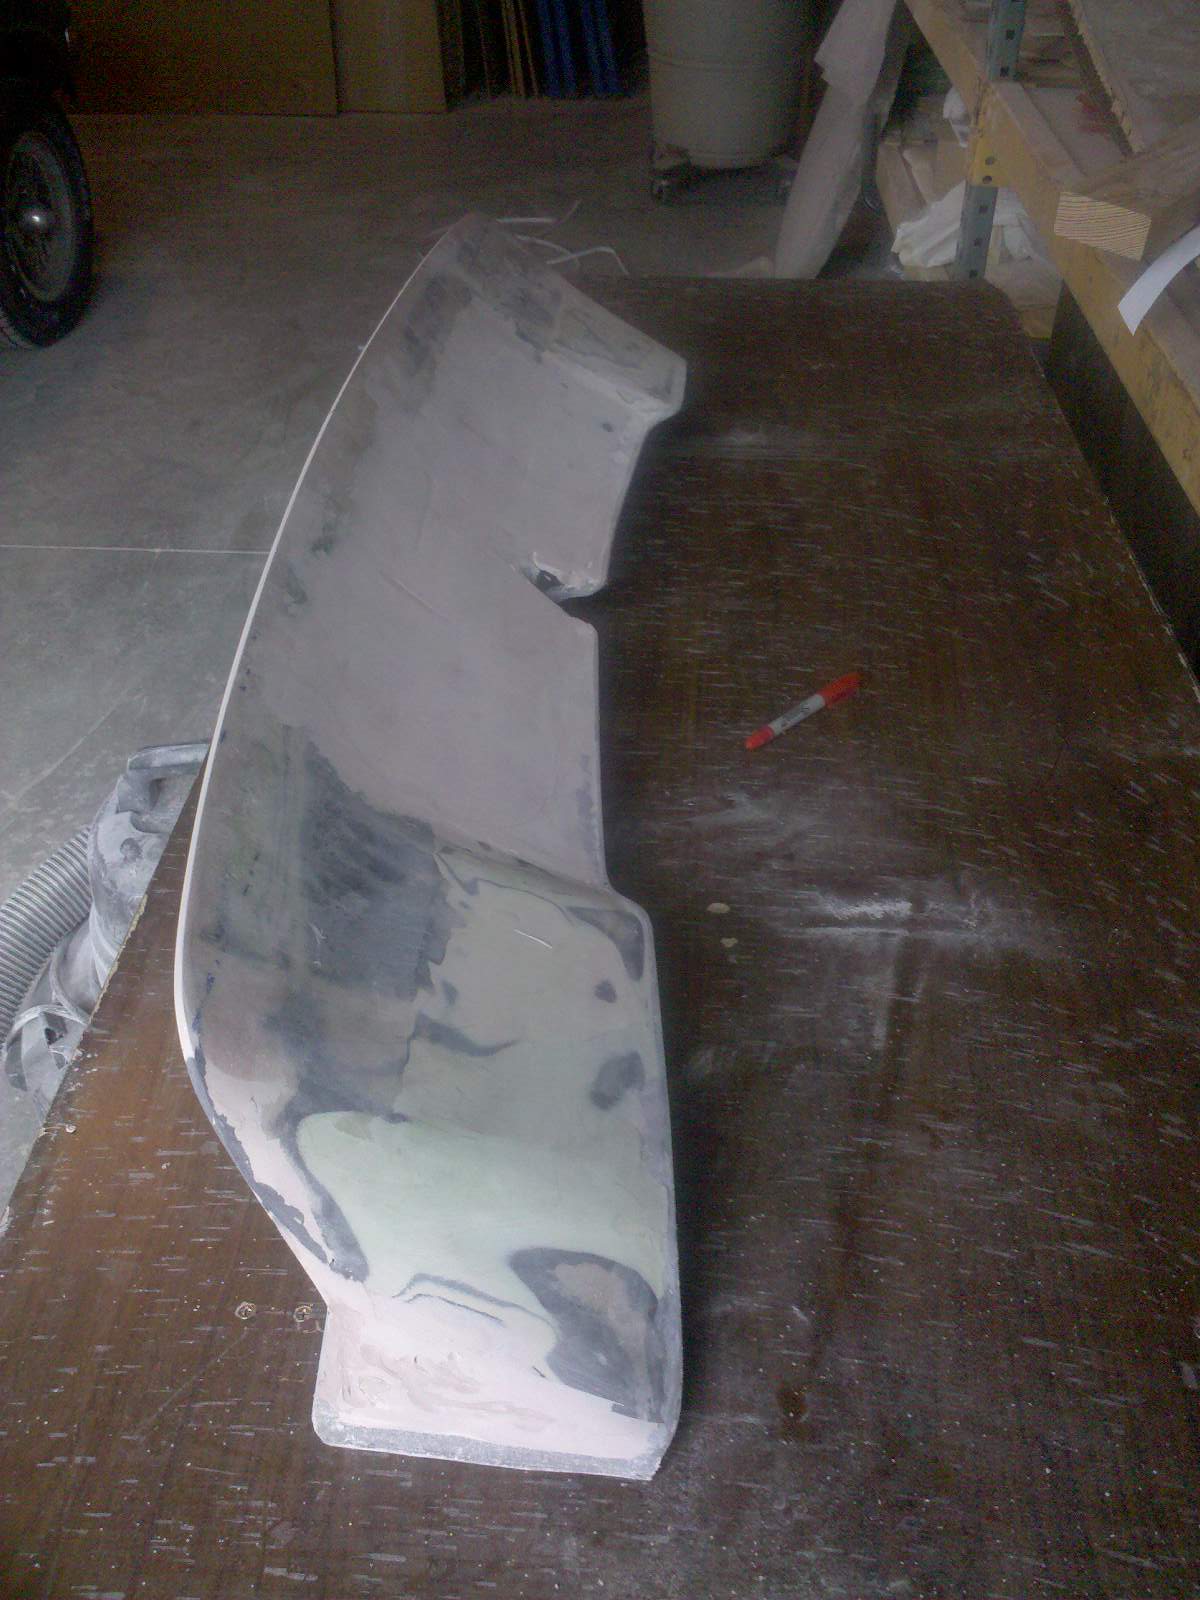
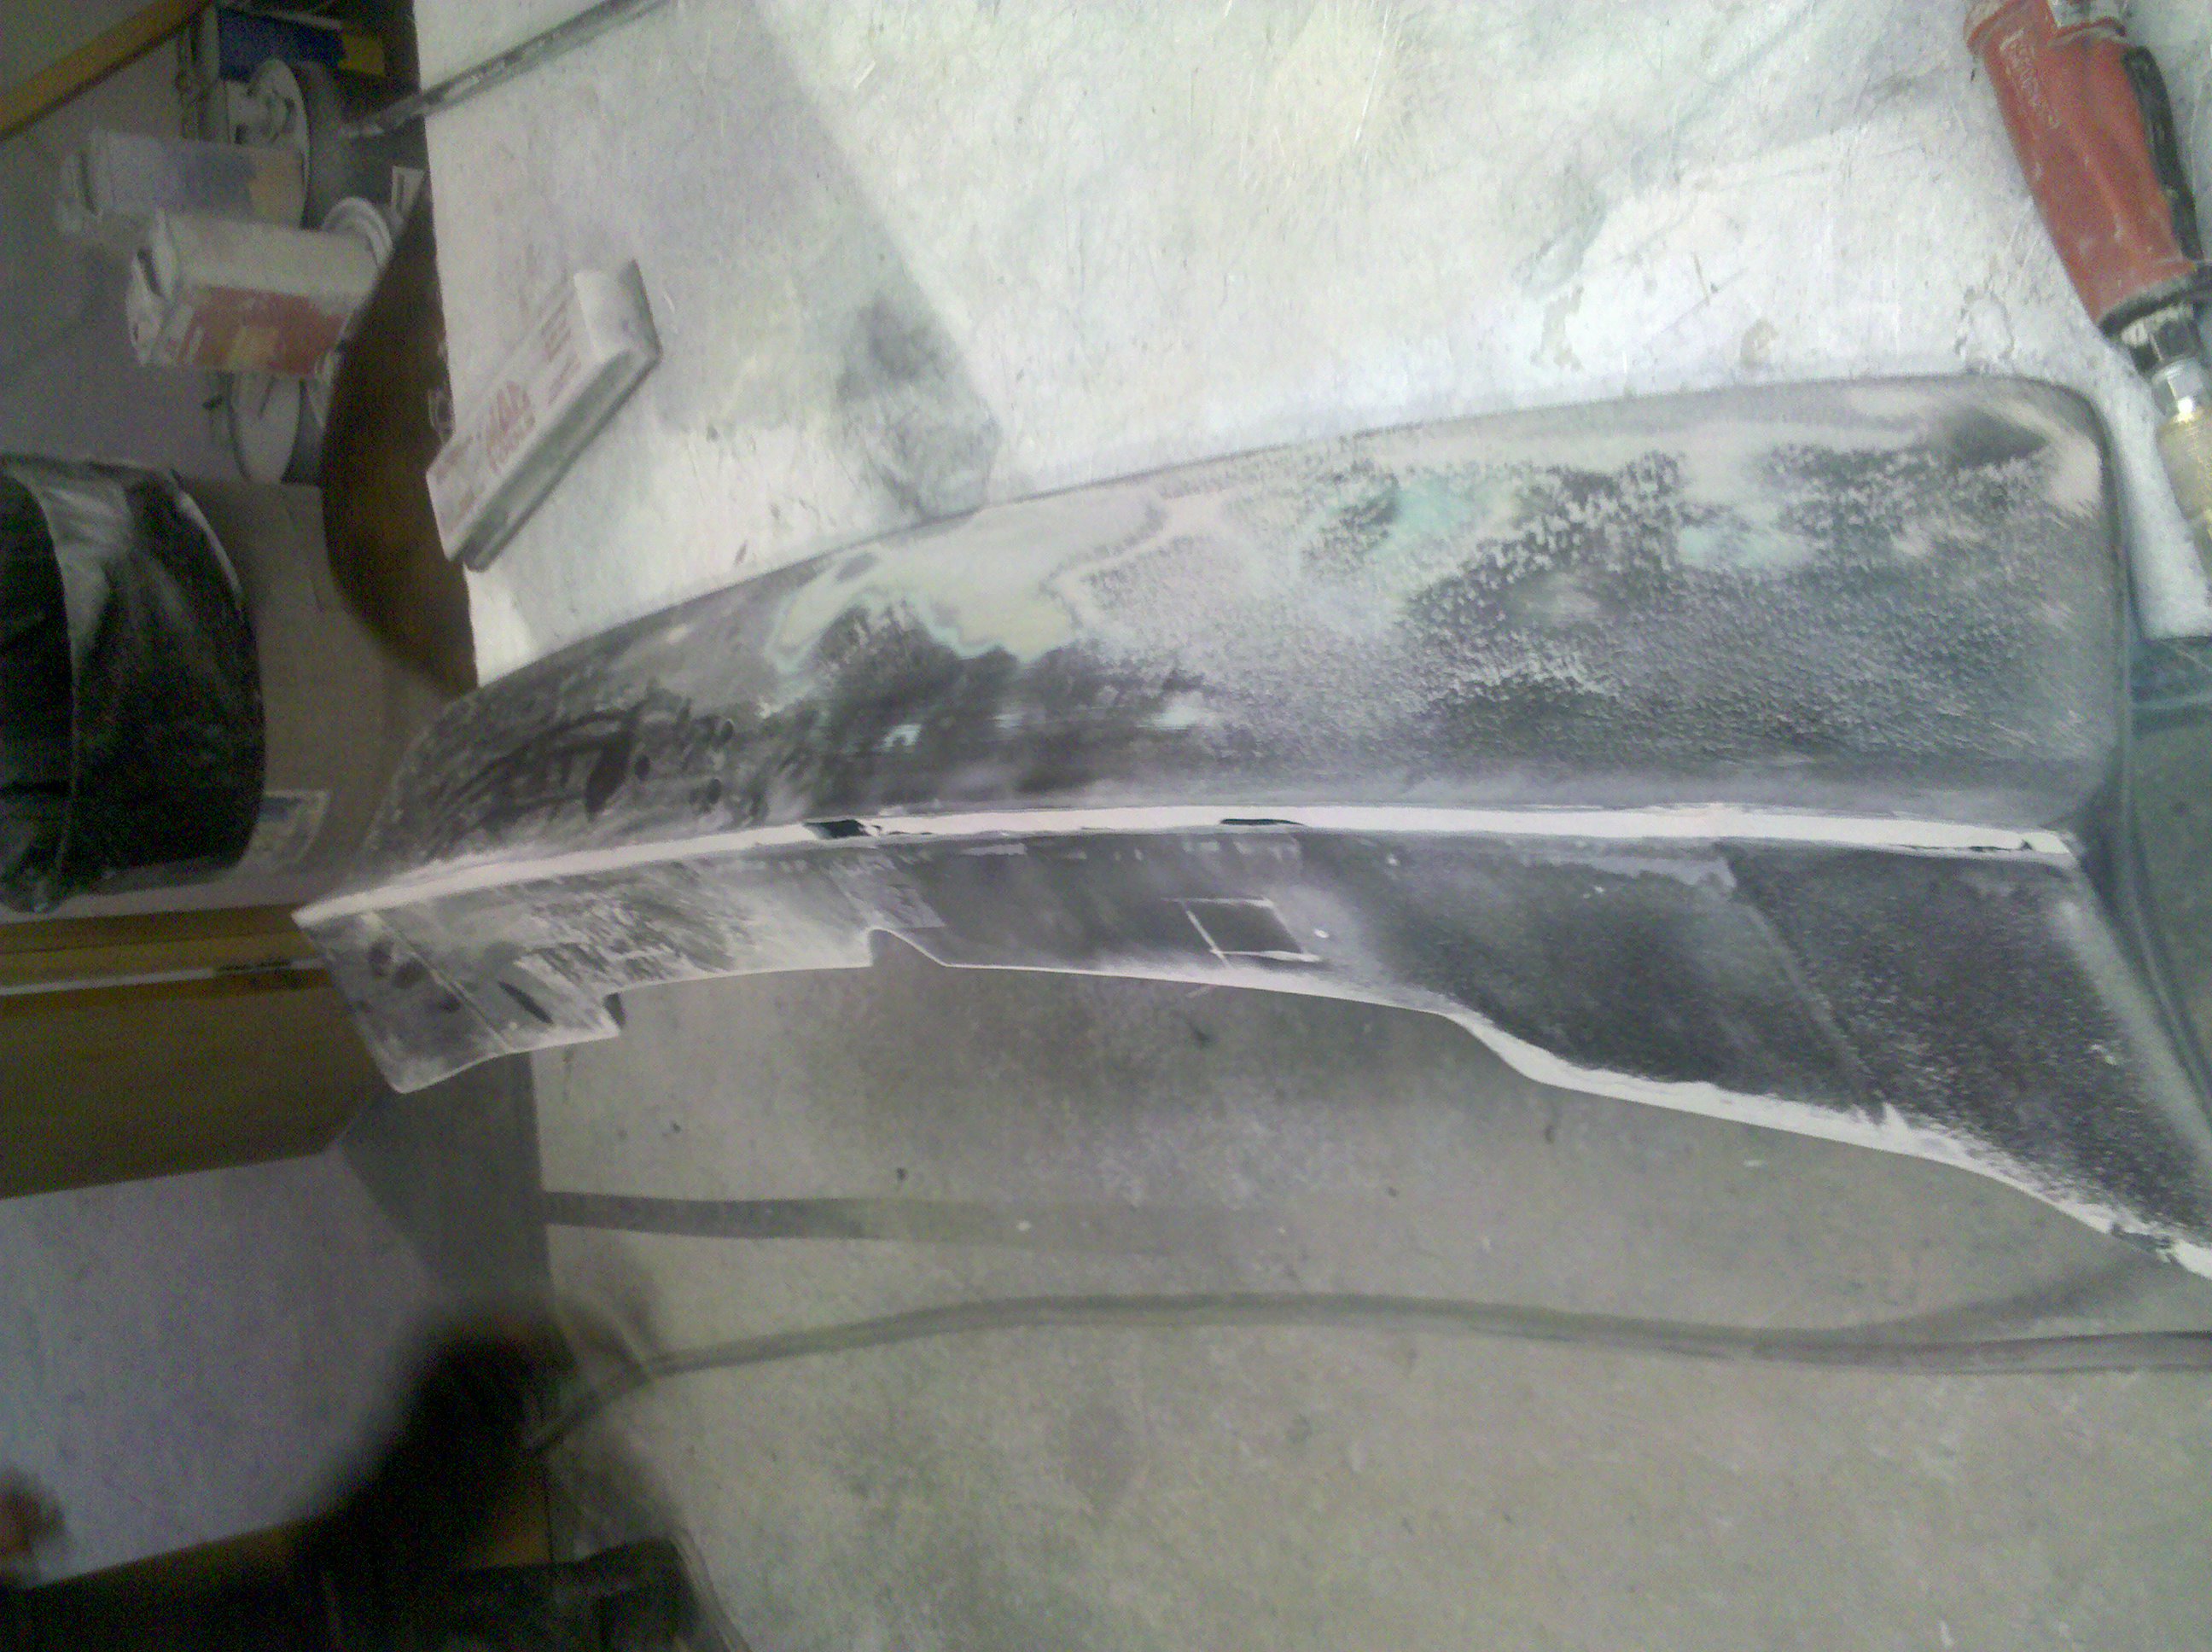
OK.. sorry, been so busy haven't been following things lately. Work on the tail is in full swing!!.... Jesse started removing the lower lip on the bottom, and is into the rounded tips. I only have this photo at this time, but will have more shortly showing the changes as they are completed. There are alot of questions about pricing, but until I have a full layup schedule completed on both FG and CF ( which wont happen until the mold is done ), I won't have a good idea of pricing. So i don't want to guess. I will tell you that the CF tail we are going to produce is going to be the best thing I can have made... NO FG in it at all!!... and shootingf for 3-4 lbs. ( thats with clear coat ) I'm excited to see the tail with the changes. It should be very special indeed.
-
ZCC - Custom Tail Project (Rear Spoiler)
azcarbum replied to palauoriginal's topic in Body Kits & Paint
Dave, Great!!......... Finally some advancement on the car. I'm sure glad to see that coming along...... It looks great!! -
My Custom 280z-JCR Supercharger Project
azcarbum replied to azcarbum's topic in S30 Series - 240z, 260z, 280z
Been doing alot of thinking about the cooling spacer.. As per the concerns of some of the members here, the height of the SC can be an issue, but even more than that, I've been questioning the IC idea because of the 7th injector. If I was to use a IC, this would mean that the system would have fuel vapor in it, and the possibility of puddling is there. The last thing I'd want would be to have my cooling system somehow ignite (BOooM!! ). I think the best bet would be to use the same spacer, but go to a water-cooling setup. Yes, it would requre a bit more in parts and setup, and yes its not as customized as the IC would be ( Darn ), but in the end I think it will do the job just good and much safer. So with this change, I can actually reduce my spacer to a thickness of 1". I will then have the ends drilled to allow for inlet/outlet line ports. The idea then will be to find someone who will weld in a runner tube w/ fins into the center cavity. I can gain some size to the cooling fins, as they can extend down into the intake some. -
Yep....that's the one...thanks for the help.
-
Who is it on this forum that sells the custom ducted hood... The one with the intake duct at the tip/center of the hood nose? I've seached, and I'm not loving the seach system on here. Any help would be much appreciated. Brian
-
My Custom 280z-JCR Supercharger Project
azcarbum replied to azcarbum's topic in S30 Series - 240z, 260z, 280z
I don't see there being enough displacement to be an issue. The total height of of the adaptor is 1.7".... because it sits at a near 45degree angle, the total offset of the SCr towards the tower will be less than that....it should be less than an inch. I will know for sure once I get it in. -
My Custom 280z-JCR Supercharger Project
azcarbum replied to azcarbum's topic in S30 Series - 240z, 260z, 280z
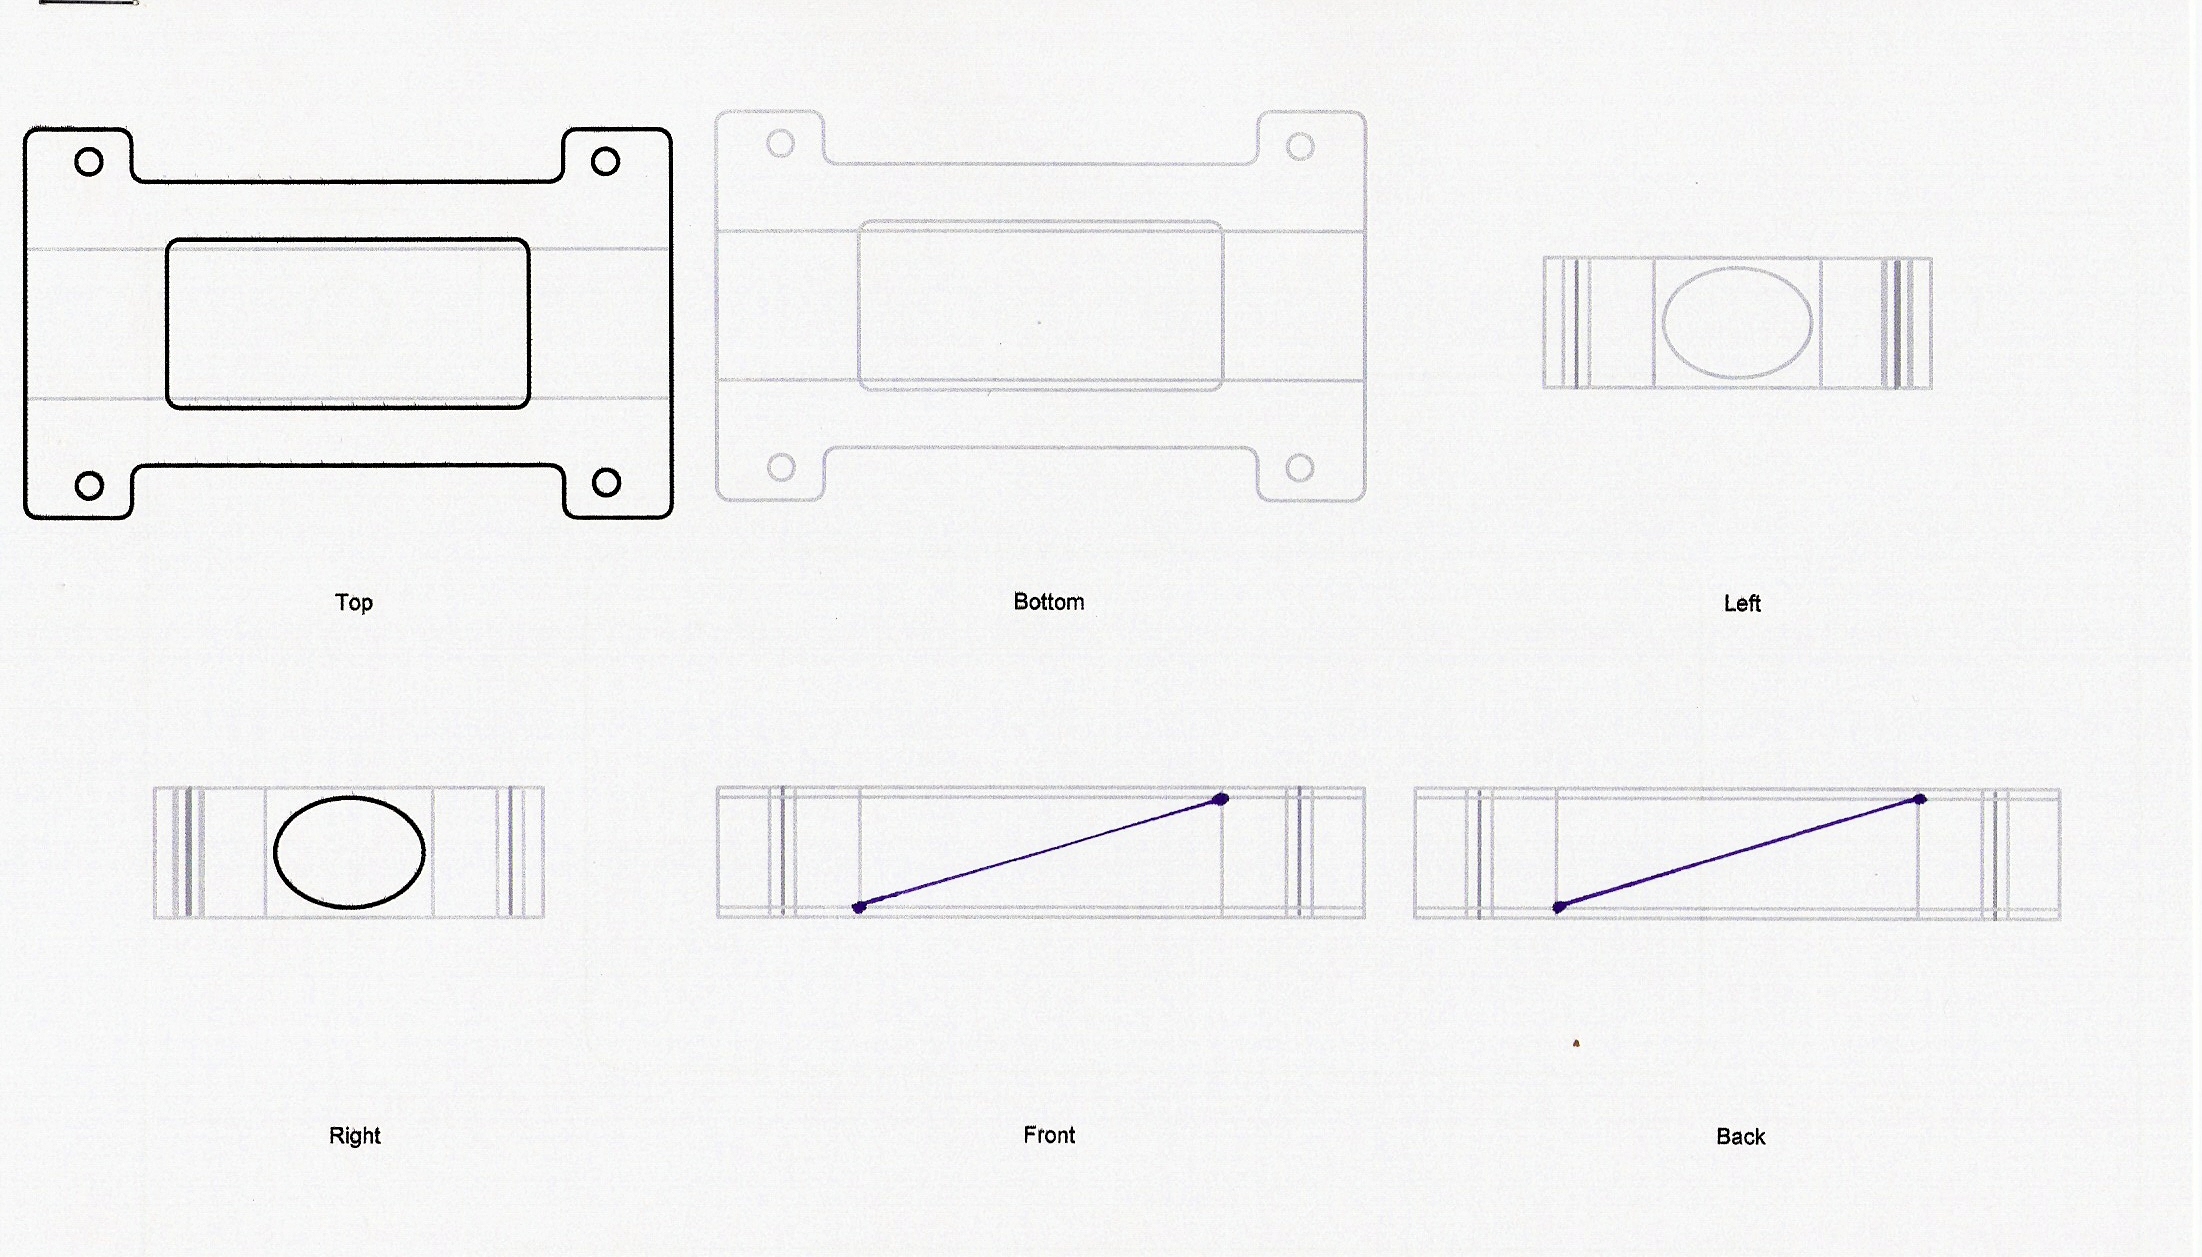
OK.... Here it is, all Cad'd up!! Camden 7" SC'r adaptor to allow "air-to-air" intercooling!!! It will add height to the SC'r, but I think thats a small trade for this "HUGE" improvement.
-
My Custom 280z-JCR Supercharger Project
azcarbum replied to azcarbum's topic in S30 Series - 240z, 260z, 280z
For simplicity, I think RTz's idea would be a great addition. Simple, direct, and would significantly bring down the intake air tempratures. I think I'll have to start taking some measurements...LOL -
My Custom 280z-JCR Supercharger Project
azcarbum replied to azcarbum's topic in S30 Series - 240z, 260z, 280z
OHHHHH buddy..... I like that idea! -
My Custom 280z-JCR Supercharger Project
azcarbum replied to azcarbum's topic in S30 Series - 240z, 260z, 280z
Na... Continueing on with current plans. Just really curious to see that, more than anything. -
My Custom 280z-JCR Supercharger Project
azcarbum replied to azcarbum's topic in S30 Series - 240z, 260z, 280z
Now as another thought... I could alway's put the SC on a custom mount, locate it on the otherside of the motor, and build a custom intercooler kit to the intake, mounting a custom Intake "hat" to the manifold...LOL Hey RTz, you up for that.. he ehe hehe hee