Rob240z
-
Posts
46 -
Joined
-
Last visited
-
Days Won
1
Content Type
Profiles
Forums
Blogs
Events
Gallery
Downloads
Store
Everything posted by Rob240z
-
This is a picture of a 944 back seat. This might be a better fit than the 911 seats. It looks like if you remove the storage cubbies this would be a very close fit. This might just become my winter project this year. I personally am not looking for a big back seat. I bought my car before I had kids and 2 seats was no problem. With two little kids, it would be nice to go to a car show or out with the family in one car every once in a while. I've done so much work to my car and really like how it has turned out. I would rather not start over with a 2+2 end end up with a car I don't like as much. That being said that dark grey 2+2 that Plata posted is the best looking one I've ever seen. If I was just starting a project now I would probably look for a 2+2 and do something similar. Porsche 944 rear seats by Rob Olejniczak, on Flickr
-
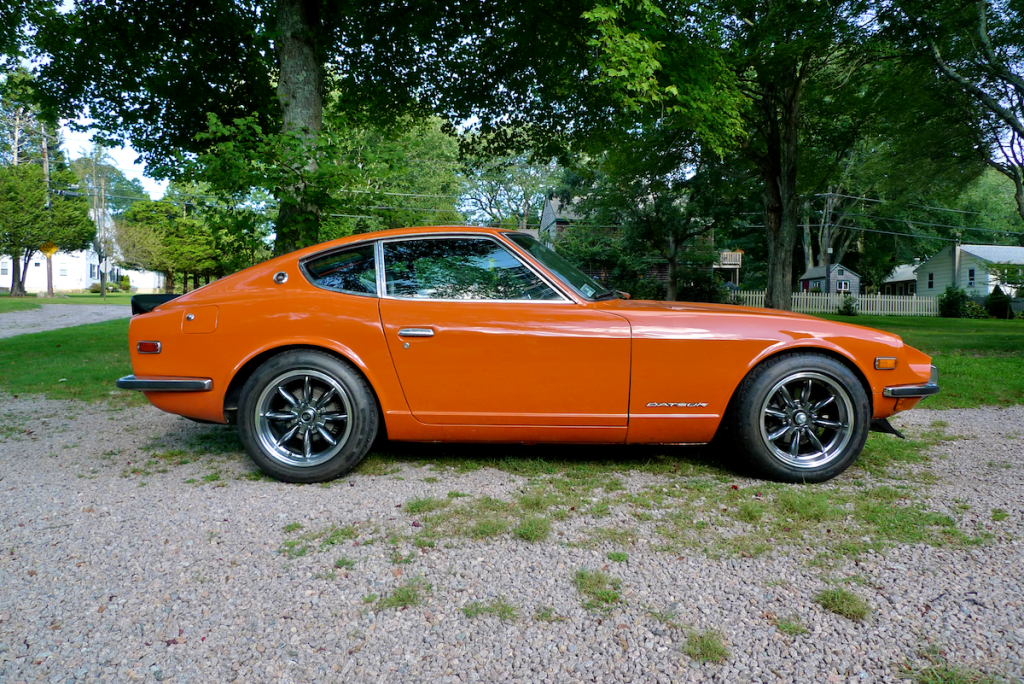
I've been considering doing this to my 240z for a while. My kids are 5 and 8 and could fit in a really small seat for a few more years. Also, I just don't like the body lines of the 2+2. I had seen the photos Plata posted in the thread earlier and it doesn't seem too hard of a project. I also think doing something like the early 911's would work pretty well too. 706282 by Rob Olejniczak, on Flickr
-
Wanted: R200, Brake Hats, Performance Clutch, Trans adaptor etc.
Rob240z replied to BurtonBrown's topic in Parts Wanted
I have a Spec stage 3+ clutch kit I'd sell for $300. It's brand new never installed. It cost $450 new. I'm not sure if it will work in your setup or not. I bought it for a 225mm flywheel L-engine build, but ended up doing a Chevy v8 swap instead. -
You most likely are right that I am mis-translating some modern car concepts. I agree that he should do what you say and use the FSM. I have a 240z with no fuel injection and have very little experience with 280z early FI. I do have a lot of experience with early FI in other cars though and I think the example I gave can help with at least understanding in general what could be causing the problem. Basically, a sensor related to temperature is probably not performing correctly and might be the source of the problem. Testing those sensors would be a good thing to do. Here is a good thread that might help. http://www.classiczcars.com/forums/fuel-injection-s30/13077-280z-running-rich-how-fix.html
-
I had the same thing happen to me once before. It wasn't easy to figure out because no engine codes were triggered. In my case the coolant sensor was giving cooler readings to the computer than it actually was. This made the computer choke the throttle body, which is what it should do until it warms up. You can check it by disconnecting the coolant sensor wire. If it's reading wrong that will allow it to run pretty much normally until you replace the coolant sensor. Sometimes it just needs to be cleaned. It would have been an easier fix if the sensor just stopped working and tripped a code. Also, if you floor the gas during startup on most fuel injected cars it actually will cut all fuel. This should help to start the car in your scenario. You plugs are probably fouled by now and should be replaced when you figure this out.
-
Clutch will not disengage: Tried everything
Rob240z replied to Ben's Z's topic in Trouble Shooting / General Engine
I wouldn't leave any wiggle on the slave rod adjustment. If there is wiggle the initial part of the movement will be to just take up that slack. I would preload it just a little bit. Maybe 1/16" preload. That 1/16' wouldn't be releasing the clutch it would just be tightening up everything before it starts to actually work. 3/4" movement doesn't seem like enough movement for the slave rod to totally disengage the clutch. Either you still have air in the system or the parts aren't matched right. A smaller master cylinder used with a larger slave will cause the slave to not move as far as the master. If you use a larger master than slave, then the slave will move more. -
PM sent about clutch. Thanks, Rob
-
What happens if you don't install retaining clips for 280zxt cv axles?
Rob240z replied to Rob240z's topic in Drivetrain
I pulled the cv axles back out today. Just as Jon suggested using a socket to push them in to the side gears that is exactly what I was doing. I had experimented with a bunch of different ways to get them in the side gears on the original differential I had taken out and nothing worked right until I tried that. I was really nervous about pushing it in past the grove and not being able to get it back out. That method worked great. I had to make the clips diameter a little smaller by squeezing it a little first. I pushed the clip in with needle nose pliers, spun it while it was in there to orient it almost correctly, and then very carefully used the socket to push it in place. The passenger side cv input shaft went in much easier than the driver side. The lower suspension arm was lined up just right to use it for leverage with a pry bar to pop in in. The driver side wasn't so easy. The suspension doesn't line up as nice. I ended up, after a lot of trial and error, rigging up a couple spring compressors to push it in using the outside of the lower suspension arm. I used the compressors as spreaders instead. It still took a lot more force than the passenger side. I think that was because I used the new clip on that side and it is a slightly thicker steal than the old one. NewZed you were right about the side seal. I only drove the car without the clips for about 2 miles and the passenger side seal was getting scuffed up pretty good. The drivers side didn't seam to have touched at all though. I have no idea why one would be damaged and the other fine. I haven't been able to drive the car just yet, but tomorrow I will and I can't wait to see how different it is. It actually seems a little quieter when I moved the wheels around while it was up on jack stands. Thanks guys! -
What happens if you don't install retaining clips for 280zxt cv axles?
Rob240z replied to Rob240z's topic in Drivetrain
The clips that hold the inner cv into the diff. -
What happens if you don't install retaining clips for 280zxt cv axles?
Rob240z replied to Rob240z's topic in Drivetrain
I wasn't even thinking about the side seals. I agree it is designed for it and I really do want to install the clips. I'm just not sure how to do it. This was my first time working on a differential. That is the reason for not putting the clips inside first. I had read that that is how it is done too. I wasn't thinking it would be this hard to get the clips in. At this point I think I'll try to get the clips in the diff while it's in the car. That is not going to be easy though. Are there any tricks to doing that? Courtesy Nissan is where I bought the new clips. I still have 2 clips. -
I recently converted my 71' 240z to r200, obx lsd, rt mount, and 280zxt cv axles. When I went to install the cv axles they would not go in with the retaining clips on them. I tried a multitude of ways to force them in while keeping them lined up with no success. The axles go right in without the clips, although it's a pretty tight fit. I was trying to install the axles with the clips on the axles. Next time I think putting the clips in the diff would be potentially easier. Even then, It doesn't seem like there is actually enough room for the clips. The clips sit proud of the splines on the shaft when it is completely set in the groove. The opposite splines in the diff would have to go right through it. I have read that you need to use a lot of force to get them in. I tried that with an 8lb sledge, and proceeded to complete demolish the clips. I was using new clips from Nissan. After smashing one of the new ones I realized that the original clips were still in the original carrier. Those clips were slightly smaller in diameter and I could see small score marks from the spines. I tried to install one of those with the same negative results. I know I must be doing something wrong, I just can't figure out what it is? I ended up putting it all together without the clips, and took it for a small test drive today. There is a loud gear whine from the diff. It happens under acceleration or deceleration, but not when there isn't a load on the rear. There also is some clunking going on too. My guess these noises are from the cv axle going further inwards than they're supposed to. Is this going to cause any damage to the diff or axles if it is driven this way until I get a chance to somehow get the clips in? Thanks, Rob
-
I wonder if I can get the head to bolt on to an L motor?
Rob240z replied to mutantZ's topic in Non Tech Board
That header is a piece of art! The one Tony posted. -
That looks like the one! I don't have your address anymore. Could you send me a pm with it? I still have your paypal info it is the same? Let me know how much shipping is. Here are a couple of pictures of the one I will be sending you. Wow, these are very hard to remove from the diff! If everything sounds good I'll send it out tomorrow. Thanks, IMG_2809 by Rob Olejniczak, on Flickr IMG_2811 by Rob Olejniczak, on Flickr
-
Sounds great, thanks a lot! I'm 99% sure it is from a 280zxt. That is what the guy I bought it from told me. I bought a T-5 with the drive shaft from him too and the drive shaft hooks up to it. I'm not going to be using the T-5 anymore though. I'm sure I'll be listing it for sale at some point as I don't need it anymore. This is the second time you have helped me out with a part I needed. I really appreciate it. Thanks again!
-
I could give you the one I have. It is the middle one in the picture above. It is from a 280zxt. If that sounds good, how much do you want for it? Thanks,
-
I'm trying to swap a 280zx r200 in my 240z. The pinion flange on the diff is not the size I need. I already have a driveshaft that I would like to use. I need the DAT-110 with 2.75 bolt circle. In the picture below it is the one on the left. I need the bolt too. Thanks, Rob diff-flanges-2168 by Rob Olejniczak, on Flickr
-
16x8 +15 offset on a 280Z?
Rob240z replied to michael wales's topic in Brakes, Wheels, Suspension and Chassis
The eBay listing says they require 5 mm spacers for a 280z. The rim might fit without hitting, but you would need to run pretty narrow tires on an 8" rim without the tire hitting the spring. -
Seems like your on the right track as it sounds like it could be a timing issue? Have you adjusted the valves?
-
What valve covers are these. They are beautiful!
-
When I was planning to build my engine I did a ton of research online. It was tough to find any concrete answers and/or equations to use in my calculations. I'm using a supercharger instead of a turbo, but figuring it out is very similar. I read Corky Bells books, Maximum Boost & Supercharged, as well as all the other books I could find about boost and engine building. As a baseline Corky Bell assumes that detonation occurs when combustion temperatures exceed about 1075 degrees. You do everything you can to not exceed it. I created a spreadsheet with all his equations to build an engine for my goals in theory. I understood that using all his equations isn't going to lead to exact real world results, but I figured it was better than slapping a bunch of random parts together and experimenting blindly. What I did was pick a horsepower goal I wanted to achieve and work backwards from there. Practically everything is done to reduce heat. I didn't care how many psi I could run, I wanted the engine to flow enough to reach my horsepower goal. I better flowing engine will make the same horsepower with less boost than an engine that doesn't flow as well. For a supercharger you need to size it using it's compressor map to match your engine and goals so it will be operating as close to the most efficient area of the map as possible. I think turbo's are the same, but I'm not 100% sure. What I would suggest you do: Read "Maximum Boost" by Corky Bell and plug in your engine components into his equations. That would give you an educated guess. Then when you take it to the dyno, the tuner should be able to get as much as possible out of it safely. Hopefully, the power will peak before you experience any detonation.
-
I doubt any of the guys that know what they're talking about on this forum will answer this question. It would be a total guess. What compression ratio and gas you are running is going to be a big factor. Every motor is a little different and the only way to know is tune it on a dyno. Maybe someone can give a hypothetical guess with some more info and has a very similar setup. Rob
-
Tri-Y header fab. The really hard way.
Rob240z replied to peej410's topic in Gen I & II Chevy V8 Tech Board
I love it. Awesome job. Making my headers in on my bucket list. I'm learning to tig weld currently and it's fun. When I feel like I'm proficient enough I'll tackle something like you're doing. I can't wait to see yours all welded up. Rob -
Eibach lowering springs uneven ride height?
Rob240z replied to 415DZ's topic in Brakes, Wheels, Suspension and Chassis
I'd go with these on 15" rims. Toyo R888 http://www.tirerack.com/tires/TireSearchResults.jsp?skipOver=true&width=235%2F&ratio=50&diameter=15 I originally wanted to get the Rota RKR's in 15" when I bought rims and tires. The the RKR's kept getting delayed so I went with the RBR's in 16x8". I would have bought the R888's if I could have bought the RKR's. -
Eibach lowering springs uneven ride height?
Rob240z replied to 415DZ's topic in Brakes, Wheels, Suspension and Chassis
I agree with John C, you car looks good as is. It doesn't sit the way mine did before I changed the springs. My car was extremely nose up. I thought my original rear springs were sagging and something was wrong and my reason for new springs. I really like the shakotans on your car too. What size tire is mounted on them? The diameter looks smaller than stock. My car has 225/50/16's. I think if the overall diameter of your current tire is smaller you could just get a bigger tire and it would fill the gap some. 225/50/16's have a diameter of 24.9", which is really close to the original diameter. For 15's I would look for 225/55/15 (24.8), 245/50/15 (24.8), 215/60/15 (25.2) or 235/50/15 (24.2). -
Eibach lowering springs uneven ride height?
Rob240z replied to 415DZ's topic in Brakes, Wheels, Suspension and Chassis
I installed the eibach pro spring kit on my 240. I had read all the threads about installing them incorrectly with the fronts in back etc. After installing them correctly the front definitely was sitting higher. I took them out and reversed them to see if it was my fault. It was worse. I put them back and then measured the difference in the wheel to wheel-well gaps. It was about 1 1/4" bigger in the front on my car. I installed the progressive portion of the springs up. When it was sitting the top 3 progressive coils were completely compressed. I know people say that you shouldn't cut progressive springs, but seeing as they were completely compressed I cut the top 2 dead coils off one at a time. My thought was that a normal ride height they would just act as a spacer. Cutting the springs was easy with a cut off wheel. The ride height is even now. Here is a picture after cutting the springs. Rob