-
Posts
174 -
Joined
-
Last visited
-
Days Won
1
Content Type
Profiles
Forums
Blogs
Events
Gallery
Downloads
Store
Everything posted by ttodhunter
-
I just added a Right Said Fred shirt to my Christmas wishlist.
-
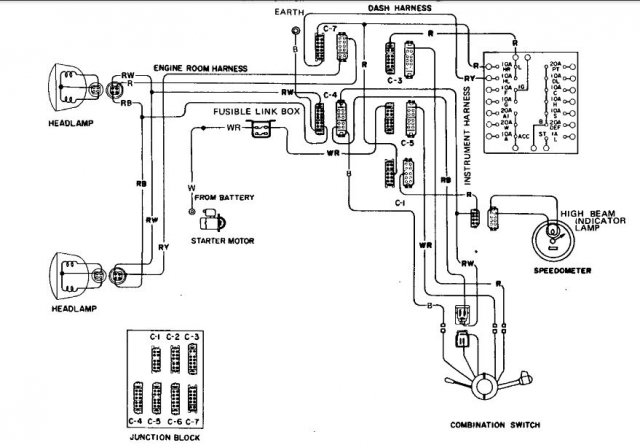
I'm still pretty green at electrics... From my rookie observations, it seems the dimmer switches ground between low/high, but the headlight switch supplies power to the system? On the actual switch itself, there are the power supplied from the fusible, the power out to the fuse box, and the two small green wires. The big black ground is not connected to the headlight switch, but to the dimmer assembly. This is (I think) what Leon was saying, right? Diagram for reference...
-

Alternative AFM boot replacement
ttodhunter replied to ttodhunter's topic in S30 Series - 240z, 260z, 280z
Well, crap. Thanks for pointing that out, now I've got some thinking to do... The idle was crappy which is why I thought there was an intake leak before. When I replaced this, the problem didn't go away so I assumed it was something else. Now, knowing that there's still a vacuum leak makes sense... -

Alternative AFM boot replacement
ttodhunter replied to ttodhunter's topic in S30 Series - 240z, 260z, 280z
Ok, pic size has been reduced. I had no idea they would hold resolution on a big screen TV! Blu, I love your sig. NewZed, I've been driving it for a few days and it's probably more like 20hp. -
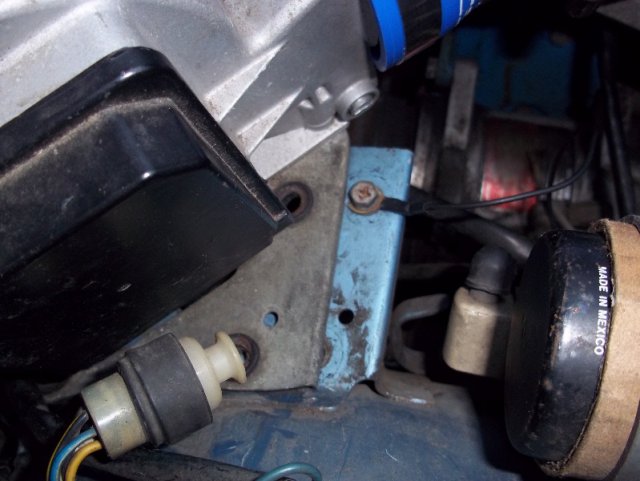
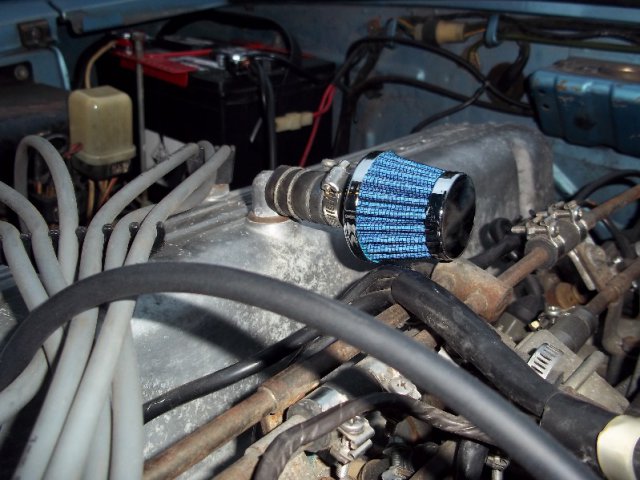
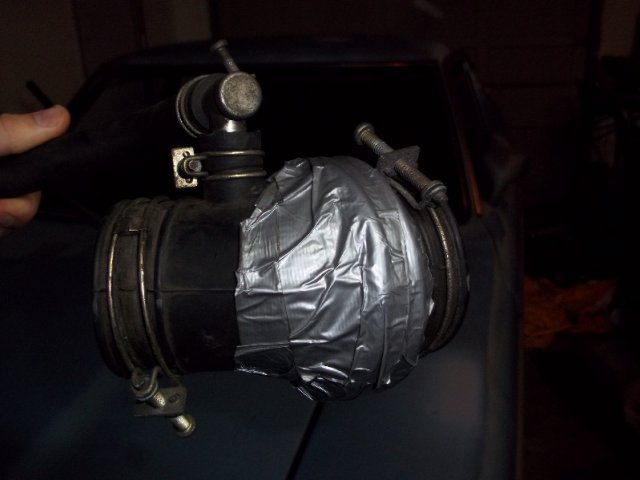
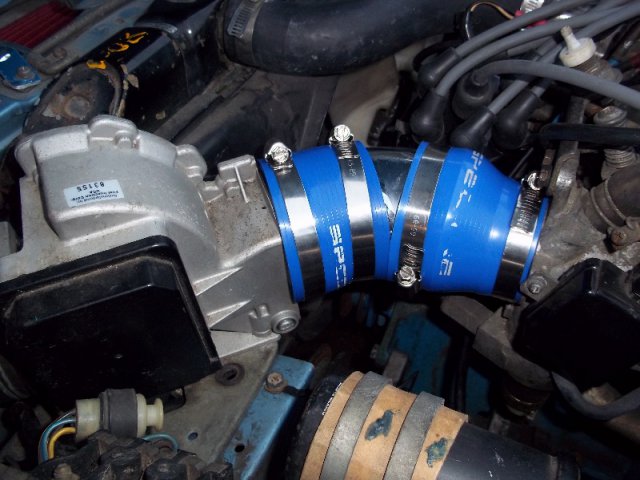
Probably every 280z out there has either had its AFM boot replaced at some point, has a leak in it, or has a ghetto fix like I did. Well, I finally decided to upgrade (mainly because I thought I had a vacuum leak) and hit the local parts store. I picked up: 1x 3-3" or 3-2.5" Silicone Coupler. It comes with a black insert. This is important. ~$7.99 1x 3" > 2.5" silicone reducer. ~$6.99 1x 45 degree 3" mandrel bent tube. ~$10.99 1x Crankcase Breather filter. ~$15 The stock boot is really small/short, and the two couplings alone are about the same size if set end to end. But, you need the 45 degree tube to make that bend and to mate the two couplings. So, you will need to do a bit of cutting on the tube. This is when you'll realize that its probably some cheap plastic with chrome covering and get mad that it cost $11... I cut it until the couplings touched each other on the inside of the bend. Took it over for a trial fit and found that it was gonna be close. I unbolted the AFM so I could wedge it in there. Throttle body end slipped right on and fit like a glove! The AFM end, on the other hand, was really loose. This is where the black insert from the 3-3" coupler comes in. I had to take a razor blade to the inside of the insert and try to remove about 1/10th of an inch, just enough to let it slip over the AFM outlet. Once that was fit, the 3" coupler can be slid over it and everything tightened up. This setup is still a little longer than the original AFM boot. I was unable to get the AFM mounted back to its original mounting point, it's off by about an inch. I assume you could trim a little more off of the tube, and angle off portions of the couplers, but it feels like it's on there pretty good. Don't forget to reconnect the ground to the AFM mount. This setup doesn't have a breather tube for the crankcase. I decided to put a K&N style crankcase breather filter on (it looks cool and the honda guys told me it's at least 10hp). The filter from the store was some kind of plug, so I cut a portion of the existing breather hose to mate to the crankcase. The plug of the filter wouldn't fit in the hose, so I trimmed material from the plug (rubber) and a little from the inside of the hose. Make sure all shavings are cleaned out and jam it in there. Clamp both sides and, voila. Soo, for $40-45, you too can have a setup like this! It's cheaper than buying a new boot online, it's stronger, will last longer, looks better, who knows, might even flow a wee bit better without the accordian.
-
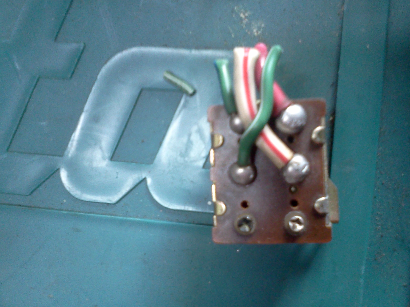
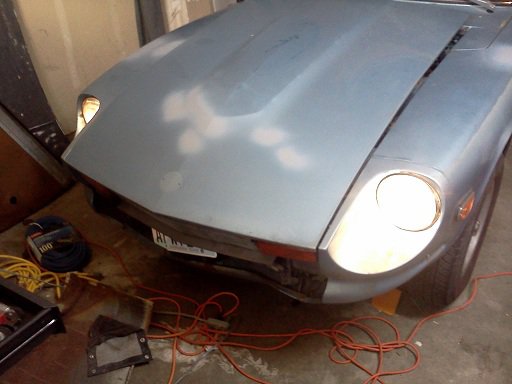
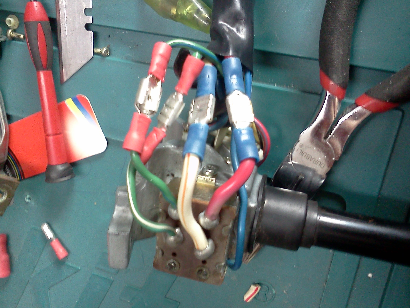
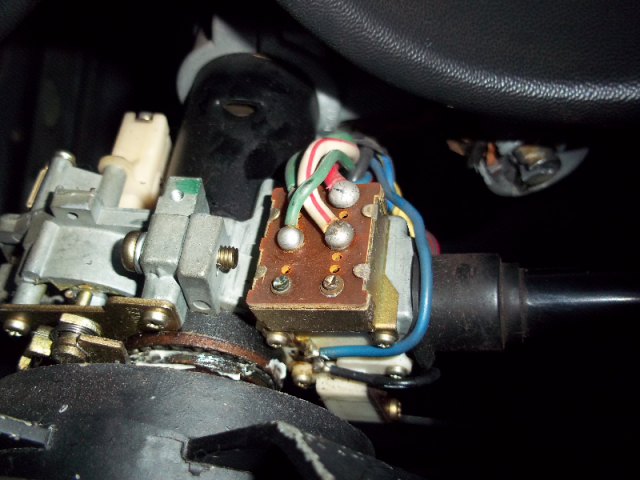
Hey all, I just thought I would share my experience troubleshooting a problem with my headlights. Basically, all of my lights were functional, except my headlights were not working. My first step was obviously to check the fuse. No such luck that it would be that easy. Next, I checked voltage at the fusible link. Voltage checked out. I busted out my test light and started probing at the plugs in front of the radiator on the lower support. Make sure that the headlight switch is on before testing. No voltage coming through. I did a bunch of testing in the junction block, but what I tested next is probably a better place to start. Pop the steering wheel cover off and expose the headlight switch. There is a brass colored box on top of the base of the headlight/wiper switch. It should have a couple of smaller green wires, a larger white with red stripe and a larger solid red. Touch the white/red with a test light and make sure that it has voltage. This wire is direct from the fusible link, and if the link has power, it should as well. If not, the problem is in the wiring from the fusible link. Next, with the headlight switch turned on, touch the solid red wire with the test light. If it doesn't light up, your switch is dead as it was in my case. You can also do a continuity test between white/red and red. No continuity with switch off, continuity with switch on is normal. No continuity with switch on is bad. I was able to find a '77 scrap car and pulled the combination switch assembly for $5 or so, not bad. I brought it home and did a continuity test between the white/red and solid red with the switch turned "on". Got continuity, switch is good. The connectors didn't match up with mine ('76), so I cut the box off both the donor assembly(good) and my assembly(bad). Then, I spliced the wires together. I did electrical tape the connections (not in picture). Once all back together, I gave it a shot and sure enough, the headlights worked! To summarize, the wiring goes like this: Battery -> Fusible Links -> Headlight Switch -> Fuse block -> Headlights - And that is the order I would perform checks in.
-

My 76 280Z is serial killing batteries
ttodhunter replied to ttodhunter's topic in S30 Series - 240z, 260z, 280z
I did replace the alternator and everything seems to be operating properly. Thanks for the input. -

1976 280z fuel gauges not working
ttodhunter replied to mk2mike's topic in Trouble Shooting / General Engine
Old thread, I know, but I have the exact same issue with the fuel, temp and oil not working but the voltage and tach are fine. Did you ever find the problem here? Thanks! -

My 76 280Z is serial killing batteries
ttodhunter replied to ttodhunter's topic in S30 Series - 240z, 260z, 280z
Yeah, I actually double checked before I posted this. The ground wire (black) has a wire that mounts to the firewall and the base of the starter. But I did notice a red wire coming off of the negative lead... I do need to make sure it's understood that it is not only draining the battery, but destroying it to the point where it will not conduct electricity. Thanks again guys. -

My 76 280Z is serial killing batteries
ttodhunter replied to ttodhunter's topic in S30 Series - 240z, 260z, 280z
Still have the stock radio in there. KTM, that sounds like some good info. I'm pretty dumb when it comes to electrical issues, but am learning and that definitely helps! I will do that soon. I don't know that that would explain the killing of the battery though, would it? Thanks guys. -
This is a new one for me. I had a cheap, but new battery in my Z while I was working on fuel issues. Once my new tank was in and new fuel pump installed, I turned the key to see if I could get fuel pressure- Dead battery. I put a charger on it and the charger just read "not connected properly". Weird, red to red, black to black; what gives? Pulled out the multi meter and it doesn't even know it's touching a battery. Took back to O'Reilly's to have it tested and it doesn't register on their tester. So, I upgraded to the premium battery, put it in the car, and the water main to my house blew so I was distracted for a week or two. Finally get back to the Z and the battery is dead. Hooked it up to the charger and hear clicking over by the intake manifold. It, again, won't take a charge and won't read on the multi meter. I had not made any changes to anything in the engine compartment and it was fine for months until the first dead battery came out of nowhere. Does anyone have any experience with their Z killing batteries to death? Please Help! TIA
-
I had noticed after washing the tank and drying with a hair dryer that it pushed water out of the pickup hose. But with actual fuel in the tank, I doubt that a hairdryer is a good idea. I'll try to improvise. Today.
-
I'll try with a few gallons and report back. Thanks guys.
-
I'm about to install a new (to me) fuel tank in my stock '76 280z. I know from past experience and from the FSM that the fuel pump will not prime until the tank is nearly full. Is there any other way to prime the pump, such as pouring fuel down the line from the engine, or do I need to spend $70 on gas and have the possiblity of needing to empty it back out if something doesn't work? Any help is appreciated!
-
I found a massive tear in the intake boot behind the AFM. Using leftover JB weld, I filled it in. Now it idles (at 1800 RPM). On to the next challenge...
-

POR-15 Fuel Tank Repair question
ttodhunter replied to ttodhunter's topic in S30 Series - 240z, 260z, 280z
The only thing I can think of is to make sure to blow through the pickup tube -hard!- a few times while it's drying. It should blow through fairly unrestricted. -

POR-15 Fuel Tank Repair question
ttodhunter replied to ttodhunter's topic in S30 Series - 240z, 260z, 280z
The base is a canister with a very fine mesh screen around the sides, probably a bit finer than the oil sump. This is on a 76. -

POR-15 Fuel Tank Repair question
ttodhunter replied to ttodhunter's topic in S30 Series - 240z, 260z, 280z
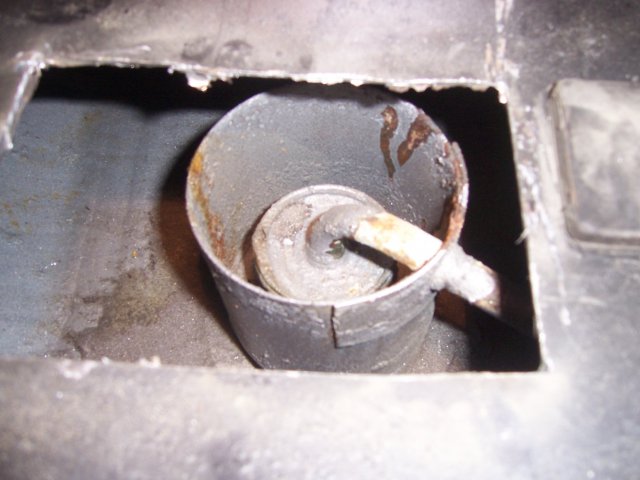
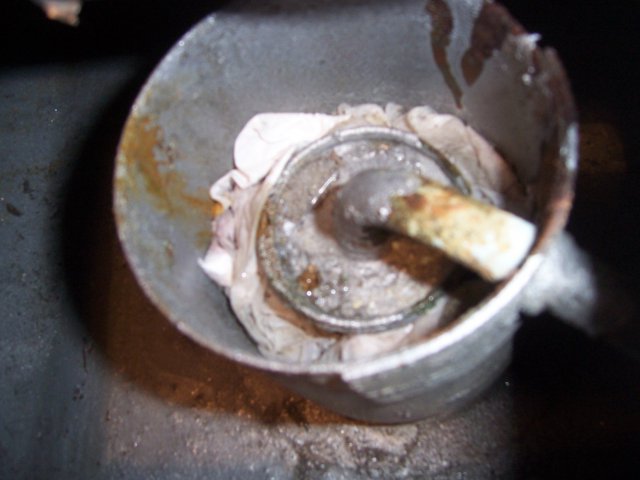
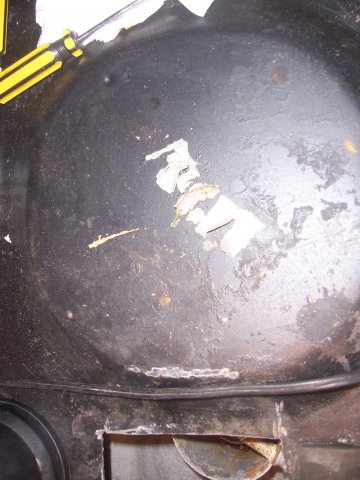
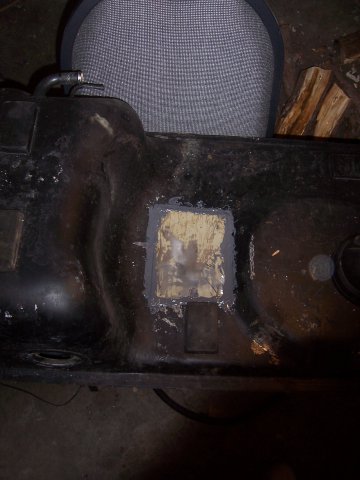
Just in case anyone cares or comes across this problem themselves, this is where I'm at. I couldn't get the pickup to flow anywhere near enough, so I figured the tank was basically scrap metal and got to cuttin'. Looking at the diagram and visually inspecting the pickup tube, it appeard to go in a bit then hook a slight right. So, I busted out my cutoff wheel and cut me a hole. This ended up almost directly above the pickup, but I did end up cutting through one of the breather lines... Hopefully that wont be an issue. I soaked some paper towels in the stripper and shoved them alongside the pickup. After a few applications I was able to peel a layer of sealer off of the entire pickup. Nice. I cleaned up the tank and cut a piece of scrap metal (from the old spare tire well) to fit over the hole and proceeded to JB weld that on. Another side note: In the FSM, it says that if you drain the tank completely you will have to top it off in order to prime the pump. That is absolutely true. 5 trips to the gas station with two 2 gallon gas cans (just over 17 gallons), everything seems like it works. -
Ok, I've found the problem and it is in the AFM, but it confuses me. When I reached in and poked the flap, the pump turns on. But the problem is still there. Sooo, I primed the rails with fuel and hit the starter, fired right up, then ran to the AFM and jammed my finger in there and shonuff, it idles perfectly. I guess the flap isn't opening enough to trigger the pump... Can this be fixed with an adjustment or do I need another AFM? The AFM in there does have a "remanufactured" sticker on it.
-
So I finally got my Z running for the first time, but only for about 3 seconds. The good news is it runs smooooth, the bad is that it loses fuel. When it dies, I can't hear the fuel pump when trying to start it. If I disconnect the starter solenoid and hit the starter, sometimes I hear the fuel pump pumping, sometimes I don't- but when I hear it pump, it builds up enough pressure to run it for that 3 seconds. I've cleaned and brushed the terminals on the fuel pump, they're good. The wires coming off the pump look good too. Is this a fuel pump relay issue? I know that once you release the key from start, the airflow through the AFM triggers the pump, but after it dies it won't start again... The fuel pump isn't getting a signal from either the "start" position or the AFM, sometimes...
-

76 Fuel Tank- 2+2 same as coupe?
ttodhunter replied to ttodhunter's topic in S30 Series - 240z, 260z, 280z
So the junkyards "76" turned out to be a 74 260. I'm assuming the Carb'd tank is different than the FI? The 260 did have a dual Weber setup and they said they would sell the manifolds for $50... -
I f'd up on my fuel tank repair and let the sealer seal the pickup. A local yard has a 76 2+2 tank for $50, does anyone know if there are any differences between that and a coupe? Thanks!
-

POR-15 Fuel Tank Repair question
ttodhunter replied to ttodhunter's topic in S30 Series - 240z, 260z, 280z
Well, the POR Strip is pretty strong. It pulled all the paint surrounding the line within a couple of seconds. It has loosened up a very small bit inside of there so that the fluid drains but really slowly. Blowing through it is like trying to blow through a pinhole. I assume that it should blow through freely, does anyone have any experience with blowing through the fuel pickup? -

POR-15 Fuel Tank Repair question
ttodhunter replied to ttodhunter's topic in S30 Series - 240z, 260z, 280z
I just got off the phone with POR and we came up with a possible solution. They sell a POR stripping solvent that will dissolve the hardened sealer. The idea is to take the tank back off, empty it and pour a tablespoon or two down the pickup line. I'll have to monitor when it frees up and immediately pour water into the tank to neutralize the solvent so it doesn't damage the rest of the sealer in the tank. Wish me luck and I'll let you all know how it turns out... -

POR-15 Fuel Tank Repair question
ttodhunter replied to ttodhunter's topic in S30 Series - 240z, 260z, 280z
Yes, it is on the side. It's got an arm that floats up and down on a pivot from there.

