ttodhunter
-
Posts
174 -
Joined
-
Last visited
-
Days Won
1
Content Type
Profiles
Forums
Blogs
Events
Gallery
Downloads
Store
Everything posted by ttodhunter
-
Well, I got my stock manifold sent off to Lonewolf Performance to get their port package. James there has been great and will be porting the runners to match the gasket, and will bore the tb hole to match the spacer I supplied him and filling in the notch. I got the pulley, water pump and hall sensor mounted and had my fiance monitor the handheld while I rotated the crank by hand. We saw all three magnets and the sync, so I was happy. I will need to get a belt that is about two inches longer so that the alternator fan will clear the hall sensor.
-
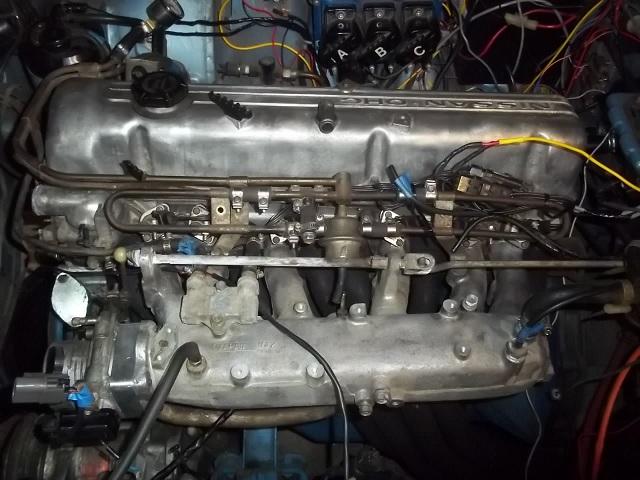
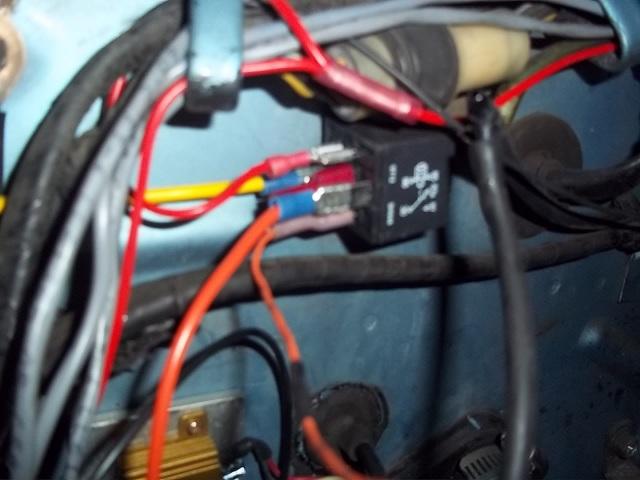
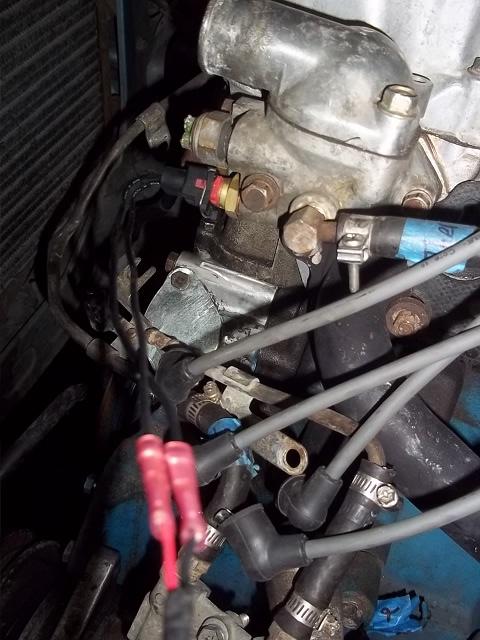
I got a little bit of work in over the past week. I got the injectors back on and mounted and the wiring soldered to the resistors. I had cut the wires from the hall sensor when removing from the Legend, so I had to test which wire was for the sync and which for the trigger. I ran about 4 feet of wires from each lead and hooked up to the hall plug for the ECU. Luckily, I guessed right the first time. I powered up the SDS for the first time in the Z and made sure that the magnets read correctly on the controller, then ran the wires back towards the firewall. I decided to mount the cold start valve in the stock coil location. I got the throttle body mounted and connected to the linkage, and all works well. I also checked the wires on the throttle body and found that red= +5v, white= signal and black= ground... Pretty obvious. I had the plug wires (MSD Superconductors) left over from the Legend, but they had different plug ends, so I cut those off and removed the insulators from the stock Z wires and came up with a hybrid. I ran a wire for the injector + to the fuse box I put together in previous posts. I mounted the MAP sensor in the location from a previous post, but still need to put a T in the line to the FRP and run the vacuum line. I ran a wire from the Green out of the coil pack to where the factory coil negative goes. Not sure if that will work, but I'm going to try it. So, most of the work had been finishing up wiring, but I feel progress is being made. Now I have to figure out my game plan for the intake manifold, finish the vacuum tubing, create a relay for the cold start, fab up an intake and put all of the components (radiator, water pump etc.) back in place.

-
Well, I guess this is why I mentioned I might do something dumb. I was planning on sending off the stock intake to Lonewolf to get ported and have the throttle opening done correctly while using this one to get things up and running. If the concensus is that this is a very bad idea, I may have to reconsider. I'll have a status update later tonight.
-
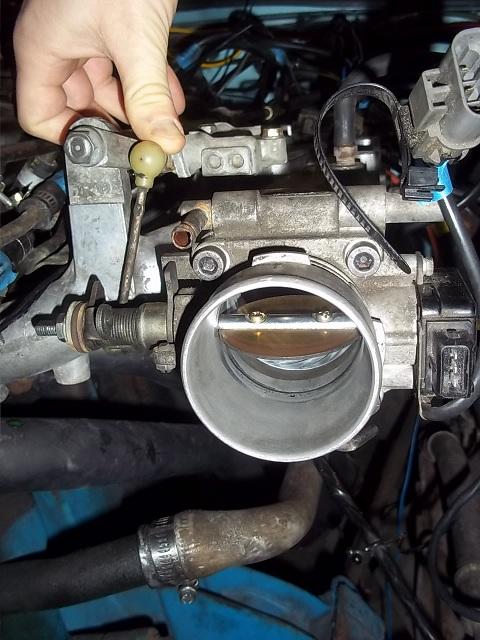
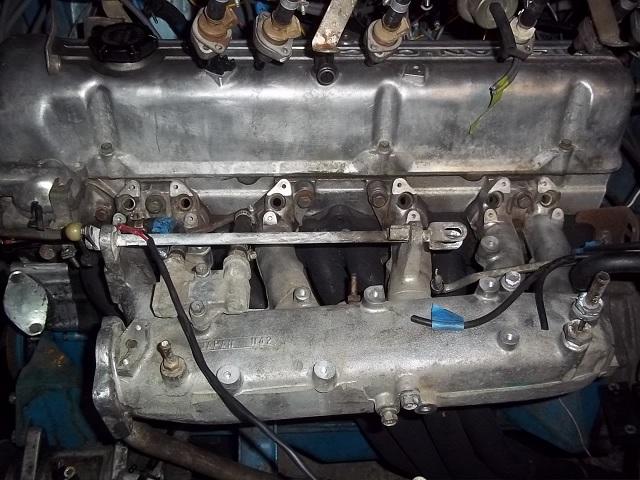
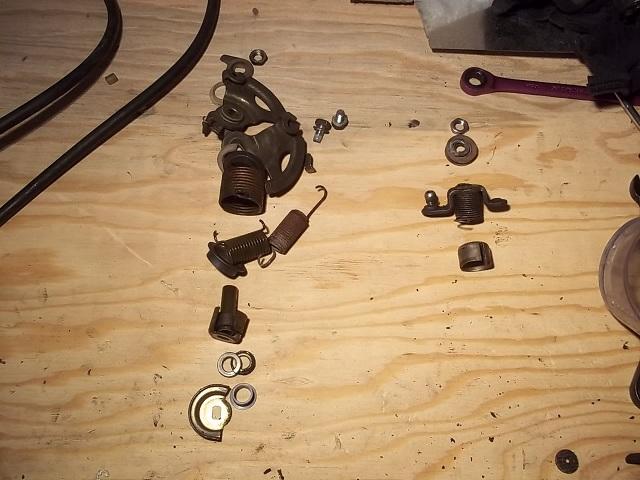
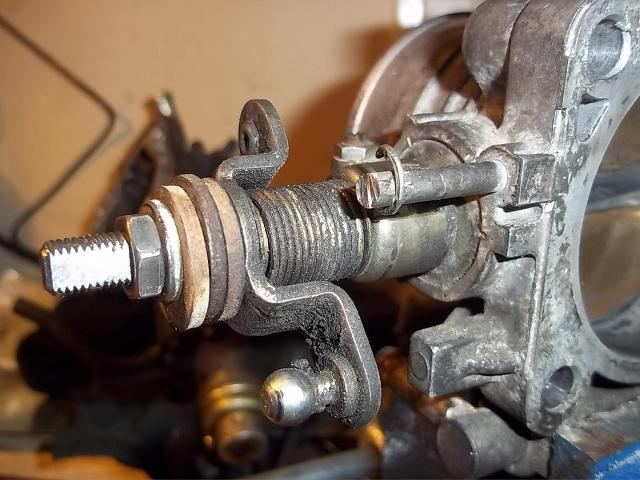
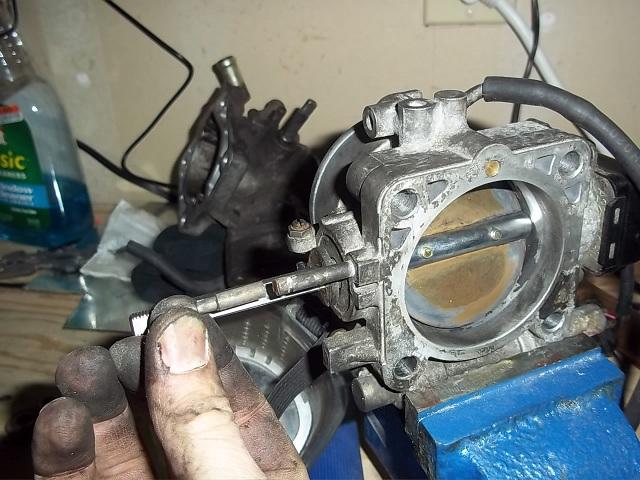
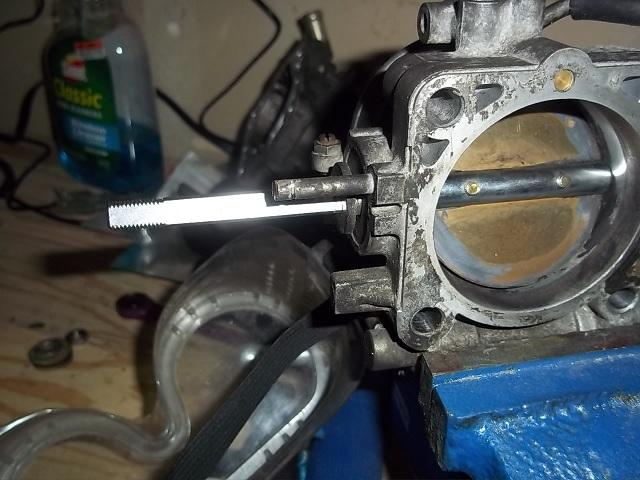
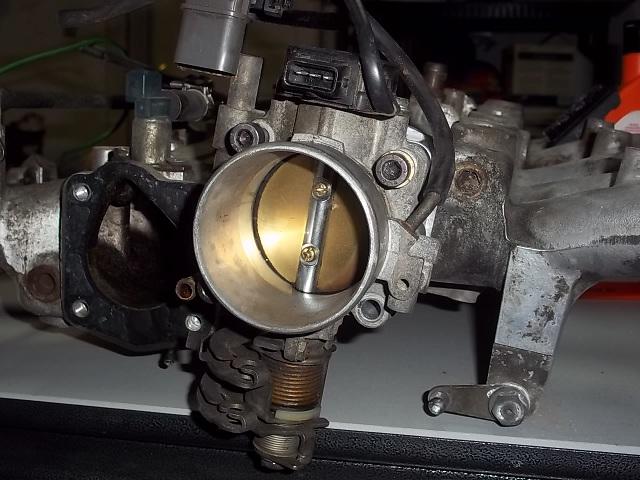
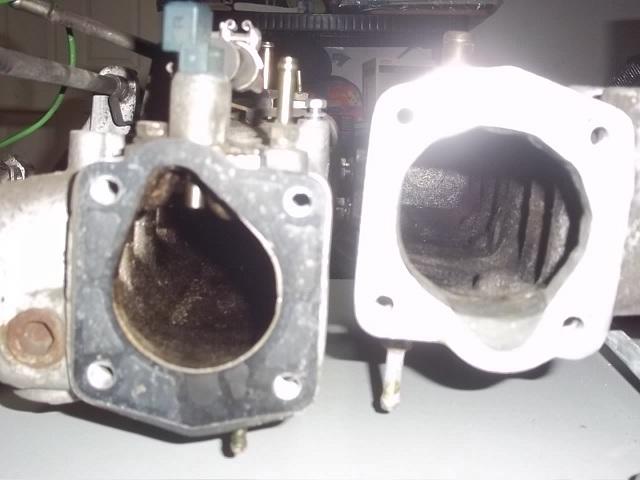
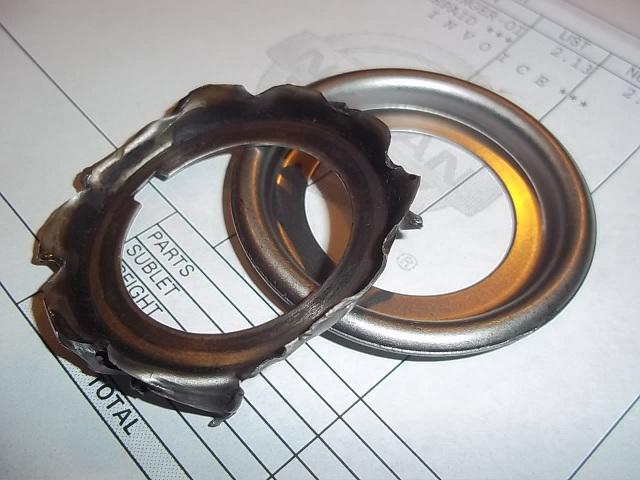
I got a great idea after some beer yesterday and decided to try cleaning the intake manifold with Brakleen. 3 cans later, I felt the manifold was fairly clean. I ran a rag through each runner and through the plenum a bunch of times and it looked pretty good. I got the manifold put back on and it looks really clean without all of the crap on it. I mocked up the throttle body, then I remembered that I had to modify the linkage to work with stock setup and to clear the manifold. The 240sx throttle body linkage is a huge mess with way too many components. I stripped each throttle body and began to formulate a plan. (240sx on the left, 280z on the right) I took the components on the right and slid them on the shaft with a few washers as spacers since the threads on the shaft don't go in far enough. Once mocked up, I noticed that the throttle opening was being limited by the spring holder. I busted out the dremel and got to cutting. I notched the spring holder so that the spring would sit in the notch and not slip off. When all put together, the throttle opens freely, there is no slop, and there is enough clearance for the throttle to open completely. Earlier in the week, I picked up another relay for the fuel pump. I tapped into the switched power wire for the other relay, ran another fused wire from the battery and ran the wire back to the fuel pump. The orange wire from the SDS acts as a ground for the relay. Blurry pic: Thats all for today. Next up: Mounting the throttle body and figuring out its wiring, mounting the injector rail, figuring out the hall sensor wiring.
-
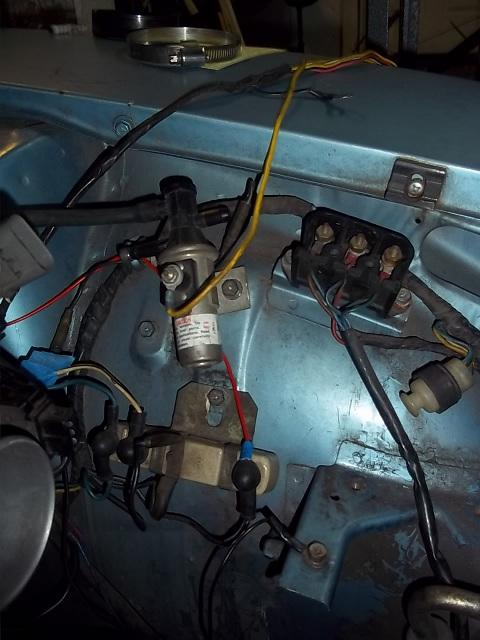
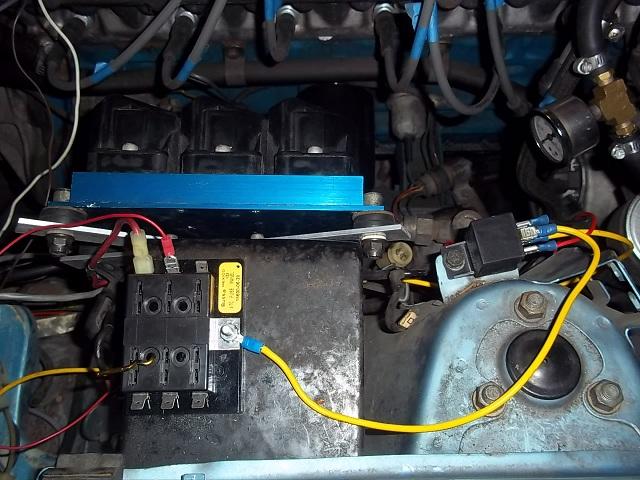
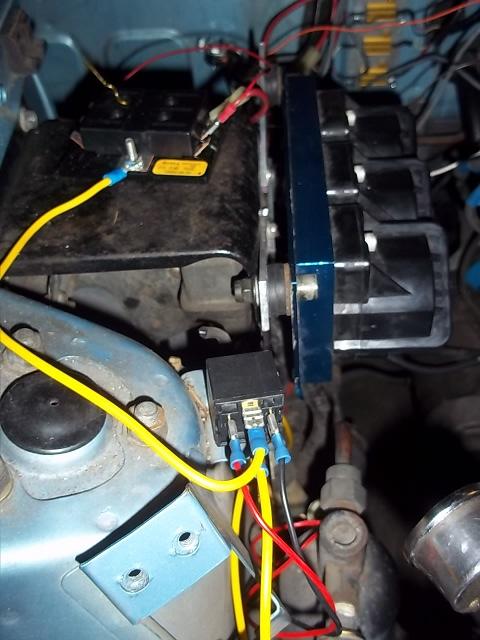
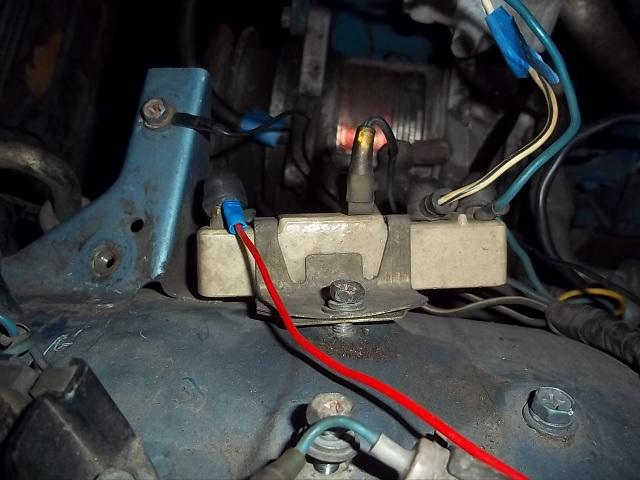
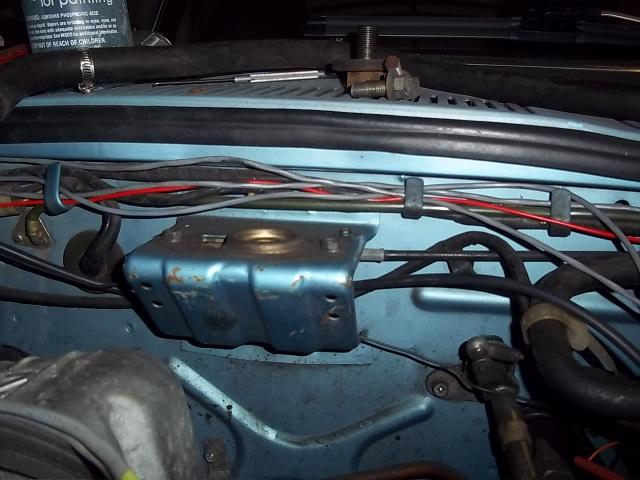
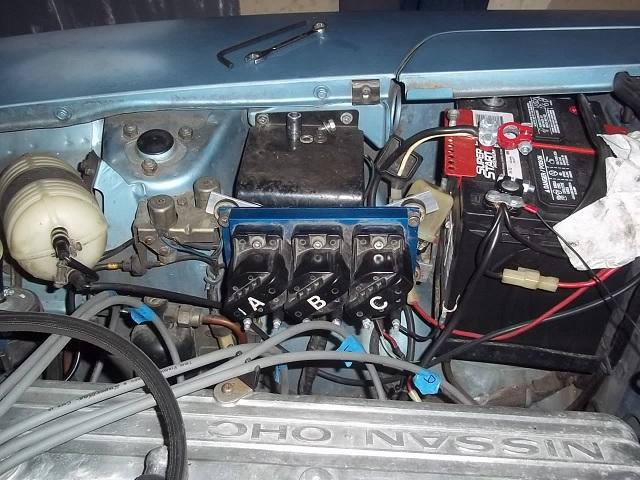
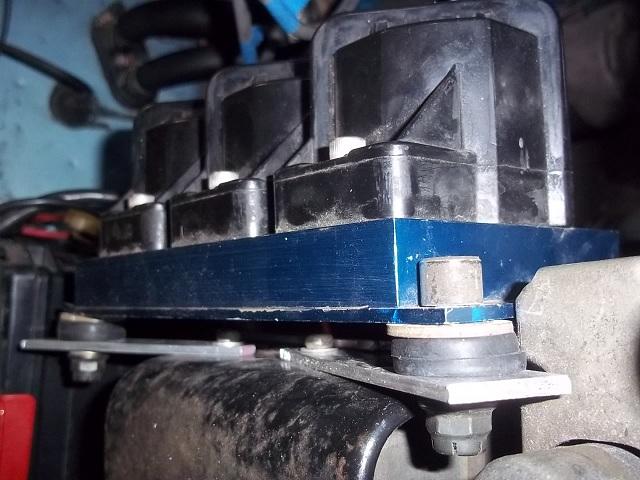
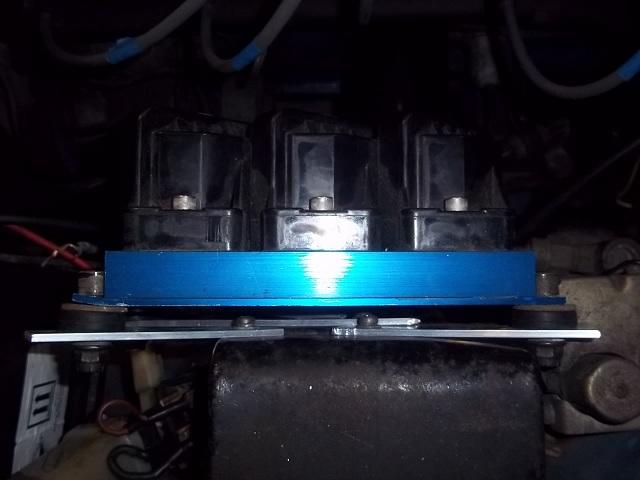
Haven't had too much time to work on the Z lately, but I was able to put in a few hours today and get a lot of the electrical worked out. I decided to put the relay and fuse panel behind the coil pack and drilled a couple of holes to mount. I sourced the switched power from the source for the original coil, and ran the wire back to the firewall and around to the relay. I tapped power from the positive battery clamp and put in the inline fuse. I found a ground and ran the relayed power wire to the fuse block. I tested the setup and it worked perfectly; no power with key off, power with key on. I re-mounted the coil pack, ran a wire to the new fuse block and grounded to a chassis bolt below. Green wire coming out of the coil pack will eventually send signal to the tach (hopefully). The install manual says that Bosch type water temp sensors are compatible with the SDS, so I butt connected the sensor to the SDS wire. I ran a few more wires from the firewall hole under the battery tray using the stock harness ties which worked great. I was looking for a place to mount the Map sensor. SDS advises to mount it with the vacuum port facing down, so this was a prospective location. Next up: I need to clean the intake manifold- there are metal shavings and lots of loose grease crusties- then get it mounted. I may need to take it to a shop to get hot tanked. I need to wire up the hall sensor- I cut the wires when removing it from the Legend, need to figure out which wire is for trigger and which is for sync. I need to figure out the wires for the coil pack, also cut, and the wires for the throttle body.
-
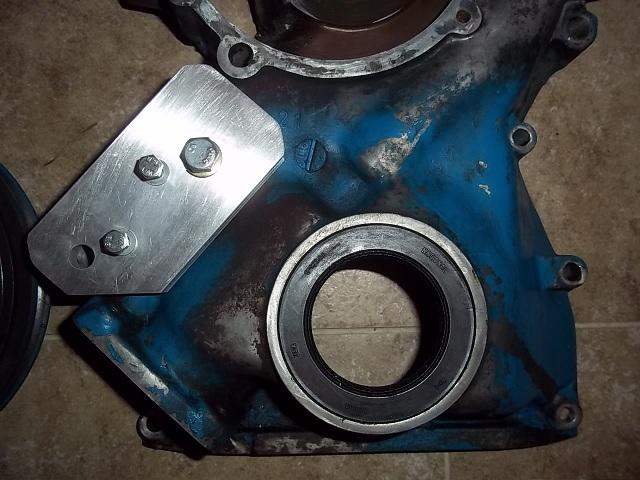
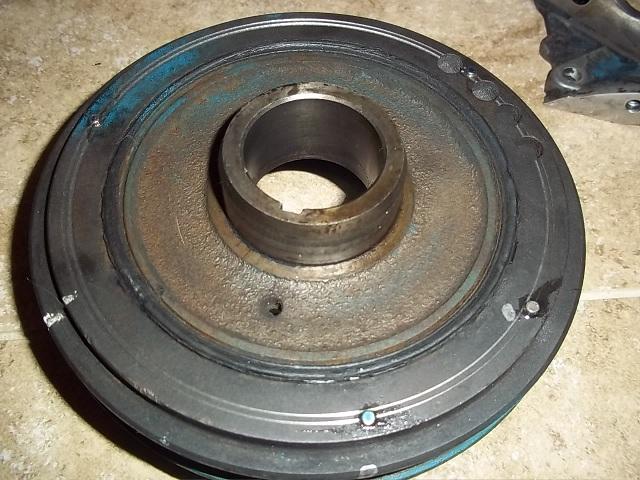
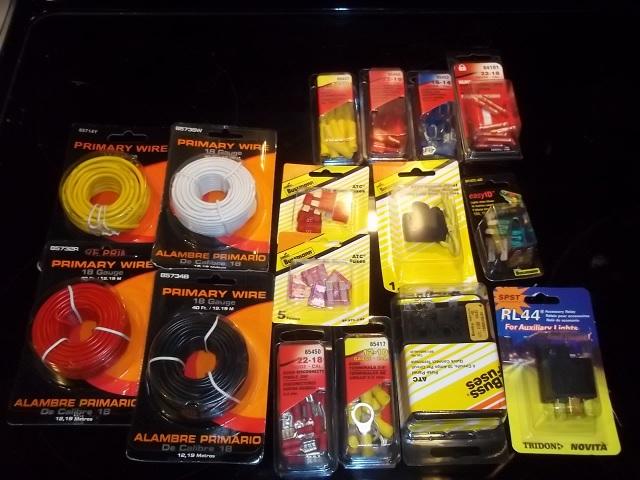
A little bit of an update. I picked up the front cover with Hall Sensor mount and the pulley with magnets installed from Motorworks. They both look really good and probably a lot better than if I attempted. I mounted the resistor pack to the firewall just inward from the battery location. I found a large hole under the battery tray for the stock wire harness. All of the connectors fit through it nicely. I pulled off the intake manifold so that I could put on my modified mani. When removing the front cover, I found that the "oil slinger" had been installed backwards and got mangled by the distributor drive gear. Had to get a new one through the dealership, but only $2. I went to the parts store to get a buttload of wires and connectors for the relay setup. $100 later I had picked up a 40 amp relay for "auxiliary lights and horns" , a 6 slot fuse panel, 4 looms of wires, probably 8 boxes of connectors and an inline fuse for before the relay. Tomorrow, I'm hoping to get the front cover/pulley and the intake manifold put back on and mock up all of the sensors and wiring.
-
Hey all, Sorry for the lack of progress, but holidays and all and got engaged last weekend. I pulled the fuel rail, but thats about the only progress. I did buy a long scrub brush to clean out the intake manifold, but haven't even gotten around to that yet. More updates soon.
-
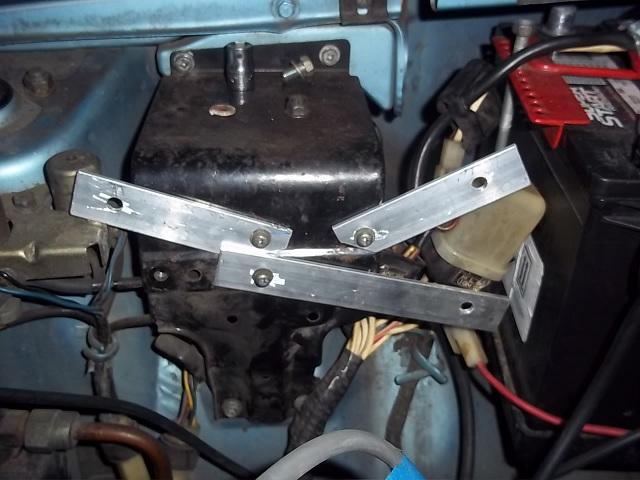
So, a little bit of progress. I got the front cover off along with the pulley and got those dropped off at Motorworks LTD. The oil pump was above the oil level, so no spill there, but- when removing the water pump, it spilled about a quart of coolant on the floor... I removed the front cover bolts starting at the distributor and going counterclockwise, numbering the bolts with painters tape. I bought some 1"x 1/8" aluminum bar and some rubber grommets and built a mount for the coil pack. I didn't initially have much hope- just screwing around- but it turned out really well and I think I'll stick with it. Next up is to remove the intake manifold and get the new one cleaned up for install. I'll also get the resistors mounted to the firewall and continue my search for a passage into the cabin. I'm thinking about the hole for the vacuum to the heater control... P.S. I went to the dyno with Pete and... WOW. I'm really impressed with his setup, dyno numbers and the ride I got on the freeway onramp. Thanks Pete!
-
After a weekend of attempted clamming (0 clams), I made my way to Harbor Freight and bought the 27mm socket, a benchtop vise for bending metal and an impact gun because it was $20. I got home and found the 27mm fit the pulley bolt perfectly, but that I couldn't fit the impact gun in between it and the A/C condenser. Bummer. I put my torque wrench on and laid it against the drivers frame rail, bumped the starter and hand loosened the bolt off. Surprisingly, I was able to pull the pulley off with my hands! I took a look at the timing cover and visualized removing it; will probably need to drain the oil since the oil pump looks to be connected to it. Not too much accompolished yet, but progress forward I suppose... Next step is to get the front cover off, and bring it and the pulley to Motorworks for magnet install and hall sensor mount. I'll keep yall posted.
-
Yep, I had stumbled across Motorworks website a while back, then ran in to Duane at a car show. How do you like your setup?
-
So I put the Z in the garage and decided to get started with the transplant. I disconnected the AFM and all of the other stock EFI junk, so there's no turning back. I removed the radiator and the fan, then found out I don't have the correct size socket for the crank pulley; my 26mm isn't big enough, need a 27. I'll go buy one from Harbor Freight soon. I did decide that I'll mount the coil packs to the stock location for the fusible links, but will need to make a mounting bracket. I tested the injectors and found that the resistance is about 2.4 ohms... Low impedence. The water temp sensor doesn't have the same connector as the SDS hookup, so I'll have to check what a newer Nissan sensor looks like.
-
Hey all, I have a SDS F system sitting in my garage that was previously on my turbo Legend (RIP). Since this was for a 6 cylinder, I figured I might as well put it onto the Z since the stock EFI system is fairly crap. When I was doing my header install, I figured I would put in an O2 sensor for future tuning. I have found that the car runs pig rich in almost all scenarios which might explain my 13-15 mpg average. I checked the forums and found that the most likely cause is the water temp sensor and wiring. I replaced the sensor and the connector, but still running full rich on the mixture meter. I picked up a N42 intake manifold and a 240sx throttle body locally from Craigslist. I ported out the opening to match the ebay special 1†spacer I bought (this spacer didn't compensate for the oblong opening on the stock mani, so I filled that in with JB Weld). I found a shop locally that specializes in both Z cars and SDS, so I will be having him set up the crank magnets and hall sensor mount. My “to do†list at this moment looks like this: Check injector impedance. (Current harness has resistors for low impedence.) check if water temp sensor can be used (manual says SDS can use Bosch style sensors). Find out where to mount air temp sensor (easy once intake fab'd up). Find where to mount map sensor, T fitting to FPR, port facing down. Figure out tps wiring. Find/make hole in firewall or other way to run harness into cabin. Test ignition coil + for hot while cranking. Research relays for sourcing switched power. Figure out fuel pump relay. Find mount and mani port for fast idle. Figure out tach (can be hooked up to coil packs?) Find where to mount coils. I will be removing the crank pulley and the front cover to bring over to the shop for machining this week, so I figured I should try to get some preliminary numbers. I found a G-tech Pro meter on Craigslist and picked it up. After a couple of runs, I got lame data that is about what I expected. I set the vehicle weight to 2850 with the girlfriend and myself in the car. '76 280Z Cone intake/ Headers/ 2.5†Exhaust Bumpers and mounts/shocks removed, no spare tire 0-60 8.75 Seconds ¼ Mile 17 Seconds at 80-85 mph Est. HP 115-120 I felt the launch could have been a little better, but the numbers were fairly consistent. I will update this post with progress of the install, any dumb mistakes I'll learn from and any genius moments I have.
-
I've got an M90 in the garage that, someday, I want on my Z. A while ago, I came across the Magnuson bypass and bookmarked the page, which has since been lost. I found the description out there still: "The best kept secret in forced induction is the little known bypass valve. This small valve, when properly installed between the supercharger and the air throttle body, allows the supercharger to become extremely efficient in terms of economy and parasitic power loss. Our M90 supercharger uses less than 1/3 of 1 HP at 60 MPH cruising. The bypass is operated by a vacuum actuator control unit that is normally closed. When vacuum is high (idle-cruising) the actuator opens the bypass valve, equalizing the vacuum pressure throughout the system. When boost is required (accelerating) the vacuum is decreased and the bypass valve instantly closes, causing pressure to increase into the cylinders. This equalized vacuum condition virtually eliminates the normal parasitic power loss of a forced induction system." "Magnuson Products, Inc. Standard Bypass was designed for those applications where space limitations or plenum/manifold shape or other considerations dictate a remote bypass. The four bolt flange should be mounted on the inlet tube or casting and the 1 1/2†tube should be plumbed to the discharge side of the supercharger." This might be what you're looking for, maybe not... Either way, I'll be following the topic! BTW, what year is your Z?
-
Yeah, woops. 76 280z, manual tranny. I was thinking about the + wire to the coil, or I saw Tony had it hooked up to his fuel pump relay. I looked through the fsm and there doesn't appear to be many fused acc switched wires in the engine bay. Forgive any grammar, sending from my phone.
-
Hi everybody, I'm installing some headers for a couple of reasons. 1) There was a massive exhaust leak in the stock manifold that made it unbearable to drive for long distances, and 2) I wanted to put in an oxygen sensor as I will be installing an SDS and need it for tuning. (3- I always wanted headers). In wiring up the oxygen sensor and Split Second ARM-1 for monitoring, I need a switched source for power to supply the heat source for the 4 wire and the power source for the ARM-1. Does anyone have any recommendations for the source of the switched (accessory or engine running) power I can tap into? Thanks in advance.
-
You really need to check out the car in person. The big things to look for on early Z's is rust; particularly under the battery tray, down the frame rail to the passenger floor pan. You will want to bring a spare battery to make sure that it cranks over. If you plan on driving it home the same day, have the guy start the car over the phone or send a video of it running. It would probably be best to plan on dollying it home. There are too many things that can possibly go wrong (with an unknown car)to plan on having no problems. Not trying to scare you off by any means (buy it!), but with a car that age it's best to prepare for problems.
-
Hi and welcome. There is a whole sub forum relating to these swaps here. http://forums.hybridz.org/index.php/forum/74-gen-iii-iv-chevy-v8z-tech-board/ Everything you ever wanted to know is in there. And yes, it will be worth it. Have fun!
-
You stated that you know that the spark plug wires are hooked up correctly, and this may be a problem... #1 cylinder is at the front of the engine. White smoke out of the exhaust is a sign of water in the combustion.
-
I stumbled across this a little while back. http://en.wikipedia.org/wiki/Gasoline_gallon_equivalent E85 only has 72% of the power potential of regular gasoline. My understanding is that you will reduce detonation potential significantly, but will make a lot less power. For a rough example, you would probably make more power running a 9:1 CR on pump gas compared to a 11:1 setup running e85. And, food for thought, if you build an engine to run e85 and end up somewhere where e85 isn't available... I'm no specialist, correct me if I'm wrong anyone.
-
I think so, but this might help you out. http://xenons130.com/ECU.html
-
Sounds to me like something wrong with the ECU. I had mine (76) die for no apparent reason, wouldn't fire when cranking. I disconnected the battery for a minute and it fired up and drove like normal. On the ECU I had before this one, the engine would idle, but die if you gave it gas. I was able to pick one up for $20 or so off of Craigslist, or maybe someone on the forum has a spare. Run through the troubleshooting section of the Fuel Injection Bible. Good Luck!
-
http://forums.hybridz.org/index.php/topic/20739-chevy-43-v6/ See if that helps.
-
Soo, a destroked L28. One of the problems I see in the setup is that Nissan factory 89mm pistons don't come in 38.1mm pin height(that I know of). So, unless you were going custom forged, you would need to re-use 86mm's. By my calculations, this would give you slightly less than 2.6L with a 8.25CR using a P head. Are you doing this for a better rod/stroke ratio? What is your goal for the build?
-
P79 camshaft into a n42 head will it work ?
ttodhunter replied to S30Turbo's topic in Nissan L6 Forum
I'm no expert on cams by far. I just see that on the chart, all cams before 8/81 have the same part number. So I guess check to see if it's an "A" stamp or a "F"... I could be mistaken, but my $.02... -
P79 camshaft into a n42 head will it work ?
ttodhunter replied to S30Turbo's topic in Nissan L6 Forum
This should help. http://atlanticz.ca/zclub/techtips/cam/index.htm