-
Posts
663 -
Joined
-
Last visited
-
Days Won
2
Content Type
Profiles
Forums
Blogs
Events
Gallery
Downloads
Store
Everything posted by gvincent
-
Yes screw/bolt mounted to the fender well and a second wire from the bracket itself also screwed to the fender well.
-
OK, can't afford a mega squirt solution. I am back to where I started. I lost everything when I removed the 78 280Z ignition/transistor box that was on the passenger side under the dash, apparently everything was running through that and it must of taken everything out. I lost all signal from the Distributor and the ECU was no longer triggering the injectors. I got ahold of another 83 ECU and got a new Optical module from Rock Auto for the distributor, I wired the new ECU pin 5 output directly to the 280ZX exciter/transistor, the injectors work again so that tells me the new optical module is working and sending the Hi and LO resolution from the distributor to the ECU but still no spark. I got ahold of an Oscilloscope and will look at the output of the ECU next saturday. I am trying to locate a Square wave generator to test trigger the exciter transistor to see if I can get a spark. Does anybody know the frequency range of the square wave signal needed? I am assuming I need 0-5volts as well. Thanks will keep you posted
-
I guess I am Calorically Challenged LOL, I need a 280Z seat belt extender, anybody know if they are available anywhere or what extender might possibly fit the 240-280Z?? Thanks Greg
-
Thank you, I will stop by the shop in the morning and give them this info and see what we have from there, I'll let you know the results and take more pictures.
-
Happy New year, Finally got a chance to get to the shop and try a few things. we tried a remote start and put a 12v source to the positive coil because we were not reading 12V at the coil while cranking but we do have 12V with ignition on. Now we seem to be going backwards as now we no longer have the 0-5V pulse on the yellow wire on the ignitor or the blue wire as I mentioned in my post above. we looked on the passenger side and yes there is a "black box ignition/transistor"thing that another forum suggests that I check. Now wasn't this box for the 280Z? Is it still needed with the 83 280ZXT? Could it be causing problems with the 83 turbo ECU? I don't know if that Ignition box could be getting any info as the 280Z distributor/motor etc is no longer there. getting frustrated and being an ole geezer I don't have any hair to pull out. Don't know what to try next until I found out what to do with the old 280Z ignition box we have double checked the wire connections per the Info above, but like I mentioned I have a Yellow wire, a Blue wire, a Black wire, a Black/White wire and a White/Black wire in the harness going through the firewall. I do not have a Yellow/White wire that is on the wiring info given to me in the Post above by 1970 240Z Any info about the ignition box or other suggestions would be greatly appreciated Thanks, Greg
-
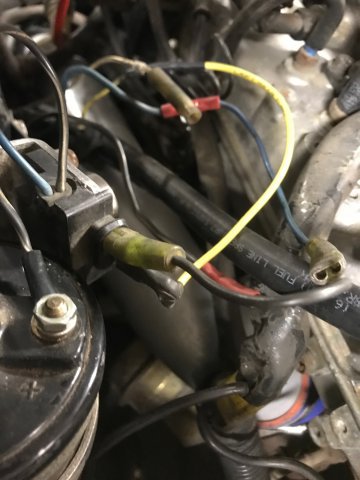
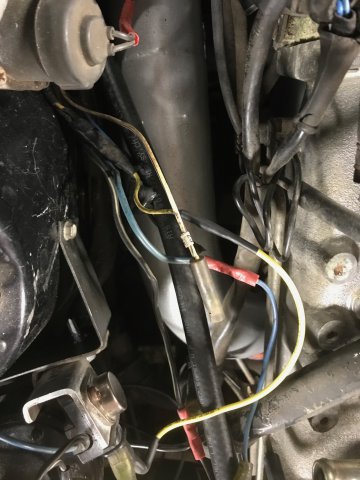
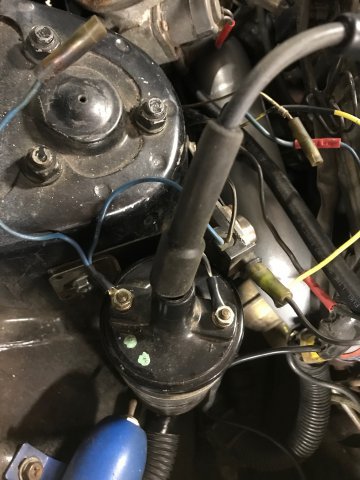
Hi, Thank you for your responses, I am headed to the shop to try a few other things today. Yes the black/white wire is connected to the ignitor spade connector and I have a yellow wire connected to the other spade connector. there is a B/W wire from the ignitor going to the + coil terminal. There is a blue wire on the coil - terminal Ignition in on position 12 volts present at + coil terminal Cranking using an analog volt meter on 0-5V scale the yellow wire is receiving a signal, jumps from 0 to 5V Some people say it should be a yellow/white wire but all I have in that harness is yellow. Cranking using an analog volt meter on 0-5V scale the Blue wire is ALSO receiving a signal, jumps from 0 to 5V is this normal? Now I noticed with a spark indicator light on the output of the coil that there was a single spark every time i turned the ignition on and again when I turned it off Second thing i noticed that while cranking there was no voltage on the positive terminal of the coil?????? Bad Ignition switch? Going to try a jumper wire from the battery to the ignitor and to a remote starter switch with ignition in the ON position today to bypass the ignition switch. Going to search for this black box somebody mentioned that is under the dash on the passenger side, but if it was for the stock 280Z it was probably removed because that motor, harness etc. went into a 240Z that is running. I don't know what else to check, green light visible on ECU, yes. Now I had this thing somewhat running 4 years ago, badly but at least would start and run if I just feathered the gas, figured it was a fuel problem. took it apart, installed an intercooler custom fuel rail new injectors and new connectors, new fuel pump, hoses and a gauge and put it all back together and now no spark. I'll post back what I find Thanks again Greg
-
Thanks, but Distributor has not been removed, Still don't know what to do, Nobody can verify my wires or why I have signal/voltage swing on both the yellow and the blue wire. I'll keep searching to see if I can find something, running out of google search topics though.
-
I am at a lost trying to figure why I can't get any spark on my turbo swap project. I am putting an 83 turbo motor in my 78 280Z. I have ruled out the distributor as I am getting both high and low signal to the ECU computer, I can hear the injectors clicking while cranking, I have correct fuel pressure. I have changed out the coil and even tried the GM HEI module swap in place of the ignitor transistor. I have the Black/White wire with 12V connected to the coil+, the blue wire from the ignitor to the coil- terminal. I have a yellow wire, not a yellow/white wire which most people say i should have connected to the ignitor. this wire is in the same 78 280Z harness coming from the 8 pin connector at the 83 turbo ECU, I checked it with an analog meter on low scale and you can see it swing from 0-5volts, now the blue wire in that harness also is reading the same is this correct? There is a white/black wire which I don't know what it is for. the ignitor is grounded with a black wire. Now i had this engine running 4 years ago although not very well I think it was low spark from the old coil. All the wires come from the 78 harness that goes to the 8 pin connector with was wired to the 83 ECU 8 pin connector. I haven't hooked up the blue tach wire as I was told I need a resistor but couldn't find a value anywhere yet. I'm lost trying to figure what to check next. Anybody have a spare 83 Turbo ECU I can borrow
-
well don't have the money to go with a different ECU. I think either mount it through Radiator support in front of radiator ,intercooler, condenser or cut fender well and fab a shelf maybe. I know there are pictures around but the search is not working keep getting server error message.
-
Started to put together my long stalled turbo swap in the 78 280Z and need some advice and pictures on where did you mount your AFM. I am keeping the AC and have an Intercooler so that doesn't leave much real estate for the Big AFM
-
Any Updates? Thanks
-
Thanks Dan
-
My gallery is gone, I just looked at all 62 listed and Mine is not there. I noticed that some old timers albums now say zero images? granted it probably been a few years since I added pictures but now it is gone. was this when we had to change systems?
-
Exact same thing is happening to me, did you figure out the problem?
-
I guess this is not an easy answer as nobody has even responded yet
-
How do i send a donation in another members name?
-
Looking for 8mm wheel spacers for the front of my 280Z, Don't want cheap slotted lug nut holes want the correct 4x114.3/4x4.5 holes. I will take 6mm, 7mm, 9mm but prefer 8mm. 10mm might get me some fender rubbing but will do as a last resort. Looked online and almost anything that had the right hole spacing was for the Nissan 66.1 bore, the Datsun was a 73mm bore. OH need longer studs also Please PM me or email me Thanks, Greg
-
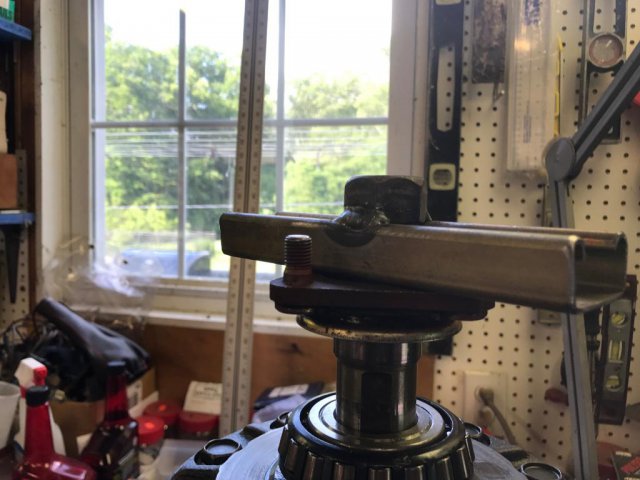
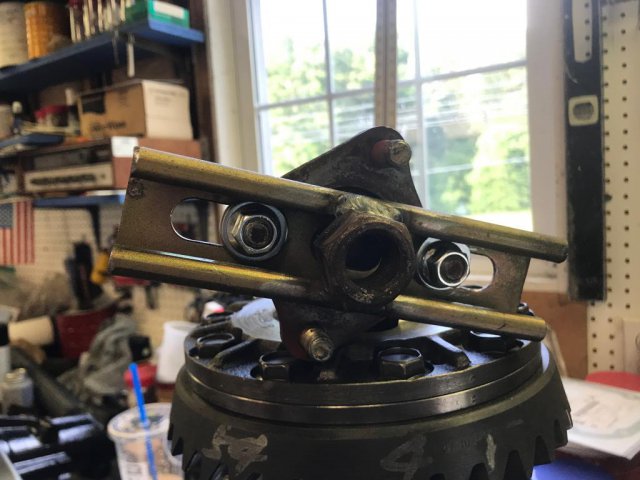
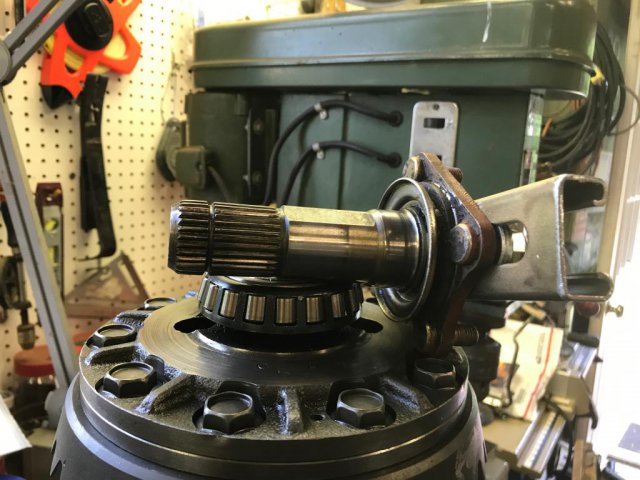
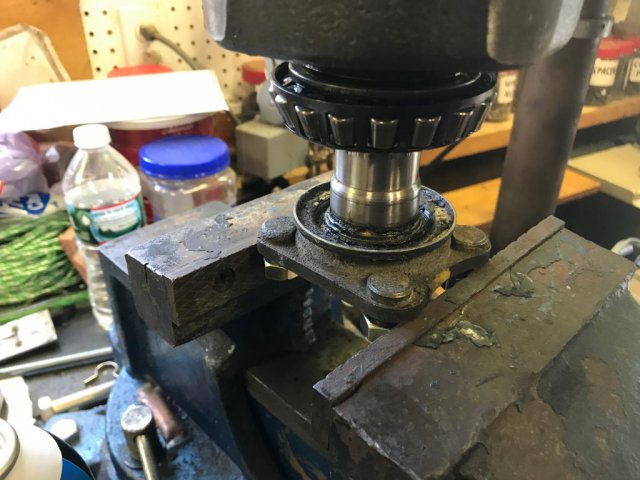
I made a tool to measure the break-away torque using the old R-200 diff stub axles a piece of Uni-strut and a large nut welded to the uni-strut. I elongated the holes in the Uni-strut to bolt up the stub axles. Actually the hole spacing works out so I can test again later at the wheel studs later once it is all installed. The test of just the CLSD assembly as shown in the pictures was 62Lbs. I then used my torque wrench and started at 25Lbs and increased it in 5 pound increments until I reached the point where it turned the axle then backed off a pound at a time to the point where it no longer turned the axle.
-
Thought the upload froze as the last two pictures would not load so please delete the first two, the third one has all the pictures.
-
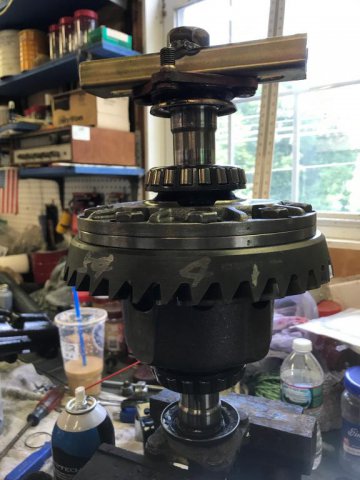
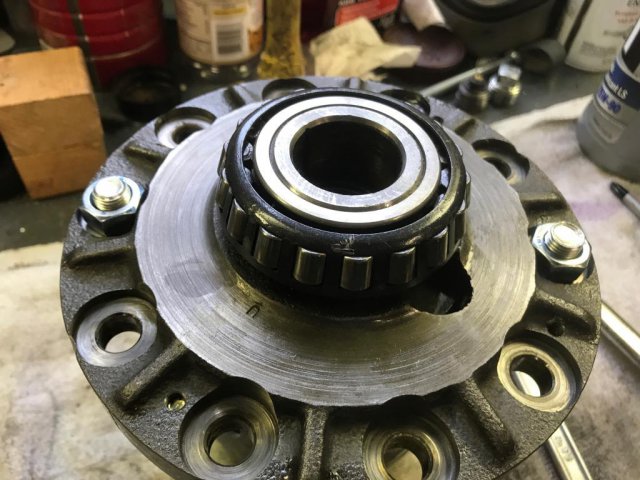
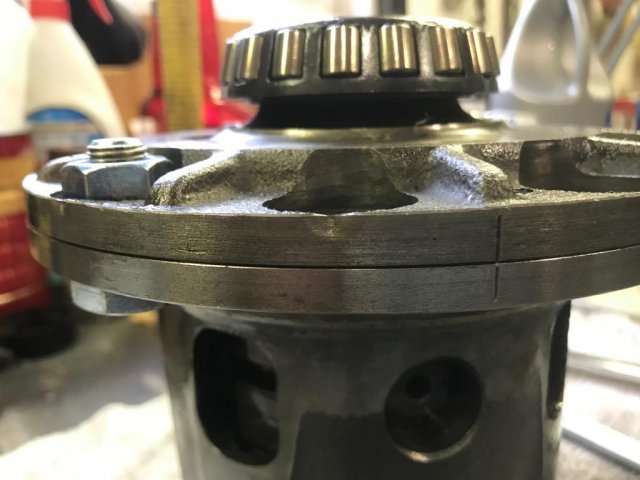
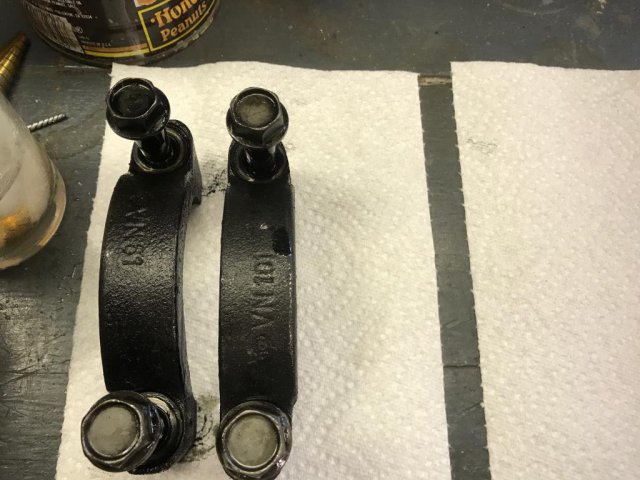
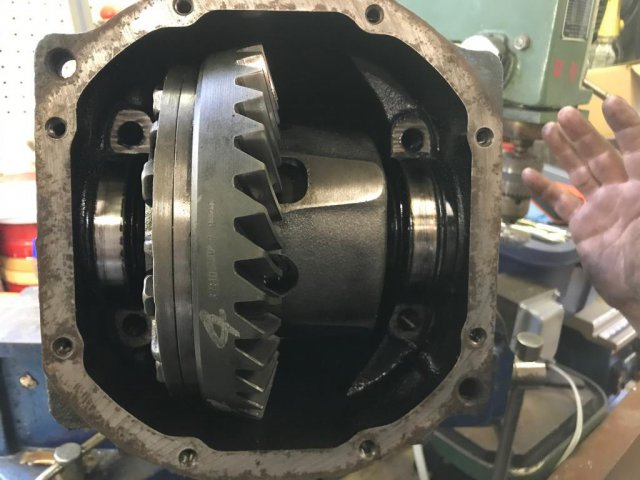
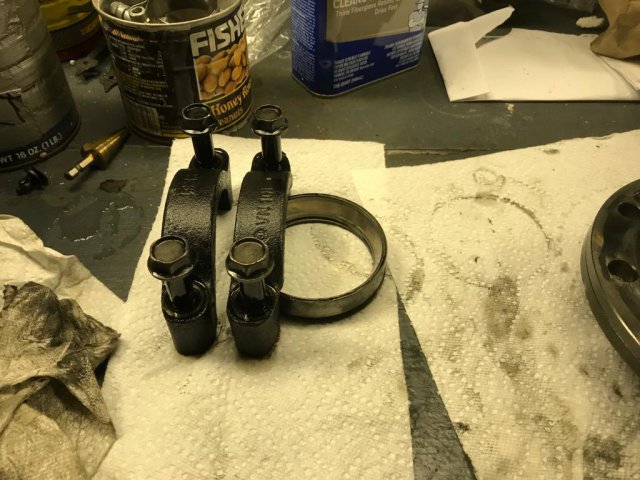
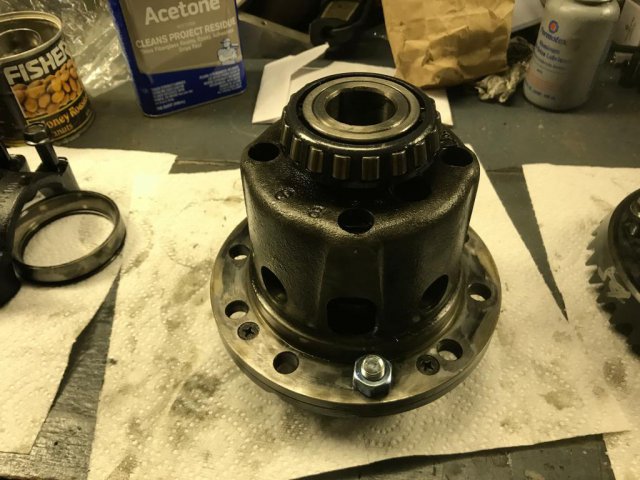
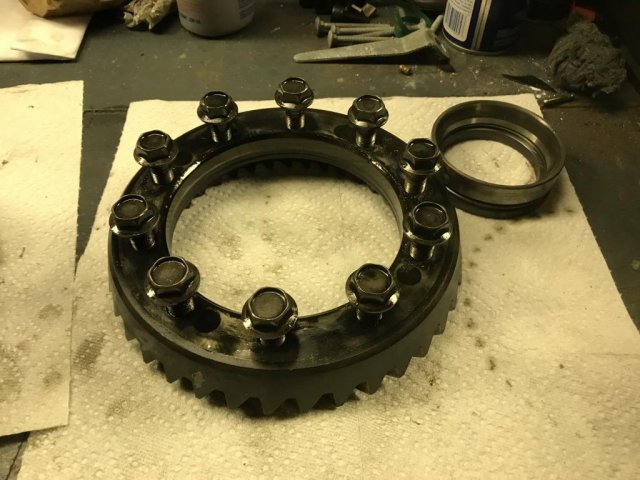
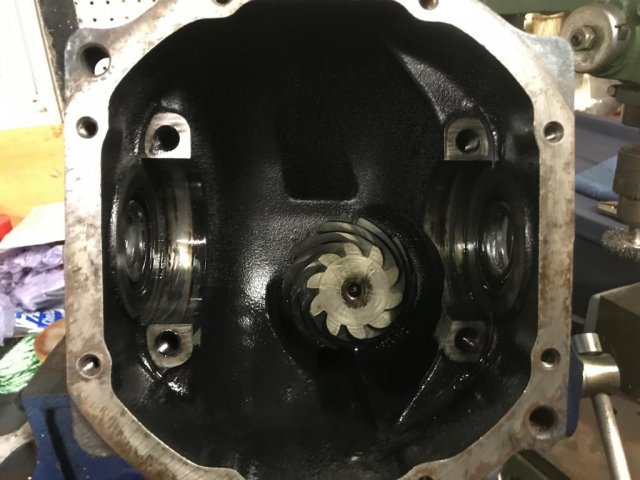
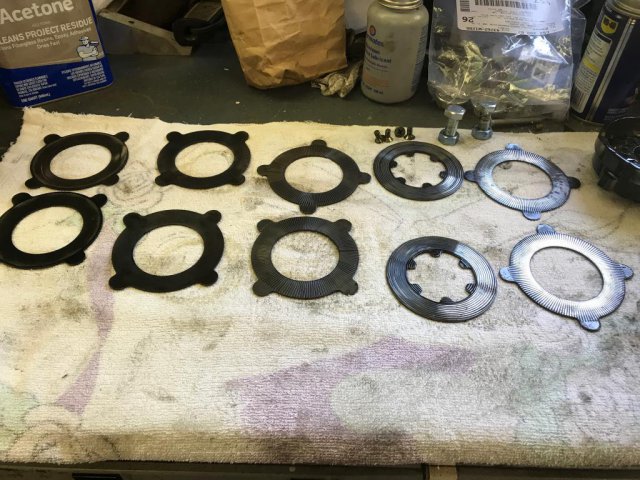
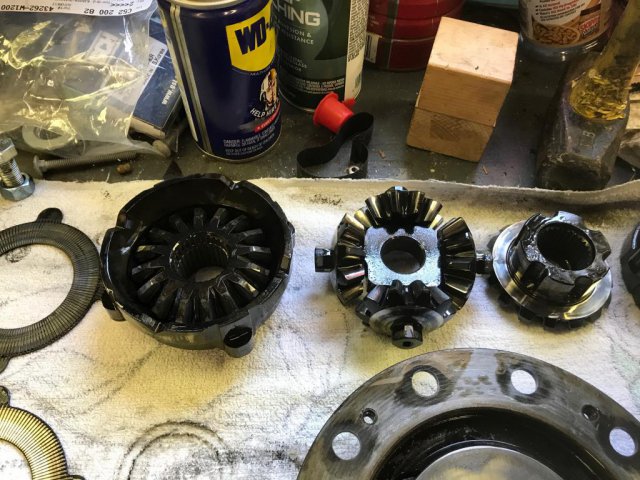
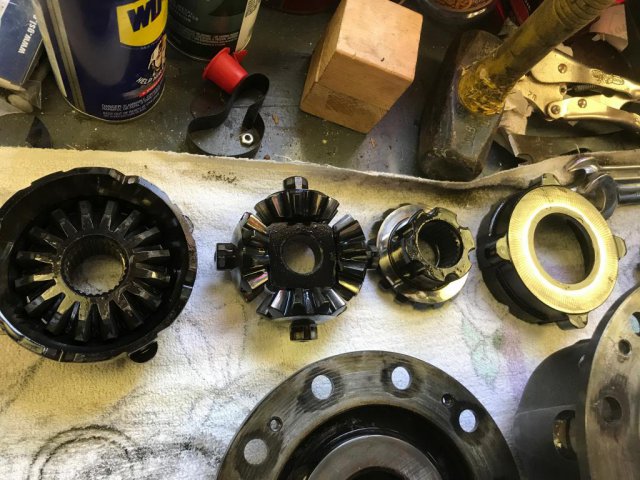
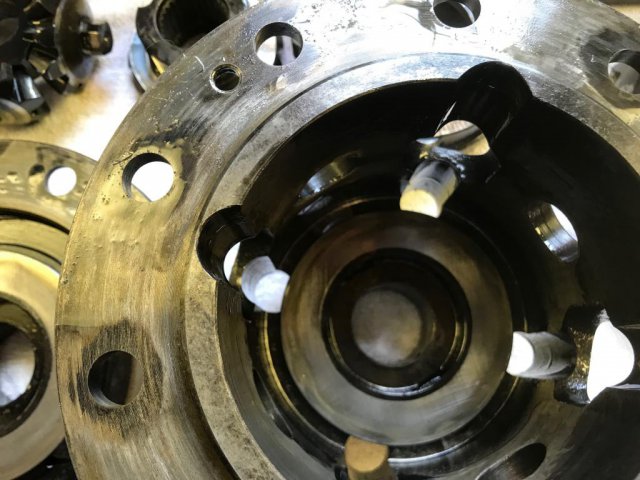
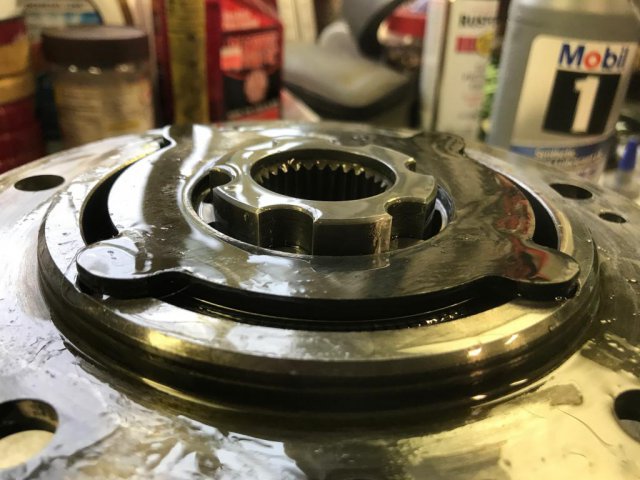
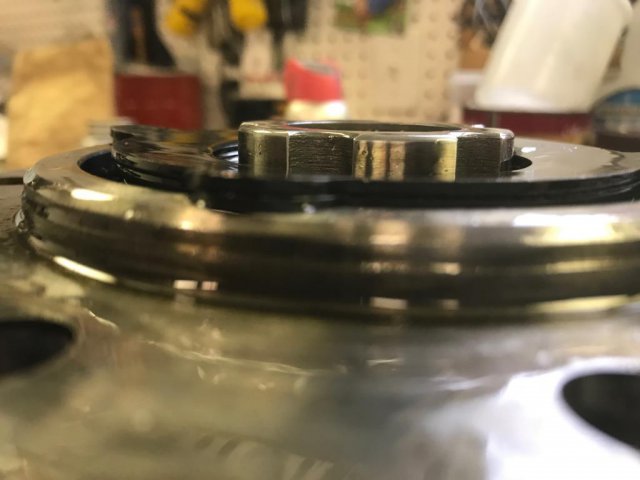
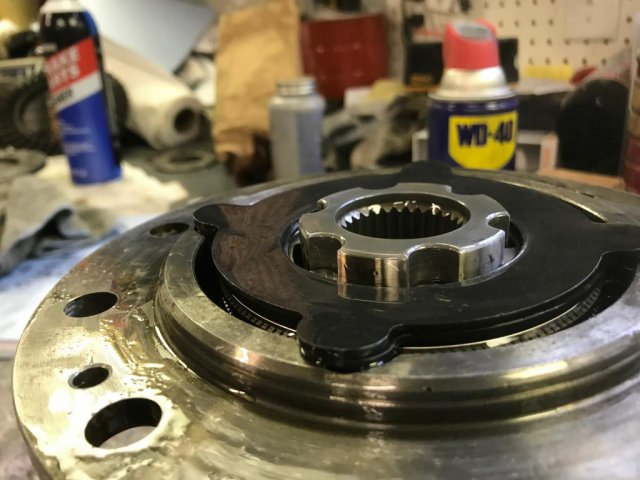
Here s a series of pictures of the removal and rebuild, first the teardown I reloaded the diff in the order I posted earlier, here is how much the last spring plate stuck out over the housing. I oiled up the plates, clutches, and spring plates and attempted to put the cover on, it took me three times to get it on, i used bolts through the ring gear holes to SLOWLY and GENTLY compress the cover on. When I felt the cover giving resistance that seemed like pinching the tabs I stopped and started over again. Finally on the third try it compressed all the way without the spring plate tabs getting out of alignment. Picture of bolts used, Half turn of each bolt until it closed
-
Here s a series of pictures of the removal and rebuild, first the teardown I reloaded the diff in the order I posted earlier, here is how much the last spring plate stuck out over the housing. I oiled up the plates, clutches, and spring plates and attempted to put the cover on, it took me three times to get it on, i used bolts through the ring gear holes to SLOWLY and GENTLY compress the cover on. When I felt the cover giving resistance that seemed like pinching the tabs I stopped and started over again. Finally on the third try it compressed all the way without the spring plate tabs getting out of alignment.
-
Thanks Jon, I'll try and get it together tonight, it is the last spring disc that will need to stay put over the tang slots as I squeeze the cover down slowly and pray it stays aligned. Not sure what you mean by flipping the housing, I flip it to get the first set of plates in then flip it back put the center section in and then the stack of plates and the cover? I'll post some pictures.
-
Finally getting around to rebuilding the differential and encountered something weird the diff had NO Spacers???? I am going to try and put the cover back on and it seems like there is not enough room for everything to fit. I have only the old clutch plate left over if I follow the sequence of : spring disk spring disc new clutch plate new clutch plate new clutch center section new clutch plate new clutch plate new clutch spring disc spring disc I did a trial assembly and the last spring plate is not in the tab slot, I am guessing that I am going to have to use 3 bolts in the ring gear holes to squeeze the cover on and hope I can compress the spring plates enough for the last spring plate to go in the tab? this seems awfully difficult to do without that last spring plate moving around but I guess with enough attempts it will go together. Having no spacers to remove sound normal to you? I looked up the factory manual and they do show a spacer. It might be possible the previous owner had it apart some time and removed the spacers? what for and why did my diff seem fine until it developed a clunk?
-
Well I haven't had any luck finding Axxis/PBR Ultimate pads so now I am looking at Porterfield R4S pads. searched and a thread said AP272-R4S But I can't find that pad for sale anywhere. Searched Porterfield site and downloaded a 2010-2011 catalog and the list a AP230-R4S for all 240SX rear applications been able to find a few online but nothing on Ebay? Can someone confirm I have the right pads before I order them? Thanks, Greg

