
DREW RBZ
-
Posts
282 -
Joined
-
Last visited
-
Days Won
3
Content Type
Profiles
Forums
Blogs
Events
Gallery
Downloads
Store
Everything posted by DREW RBZ
-
Thanks very much guys! Its going pretty well so far. Bolting on nice shiny stuff is therapeutic!! Joel, Did you get the checkered flag hubs installed yet?
-
Some updates. Car is back from the bodyshop. We decided to do the underside, interior, engine bay and door jambs etc first. We will then assemble the car and take it back to the bodyshop for the full exterior spray. This is being done to avoid the chips and scratches while undergoing assembly. The interior of the vehicle received a "lizard skin" type spray on sound deadener application to the firewall, tunnel, hatch area, wheel wells and floors. It is already a noticeably less "tinny" sound. I then began to install the "FatMat" insulation. Yes...this will add weight to the car however I want this car to be as rattle free and quiet inside as possible. This is primarily a street car. I guess I'll have to dial up the boost a pound or so to compensate. It is hard to see but this is a photo of the sprayed on sound deadener. Here you can see the "Fatmat" being applied..yes..theres a lot of it. You can also see in this photo the paint colour changing a bit to bronze. As mentioned...this is the Nissan "titanium" paint (Code is KAC) Painted wheelwells. underside of car...in this light paint looks more grey... Underside of car and hatch area where fuel cell will be installed. Arizona Z car billet stuff installed. More to come soon...Techno toy tuning front and rear control arms and T/C rods later today...
-
MODS - **PLEASE DELETE
-
I have decided on the wheels. I absolutely love the CCW classics and will be placing an order in the near future. Im looking along the lines of 11" rears and 9.5" fronts in 18 inch diameter.
-
I realize that i am late with the thanks but appreciate the encouragement and nice comments sent my way. I am not sure of a few variables at this time in order to respond to questions as to final weight etc...have to wait until it is all done. As for weight...I would imagine that there will be some added poundage as a result of sound deadening and some of the cage work/chassis stiffening. This will primarily be a street car so I am looking for it to be a bit quieter and civilized than a "race car". In the meantime I took a shot of some of the goodies that I have recently accumulated that will be going on the car. I will be using the coilover suspension and braking system from my last car however will be adding front and rear Techno Toy Tuning adjustable control arms and adjustable T/C rods, some Arizona Zcar aluminum bling bling and some checkered flag racing 5 lug chromoly hubs. More pics will follow as I get the bits and pieces sorted and cleaned up before starting the build.
-
Its been a while since my last update. The car has been in the bodyshop and is now block primered in preparation for paint. The entire underside of the vehicle was also done and will also be painted body colour...it is as nice as the topside of the car! This was a very time consuming process to say the least. View of the front of the car without urethane airdam affixed. Driver side view...the rear BAMF wide flare is bolted up in this photo...they have been slightly modified to fit perfectly. In addition the front and rear lower part of the quarter panel has been stretched slightly and beat into shape to mate nicely with the flare and to carry the line of the flare seamlessly. View of the rear of the car. Dual strengthened exhaust cutouts and custom sheetmetal spoiler. Passenger side view without flares bolted up. Rear passenger side view without flare bolted up. View of the underside of the car. Zeddfinding floor pans were added as they are less flimsy than stock..Custom 1x3" rectangular .120 wall tubing was used for frame rail strengthening. Crossmembers and other chassis strengthening also completed as described earlier in post. Entire underside will be painted bodycolour. Interior floor, hatch area and tunnel will be sprayed with sound deadener product and Fatmat extreme will be used sparingly inside vehicle on firewall, doors and other selected areas. Rollcage will be painted body colour. Now...as for bodycolour...here is what has been chosen from one of my all time favourite cars..: The paint code is Nissan KAC...it is known as titanium grey or alternatively as desert shadow metallic.
-
Long shot but ill give it a try. I am looking for a set of wheels for my new project car. It has the wide BAMF flares by 280zforce. The hubs are 5 lug. Im hoping (faint clause) that someone is looking to part with their ccw's or other quality setup. If nothing by end of March then ill be ordering CCW's...thanks in advance,Andrew
-
I get it...
-
Here is a link to a neat site that gives some explanation. http://auto.howstuffworks.com/muffler4.html
-
Very cool car. The webers are a work of art!
-
ZT-R...wheels look fantastic! Fitment looks spot on to me..thanks for sharing!! Joel...how did you feel when you cut into the steel the first time...scary eh? Gonna be worth it..!
-
Im in for a couple...a hoodie would be good too. My last one has taken a beating.
-
PM sent...
-
My Dream LS7GTZ.......project underway
DREW RBZ replied to cobramatt's topic in S30 Series - 240z, 260z, 280z
PM sent regarding parts for sale. Absolutely incredible project! -
Hi fellas! Thanks very much for your help! I managed to find an excellent door from a 72 240z which is the same year as my project car. Appreciate it! Admin...PLEASE DELETE THIS POST..I tried to search how to do it myself but didnt find anything. Thanks! Andrew
-
Hi guys...Im in the middle of my project and we have discovered that the drivers side door had some concealed damage and rust issues due to some standing water. I am looking for a very good to excellent drivers side door (dont need glass, interior door panels etc. I am in Canada close to Ogdensburg, New York..will come and pick it up if not too far. HELP! Thanks
-
Epic seat covers! Love the military paint scheme...make sure to update with the results of the 7.62 rounds...lol!
-
Into the trailer and off to the bodyshop. Shop is going to start the car at the end of the week. I am going to be going with a gunmetal colour. Here is one of the cars that I am using as inspiration. I do not know who the owner of this car is...would love to know more about it if anyone can chime in.
-
Transmission mount and Driveshaft loop...Driveline angles set.
-
Some more progress... cage work Rear subframe connectors Welding/cleaning up tunnel...will be carpeted and custom aluminum console/switch panel fabricated: Paul and I unloading the RB powerplant ready for fitting...More than one use for a backhoe! Motor put down 540rwhp at 17psi at Almasi Tuning in Montreal, Quebec. Fully built; HKS step 2 cams, 2860r -5 turbos,external peterson oil pump, tomei downpipes, 750cc injectors, methanol injection. Paul stretched the rear stock quarter at the bottom to flow nicely with the flare. NEXT UP...set the motor and tranny in the car, set the proper angle; fabricate custom transmission mounts and install driveshaft loop. Stay tuned!!
-
That was a very good laugh...pretty funny stuff..thanks for sharing.
-
Now onto the aluminum fuel cell. Paul cut the spare tire holder and stock floor out of hatch area. Square steel tubing used for the support for cell and added rigidity to the rear of the car. New steel welded into floor.
-
Now...onto some cage work...Car will be primarily street driven but will be used for the odd "friendly" track day. Tubing used is dom seamless 1 1/2" .120 wall. Close up of rear of hatch. Tubing welded to 6x6" 1/8 steel plate. Under the plate is the rear subframe. Cagework viewed through passenger side of car. Still to be added is tubing along the side of the door..will be relatively low down to provide easy access in and out of the car. Yes... what you see in the middle is the meth tank for the methanol injection...vented to outside of car. This is not 100% meth..it is a 50/50mix..from what I understand not much different than having windshield washer fluid in the car...discuss??? Also in the photo is a custom titanium strut tower bar by Rick Wong. Tubing behind driver seat...welded to 1/8" 6x6" steel plate. Under the plate is the subframe. View of tubing from rear of vehicle. Tubing welds behind seat area
-
Now onto what we are doing to strenghen the chassis. The decision was to completely remove the stock frame rails and weld in 1x3" .120 wall steel rails. In the photos you will see that the rail is welded right into the floor where the old rail was..protrudes 1/2 inch on each side of the floor of the vehicle. The rail continues on and is welded to the subframe. In addition an additional section of steel goes off at a 90degree angle from the frame rail and is welded to front and rear of the rocker. Close up of front right frame rail with section going to rocker and start of 2.5x2.5 wall steel going to front of car (where TC rod connects). Sorry for poor explanation here...hope the photo is self-explanatory. Close up of driver side floor - Frame rail and tie in to rocker. Rail then continues forward of the firewall area as 2.5x2.5 .120 wall steel. More detail of chassis strengthening at front of car. Stock seat brackets removed and new lowered sections welded in. Aluminum recaro seat brackets will be affixed to these new sections. Seats are Recaro Pole SPG's
-
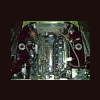
As per request here are a couple of pictures of my previous RBZ - 1970 240z - Written off September 2010. Engine bay - dynoed at 540rwhp at 17psi. Pic of the car leaving the bodyshop... I dont have the heart to post a pic of the car after meeting a concrete wall...so I will just leave it with good memories..
