ryant67
-
Posts
355 -
Joined
-
Last visited
-
Days Won
4
Content Type
Profiles
Forums
Blogs
Events
Gallery
Downloads
Store
Everything posted by ryant67
-
I imagine it was a lot of work, but it was also soooo worth it, right? Looks like you did a great job getting it all back together and better than ever - now get out there and enjoy some of that sweet sweet summer cruising!!
-
A fuse cover with integrated gauge pods would be a pretty useful item for many folks, I would imagine. There really isn't much provision for adding gauges in these cars, and any switch from the stock dual gauges necessitates adding more, so it's a common problem. It'd be great to have a professional looking solution on the market.
-
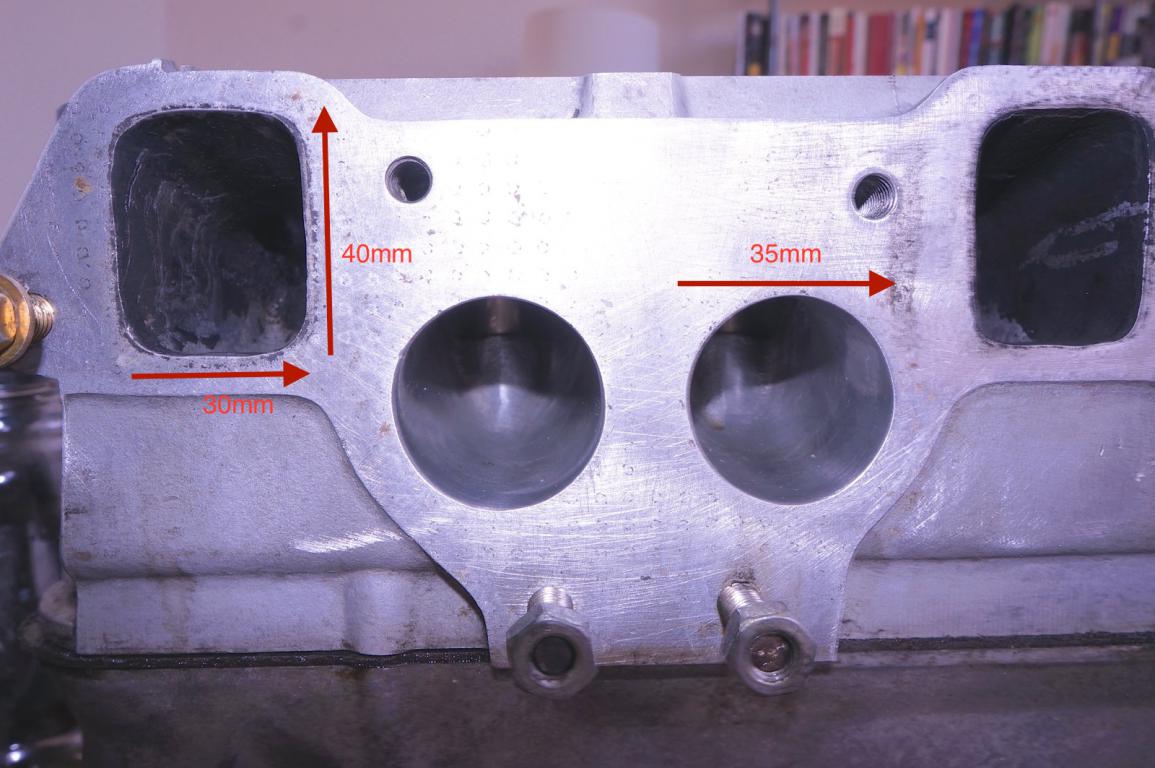
Checking over things from the old engine, killing time in limbo... My E31 head: DSC04427 by ryant67, on Flickr At the very least, those old aluminum valve retainers will be needing replaced. DSC04432 by ryant67, on Flickr -------------------- The camshaft has obviously been reground, but there is no stamping on it besides the factory "K". Mystery cam! The car was pulling very hard from around 4k rpm up to red line at 7k rpm. I set the rev limiter to 7k rpm due to the unknown internals, but this thing wanted to keep going at 7k... Measuring the lift with vernier calipers: Find the smallest lobe measurement DSC04430 by ryant67, on Flickr Then the largest lobe measurement DSC04429 by ryant67, on Flickr So 1.5" - 1.15" = 0.350" Rocker arm ratio on these cars is typically 1.5 I believe, so 0.350 * 1.5 = 0.520 lift. So that helps explain the powerband a little. Skinny looking lobes though. ---------------------------- Checking on the Centerforce clutch and Fidanza flywheel, all looks pretty good to me, aside from all the oil from my rear crankshaft seal leak - still though, I guess my shifting isn't THAT bad... DSC04412 by ryant67, on Flickr DSC04411 by ryant67, on Flickr DSC04413 by ryant67, on Flickr ---------------------------- Cleaned up my Mikuni intake manifold. DSC04408 by ryant67, on Flickr DSC04407 by ryant67, on Flickr DSC04410 by ryant67, on Flickr DSC04407 by ryant67, on Flickr Who is Jack? I measured up the manifold: Carb side: 44mm Intake side: 35mm So the ports all match (for better or worse..) Probably going to soda blast my Mikuni 44's this weekend in an effort to clean up the outside of the casting. I have a damaged body to test on first, but this method looks simple enough, and the results look spectacular! Link: http://www.aircooledtech.com/tools-on-the-cheap/soda_blaster/
-
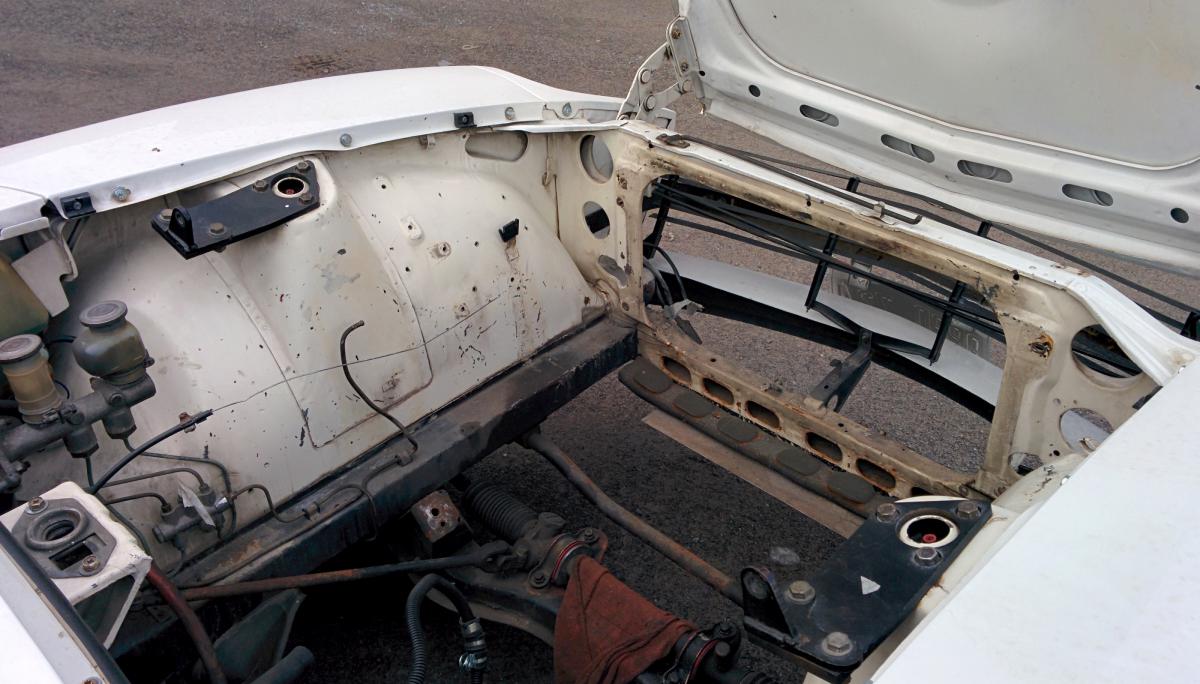
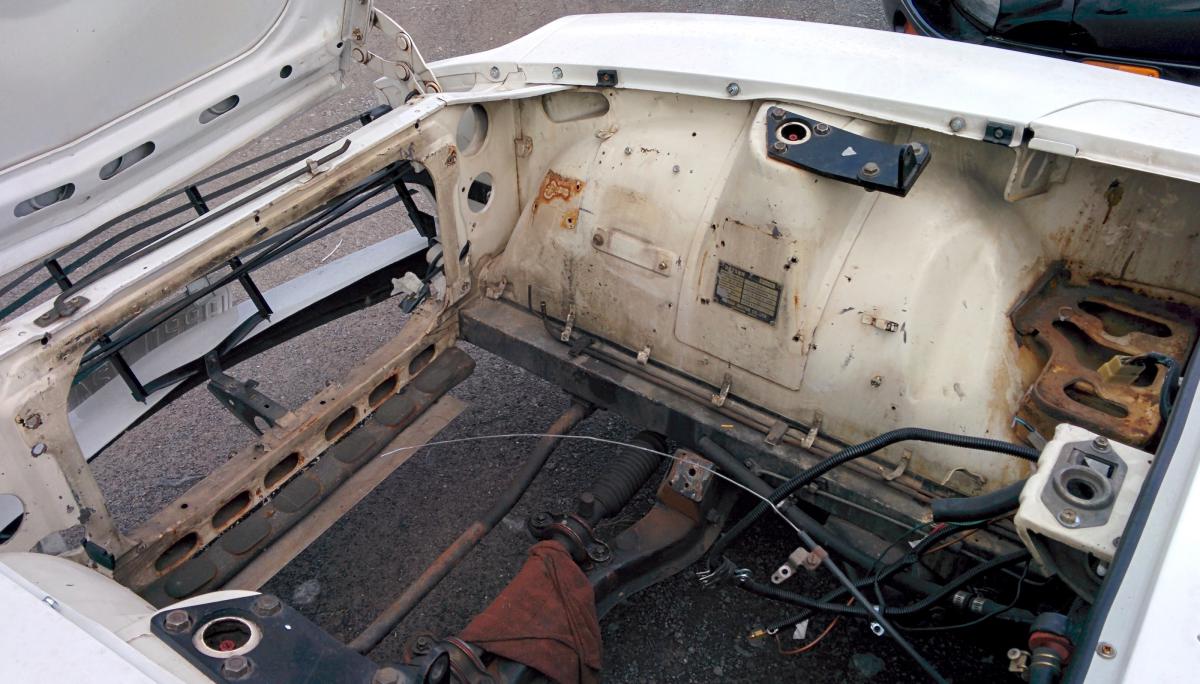
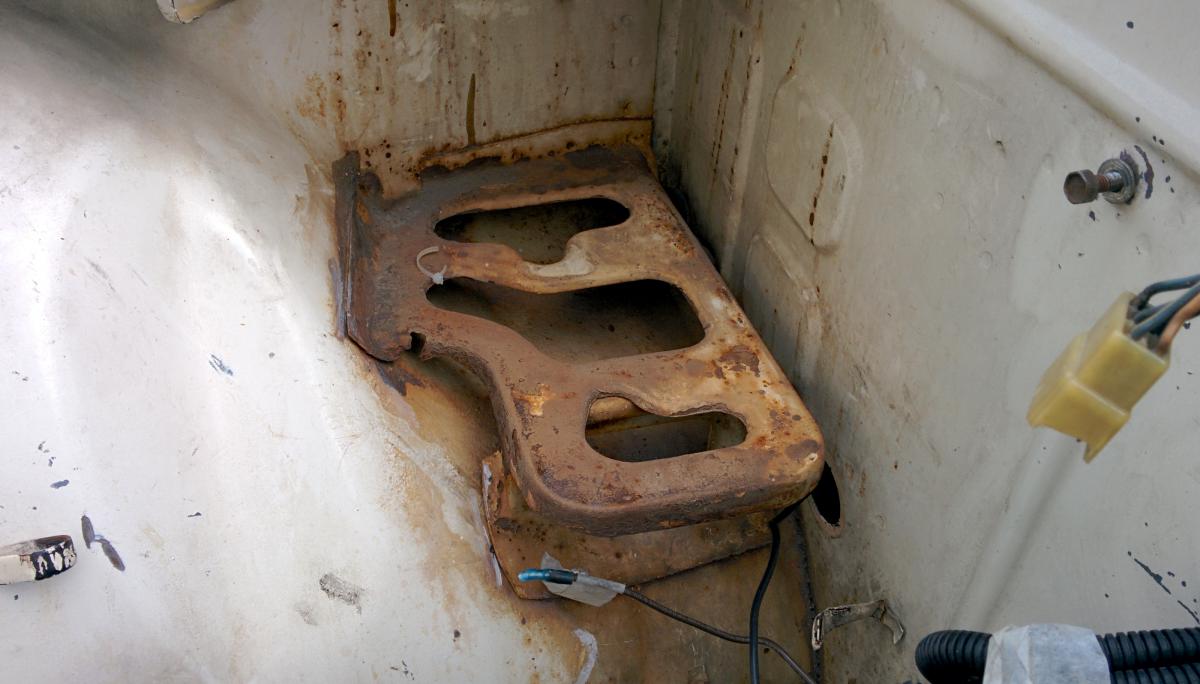
Done all I can, so it's off to the body shop for paint. The frame rails are rock solid, which is good. Thankfully the rust by the battery tray doesn't seem to go too deep either, just surface stuff. Excited to see how it turns out. Big re-wire job is next up. Did a re-wire last year, learned a lot in the process too, but I think I can do a much better job this time - especially with no engine in there!

-
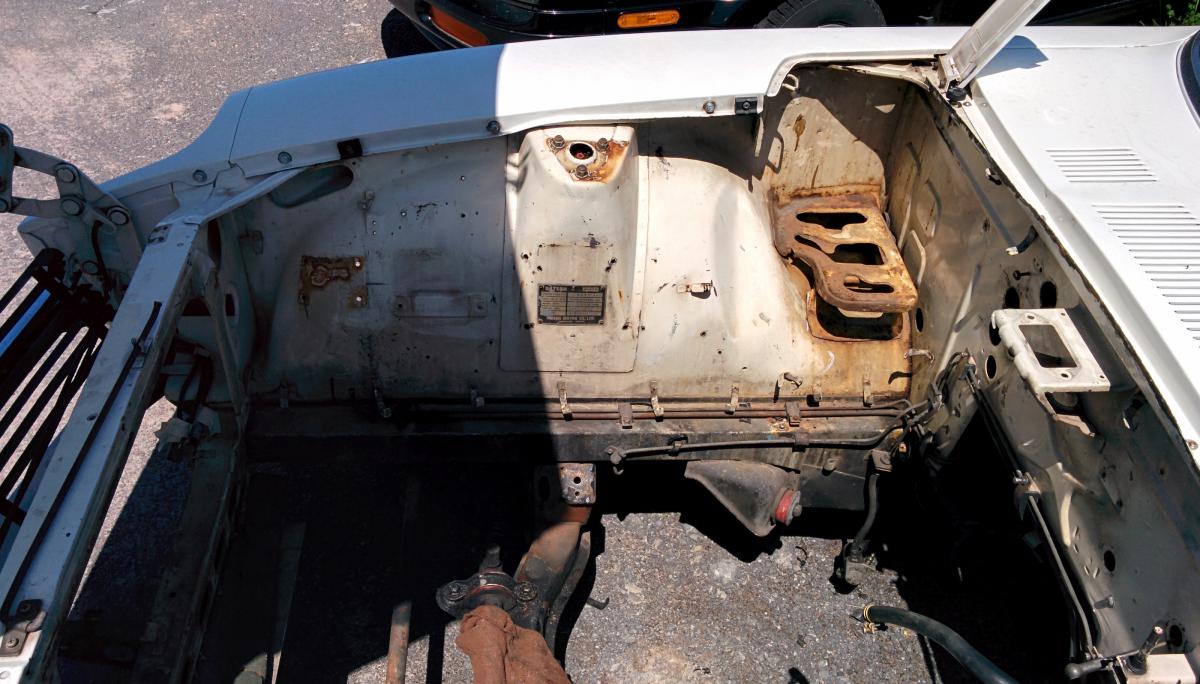
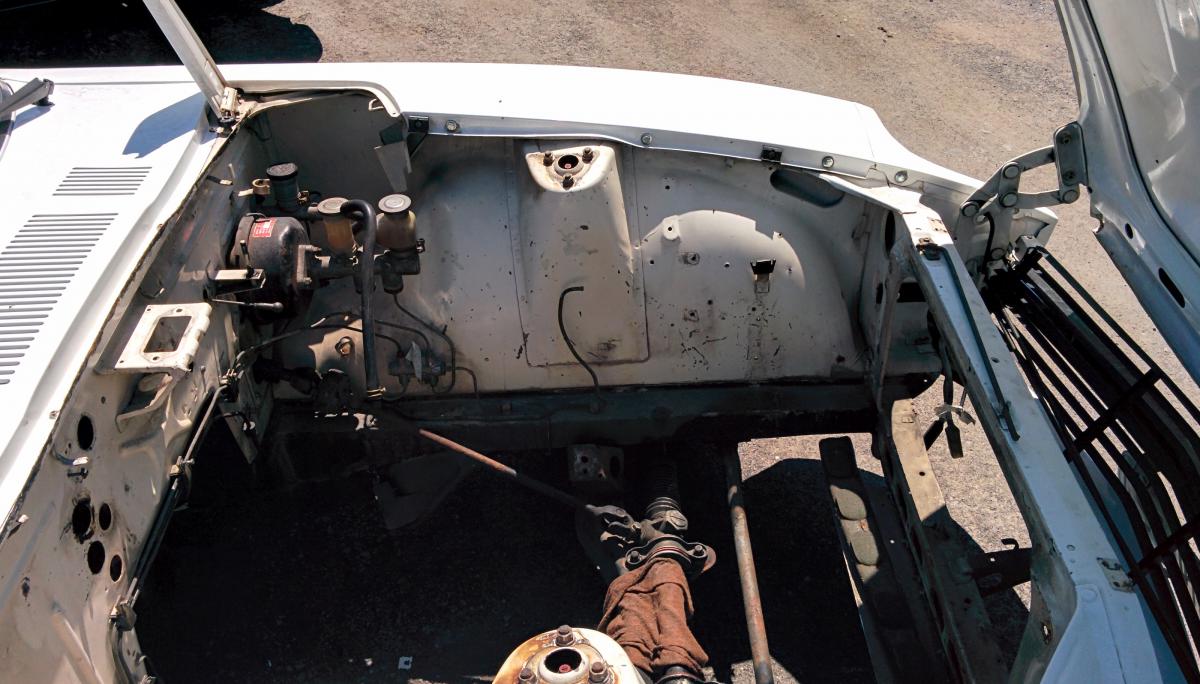
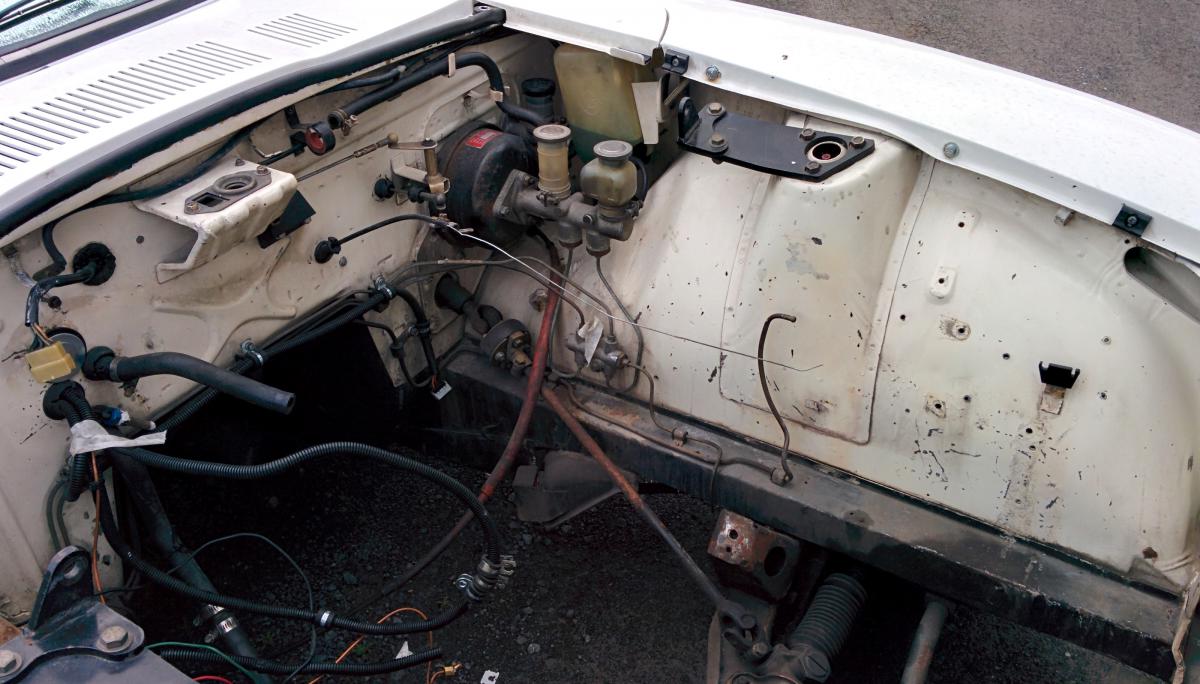
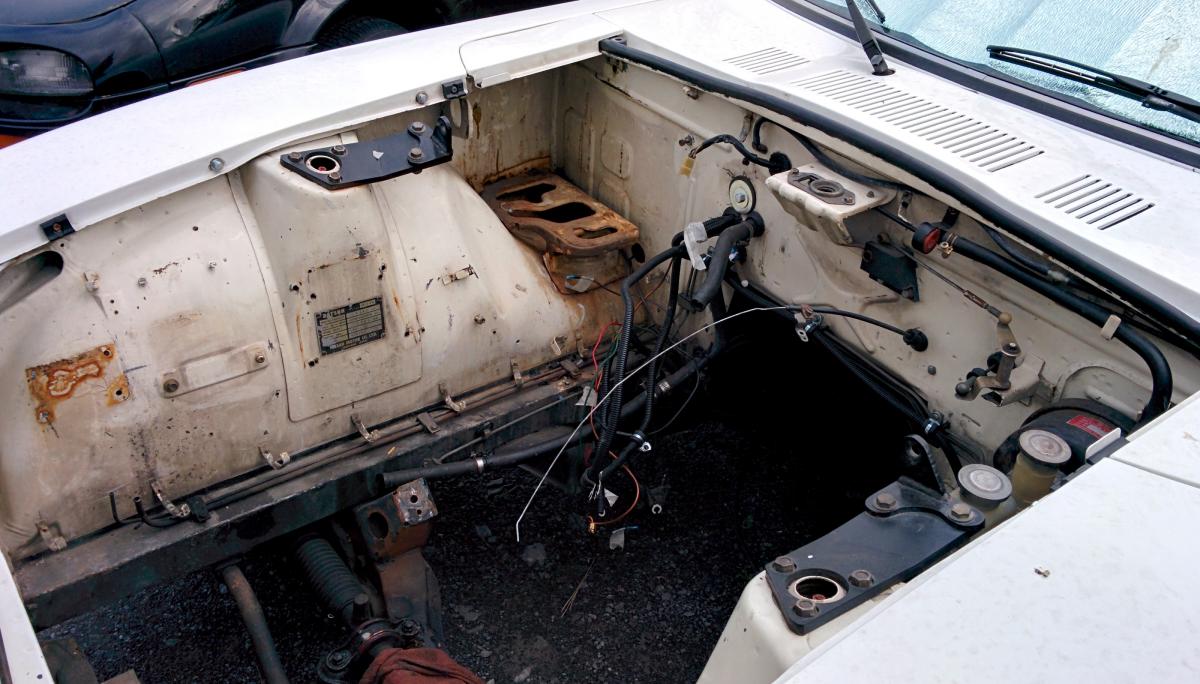
Bought a fully built engine over the weekend. Was going to build another stroker, but it's Summer and I want this thing back on the road ASAP... besides, rushing a serious engine build is probably not the best of ideas, so the stroker can wait... for now. I'll be switching to a well built L28 with flat top pistons and a ported N42 head, running about 9.5:1 compression with a 1.5mm thick Kameari head gasket. It currently has a pretty mild Crane camshaft in it. I am planning to run it as-is for now, but since I do have my E31 sitting here I am tempted to slap a more aggressive Isky cam into that, switch to a 1mm head gasket, and shoot for 10:1 compression with some valve reliefs cut into the pistons. Could work well, and the quench from the flat pistons and E31 head should keep detonation from happening. Anyway, that's all speculative since I don't pick up the engine for another week or two. For now my attention has turned to having the engine bay sitting perfect and ready for that new engine. The paint on the body of the car looks pretty great still, and the underside is solid, but the engine bay is looking pretty sorry. Quite sure this is still the original paint, and I have a little bit of battery area rust going - now is the perfect time to take care of this. Stripping everything out of the engine bay now, but still have to do the area by the master cylinder. I'm shopping the repaint out to a local shop, I know my limits and want this done properly. It will be getting painted white to match the rest of the car.
-

Techno Toy Tuning Strut Brace
ryant67 replied to dreco's topic in Brakes, Wheels, Suspension and Chassis
Can confirm, the bars are about 2" too short to reach the Cusco ends. I emailed T3 and they are sending me out longer ones - will report back once I get them. -
Techno Toy Tuning Strut Brace
ryant67 replied to dreco's topic in Brakes, Wheels, Suspension and Chassis
Wow, that's a stunning engine bay - the little flashes of blue really pop and bring it all together!! -
Techno Toy Tuning Strut Brace
ryant67 replied to dreco's topic in Brakes, Wheels, Suspension and Chassis
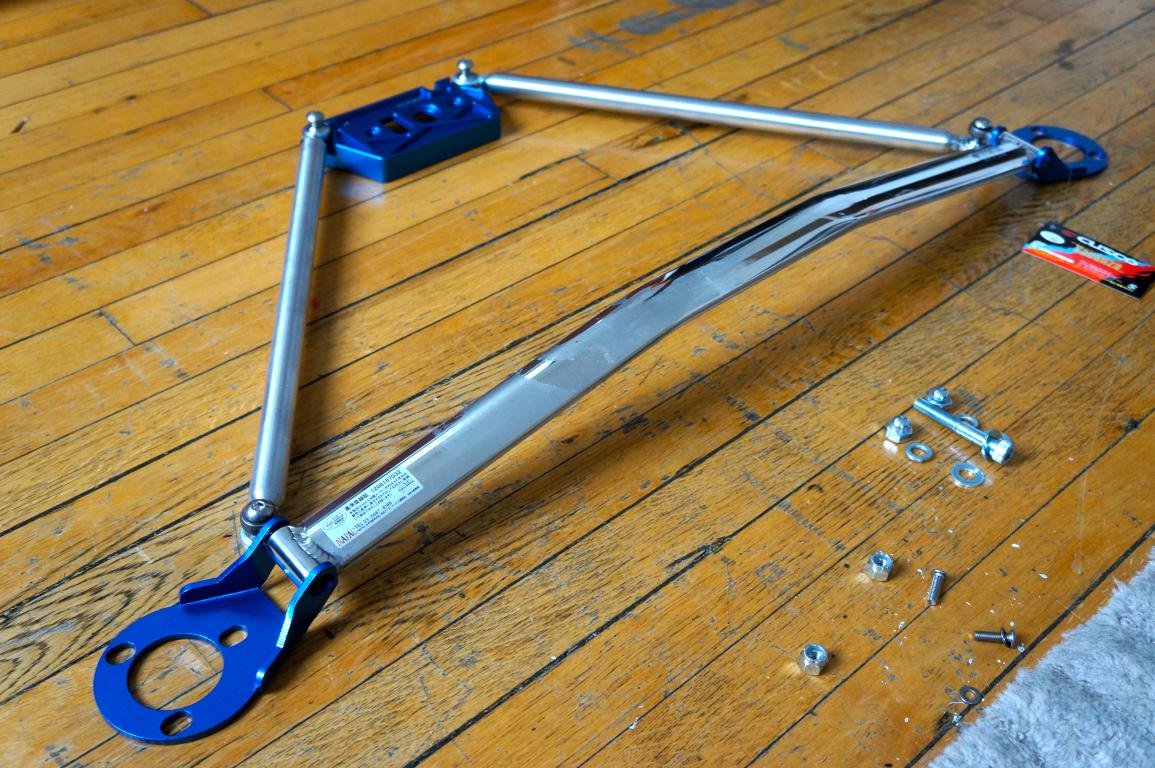
Didn't get to my car today, but here are a couple of pics anyway. The triangulation rod's are both 19" long, center to center, and are spaced apart about 6.75" at the hood latch. So that should give you an idea as to fitment. Unfortunately it seems I didn't get the correct hardware for the cusco bar from T3 though, so I'll need to shoot them an email about that. The rod ends are too short to reach all the way through the Cusco bar. Sure it was just an error, not a big deal. Quality seems great though, and the latch part matches the Cusco blue almost perfectly - very nice!!
-
Techno Toy Tuning Strut Brace
ryant67 replied to dreco's topic in Brakes, Wheels, Suspension and Chassis
According to T3, they have what is needed to make the triangulation work with the Cusco bar. I have ordered the kit based on them stating as much to me - I should be picking it up from the post office tomorrow. Unfortunately my engine bay is empty right now, but I can certainly post back with measurements if it helps... -
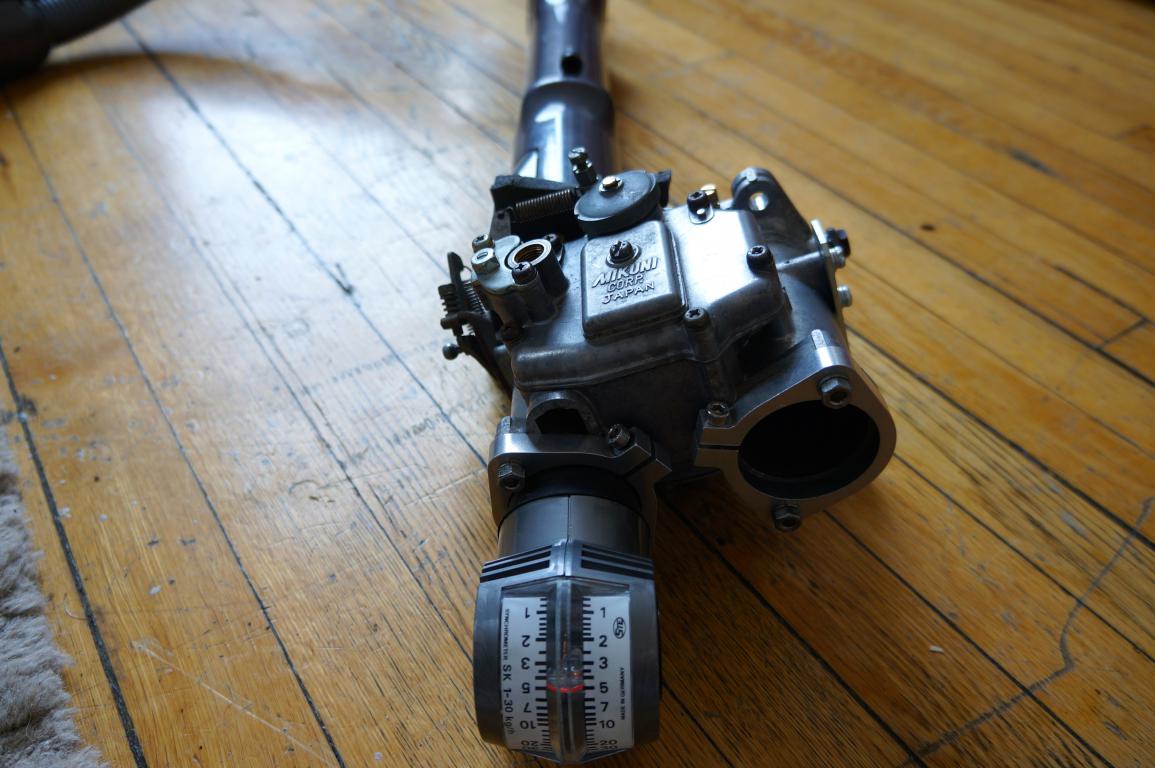
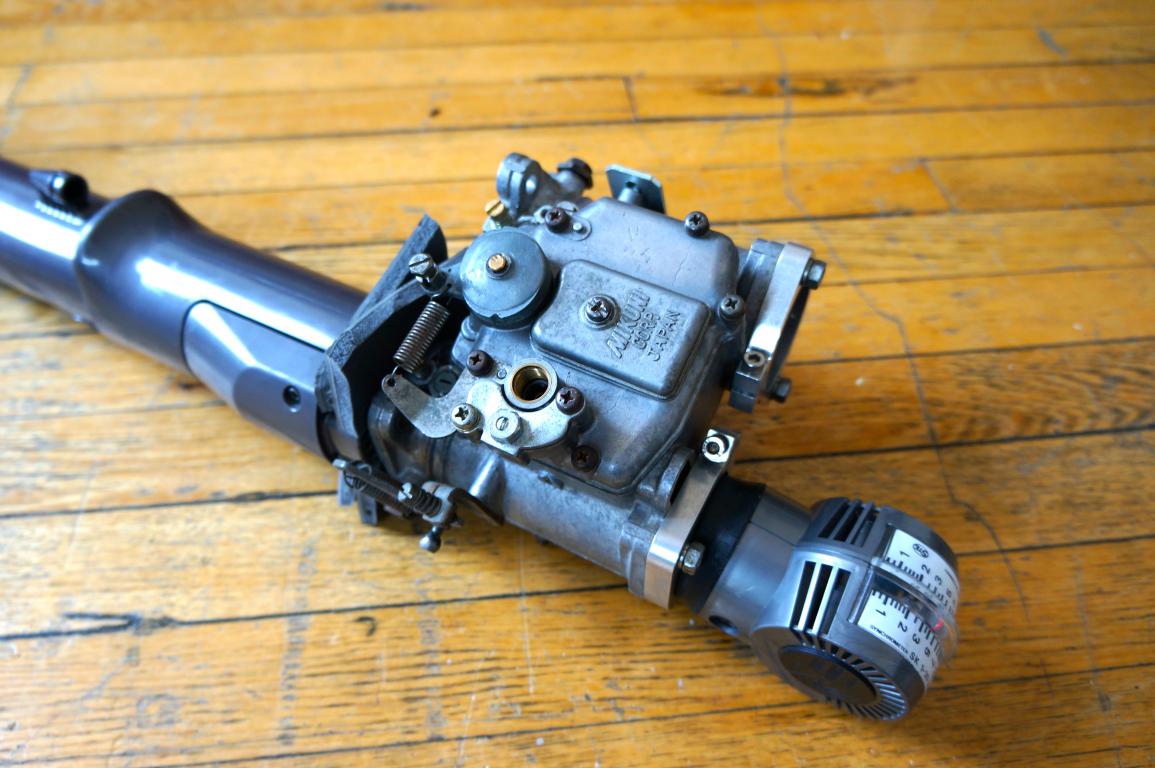
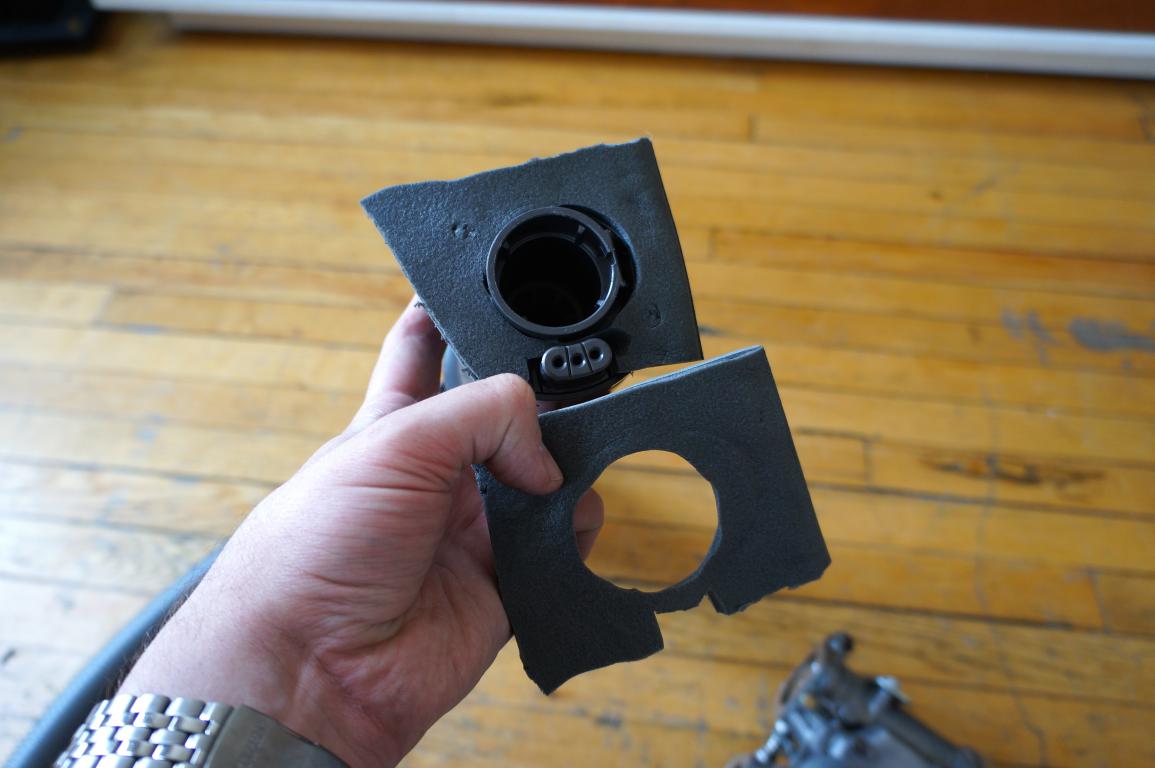
Bored while waiting for other engine things to fall into place, so I figured I would give my Mikunis a good look over as they weren't perfectly balanced when I put them back on the engine after rebuilding them. Enter "The Madkaw Method"! I grabbed some dense closed cell foam and made a few gaskets to fit over the end of my vacuum hose, and they seem to create a good tight seal - measurements with the gauge are repeatable with pretty much no discernable differences in readings. This actually works pretty nicely, since you can adjust the throttle stop screw to get a higher or lower airflow reading, and see if it's balanced through other amounts of flow. The first two carbs were perfectly balanced on both sides, but the third was a full kg/h off on one side @ 5kg/h. Checked the seals and all were good. So figured it's probably a twisted shaft. Pliers on both ends of the throttle shaft, a gentle twist, check, nope... twist again, check, and we're all good! The real test will be once they are back on the car, but if it works it will be pretty impressive. MUCH easier to play around with these things when they are not mounted on the car - thanks Madkaw!
-
Roger that, I'll stop trying to put the chicken before the egg. No point in doing any work before I see how it performs as it sits.
-
Agreed Jon, reckon I'll go ahead and change the title from "ideal headwork for E31" to "improving E31 flow". Less hyperbole is always better Yeah, there is still a little room left to open things up further. The heart shape could be smoothed a touch more in the process as well. I've read through Zredbaron's thread a few times now, it's loaded with great info. Only issue is almost all of the picture links are now broken... Were you running an e31, or was it a n42? I have an couple of old n42's laying here as well, so I might use one for practice before touching the e31.
-
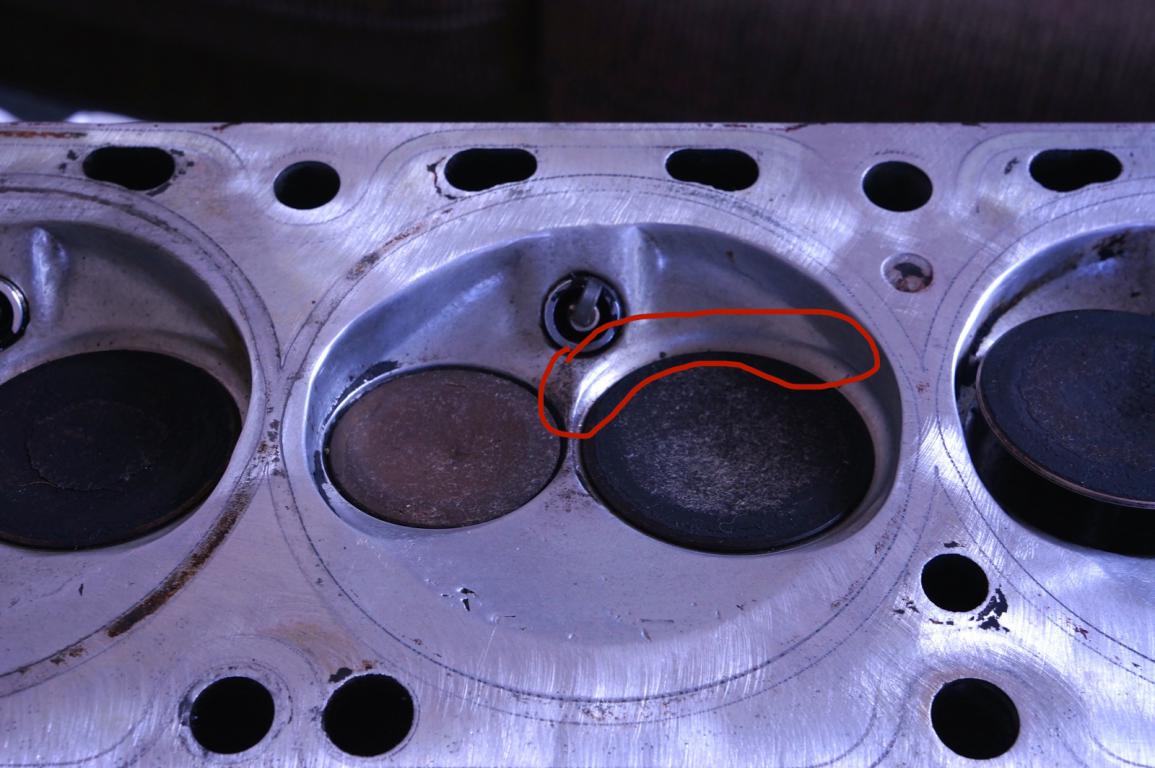
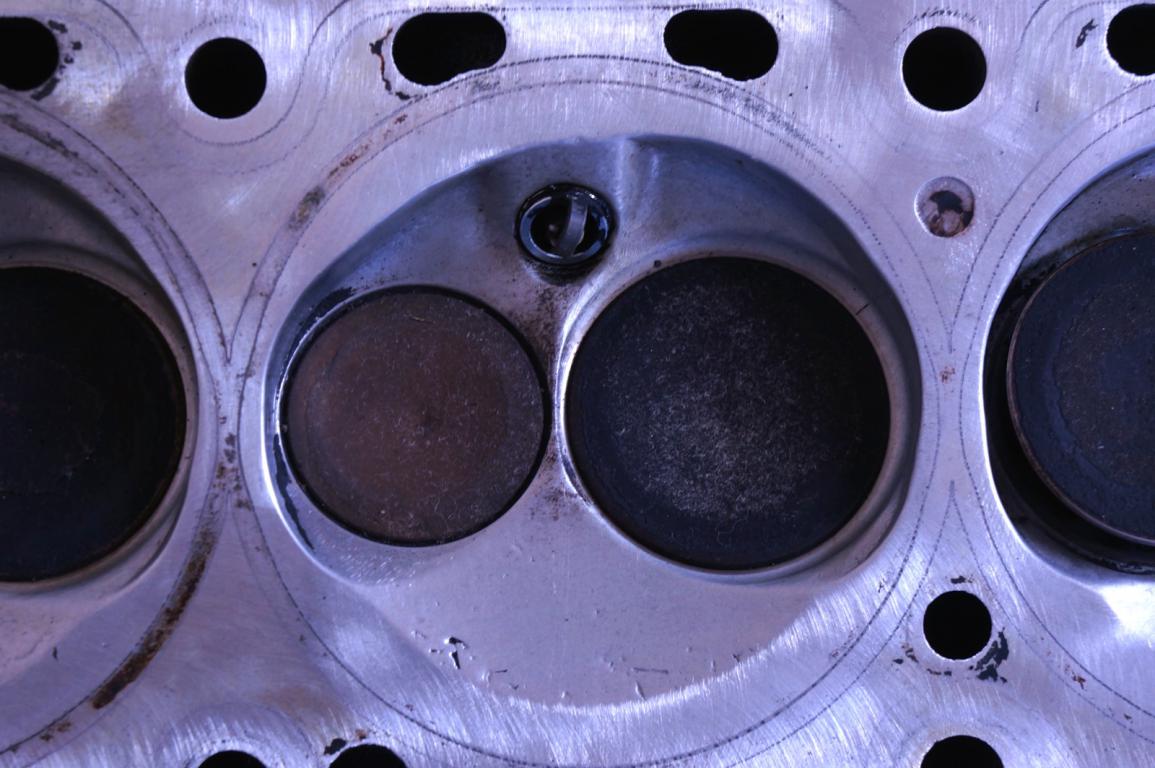
Pulled this E31 off of my old stroker motor that I spun a bearing on. It's had a little work done, probably the better part of a couple of decades ago. No idea who did said work. It does have the larger L28 valve job done. Question is, what is the ideal for these heads when it comes to unshrouding valves? It looks like a decent bit of work has already been done, but I am questioning the areas highlighted and wondering if some simple touch up work that could better blend things could possibly improve flow further.
-
Good stuff, thanks for the response!
-
Madkaw, have you gotten your rockers done yet? If so, what path did you end up taking with them? I am in the process of rebuilding my engine, and doing a cam switch in the process. The rockers seem to be one of the less simple choices, since there are so few good options available. I'm a little torn between attempting to resurface a spare set myself with Norm's method*, or sending them off to Delta. *link: http://www.zcar.com/forum/10-70-83-tech-discussion-forum/88884-directions-how-resurface-rocker-arms.html#/forumsite/20721/topics/88884
-
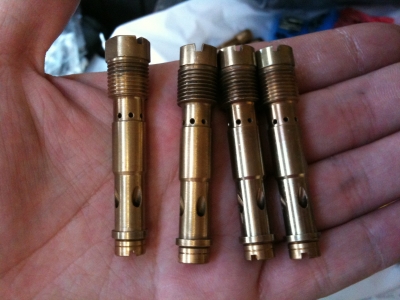
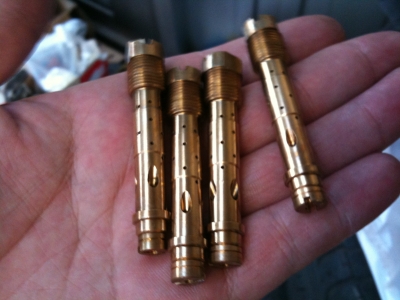
I've been trawling through Japanese websites about S30s lately, and surprise surprise, I came across people over there struggling with the old pilot to main jet stumble. From what I gather, they blame the OA style jet blocks and replace them with different ones. May I present to you the "Wako SPL Jet Block" from AS Watanabe! Pics stolen from this link: http://yosyos227.jugem.jp/?eid=341 Looks interesting. http://www.as-watanabe.com/parts4.htm 5000 yen is about $40 USD each.
-
Sad pics... DSC04337 by ryant67, on Flickr DSC04335 by ryant67, on Flickr DSC04334 by ryant67, on Flickr While the engine is out, I will be repainting the engine bay and tidying the wiring and such up quite a bit. Lots of little brackets and such to POR-15 up too. Here is how the head looks, since it's now pulled. Thankfully the valves have already been switched over to the larger L28 ones, and some head work appears to have been done. DSC04339 by ryant67, on Flickr DSC04340 by ryant67, on Flickr DSC04338 by ryant67, on Flickr Should be hearing from the machine shop this week, and once I know the status of my short block, I can get things rolling. The sooner the better too, since I am obsessing over details way too much already, idle hands...
-
Cheers mate! That makes perfect sense - I somehow missed Leon's post on my read through the thread, d'oh!
-
Trying not to go too crazy with the rebuild here, but since I am already running L24 rods and have a LD28 crankshaft, I guess I might as well take things a step further. At the moment I am thinking of going with the following: E31 head - already ported and polished with enlarged valves (have) Isky cam - thinking stage III? F54 block (have) L24 rods (have) LZ24 pistons - 89mm LD28 crankshaft (have) Clevite bearings 1mm head gasket BHJ damper Misc other items I also have: 9qt oil pan Electromotive HPV-1 Mikuni 44's Fidanza flywheel Centerforce II clutch So, when it comes to pistons, are there any specific brands to seek out or avoid? Presumably actual Nissan ones would be best, but I haven't been able to find any online so far. Same question for piston rings I guess - I think I have read that ITM do the job just fine? I'll be shopping around this week for a decent machine shop to do the rod/crank balancing and engine boring. I know quite a few serious autocrossers, so it shouldn't be too difficult. Ultimately all of the above should leave me with roughly 9.5 compression ratio on a 3.1L stroker. I was running a 3.0 stroker with what I suspect to have been very low compression (never had any ping, no matter how far I advanced the timing), and an unknown camshaft regrind, which I suspect was very mild. Looking for a bit more grunt here - I drive the car purely for fun, hitting country roads and occasional track days. Any thoughts are more than welcome!
-
Had the Z in with my mechanic as it was leaking a fair bit of oil and he suspected the rear main seal. While he was in there replacing it, he found a spun bearing. More money I guess. On a positive note, we did confirm that my engine was indeed a stroker with the V07 crank - hopefully it's undamaged. Heading back up there later today to tear some parts off the engine, to make it easier for him to pull it. Will be interesting to see what's all in the engine, rod/piston wise, etc. Time to read up some more on engines...
-
NA 3.1L=>head & camshaft questions. No shortcuts, max
ryant67 replied to zredbaron's topic in Nissan L6 Forum
Just a random thought, along the line of what Inline6 just posted... You run one of those TWM air boxes, right? I recall reading about someone using one of those and having a rivet inside the box break loose and getting sucked inside the engine via the intake. Might be worth giving it a good look over, if you were running it when the failure happened. For reference, post #12 http://forums.hybridz.org/topic/59069-intakeair-filter-for-triple-mikunis/ -
Actually, I'm really digging the two tone. The contrast really completes the look, and makes the carbon seem a little less showy. Understated, in a good way.
-
NA 3.1L=>head & camshaft questions. No shortcuts, max
ryant67 replied to zredbaron's topic in Nissan L6 Forum
Good stuff, glad you are going to keep at it! These cars are too much fun when running to let a few setbacks (admittedly, heavy ones in your case...) stop you. Hope everything goes smoothly, third time's a charm! -
Wow, you're getting really good with carbon fiber, man - those door panels look very professional!
-
So under what circumstances would you benefit from switching venturi size, and what does it directly affect? The mikuni manual didn't really mention much about their function. Just asking as I pulled and "refreshed" my 44's today, and switched from 34 venturis to 37's while I was at it. Haven't had a chance to play around with things too much yet, hopefully tomorrow.