ryant67
-
Posts
355 -
Joined
-
Last visited
-
Days Won
4
Content Type
Profiles
Forums
Blogs
Events
Gallery
Downloads
Store
Everything posted by ryant67
-
It's a shame that the TWM airbox proves detrimental to top end horsepower, but other box designs have been tested and shown improved midrange torque and no loss of top end horsepower. Thankfully I not attempting to emulate the TWM design terribly much. I don't mind pushing on with this project - worst comes to absolute worst, I still have my ITG backplate and can just buy a new filter and be out some money. Might as well have some fun and see if I can build something a little different though.
-
 Wow, that's borderline unreadable... From what I gather though, one of the unused concepts for the original Fairlady Z has been built and will be unveiled at this years ZCON. Yes?
 -
^ Gorgeous shot, KnuckleDuster! Love those mirrors, subtle, but they look so good on the car.
-
Odd. Technically, it shouldn't work that way, since the engine will technically be getting cooler air, and even 10 degrees cooler should show a slight gain. Hard to argue with someone's actual testing results though. A fellow with a highly modified 240z on zclub (uk club site) has an airbox similar to the TWM (MJP Airbox) and he swears by it and has stated that tests showed gains for him. He said, she said, stuff I guess. I do agree that the fire was due to my own poorly tuned set up, rather than the filter itself; but, at the same time, I have read of at least 5 other Z cars with ITG filters having them catch fire. Either way, I've spent most of the money required at this point, so will march on. I plan on going for some dyno tuning time later this summer, so I will perhaps test with and without the box while doing so. Understandably, without tuning for and without the box, it's not apples to apples, but it should be interesting all the same.
-
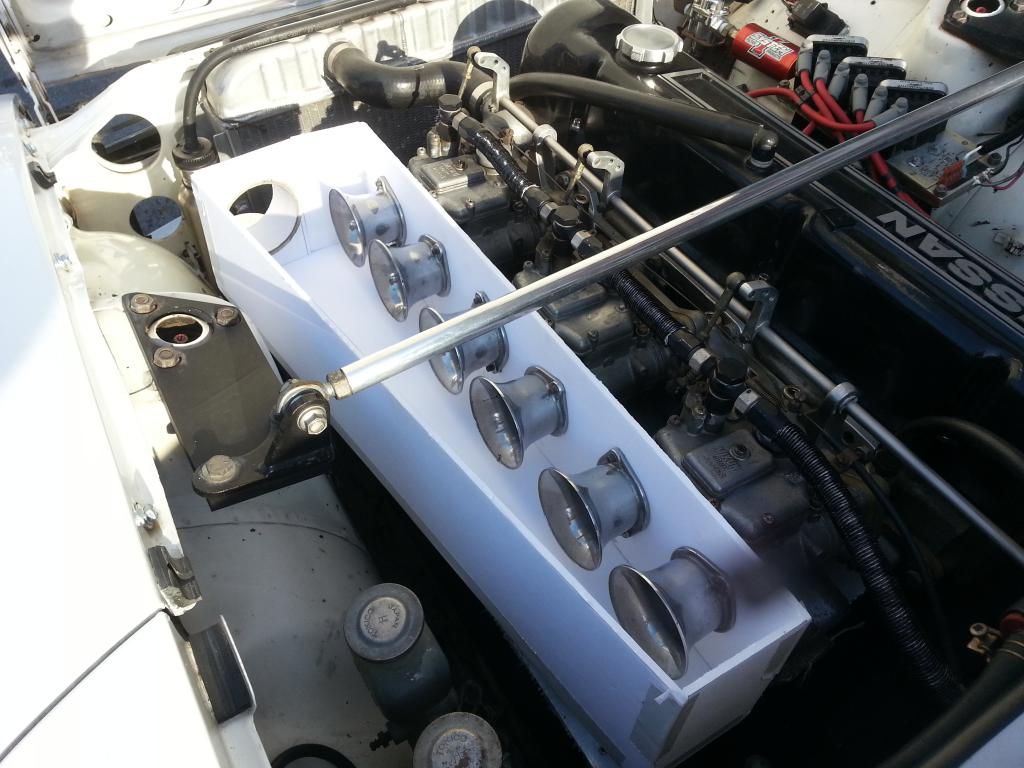
One final variant to mock up today, then I think I'm done. Gareth: I do get a little bit of reversion, but it doesn't seem excessive - a small amount of black residue now and then. Pretty sure the fire was caused by multiple things: - My carbs are running excessively rich (working on fixing that right now, just got a wideband) - I was having starting issues with a dying ignition switch, which meant that at times I would have to crank on the engine pretty hard while fully pressing on the gas pedal. I've since replaced the switch and starting requires only a slight press of the pedal now and it starts instantly. - The ITG filter likely wasn't deep enough for the horns I was using. 65mm internal depth on 50mm air stacks. Might as well take the opportunity to improve the set-up. If I leave enough space, I can always get longer stacks down the road. Clearance on stack #6 is currently 2.5" with airbox version 3. I have bought a sheet of 0.125 lexan and plan to rivet (or screw, haven't decided yet) it on as a top panel to this box, so I can easily keep an eye on the horns and what's inside. The pipe in version 3 is 3 inch diameter. I think I will go with 4 inch diameter in the final version. This means that if I decide I need more airflow, I can enlarge the hole in the radiator support, and only have to remove the silicone reducer and buy a new cone filter. Should be moving forward with all this next week. Sheet aluminum came in today, and I have the lexan and fasterners, so I just need to buy the pipe now.
-
Will take a dig for it, must have the receipt somewhere. The guy at the local Napa just searched for it in their system, and found it easily enough. They didn't have any locally and had to ship it in from a store out west though. Pretty sure the brand was Echlin. Not all Napa's are created equal though, some have pretty terrible workers who seemingly go out of their way to be unhelpful. Might be worth trying another location if your local one isn't trying too hard for you.
-
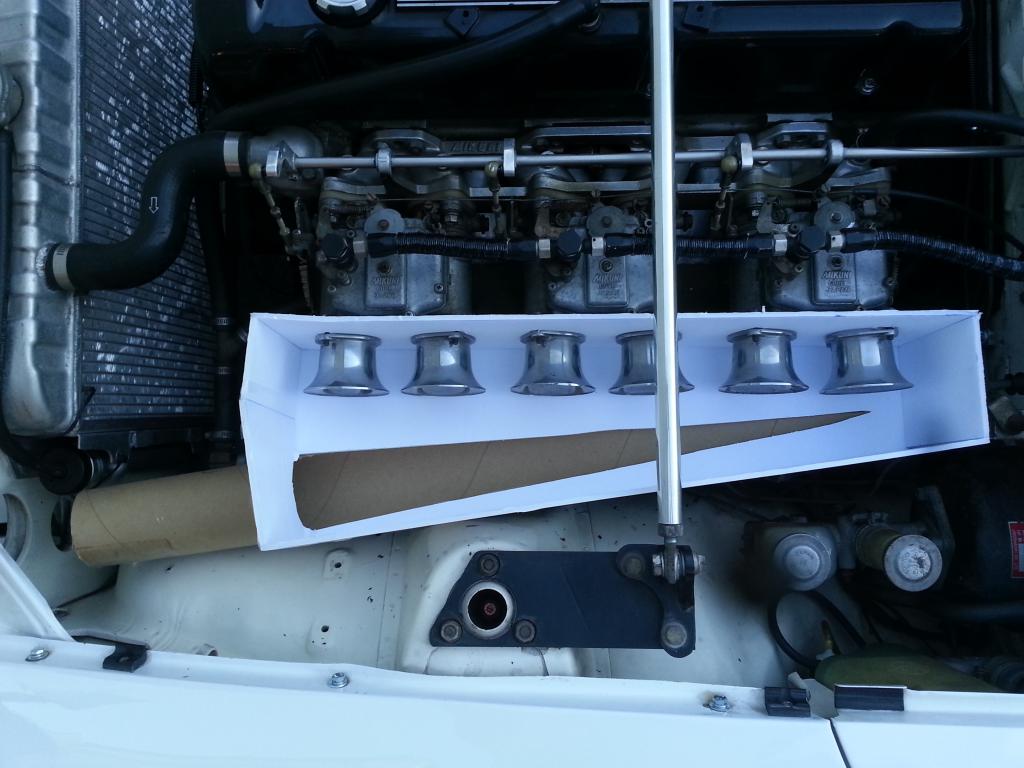
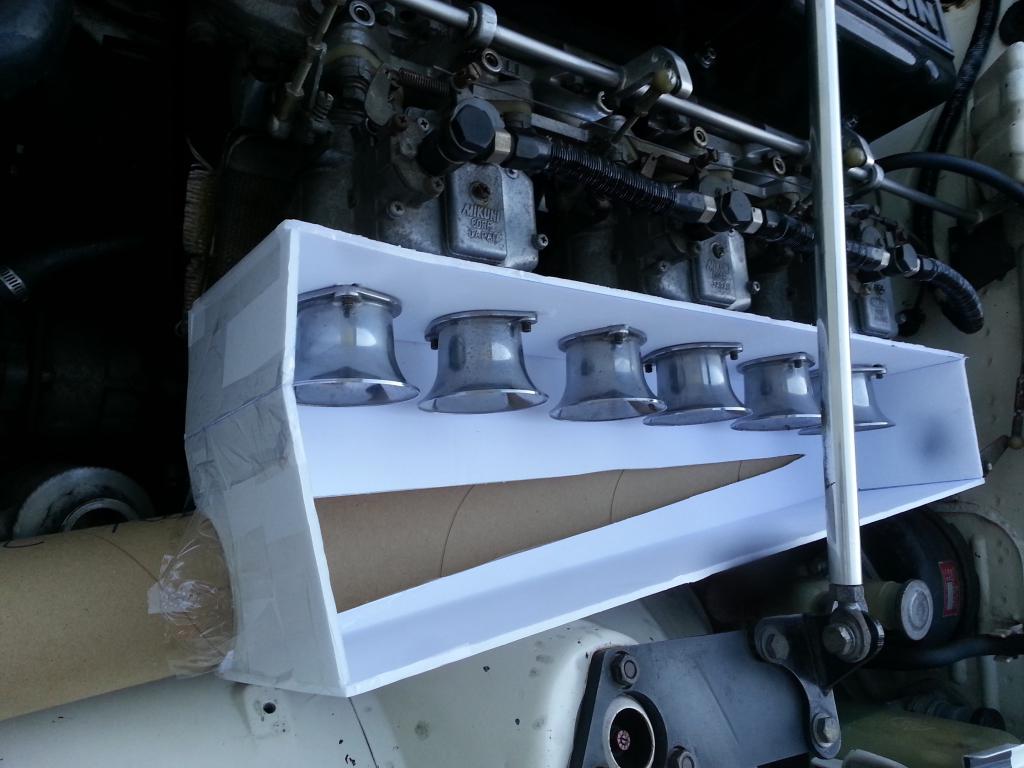
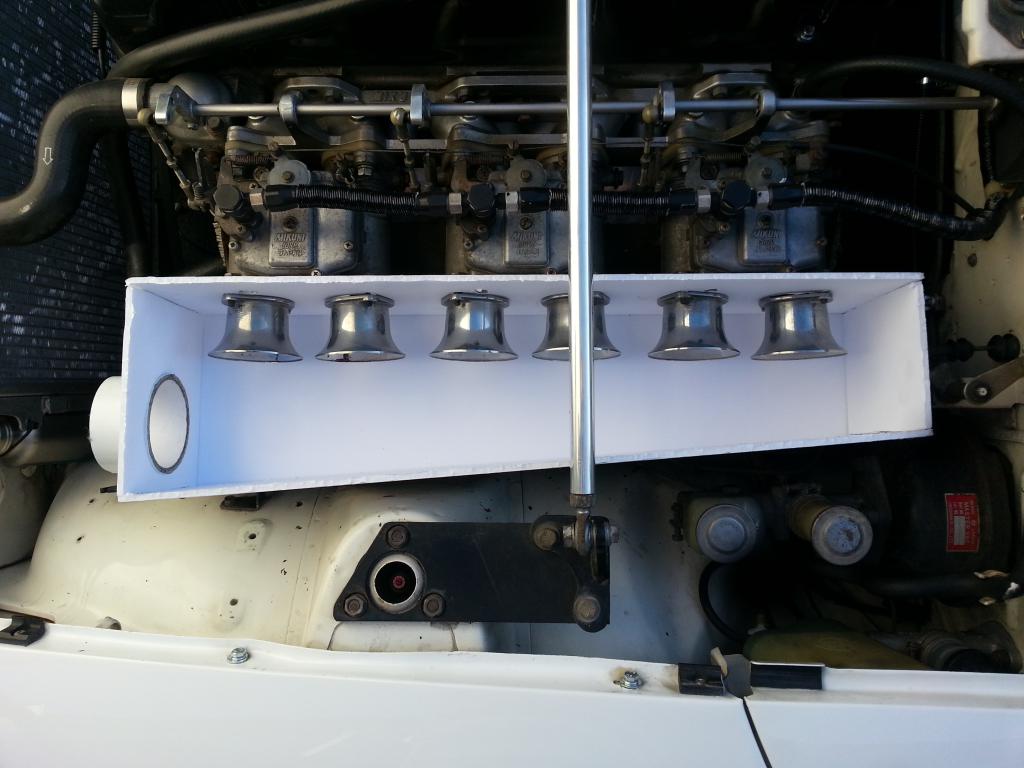
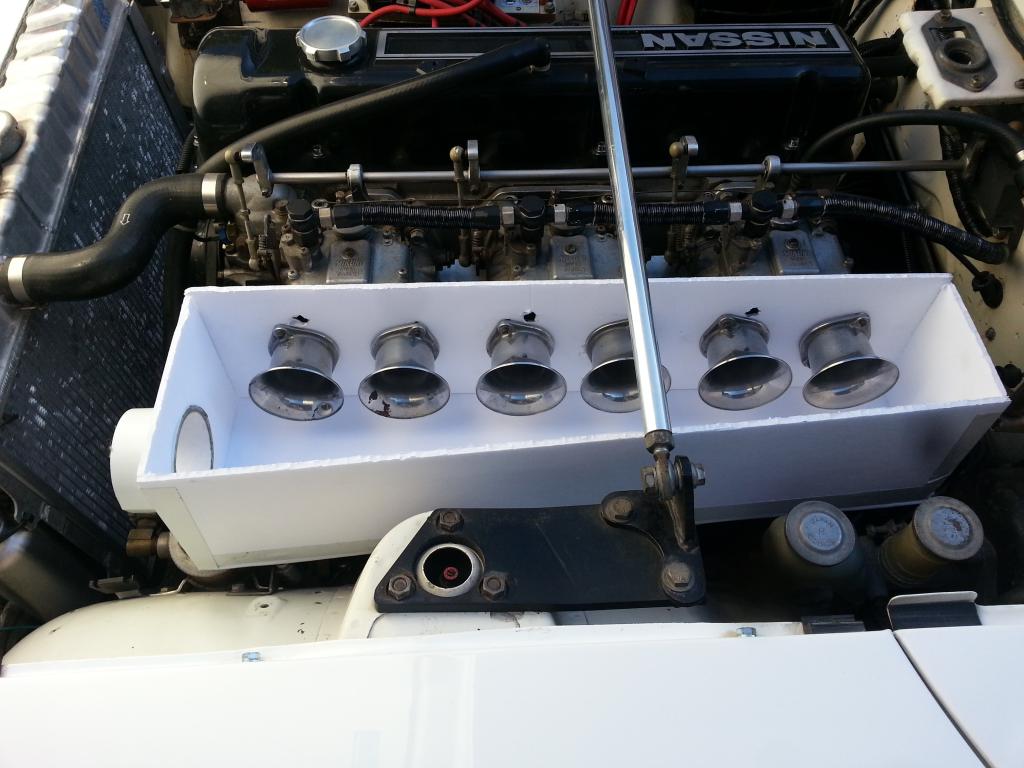
Version 3 Intake tube tapers in from underside, which should help even the air more evenly throughout the entire length of the box. Angle adjusted at radiator side, just about lines up with the radiator support frame hole now. Pics:

-
More food for thought there, thanks Tony! Came up with a few more ideas, will play around with making models of them over the next few days. Aluminum is ordered, and I will be using dzus fasteners to attach the box to a backplate held by the air horns to the carb (same as how my ITG Megaflow attached). Might try and have a lexan window on the top of the box, would be nice to easily keep an eye on what's in there, and it would look 'cooler' too. Torn between just using a cone filter, or paying a little extra for a canister style setup that I can force in into by redirecting air at one side at the front of the radiator. Will probably just see how the cone performs first.
-
I grabbed a ignition switch from my local Napa, think it was around $50. So it's available from Napa Canada. Rock Auto has the same part, albeit a different make, for about $20 USD. It's a basic part, so I doubt anything is gained by buying 'genuine nissan'. Before ordering though, I would run a voltmeter to the back and yellow (or is it black and white? whichever runs to the starter solenoid...) wire where it plugs in at the back of the ignition switch and see if it has voltage when you turn the key to start the car. If no voltage shows, check the the power wire. If it's fine, then replace the switch. Mine wasn't showing voltage, turns out the spade connector for that wire had broken loose from the switch. When I replaced the switch, it solved my starting problems.
-
Good idea on using downspace, I could taper the inlet in from below, like the Reverie intake, should help with a more even distribution. Trying to keep it simple for the welder though, so I can't get too carried away. I think I have seen a pic of the race car you mention, is this it? Very hardcore setup, but impractical for my purposes. It would be very difficult to get a good enough seal, and the air will probably suck in from wherever is easiest. I notice the back end isn't sealed, and I am curious what the air filter set up looks like off the left side of this picture. Very cool idea though! What a great thread, Monzter's post #157 in particular is enlightening. I am curious if the same principles apply without forced induction though? The air in my carburetor intake won't be pushed in nearly so quickly, so it shouldn't blow past #1 quite so easily. The flow diverter fins are interesting though. Thanks man!
-
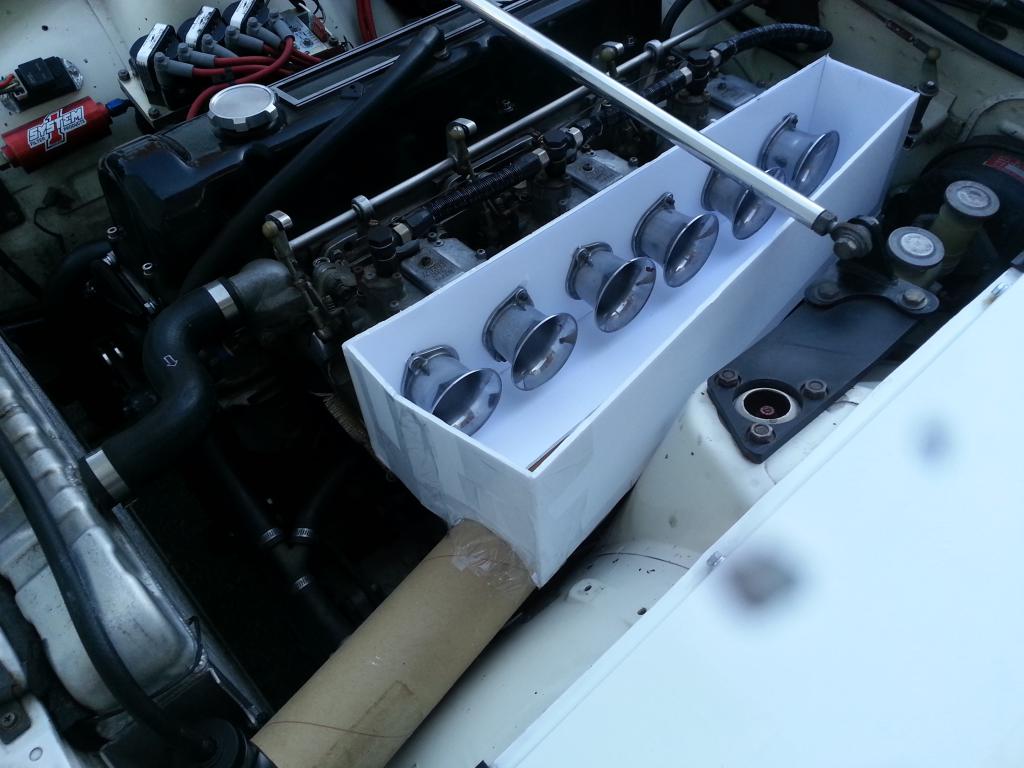
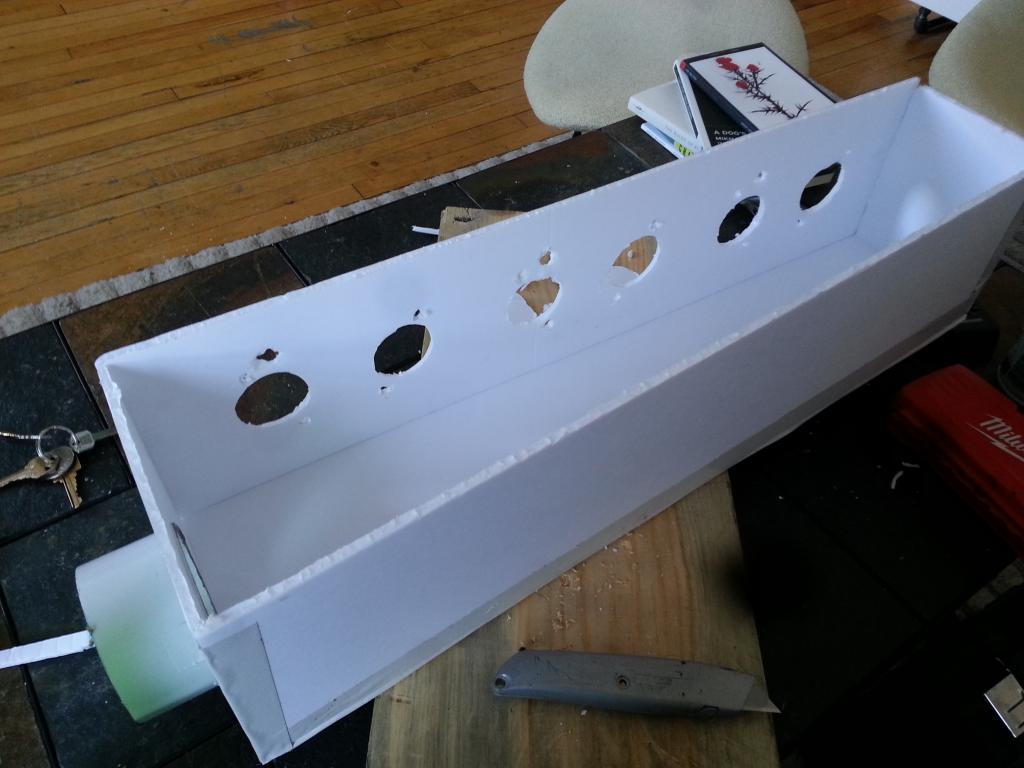
Version #2 - firewall end tapers down to 4", instead of 5.5". Box is now 5.25" tall instead of 6". Adjusted the front entry angle to clear my oil catch can and allow a straighter pipe through the front clip. Going to try widening the entry side 1" more, which should allow a little more angle.
-
Nice!! I completely forgot about that site, better price and Marugen Shoukai is still supposed to be excellent for quality.
-
Be prepared to pay through the nose for one of those... Only source I am aware of: http://www.restored.jp/english240z260z.html 160,000 yen is about $1600 USD I think there is a fella on these forums that imports their wares. He had a post on here offering a group buy at one point, worth doing a search.
-
Perhaps something like this inside? baffles that direct a portion of the air to the front of each of the 3 carbs? crude, but at least it would stop the first two carbs leaving the third with nothing.
-
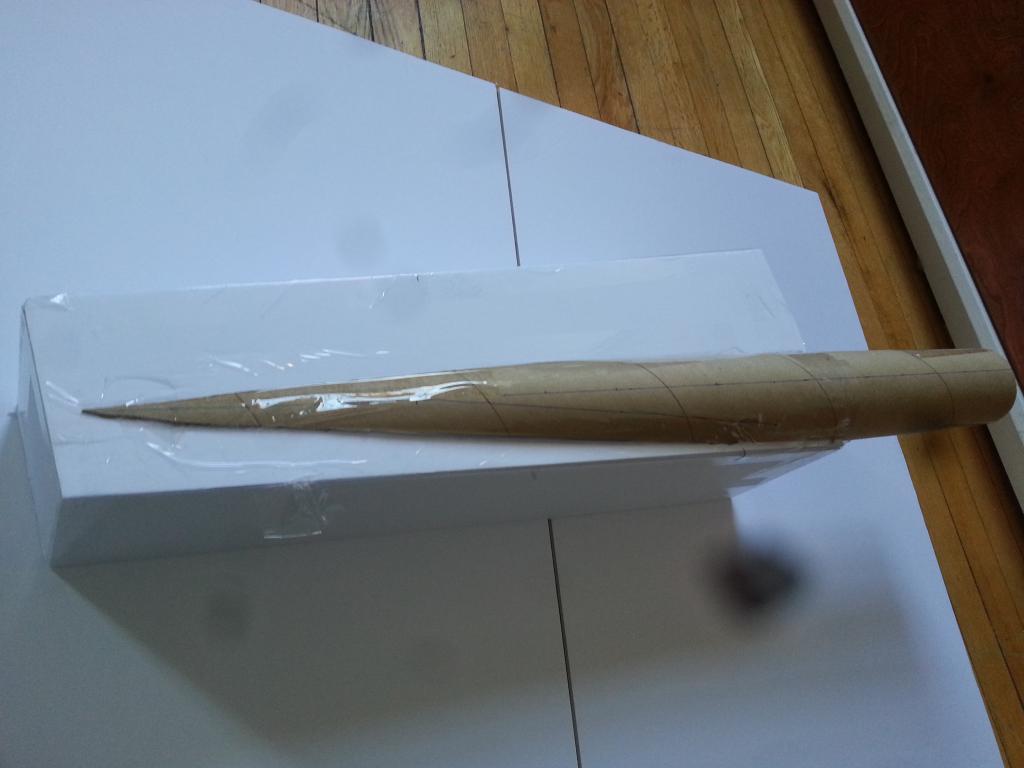
Hey folks, So, after seeing my ITG air filter go up in flames, I've now gone off the idea of running one of those. I bought K&N's and found that my Mikuni air horns were too wide for the filter to squeeze over, and with things being so tight inside those little filters, it wouldn't be ideal. I want to be able to run air horns on my carbs without being limited on size. The ideal solution seems like an air box that feeds cold air from a cone style filter in front of the rad, or at the extreme front left of the car by those 2 round holes in the front clip. I've done a lot of searching, and there are a few of options out there to buy: TWM - http://www.racetep.com/ztripdcoe.html MJP - http://www.mjpshop.co.uk/index.php?route=product/category&path=155_78_113 Reverie (very expensive) - http://www.reverie.ltd.uk/product_detail.php?prod=zolder_macau_6_cyl_airbox_lh_carbon__to_fit_jc100_backplate_range&group=A%20AIRB&subgroup=A%20AIRB%206C&part_code=R01SE0561 My question is: Does the shape of the air box really matter all that much for this application? I have seen others fabricate up aluminum air boxes that are considerably more square. For $30 in sheet aluminum, and some beers to a welder buddy, I could have a basic air box up and running. Do I lose anything by going this route? For example, 10 minutes and some board, and I have mocked up this. Would this with a lid on top, in aluminum, be inferior to the TWM unit? Any thoughts would be very welcome. Thanks.
-
Ask and ye shall receive - http://www.topstage.com/shopping/ Scroll down to "S30 240z 260z Aerodynamic Front Spoiler". Looks like that's very close to the air dam in the picture you posted. Bad news is that Top Stage is located in Australia, so the shipping would be pretty expensive. If I were you, I would buy a Kameari style front air dam in fiberglass, perhaps the MSA type 1, and modify the lip so it protrudes more. Might be a bit of hassle, or money, but it's doable.
-
The filtering, if that's what it is - I think it's just washed out pictures from a not-so-great camera - isn't that big a deal, but the pictures are quite small. Come on man, give us some nice BIG high resolution pictures so we can properly ogle your new Z!! A rust free car is a great starting point. Do everything you can before painting to make sure you get it all and seal everything up properly - POR-15 when applied properly is a good choice, as is Wurth Stoneguard for underneath the car. I would consider going with an L28 engine if you can, these cars are so light that you don't need crazy amounts of power to have fun in them. It's nice to keep the proper engine in the car, and these straight sixes really make a wonderful sound, are built strong, and are easy to work on. Looking forward to see your progress!
-
Xenon 3124 air dam, made of urethane. I don't imagine you need to do much to fit it to a 280Z, although it's designed as a 240Z air dam. You can see the empty 240Z turn signal sockets in the air dam - Xenon makes the same air dam for the 280Z with those filled in, part number 3125.
-
NA 3.1L=>head & camshaft questions. No shortcuts, max
ryant67 replied to zredbaron's topic in Nissan L6 Forum
Any updates? Always been a fan of what you have been doing with this car, hopefully you have it up and running again now. -
Depends what you are looking for. There are times I wish I had some of the comforts that something like an E30 offers, namely cruise control, 4 seats, and a quieter interior. If any of the above (cruise excepted, as it's an easy fix) matter to you, then go for an E30. If however, you want a raw, visceral driving experience, and a cool, seriously old school sports car, then the S30 is the way forward. I feel the negatives of the 240Z are well worth the little hassles. The engine is a joy to work on, the interior is certainly comfortable enough once you soundproof it, and these cars are still far more affordable than they ought to be. Erm... this doesn't help much I realise, but hey, they are both bloody great choices. I suggest that you keep an eye out for both, and whichever pops up first in the right condition, grab it and never look back!
-
Great work, thanks for taking the time to document it and share it with us all!!
-
Supposedly the Koni 8641-1060SPORT shocks will fit both front and rear on a 240Z, with a 20mm spacer needed for the front. They are adjustable and probably as good as (if not better than) the Tokico Illumina's. Sources on this info: http://www.viczcar.com/forum/index.php/topic,3948.msg35821.html#msg35821 http://www.viczcar.com/forum/index.php?topic=10542.0 I'm currently torn between going with these, or the 8610-1437RACE shocks. I think I prefer the idea of having the lifetime warranty with the SPORT, as opposed to no warranty on the RACE. Edited to add: These are the front shocks for a 1984-89 Nissan 300ZX.
-
Credit where it's due, you've built one heck of a clean looking car, it's gorgeous - well done!!
-
You are really packing the work in quickly, wow! Love the colour choice, can't wait to see how it all comes together, great work!
-
This Hybrid Z sold a few hrs ago, opinions/comments
ryant67 replied to PLATA's topic in Non Tech Board
Given how clean it looks, and how it seems to be well executed, that price is probably about right. Could you find similar for less? Absolutely, but the price it went for isn't unreasonable. Glad to see he went the extra mile and put a 'super strong driveshaft' in the car!