ryant67
-
Posts
355 -
Joined
-
Last visited
-
Days Won
4
Content Type
Profiles
Forums
Blogs
Events
Gallery
Downloads
Store
Everything posted by ryant67
-
I had an old one that did the same - the foam dries out if they sit for too long. I hung onto it, thinking it might be a great base to fibreglass up some sort of air box onto - the backplate is there already after all. In the end, I got lazy and never bothered, but there is a company over in the UK called Reverie that makes some pretty incredible looking air boxes that attach onto ITG backplates. Big $$$ though! Some ideas for you here: http://www.reverie.ltd.uk/carbon_airbox.php
-
Seems like a reasonable plan. ITG makes some interesting looking air canisters - perhaps something like one of those, with a proper air inlet, would keep enough filtered air on tap to help combat choke issues? They look like they would beat the heck out of a simple cone on the end of some ducting tube anyway! http://www.itgairfilters.com/maxogen-introduction.asp As a more basic approach, I always thought the attached image below looked great. Congrats on getting the Z registered again, by the way!

-
Like on this page of the mikuni phh booklet: http://www.mikunipower.com/PHHCarbs/PHHservice18.jpg Whole booklet here: http://www.mikunipower.com/PHH01.htm
-
That's a difference of 0.021, or half of a millimetre... I'm not sure the floats need to be quite that precise. Your math works, but perhaps the number was rounded within margin of error since most people would lack the ability to measure quite that accurately? I actually made a little float measuring device today using some clear acrylic rod and a nylon spacer. Copied this design, which seems useful: http://www.webstore.com/item,pgr,Optical-Fuel-Level-Measuring-Tool-Indexed-at-25mm-for-DCOEs,name,44933341,auction_id,auction_details Just mark it at the desired depth (21.5mm), place it over the jet block hole, and slide it down until it hits fuel and the rod goes dark. With the floats set properly, the mark should be where the change occurs. Simple but effective tool for very quickly confirming float levels.
-
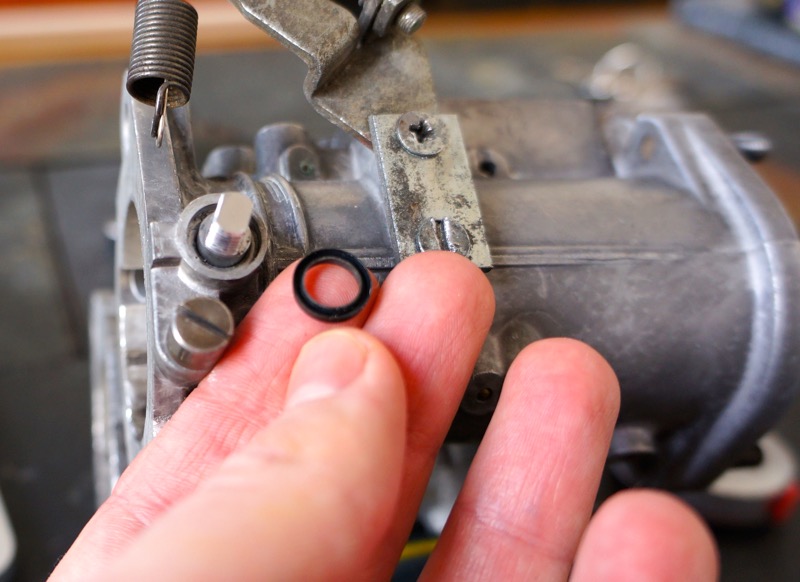
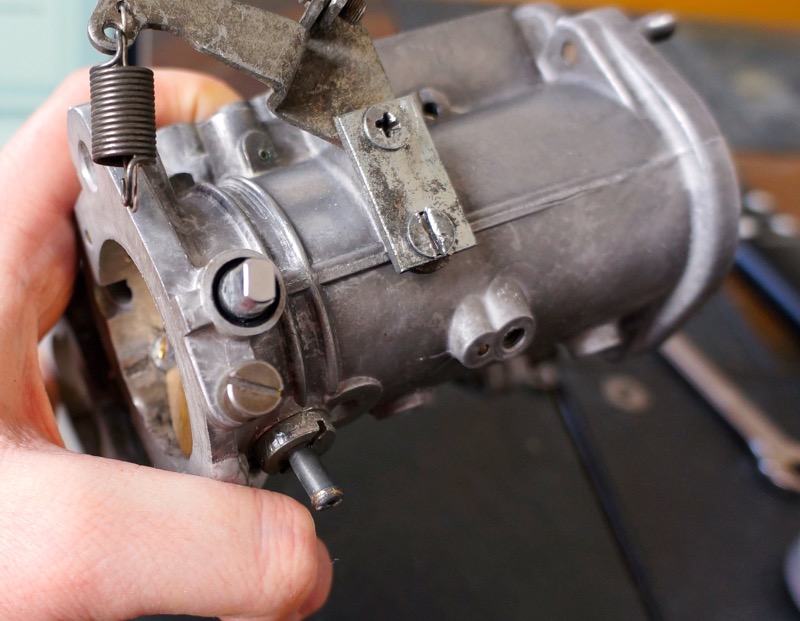
Is the old light-inspection method not capable enough for this task? Just hold the carb up to sunlight or a good lamp, and look down the barrel with the butterflies closed. In a perfect world, no light should leak through around the butterflies - and if a tiny amount does, it should at least be equal on both side. Outside of the butterfly, the only other things that could be an issue are the little rubber seals around the throttle shaft on either side of the butterfly. They can get pretty brittle with age, and may not be sealing properly. Some pics of said rubber seal from my "practice" Mikuni...
-
It does seem to do a great job of agitating grime off in those impossible to reach places. I've also read of people soaking parts in a can of carb dip with an orbital hand sander attached to the can - simulates what the ultrasonic cleaner does, but at nowhere near so high a frequency.
-
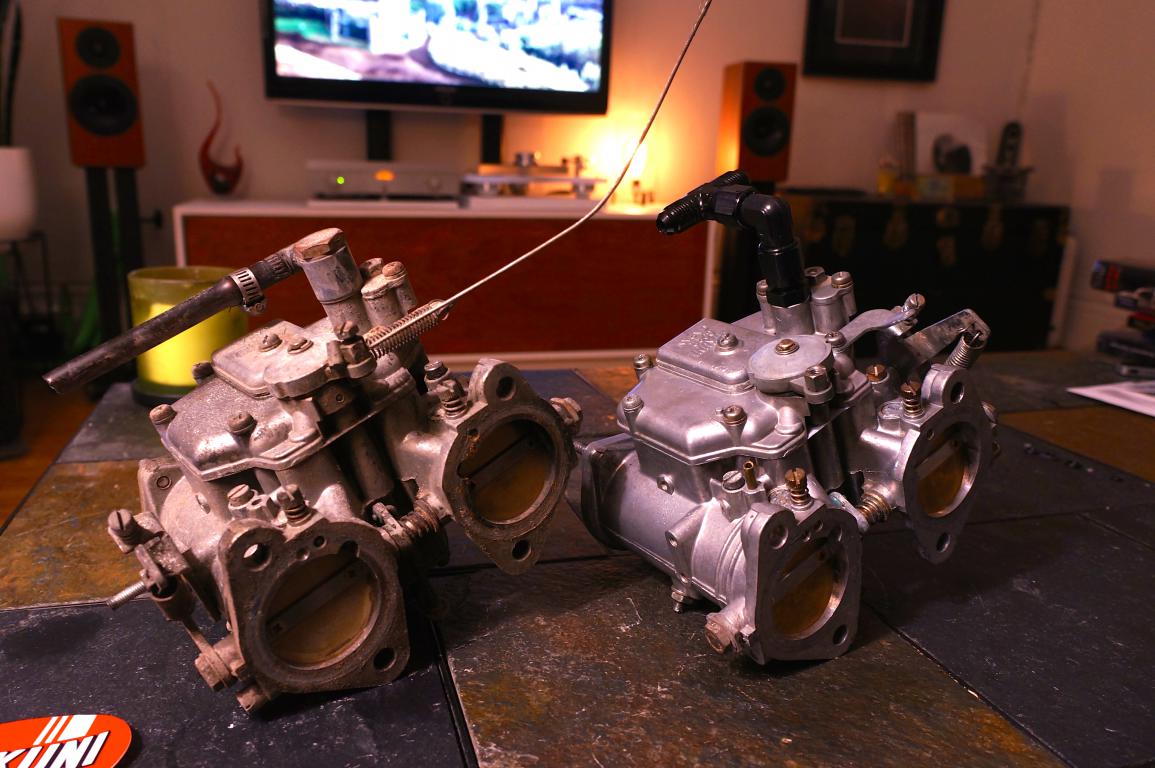
^^ I just cleaned up a really crusty set of 44's I got off ebay. 'Simple Green' degreaser and water, 50/50 mix, in an ultrasonic cleaner. Set the cleaner to go for about 20 minutes or so, with the heater function on. It was pretty remarkable just how much crap came off (and out) of those carb bodies. Might be worth a shot, and it's a handy tool to have for cleaning all sorts of metal items - I got mine for about $70 at Harbor Freight. Pic of one of the carbs that hadn't been cleaned, and one that I had just finished up with.
-
Hoping to do the same thing this summer. Would be very interested in reading how it goes for you!
-
Well, thanks to this post of yours, I just went and spent $225 on 6 probes, a 6-way selector, and a Westach EGT gauge. My wideband always left me scratching my head a little, since it told me the whole picture, but none of the individual parts. This new toy will remove a lot of trial and error guesswork hopefully. If one cylinder is running rich, I'll see a lower temperature on it, and if another is lean, a higher temperature. Seems worth a go... Between playing with timing on the Electromotive HPV, changing jetting on the mikunis, and checking the wideband and EGT readings, it looks like I am going to be having a lot of fun this summer!
-
As another thought, I recall reading something about measuring the temperature of each header pipe with an infrared temperature gun. Basically, measure each header pipe, and when things are ideal, they should all be very close to the same, but if one is lean or rich, it will show a difference. Anyone have any experience with this?
-
Great info, thanks for taking the time to share it. I seemed to be always be running rich when on the throttle hard with my Mikunis last autumn, and misfire might explain some of it. I'd go from mid 13's straight down to mid 10's. Running the jetting I am, it's a curious thing - 57.5 pilots, 150 fuels, 200 airs, 40 pump nozzles, and 34mm venturis. I think I am going to do some plug chops when I get the car out this spring, and it might help give me some answers. The wideband seems like a great tool, but on it's own it can indeed be misleading.
-
Elegant solution, and in theory it makes total sense. Hope to hear how well it works for you when you are back up and running, which really can't be too far off at this point. Keep up the great work!!
-
Mine at the moment is horrendously ugly, but I am working on something similar, but as a single sheet. As it stands, it's your basic kameari/zccjdm style one, with heat wrap on the underside, and an extra layer of aluminum attached with another layer of heat wrap again. the lower layer extends the heat shield coverage from where the intake manifold bolts to the head, to just beyond the front of the trumpets. The issue I have with most heat shields is that they barely cover the carbs, and nothing beyond that. Heat must bleed in from around, no? Or is going larger than just the carbs excessive precaution with no actual gain in heat protection? What's the ideal mounting point for these things? Generally most seem to go with bolting where the carbs attach to the intake manifold, but some use the extra bolts on the side of Mikunis, such as Datsun Spirit's (https://datsunspirit.com/products-page-2/performance/triple-carburetor-heat-shield/).
-
Hang in there - it will so be worth all the effort once everything is finally done and you are driving it smiling from ear to ear!! Besides, what else can possibly go wrong at this point? *knocks on wood*
-
No idea about any other brands, but I was running a Flowmaster muffler on my 3" exhaust and the 18" Vibrant really removed the awful drone I was getting at highway speeds - it also mellowed things out in general. Still screamed when you got on it, but for normal driving it worked wonders. Still have it in my system, but run a Magnaflow muffler now - conflicted about the Magnaflow, it does sound great and it's not as obnoxious as the Flowmaster, but it's a still a touch too loud at times.
-
 Beautiful work, it's really taking shape! Reckon we all in the Kingston/Syracuse/Rochester corridor should try and get to Dinosaur BBQ with the Z's this summer - would be great to see your car up close!
 -
Wow, great work with the wiring! I wish I was aware of that Bussman block when I redid my wiring last summer. I wound up with 2 separate boxes for relays and fuses - your solution is much tidier! Great work with the fans and shroud too, as you said, it looks like it was factory made, very professional work.
-
In theory it looks like a nice idea, but the accuracy doesn't cut it. 100 feet or so is way too much. If some thief steals your Z, you want to be 100% sure you have tracked it to the right address - merely being in the right block isn't enough, since it being in 1 of 20 houses isn't going to help you, it will just get you in trouble with the authorities. I've seen DIY GPS trackers using cheap old phones with GPS capability, call as you go plans, and being hardwired into the battery in the car. Not as cheap, but presumably accurate enough to lead you to your cars exact location. As these cars become more valuable, and as such more desirable to undesirables, this is something probably worth investing in. We've all seen those pics of stripped Z's - I know if someone stole mine, I would very much want to be sure they got what was coming to them...
-
If I hadn't have been demoted and still had the ability to do so, I would have liked this post. Seriously, the internet is no place to ever take oneself too seriously. We've all been there, in a grumpy mood and quick to take offense - but on the positive side, after a couple of seconds, no one will bother to remember it.
-
Isn't that the goal in installing adjustable coilover suspension? You would never have to worry about speed bumps or steep parking lot ramps every again!
-
http://minkara.carview.co.jp/en/userid/721030/blog/29822309/ 275,000 Yen is about $2300 USD right now. Shipping will obviously increase that price by a fair bit though. Looks like they need cores to work with too.
-
Would installing the leather onto a full dash cap perhaps be worth the additional expense? Probably a bit more forgiving to work with, and reversible. For what it's worth, I think the leather cover looks great on there! I bet it was a lot of meticulous work to get it to sit right with all of the curves in these dashes, but it looks like you took your time and did a very good job with it. Well done!
-
Ack, double post - sorry about that!
-
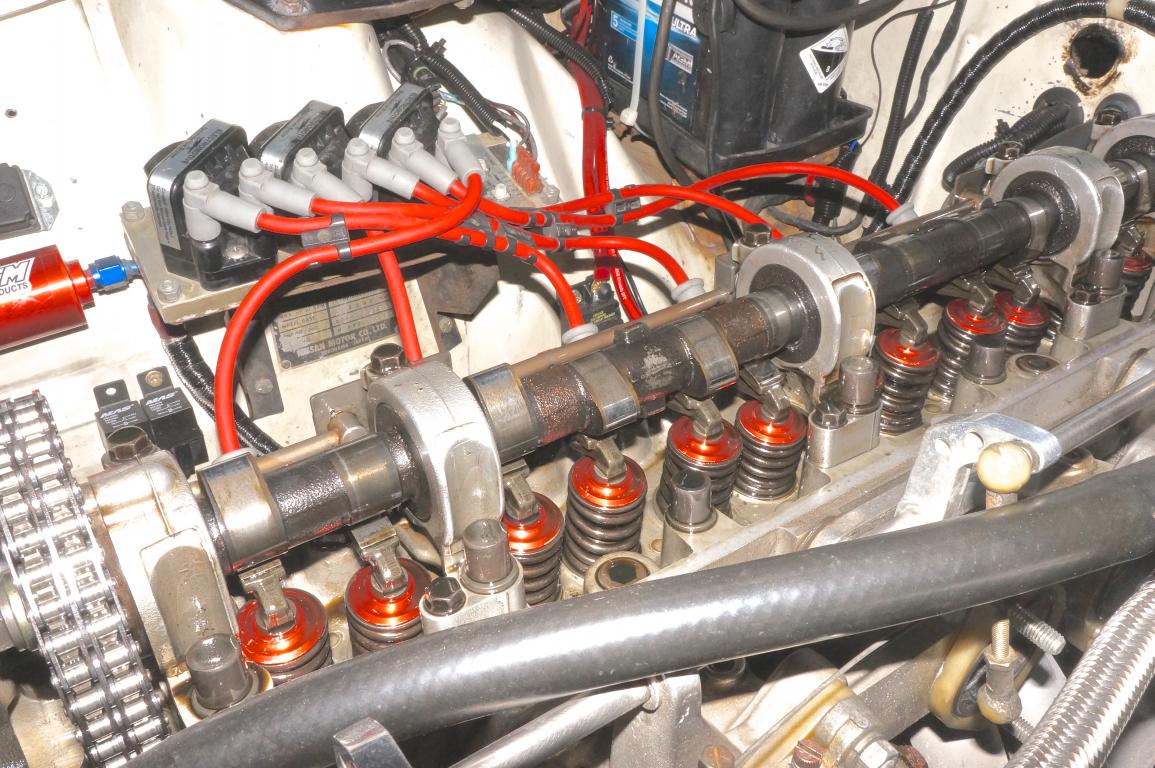
F54 block and E31 head. According to the previous owner it's a 3.0L stroker, but again, no way to be sure without opening her up. He had a LOT of money into other parts of the engine and car, so I give benefit of the doubt. The choice of the K cam seems like an odd one though, unless it's a regrind... Seems to pull hard enough anyway, but these cars always do
-
Hey, another K cam - my engine has one of those in it as well! I can't tell you anything about though, as my engine was built 2 owners ago and I'm reluctant to tinker with it when it's working properly.