Chris Duncan
-
Posts
163 -
Joined
-
Last visited
-
Days Won
1
Content Type
Profiles
Forums
Blogs
Events
Gallery
Downloads
Store
Everything posted by Chris Duncan
-
1) Yes 2) Yes but in my case the existing shims are too thick so I have some thinner ones on order 3) http://www.nissanpartsdeal.com/parts-list/1990-nissan-240sx/rear-final-drive.html?Diagram=380_A02 you can take these part numbers and just Google them, there's a lot of places that sell them since the r200 is in a lot of vehicles. Available side bearing Adjusting Shims ( Carrier Bearing Shims ) 2.00 ( 0.0787 ) 38453- N3100 2.05 ( 0.0807 ) 38453- N3101 2.10 ( 0.0827 ) 38453- N3102 2.15 ( 0.0846 ) 38453- N3103 2.20 ( 0.0866 ) 38453- N3104 2.25 ( 0.0886 ) 38453- N3105 2.30 ( 0.0906 ) 38453- N3106 2.35 ( 0.0925 ) 38453- N3107 2.40 ( 0.0945 ) 38453- N3108 2.45 ( 0.0965 ) 38453- N3109 2.50 ( 0.0984 ) 38453- N3110 2.55 ( 0.1004 ) 38453- N3111 2.60 ( 0.1024 ) 38453- N3112 2.65 ( 0.1043 ) 38453- N3113 Torque Specifications Ring Gear 98-112 Ft/Lbs Bearing Caps 65-72 Ft/Lbs Rear Diff. Cover 12-17 Ft/Lbs Backlash Factory 0.10-0.15 mm (.005" - .007") Check several points Ring gear runout 0.002 Inch
-
You could just try tapping on them while the engine is running. Like with a screwdriver and small hammer, just lightly tap. You could also try soaking them overnight in carb cleaner And if you do get them working dump some Techroline in the gas tank
-
 Yeah, S30 is lug-centric, you can try to keep it straight by torqueing an unloaded wheel in multiple stages and turning the wheel 180 deg before final torque. The 280Z Chumpcar sometimes vibrates and you have to bring it in and re-torque. Hub centric is superior but the stock back hub doesn't stick out enough to make it work.
 -
Low oil pressure with Rb? Dont ignore it.
Chris Duncan replied to 240zdan's topic in Nissan RB Forum
Agree with your thoughts now that I see what you're talking about. Also think problems are created by people going beyond or far beyond the factory HP. I'm just going to try for weight reduction gains, at least at first. -
Okay, the R200 shims are all the same and here's a part number to start the search. 38453-N3100 and all the vehicles that have an R200 Part Fitment Model Year Trim Engine Important vehicle option details 200SX 1984-1988 SGL 4 Cyl 1.8L, 6 Cyl 3.0L CA18ET, VG30E 240SX 1989-1998 SE, STD 4 Cyl 2.4L KA24D, KA24DE, KA24E 280ZX 1979-1983 GL, NON GL 6 Cyl 2.8L L28E, L28ET 300ZX 1984-1996 GL, GLL, SF, SS 6 Cyl 3.0L VG30, VG30D, VG30T 350Z 2003-2008 350Z, Base, Enthusiast, GT, Touring, Track 6 Cyl 3.5L VQ35DE, VQ35HR 370Z 2009-2015 40th Anniversary Edition, Base, Base Sport , Nismo, Sport, Touring, Touring Sport 6 Cyl 3.7L VQ37VHR 720 Pickup 1982-1986 DX, GL, ST, STD 4 Cyl 2.4L Z24, Z24I Frontier 1998-2015 LE, PRO-4X, S, SC, SE, SL, SV, XE 4 Cyl 2.4L, 4 Cyl 2.5L, 6 Cyl 3.3L, 6 Cyl 4.0L KA24DE, QR25DE, VG33E, VQ40DE Hardbody Pickup (1986.5-1994) 1986-1994 DX, GST, ST 4 Cyl 2.4L, 6 Cyl 3.0L KA24E, VG30, VG30E, Z24 Hardbody Pickup (1995-1997) 1995-1997 Long Body SE, SE, XE 4 Cyl 2.4L, 6 Cyl 3.0L KA24E, VG30E Pathfinder 1987-2012 DX, LE, S, SE, SE Off-Road, Silver Edition, ST, SV, XE 4 Cyl 2.4L, 6 Cyl 3.0L, 6 Cyl 3.3L, 6 Cyl 3.5L, 6 Cyl 4.0L VG30E, VG30I, VG33E, VQ35DE, VQ40DE, Z24I Van 1987-1990 E, XE, XE/GXE 4 Cyl 2.4L Z24I Xterra 2000-2015 Base Camp, Off-Road, S, SE, X, XE 4 Cyl 2.4L, 6 Cyl 3.3L, 6 Cyl 4.0L KA24DE, VG33E, VG33ER, VQ40DE
-
Low oil pressure with Rb? Dont ignore it.
Chris Duncan replied to 240zdan's topic in Nissan RB Forum
Wasn't saying you didn't know about it. And it does apply to this post. I was just mentioning it for those that hadn't heard about it. Did Nissan have it wider at first then made it narrower? I thought the first design was narrow and then the fix was to go wider? It makes perfect sense because the narrow gear has a much smaller contact area to transmit the load. Anyone that stays with the narrow drive is asking for trouble IMHO. Non of the AM pumps recommend the use of the narrow drive do they? Just look at the pic you've posted, it's digging into the drive surface. That shouldn't be happening and probably wouldn't if it was the wider style. All that surface area on the pump and the drive is only touching the edge of it. Thanks though for the heads up on the screws, will def put the red locktite on the build. -
Does anyone have a source (prefer West coast) for side shims for the R200 diff? Not sure if it matters but it's an '83 280ZX diff I found some for a '90 and up 240SX but not sure if that's the same diff. Do all the R200's have the same side shims?
-
Low oil pressure with Rb? Dont ignore it.
Chris Duncan replied to 240zdan's topic in Nissan RB Forum
There was also an issue on the early '90s engines of the oil pump drive on the crank being too narrow and breaking. They fixed it by going wider. -
Need some stiffer springs.
-
What's your ground clearance?
Chris Duncan replied to Boben's topic in S30 Series - 240z, 260z, 280z
My Chumpcar "77 280z is 4.375" in the front (to the crossmember) and 4.75" in the back to the bottom rear diff. It's streetable but barely, have to be careful of driveways and speedbumps. It's got 225-45-R15's so they don't fill up the fender (no hella flush) but they do keep it low to the ground. -
Yeah, if you're going with custom suspension a custom sized rack may be in order. I am looking for another rack for the GTRZ because the Skyline is RHD and rear steer, as opposed to the Z rack which is front steer. Haven't found anything yet that is semi-affordable and has a quick ratio like the Z rack. Don't know if I want to pay $1000 for a rack when a Z rack goes for around $100. I'm going to maintain easy steering by taking out caster. If I do need power steering it's going to be electric at the column. Just way less clutter that way. I've scratch built three twin a-arm suspensions and it takes longer than you think, especially if you want to really fine tune the handling. It can get complex and becomes sort of experimental. So you're not sure about the end result until you drive it. Went a different route on the GTRZ just to save some time. Essentially bolting up the entire Skyline sub frame in the rear and the Skyline body clip and sub frame in the front. And if wanted later on can either duplicate the stock arms with tubing or get aftermarket tubing arms off the shelf. One thing that was nice about this was I lowered the car 1" just by lowering all the mount points on the chassis. As opposed to lowering by shortening the springs/struts which compromises geometry. I bolted up to the bumper mounts when using the rotisserie. Miller is a really nice track, wish it wasn't so far from here. And wondering about it's future since it was sold?
-
A Z is a very good drift car, with bias ply tires. I used to drift all the time before they even called it drifting. The Chumpcar I run has a very controllable drift with radials but the slide angle is not that much.
-
Looks like a very nice project. I really like the Tremec, both 5th and 6th are overdrive compared to most 6 speeds which 5th is not OD. So they have an engine with a narrow powerband and you are rowing more gears just to end up with the same OD as a 5 speed. With this much torque you don't need close gears and you might as well have double overdrive. I would go a little lower in the rear, sure you have a hookup problem but it would be more boot in the back. And with double OD a true highway car, you're going to be longing for an Autobahn to make use of it. What's your theoretical top speed? There's some (unresolved?) controversy about using 4130 for a cage, something about welds being brittle. And the purpose of going with Chro-mo is to reduce weight, and since 1.5" x .096" DOM is up to racing specs for this weight of car, you could go the next size thinner in Chro-mo. The a-arms conversion takes forever because this chassis is not set up for it. The GTRZ project I'm doing has a Skyline chassis clip in the front because it would just be too extensive to build all the mounts necessary. The stock Z rack is a really nice piece, the earlier years had an aluminum gear case. If you do change it make sure what you're putting in is actually lighter and at least as quick of a ratio. There may be something out there better but I haven't found it. I would put the chassis on the rotisserie from the start. You really have to be missing a lot of sheet metal before it moves from it's own weight. The two Z's I've recently done were both extensively rusted, complete rails, most of the pans and firewall parts. They didn't move at all with everything cut out at once. Make some measurements just to monitor things but you shouldn't have a problem. Kudos on going the road less traveled on the engine, it's going to be different and it's going to be a screamer.
-
Put me down for one of these. As long as it fits in a '83 ZX 3.9 R200
-
In desperate need of a non turbo manual 83 280zx ECU, mine fried
Chris Duncan replied to ziilch's topic in Parts Wanted
I have two of them. $75 each plus shipping from Seattle There's one on ebay but it's an auction, it's bidded to $60 with one day to go. -
My Chumpcar came out pretty good with an 8 point. The seats are thin racing buckets and they are touching the floor in the back. That way there is enough room to drive without a helmet. Don't know how a pre-built cage would work though. My cage is custom and it was designed to hug the pillars and ceiling, like a max of 1/4" clearance and touching in several places.
-
Update on this project. (It went on the back burner for a while because of the GTRZ.) The flywheel, trans, starter, and T/O bearing adapters are all done. The trans adapter is 5/8" thick 6061 with countersunk 12x1.25 allen bolts to the engine, so a flush surface for the bell housing to sit on. The flywheel adapter is 2024 that is .830" thick. It bolts up with the TL dual mass flywheel bolts which are 45mm long. This was the trickiest part of the swap so far, trying to achieve enough accuracy on a manual lathe. Also assumed incorrectly that the (China) Napa flywheel was machined accurately, it was not and it has .005" radial slop where it bolts up to the stock rear crank flange. So may have to source another flywheel. the flywheel is '92 to '05 accord 4 banger, as is the pressure plate. The disc and T/O bearing are 280Z. The starter is a gear reduction Hi-Torque for VW van/ porsche with a larger 9T pinion. They will swap the pinion no charge when ordered direct from the manuf. The starter is clocked about 45deg on it's own flange with some extra holes drilled/tapped to do this. For better clearance to the tunnel. This causes one of the starter mount bolts to become captive, making it harder to bolt up. There is also a starter adapter bracket which is 2.5" tall and bolts to the trans adapter. The starter mounts on the trans side and there's a hole cut out of the bell housing where the stock starter sits. This makes the bell housing look compromised but if you look at other manuf. trans like a G50 Porsche the bell housing is swiss cheese. Comparing the amount of material in cross section at the cutout to a G50 (turbo Carrera) it has more material so it should be okay. The last main piece of the puzzle was completed very quickly last night. The T/O bearing carrier needed to be .45" longer to reach the P/P properly. Briefly thought about machining a carrier from billet steel, but got to looking at the stock carrier. Managed to find three of them in the parts bins and thought about sectioning two of them together. They look and machine like cast iron but did a mig weld test and apparently they are weldable. So it was pretty easy to just section two of them together and weld them up. I jigged them on a 4 speed front cover plate which is steel. Had to run a hone in the bore for a bit because the weld caused some slight swelling/distortion. Much quicker/easier than machining from scratch. Just a few less difficult steps left to go. Engine mounts, starter bulge or cutout in the chassis tunnel, routing the radiator hoses from what is now the back of the engine, and the wiring harness. All downhill from here. Also considering a J32 or J35. There's another endurance road race series that morphed out of Chumpcar and they aren't as restrictive on the rules. The endurance racing will be a perfect test bed for this project, it worked very well with testing the brake swap and suspension mods, and it should be good to test the strength and durability of this swap. Nothing like 7 hours straight of WOT and maximum braking and G's to put a car through the wringer.
-
very interested, Need more info. Does this fit the R200 in the '83 280ZX? With U-joint half shafts? What is the lockup percentage and is it adjustable?
-
Doug at Fairlady Z is still around. But he's changed the name of his shop to UP Garage. It won't be cheap but he's not unreasonable. Just have the car as ready as you can get it beforehand. He does have a dyno. He's in Tacoma
-
1st build, Tube chassis 280z
Chris Duncan replied to mjp147's topic in Brakes, Wheels, Suspension and Chassis
2 x 2 is a nice size to match to existing frame rails but go with a thinner wall, like .072. I misinterpreted what exactly you were trying to build. It looks like a fun project with a low initial investment, and will definitely be a good learning experience. If you get frustrated or run into problems just take a few days off, it works wonders for motivation. -
In this area the VQ is sort of rare in the junkyards and it averages over double the amount of the Honda J engines. The thing about the Hondas is that there are a lot of them in the junkyards because of the weak auto trans. Almost all of them would blow up so if the car owner didn't have the 2K to $4K to fix it the car went to salvage. The VQ is better in that it came in RWD configuration so a RWD trans will bolt up so you don't need an engine/trans adapter. But with the rules of Chumpcar you are restricted to what you can spend, so making the stock Z trans work is within the rules and buying a 6 speed is not. You also have to look at the cost of the donor car because you need wiring harnesses, ECU, and peripherals. Again the Hondas are plentiful on Craigslist because of the auto trans problem. Haven't looked closely at the VQ RWD vehicles but assuming they are not as plentiful as Accords and Odysseys.
-
If you have a bench top drill press (or probably any drill press) you can use that as a tap holder aligner fixture
-
'90 to '2000 Honda 4 cyl flywheel / pressure plate bolts up with some minor mods. Z clutch disc fits that. The Honda PP inner dia where the TO bearing hits is smaller so may have to adapt the Honda TO brg to the Z trans. Z trans will adapt to the Honda engine with just one or two holes relocated. The toughest part has been finding a starter to work. Only two RWD J motor swaps that I've seen. An S2K and a Miata. And both of these have the starter from the engine side under the oil pan. Both of them the starter is hanging below the pan, and this uses a smaller flywheel so the Z disc wouldn't fit. Going to come in right where the stock Z starter is but from the other direction. This creates a bulge in the tunnel in the upper right corner below the heater fan case. Very tricky on the spacing for the starter to clear the pressure plate. Thinking I'm just going to pound a bump in the tunnel for starter clearance. Have already done so to move the driver seat lower and it almost looks stock if you work at it to get it smooth. Took some starter measurements thinking I'd just go to Napa and have someone pull starters off the shelf until we would find something that works. I go to the Napa warehouse location and the guy just looks at me like I'm crazy. He's got 9000 starters on the shelf, LOL! So back home and sure enough Napaonline search, no car, just "starter".... 10,000 starters. But I think I've found a starter and it's not from Napa. There's probably a few of them there but there's no good easy way to figure it out. The manifold flips around and clears the hood, straight symmetrical bolt up, everything else clears except the coolant outlets and the starter. After the trans / starter is adapted it's all downhill from there. Except for the electrical.
-
1st build, Tube chassis 280z
Chris Duncan replied to mjp147's topic in Brakes, Wheels, Suspension and Chassis
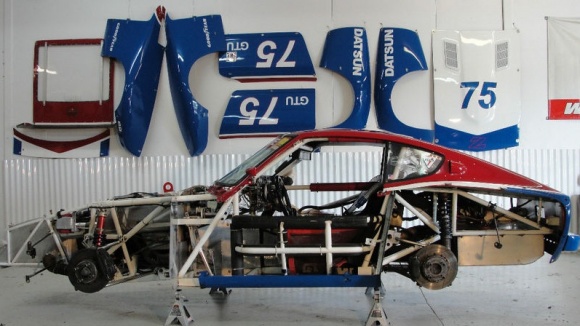
A full tube frame car is advanced fabrication, 8 or 9 on a 1-10 scale. I first did 3 full stock restorations that included extensive rust repair, then moved on to minor and major modifications including engine and suspension swaps, before (on about my 6th car) I did my first full tube frame. And that was just a simple ladder frame that was copying the existing ladder frame. A scratch designed built tube chassis was only after that. No matter how rusted your Z is it will take you 3 to 4 times as long and it will be 2 to 3 times as expensive to build a tube frame car. And you will end up with something that's only really good for the race track if even that. A tube frame car needs a roll cage and roll cages are only made with round tubing so you need a $400 bender. Also a hand held power band saw, Mig welder, grinders, sanders, drills, drill press, jig saw, air compressor. The easiest way is to start with some plans. Typically people don't give those up so you have to make your own. You'd be lucky if you could even get someone to sell them. 3D cad is the best but it can be done on paper. Another thing that would help is to be near someone that has a tube frame Z race car that would let you measure. I would just fix what you have. You probably got it for less than a rust free car and you can spend some sweat equity to fix it and gain some knowledge in the process. To do it right it's still going to cost as much or more than a rust free car but you can spread the cost out over time. (this is not my car, just an example picture)
-
I'm at work right now so can't measure but from my fading memory it's about 5" wider than the stock Z