sonomaz
-
Posts
111 -
Joined
-
Last visited
sonomaz's Achievements
")
Newbie (1/14)
0
Reputation
-
 Miles, Just read the lnk you provided. This is really well done. After 40 years the left rear has come loose so its time for a change. I was wondering what I was in for so the link was very helpful. I particularly liked how he mentions the 27mm socket. I could see it would have been a pain to figure that out. Paul
 -
robello stroker engine vs home built stroker
sonomaz replied to intangible3's topic in Nissan L6 Forum
I'm surprised at you guys! Where is the support, the belief, and the joy of engine building. Where is the encouragement to help a fellow enthusiast to go build his own. Most of us have done it and with an NA L Series, piece of cake!! Intangeble3, Yes, I believe you can build a 250 horse Honda killer for less than 6K. My suggestion? Start with a fresh, stock L28 short block that is balanced. Search in hear for the best head tricks, port, polish and manifold match. Add trip Webbers or Mikunis ( if you can find them). Pick out your favorite cam and go one step hotter. And the coup de gras? Nitrous!! Start a thread and add all your steps. Everybody will chime in with their two cents worth. Have fun!! Go fast!! -
This may be of limited help but when I bought my 72 in 84 it came with a dealer installed AC because factory AC was not available. It had a York piston compressor mounted on the right side of the engine up high on a welded bracket. The evaporator was in a box in front of the heater blower housing that only drew air if the top heater lever was all the way to the right which drew air from the cabin and not the outside. There was a "pod" that mounted to the the left of the center console adjacent to the fuse panel cover that had the temp knob. I think it was made by ARA who is now out of business. If you want a good system, Motorsport Auto has one that is very similar but uses a Sanden rotary compressor that is much better. http://www.thezstore.com/page/TZS/PROD/SAC02/16-7565 Good luck. Paul
-
Idle fluctuates 500 to 2500 and back with Holley
sonomaz replied to gtg704a's topic in Nissan L6 Forum
While you have it apart pull the carb off the manifold and change that gasket also. When you put it all back together do not hook up any vacuum connections to the manifold or the carb and make sure all ports are caped with rubber plugs (get a full set from Napa or O'reilly). Get it running with the timing mentioned by beermanpete. If you have the vacuum fixed it should run really well regardless of the carb settings. Now tune the carb, set the idle, set the idle mixture. From there reconnect the vacuum stuff, vacuum advance for the distributor, PCV, vacuum for the brake booster. If you have any dramatic changes undo the last thing and diagnose why, fix the leak then move forward. When you fix everything, pick up a holley specific book by hanes or someone and tune that carb. When you finish I bet that engine will rock!! Good luck! Paul -
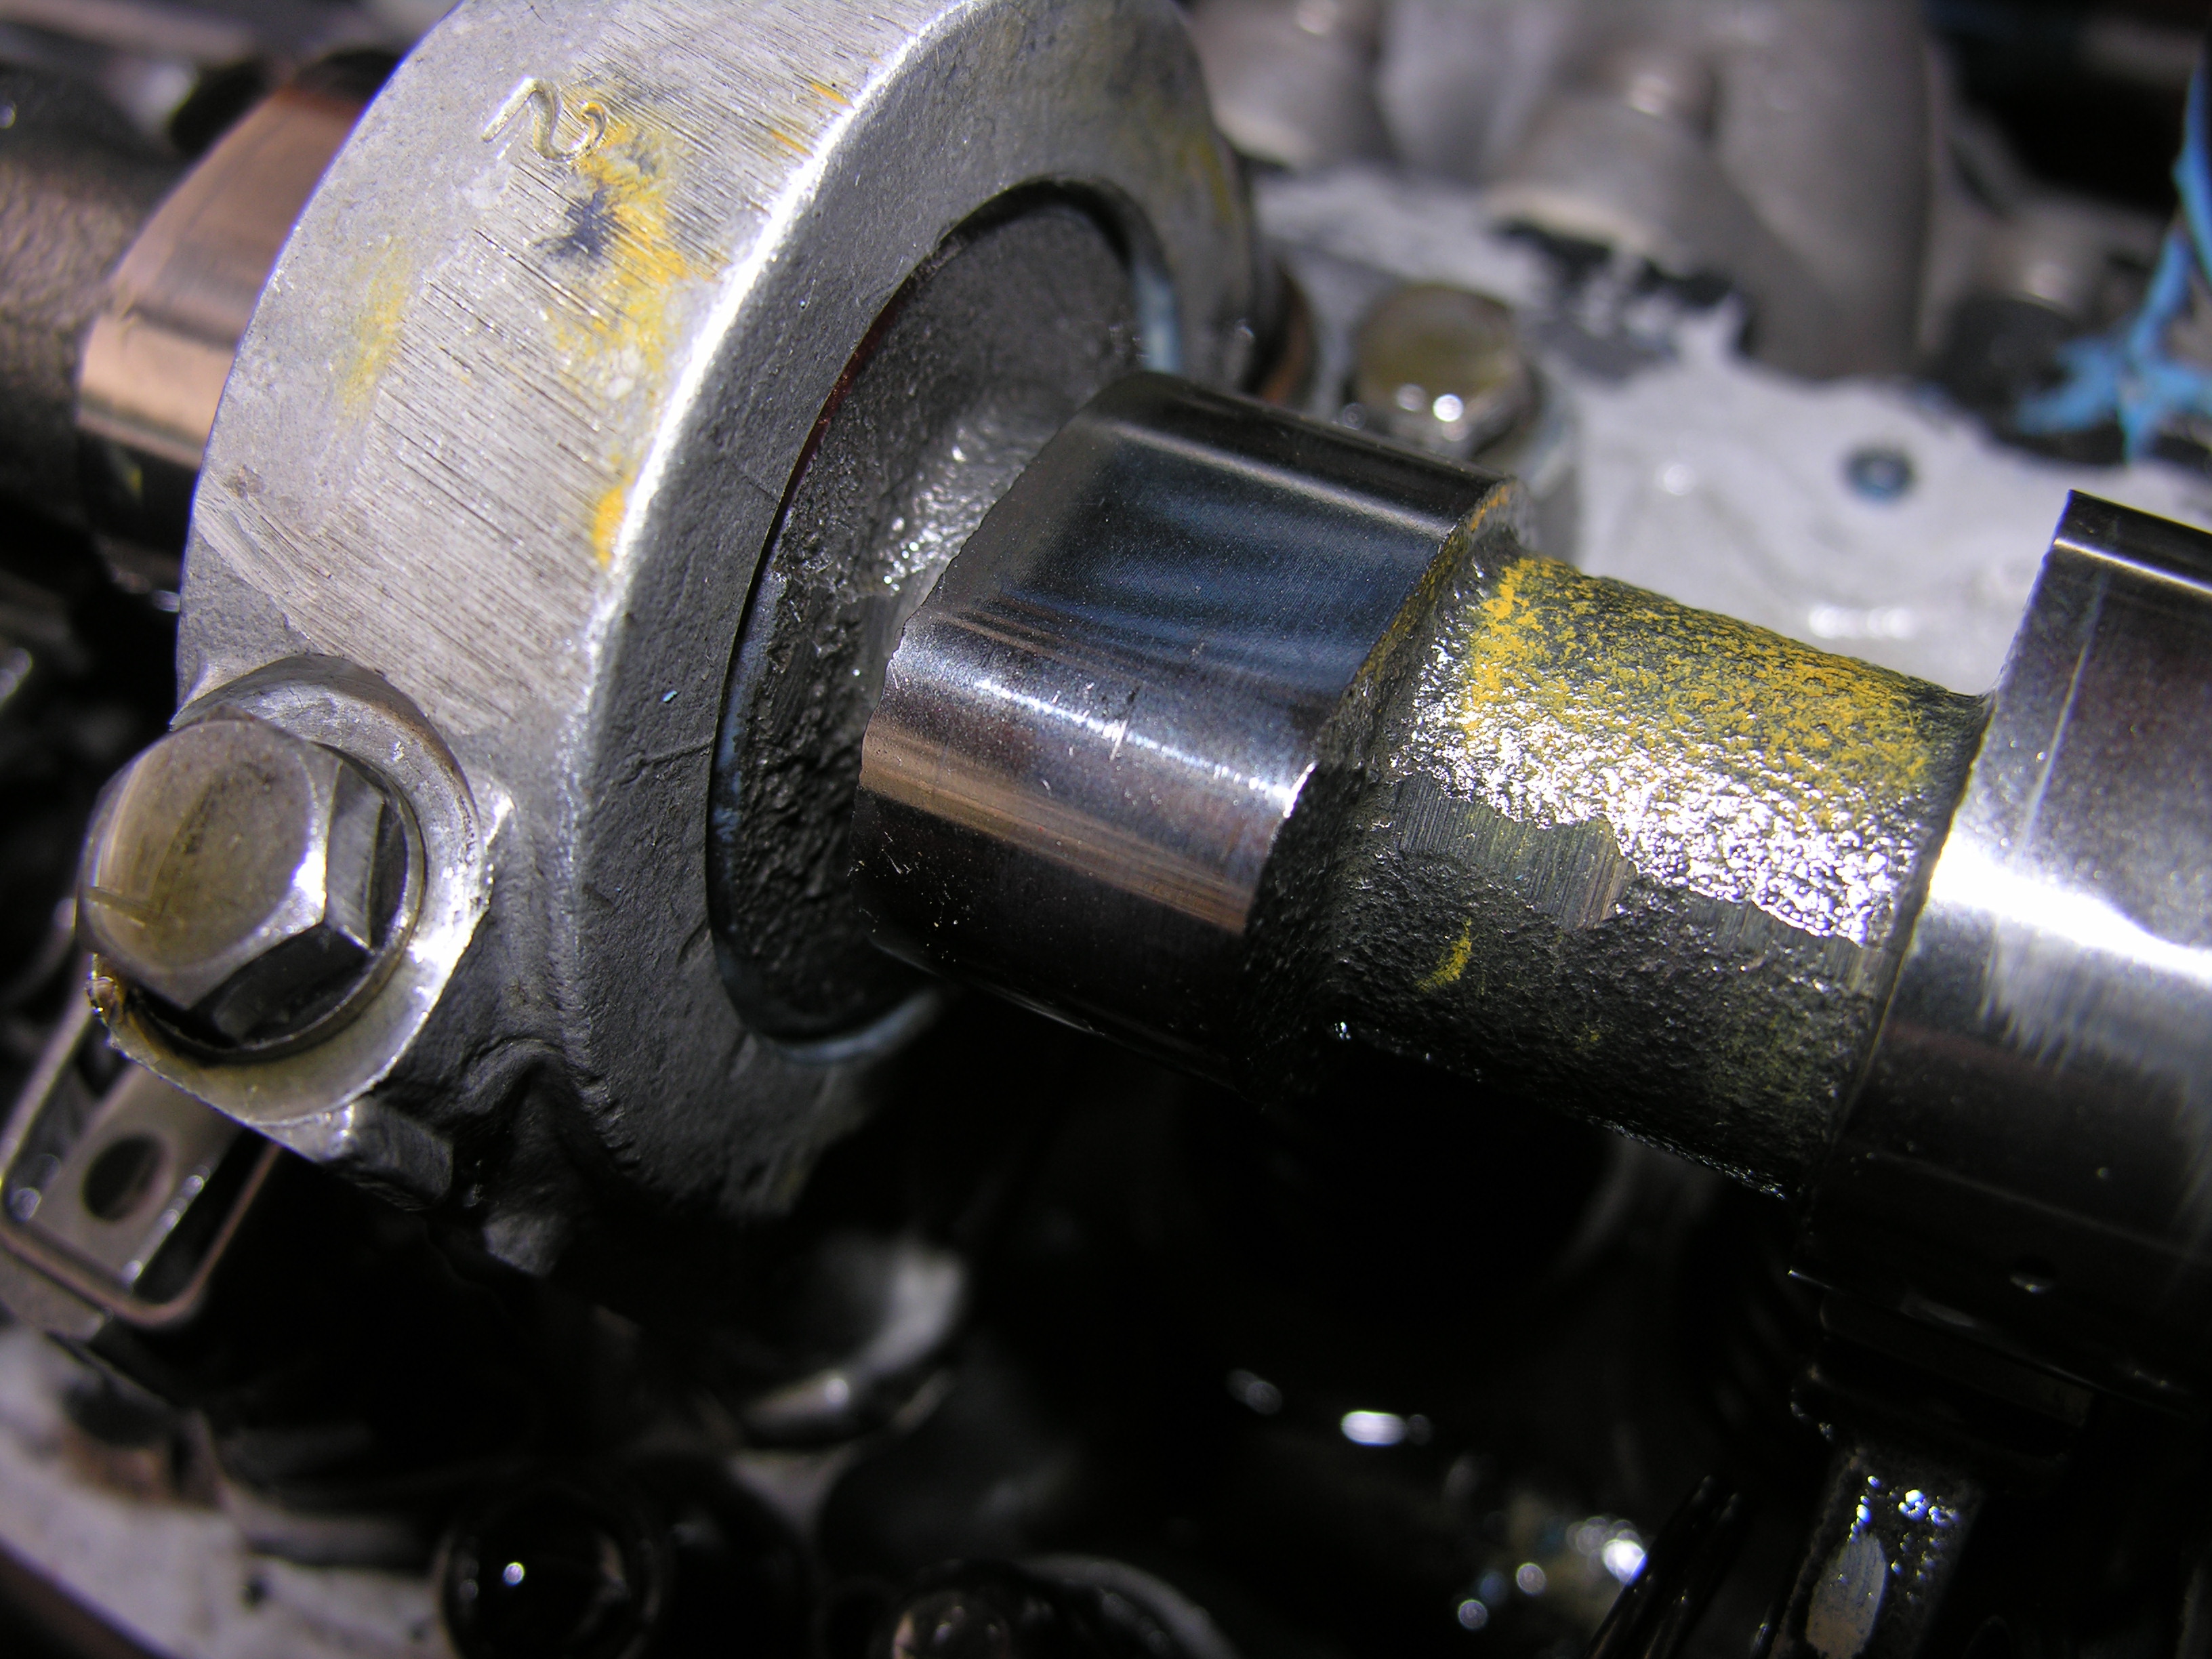
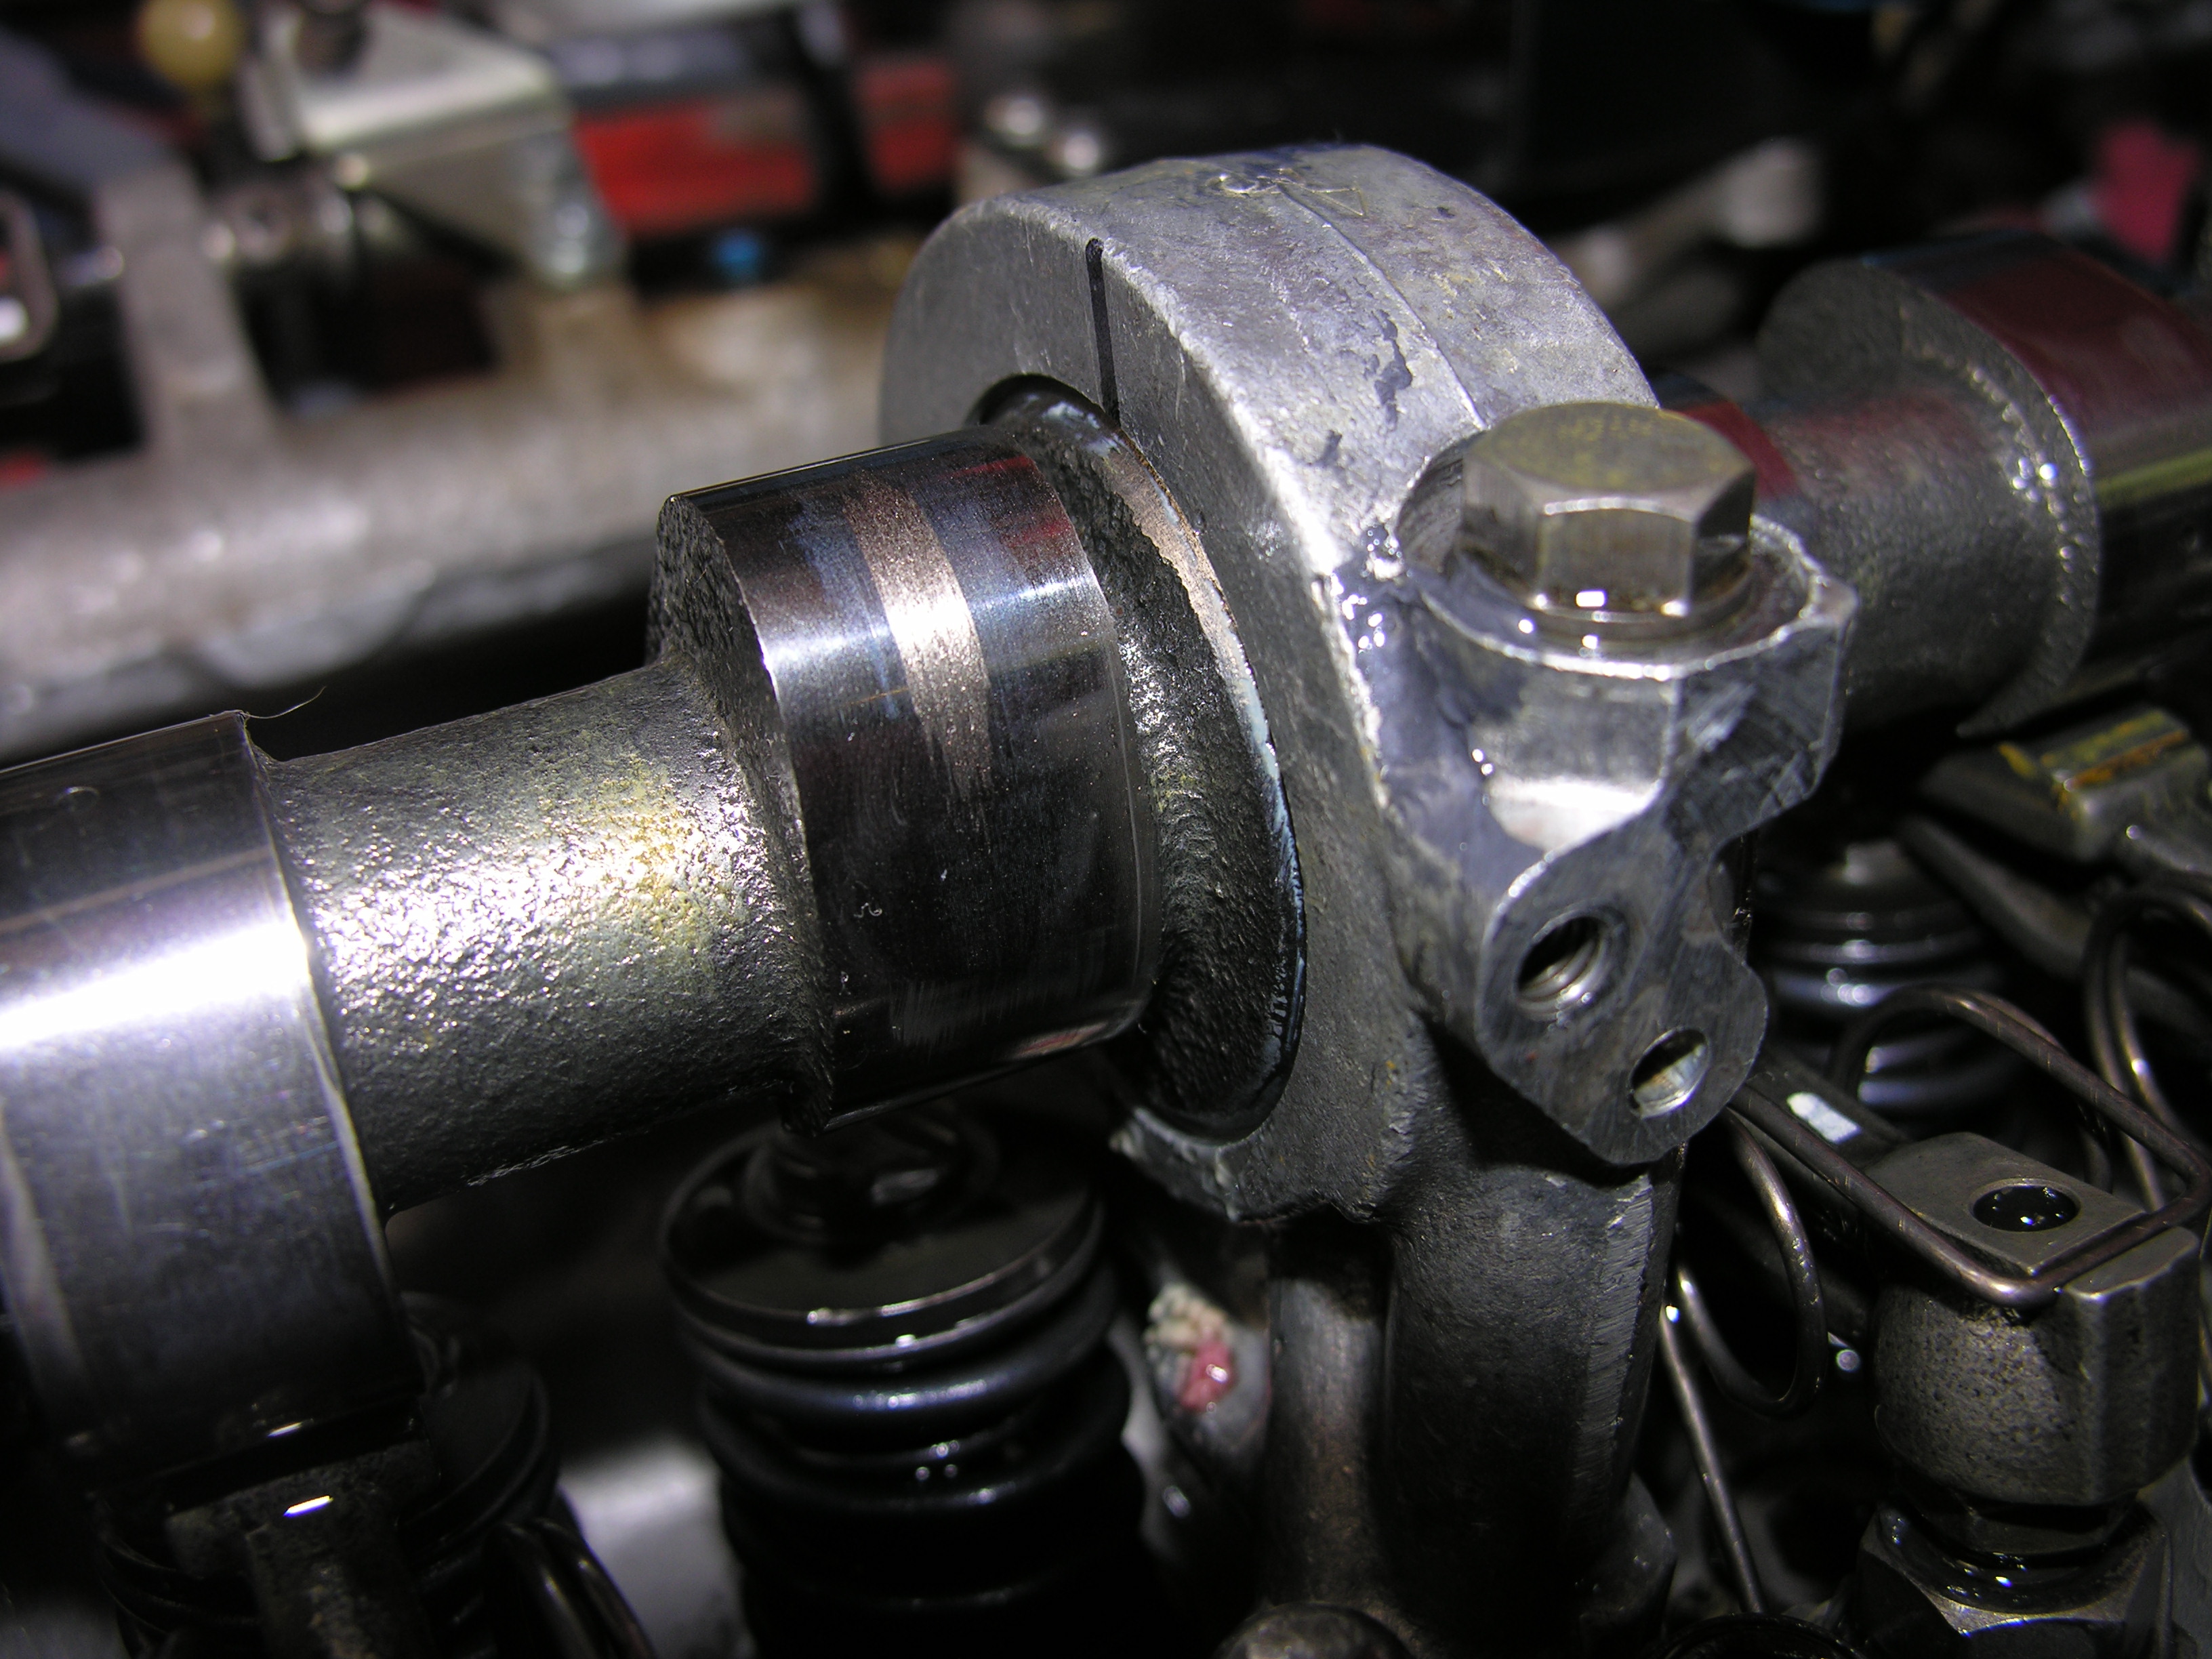
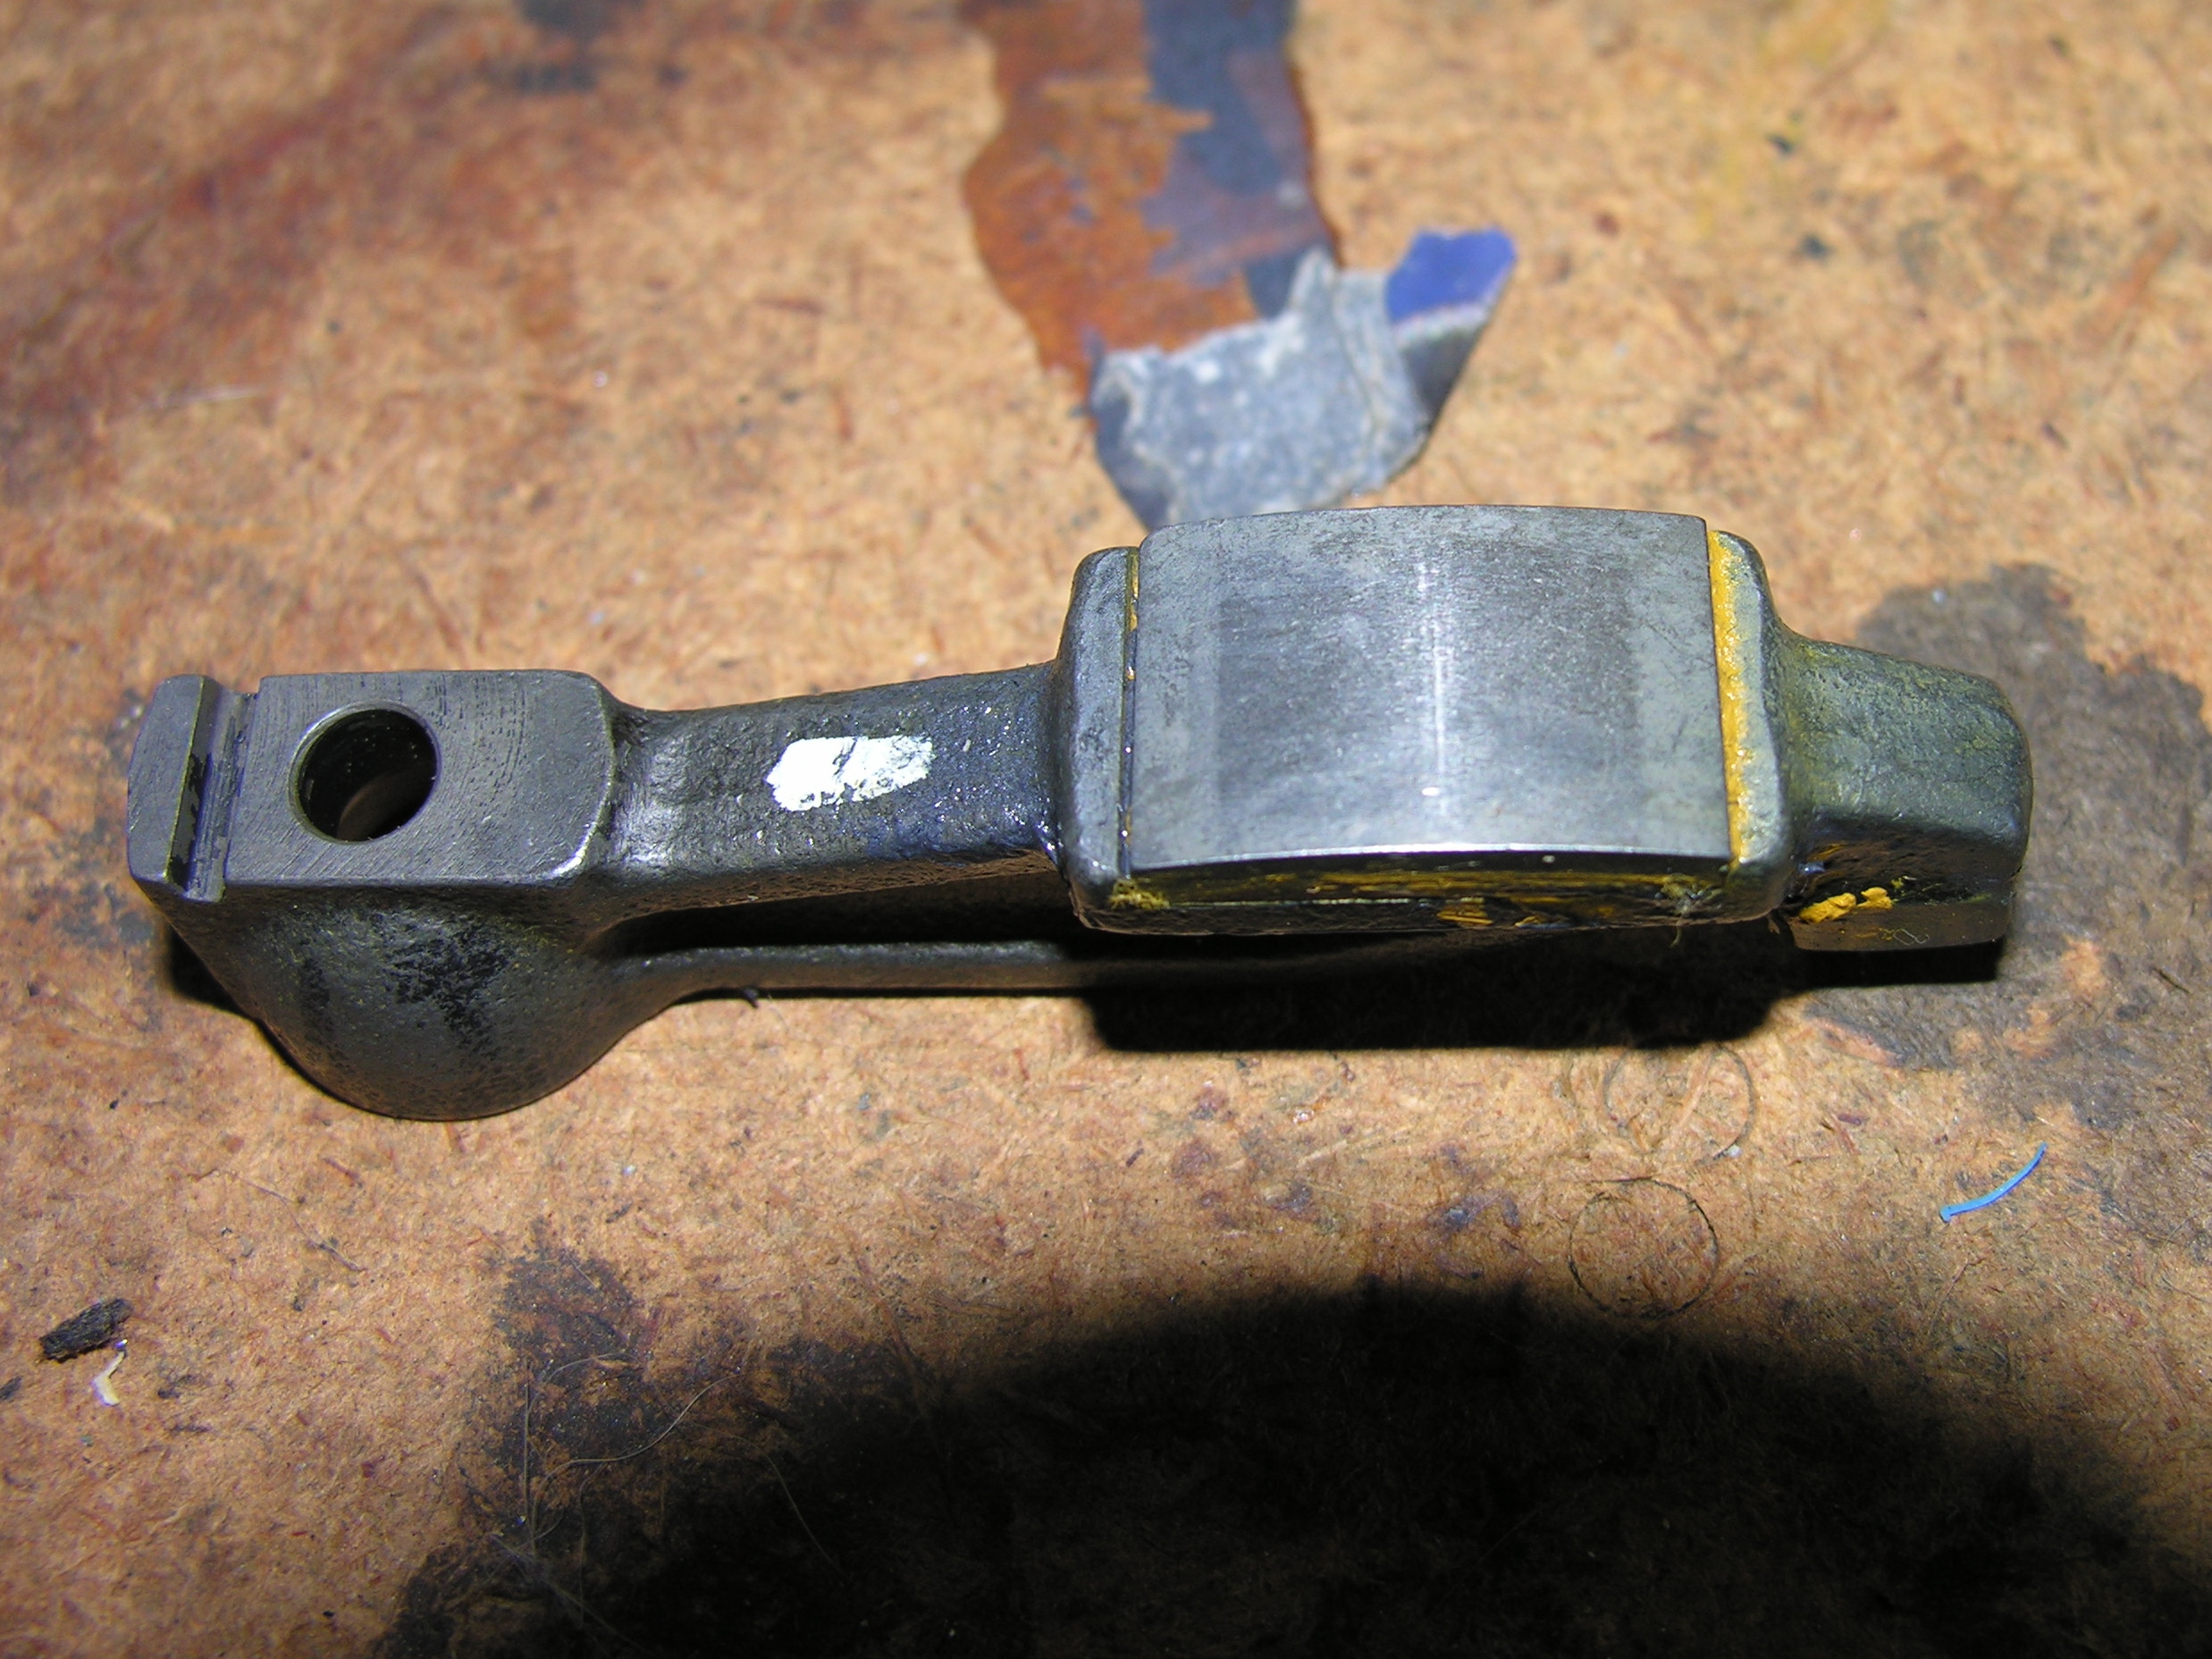
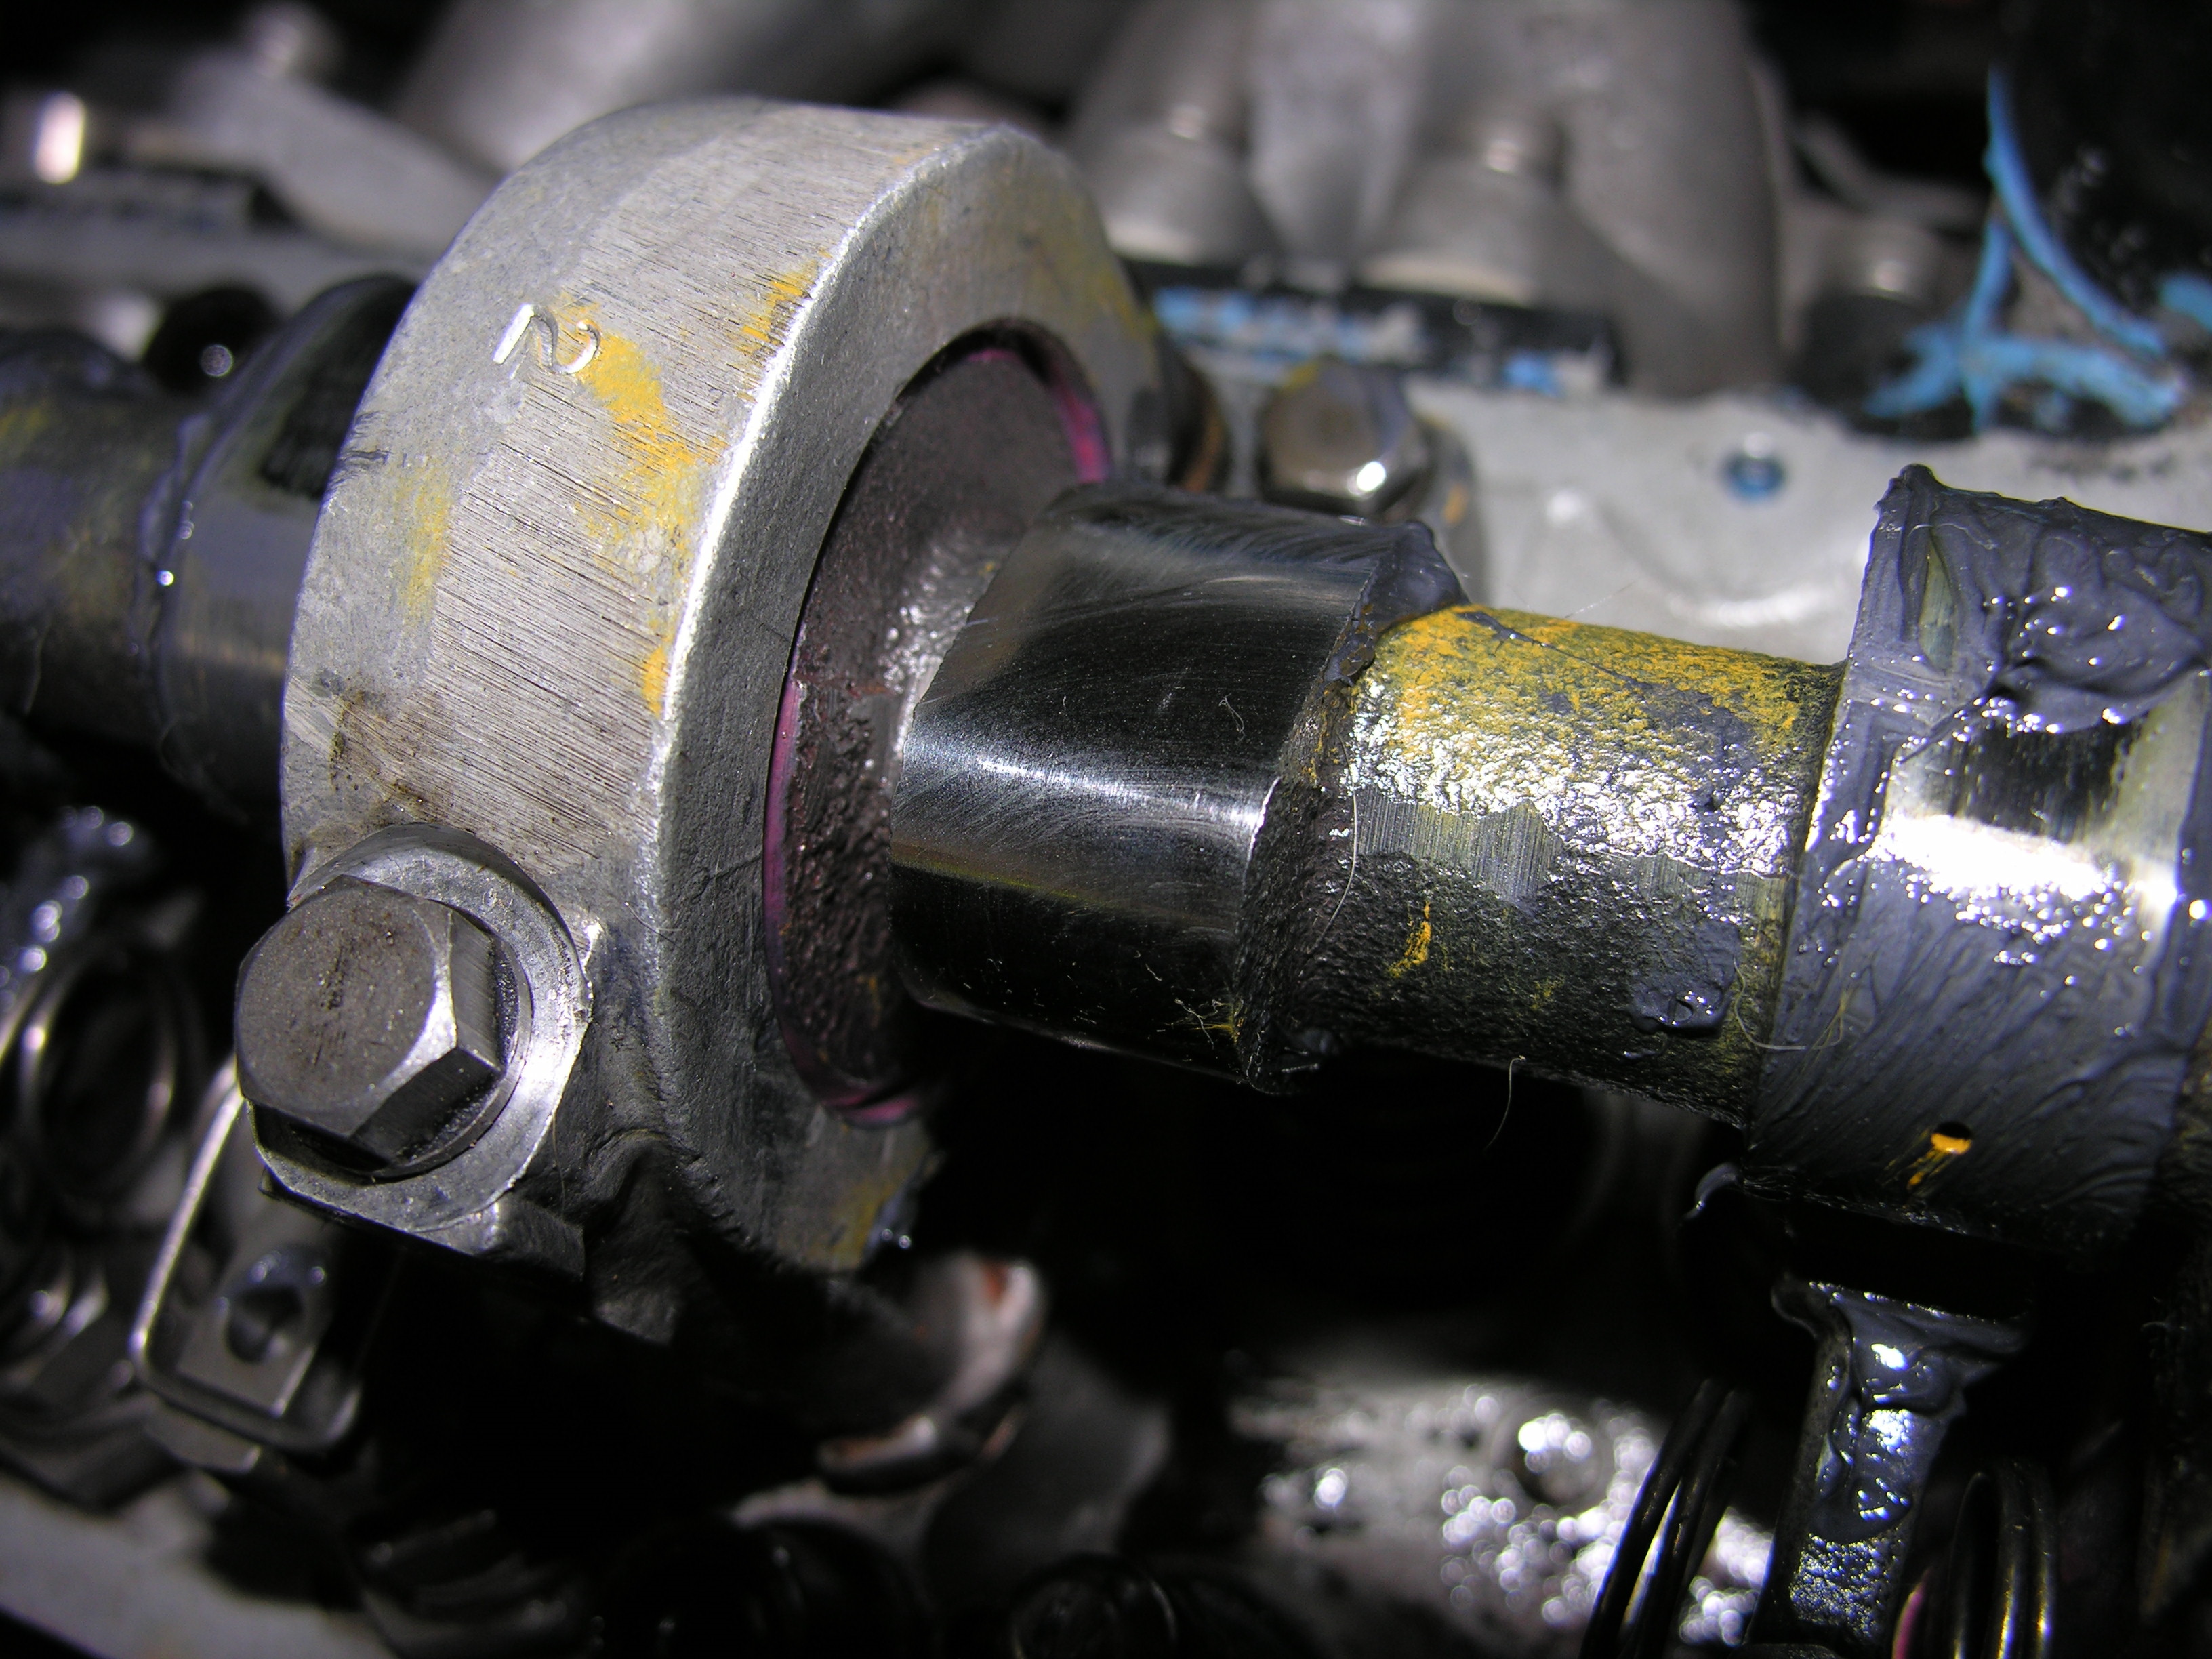
30 minutes down and I have good news and bad news. The good news is it looks like everything is wearing really well. Here is a pic of the number 1 rocker and lobe. The bad news is number 4 intake has a problem. Take a look at this. So after heaving an emotional break down I came to this plan. I think there is something that has been smeared on the lobe. Notice the difference in color. I'm going to continue to run it and check it about every 100 miles to see what it does. I also have an e-mail into Crane to ask what to do (hoping for a miracle here). At this point I have no time or money to go to a new cam shaft. And if I did I think it is time to pull the head and start at the valve installed height, spring force, etc, etc. all the way to a new cam. I took it out for a spin and man I love it! First drive in more than three years!!

-
So GJC, what did you do?
-
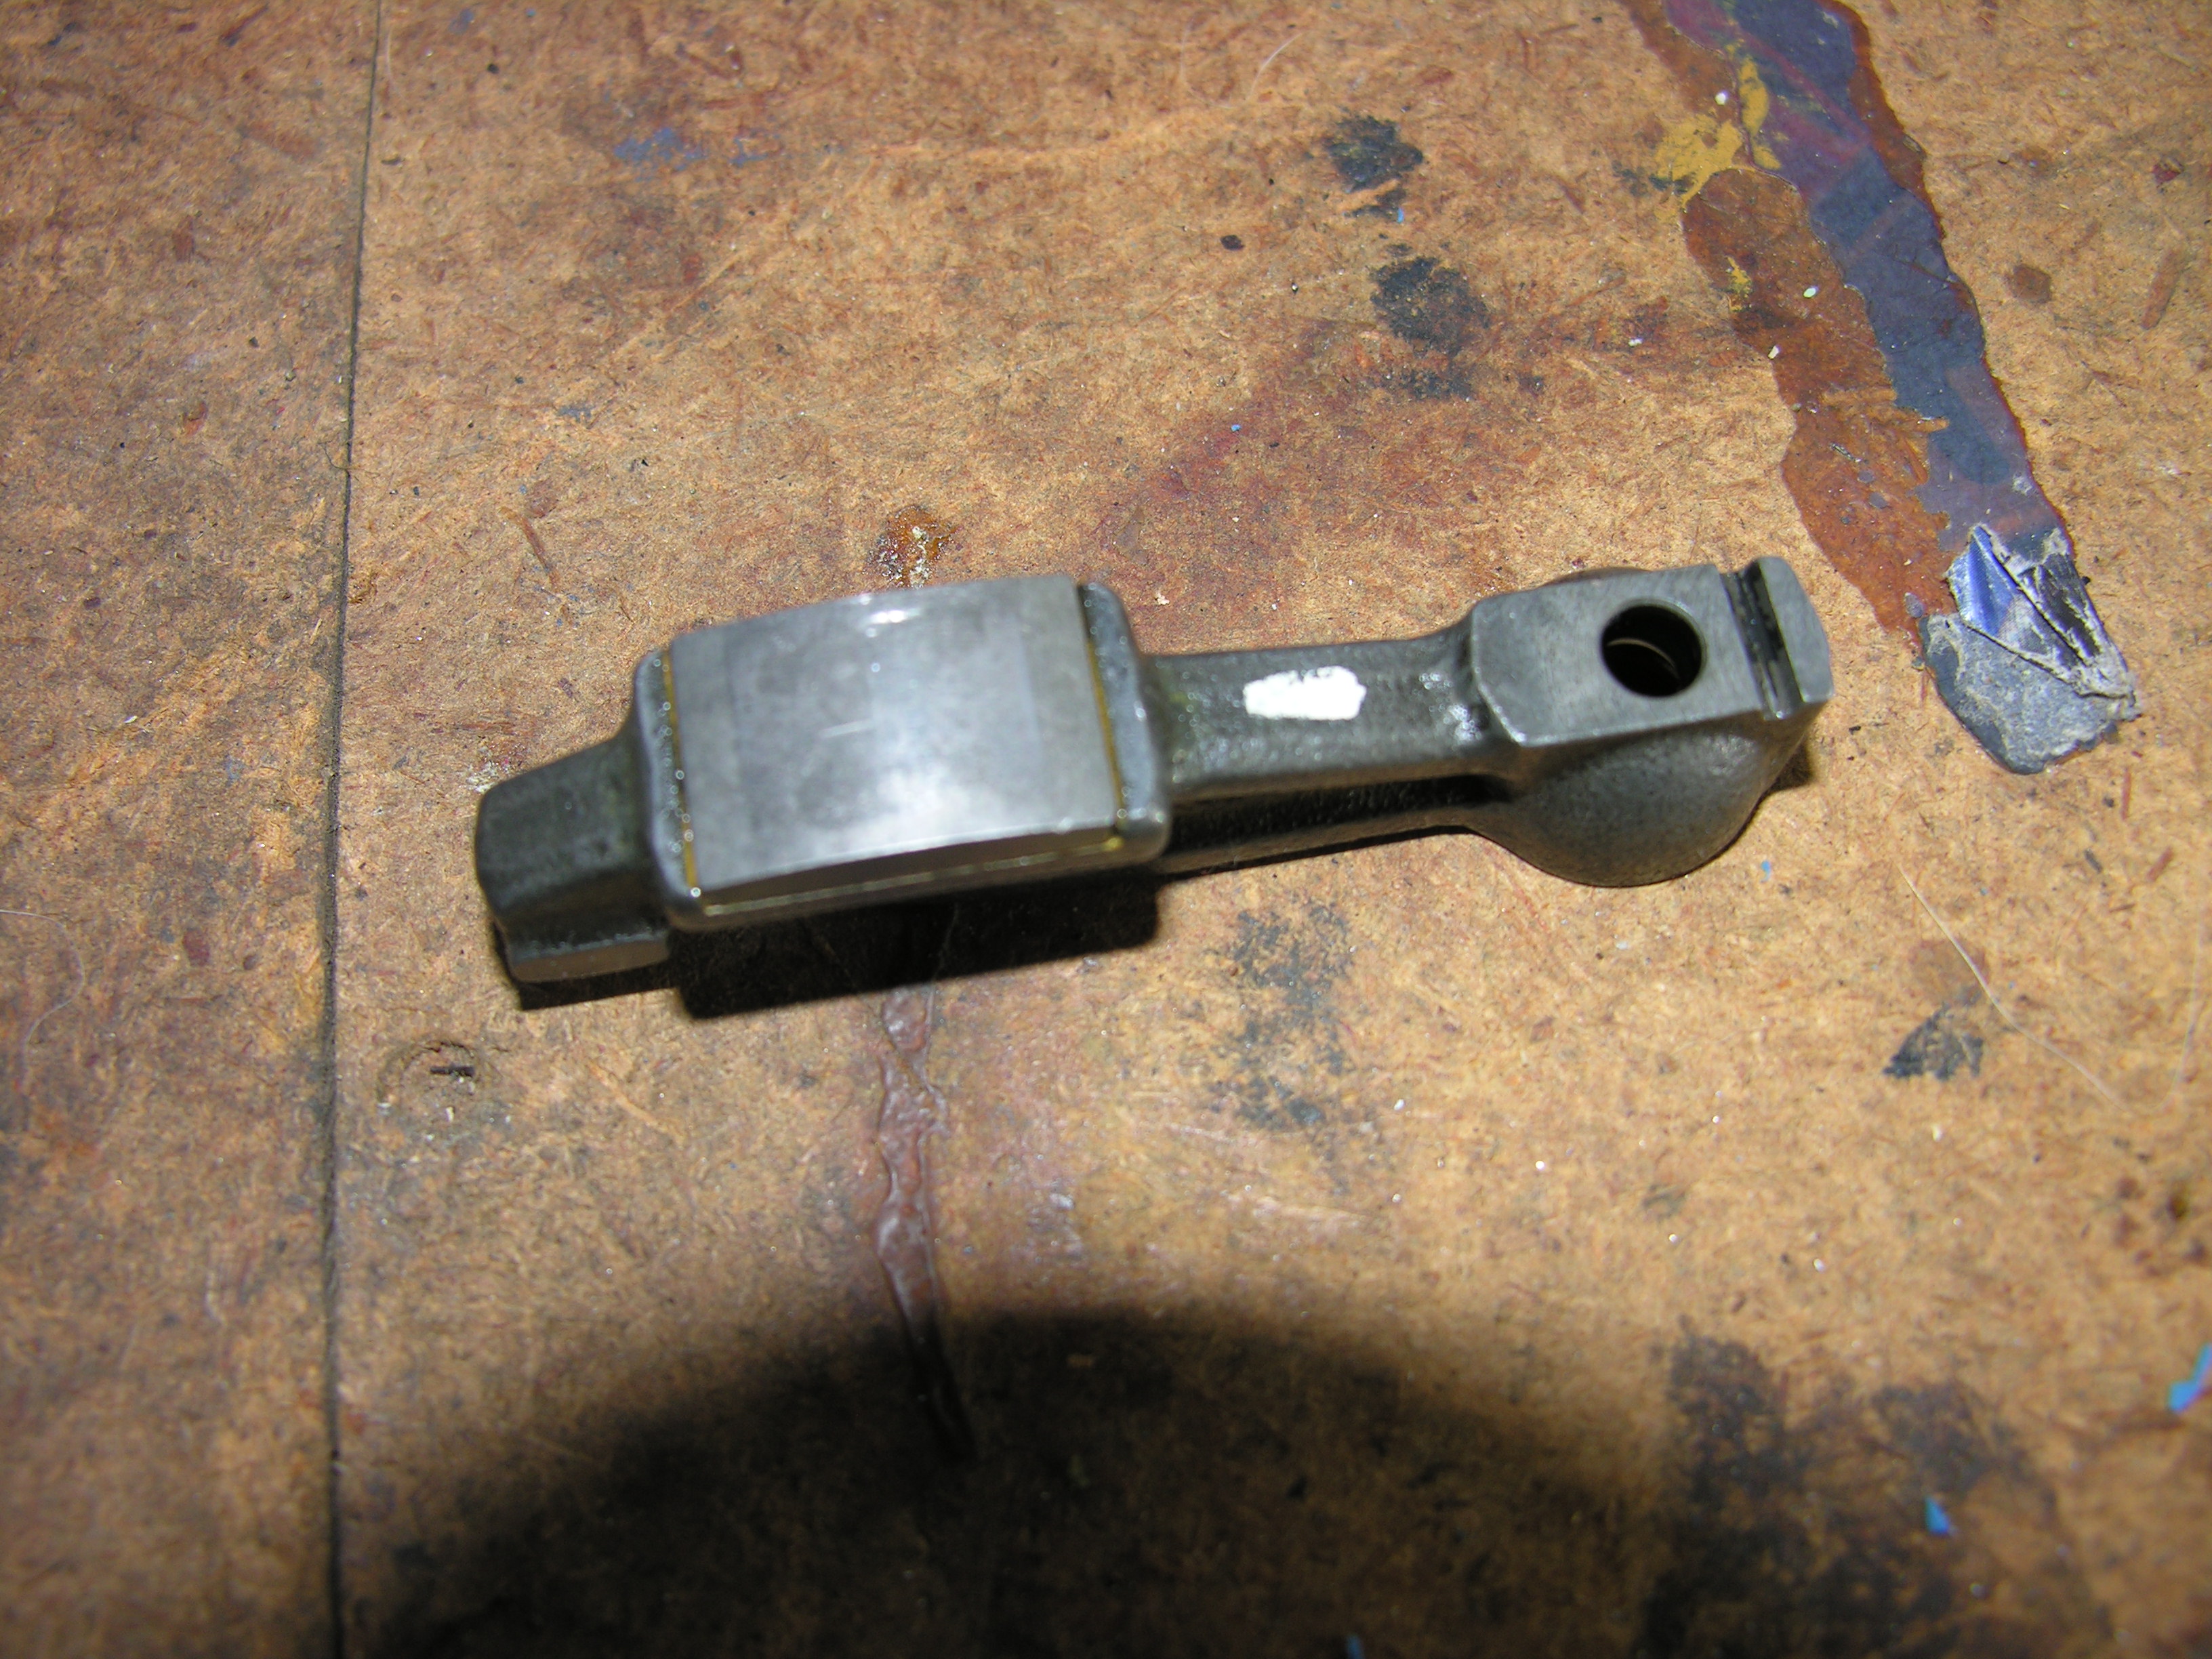
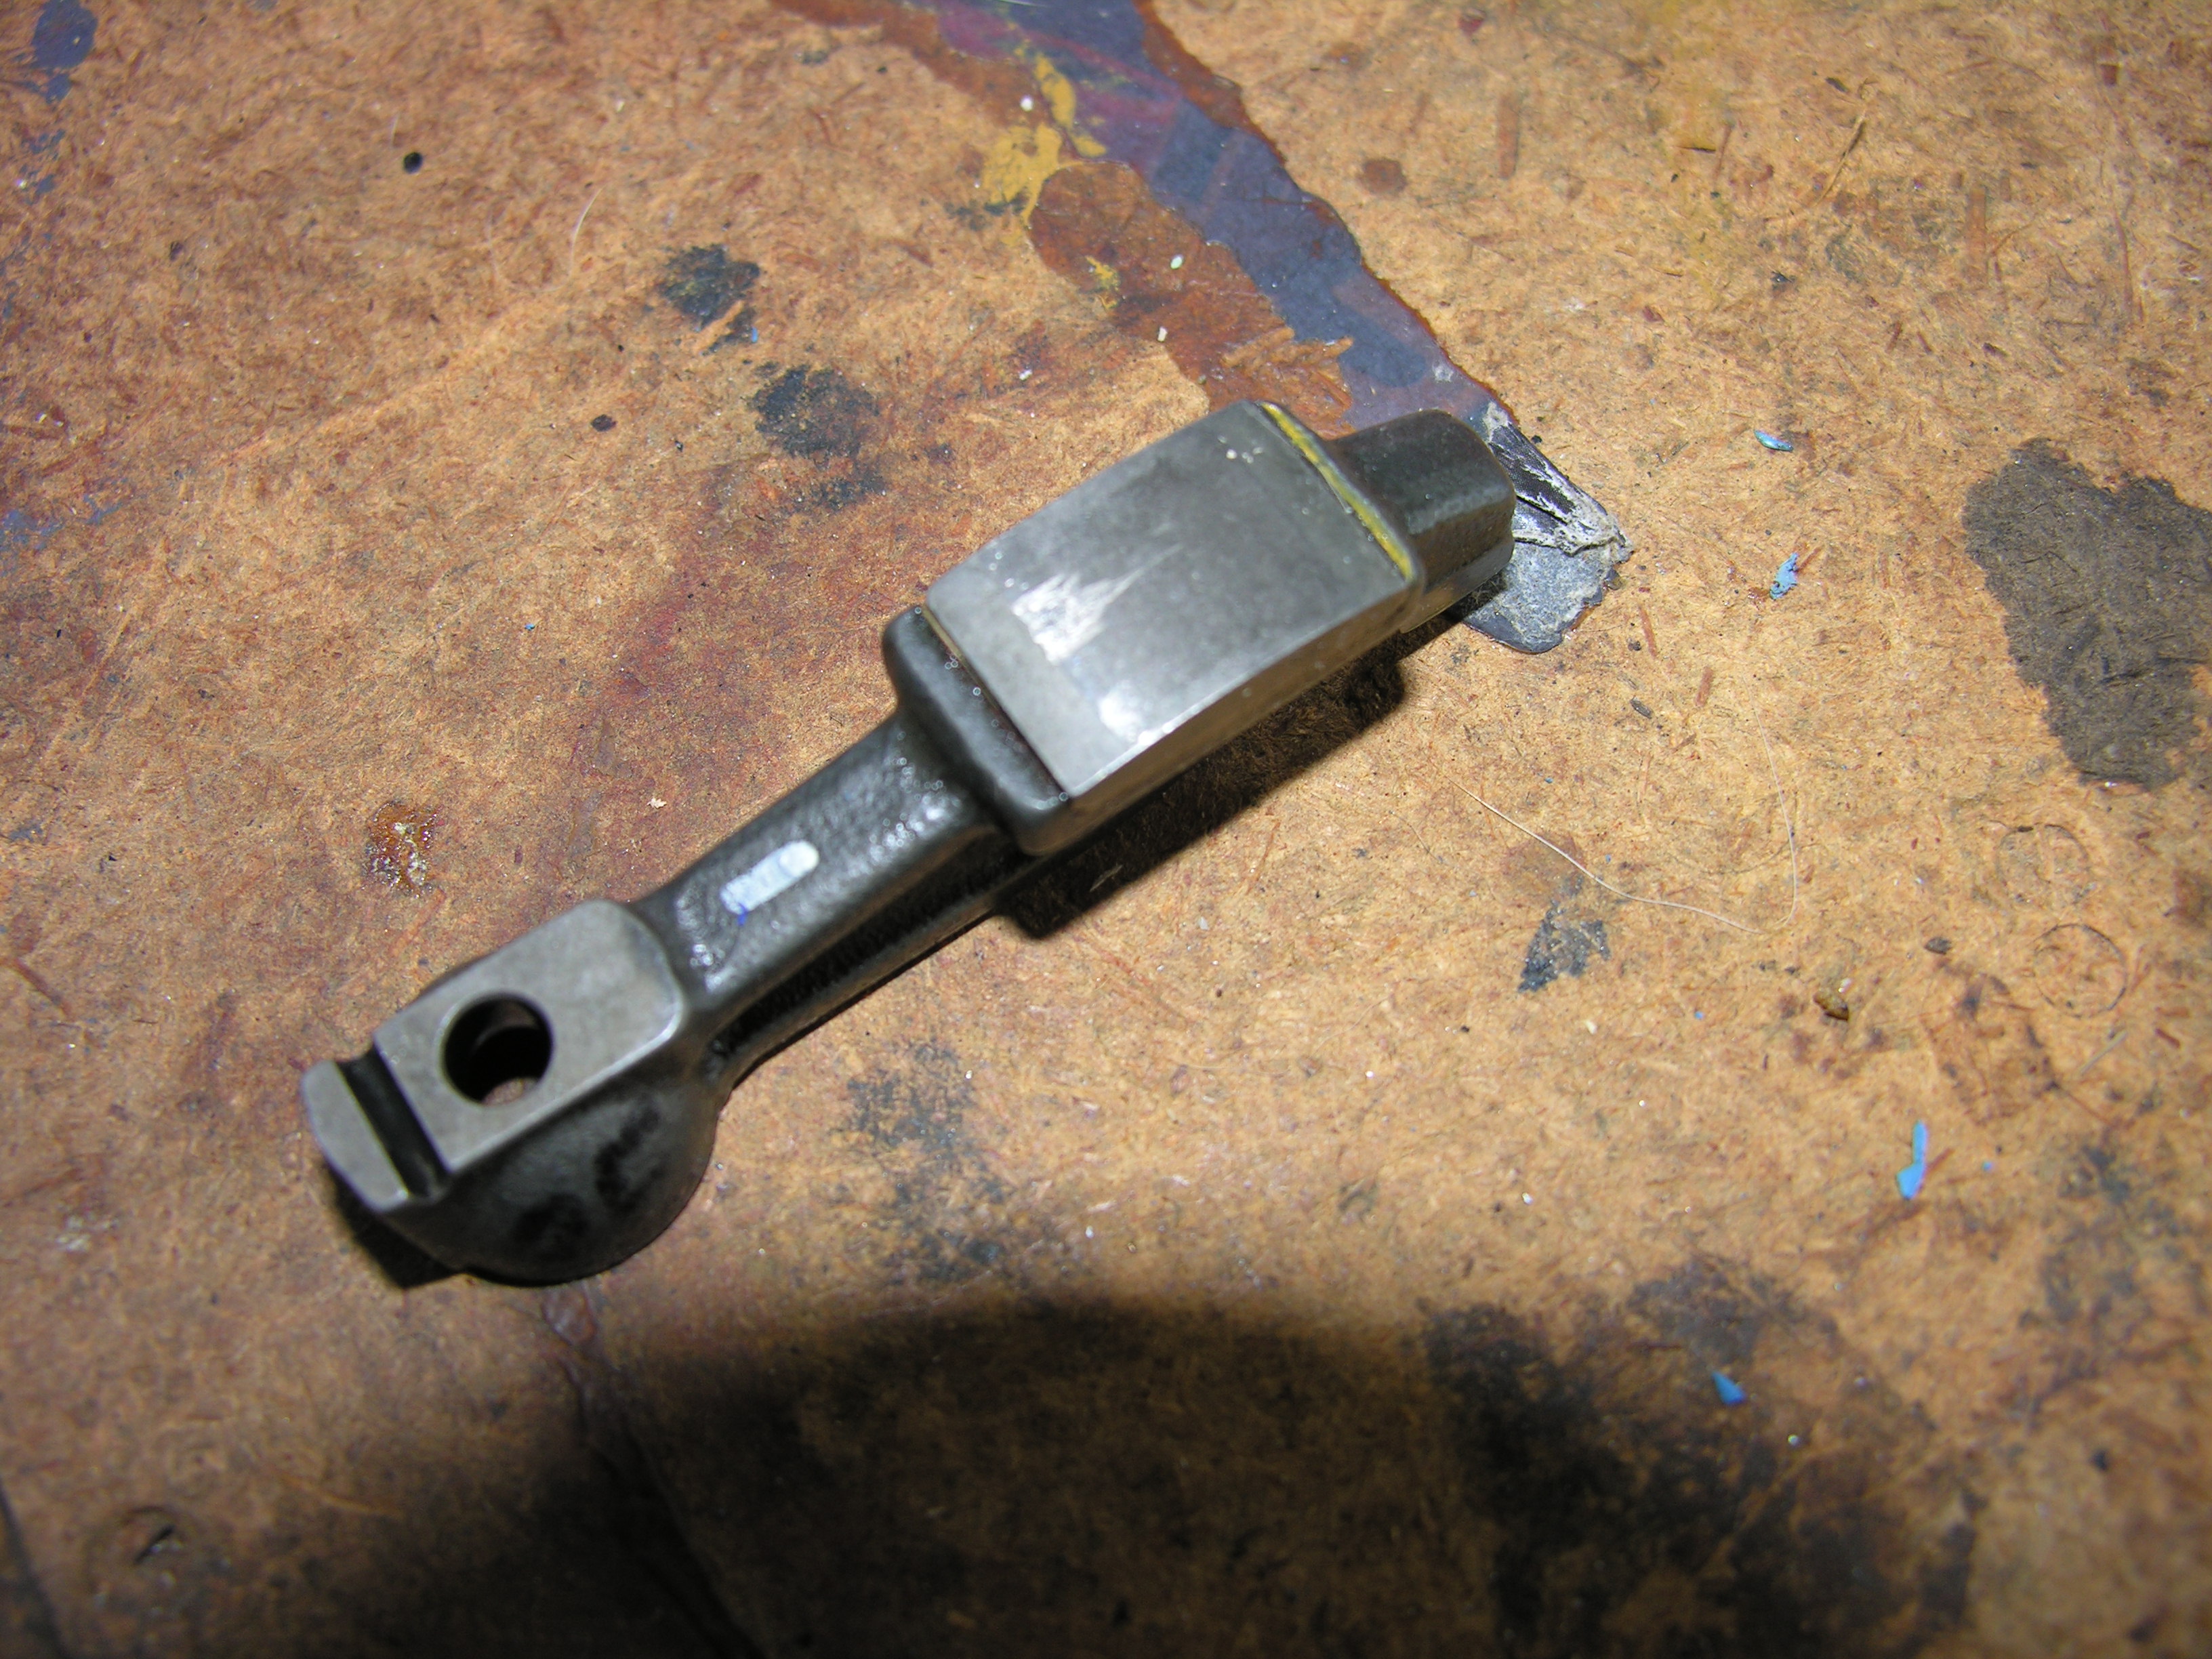
I started this thread in Aug of 2008 and worked on it for several months until things stalled. Which seems typical with most my projects. With in the past several months I was able to get back to it and have slowly been re-assembling the cam and components. I have completed the rocker arm wipe pattern adjustment and timed the cam to manufacturers specs. I also coated all the cam lobes with Moly lube. Today I plan on putting together the rest of the engine and starting it up for the break in period. So this is my plan. I have taken photos of rocker arm and cam lobe of cylinder No. 1 intake and I have posted them here. I will run in the cam for thirty minutes and take another set of pictures and again post them here. Then after 500 miles another set, and another at 1000 miles. So if any signs of wear show up you will be able to see it along with me. Obviously the goal is to have no wear at all. So this is how the engine is at present. I drained the oil, dropped the pan and cleaned it. I did find a few metal shavings and I found allot of blue silicone gasket maker in my oil pick up screen. Changed the filter and added a Filter Mag. I have reinstalled the pan and poured in Comp Cams break in oil. So next is install the radiator, valve cover and a few other items and it is Vrumba time!! The cam has been reground by Crane. I have installed new aftermarket rockers (all I could find or afford). As mentioned earlier the wipe pattern has been set with all new lash pads. Lash pad wipe pattern was checked. Valve clearance has been set cold (obviously). So next time you hear from me it will be good or bad. Wish me luck. Paul
-
Do I HAVE to hoist my engine to replace oil pan gasket?
sonomaz replied to LoneStarS30Z's topic in Nissan L6 Forum
JSM, thank your Dad for me! The thread idea worked great. Also you have to turn the crank so No. 1 is at 90 before or after TDC then the pan practicly falls out. Lone Star, get a tub of Permatex RTV Black Max gasket maker. Crawl back under and spackle the stuff between the pan and block. Also go around every bolt hole with the stuff. Don't forget to clean everything with Acetone first. Let it cure over night. That should give you a permanent seal with out re-dropping the pan. -
Do I HAVE to hoist my engine to replace oil pan gasket?
sonomaz replied to LoneStarS30Z's topic in Nissan L6 Forum
Wow! Great timing on this for me. Guess what I'm doing this weekend. -
DCZ is right. Go back to basics: Fuel, Spark, Compression. Compression does not go away and come back so check on fuel and spark. The next time it stalls pull the wire off any plug wire and crank to see if you have spark. If yes you probably have a fuel problem. If no you have a spark problem. I must admit it sounds just like a clogged fuel filter. Pull it completely off and blow though it. You should be able to almost breath through it. Any resistance at all you should change it. If it is not plugged climb under the rear of the car and make sure there isn't one back there. For spark I think 73s still had points (before you replaced it with pertronix)so I don't think you have a power resistor. PRs were used with early electronic ignitions like that used in the 280Z and I think they were acctualy amplifiers (but this is beside the point) and they were often effected by heat like after running for awhile and then slowing down to let the engine compartment hot soak. Back to the point: It could be the Pertronix module in the distributor is failing when hot. Simply put points back in to see if your problem goes away. If it does get a new pertronix unit. good luck Paul
-
Consider not venting the lines but just unbolt the compressor and tie it up out of the way. Perhaps one day you can have it vented properly.
-
So the personal budget opened enough to regrind my cam and buy rocker arms. I picked up a set of rockers from Motorsport Auto for ~$250. The issue is they are not manufactured by Nissan. When I spoke to Crane Cams they were very specific about using Nissan rockers to minimize scarf (is this a real word?) issues. So two questions: 1) how important do you thnk it is to have Nissan manufactured rocker arms; 2) where can I get them for a reasonable price? I got my cam back. I'll get some pictures posted soon.
-
All, It been a long time but I am confident I put a 280ZX flywheel on the back of my L24 so I could use my 240mm Centerforce clutch. As I remember it is very important to use the correct collar and the collar goes with the pressure plate not with the transmission. Check out the pics in this link in the third entry. It should clear up the collar issue. http://www.zcar.com/forums/read/1/720966/721049 I recomend you check your clutch movement right after you bolt up the trany mount and before you install anything else (OK you should install the release cylinder). Paul
-
Help: engine does not keep idle unless key turned
sonomaz replied to Hailstorm's topic in Nissan L6 Forum
On a stock series one Z the balast resistor is mounted under the coil on the inside drivers fender in front of the shock tower (USA versions). It looks SIMILAR, not exactly, like the one in the picture. The easiest way to check is with a test light. You can get one from Kragen or Napa for under $10 and it will help in the rest of your wiring problems. It looks like an ice pick with a cord out the back and a light bulb inside. Turn your key to the on position. Clip the test light to ground like the bolt that holds down the coil or the resistor. Touch both sides of the resistor terminals one at a time. The light should come on for both sides but one side should be dimmer than the other. If both sides don't light you are doing something wrong. If one side does not light, the resistor is bad and needs replacing. If both sides light, your problem is somewhere else and you should go with the ignition switch idea. Try this link for what a test light is http://www.partsamerica.com/productdetail.aspx?MfrCode=DOR&MfrPartNumber=86598&CategoryCode=3391 Good luck. Paul -
Ha ha ha.... so many things to say to that, nothing related to Z's!!!