AydinZ71
Members-
Posts
1073 -
Joined
-
Last visited
-
Days Won
27
Content Type
Profiles
Forums
Blogs
Events
Gallery
Downloads
Store
Everything posted by AydinZ71
-
240z SCCA vintage race car, restoration
AydinZ71 replied to AydinZ71's topic in S30 Series - 240z, 260z, 280z
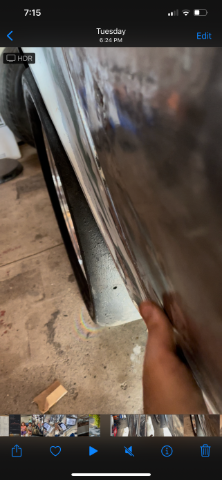
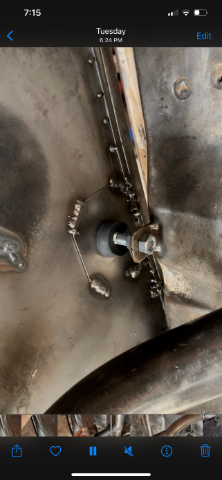
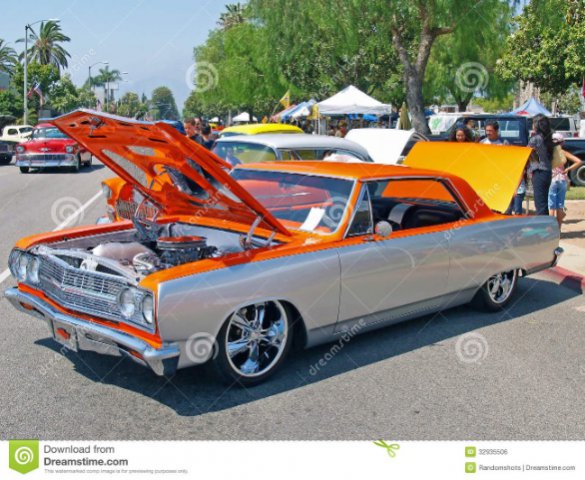
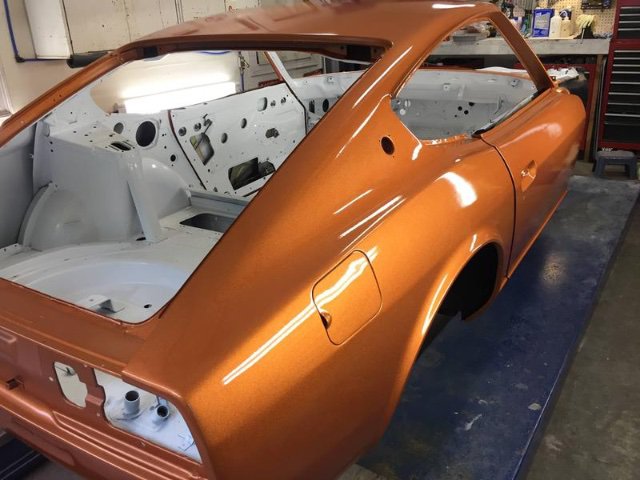
Updates: - sanding the previously-applied epoxy primer in the engine bay. Tried using a small sanding block and quickly realized this need to be done with fingers alone. Ahhh the joys of paint & body. I burned-through in a few spots so il do some spot application when I spray the interior as well. - the passenger door skin is only 20-gauge sheet with a folded lap joint on the outside edge. The rear of the door was off the body-line by about 3/8” so I used a single adjustable bump stop to make the correction. I could have worked the metal to make the adjustment but I like the idea of applying constant force outward on the door. Will help with vibration and keep the door flush over-time if the steel exhibits some warping. -color. I’m going with Malibu sunset in the top and silver on the sides. Silver interior with flat black where the drivers eyes meet the windshield and rear hatch. -
That is a 280zx, also known as an S130. It was produced from 79’-83’ lots if information online for this car so feel free to search that model.
-
240z SCCA vintage race car, restoration
AydinZ71 replied to AydinZ71's topic in S30 Series - 240z, 260z, 280z
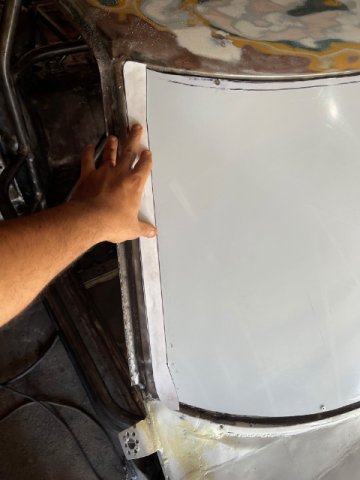
You read my mind. I have 1/4" wide #8 alluminum spacers in different lengths precisely to offset the windshield from the sill and make it as flush to the bodyline as possible. The stainless bezels do a great job of creating a nearly flat transition on the ends of the windshield as well. What I REALLY want to find is 2-component outdoor urethane rubber to fill the gap between the polycarbonate and the sill. 3M makes a single component moisture-cure product but nothing beats the durability and strength of a 2X urethane. They must not sell it to the general public because I keep coming up deuces. I KNOW they make it, since its used in manufacturing. The floppy urethane bumpers sold by MSA are made from vacuum mold injected 2X urethane. PS: you always FK up your first one... Its super hard without a template for sure. its very difficult to estimate the length with the curvature since the geometry is kind-of complicated and you have to take-into account the offset from the sill. -
240z SCCA vintage race car, restoration
AydinZ71 replied to AydinZ71's topic in S30 Series - 240z, 260z, 280z
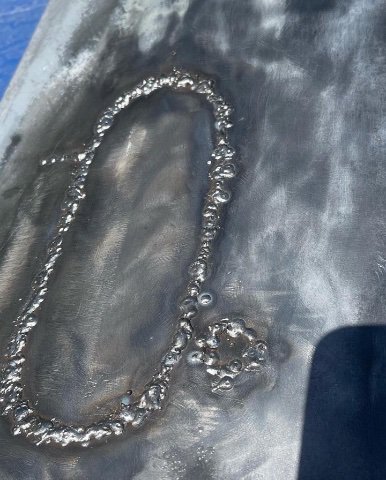
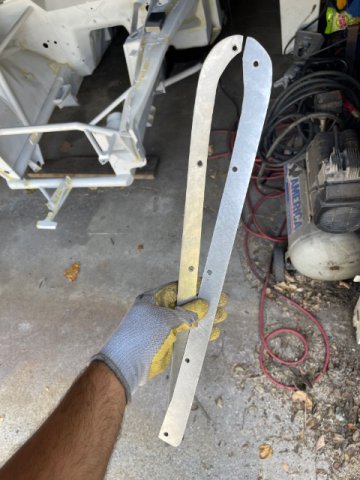
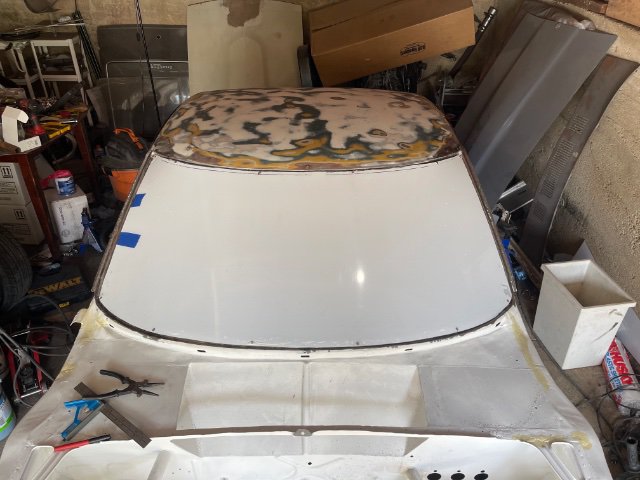
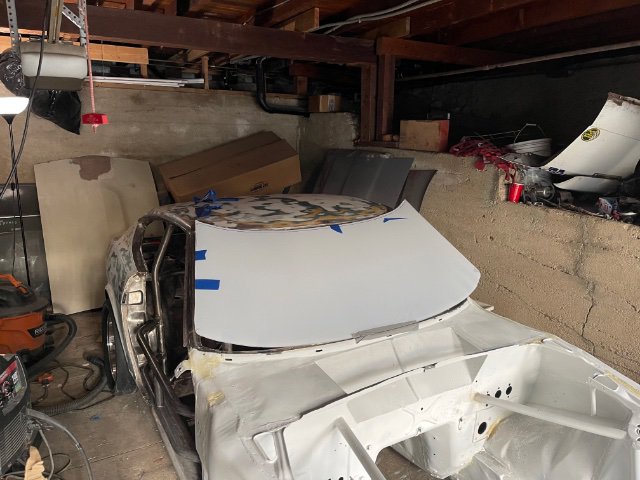
Polycarb windshield has been cut, mounted, and removed ahead of bodywork/paint. Came-up 1/2” short on the ends (these are hard to do!) so I made some fabricated stainless flanges on each end which serve as a cover for the gap, and also distribute force from the mounting bolts. This should also help a bit with the “bubble” effect from single point forces on the plastic, when viewing from an angle. also had the doors media blasted. Uncovered a poor door-handle delete job which only had a handful of tack welds holding it in place. Fixed it, but also had some wicked metal deformation to deal with. Used my MIG setup to heat-shrink the bowing spots and hammer-dolied the rest to a reasonable curvature. Converted the passenger door skin’s failing Dsuz fittings to all quick-latch. spent hours trying to align and get them all yo click without any pre-load or binding. Was happy with the results! Back to bodywork. PS: the video shows me removing it with the quik-latches. cut the length so it can post. IMG_8753.MOVIMG_8738.MOV -
ME here as well Not licensed (didn’t want to be), started as a project engineer and worked as a PM for years. Now an engineering consultant. A lot of my work on oil/gas/hydrogen was transferable to cars from material science to thermo/process. I geek-out on details. What part of CA are you in? yeah I need a TIG for sure. I’m almost done welding on the race car though, so I kinda just want to get it done and start fresh on the next one.
-
For a small job, it works just use whatever scratch you have. If you have Time and interest, buy a small sheet of 30-series, 50-series, and 60-series and just play with them. You will be shocked at how differently they all behave. The last two numbers (“T6”) is the heat treating. Ideally you want that number lower if you plan to bend/manipulate it unless you feel like annealing it yourself. when I first started fabricating, I kinda ignored all these details and just sent-it. Over time, realized understanding the material better saved a heck of a lot of time. Just shootin-the-**** here, but if you ever want to do a ground-up project play around with everything. Price really isn’t a factor but n the quantities we are talking about. I bought one 12X48” sheet of 20-gauge stainless for like $30 and still have not used it all. Made several small brackets, battery hold-down, etc. and saved time by not needing to coat any of it. Stainless is underrated in fabrication IMHO. If you use thin enough stock and are willing to manipulate & weld it, often not much heavier than AL for the same job. You are way ahead of me on welding though. Your exhaust work looked great! I have yet to load a cord of stainless wire in the mig and give it a go on my own stainless exhaust. I don’t have a TIG, or experience with TIG yet.
-
Brackets look good what’s the AL alloy? 6061 machines a ton easier with less deburing, but it won’t bend easily without annealing. I use snips on AL precisely because my cut-off wheel makes a mess of the lower alloys. 0.08” 5052 will bend at that thickness, snips will still cut it, but it’s rigid enough not to warp the hell out from the snip. Give it a shot next time
-
Looks good if anything looks to be less than 1/8” gap, I’d put on a little patch of 1/16” thk self-adhesive silicone. Better to have things rub on rubber than metal ask me how I know 😂 PS: don’t use silicone on any material that oxydizes. It attracts moisture in a way other synthetic rubbers like EPDM or urethane do not. It behaved almost like a rust catalyst on some parts of this car from the PO’s use, even on nuts a bolts.
-
Cool hope you get some responses. Good luck on the car!
-
looks good! any particular reason you used a bulkhead fitting at the rad support? Nothing wrong with that, just curious what your take was. I thought about it on mine but realized it would just add weight and complexity. More fittings means more leak points, especially on oil which seems to weep through when its doing its job. I just drilled some 1.25" through holes and plan to use a rubber grommet
-
Tuning w/ cam is tricky. It really has to be under load, and at higher RPM. RPM’s under the cam’s peak torque range will be wonky because of reversion and poor volumetric efficiency. Off-load like at idle, I tune for max vacuum and the smoothest idle I can get. Did you clock the head to the block when you installed the cam? It’s really important with wilder cams to ensure the lobes are landing exactly to the cam chart. Not just for performance, but also for off-load rev-up. With an adjustable EFI, have you considered running a small turbo? That will work with 8:1 static CR. You will have a bunch more torque without sacrificing street-ability. You already have one of the most expensive components, which is the independent EFI. With the headers and cam, I understand if you are committed to NA.
-
Unfortunately, I do not have such data to share but in general a lopey cam is going to hurt your idle vac., and you will need to inch-up your idle rpm. Is there a particular reason you need the vacuum? Brake booster? There are larger boosters out there, but you would need to fabricate to adapt them in most cases.
-
IMSA GTU vintage racer build
AydinZ71 replied to clarkspeed's topic in S30 Series - 240z, 260z, 280z
ahahha, no kidding! The color is just the "sexy" part folks want to know about. I also built a war chest of bodywork material first. Durablocks... five rolls of varying grit paper, AL filler, regular filler, ahahha. Sanding sanding, and more sanding.... I have DA'd the existing finish down to primer/filler/bare steel. Using the existing filler matrix so I have less work to do, but down to bare steel on most of the car. -
IMSA GTU vintage racer build
AydinZ71 replied to clarkspeed's topic in S30 Series - 240z, 260z, 280z
Agreed I have been building my war chest of paint over the past few months haha I have silver, orange metallic, and black base coats. All are acrylic urethane with separate hardeners and reducers. I also have urethane clear coat is gloss and matte. I had to clear a whole 5’ square section of the garage just for bodywork stuff haha. -
IMSA GTU vintage racer build
AydinZ71 replied to clarkspeed's topic in S30 Series - 240z, 260z, 280z
Clark, 100% with you on the inexpensive role of swapping springs and bars. In lieu of being another "give me your numbers" offender, could you coach me through it once I have the suspension all back on? I understand the general concepts (camber, caster, RC, etc.), but have zero experience on how to set-up a car. If I understand correctly, I need to set my ride height first, then my camber, then my caster and so on... I don't even know what ride height I should be going for, or even what point on the car I need to measure from 🤣 Prather says 4" high, but that's from the ground to the bottom rocker of a miata. I assume its not transferable. -
IMSA GTU vintage racer build
AydinZ71 replied to clarkspeed's topic in S30 Series - 240z, 260z, 280z
Ahh... that's cool! I didn't realize you could use the insulating coating on motor windings for other applications. Good stuff What irritates me is how difficult it is to get a real-good tangible understanding of all the different available coatings, without direct experience (buy it and try it). Enamel, Epoxy, Urethane, Acrylic Urethane (the crap we have to use in CA), moisture cure, 2-component cure. so on... What is advertised by the manufacturers is so far from a "spec" or even valuable for a DIY'er. Silly, but I gained most of this experience using all these various chemistries on model cars. Yes, they even make 2X clear urethanes for model cars now 🤣. For example, people have been using enamel spray cans for decades... It's what most auto-parts store will recommend and sell you if you walk in. It chips and has terrible adhesion. the paint itself cures hard, but what's the point if the failure mechanism is a loss of adhesion and not abrasion. I have tried it with and without the dedicated primer, paid super close attention to surface cleanliness and roughness. There must be a very particular technique that evades me, but its not on the can. I suppose that is the point of being a professional... understanding the ups and downs of all the various chemistries and taking it further. Like, which brands provide a superiors chemistry even in the same class/type of coating. So far I have been really happy with products sold by Speedokote. I have an order of Eastwood basecoat. I'll let you all know how it goes! -
IMSA GTU vintage racer build
AydinZ71 replied to clarkspeed's topic in S30 Series - 240z, 260z, 280z
What kind of paint is Glyptal Clark? I’m not familiar, and curious about the chemistry. I’m going to epoxy coat all my suspension components next time around. I’m just irritated with all the chips and dings after test fittings and assembly. -
More to add… weights in lbs. from a series one 240z. 50-lb kitchen scale. Accurate to 4oz OEM 240z genuine Nissan windshield: 25 polycarbonate windshield cut-to-size: 11 Series one “bench” oem sheet metal behind seats (no storage cubbies): 7 Pedal assembly and steering wheel mount: 7 sway bar w/o links or mounts: 11
-
240z SCCA vintage race car, restoration
AydinZ71 replied to AydinZ71's topic in S30 Series - 240z, 260z, 280z
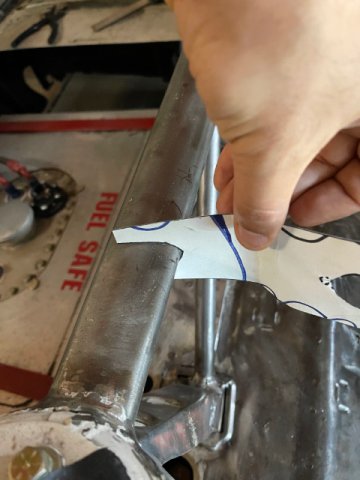
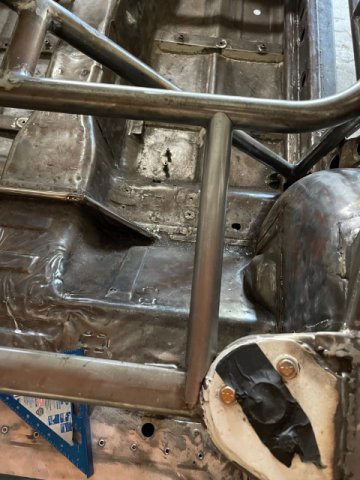
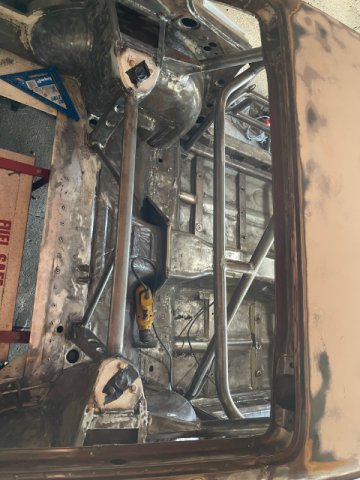
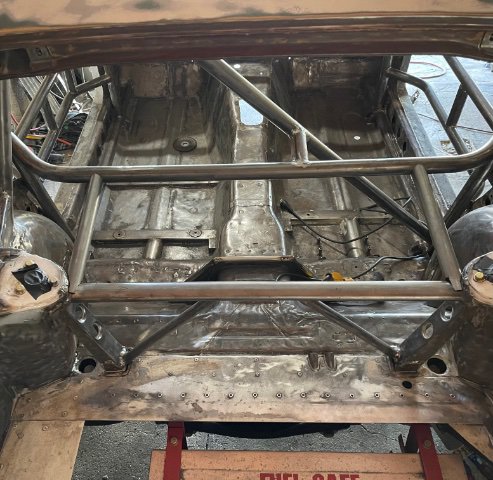
This is what a 5-hour job looks like I felt like something was missing in the rear strut towers. The series one has a tendency to “taco” under torque. Removing the bench behind the seats would just make it worse, so I added a 16-gauge 1.25” tube at 90-degrees to the roll bar. I really need to get back to body and paint 😕 IMG_8647.MOV -
240z SCCA vintage race car, restoration
AydinZ71 replied to AydinZ71's topic in S30 Series - 240z, 260z, 280z
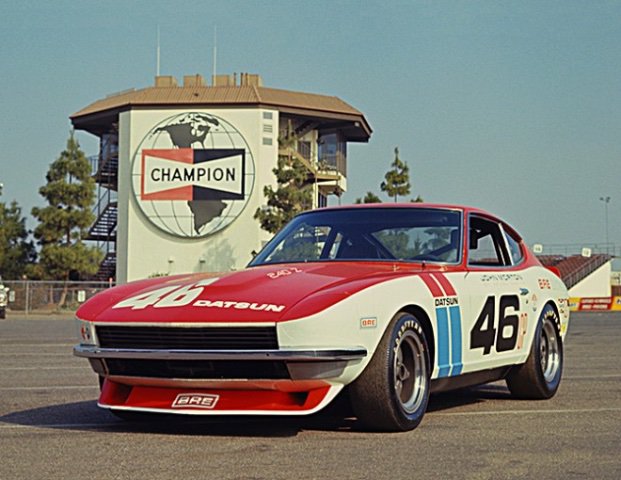
Now that I am on to bodywork, it’s time to pick paint! The idea is something that will give a nod to the past (possibly even multiple nods), while still being unique. My current idea is a two-tone with the same profile as the BRE Morton Z, but with different colors. I thought the top color as metallic orange (Malibu Sunset by Eastwood) could be an image to Greg’s 13’ & 15’ winning car. The bottom color was thinking off-white (like a creamsicle) or silver (to match the metallic). Attached are some photos as guides/examples. Was also considering the top color as alpine green (sample attached, spruce green metallic). would love to hear your thoughts!! 6A9A569F-AE57-4D1D-9335-EDFA444C6090.jp2 -
240z SCCA vintage race car, restoration
AydinZ71 replied to AydinZ71's topic in S30 Series - 240z, 260z, 280z
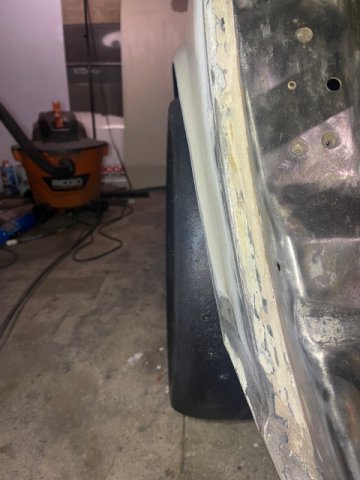
@Dat73z thanks! Yeah they are close but no cigar. Production racing rules say you can’t see the top of the tire when looking straight down from above. Max wheel we can go is 15X7” which is what this wheel is. These are cantilevered slicks meaning the tire is designed to be much wider than the wheel would normally support, without having to “stretch”. The whole assembly is remarkably light! No steel belt from what I can tell, although Hoosiers website does not provide much info beyond the word “radial”. I really was super close to just modifying or adding sheet metal to make it work. Even more so since I can use the existing flare profile as a template (not much to add). Thinking about it though, each wheel well is going to be at least 4 hours of work (cutting, welding, hammer-dolly) and that doesn’t include filler, sanding, contour. The flares are like $350 so less than $100 per wheel well. Not many spots left on the car where a purchase can save me three or four weekends of work. lastly, I’m doing the flares now because I’m on paint and body. It’s now or never, and going with a solution that is more versatile than just my current wheel/tire/track width makes sense vs. hoping every change in the future will work with something custom I make. Depending on the total surface coverage of the flare, it may even end up being a net negative in weight after I trim back the steel. We’ll see! -
240z SCCA vintage race car, restoration
AydinZ71 replied to AydinZ71's topic in S30 Series - 240z, 260z, 280z
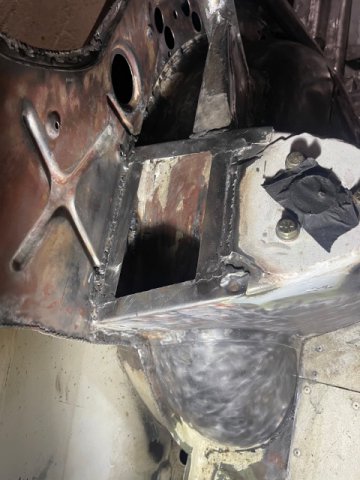
Finished stitch welding the whole car and added a stiffening flange to the rear towers. They will be capped with a riveted sheet of aluminum. also got the 245 mounted and I do need the flares. I ordered the marugen delux from rhd-Japan. i could have fabricated a flare from sheet metal using the existing lip as a template but I decided to just spend the cash and save 10 hours of labor. -
IMSA GTU vintage racer build
AydinZ71 replied to clarkspeed's topic in S30 Series - 240z, 260z, 280z
Hmm, il have to look into the hammertone. My biggest pet peeve with anything out of a can is how easily it scratches off or delaminates. Even the self-etching stuff does a great job at bonding with the steel, but then has a hard time making a good bond with whatever I spray over it. There just doesn’t seem to be anything that gets anywhere close to the performance of 2X epoxy. I’m going to use it on everything from now on, even subframe components and struts. so my plan is to stay the entire interior with DTM epoxy, followed by a thin silver base coat, and one thin layer of clear-coat. Maybe a light sand on the epoxy, just to highlight any MIG spatter I missed, but otherwise it will just be coat-coat-coat. I need to get one of those 3M head-to-toe onesies. The bar’s facing the driver, the window sill, the cowl… really anything facing the driver I plan to hit with jet black then flat clear. Is that silly? It just seems logical to me but I may be over-doing it 🤷🏽♂️ -
IMSA GTU vintage racer build
AydinZ71 replied to clarkspeed's topic in S30 Series - 240z, 260z, 280z
Woohoo. Final stretch! That’s awesome man. Hey is there any particular reason you painted the cage a different color than you will the interior? I planned on painting my cage the same color as my interior except for everything that was driver-facing. That will all be flat black. I appreciate the compliment! Especially as someone who genuinely doesn’t know what I’m doing. A part of me still has imposter syndrome with all this fabrication work. Yes it has been dozens and dozens of hours but with no formal training I’m just using intuition.
