AydinZ71
Members-
Posts
1073 -
Joined
-
Last visited
-
Days Won
27
Content Type
Profiles
Forums
Blogs
Events
Gallery
Downloads
Store
Everything posted by AydinZ71
-
240z SCCA vintage race car, restoration
AydinZ71 replied to AydinZ71's topic in S30 Series - 240z, 260z, 280z
Haha! Can you imagine a flying Z? Better be a G-nose. I wasn't worried about lift-off, but rather a loss of down-force on the front wheels or increase in Cd. Honestly since my credential at this point is limited to "fabricator", I still want to build a competitive car just to satiate my over-achieving (more like obsessive) nature. It sounds like I have much bigger worries than some air getting into the wheel well. I got the 130mph figure watching Greg's races. The highest I saw on his digital dash PIP was 136, and that was at Road America's straight. He was running a read-deal EP motor though, @260hp & 2150 lbs including driver. -
240z SCCA vintage race car, restoration
AydinZ71 replied to AydinZ71's topic in S30 Series - 240z, 260z, 280z
Thanks Jon! I actually have quite a bit of different styles of weather-stripping I can try. I bought a bunch off mcmaster to try them out on the rear hatch area and fender flares. Otherwise, the sheet metal ring around the OD of the velo stack is a definite solution! Why I brought this up: I noticed the new Le Mans rules require a huge hole in the fender to allow pressure to be relieved in the wheel well. Apparently they feel the massive pressure imbalance between the wheel-well and the air traveling overhead was a contributing factor in seeing those cars "fly" ( you have probably seen the famous vid of the Mercedes flipping backwards on the straight). That's my first indication that air flow (or lack of) through the fender cavity is a consideration. Aero stuff is not always intuitive, so I thought I would learn from you actual racers! Doubt the EP car will get much over 130mph, so I may be over-thinking as usual. -
240z SCCA vintage race car, restoration
AydinZ71 replied to AydinZ71's topic in S30 Series - 240z, 260z, 280z
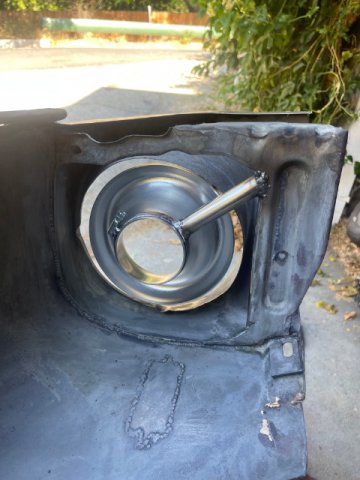
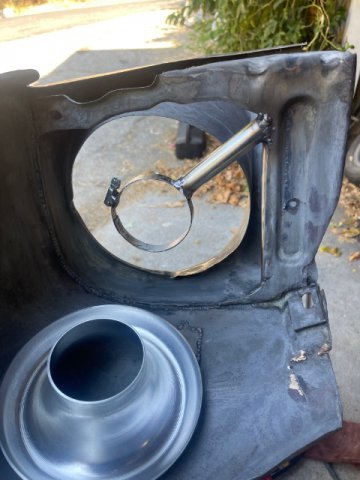
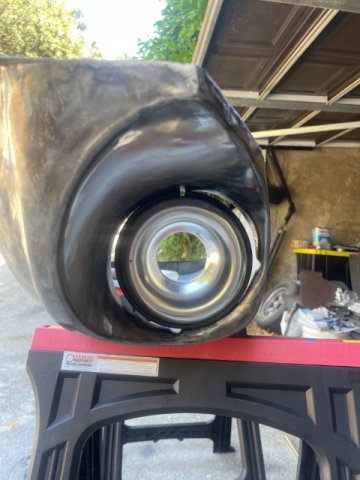
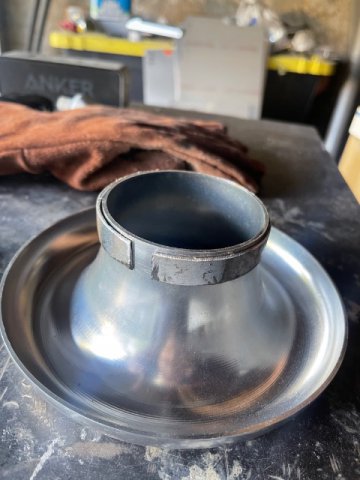
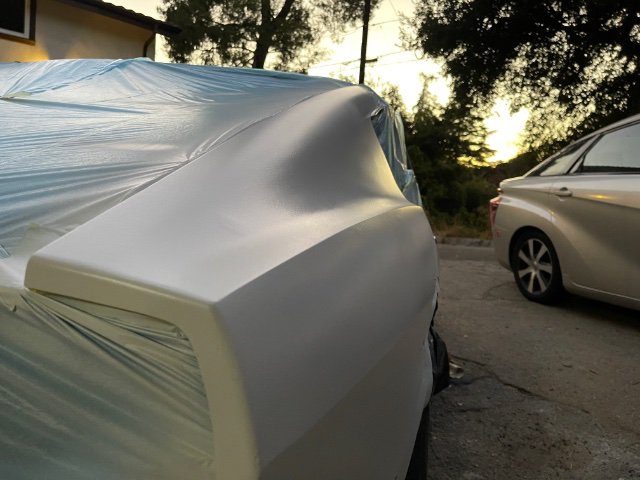
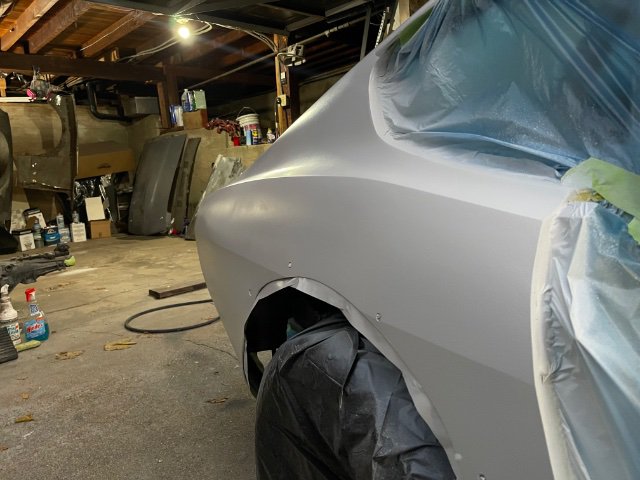
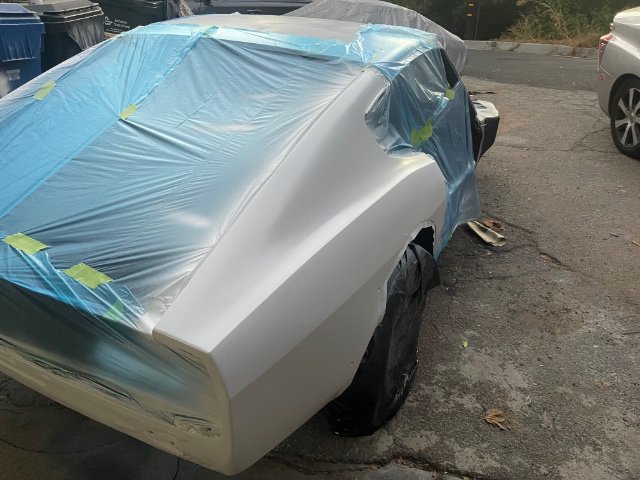
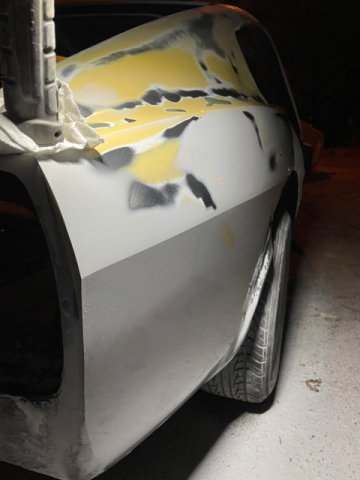
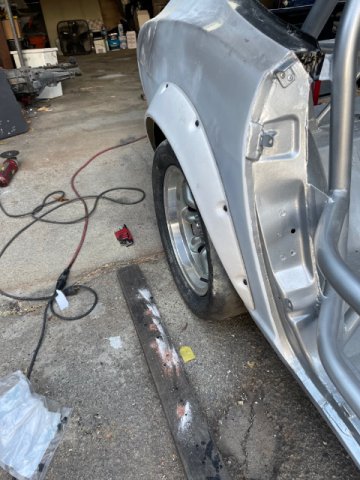
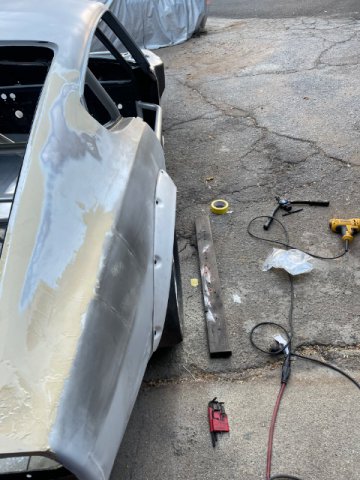
Well folks, two years-in and I’m still a fraud as a race car driver but apparently I can add bodywork to the list, haha. rear passenger quarter panel bodywork is done and sealed (epoxy). Working my way around the car, but also started back up on the fenders. Need to get them ready for sealer as the surface rust just marches-along. As much as I love the closed headlight covers, it won’t meet EP so I got started on fitment/clearances on the OEM steel bezels. Decided to just weld the bezels in, and remove any unnecessary steel in the process. Still using that thin-wall SS tubing where I can for it’s rigidity and light weight. Got the velocity stack mounted on the drivers side. I put quite a bit of pressure on it, and doesn’t seem to be going anywhere. I cut a narrow ring of 3” 16-gauge tube, split the ring, welded on a standard worm drive hose clamp, and used the thin SS tube as a cantilevered mount. Question for you real race car drivers: what are your thoughts on sealing the space between the velo stack and the headlight bezel? Is there a particular aero reason you would want to limit the amount of air leaking into your fender? I’ll be honest, I can’t tell if allowing a leak path for the high-pressure air here is a good or bad thing. @JMortensen @jhm. @tube80z @clarkspeed -
Oh snap! Yeah that totally makes sense. When Ben first told me about it, I thought something came loose and jammed the gear which would naturally cause the sprocket or worm gear to shear. High oil back pressure would certainly stress the gear. Always something to learn here
-
I felt a bit guilty for this (I shared with Ben): his unfortunate accident gave me an idea for a secondary oil pressure sensor. Instead of a broad spectrum sensor, I’m thinking a more reliable (simpler) pressure switch set to something like 4-10psi (for idle). The switch would connect to a micro (super bright) LED I sourced but also cut-out my ignition system via a relay. I could “arm” the system with a switch, but a more complicated timer delay is also possible (so I can start the car). I’d rather have the engine die than run at 0 pressure! The pressure gauge seems more like a troubleshooting instrument than a means to immediately address a serious problem.
-
IMSA GTU vintage racer build
AydinZ71 replied to clarkspeed's topic in S30 Series - 240z, 260z, 280z
Thanks for sharing Clark! let me ask you, do you feel cooling is better with the hat and rotor in a 2-piece configuration like that? I assumed having your ducting feeding right into the vanes without a gap would force more flow through the vanes, but I'm just guessing. I could section the 280zx rotor on a lathe, but from what I am reading they are intended to be "disposable" after one or two races? I'm going with the 3" velo stack in the headlight recess, like all the other EP cars (sigh). I was trying to get fancy, but we cant cover the headlight bezel so might as well use the 7" hole for something. I asked Greg about the knockback, and he didn't seem to have much trouble with his setup. -
@Ben280 Hey Ben! So I'm working with Robello's head guru and I asked him about the stripped worm gear & sprocket phenomenon. Only time I have seen the oil pumps fail is what you experienced. He mentioned the critical consideration is sufficient lash. He has only seen it happen when the interface is too tight and there isn't enough shaft play. I don't remember the number he gave me, but I remember being surprised how much play he recommended (big number). Il probably ask him again before my motor goes in, and Il put it up here. He doubted the dizzy removal was the cause. Your post just reminded me to get back to you on it.
-
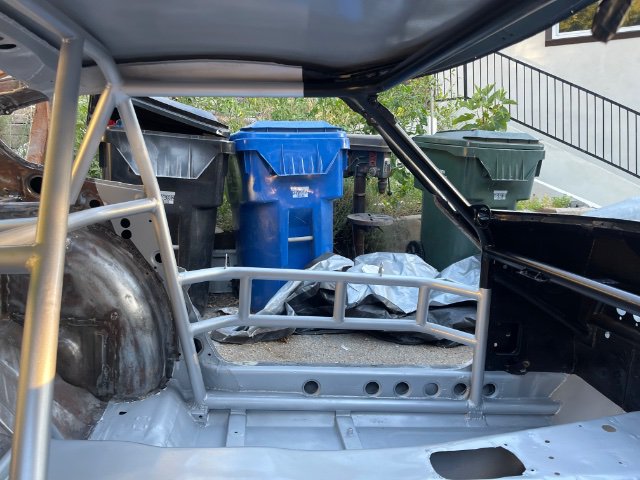
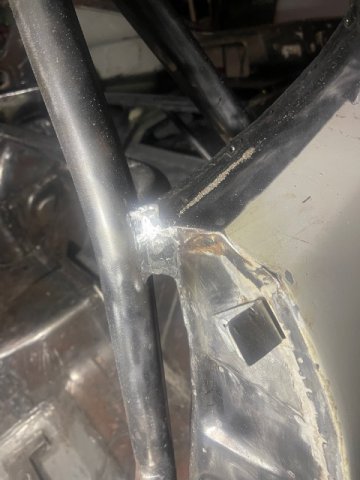
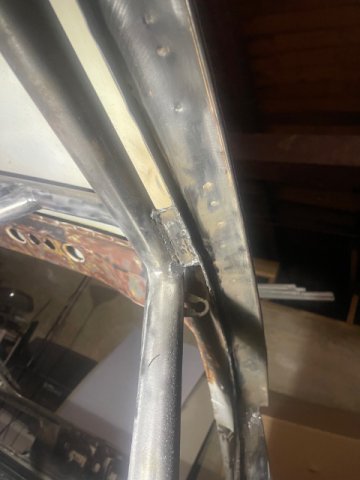
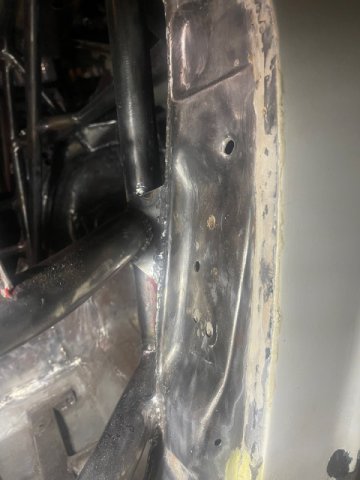
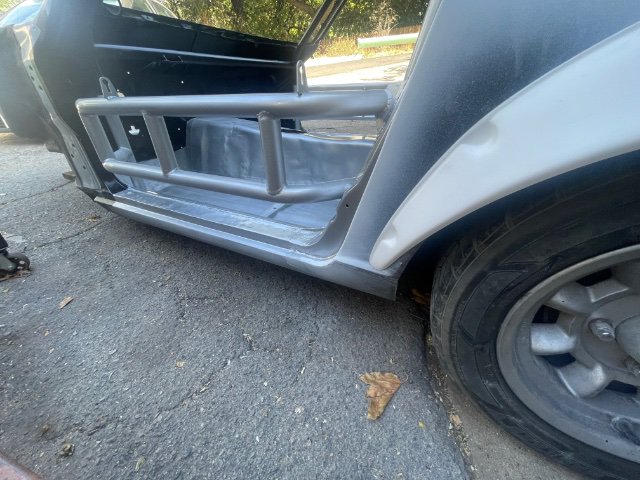
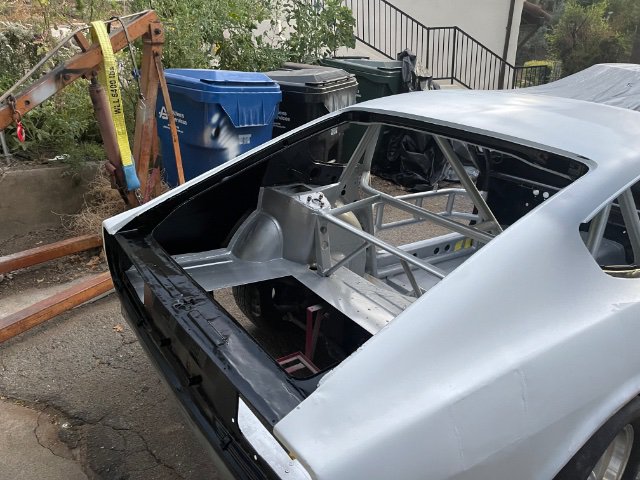
I thought about doing the full-length strip with dimple die holes, but decided the added weight along with the compromise on metal thickness didn’t make sense for me. I thought about the metal fatigue concern too, so I opted for 14-gauge with the ends bent into 90’s. The fatigue will cause cracking/tearing at the extreme ends, so I paid special attention to those when I welded. Heck, it might still rip. I have the cage tied in several places (besides the rule-enforced spots with the 1/8”thk plate) three spots per side to the door jam. where the front hoop nears the lower windshield sill. where the front hoop bears the front roof support (both axis on this one) where the roof supports over the doors meet the horizontal roof support behind your head. Sorry, most of these are from before I painted the interior.
-
Wheel/tire discussion (carry-over)
AydinZ71 replied to AydinZ71's topic in S30 Series - 240z, 260z, 280z
@JMortensen Gosh I'm really curious to see how those huge 4" ducts and v-stacks coming out of the headlight buckets are going to fair, even with the OEM S130 caliper and vented rotor diameter. I only know of Lance and Greg running them in EP, but im sure there are some folks in regional that have those running as well. Since we cant ditch the OEM headlight bezels or even cover them, its kind of a unique opportunity. Most S30 race cars I see either have the bezel replaced entirely with a fiberglass nose (like the CP cars), or have a plastic cover over them. Needless to say they are an aero drag for sure! It seems like a large enough variable that it could make the difference between a vented rotor front setup that "works", and one that fails measurably (like your disappointing description of losing your brakes on track). I'll just have to live with the performance from the 280zx calipers, but there seems to be enough flexibility in the rotor design (seems to only be limited by the diameter) to make some tweaks. Cryo treatment, angled vanes, slotted, alloys, etc. -
Wheel/tire discussion (carry-over)
AydinZ71 replied to AydinZ71's topic in S30 Series - 240z, 260z, 280z
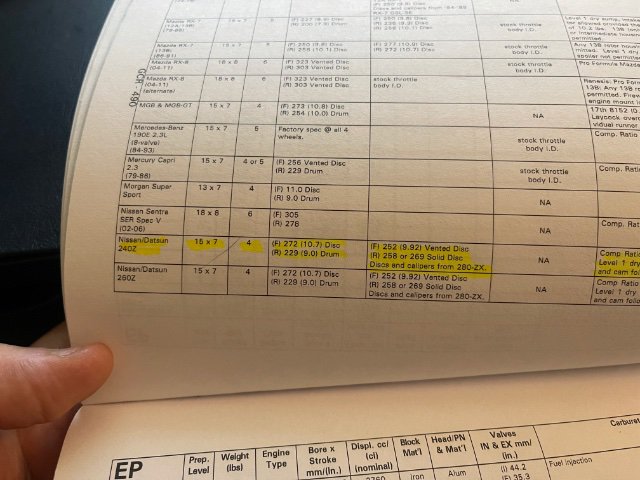
Hey thanks Clark! yeah its the spec. line that has me nervous. Has the 280zx brakes listed specifically, for no weight penalty. As you eluded to though, I plan to run regionals. A part of my over-thinking is to ensure the car is truly built to EP, so I have some pride in it if/when I sell. I hate saying "it is EP, but... yada yada" Good point on Greg's ability to actually "use" the weight advantage. Me being a complete novice! I should be seeing him in Oct/Nov. so I can pick his brain on the specifics of his rear setup (which caliper, rotor, how he adapted etc.) So here is my thought-process. Start with the 280ZX front brakes, leave the rears drums for now. Once the car is all put together, I can finally weight it and see where I am. If I am already above 2150 w/ me in it, then its a no brainer! I know Greg runs the willwood caliper in the rear so need to understand how he negotiated that. Really appreciate your involvement in the development of my car! You, Jon, John, Cary. All been very helpful. Now if I can ever get out of bodywork purgatory! -
Wheel/tire discussion (carry-over)
AydinZ71 replied to AydinZ71's topic in S30 Series - 240z, 260z, 280z
Hey this is super helpful Clark!! Really I’m clueless on the topic so your personal experience is ideal! With this in mind, il run the 280ZX OEM front and rear calipers to meet the EP spec and assume for now that I will likely have enough pedal response and heat dissipation for the future 3.1L as well. local friend of mine is picking-up a 280zx parts car and is earmarking the calipers for me. how about rotors? Are the OEM front vented and rear solid rotors sufficient in your mind? Without knowing any better, I was going to get quality OEM units slotted. pads, I was going to take your suggestion and start with quality street performance pads (porterfield?) and go from there. i have experienced the same lack-of-wear phenomenon on my street Z. Same pads for 10 years… not even %50. Tires… under normal semi-aggressive driving even performance tires would lose grip from age before loosing tread. I always attributed this from a lack of load(momentum). -
Wheel/tire discussion (carry-over)
AydinZ71 replied to AydinZ71's topic in S30 Series - 240z, 260z, 280z
@clarkspeed with a long-enough timeline I could spend $1-2k for the “vintage” setup running the 3.1L I’m building. Definitely will be bumping classes for that one, but that’s more of a “how fast can this thing go” setup. For the EP setup, I expect the pads will be the most expensive component but otherwise not expecting S130 calipers and rotors to break the bank. nice that you have an AZ setup! How did you like it? My biggest concern after braking surface area and cooling, is weight. I have run the 4X4 calipers with the Z31 rotors and was not a big fan. Added a ton of weight to the front, and made the already common understeer even worse. I may have just had some bugs that needed fixing of course. Had poor rear braking at the time which would obviously make understeer worse near braking. I will probably have to come back to this in a few months, but should be ready to purchase by Oct. I’m still reeling from the body/paint expenses. Who knew just stuff in cans (primer, sealer, base, clear, filler) could cost 2-3k alone! Makes a $8k paint job sound much more reasonable when only $5k is labor. granted, I did refinish the entire interior. Once every inch was repainted, it consumed a full gallon each of sealer, base, and clear. -
Wheel/tire discussion (carry-over)
AydinZ71 replied to AydinZ71's topic in S30 Series - 240z, 260z, 280z
@tube80z @clarkspeed Thanks for the comments guys! I did confirm Greg ran the 280zx front brakes. I'm taking his lead since the way the GCR is written can be confusing. In one section it says anything used other than OEM carries a weight penalty, but then do they do list 280zx brakes on the spec line. I will look into the Bendix pads and ask Greg what he used. I might get-away with Porterfields and just go easy on the brakes until I start to feel they are my limitation (besides a lack of driving skill haha) Im not sure if we can split the OEM form-factor for the 280zx brakes into a separate rotor and hat, but I will look into it! We have to keep the darn headlight buckets uncovered per rules, so I was going to use a velocity stack in place of the headlights with a 4" duct to the rear of the hub so the air can travel through the vented vanes. Should provide quite-a-bit of cooling. Plan on running the Koenig rewinds for the time-being until I can find a pair of Volk wheels in the now-discontinued size (15X7"). Hopefully they bring that size back. Thanks for the comment on knockback! I will look into that as well, including your suggestions. Thanks all!! Any thoughts on brakes for an open class (vintage)? Front-runner for me was the AZ zcar setup, but wanted to hear your thoughts! I don't plan on running a wheel larger than 15". -
240z SCCA vintage race car, restoration
AydinZ71 replied to AydinZ71's topic in S30 Series - 240z, 260z, 280z
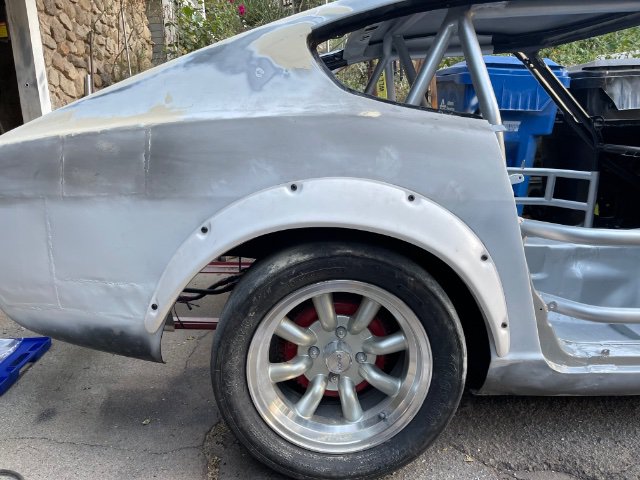
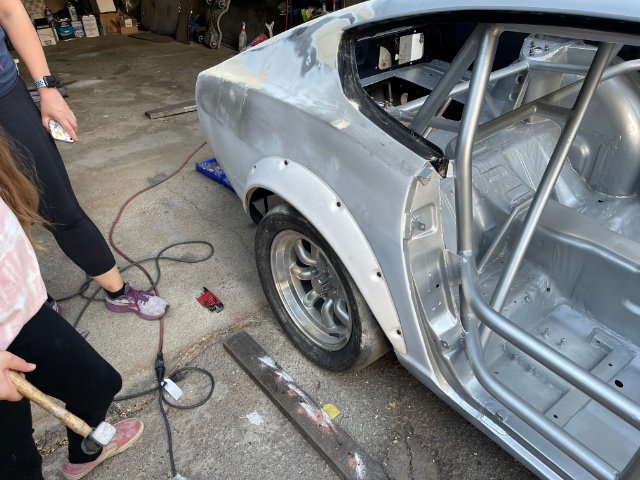
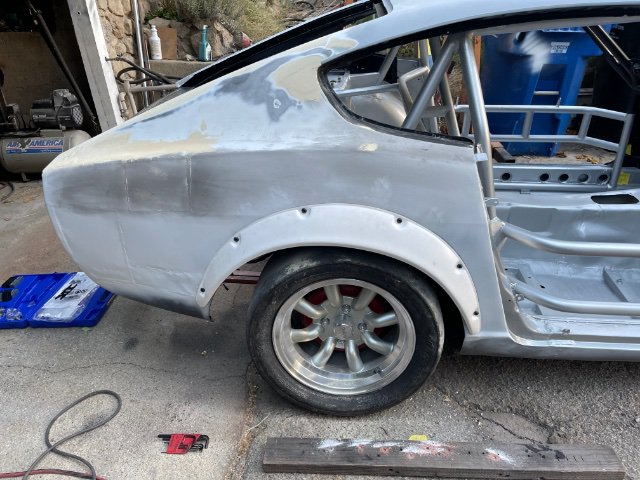
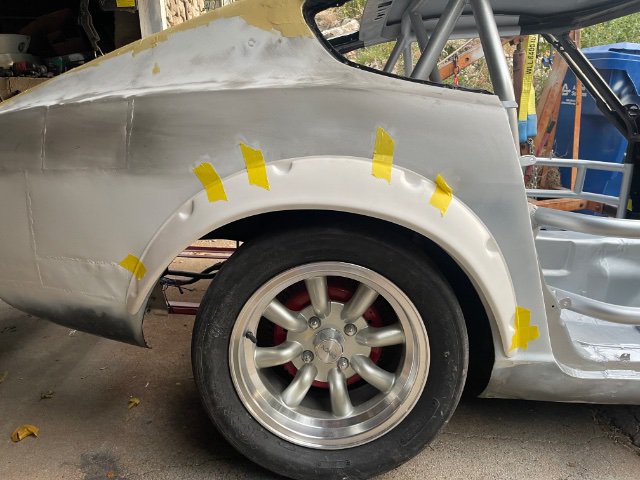
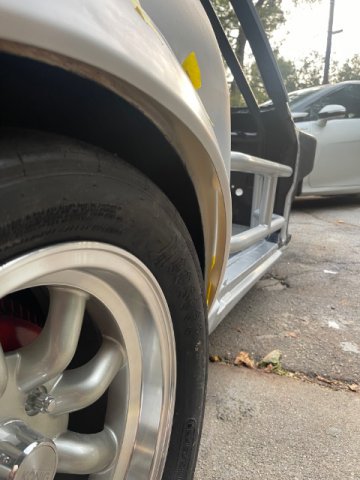
Thanks for your help @Dat73z! Hopefully I did it right! The ride height it set way high right now. It should look right once it’s lowered a few inches. 5/16 rivnuts. I plan to use weatherstripping to make a flush-fit. I really don’t mind the black accent on the edge of the flare, but I know many do. -
@Dat73z I don't know how to refer to you. Do you have a name or nickname you feel comfortable sharing? Sounds better than "hey Dat73z" hehe. I think your solution looks great for a street setup. What you are really doing is shielding the heat-sensitive items from extreme transient heat during boost, which is not all day every day. If this was a track or even drag car, I see issues with heat-sink as eventually everything (shielding or not) will come-up to temperature given high frequency boosting. The oil line is the only thing that will exhibit active cooling from flow. So the only thing I would change if you boost a bunch consistently is move-out the oil line so it is further away from the turbine housing. Even if it has to cross the housing as show, maybe just a few inches further out (closer to the hood). Quality of your work looks amazing! high attention to detail! Is that new throttle cable Lokar? That's what I have purchased and fitted-up for mine. PS: DUH! i just had to scroll up. Lokar indeed. I also bought the upgraded water pump! looks nifty! I sent him an instagram message suggesting he do a side-by-side test to show an increase in total differential pressure between the pump inlet and outlet. im sure that data will help sell them.
-
240z SCCA vintage race car, restoration
AydinZ71 replied to AydinZ71's topic in S30 Series - 240z, 260z, 280z
PS: 100% agree on hammer-dolly the body. Epoxy is on there as over-spray during the sealing of my roof and prep for filler on the hatch area. Reason why I have not done-so is I want to cut the OEM wheel flare/lip before I finish my metalwork. If I hammer everything out and cutting the arch warps the body because of static stress it would be a waste. Hence getting the fitment on the flares now is the next-step to finish the metal work in this area, including drilling the mounting holes. -
240z SCCA vintage race car, restoration
AydinZ71 replied to AydinZ71's topic in S30 Series - 240z, 260z, 280z
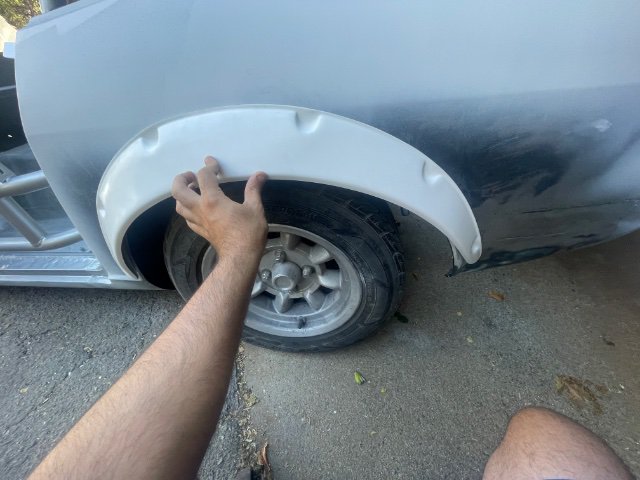
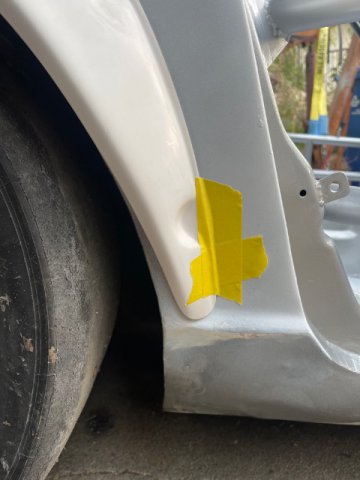
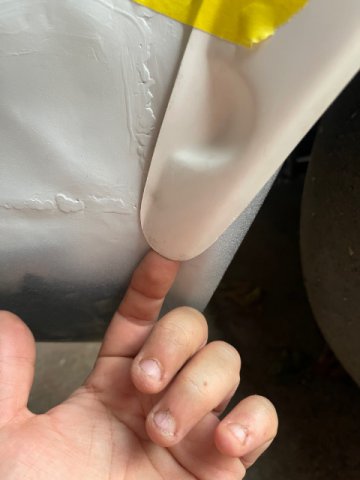
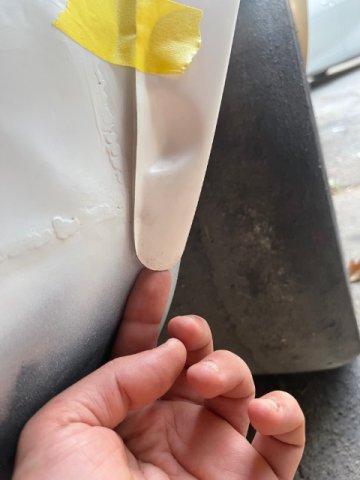
So unfortunately, the person I sold my street car to for 5yrs put flares on there, so I can’t compare. But what I can do is compare to the other side of the car which does not have any patches. i think I just need to know what it’s “supposed” to look like and everything will fall into place. It just seems like the extreme ends of the flare go beyond the wheel arch. They seem to wander further onto the body vs. staying right-over the OEM lip. This might be 100% as designed. -
240z SCCA vintage race car, restoration
AydinZ71 replied to AydinZ71's topic in S30 Series - 240z, 260z, 280z
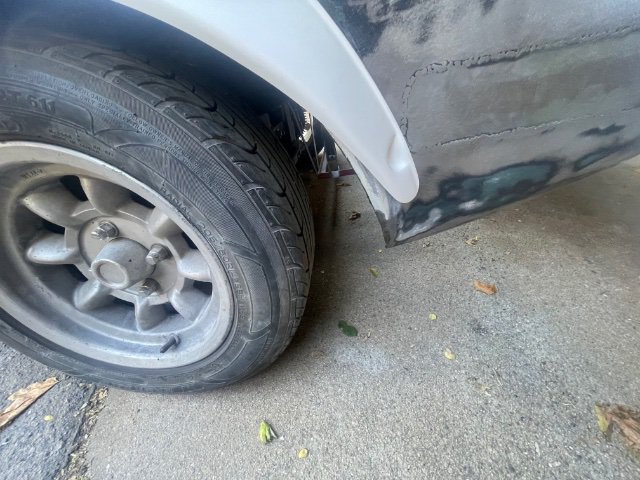
Hi all! Need some help with these flares. Honestly, no idea what I’m doing here.. I assume the forward side it would terminate where the dogleg flares-out. Seems to achieve a flush mounting so makes sense. On the aft side though, I end up with a 1/8-3/16” gap between the flare and the body. I can correct this with filler and I do plan on using a black sealing surface of some type (self-adhesive EPDM strip for instance) since I’d like to remove the flares in case of damage. what are your thoughts? -
@Dat73z yep that’s looks like what I had in mind
-
Having a hard time following the locations you mentioned but it sounds like it would be a pain to re-route. S30’s have a massive underutilized amount of space behind the front wheels in the wheel well. If I could not reroute the exhaust to the rear of the car, I’d consider a hole through the wheel-well from the engine bay. Then I’d route down and back and have them exit the front fender just before it meets the rocker. It will still stink at idle but at least the low air pressure here should carry the exhaust away fairly quickly when moving. you can dump below your engine/suspension/steering rack but I think your engine bay will become quite sooty over time. Exhaust being really hot is going to want to “rise” once the momentum from the pipe is no longer a factor. Hence, your engine bay will be a stinky mess at idle or when not moving.
-
Wheel/tire discussion (carry-over)
AydinZ71 replied to AydinZ71's topic in S30 Series - 240z, 260z, 280z
Hey if you have the torque and braking to make the steelies work, why not! The extra inertia can more easily be over-come through those upgrades than getting expensive lightweight alloy wheels anyway. EP’s is pretty darn restrictive, but that’s what I liked about it. Super limited on what the motor can output (Greg’s landed at 260hp in his most competitive seasons if I recall correctly) and improved braking beyond pads and slots comes with weight penalties. In that scenario, all you have left at your disposal is cutting rotational inertia, weight, etc. As I mentioned in the previous post, building the car makes me feel like It’s becoming more Miata and less a “hot rod” 😂 You end up “trimming the fat” like a welterweight fighter, but when those restrictions are lifted, who doesn’t want to bulk-up like Mike Tyson! hey just a thought on that splitter. I have been playing around with my spare polycarbonate from the windshield. This stuff feels like “wonder” material. It’s stiff but doesn’t buckle, bends but snaps-back consistently, super hard to scratch with even course sandpaper. I think I’m going to give-it-a-shot for my own splitter. I’m only allowed to cover the leading edge of the air dam back to the front wheel well opening, so for a limited distance it should work OK. Il probably use thin 3mm stock, but reinforce it with an AL beam near the rear. it’s also rather easy to cut with the “right” Bosch jig saw blade. -
240z SCCA vintage race car, restoration
AydinZ71 replied to AydinZ71's topic in S30 Series - 240z, 260z, 280z
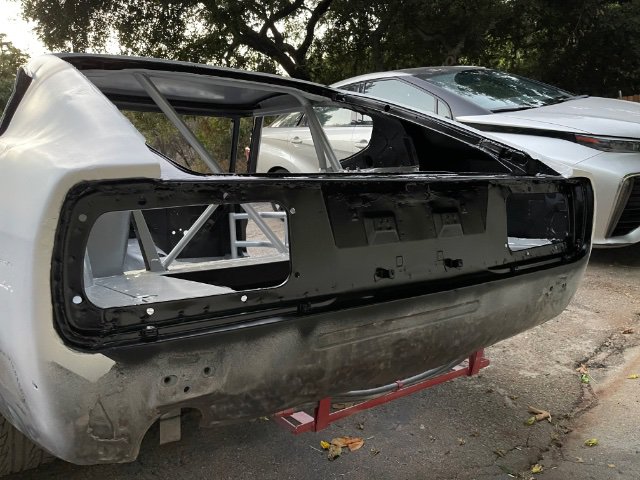
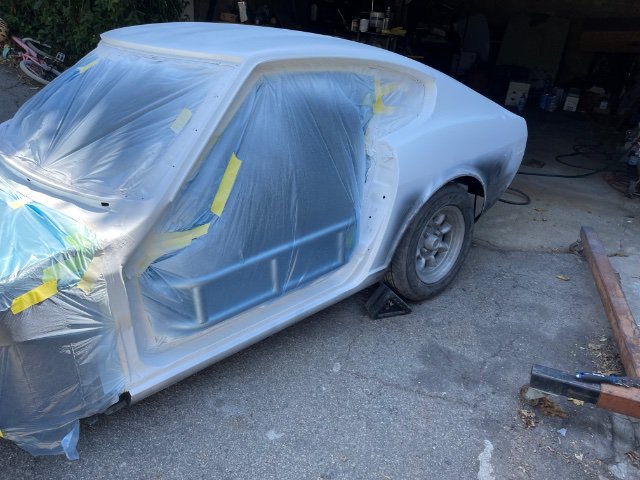
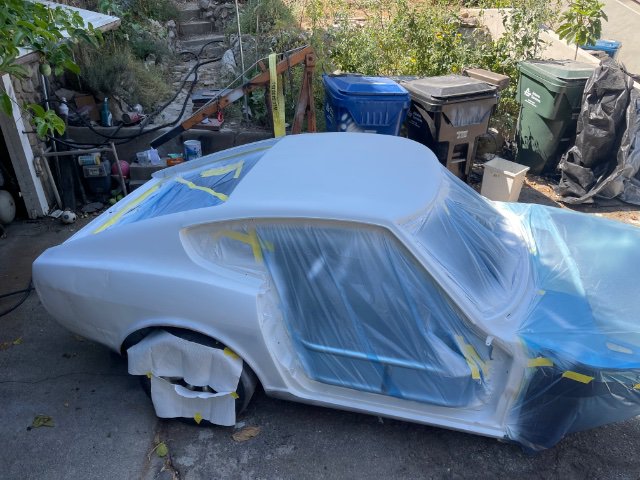
Update: roof bodywork complete. Shot most of the exterior sealer, and got high-build primer down on the roof and windshield sills. Will leave it like that until the rest of the bodywork is done, then sand the whole exterior with 220 followed by 400grit all at one-time. Next up is applying filler to the remainder of the exterior where I have fresh sealer down. Exterior portion of rear tail light and hatch sill painted semi-gloss black. Same as windshield sill and rear quarter window sill. Door jams painted a combination of silver and black to match interior. Fenders have been chem-dipped and returned. Filling some holes with the MIG soon and hammer-dolly into shape. IMG_9071.MOV IMG_9077.MOV -
Apologies. I have to admit, I had a bit of a chuckle when I read this (melty melty). Yes... the exhaust will damage your finish. Primarily from the heat but also from chem's in the exhaust itself. If its FRP, it will destroy your hood unless you clad the area within several inches with an SS or AL heat-shield. Even then, that hood will have an expiration date on it. Unless its a drag-strip car and you are wearing a respirator, empty the exhaust behind the driver. Where is entirely up to you. There is a reason the old Cobra's have the exhaust run along the rocker and exit behind the driver. Its just impractical to have the exhaust dump ahead of the driver for something that is meant to be driven on the street. Just my opinion of-course. The whole exhaust out the hood or out the front fenders looks cool, but its just not practical. That is a lot of exhaust out that motor, and with a turbo you will be dumping large amounts of fuel to keep the turbine spooled between shifts and will be running rich in-general under boost. Carbon deposits are for-sure, unless the pipe is sticking way-out. Like several inches.
-
Waiting for my basecoat to cure before I can hit the clear, so I decided to re-do the last post on this topic I made which I screwed up (by using quotes in the title). So what are your thoughts on what brake system (front & back) you would be looking at for a 15" wheel and OEM hubs. Considerations are: 1) Value - front and back must be under $2500 2) Replacement and performance (racing compound) pads 3) Quality 4) Weight & inertia I must keep the OEM sized components for E-production, but Id like to consider larger capacity brakes for then I run Vintage with the 3.1L I am building. I have a Tilton pedal assembly with a remote proportioning valve that mechanically adjust the leverage to separate/dedicated front/rear MC's. Number-one on my list at this time is the Arizona-Z system. Looks like a very lightweight system, although I will ask him for a weight soon enough. I know Silvermine, Z-car Garage, MSA, T3 (and more) all have systems offered.
