A to Z
-
Posts
1108 -
Joined
-
Last visited
-
Days Won
43
Content Type
Profiles
Forums
Blogs
Events
Gallery
Downloads
Store
Everything posted by A to Z
-
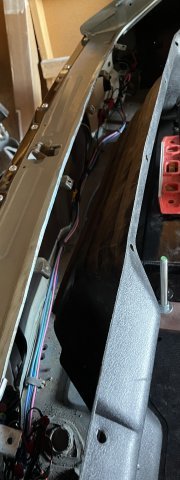
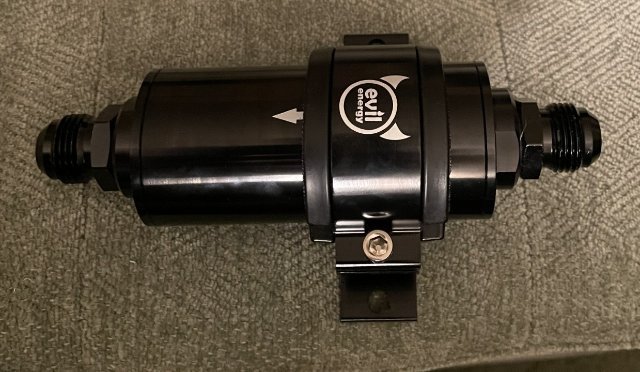
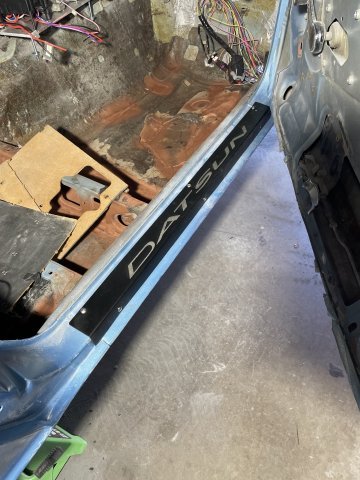
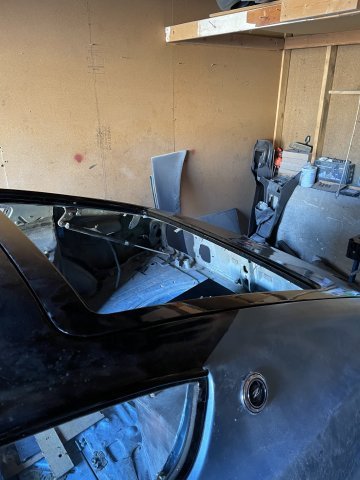
02-11-2026 ATLAS Z update: I got back half of the car all wired in except for a license plate light I am waiting for it to arrive. pretty cool LED unit I found on Amazon for 8 bucks. Got the headlights almost in. I always have a problem with this job. I had to break out the angle grinder and mod to get the driver's in....unsure so far far with the passenger one. Strange..... it REALLY fought me. I also got the 10AN line between my main filter and pump in, so it is ready for installation. PTFE lines take some work.

-
Seeing some progress on the Atlas Z
-
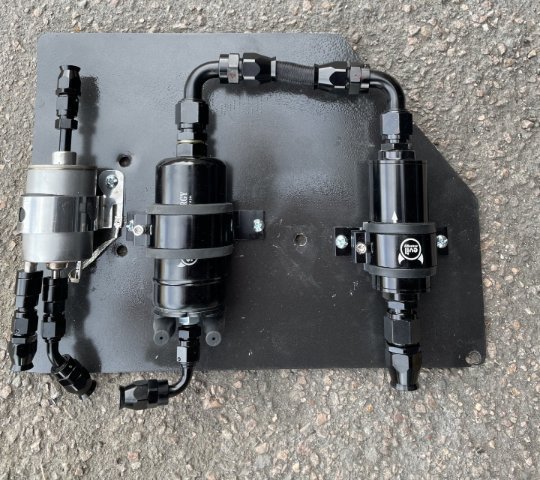
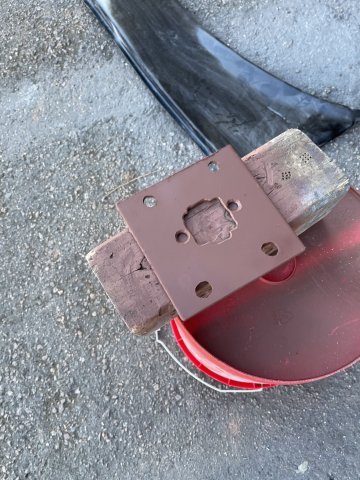
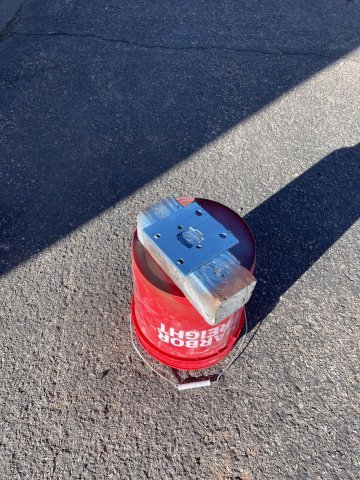
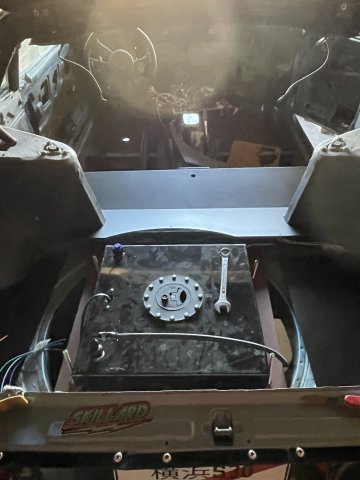
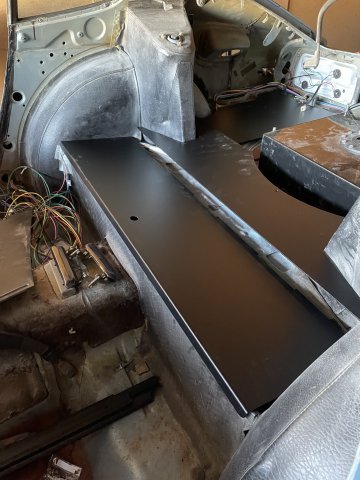
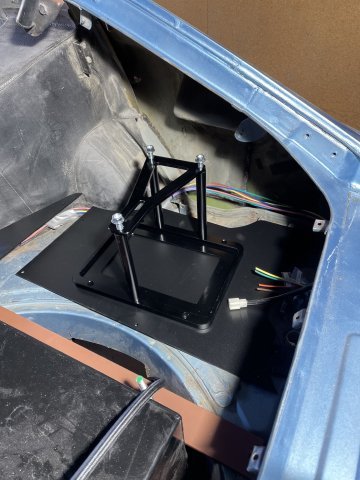
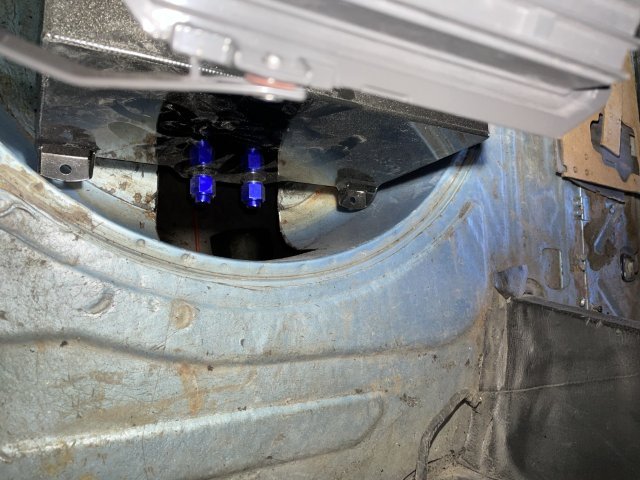
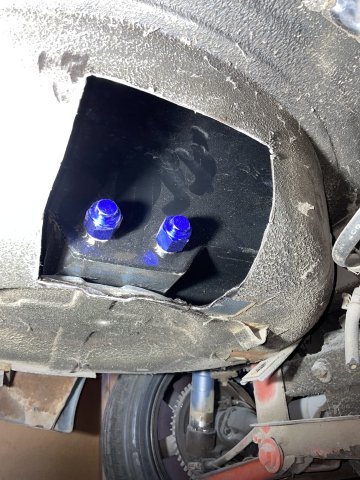
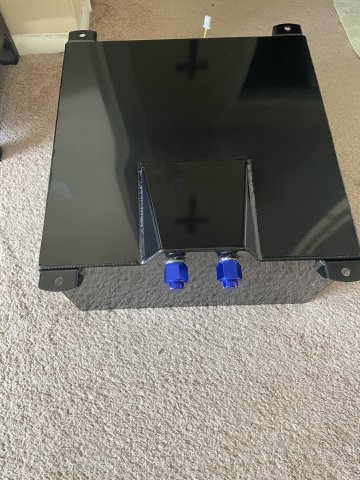
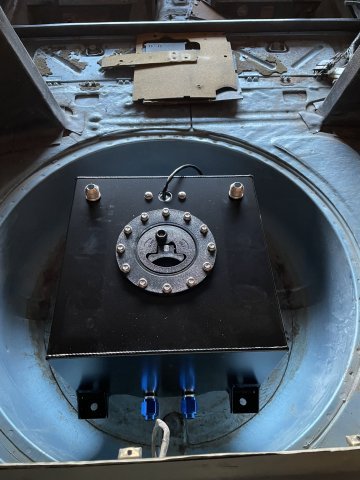
02-08-2026 UPDATE. Today I completed further work on the fuel system. It is on a sheet of metal that will be hung from the ceiling down on all thread to where the pumps are horizontal facing the floor and a tad bit lower that the fuel cell outlet so gravity flow will be good. I then took all of my interior panels I have out except he center console, and cleaned them up and painted them with SEM interior paint....Landau Black....which was referred to me years ago and really is a perfect shade and everything for these old Z cars. After they had dried, I quickly installed them a little bit, not fully, but enough for them to be in place, and then finished leveling up my fuel cell and bolted it all down. I am having some problems with the pilot bearing for the trans.....it appears I will need a sleeve or perhaps a bearing with a larger O.D. as the ATLAS, never came with a manual trans, and the well for the pilot bearing is roughly twice that of the bearing I have here that I strangely was told to use. So, I am working that problem out. I also went and installed the door handles and door locks, a bit more work in the doors, and they will be ready to be sealed up. Also got the lock mechanism into the hatch lid, but none of the rest of it. I painted the seat brackets on the floor in anticipation of a rather soon to come re-entry of the seats, which are fully reupholstered. PICS:
-
02-06-2026. ATLAS Z update: my FabBot 4 inch back relocated shifter for my AR5 came in today. Very nice billet construction. Doesn't appear to need a gasket and it came with nice socket head bolts. Also got my RAM clutch pedal adjuster. This allows you to adjust where your clutch pedal takes up or if it takes up too high, this will allow you to adjust it so it takes up where you want it to. This is for hydraulic throw out bearing setups that are in the bellhousing. PICS:
-
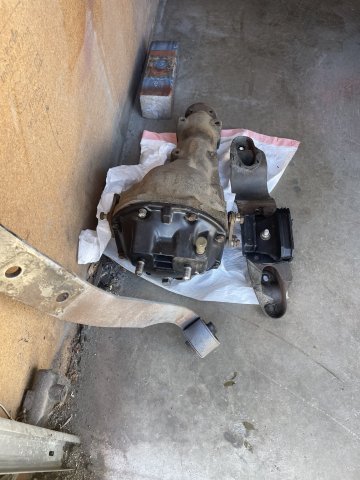
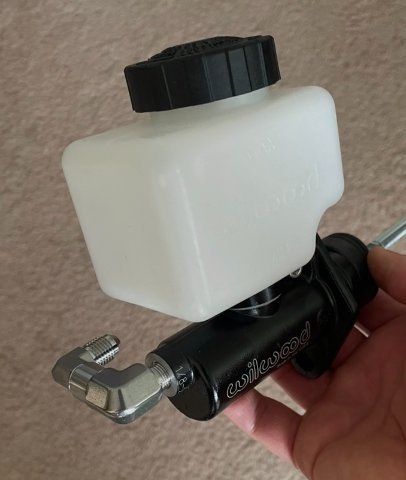
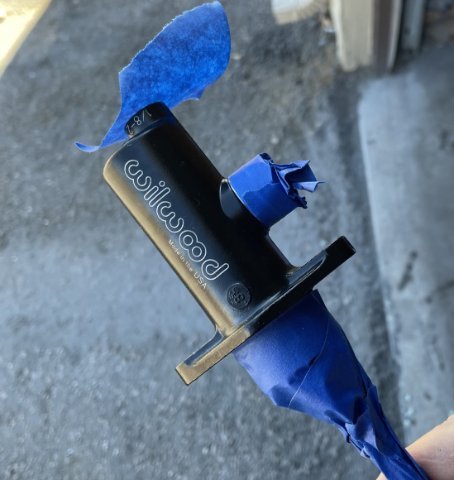
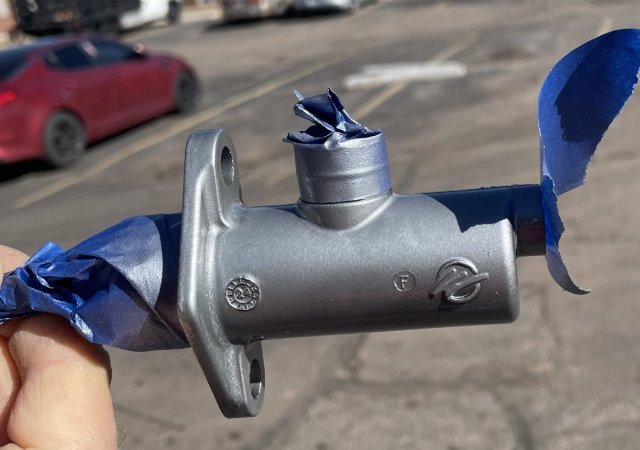
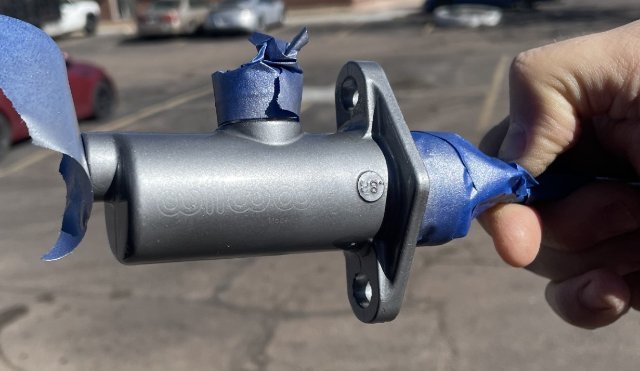
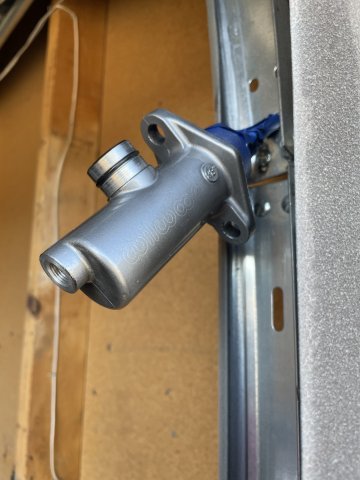
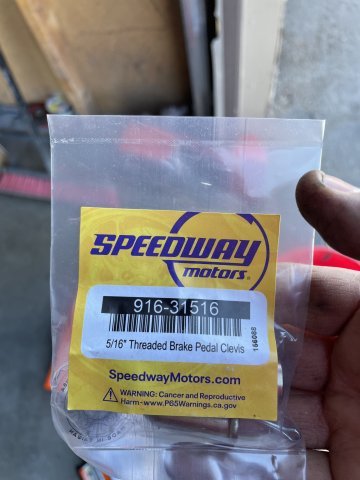
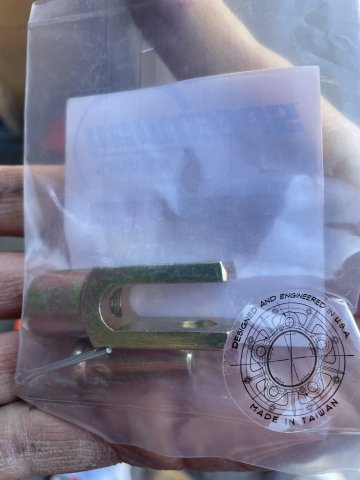
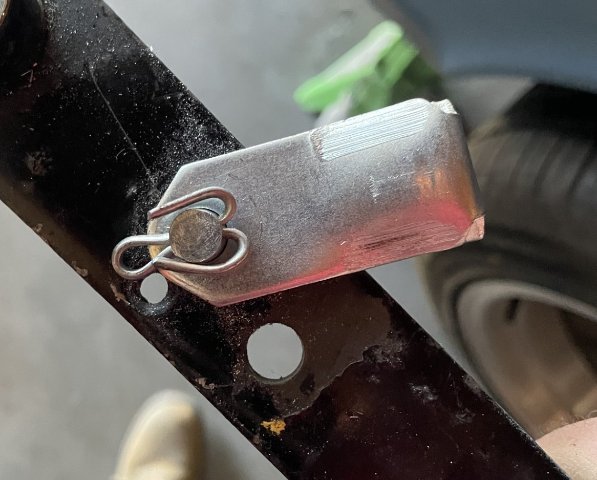
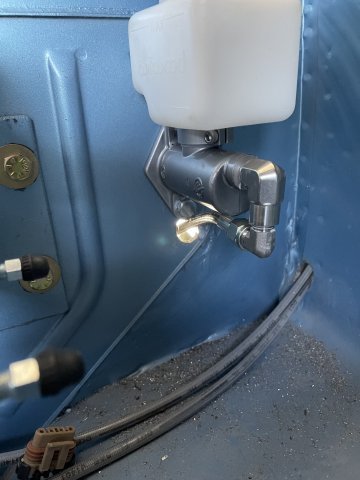
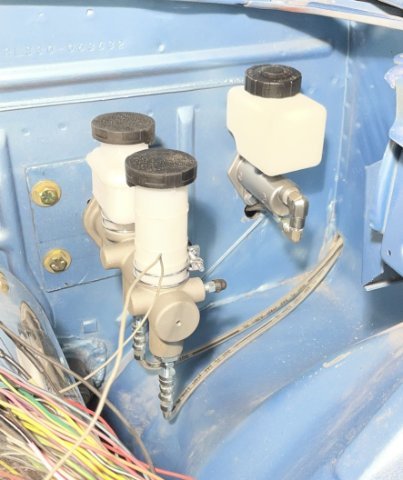
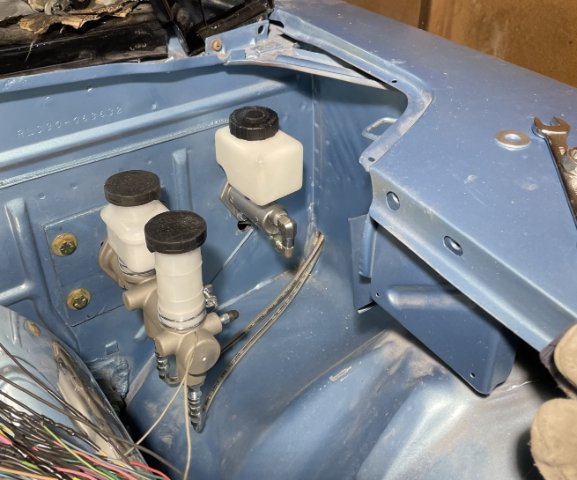
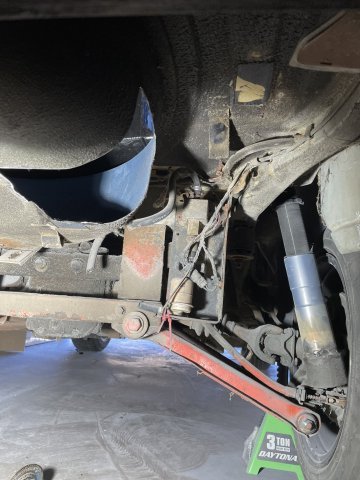
02-05-2026. ATLAS Z UPDATE. I got up early and got on the road. I went to Junkyard Jenny's in Ft. Lupton, about 110 miles one way and bought a R200 rear out of a 1978 280Z manual trans that she got in. Less than 100K original miles and she inspected it and said it is VERY nice inside. So, I got the diff, the mustache bar, and the front mounting parts. I ordered a new gasket rom Eric at Z Car Depot, and will paint it up and install later....after the trans is in. then teh driveshaft . It's an open diff with 3:54 gears! Exactly what I wanted. I ASSUMED my late 74 came with an R200, but when I looked under there, a greasy R180 stared back at me! . If you are in the Colorado springs area and want a free R180 let me know. I took my Wilwood clutch master.....I got from Godzilla Raceworks, and masked it off, wiped it down with alcohol and applied several thin coats of silver engine paint. Why? to match the brake master and the color palette in the engine bay. You will also notice I used stainless fittings to get the hookup for the clutch line that I brought in from the cabin to the master nice and clean. On the brake side, I got the Master mounted up to my adaptor plate I finished yesterday and mounted it up requiring me to remove the clutch and brake pedals, move the clevis point on the brakes up 1 inch for a better pedal ratio as I eliminated the brake booster (I did this on my 240Z, so it was quick and easy). Once I got everything bolted up, I was able to adjust my brake pedal height, but ran out of time and daylight for the clutch side. I need to get a replacement locknut for the clutch master rod as I cant find the one it had.....and then use the Speedway threaded clevis and pin, which is larger diameter, and that is why I pulled the pedal and drilled it out. In the pics, you can see I achieved the clean install I wanted. I loosened the clamps holding the master cylinders and moved them, etc. little things to make it look even cleaner. I will plug the remaining "slop" in the holes drilled and paint with a Q tip to finish it off, but I have kept the shaved firewall. Yeah, I am happy. Not too bad for a big bumper 260Z.
-
02-04-2026 more work on the ATLAS Z. I got the adaptor plate for the brake master done, more progress on the fuel cell, and unpacked some stuff. Pics follow:
-
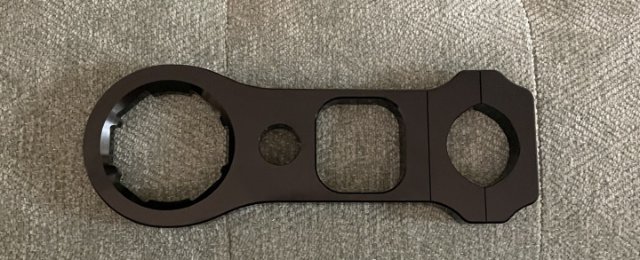
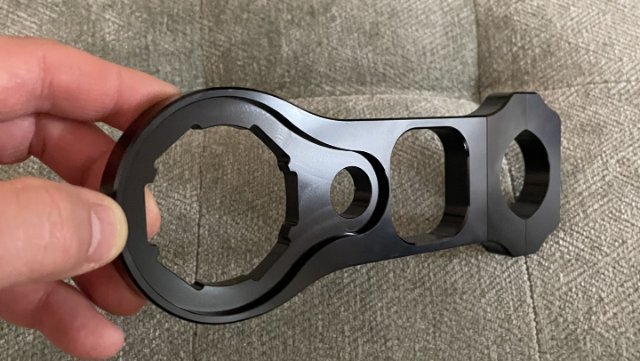
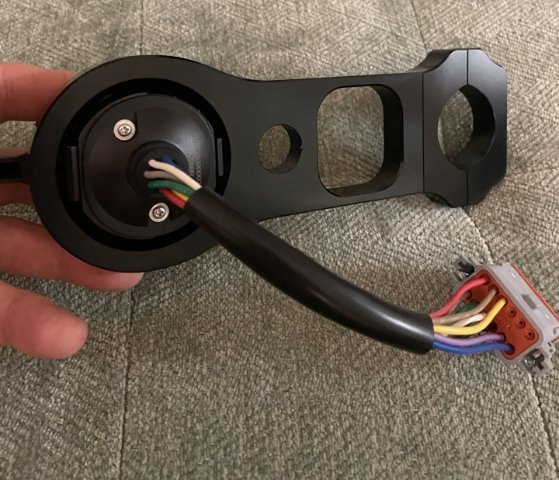
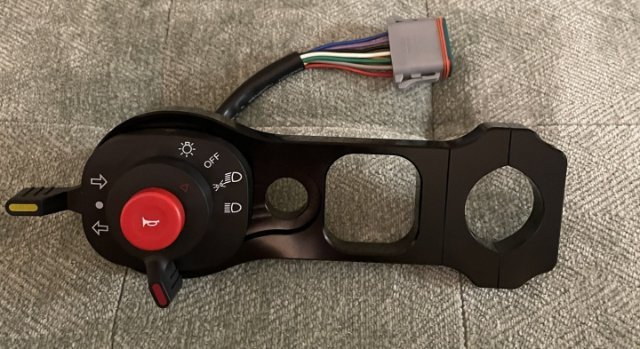
I got my billet column adaptor for my raceware turn signal lighting and horn control. Not too shabby.
-
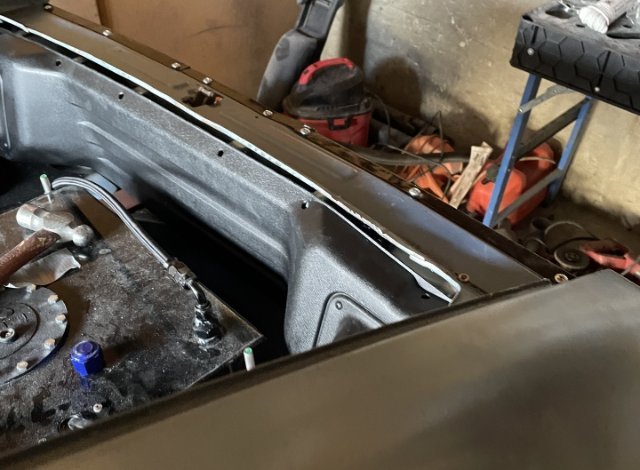
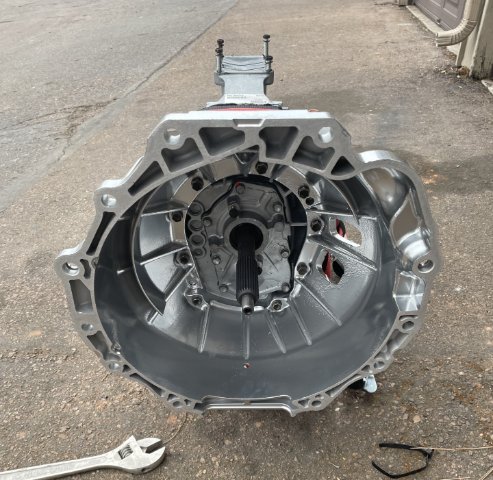
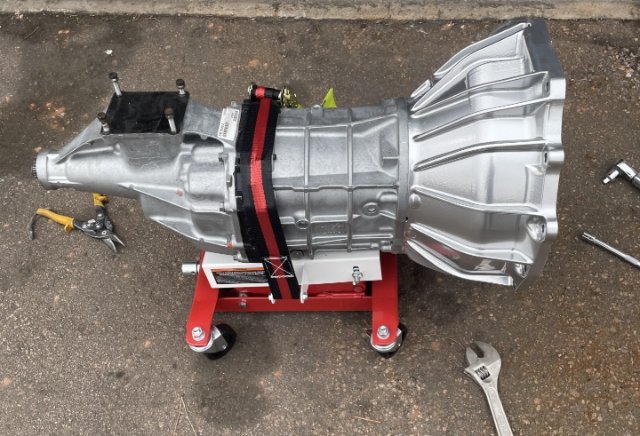
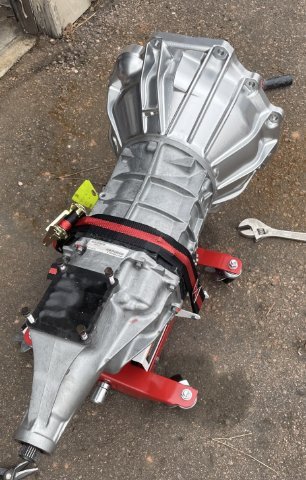
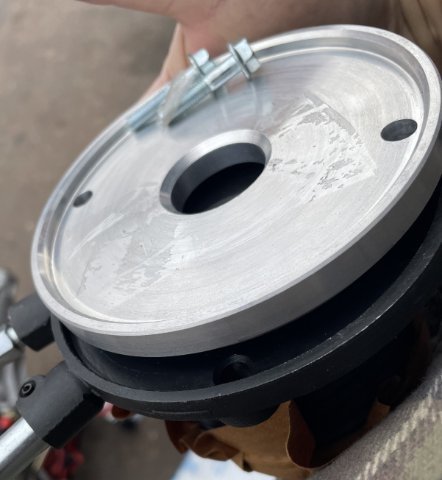
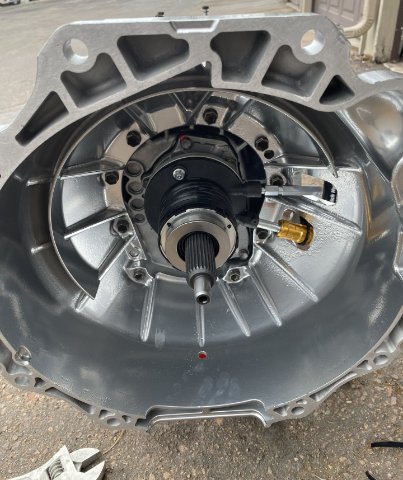
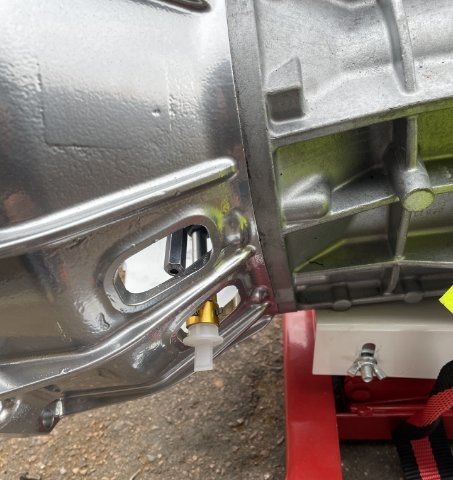
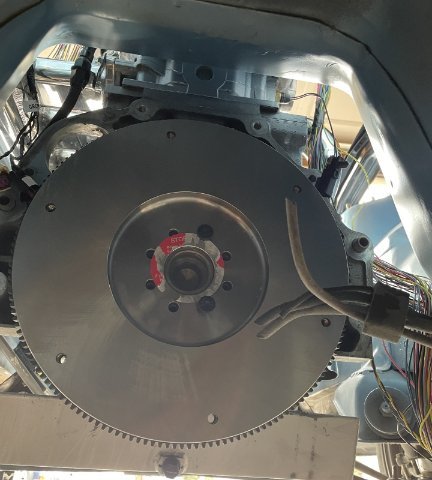
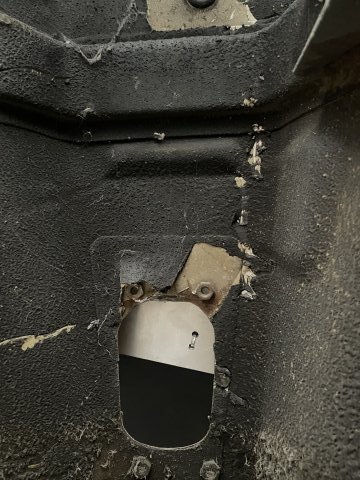
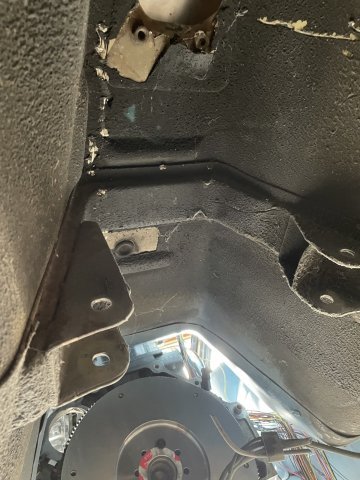
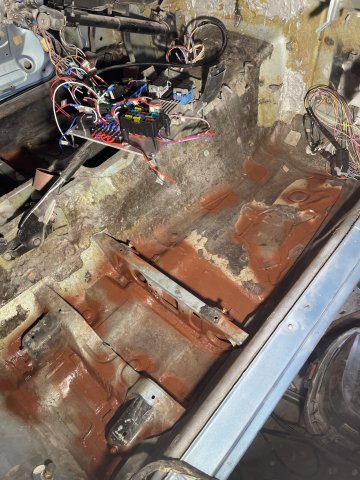
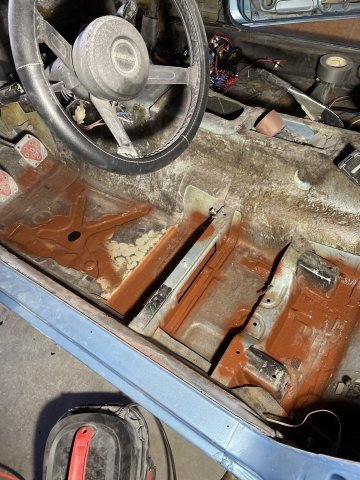
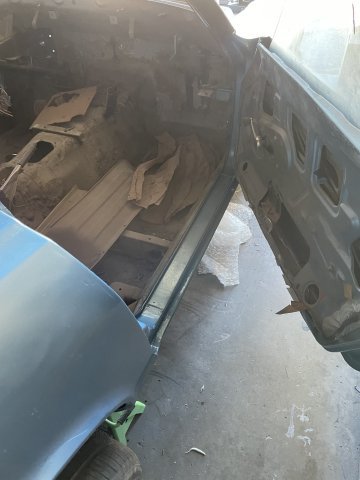
02-02-2026 UPDATE. Happy Groundhog Day! Well, it's time to get that transmission in! It is a completely remanufactured GM / Aisin AR5 for a 2003-2009 Chevy Colorado 2WD pickup. These are TOUGH and the bonus is, it bolts right up to the ATLAS engine without an adaptor plate. The 6 cylinders never came with a manual trans, and so I am doing this. I got my powder coated bellhousing on and torqued down, installed a new Hydraulic throw-out bearing with the spacer from Emtech, which is needed with their flywheel. Then I took the flywheel, which comes from Emtech, but are made for them by RAM and held it up and used a couple bolts to hold it on. 29.1 lbs., so pretty heavy, but the ridge in the center of the crank helped hold it up while I got the 2 bolts started. Thanks to RAM for putting a sticker on the flywheel that does NOT want to come off! next is install my Pilot bearing, torque the flywheel on at 70 lb/ft with the blue install fluid on the threads, which is considered necessary by ARP hardware for their fittings. I added 2 pics that show where I will have to make a new hole for my shifter, as this trans is 4-5 inches shorter, and a pic showing the factory trans mount ears in the trans tunnel I have to chop off and grind smooth. not bad for 2 hours work. BIG jump forward.
-
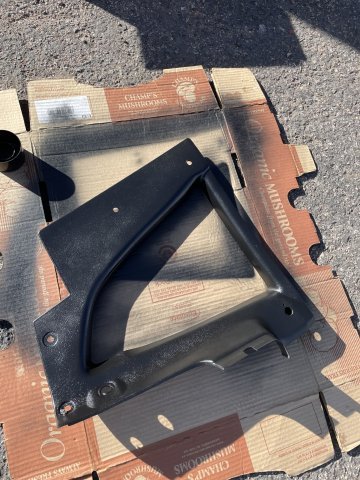
01-31-2026 pics of the completed dash center piece:
-
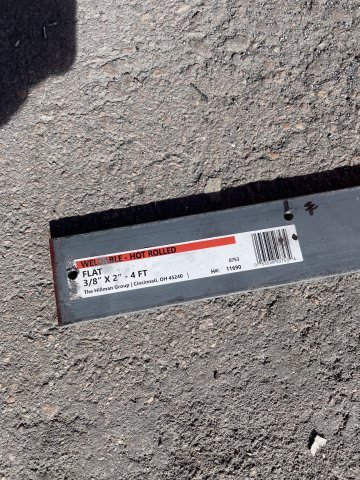
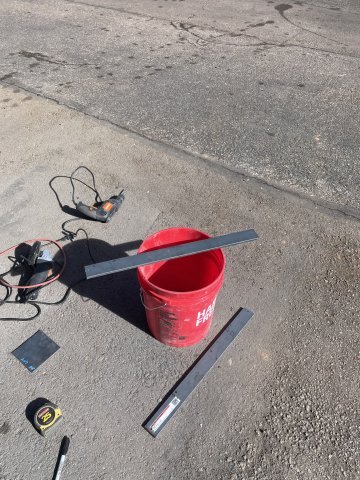
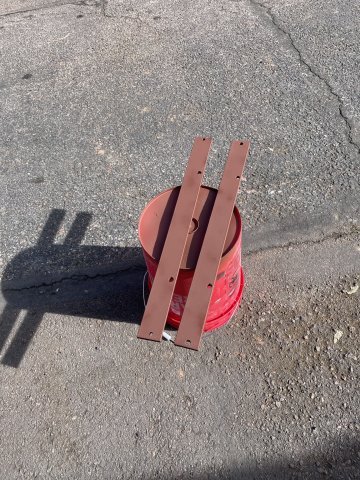
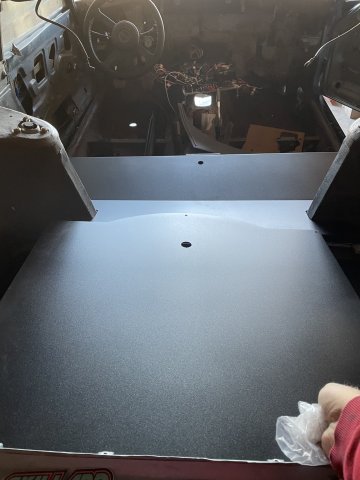
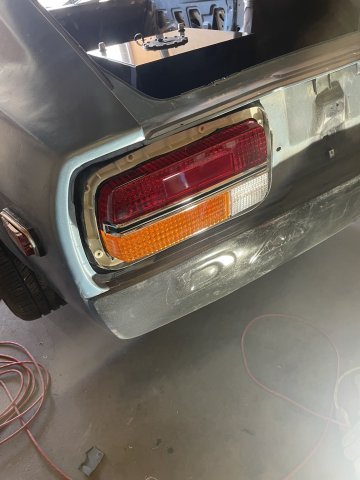
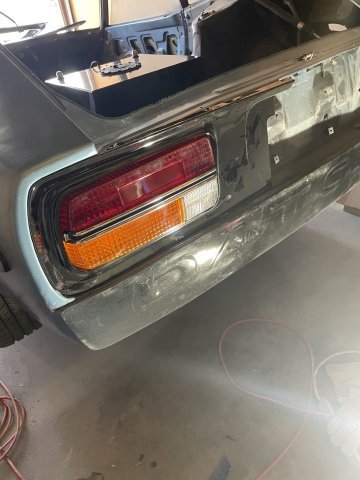
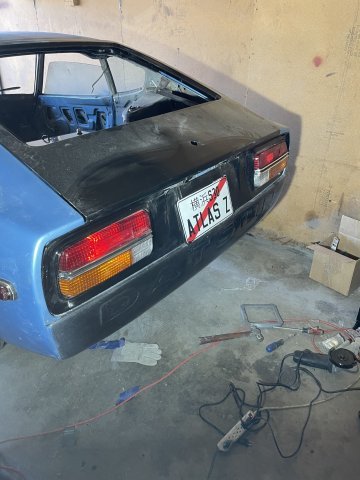
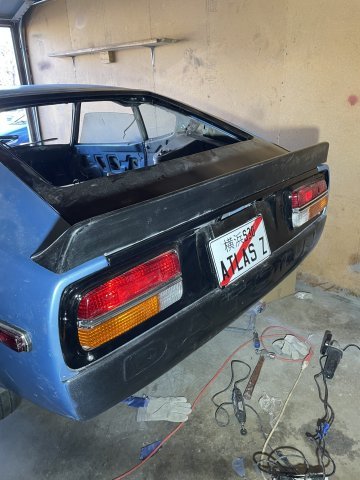
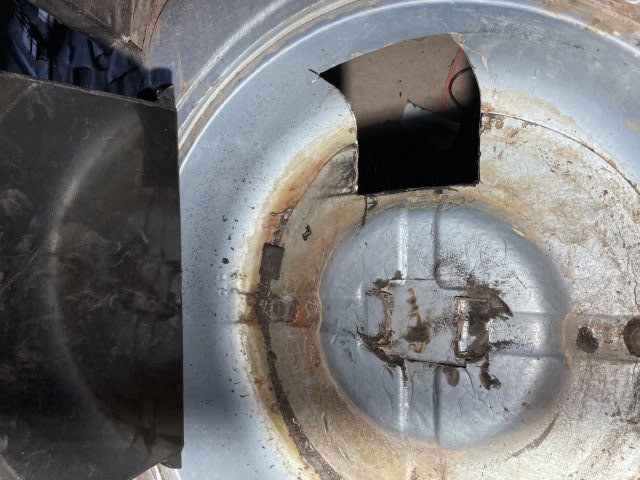
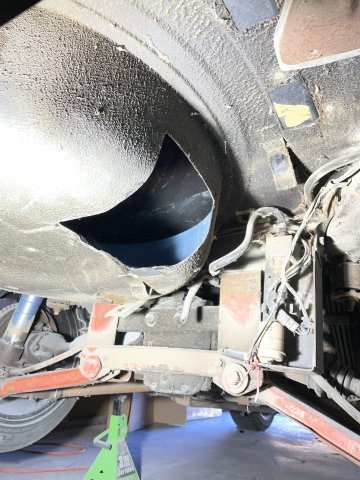
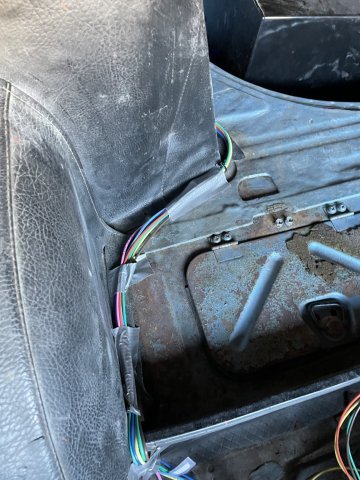
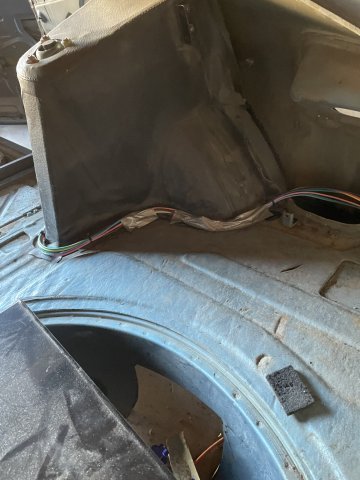
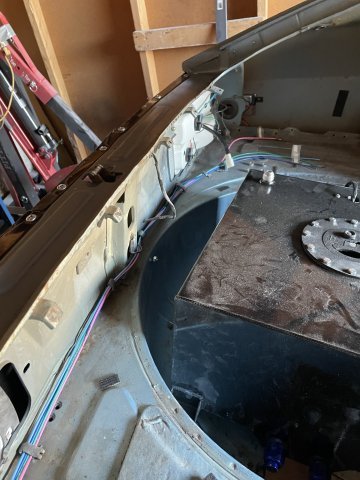
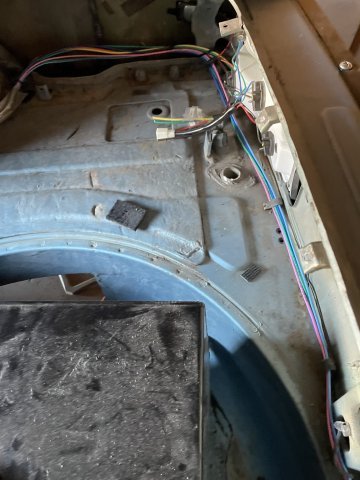
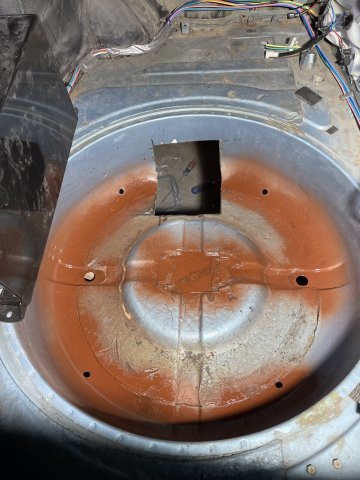
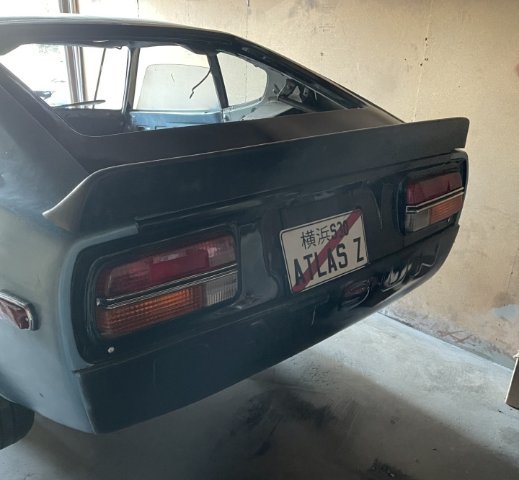
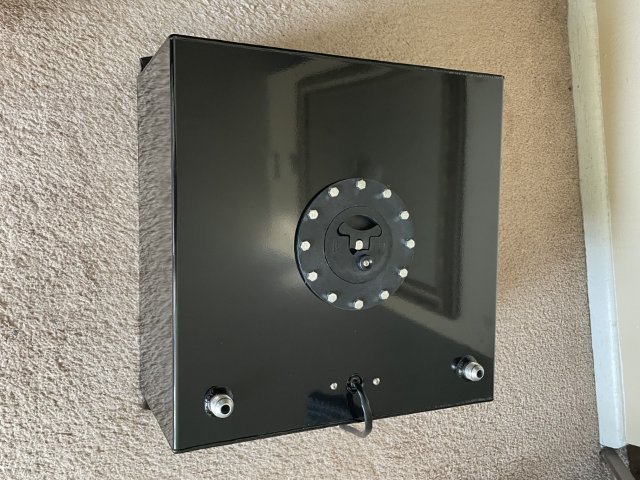
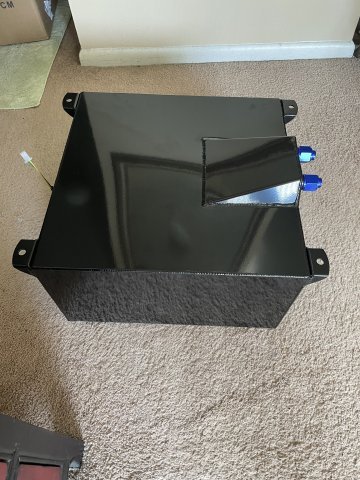
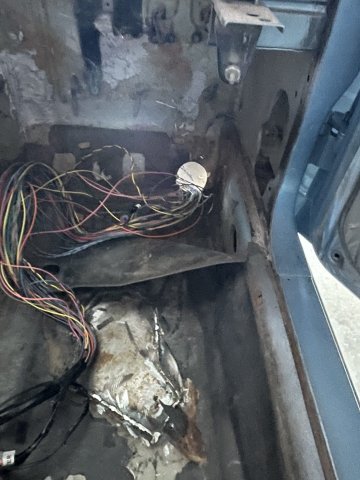
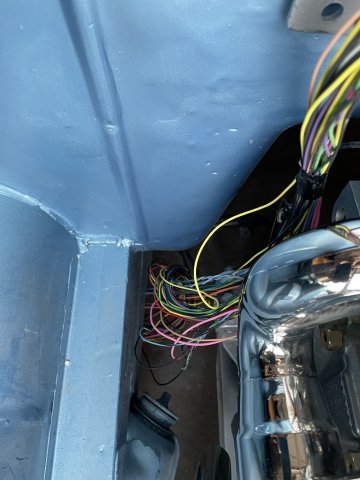
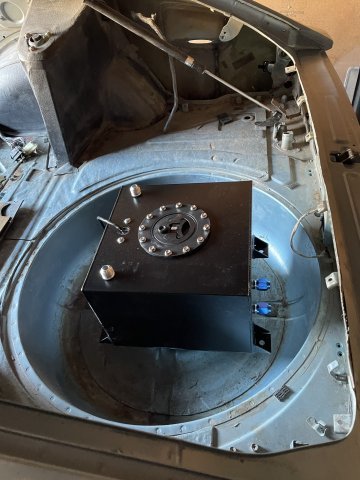
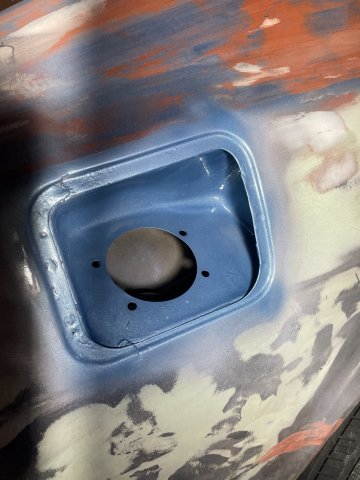
01-31-2026 UPDATE: I cut and modded the rear taillight panel and fitted some new reproduction euro style 240Z taillights and some factory covers I bought a while back that I had powdercoated gloss black. After that I attached the second hatch shock by drilling and tapping for it and then attached the MSA fiberglass rear spoiler. Then I cut the hole needed to access the fuel line hookups on the Evil Energy 10 gallon fuel cell. I turned it 90 degrees, as there wasn't enough rwork room underneath to have it facing back, and its much better as I now have a ton of room under there for setting up my whole fuel pump and filters setup. Then I wired the back half of the car, I will go back and make up the connections on the end later. I rustoleum primed the areas in the spare tire well and floors that needed it and then filed out the remaining holes on my dash center section so the gauges would sit in it the way I wanted them to. The rear taillight surround was the item that really fought me today. In particular the center section for the license plate. I ended up having to spend quite a bit of time modding it to make it look the way I wanted it to. The fuel cell isn't completely level yet as my 3/8" All Thread hasn't arrived yet. The all thread will attach at the feet on he bottom of the fuel cell and the bottom of the spare tire well. then at the top I have some 3/16" thick steel plates I will drill holes in for the all thread to level the tank up and drill holes to attach it through the floor on the ends. Pics follow.
-
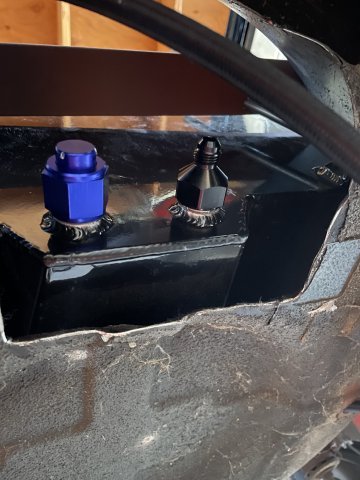
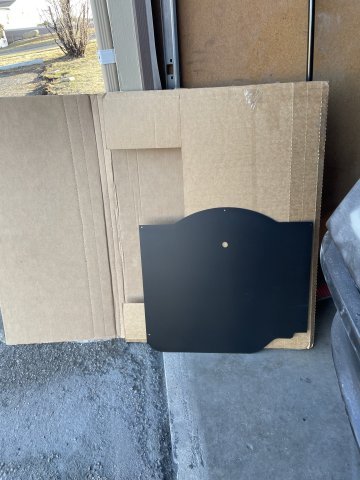
10 gallon fuel cell from evil energy arrived. it fits! very nice quality. Last pic is from the Skillard site, but I just bought this floor and will be using it with this fuel cell and a battery box.
-
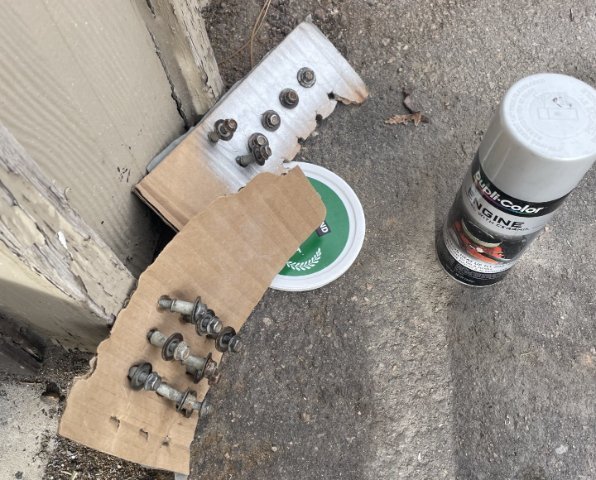
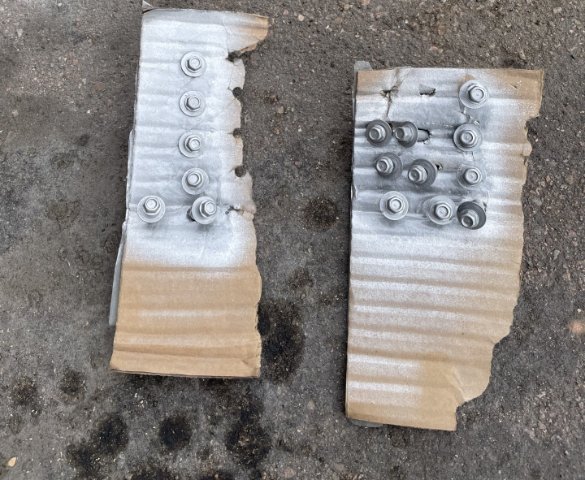
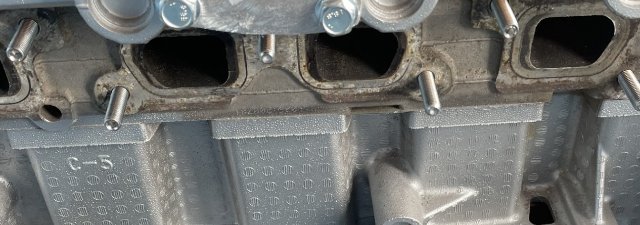
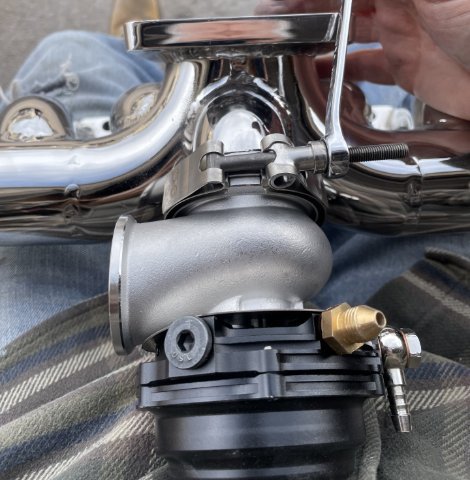
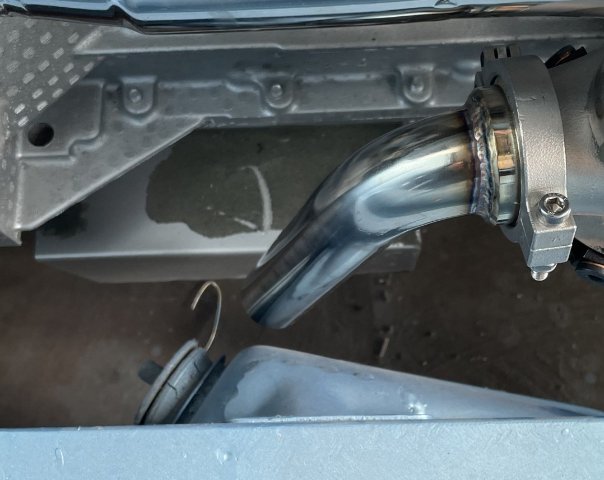
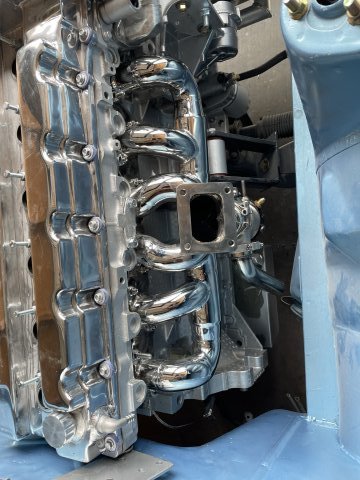
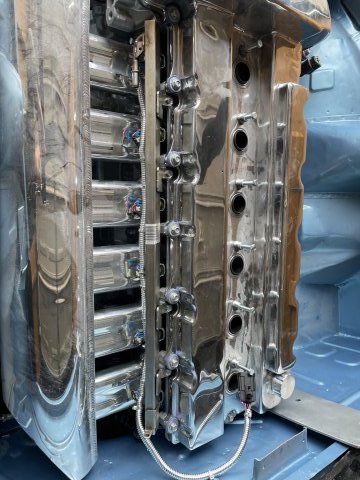
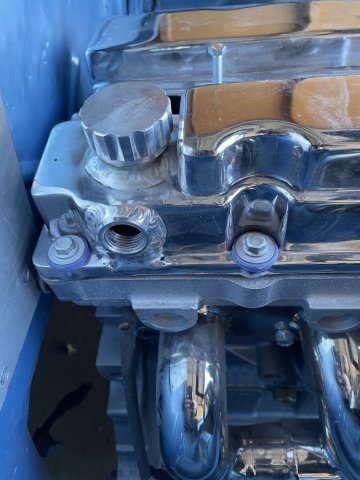
01-28-2026. Productive day. I got the remaining valve cover bolts cleaned up and painted, then installed. I then also got the fitting for the catch can installed. I drilled the access hole and got the engine wiring stand along harness laid out on the engine a couple things plugged in and fed the large end into the cabin and then set the electrical panel on tint genreal area of where it will be installed later. I also went ahead and installed the injectors and rail and pulled the header off, installed the stud kit from Atlas Industries..... installed the wastegate on to the header along with the down pipe and then got it all back on to the engine and torqued down. I took the bolts I have for holding the turbo down and turned them into studs and now I just need another turbo gasket and I can install it and be done with that. I was able to re-clock the center section, so when I get to it, I can get the oil feed and drain installed. I had enough time to get the holes cut out for my dash center panel, and with the gauges and toggle switch I can get that all assembled after I give the panel a coat of paint. Pics follow. Cheers!
-
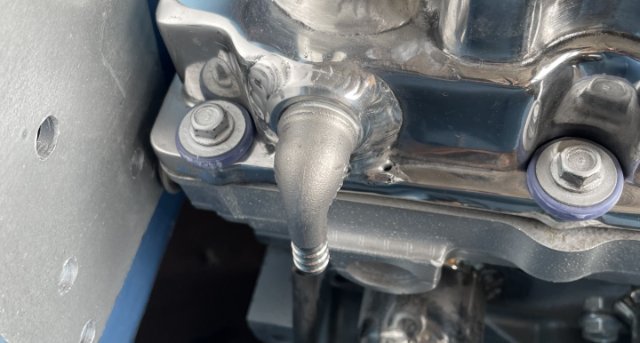
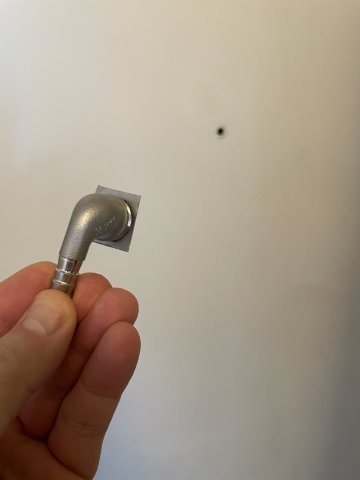
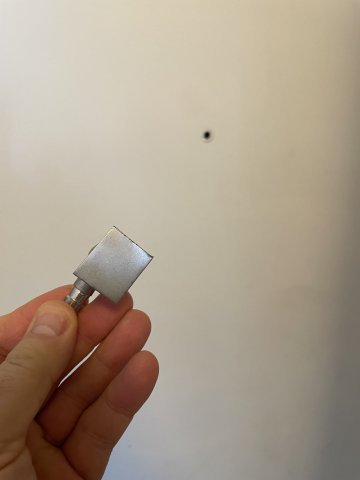
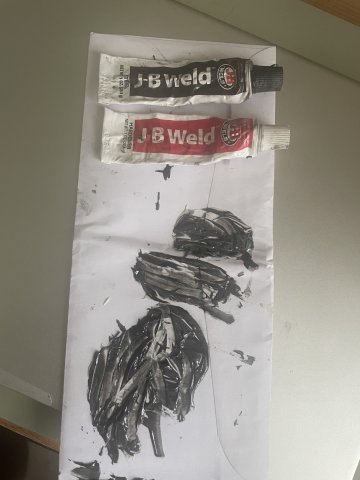
I got out to the garage for a couple hours today, and I fixed the valve cover. My original baffle for the port feeding my catch can wasn't clearing....I put off fixing it forever. Well, I am now at the point that I need it fixed now to keep working forward. So, Today I grinded it all out & cleaned it up and got the valve cover down now permanently. The location when I installed the port was against the cam and cam tower. So, What I am doing to fix it, is JB welding a steel plate on the tip of my threaded and cut down bung. Once the JB Weld is cured, I will grind it down to the same diameter as the threads, and bevel the tip, and then drill a few small holes in it. Enough to hold the oil back but the vapor can get through. My catch can is such it is easy to unscrew, pour the oil back in and screw it back on anyway.
-
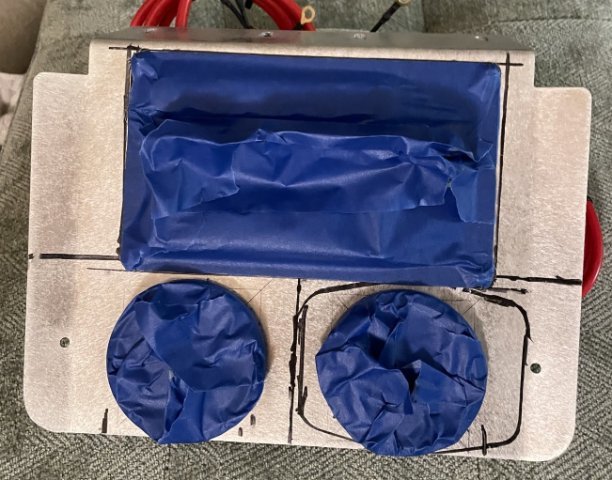
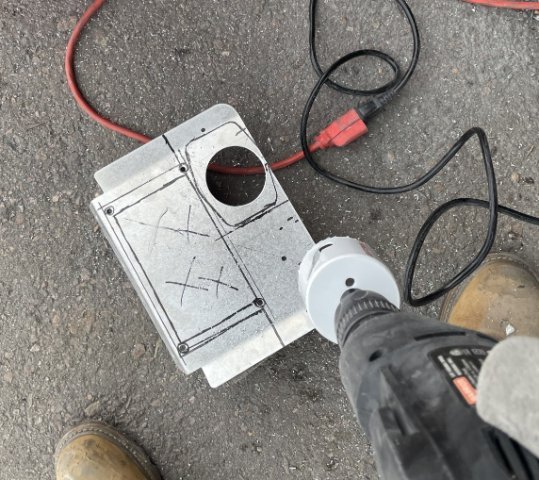
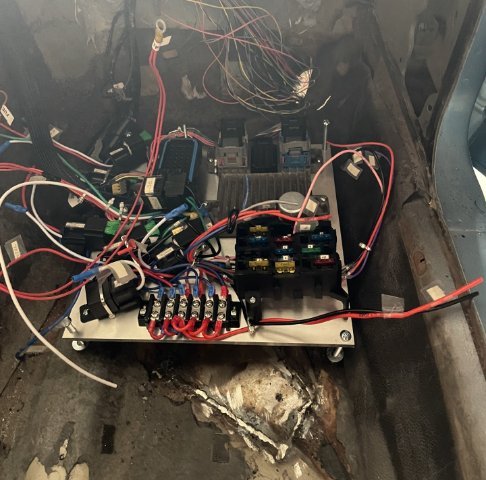
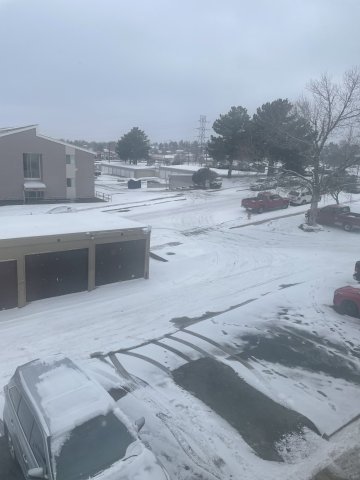
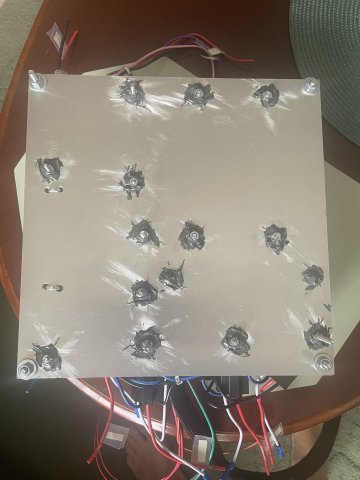
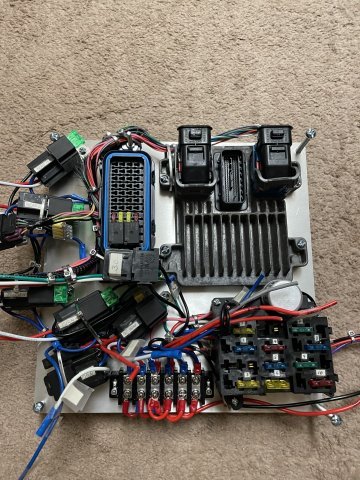
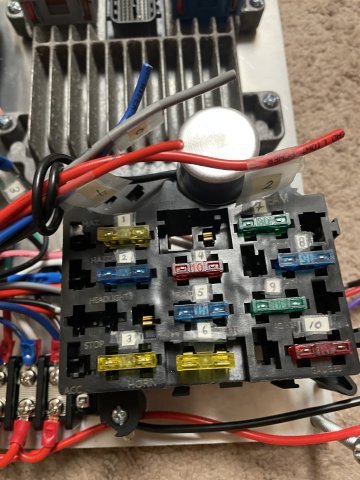
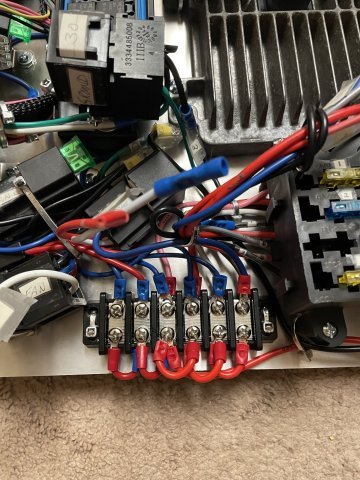
01-25-2026. Winter weather continues! And so, the work I can do inside for the 4200 swapped 260Z.....continues God willing. I flipped my electrical "Central Station" over and sanded the aluminum around each nut and sides of the nuts down to make it so the JB will stick and then coated them to make the nuts permanent. The idea being, I don't want to have to lift this back off once installed. PICS:
-
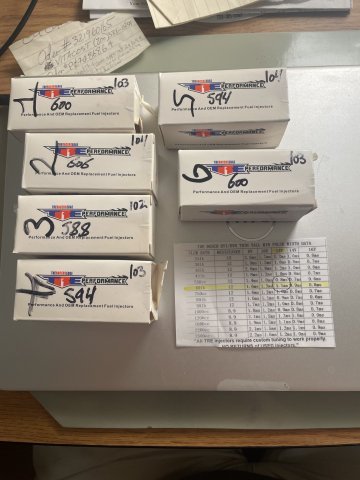
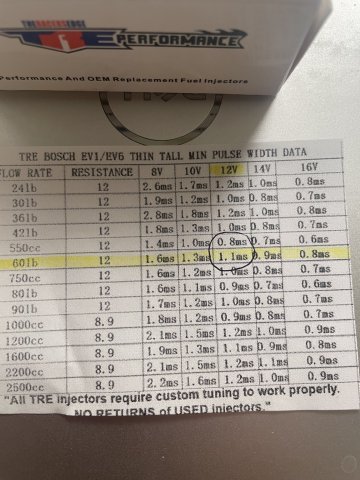
Ok, so according to TRE the numbers I mentioned are static and Dynamic values for each injector, and are used by the tuner. Cyl Static Dynamic 1 - 600 103 2 - 606 104 3 - 588 102 4 - 594 103 5 - 594 104 6 - 600 103 Interesting. Glad I took the time to keep track of which one is in which cylinder.
-
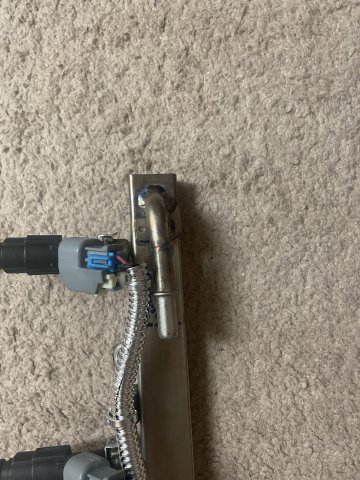
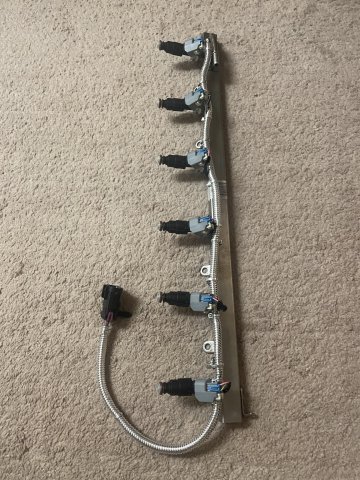
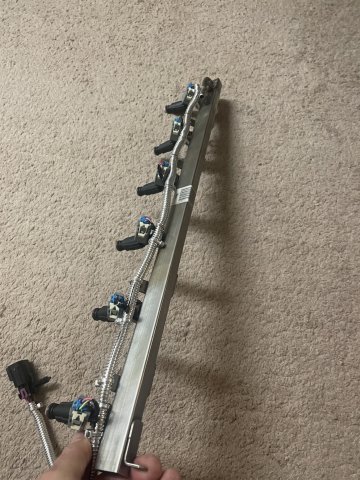
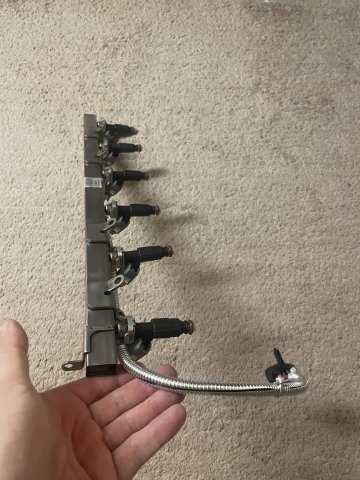
01-24-2026. Well, I went ahead and put my fuel rail together today. My factory rail I had the port for the fuel line hookup cut and custom welded on by Wagner Fabrication here in Colorado Springs, CO, for a cleaner look, and the wiring was custom made by Jemery at Lime-swap. Injectors are Siemens DEKA 60 lb EV6 injectors from TRE. You can see I put the chrome wire loom on as well and used some chrome tie wraps to make it look half decent. PICS:
-
some pics of the setup:
-
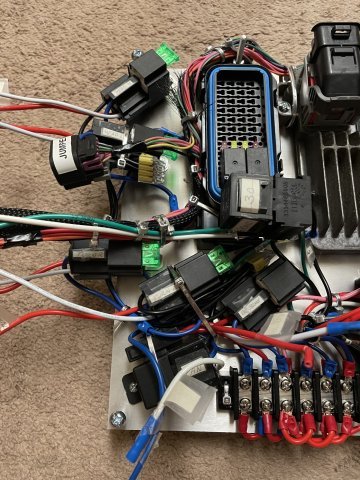
Here is a video I made for my wiring "central station". click below" V1.MOV
-
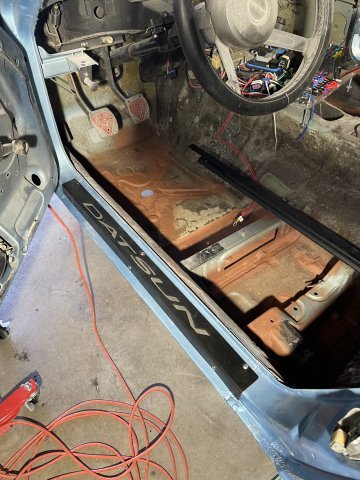
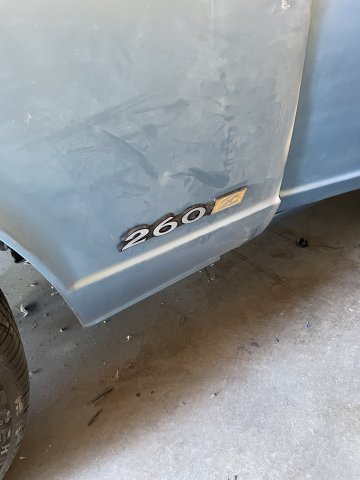
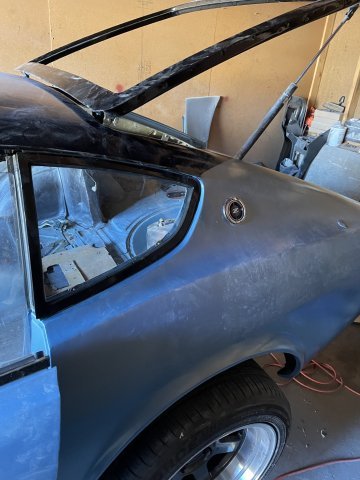
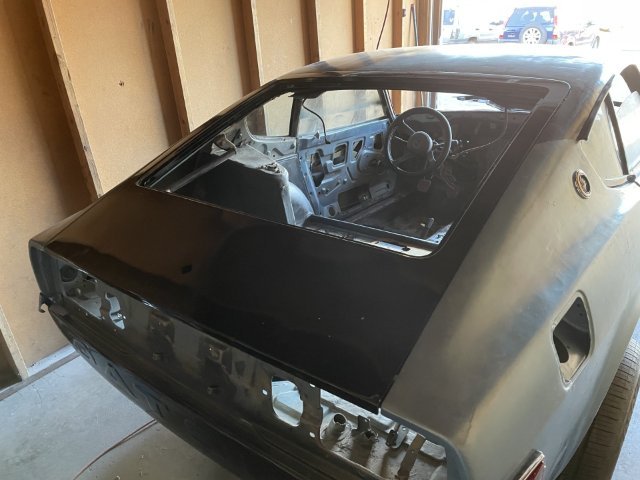
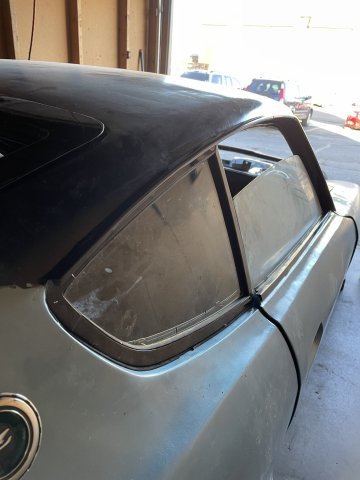
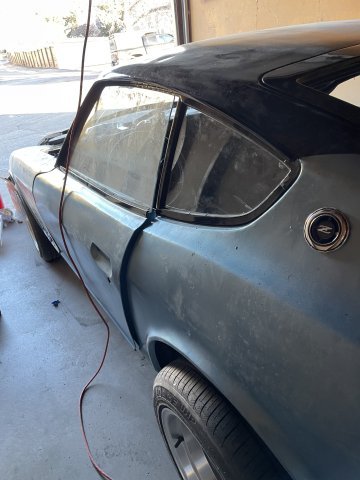
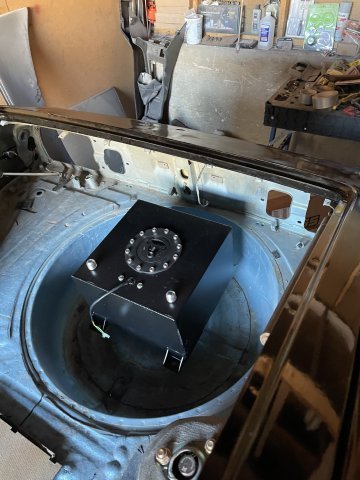
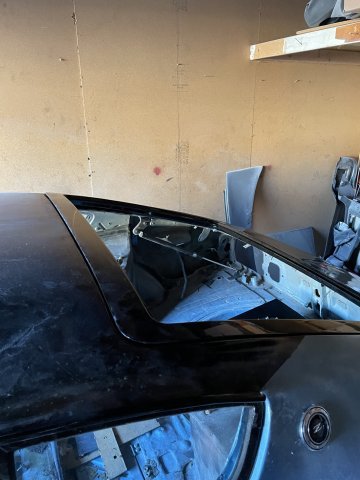
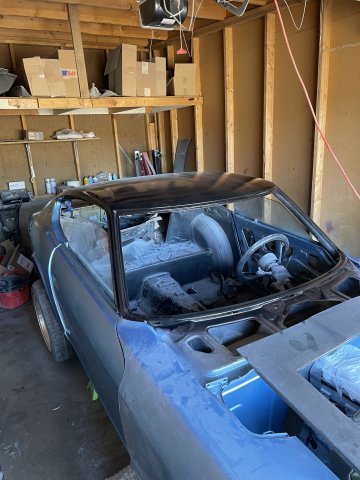
01-21-2026 UPDATE: I started the day vacuuming out the entire interior......A ton of bondo dust, and junk.....finally got it out. Later I will just have to mop it out and a light vac and it will be okay. I then installed my quarter windows, the drip rails, and the rear hatch. Installed the inspection doors and then installed the new parking lamps I got off of eBay, the sail panel emblems, and front fender emblems. A tad bit of clear caulk to help keep them tight against the metal like I want. I was also able to clean out the garage, throw away a lot of stuff no longer needed, empty boxes, etc. I set the 5 gallon fuel cell in the spare tire well for a quick look, it will be on a rack holding it up a couple inches and offset towards the driver's side to offset the weight of the battery which will be to the right of the spare tire well. PICS:
-
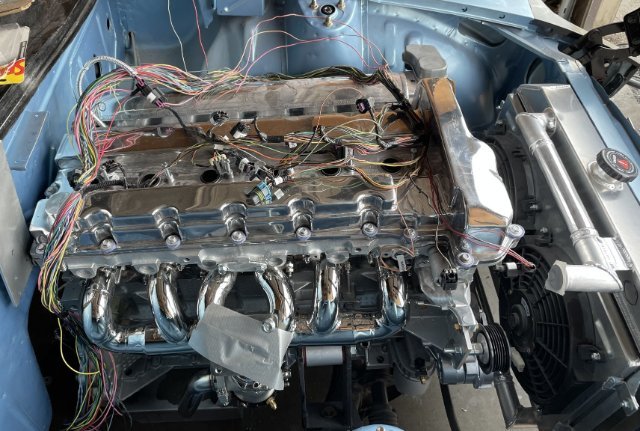
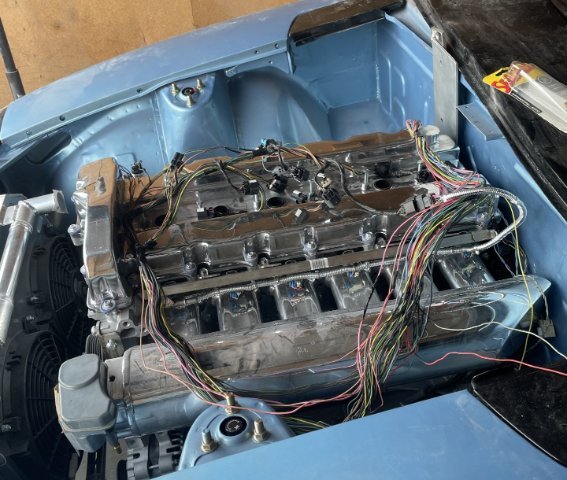
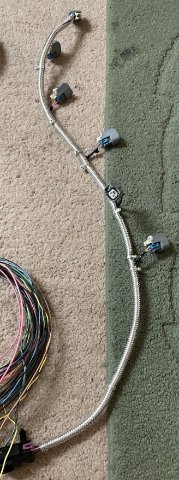
01-20-2026. Engine wiring harness. So, today I took my custom Lime-swap wiring harness for the ATLAS, and stripped off the looms and tape, so I tailor can fit everything and cut the wires down for a good, hidden fit. it's quite a bit of work removing the plastic bracket that originally held it on to the valve cover, straightening it all out, getting it all ready to be installed and then separated and cut and spliced back together correctly. I have these special splices they advertise that melt with a heat gun and solder the center.....I thought I'd try them. Some exposed wiring parts will have the chrome looms I bought over the wires, as you can see in the Injector wiring in the separate pic.
-
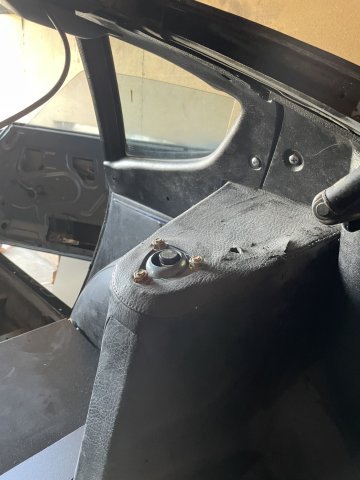
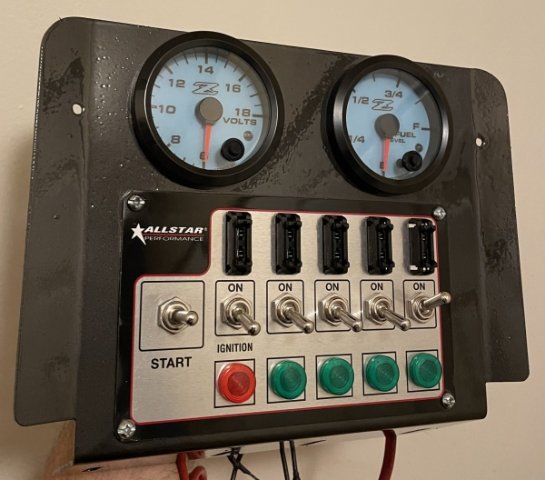
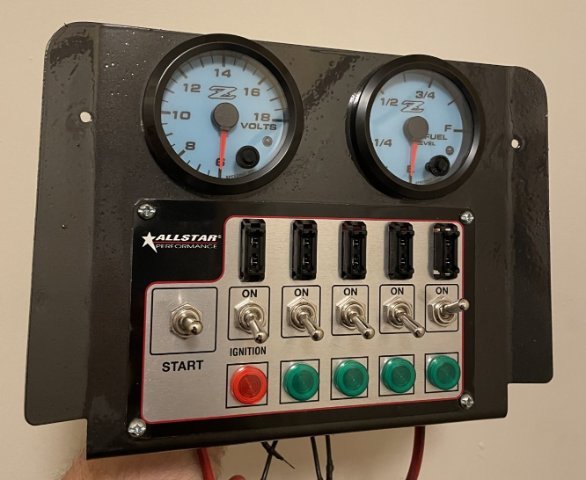
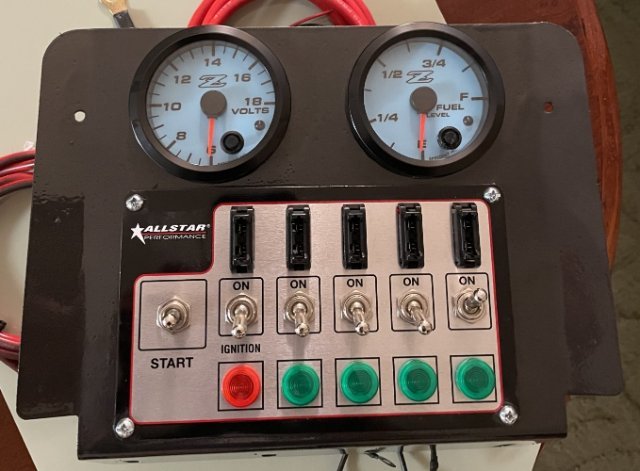
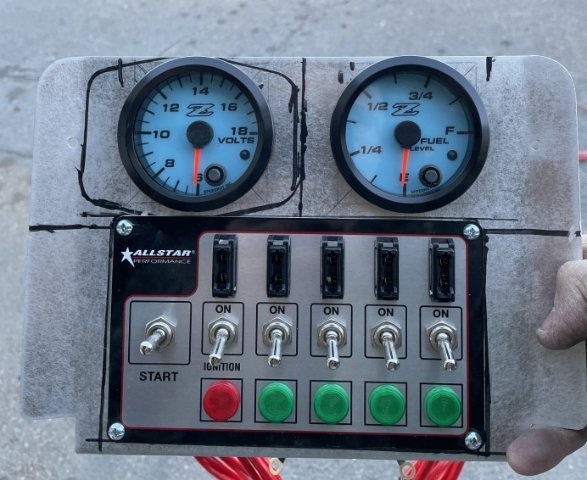
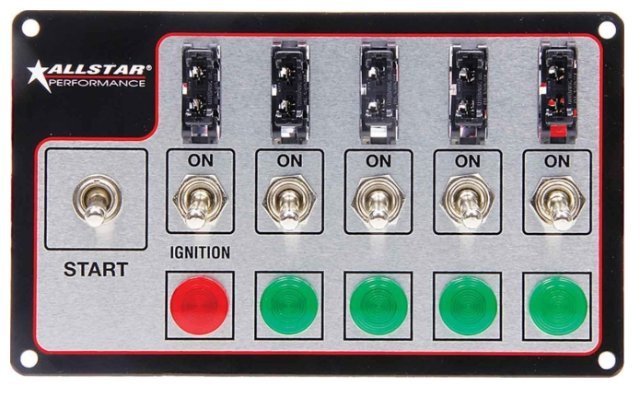
Another pic of the toggle cluster I am putting in my Atlas Z. fused and the start toggle is a momentary switch. when you flip the ignition toggle it will kill all power to the stand alone engine harness that the fuel pump runs through. I love the old school look. The quality of these toggles when you operate them you don't see often these days anymore....I got it at Summit and yep, the price is high, but the quality is A+.
-
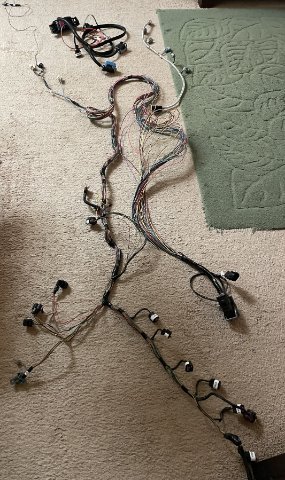
01-19-2026 First survey of my customized stand along wiring harness for the GM Vortec 4200 / ATLAS 4.2 engine swap. Keep in mind If I had kept the auto trans there would be more....I also deleted 90% of engine functions as well....only kept the cool stuff like gauge feeds, etc. At least I have a wireless throttle! enjoy the video. 01-19-2026 harness video.MOV
-
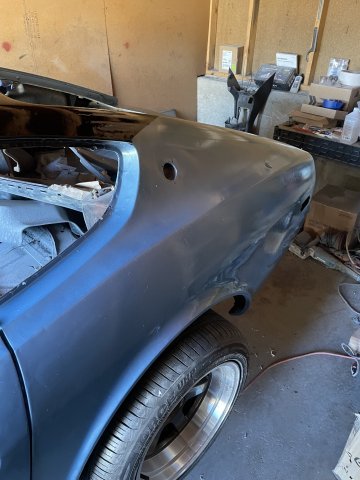
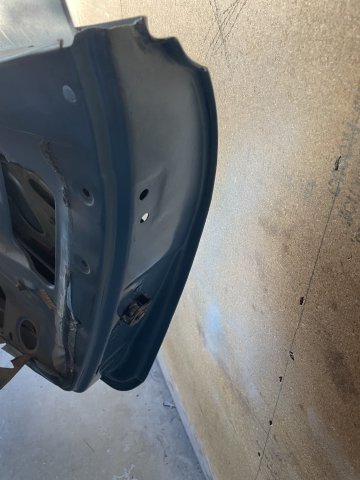
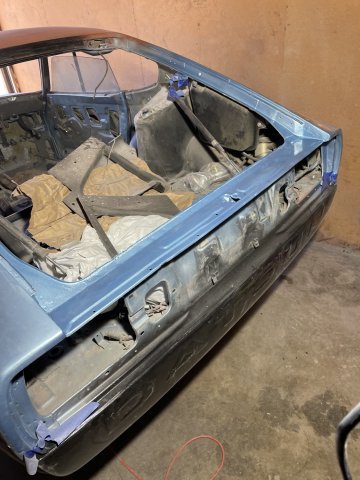
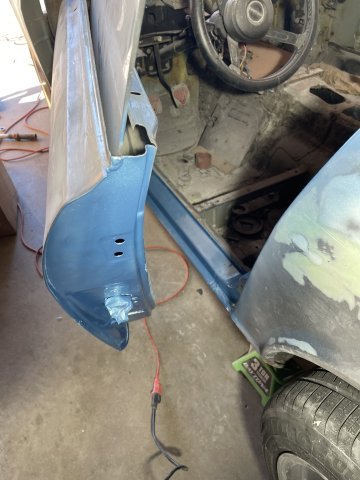
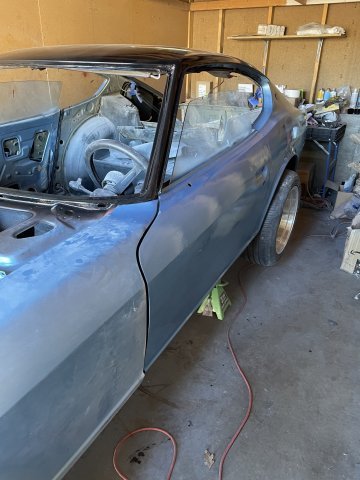
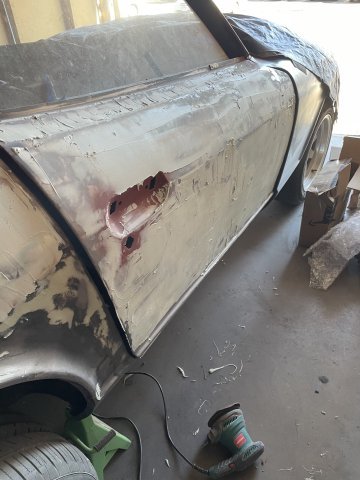
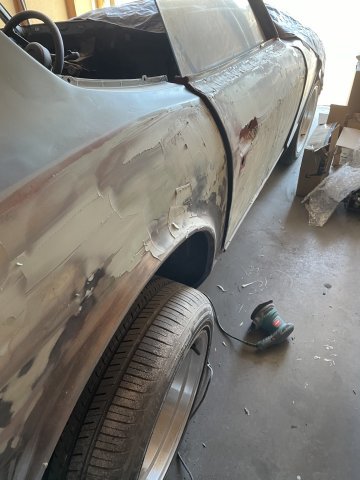
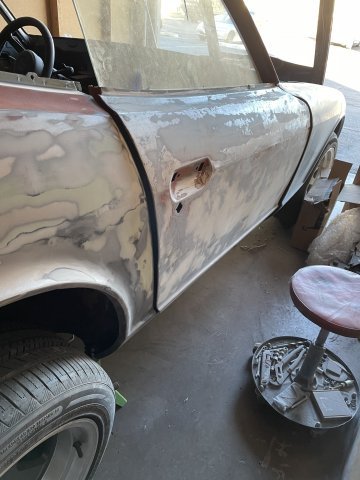
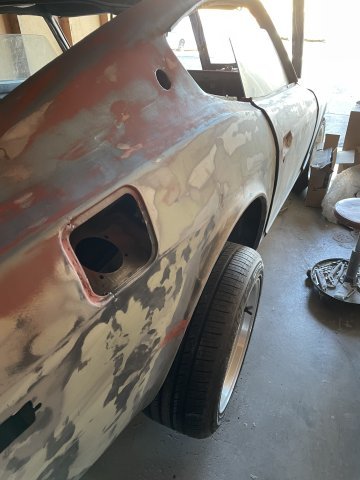
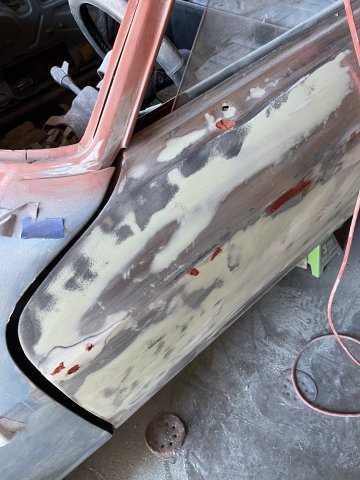
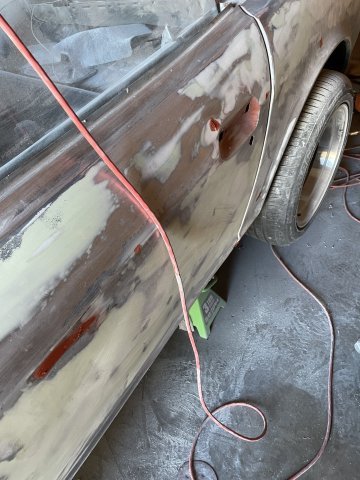
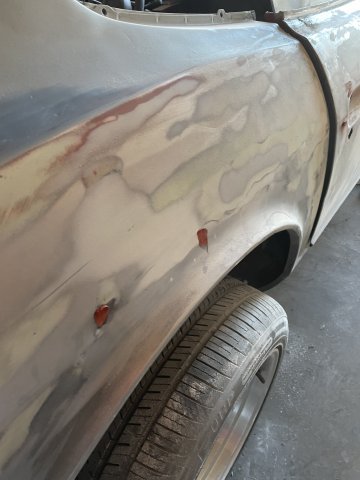
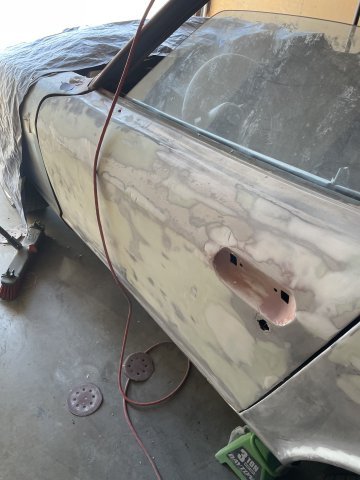
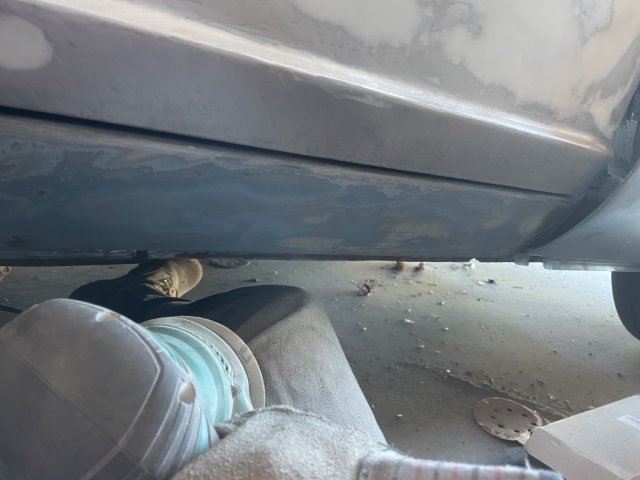
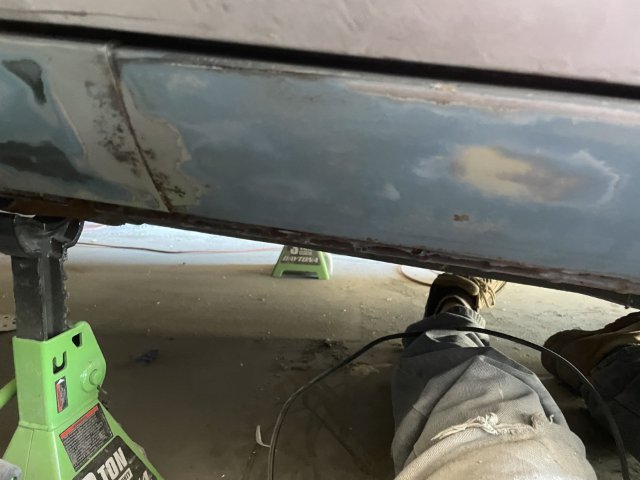
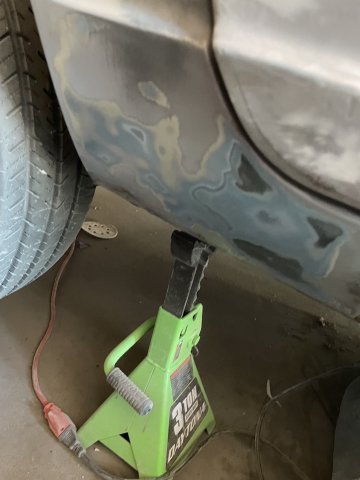
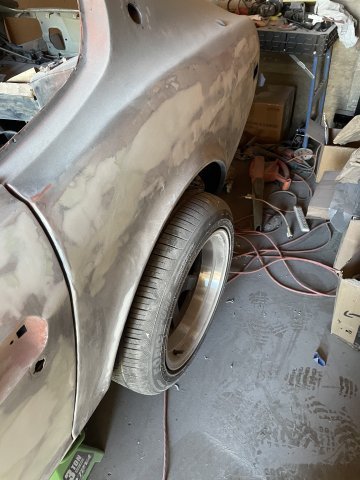
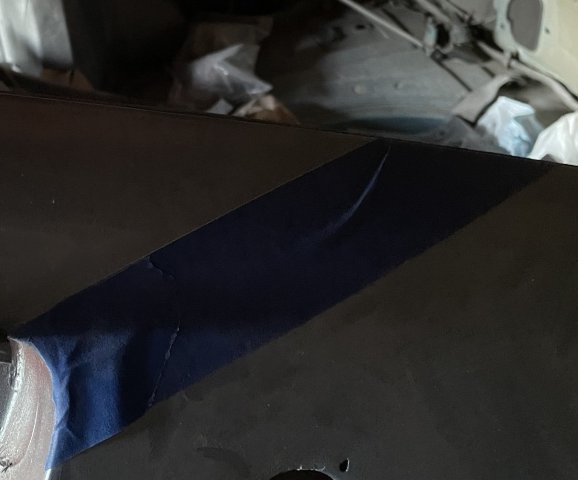
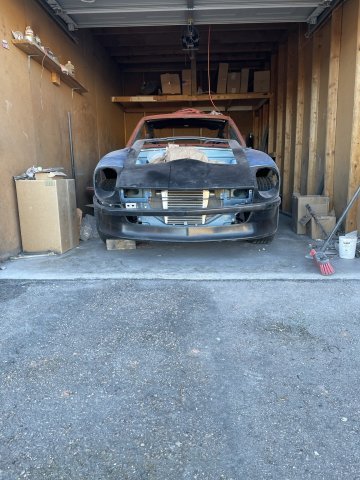
01-15-2026. PAINTJOB. Ok so it is painted now. there are a few spots I can later address and spot paint, but the major paint and bodywork is done. PICS:
-
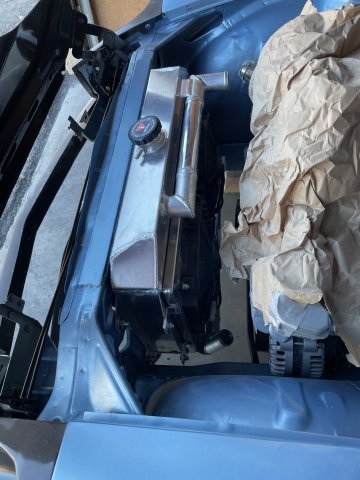
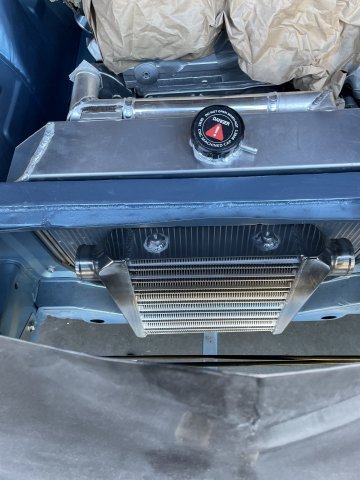
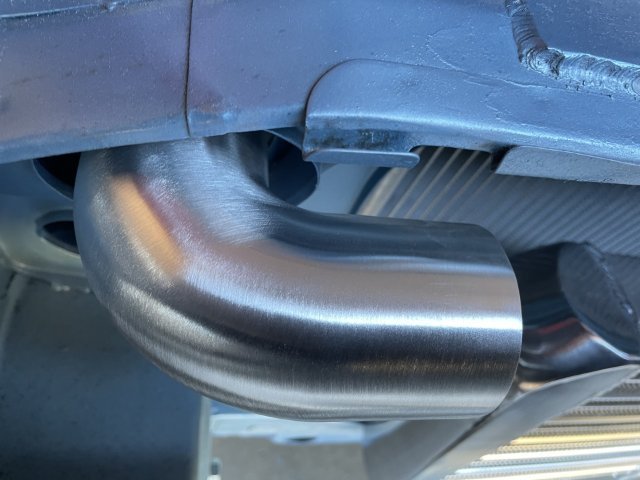
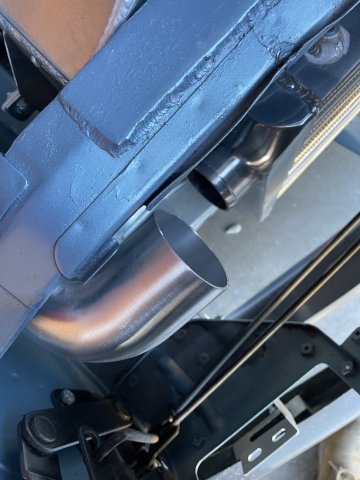
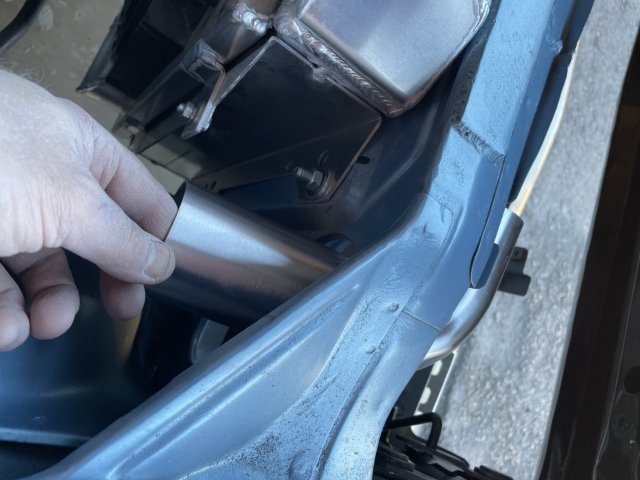
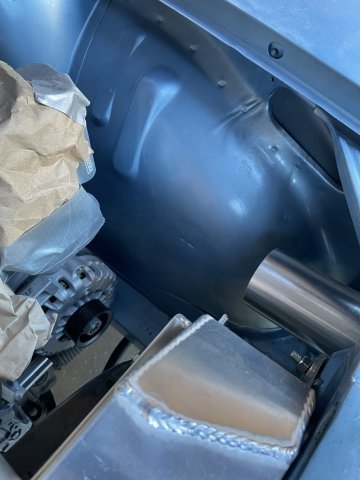
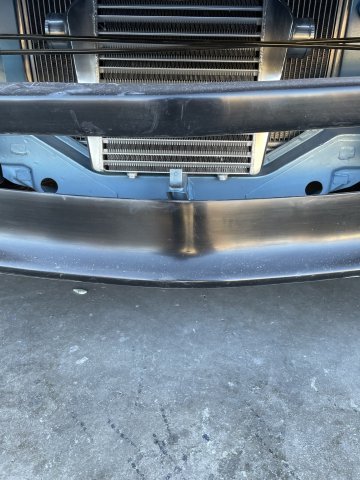
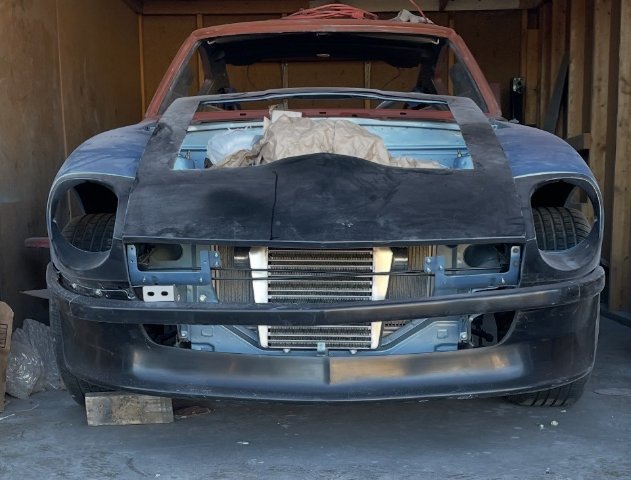
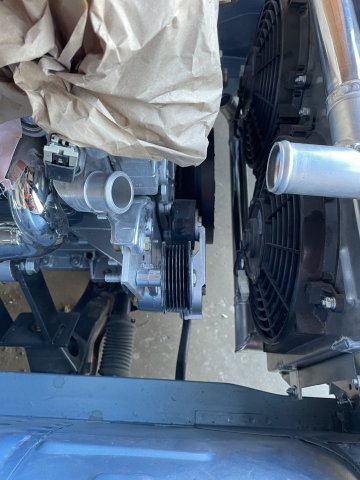
01-14-2026. Prepped for more paint. I was able to get the body ready for more paint, and I will paint it, knowing I will see spots later that I can spot repair/fix if needed. this will get it to about 95% on being completely painted. Working on the body is such that you could spend a year and still find things to "fix".....and I think it's time to "push" it forward. After getting it ready for paint, I installed the radiator finger tight and the cut down radiator engine inlet I got from 42004U.com. I then grabbed the intercooler and put it in there to get some measurements for making brackets. I grabbed one of my 90's do this as well. TIME FOR MORE PAINT!
-
01-13-2026. Just a little something to keep my motivation going. New badge and antenna delete plug from Resurrected Classics and Z Car Depot. I know, the clear looks dull, it will just need to be sanded and buffed. I'm planning on using Poppy's Patina wipe on clear in the summer God willing.