A to Z
-
Posts
1072 -
Joined
-
Last visited
-
Days Won
32
Content Type
Profiles
Forums
Blogs
Events
Gallery
Downloads
Store
Everything posted by A to Z
-
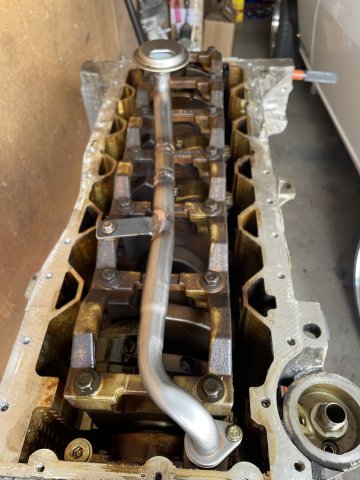
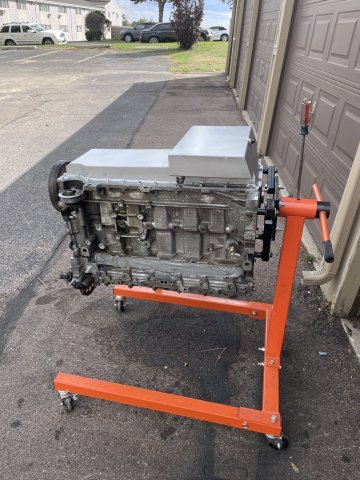
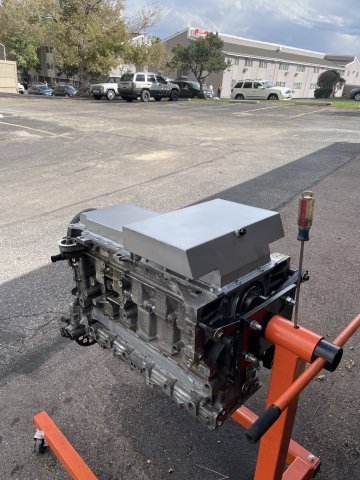
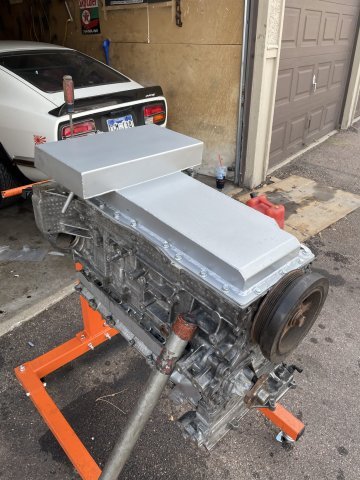
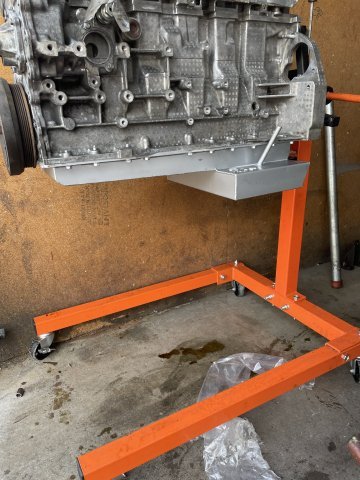
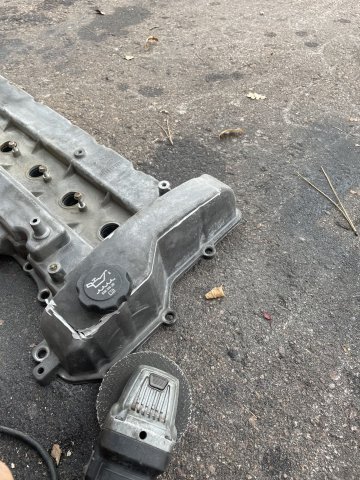
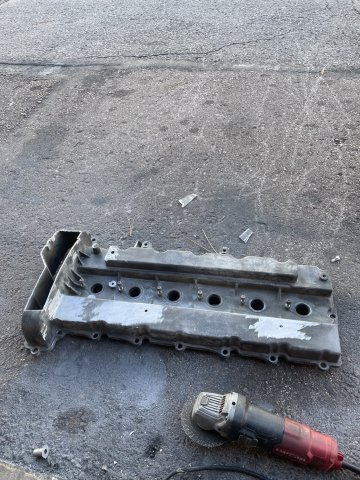
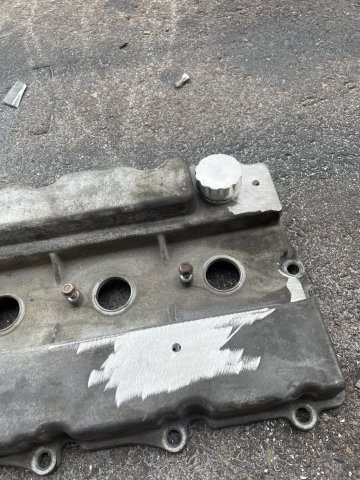
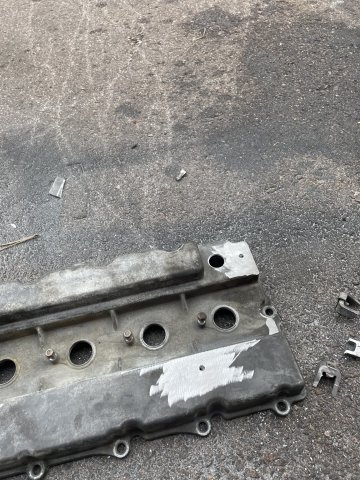
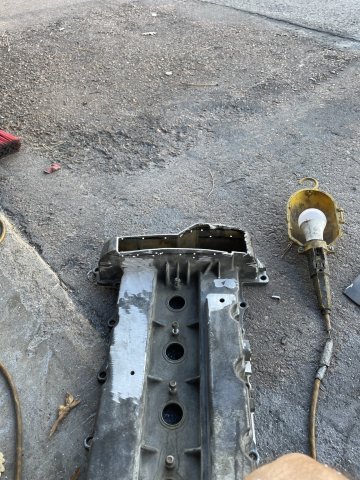
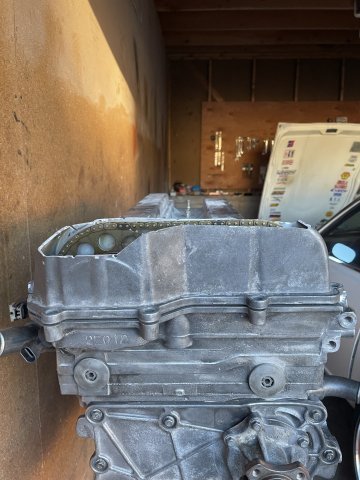
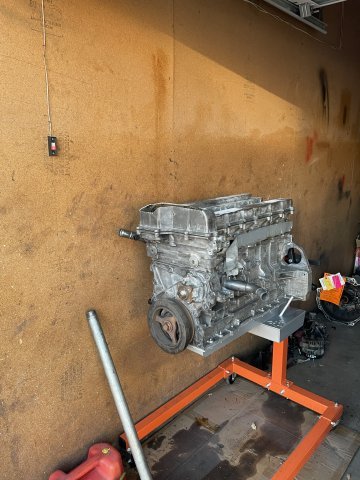
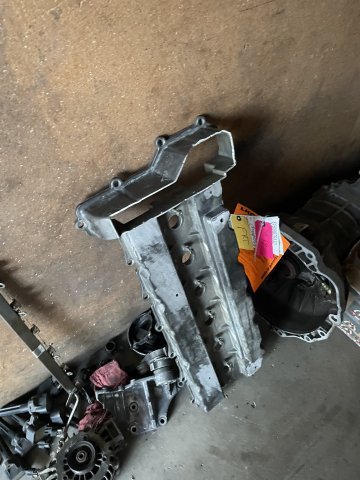
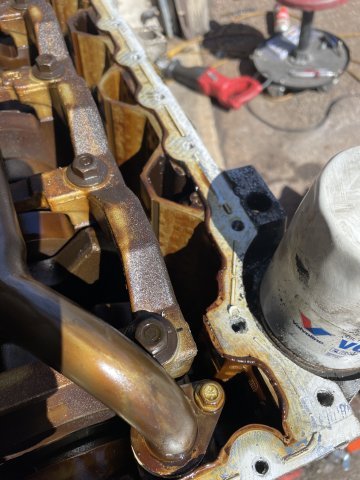
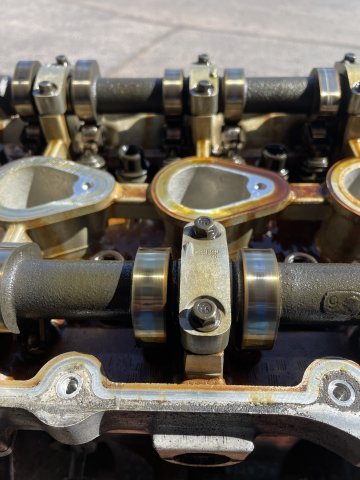
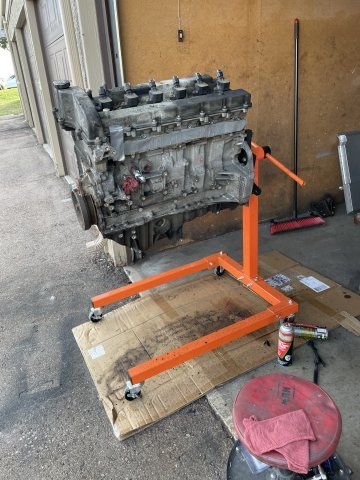
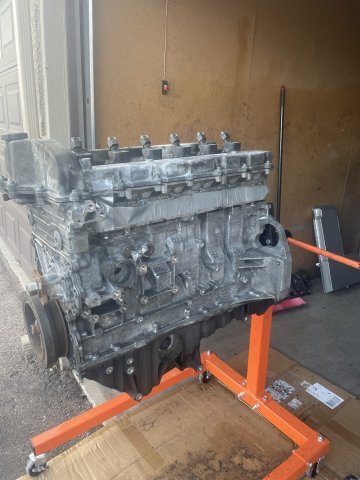
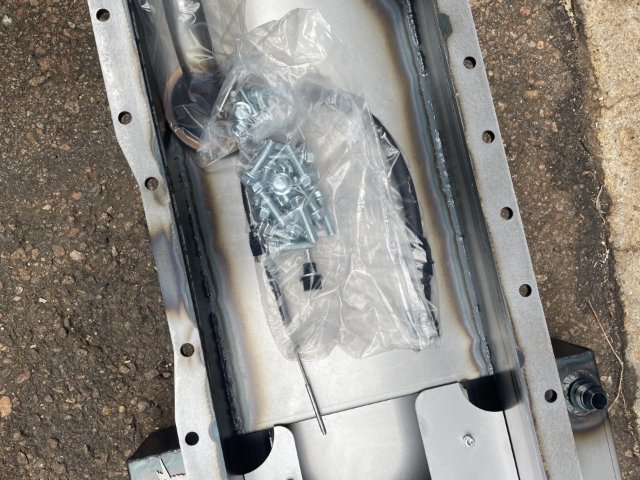
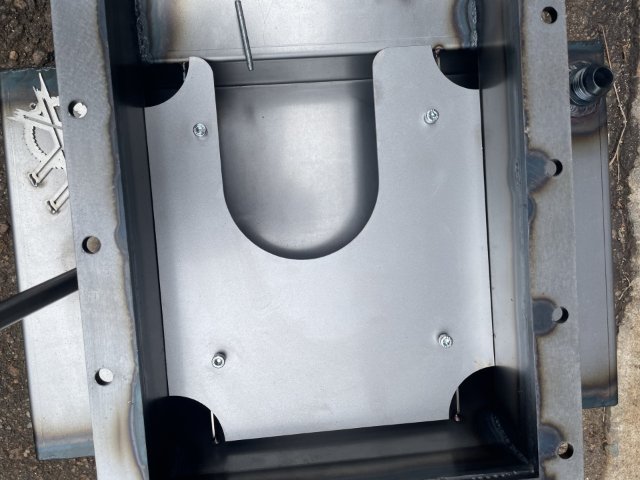
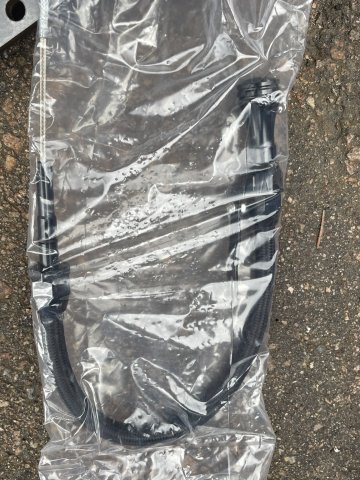
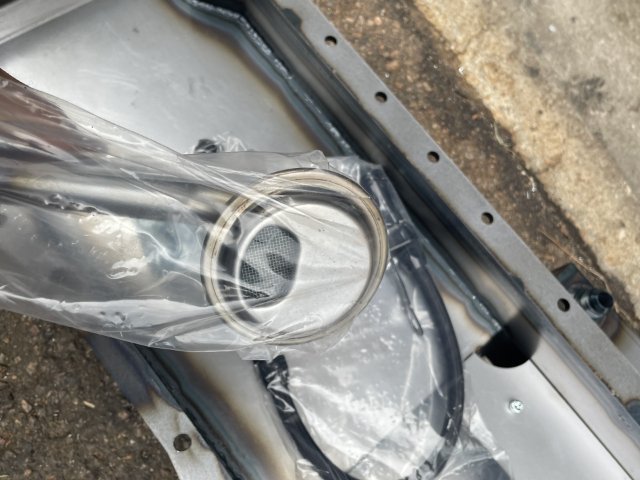
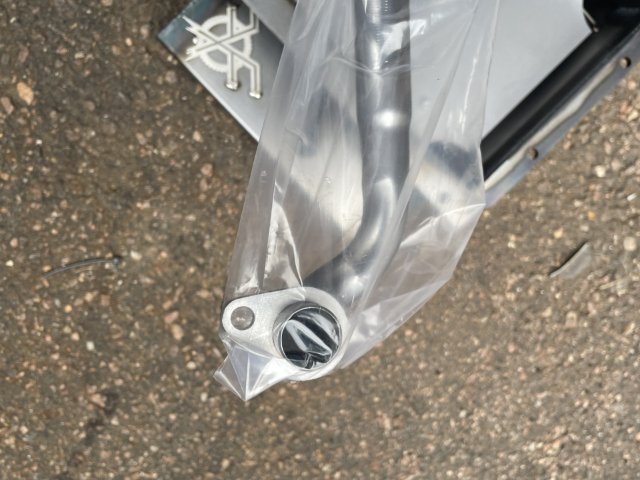
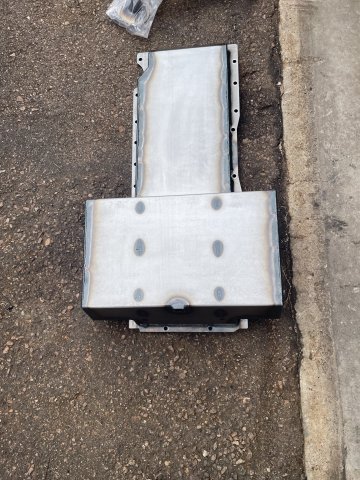
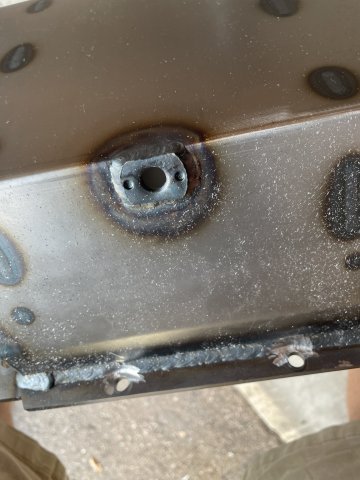
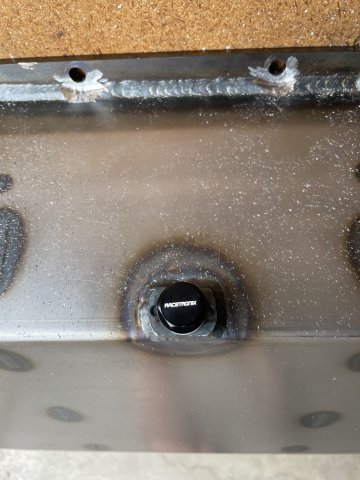
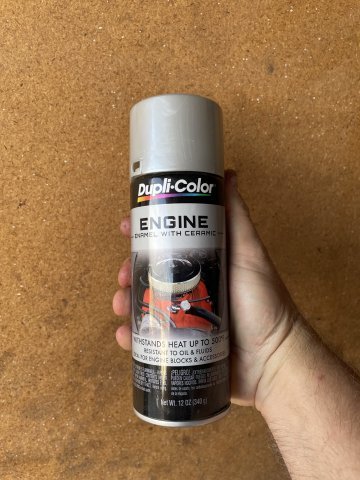
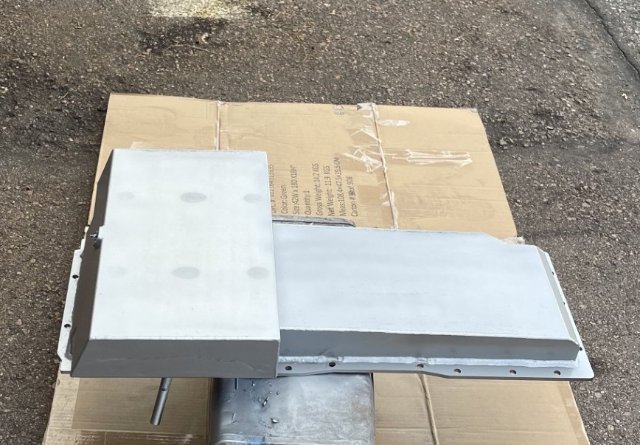
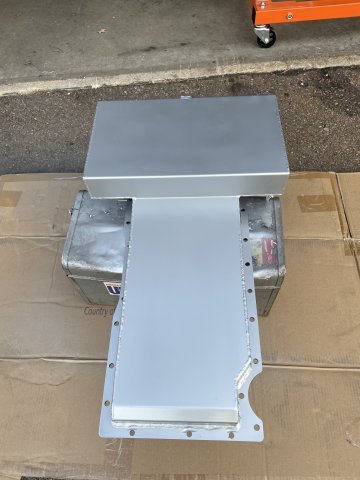
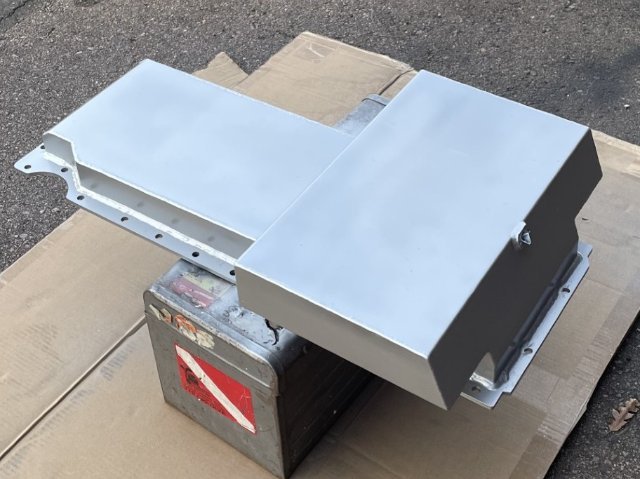
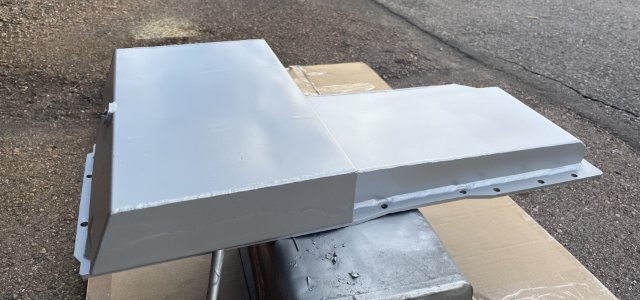
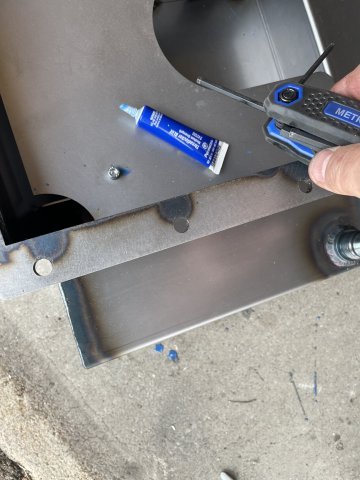
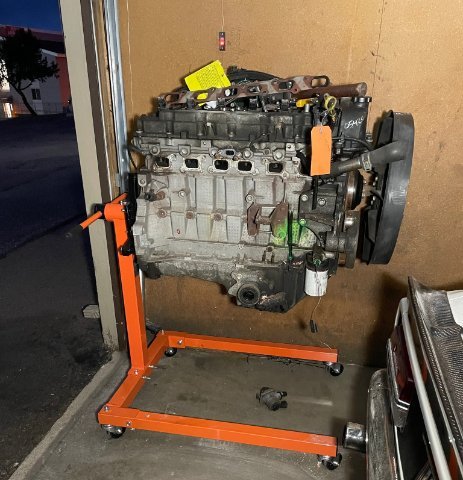
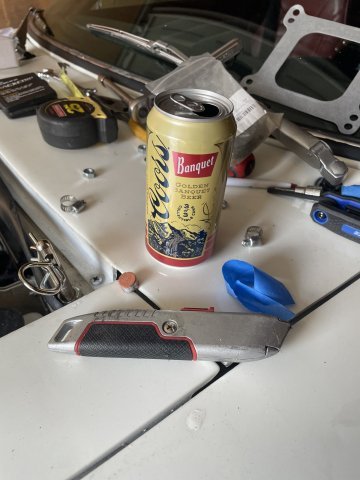
10-04-2025. I got some more 4200 work done today. I installed the modified pickup that came with my T oil pan from Forever Fabrication, and then installed the oil pan. It came with new bolts, and I used Permatex Grey to seal it. After that I jumped on the valve cover. It is a common thing on 4200's to cut down the valve cover on if you want to use it in certain cars, as the height of the engine causes issues. You either cut a hole for it to poke through or cut it down. the 2006-2009 4200's have a cast aluminum valve cover, so pretty straight forward. Using my die grinder, I cut the top out and then ground most of the other stuff off I didn't want on the cover, and drilled the hole in the back for my oil fill. I picked up this sweet cap and threads on Amazon for under 10 bucks. So, after the initial cut I then used a marker and drew some lines for further cutting and then drilled small holes so when I took it off I could draw a pattern. as the pics show it took off a bit too much where the intake cam is.....but no worries, I kept some of the cut off aluminum, and can cut strips to put there it will all be welded in Next, I will use a cereal box to make forms for how I need to cut the plate aluminum, and get it all welded up, sanded down and off to polishing. Block is about 90% ready for paint, just more corner cleaning. Going to go ahead and paint the block silver....I don't want to be tied down to a color, a neutral color is best, and the silver makes it easy to just use a thin coat. I will also probably use clear engine paint over it to give it a little more pop. Pics follow.

-
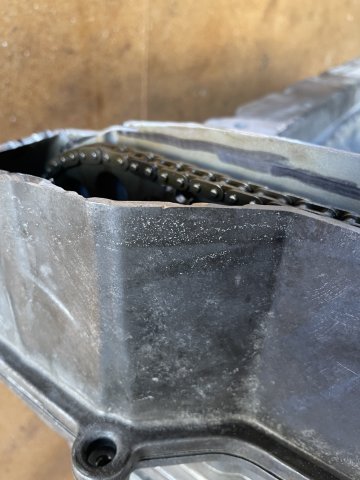
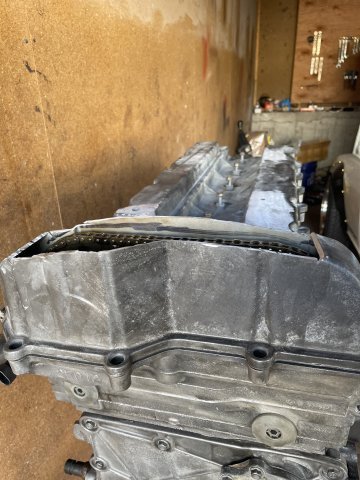
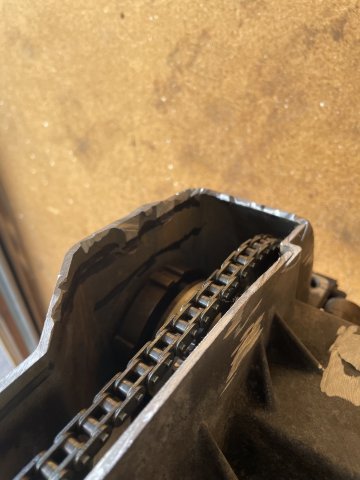
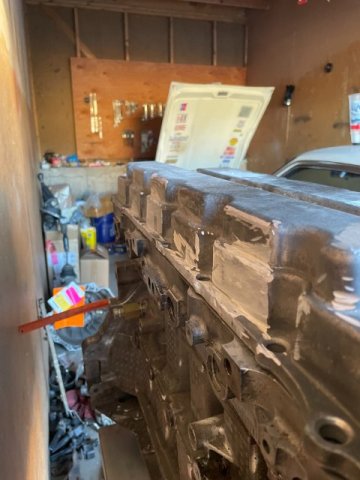
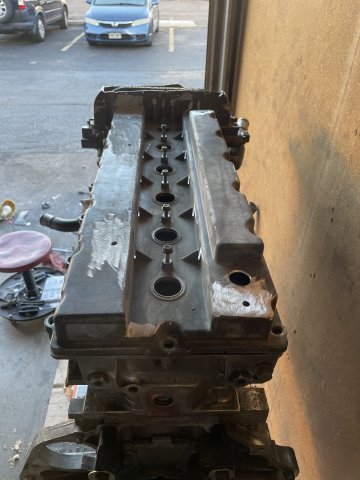
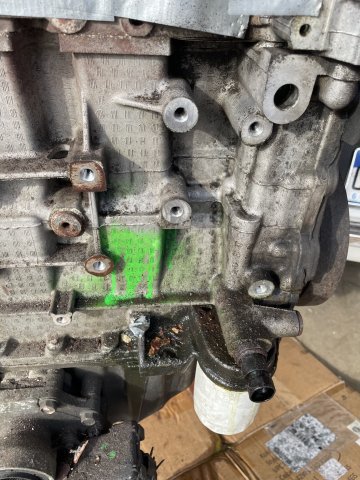
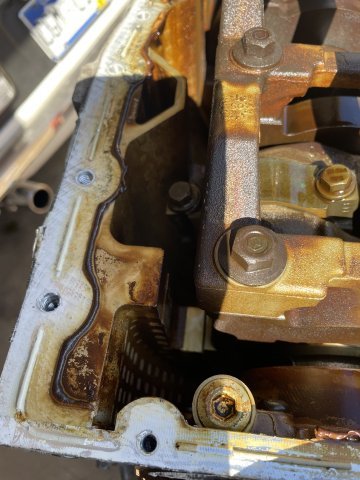
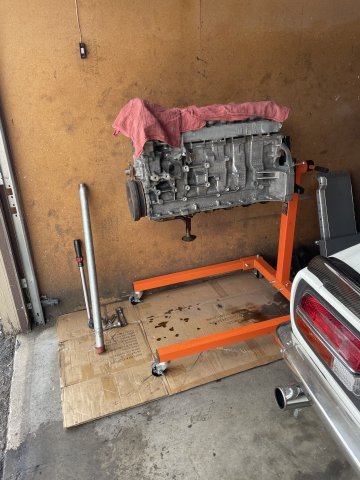
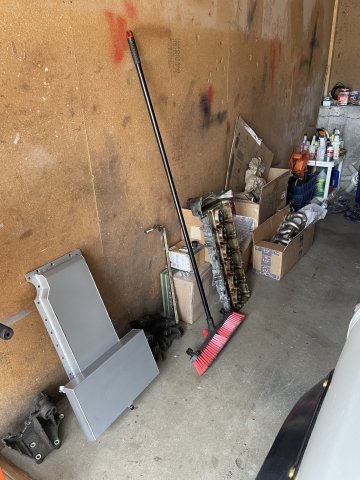
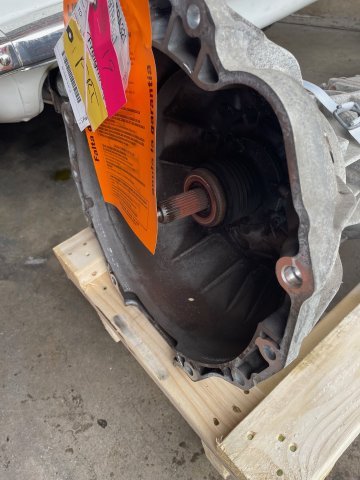
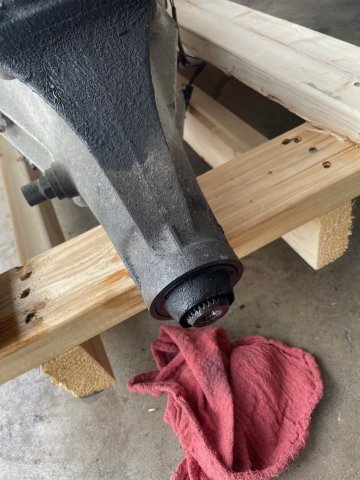
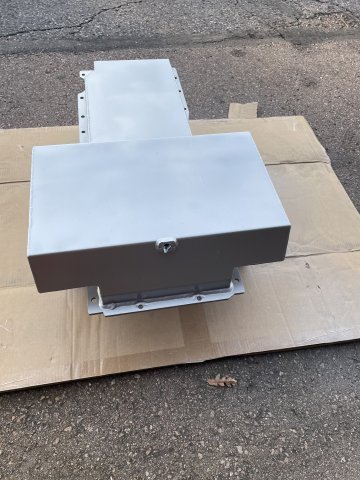
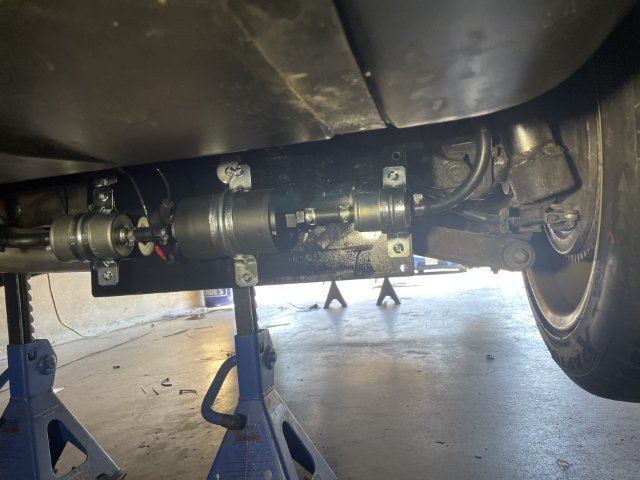
More work on the 4200 today. cleaned up the rest of the block and head, and then pulled the oil pan and cam cover. NO SLUDGE. very clean inside. I got the outside of the cam cover clean enough to at least get started on the modifications I will do to it (add an alloy oil fill to the back, add a breather port, shave off 2 original ports, cut off unnecessary brackets, weld up the original oil fill hole and probably lower it a bit as it is very tall . To fit under a Z car hood it has to be chopped about an inch......although a small rectangular hole in the hood with the polished cover sticking up can be made to look really cool. Yeah I had an adaptor snap on me, the crank bolt is SO tight, I will probably need heat and PB blaster and smack it a few times to shock the treads to get it off. I need to clean behind it and it needs to be cleaned up and painted.......I wonder if the heat will ruin it? Before I called it a day, my AR5 transmission arrived.....in need of a rebuild, the pilot shaft has wiggle room. pics follow:
-
on Youtube, you can see the 280Z a guy is building right now. actually fits very well! (3) Red Hot Channel - YouTube
-
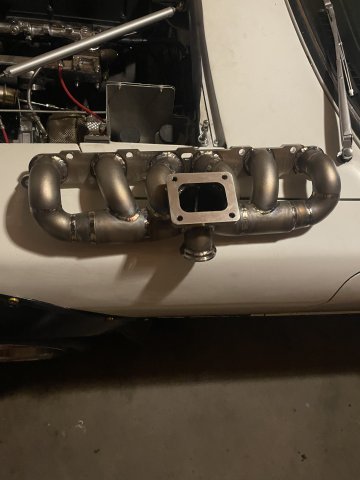
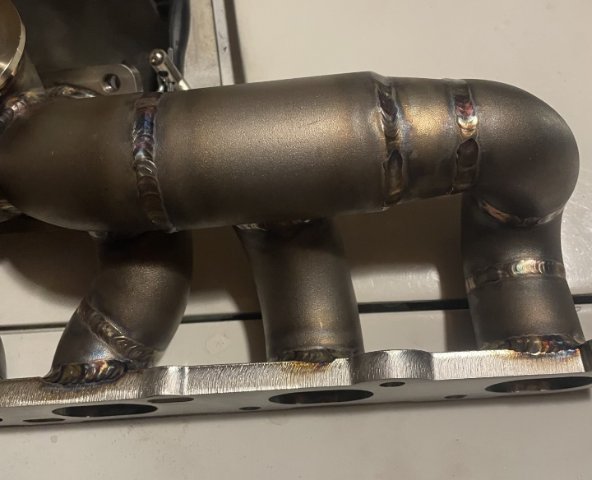
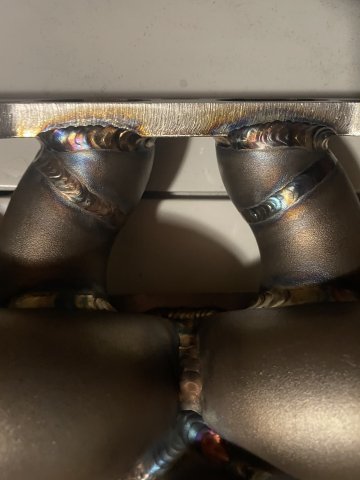
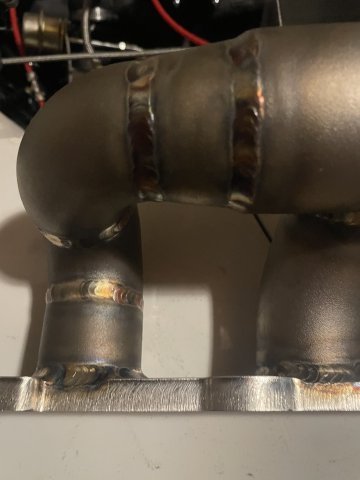
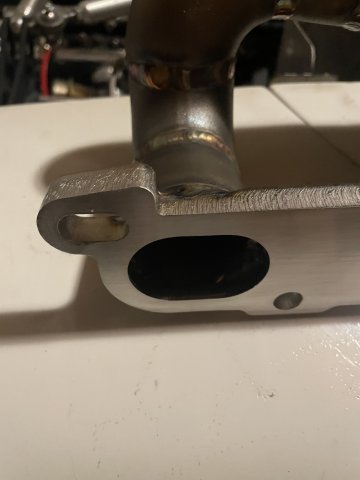
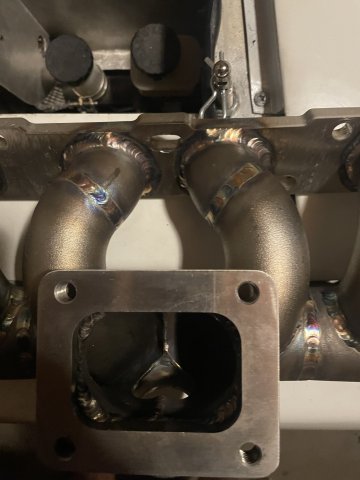
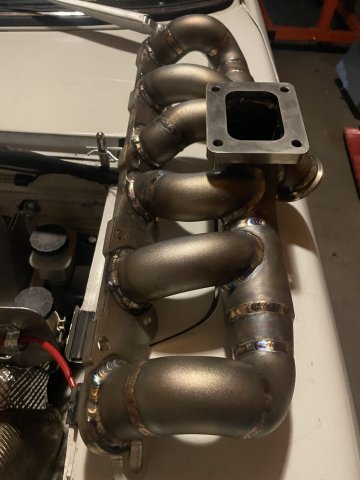
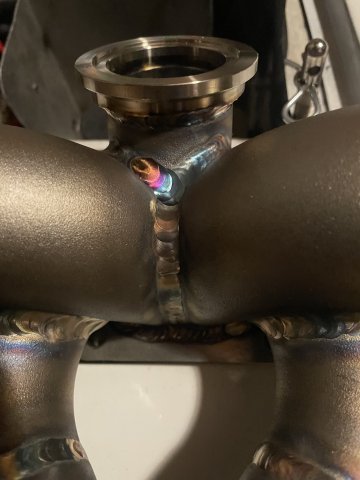
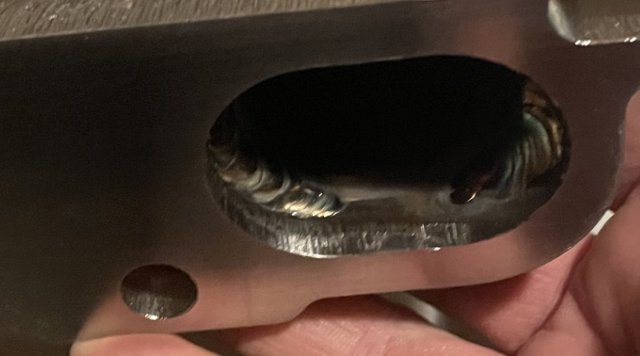
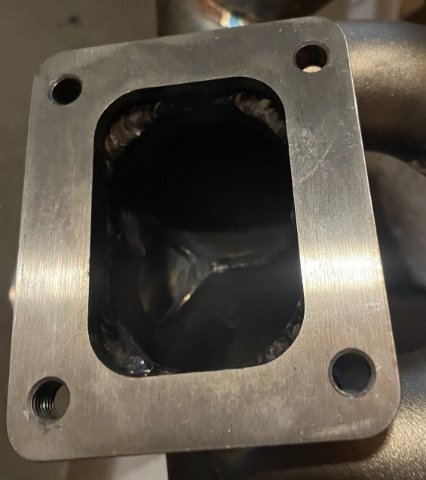
My turbo header from Forever Fabrication for my 4200 build came in today. Top notch craftsmanship as expected:
-
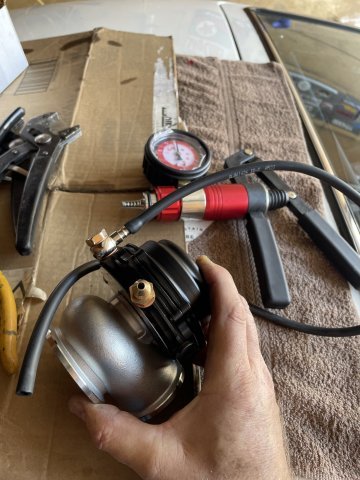
09-27-2025 More 4200 stuff. I stripped off all the unnecessary junk and was able to get one side of the engine cleaned up. I didn't worry about the oil pan as it is going to junk pile soon. Progress....sometime slow but moving forward. Pics show the cleaning in stages on that side. I got the springs into the external wastegate, and it shows a crack pressure of 8 psi and wide open at 12 psi. Not too bad.
-
oil pan:
-
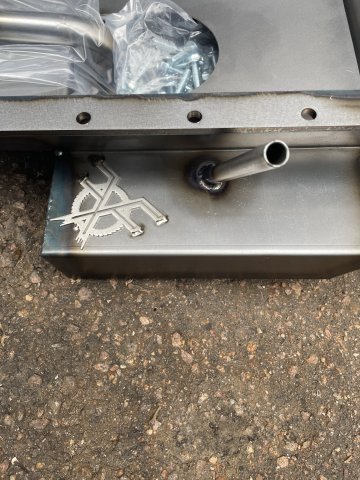
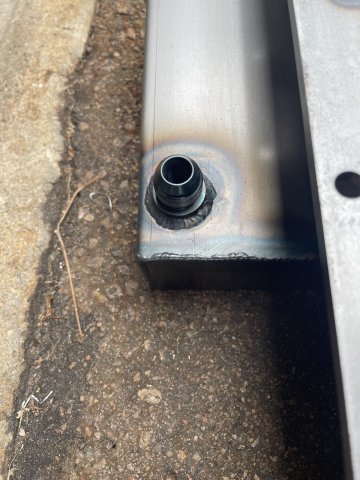
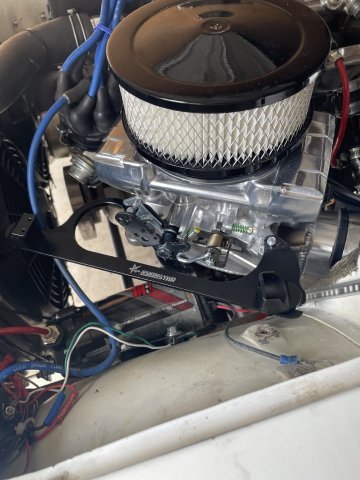
So I went ahead and bought one off of eBay and it showed up the other day. It is a 2006, which is the 2nd of 3 variants. It has larger ports and larger valves than the 2002-2005 models. I have ordered a few of the high dollar pieces needed so far, my T shaped oil pan made by Forever Fabrication has arrived and I have it in silver engine enamel, within a few days my turbo header from the same shop will be here and I am awaiting the intake flange, runners from DMZ and plenum from eBay I will use to put together and have welded, then have the welds sanded smooth and either polished or powder coated. I picked up another S30 engine crossmember which I will use, strapped tot eh bottom of the engine and measured from my Z car to fashion the motor mounts. An Aisin AR5 5 speed is also on the way, and my Turbo is here, I ordered a T76 with T4 flange off of eBay, along with a Tial knockoff external wastegate. A chromoly 17.1 lbs flywheel from Atlas Industries is on order. Cool stuff!
-
Yep. the 5 cylinder hasn't caught up yet to the six. the six cylinder 4200 is REALLY taking off now. I have one I am putting together, and possibly put into another Z at some point. It will be turbocharged, etc. you start with 291 horsepower and 270+ torque, and then go up from there. weight is 350 lbs. They are a beast.
-

My Z car log....small jobs done and fun things
A to Z replied to A to Z's topic in S30 Series - 240z, 260z, 280z
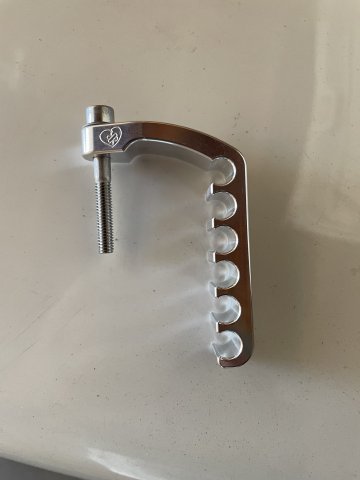
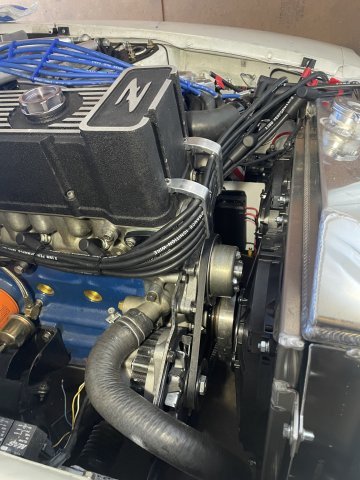
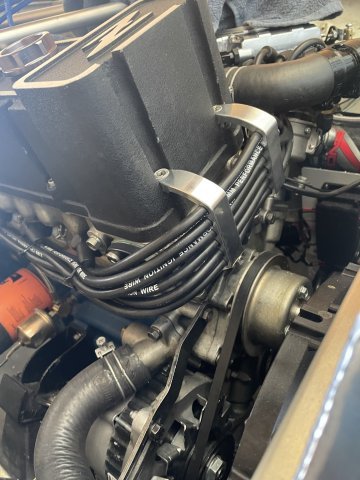
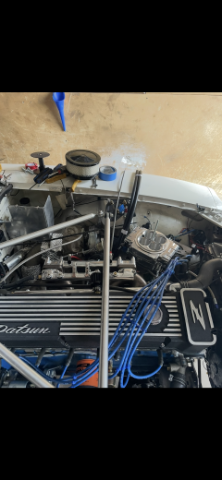
Ok, well back from the EFI conversion posts, back to just regular fun stuff posts. I decided to try custom length spark plug wires again. I ordered a set of the wire "cranes" from Lonely Driver Company and then ordered a set of 8.5 wires form Amazon and installed them today. As the pics show, it made more of a difference than I thought.
-
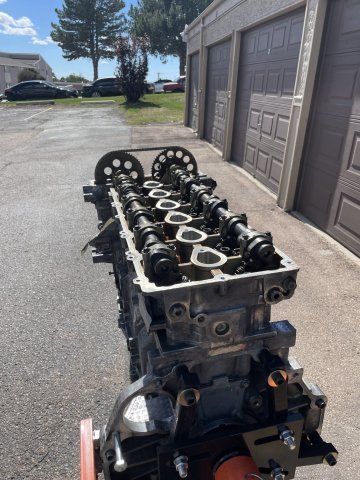
I am beginning the build of a GM Vortec 4200, also known as the ATLAS 4.2 straight six. it is all aluminum, DOHC, VVT on exhaust cam, makes 291 hp and 270 tq stock. Peak torque at 1800 RPM and hold it to 5000 RPM. A lot of these are being built on YouTube, etc., and I decided to build one. I will also be using the Aisan GM AR5 5 speed transmission which came in the 4 cyl ATLAS 2WD Chevy Colorado pickups. bolts right up and I will get a custom flywheel to work.
-
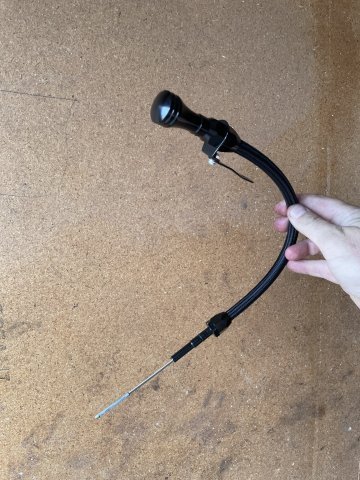
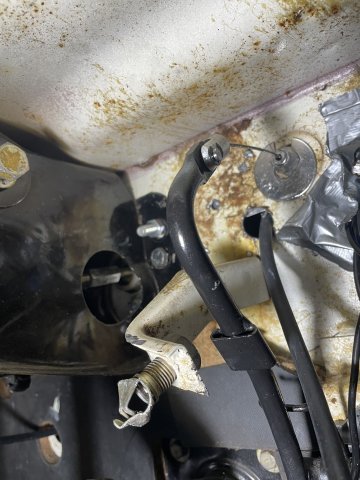
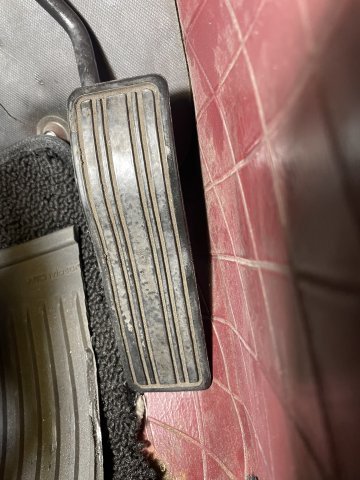
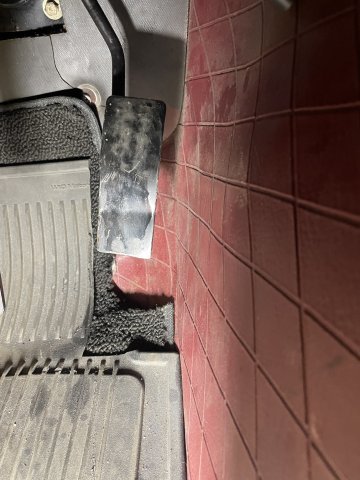
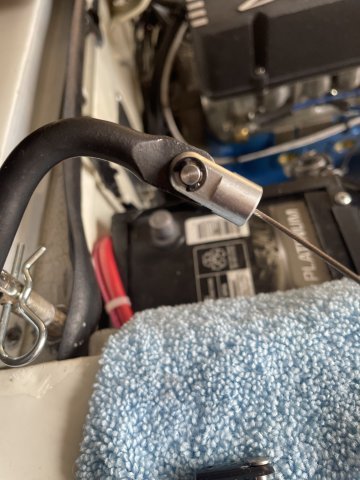
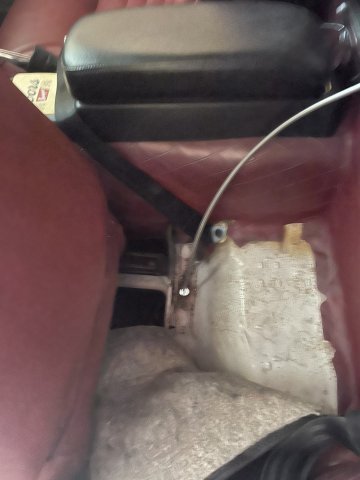
I have had a lot of problems with the throttle cable and related parts. a late night job came up with an extremely basic solution for cable hookup at the carb....I made a bracket and got a brass cable stop at Auto Zone, and the gas pedal bottom edge hitting the floor keeping full range from happening were the culprits. FIXED.
-
Adam Sylvester at Datsun Rescue or Jenny at Junkyard Jenny's.
-
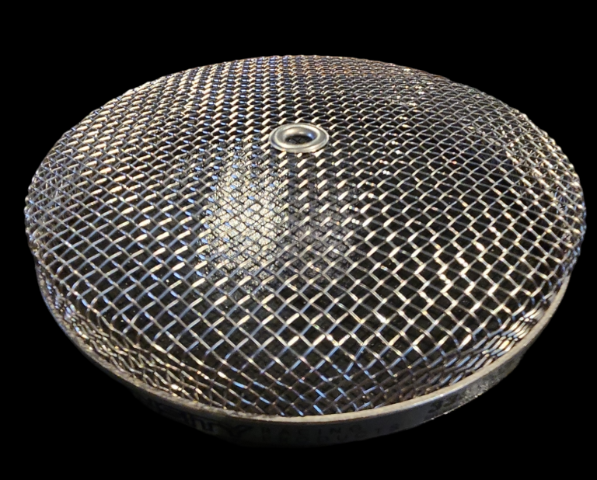
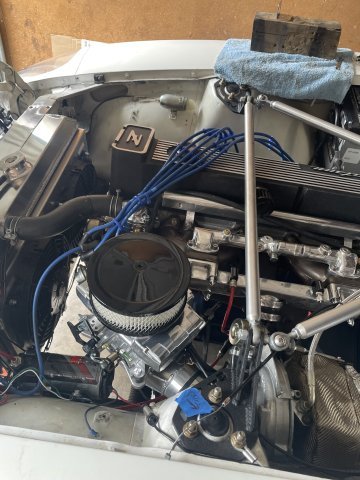
Ok, so update....thanks to those who warned me about these Edelbrock foam air cleaners. I started reading, one back fire and they will catch fire and turn into goo and run down into your carb/TBI !!!!! oh no! So, i looked online, because this filter was also hitting my hood. I found this company: Pro Series Screens - Intensity Racing Products I bought the mesh screen to work on my carb mouth. So glad you guys said something. WHEW! see pic, I got the low profile with the single hole.. 98 bucks....115 shipped. Saved my life.
-
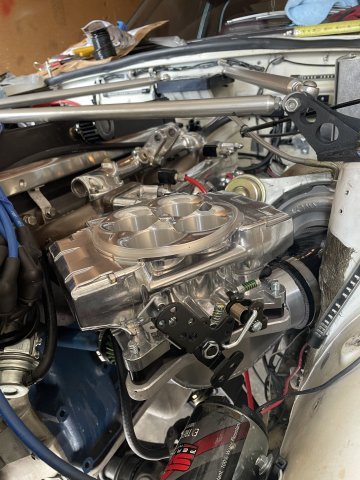
Day 4 of EFI install complete. ALL DONE. Time for remote tuning. pics and 2 videos at the end V1.MOV V2.MOV
-
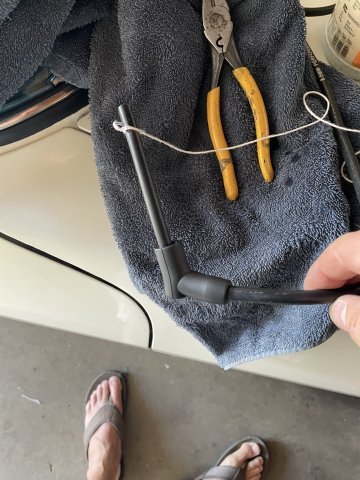
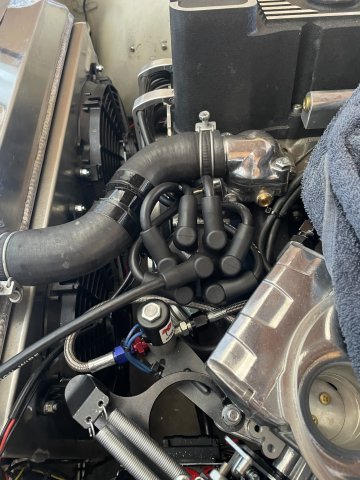
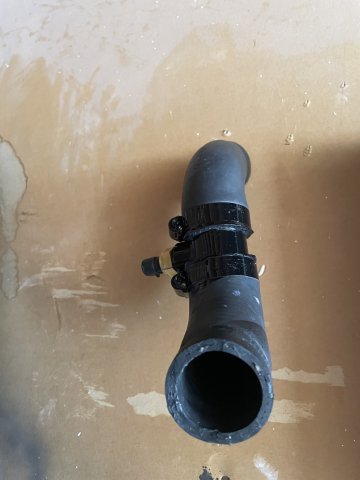
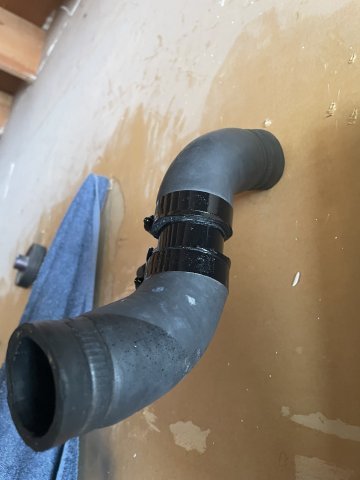
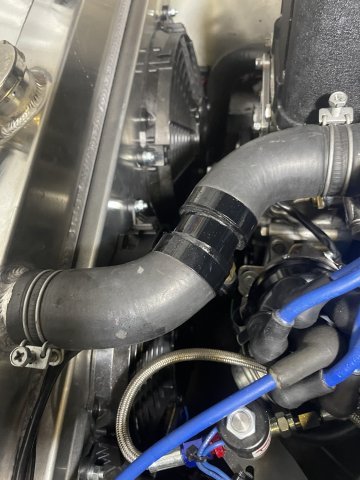
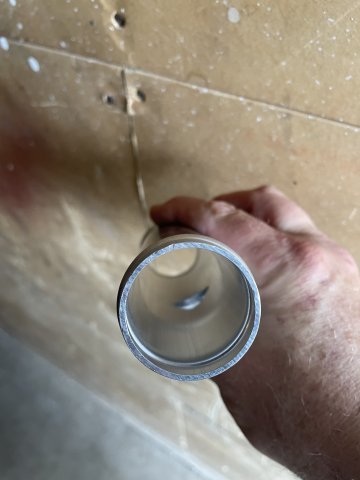
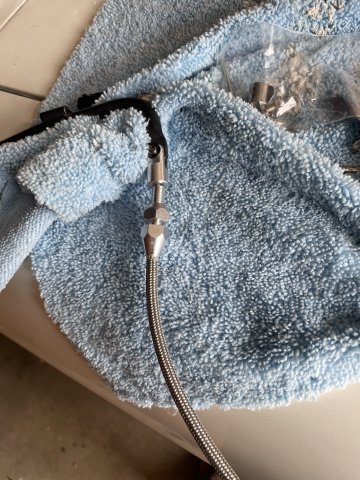
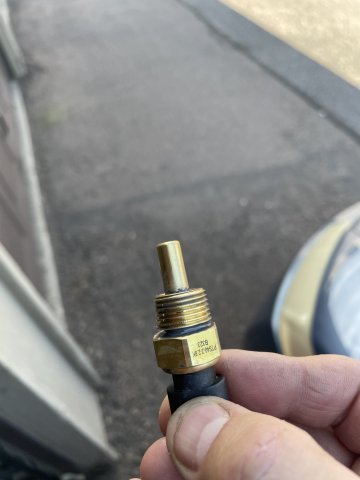
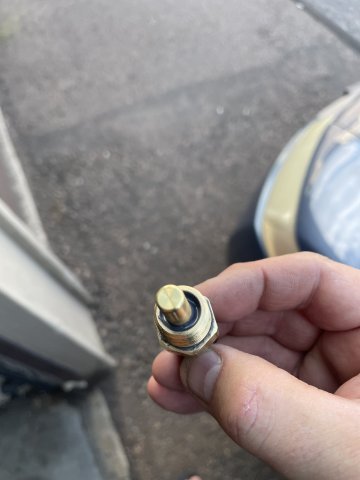
I disconnected my throttle cable and lubed it up, now it moves freely with no drag, in doing so, I re-arranged some of the items attached to the carb thus cleaning it up. A short amount of time to work on stuff today and I'm happy I was able to get it done. Also was able to tighten the spring for the secondary butterflies which is basically required to keep them working right. My thermostat probe adapter that goes into the top radiator hose also arrived and snapped a few pics.
-
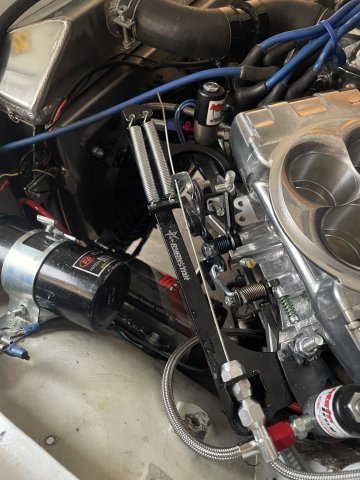
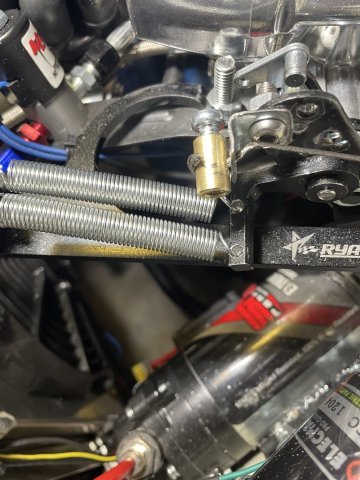
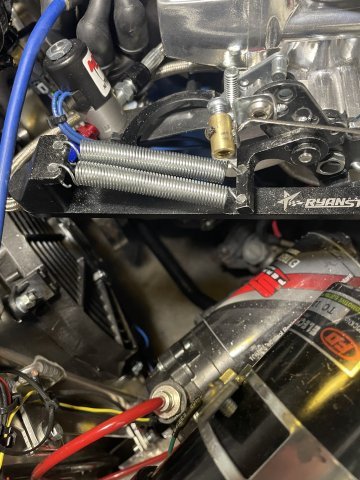
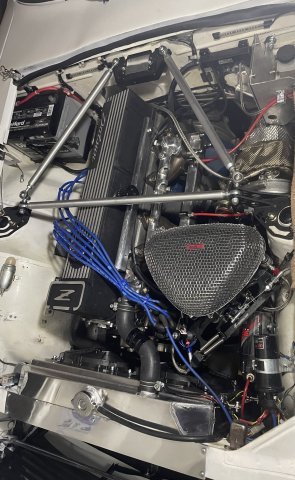
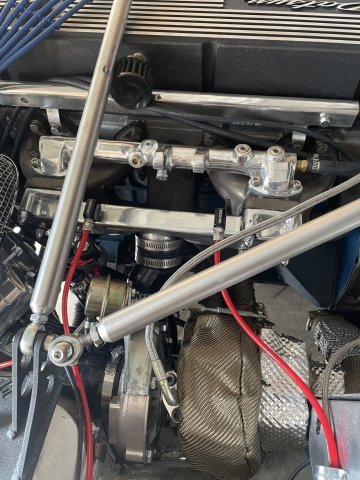
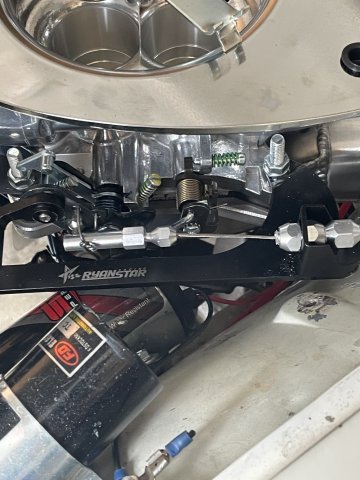
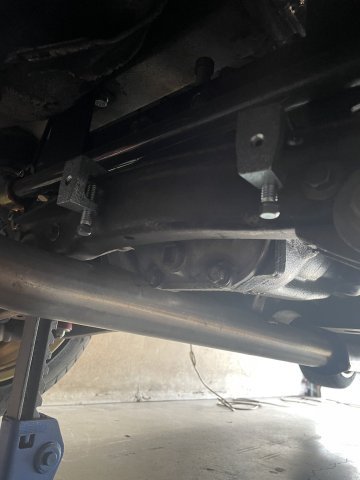
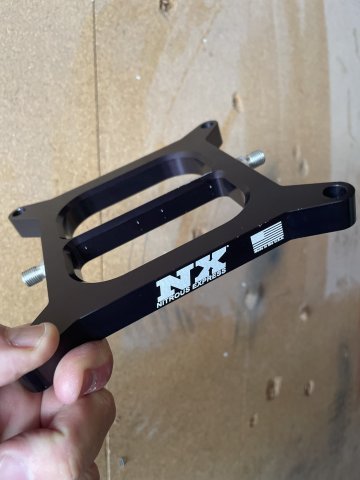
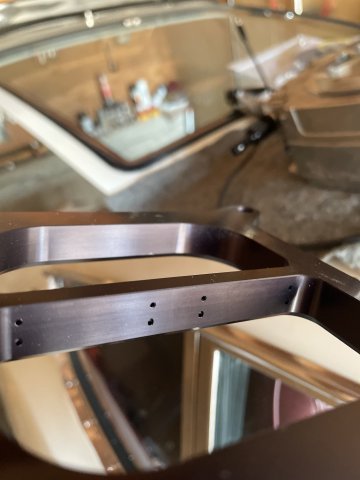
I was able to squeeze in a little time today and build a brace to hold my carb and intake up. Heim joints and all thread.
-
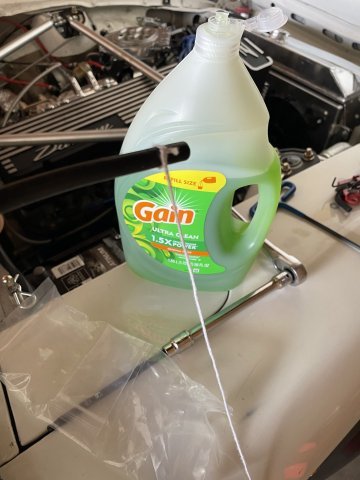
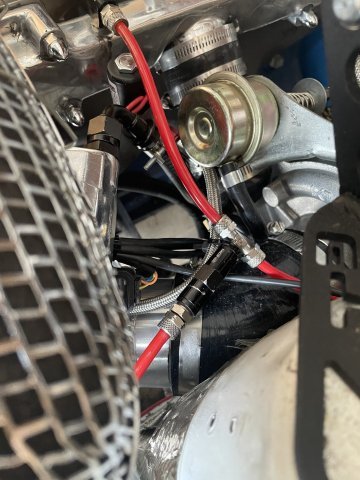
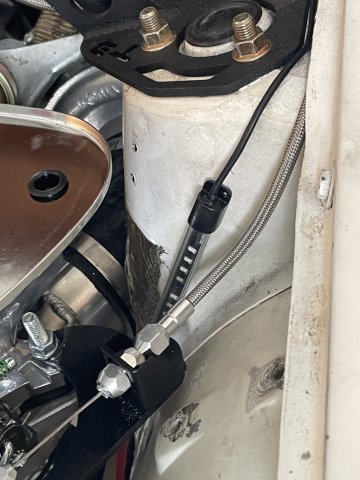
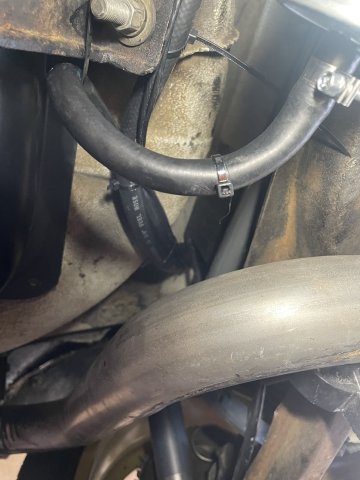
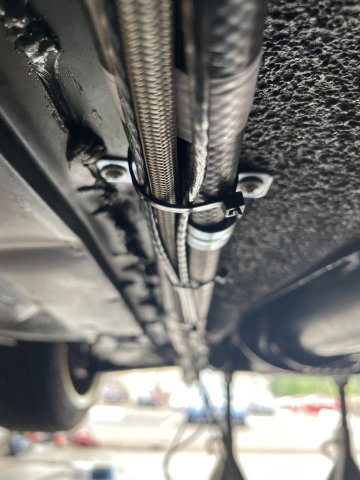
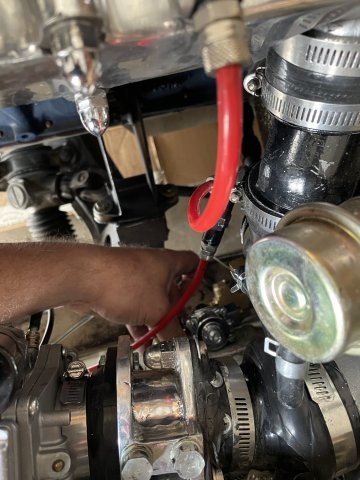
I got in a little bit of time on the EFI project today. re-ran my water meth lines....the way I had them was problematic.....kept trying to pinch the lines. Also figured out how to run a brace from the engine to the carb intake. I have some heim joints and 3/8" all thread....will come off of one of the 10mm smog pump holes in the block and then up to the bolts in the back of the intake. Small steps.
-
Day 3 EFI install, almost done!
-
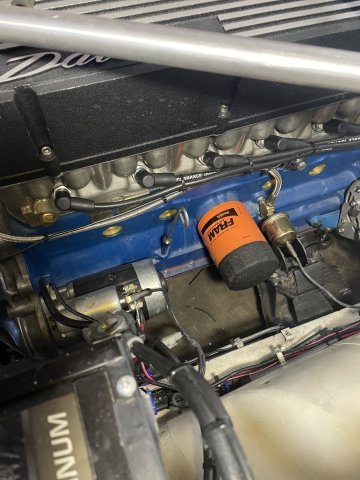
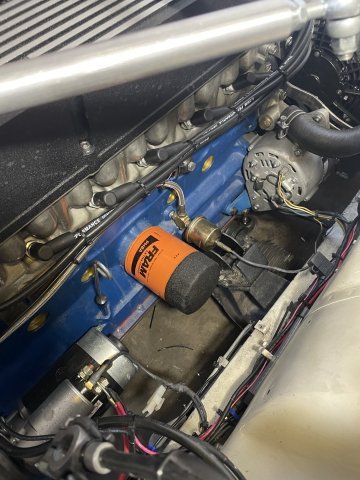
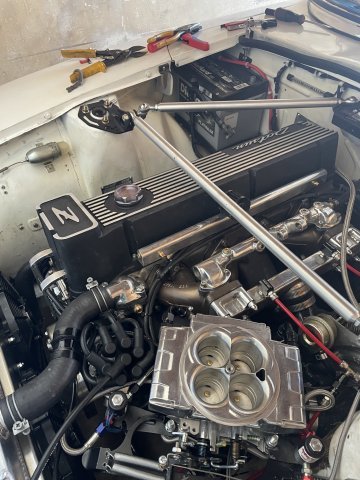
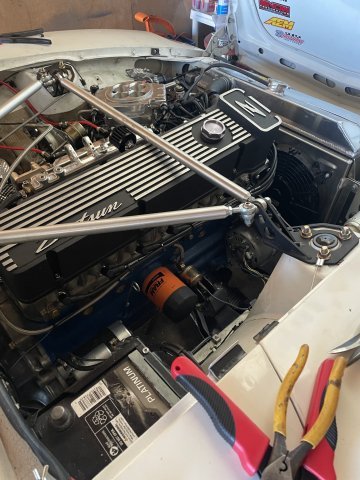
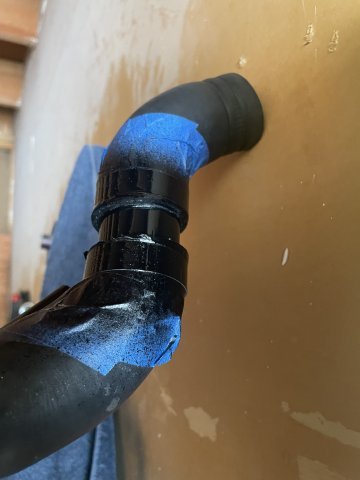
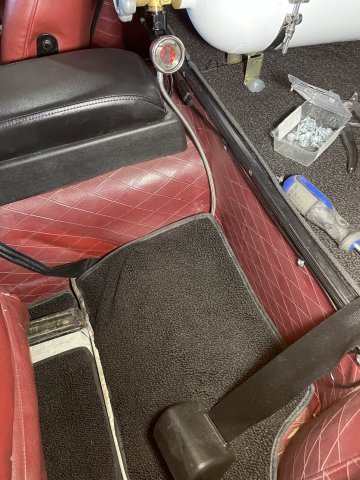
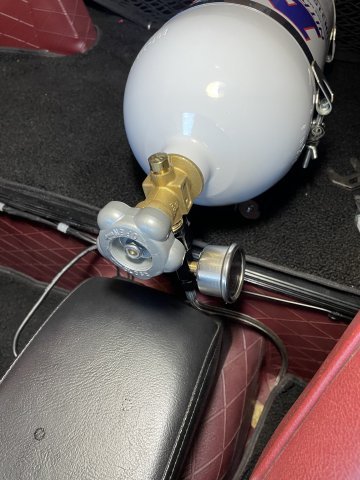
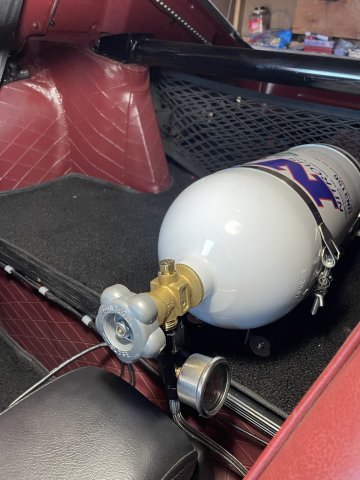
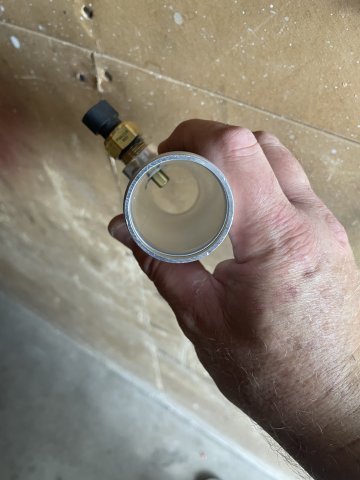
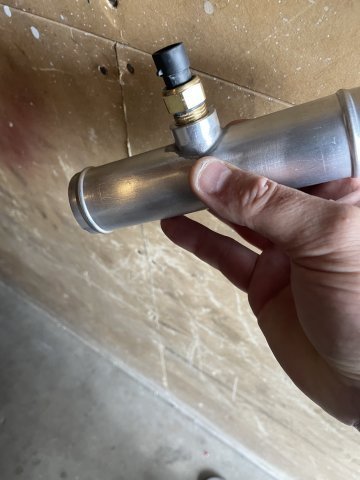
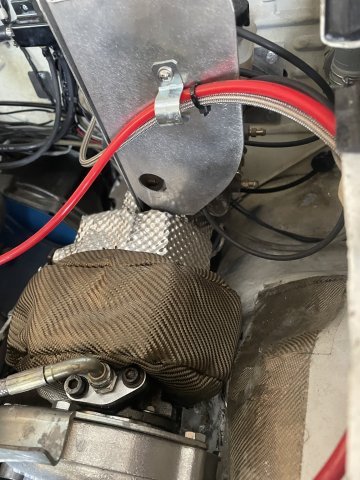
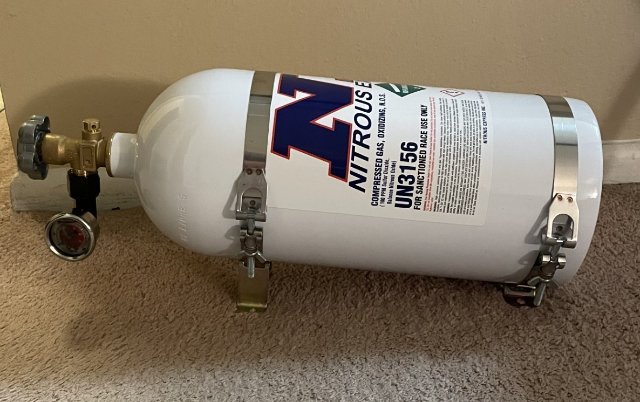
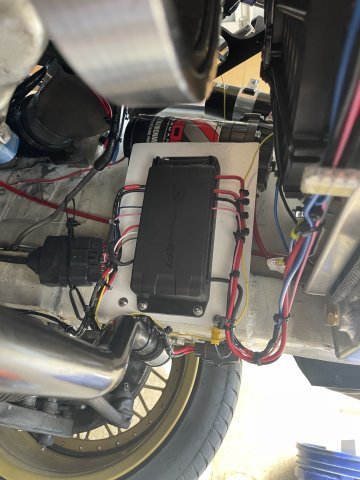
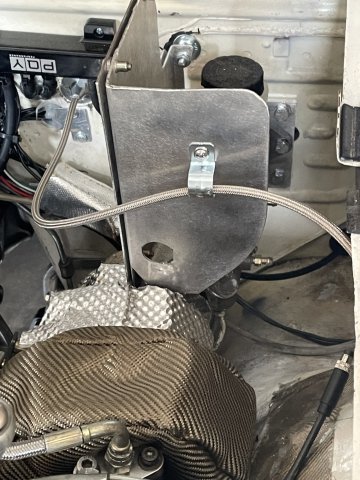
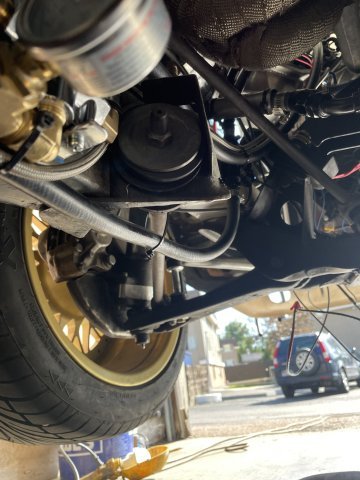
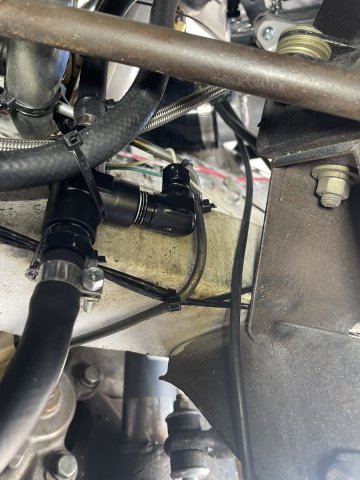
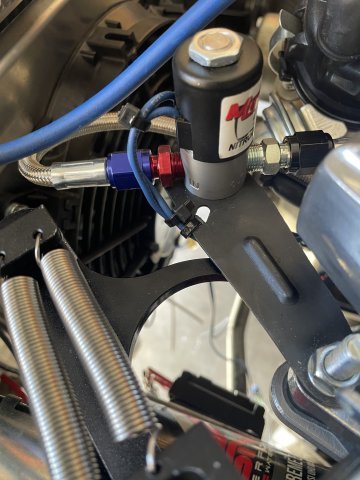
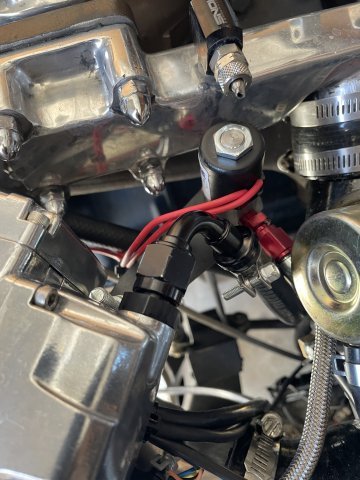
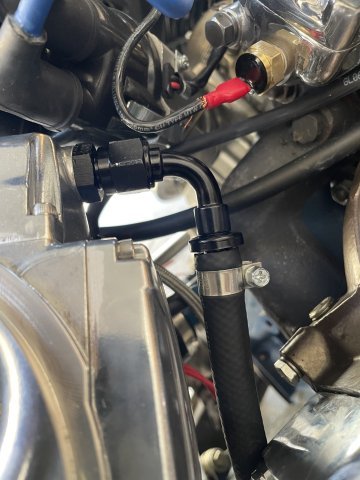
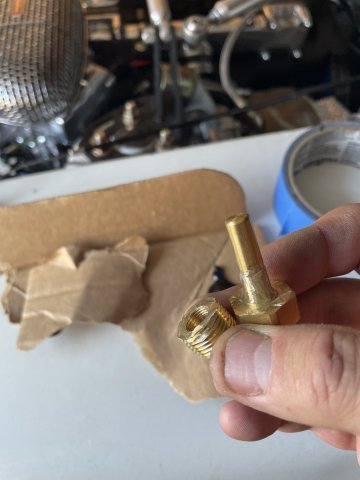
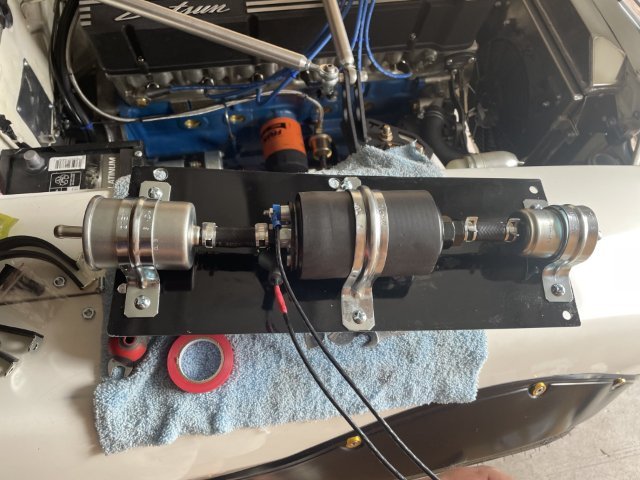
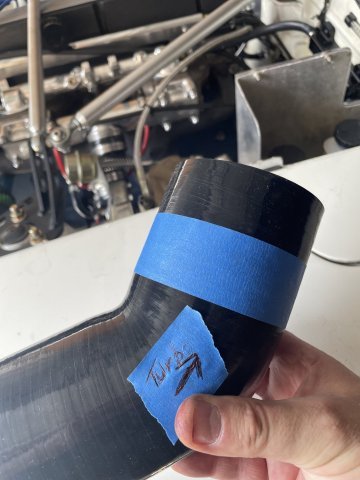
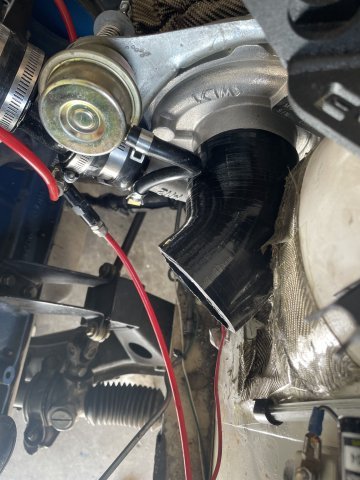
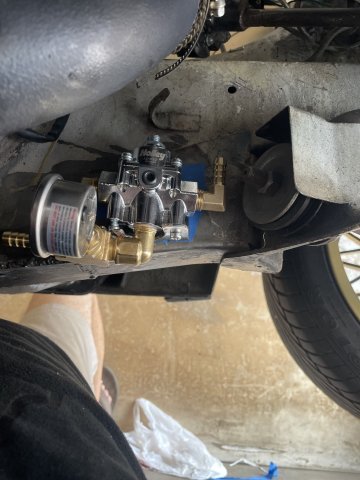
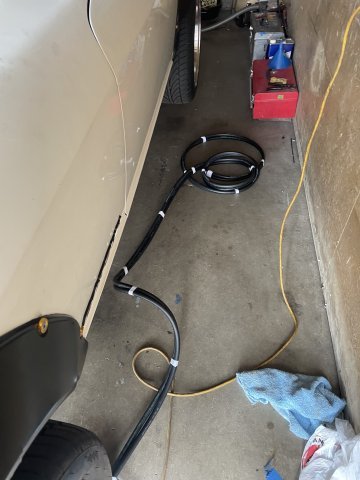
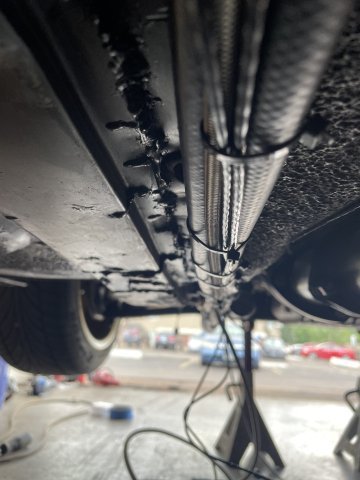
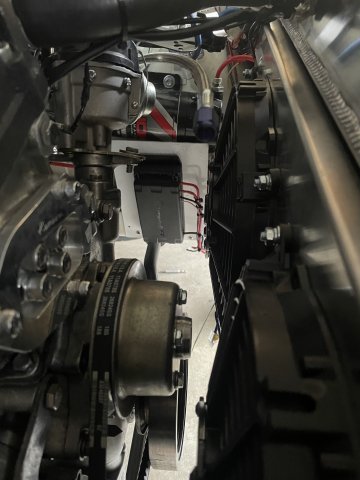
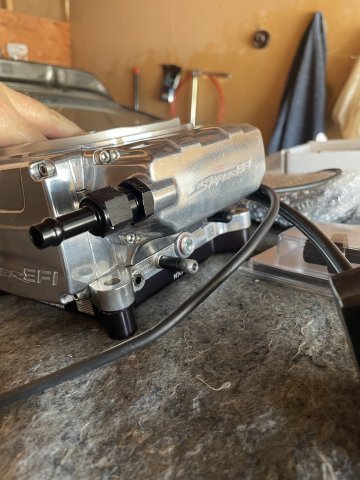
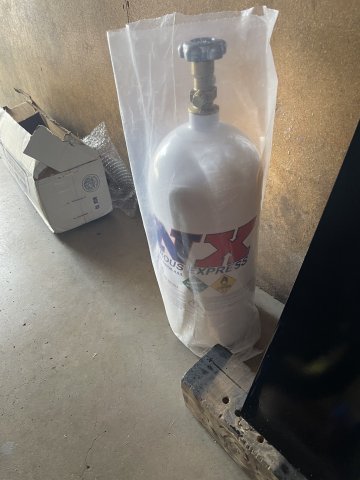
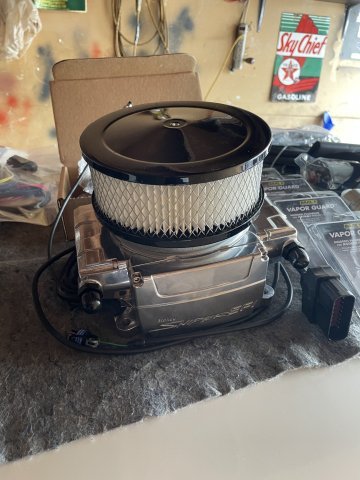
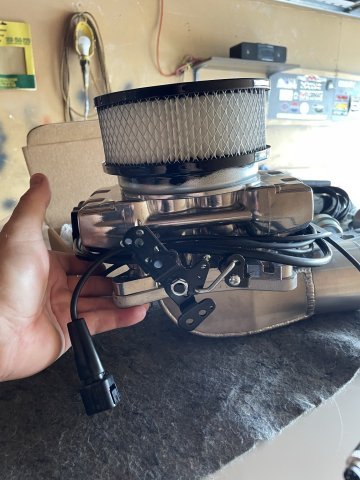
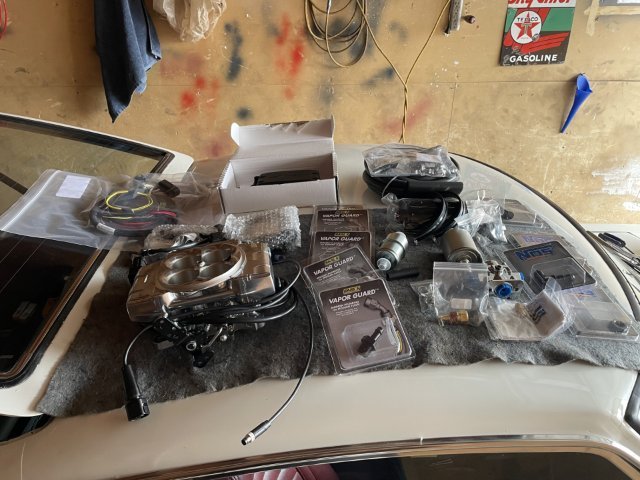
08-21-2025 Day 2 progress pics. Fuel system fully installed and wired up in the rear. Same for engine compartment. One pic you can see I abandoned in place the old fuel lines up in the trans tunnel. You can see the T fitting I installed where the nitrous line can be installed at a future date when I'm ready to melt my engine down. The temp sensor that comes with the Sniper 2 is too large, ONE other company makes one, and it's a very small one, smaller than the size I need to screw in. If I screwed it into a bushing there wouldn't be enough of the probe sticking into the stream of antifreeze to work right, so what I had to do was cut a bushing down on both sides. I tried to thread it on, but it wouldn't budge, so I ground down the threads on the smaller probe and got the bushing (which was now basically a sleeve) to fit over it. I JB Welded it together, and by tomorrow it should be ready to install. Wiring awaits me and some other little do-dad's, and the finish line is within sight. I had to change my air cleaner, as the round one was too high and hitting the hood. No one makes a thin air filter for it.......So I went with the tried and true Edelbrock foam one, and it clears. Here are some pics:
-
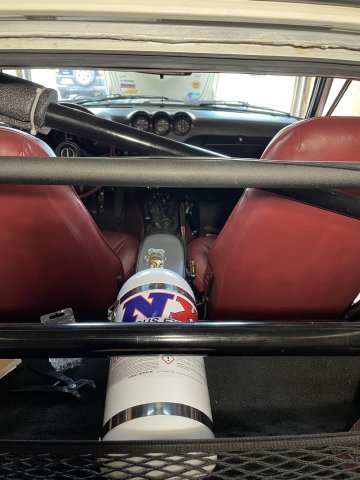
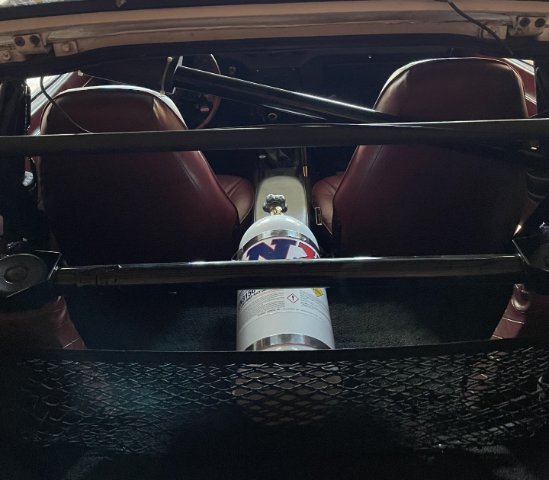
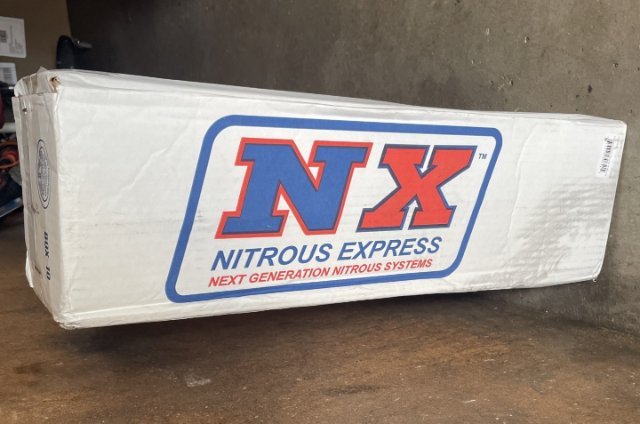
Well, thanks! I appreciate it. it's a build in progress, from SU's on a stroker, to a Crown turbo kit in pieces..... that I customized the majority of for a DIY setup using a motorcycle Mikuni HSR 45 with a flat slide, to now EFI. I am just improving the system I have had, 1 step at a time. The Nitrous is just for looks. If I were to use Nitrous with the turbo, I am not sure the engine would survive......its fully forged, but throwing 2 power adders at it at the same time?.........Eh
-
My Z car log....small jobs done and fun things
A to Z replied to A to Z's topic in S30 Series - 240z, 260z, 280z
Day 1 of installation. almost a 12 hour day and made some good headway. see below pics. click on pic. -
Day 1 of installation. almost 12 hour day and got a lot knocked out. Pics below:
-
My Z car log....small jobs done and fun things
A to Z replied to A to Z's topic in S30 Series - 240z, 260z, 280z
08-15-2025. Again, more parts arriving and I got a piece of 16 ga. steel painted up and then assembled my fuel pump and filters and laid it out and marked for drilling.
-
My Z car log....small jobs done and fun things
A to Z replied to A to Z's topic in S30 Series - 240z, 260z, 280z
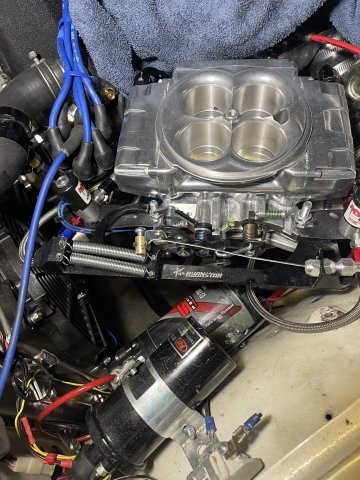
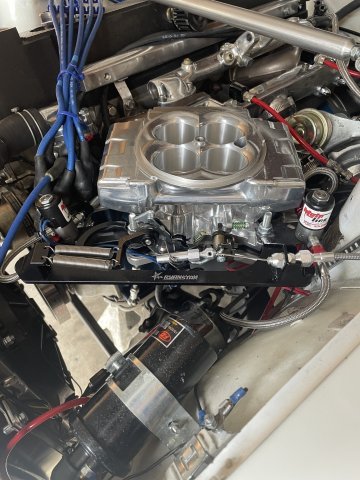
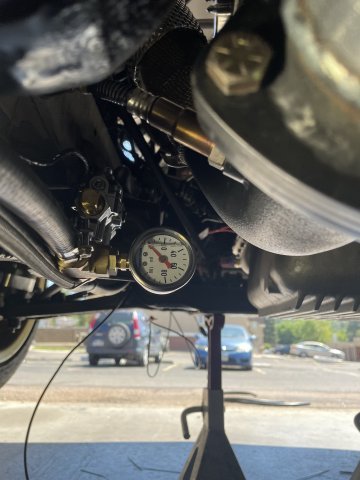
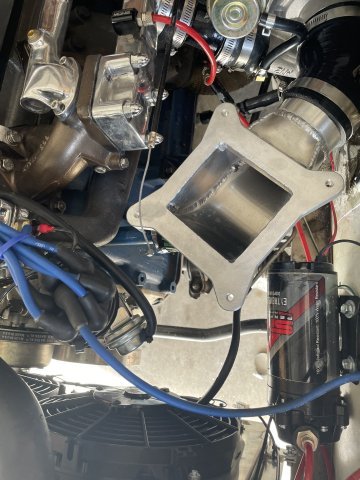
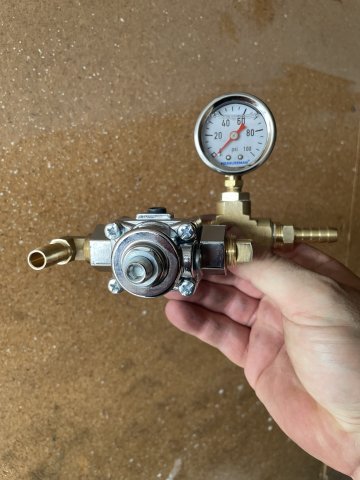
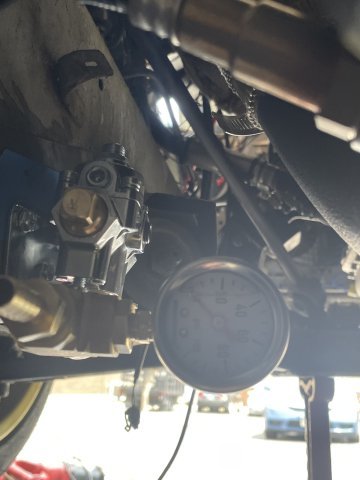
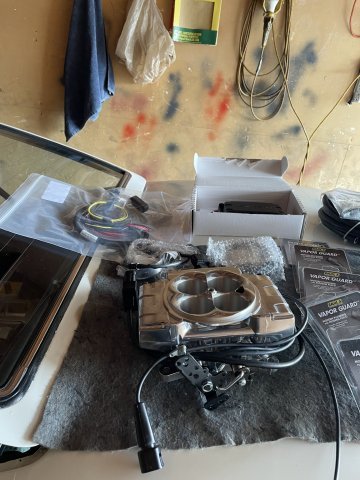
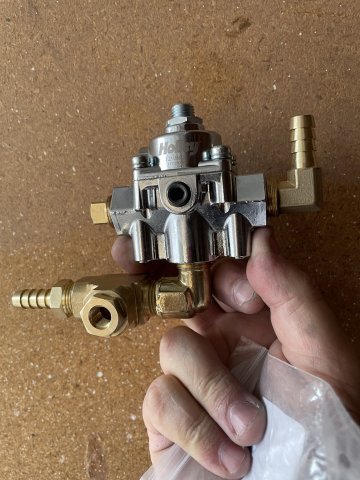
More parts came in today. Sniper 2 arrived, laid it all out, took some pics, and went ahead and used some thread sealant and put the pressure regulator together, and tried to take a pic of where it will be mounted. Psi gauge still in the mail. It will be "fun" making room for this HUGE sniper. There is a "hole" there, just have to get a couple cuts just right so everything fits. Took a few pics, first one is the "Master Kit" which is the fuel system, and it came with some NOS fittings.......then the entire deal and held it up on top of the intake and air cleaner....looks like I will be getting a thinner air filter to go in it, to clear the hood.