A to Z
-
Posts
1077 -
Joined
-
Last visited
-
Days Won
34
Content Type
Profiles
Forums
Blogs
Events
Gallery
Downloads
Store
Everything posted by A to Z
-
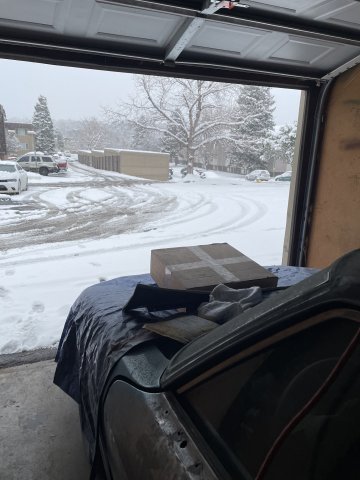
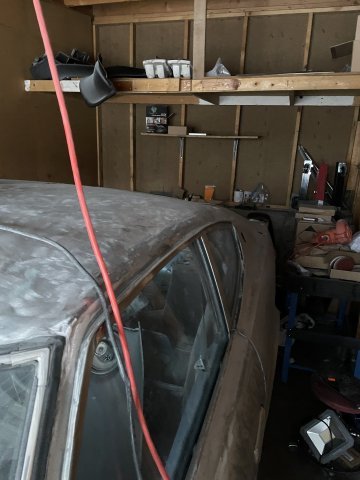
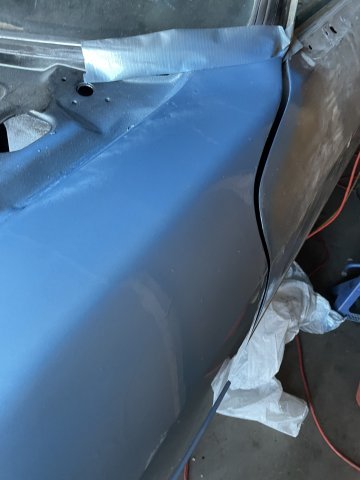
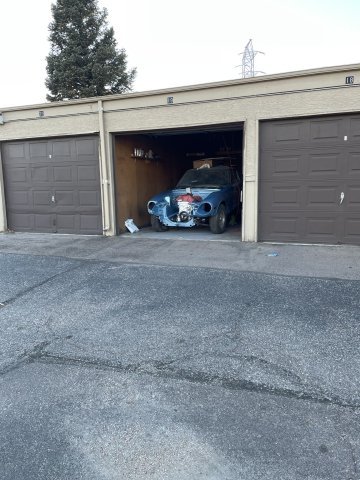
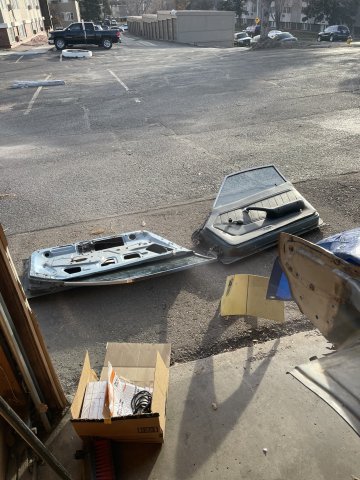
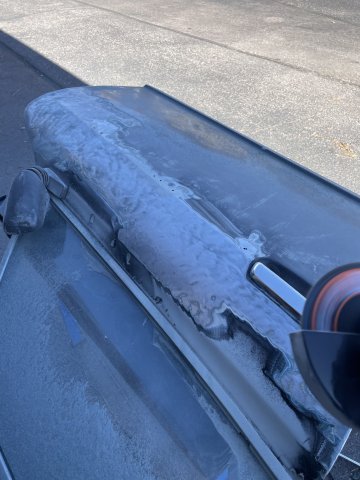
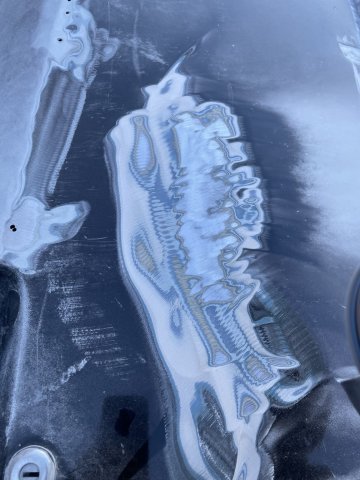
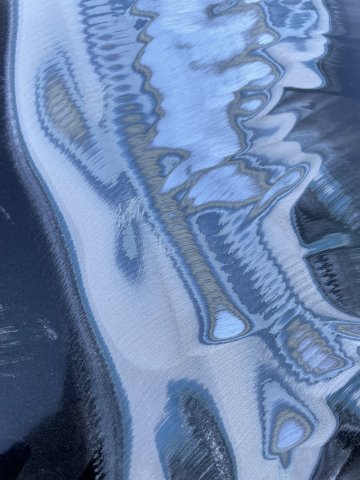
12-03-2025. At home, and it is COLD (20 degrees) and snowy. I put on 3 layers of clothes and went out to remove some more old paint off the 260Z. Hands and feet got cold, otherwise not bad. had to stop twice and use my leaf blower to blow all the paint dust out of the garage. amazing how much is created....and as usual this paint is VERY hard to remove. 60 grit flap disc on an angle grinder. I will have to go over all panels with a DA sander and 80 grit to get it smooth......way too cold to put filler on it, but I will start blocking it out once the weather gets warmer.

-
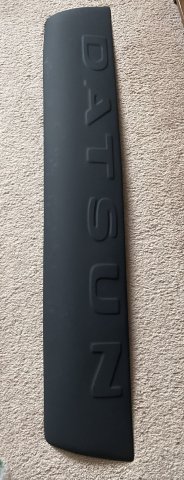
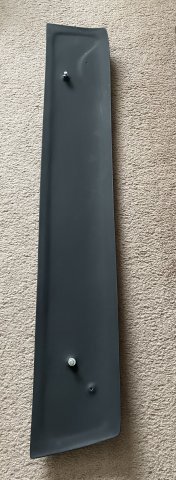
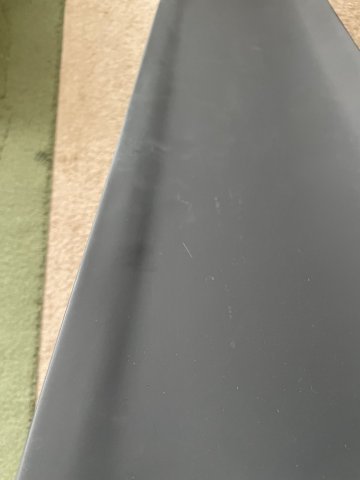
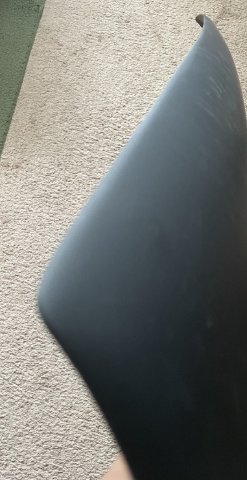
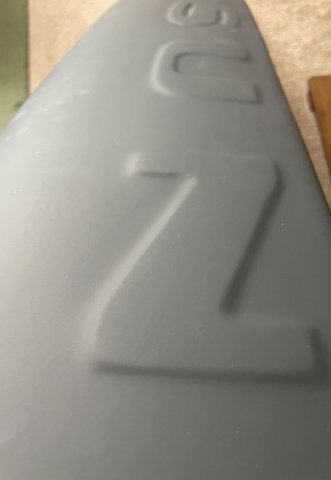
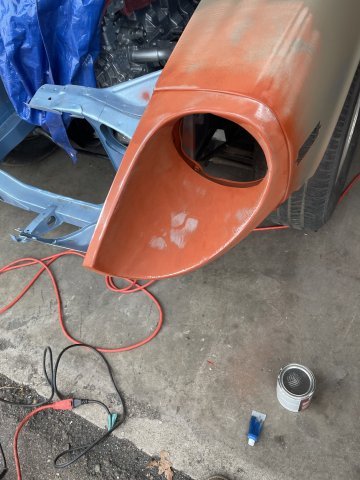
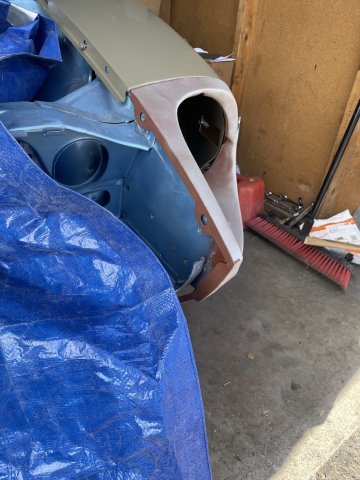
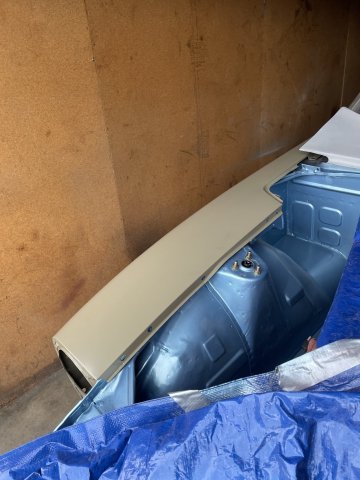
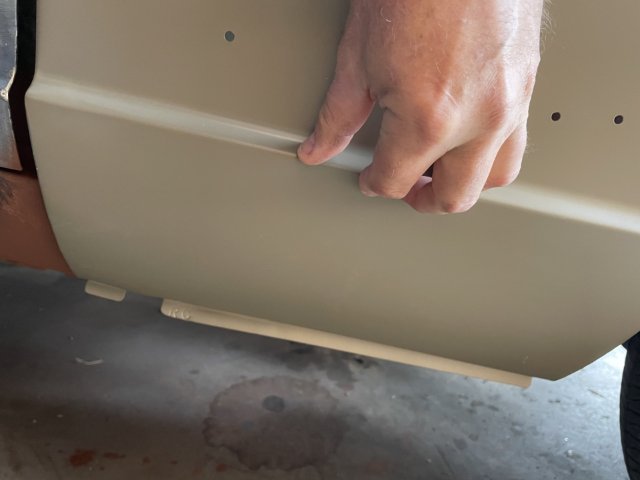
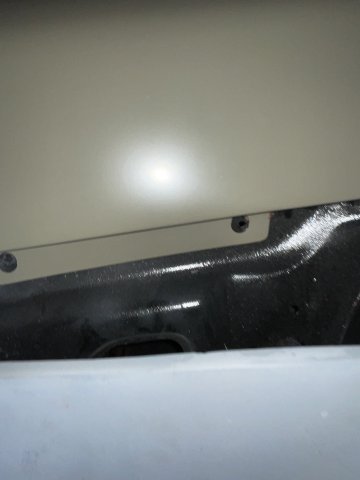
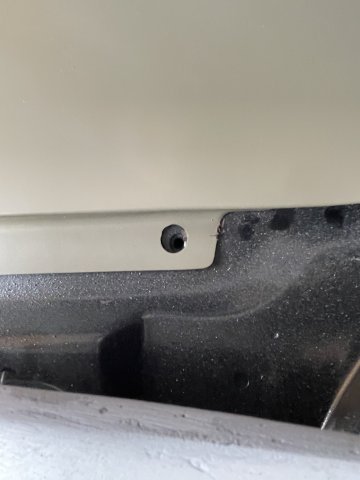
12-03-2025: Very rarely do I see things for Datsun's that are more than what I expected, particularly with fiberglass parts. Today my roll pan came in from Hot Hod Chop Suey. The pics tell it all. The quality is easily 10 times better than I expected. It was packaged so well it took me quite a while to get it out of all of the wrapping. Ken, the owner, not only made it for me with a special change, .....eliminating the exhaust cutout, but also fitted it to a car he had to make sure it fit correctly. The threads embedded in the fiberglass are clean and everything is just perfect. So, when it comes to Ken at Hot Rod Chop Suey, take it from me, you can buy with confidence.
-
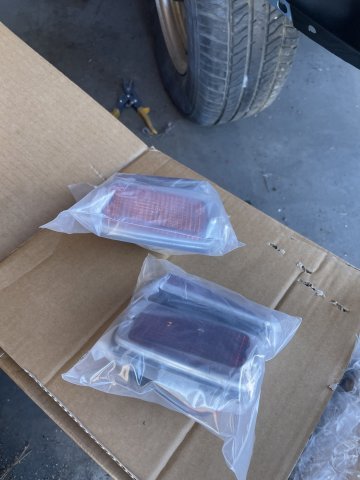
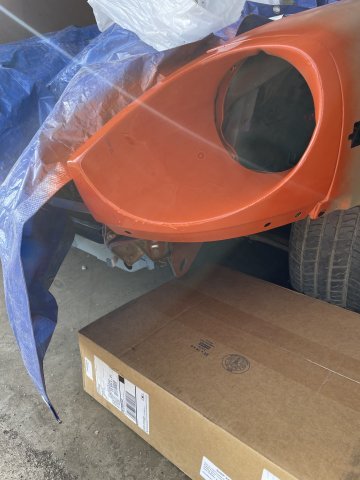
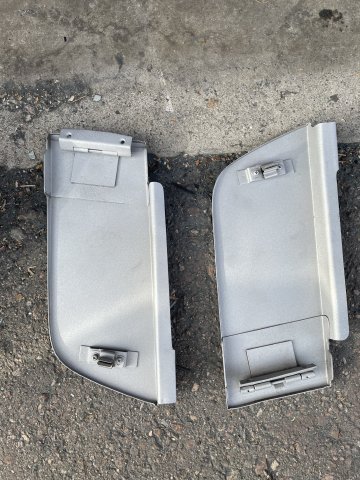
12-01-2025. First day of December. My right side headlight bucket I ordered form Z Car Depot came in, VERY nice part. Also a new set of front and rear side marker lamps. Why restore the old ones when new ones are available and affordable! My new 260Z fender badges should also arrive in the next day or so. Cool stuff.
-
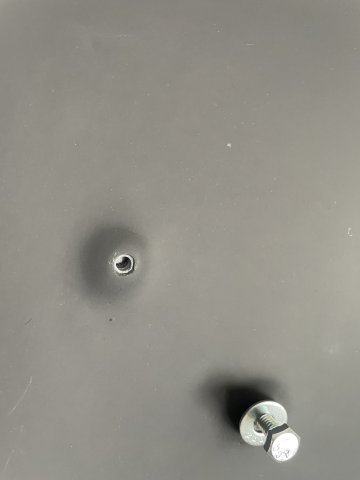
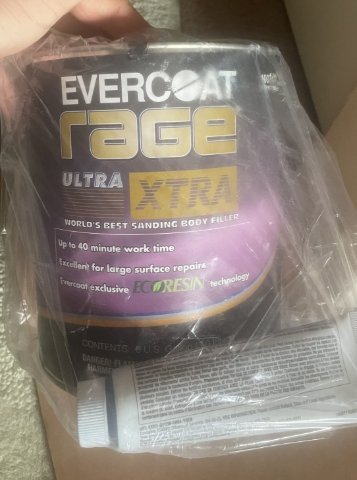
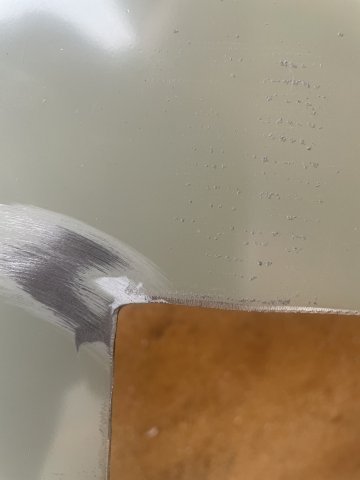
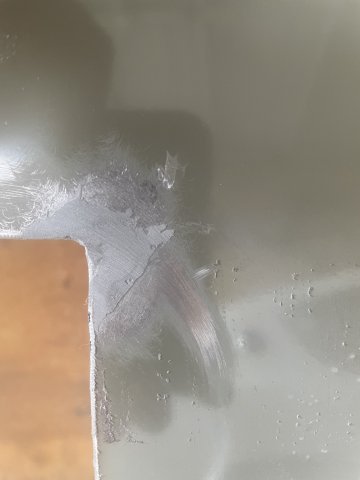
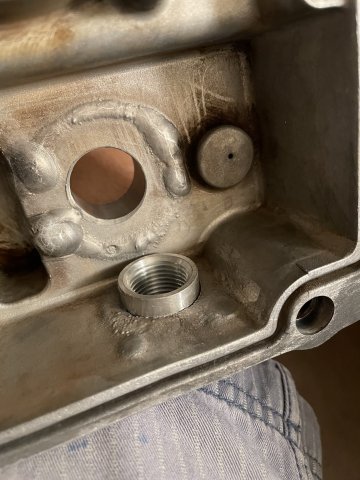
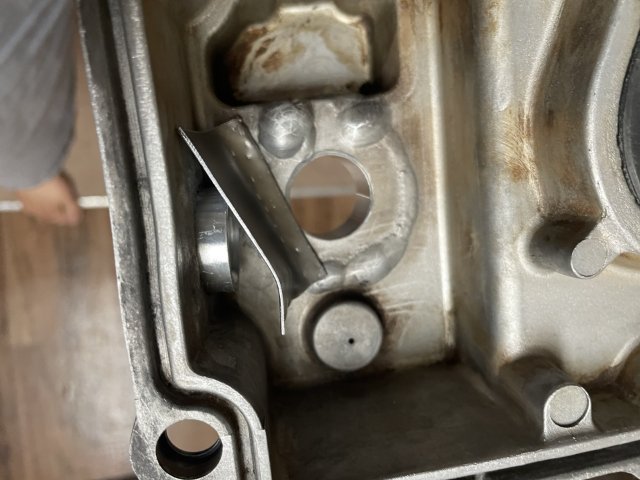
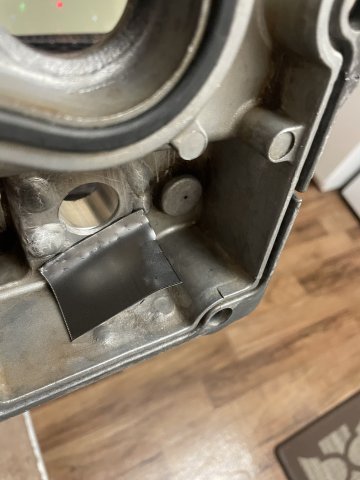
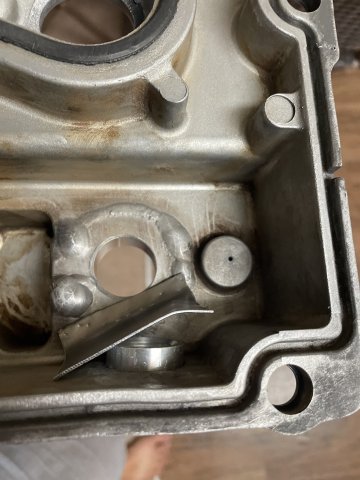
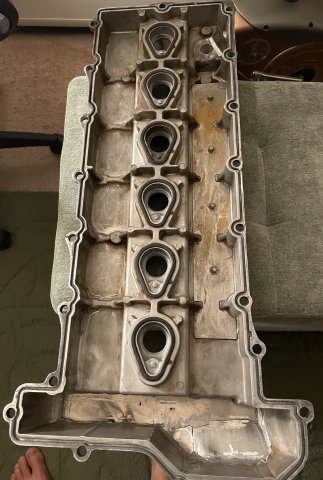
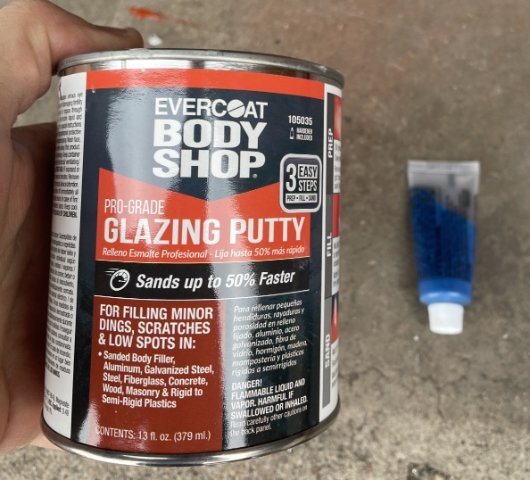
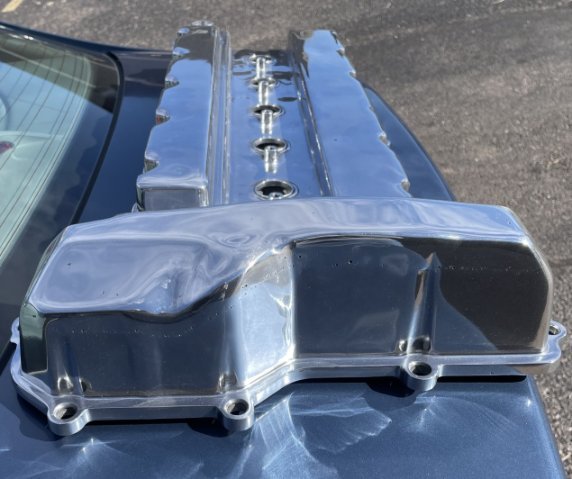
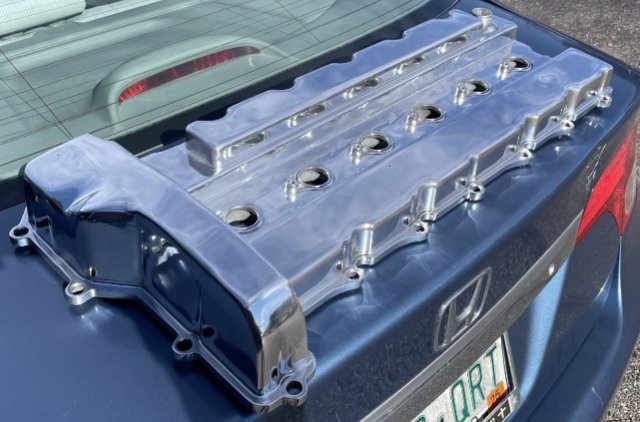
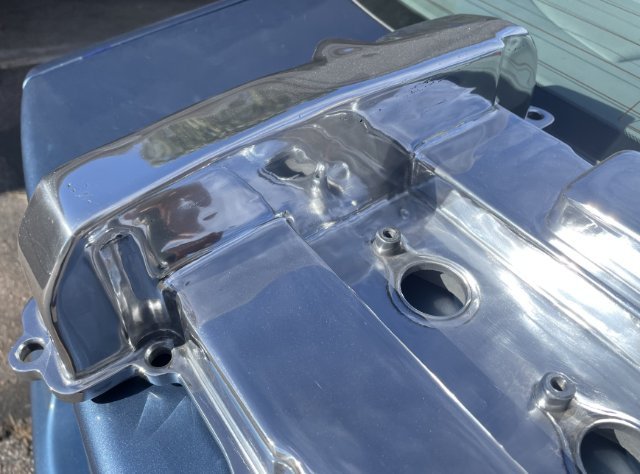
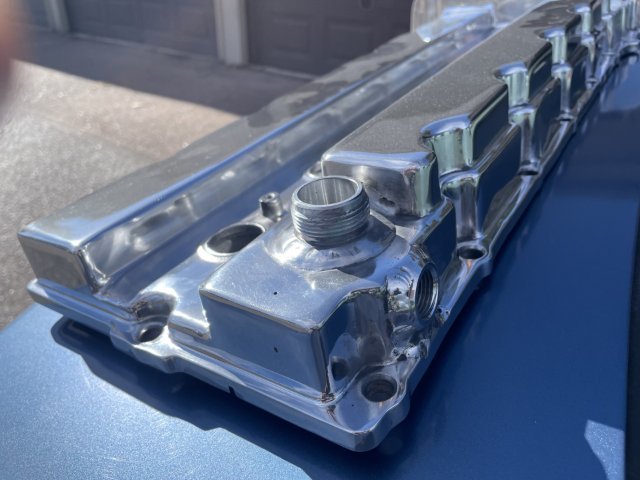
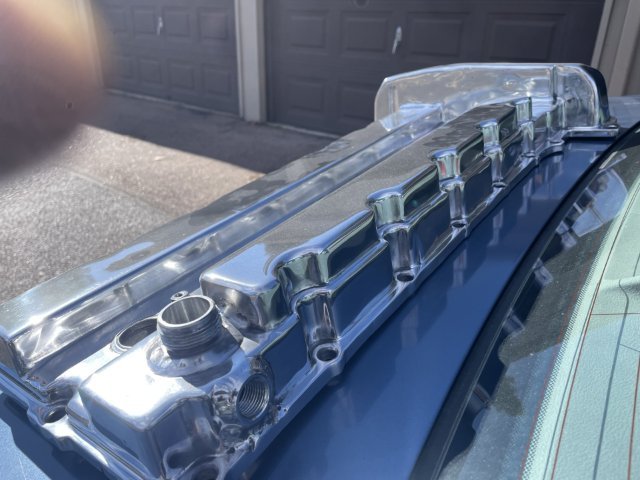
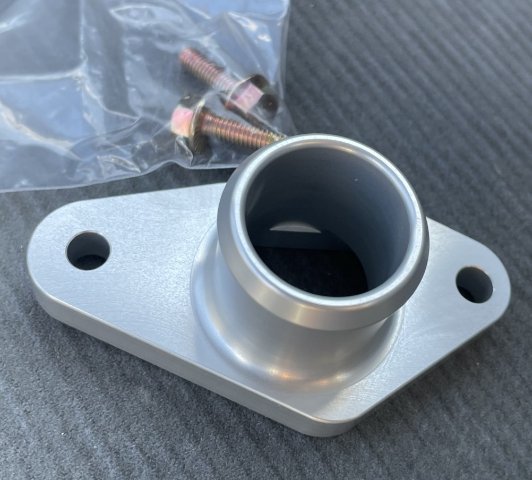
11-30-2025. Weird day for progress. Last day of November and its 15 degrees out . So, it was time to bring stuff inside to work on. My Rage Gold finally showed up, so I can begin the tedious process of making the doors, quarters, roof and tail smooth.....when it gets warmer. A couple corners on the hood had some nicks from cutting it, and I filled them with all metal filler and was able to sand them smooth quickly. All Metal is the only filler that can survive powder coating, so the hood is now ready for its trip to the powder coaters for gloss black just like my new hatch. I brought my valve cover in, as well as my coils, dash vents and dash name plaque. I used my bathtub, and some pine sol, water and an old toothbrush and scrubbed out the valve cover...it was full of dust from the polisher, then scrubbed my coils, fresh air vents from the dash and the dash plaque. 1974.5 is different, the dash vents are very unique, when it became a 280Z the next year the vents have a push pull knob in the center to open close the vent....these are just vents, with no door to open and close them. Since this is a one year car, there can't be many of these setups left........The dash plaque I will attempt to paint the letters etc with a paint pen, but I have no faith at all in my ability to do so. I have shaky hands. Anyway, it was mentioned earlier that the port I added for a catch can wasn't baffled, and that as such, I will just fill my catch can up with oil......so I asked A.I. on Chat GPT about it, and did some thinking, and came up with this.....I cut a piece of sheet metal and bent it and then used some JB weld bonding glue I had in the garage to make a baffle which will allow the pressure out but keep the oil IN. See the pics below. Once dried, it will function fine for keeping my catch can from filling up with liquid, and let the crankcase breathe. PICS:
-
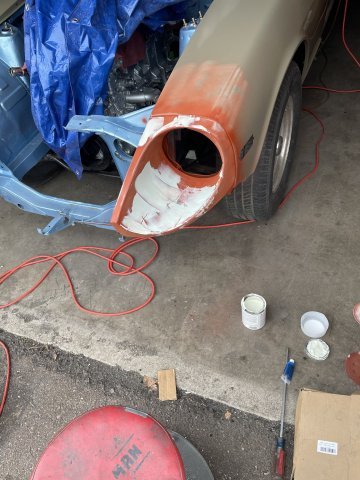
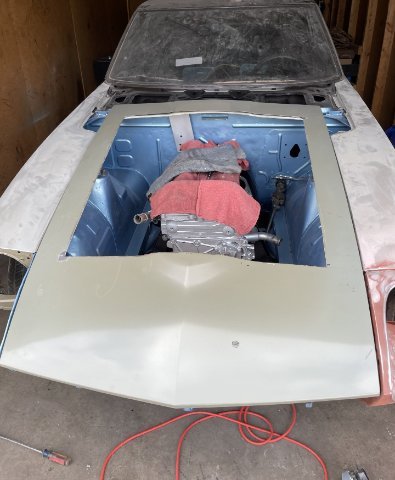
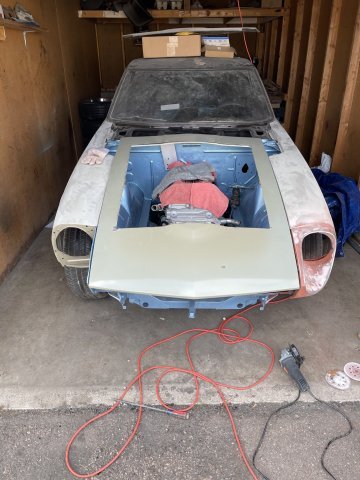
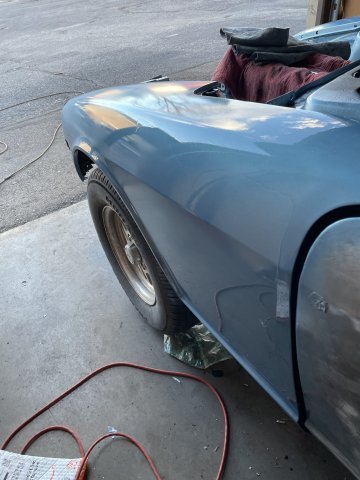
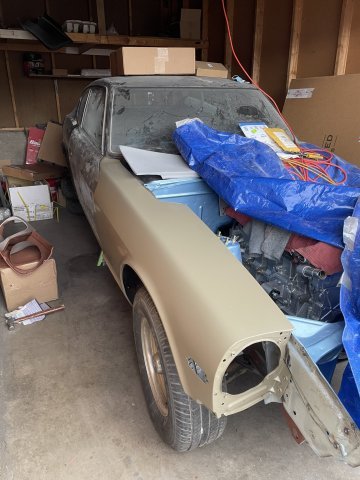
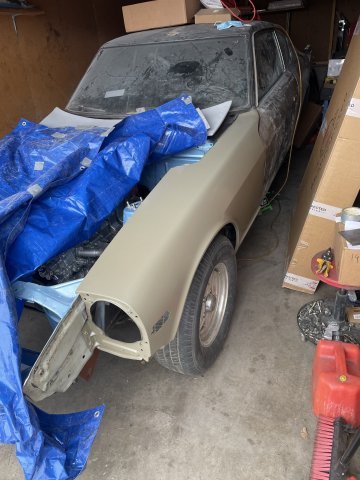
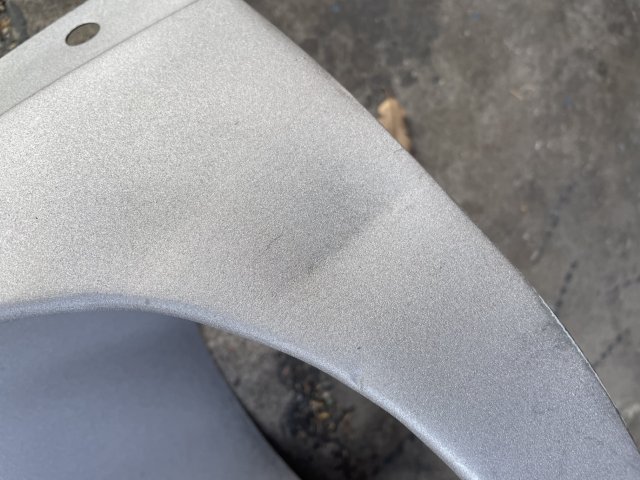
11-28-2025. I started today by sanding out and using some filler glaze on the left headlight bucket, and then sanded down both front fenders. Then I finished scribing out the hole on the hood and cut it. After that, I went ahead and primed and painted the front fenders and the one headlight bucket I currently have. There are 5-6 spots I will have to fix / paint correct, but progress is made. Pics:
-
Similar to this pic below:
-
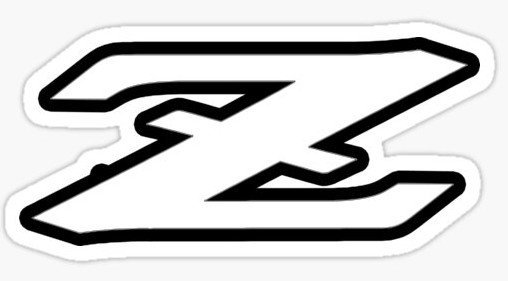
Got my proofs back from speedhut with the Z in there.
-
Happy Thanksgiving! I started the layout on my new hood before going in for the holiday. 13 1/4" from the front hood corners. this should allow for the radiator support to see seen, AND because some of the center bulge remains, those bends in the steel will help with keep the sheet metal rigid. I wanted to keep some the center bulge anyway, as it helps set the tone for how the bodies lines go back visually. the side will be cut to cover the tops of the struts, yet, show the tops of the frame rails and how there are no exposed brake lines. With the hood being black but the engine compartment blue, it will also set off the edges around the polished engine sticking up. At least in my mind.
-
I got mine on eBay.
-
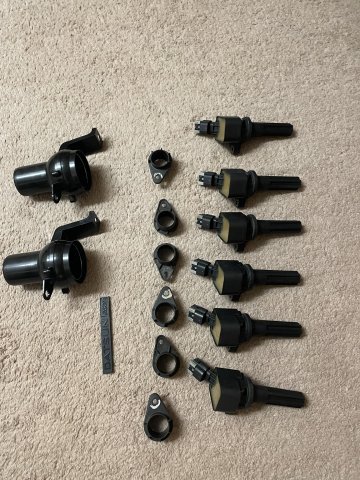
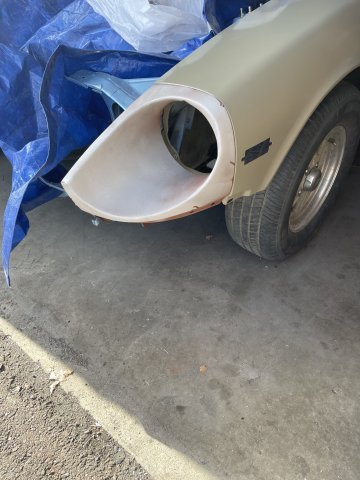
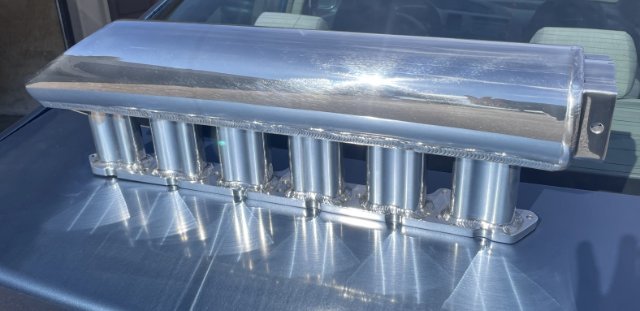
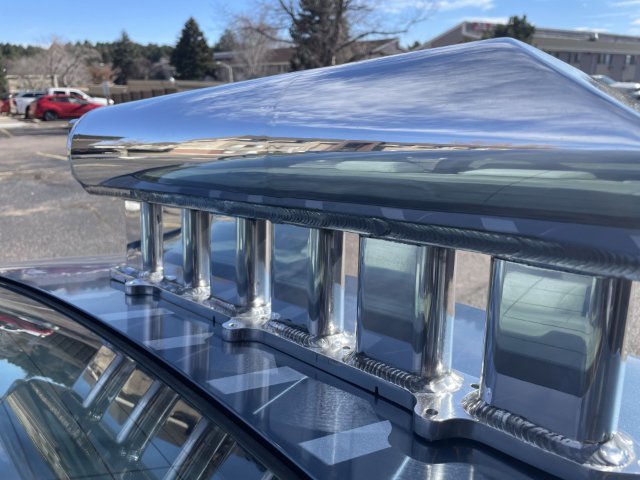
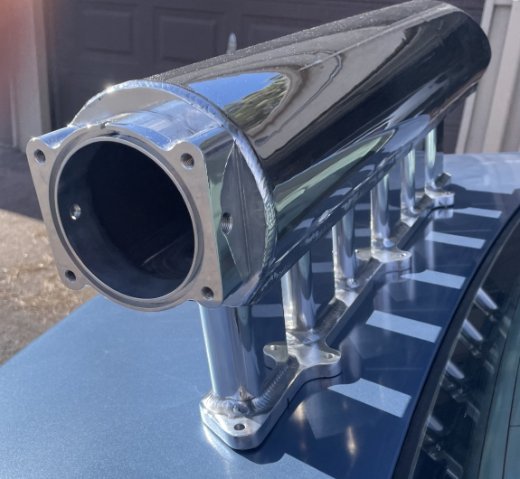
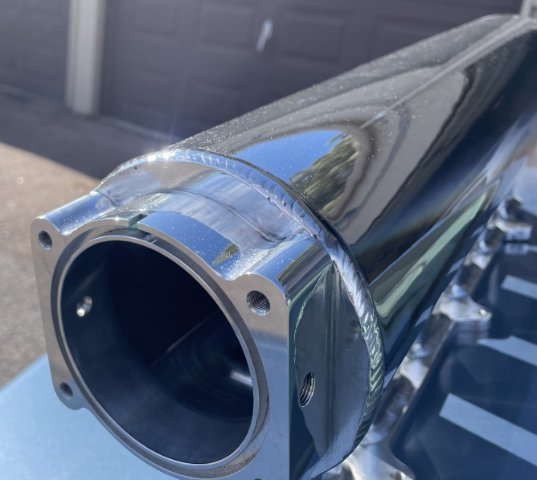
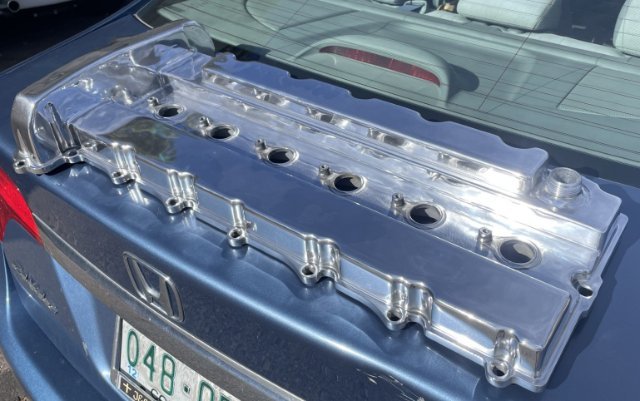
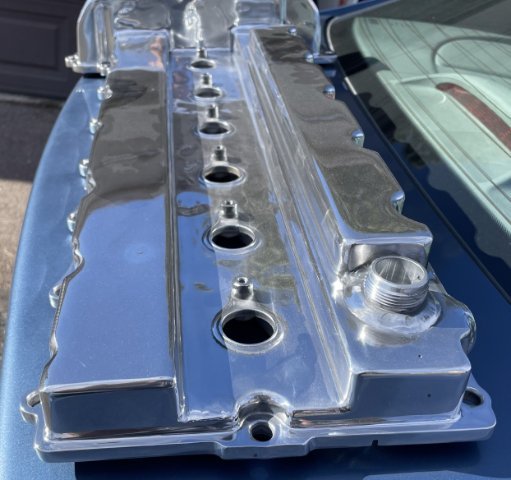
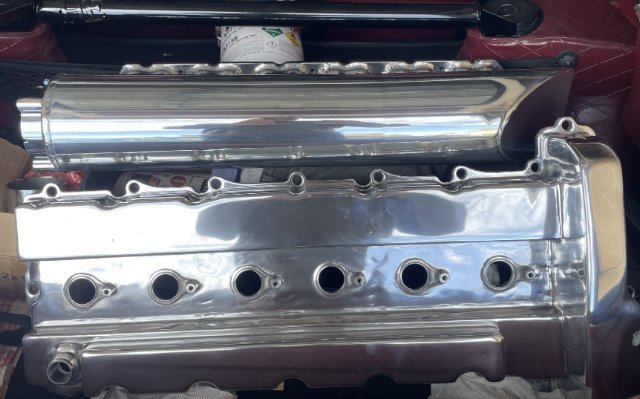
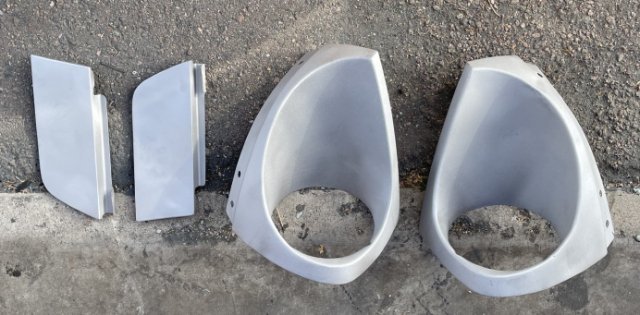
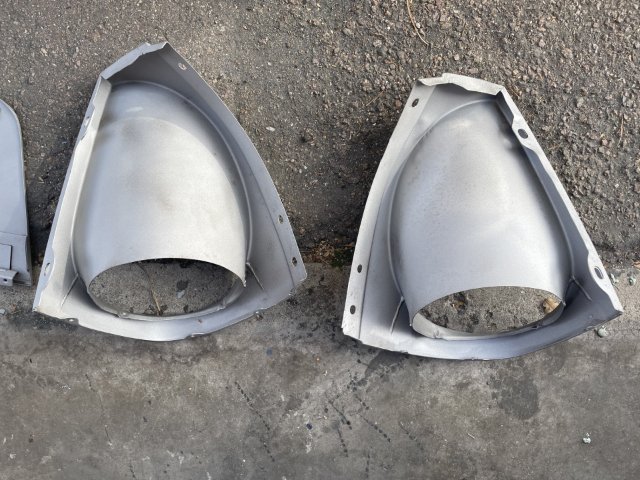
11-26-2025. I got the rear tires mounted on the wheels and balanced, and I was able to attach one headlight bucket and then started painting several coats of filler primer for deep scratches. The bucket has deep scratches in the metal in the bottom of the scoop portion, so this will get a start on filling them, and then I will put some glaze on there and sand it smooth and sealer prime it before color and clear. The other headlight bucket, after sandblasting revealed a crease in it, and I don't have the moxie to want to fight and fix a crease and make it look good, so I ordered up a reproduction bucket. I then got a call from J&S Polishing, and ran down there and picked up my intake and valve cover. Pics heavy.
-
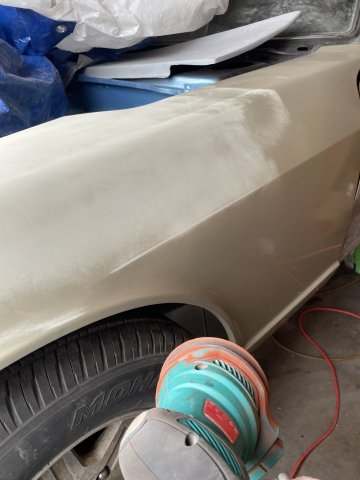
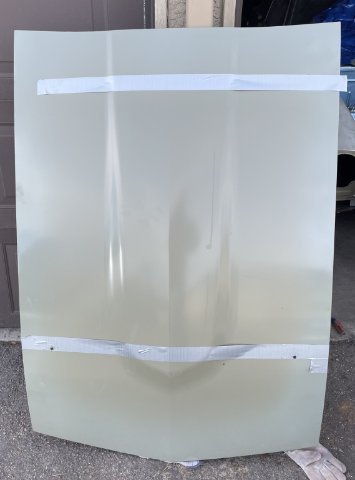
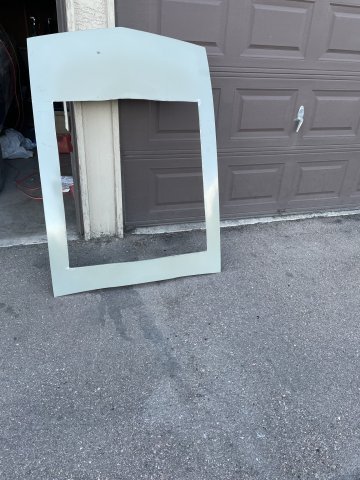
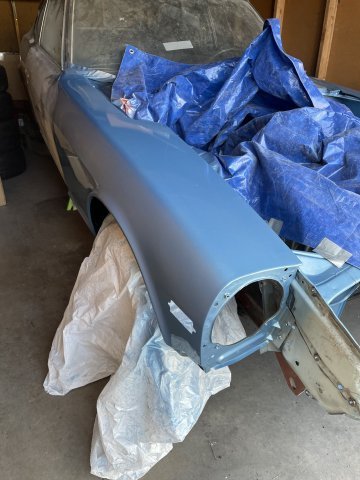
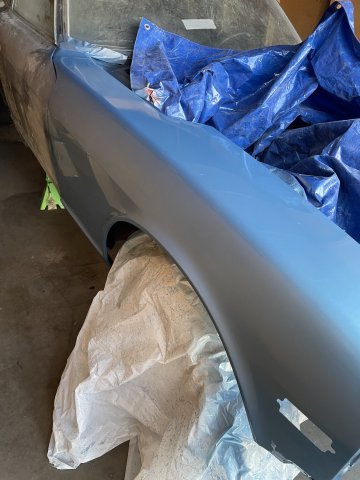
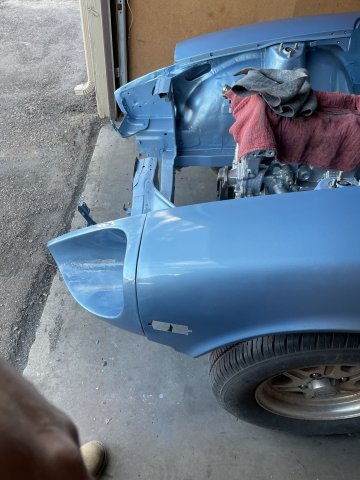
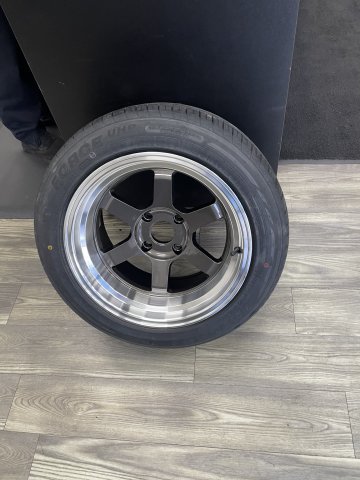
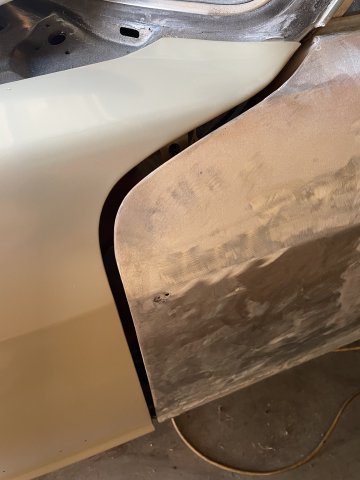
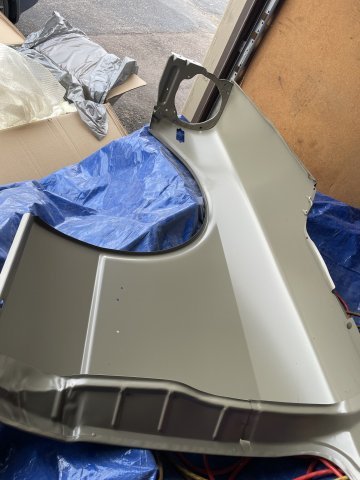
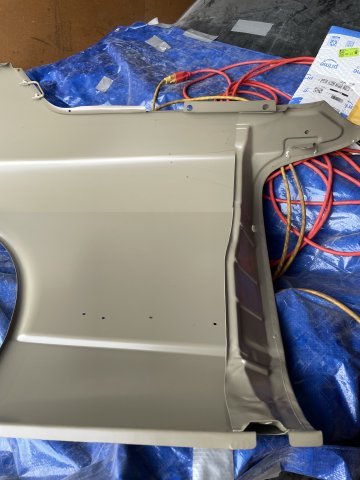
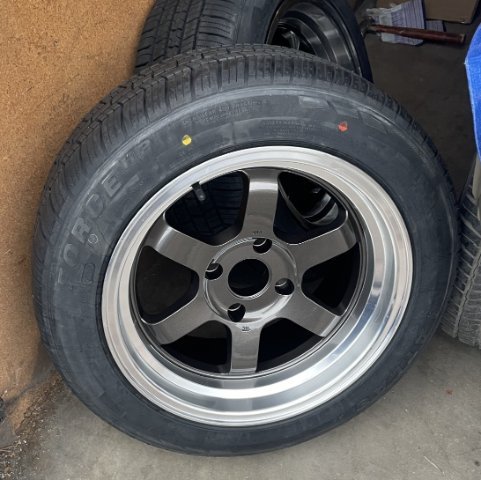
11-25-2025. My new fender and hood came in from Resurrected Classics today. I quickly hung the fenders on and took some pics to show how well they fit. Very impressive. High quality parts. The box does say "Made in China", but they are VERY nice pieces. I also went ahead and got the front tires mounted on to the front wheels. The wheels are 16X8 with 0 offset, the tires are 205/55R16.
-
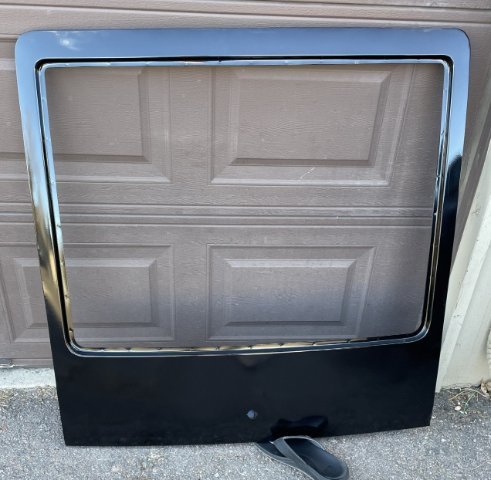
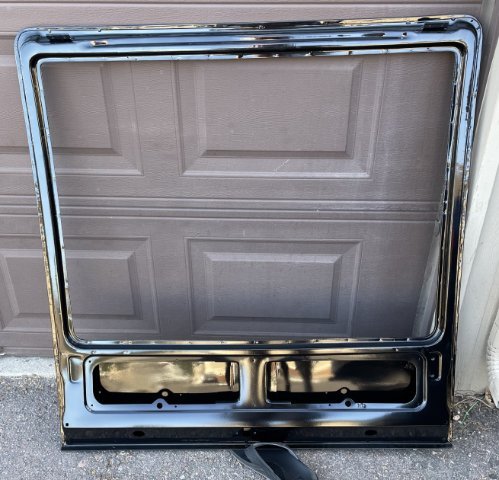
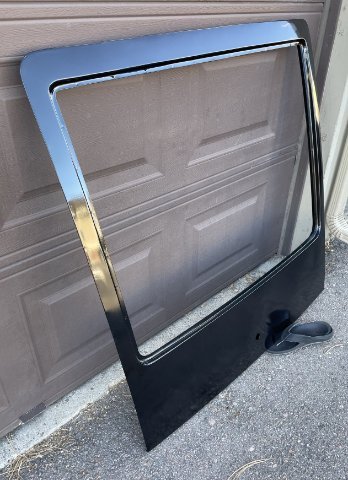
Earlier I received my new hatch from Resurrected classics, and it was so well packed to prevent damage I was impressed......today a pallet arrived for me which had a new hood and front fenders. I am very impressed at the lengths these guys have gone to, to ensure no damage occurs. The box for the fenders had a puncture hole, but I was very happy to find that it didn't damage it. So, in addition to the high level of craftsmanship used in making these parts, these guys do a very good job of packaging them. Buy from them with confidence.
-
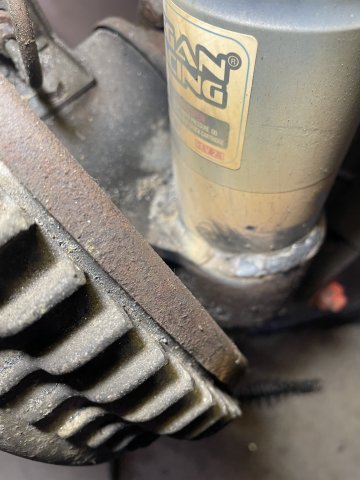
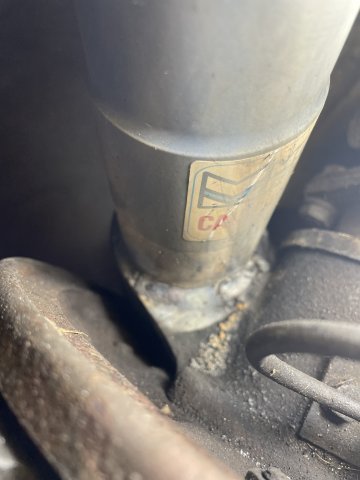
Today the mobile welder stopped by and welded the collars for my coilovers in the rear. progress made.
-
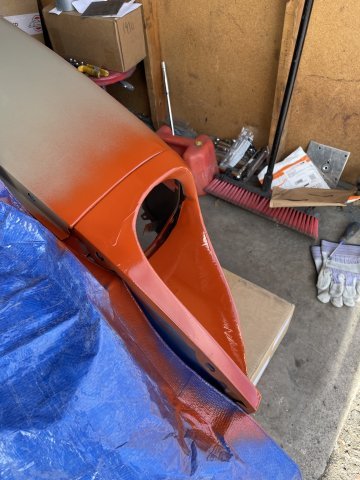
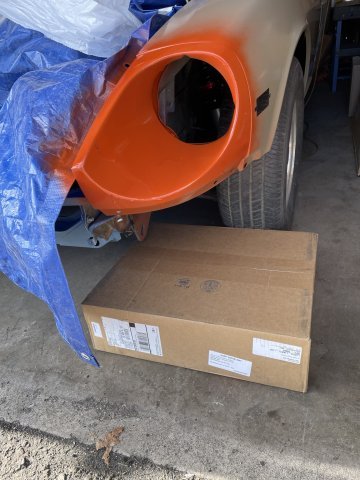
Update from Ken at Chop Suey on my rollpan: https://photos.app.goo.gl/SrTor4XxT6yc5HSD9
-
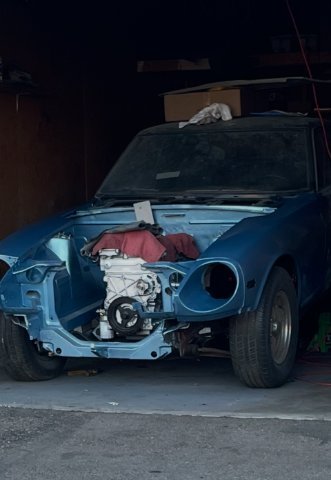
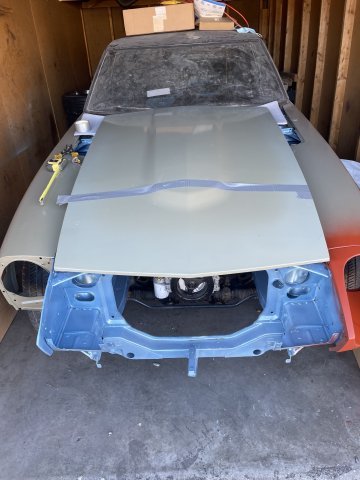
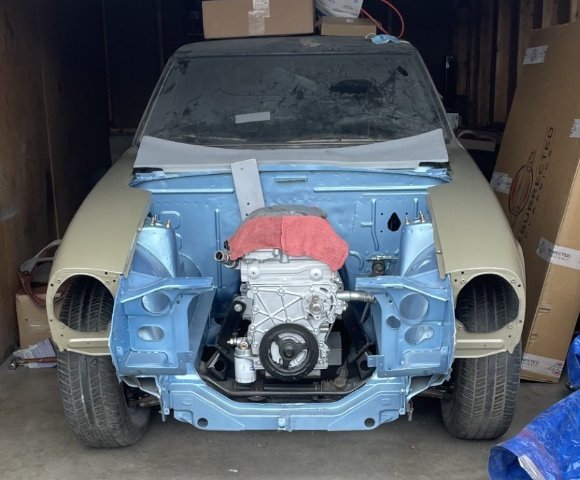
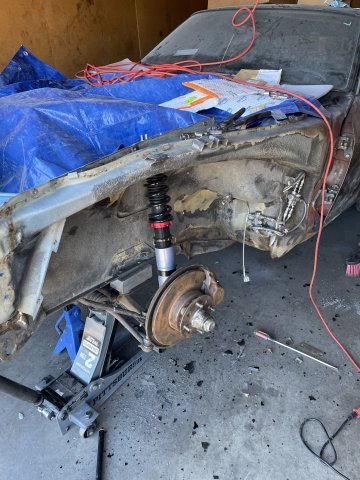
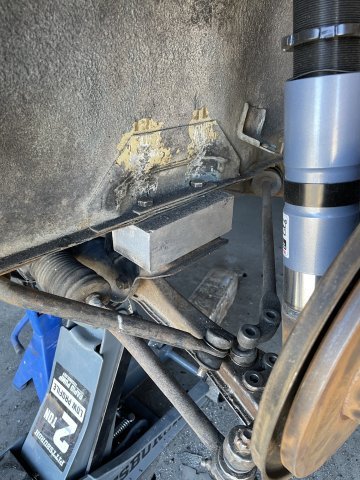
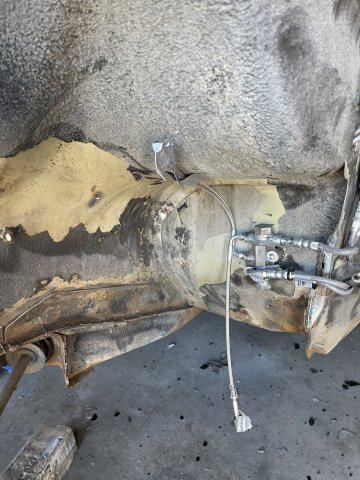
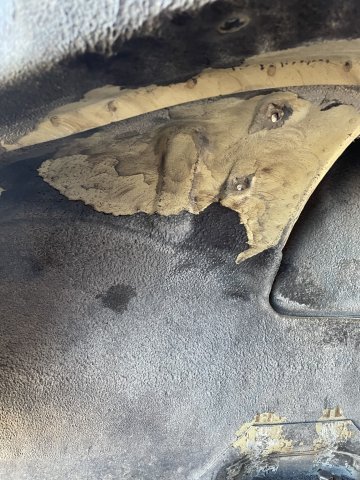
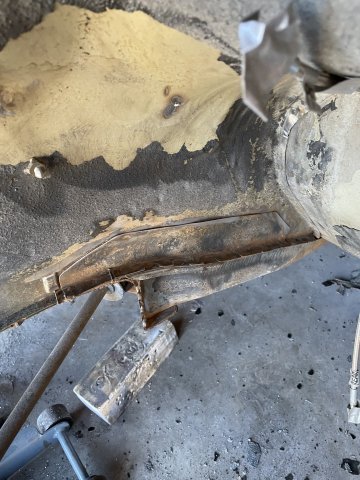
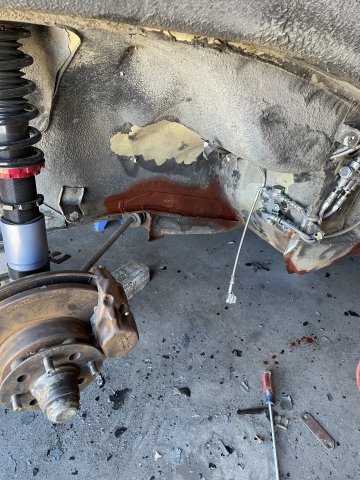
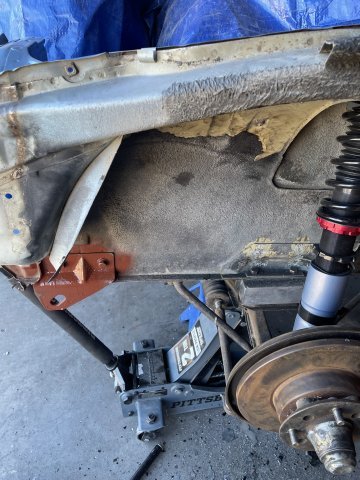
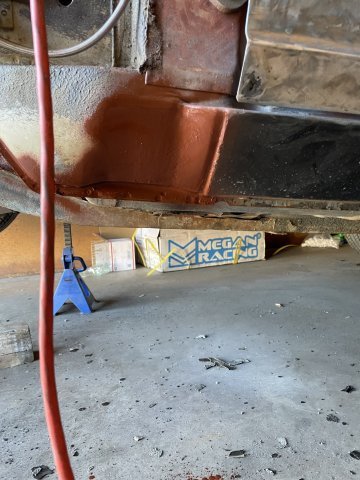
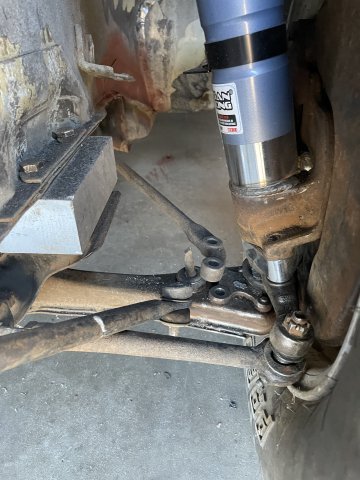
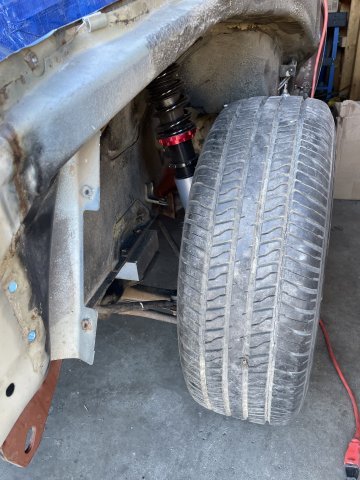
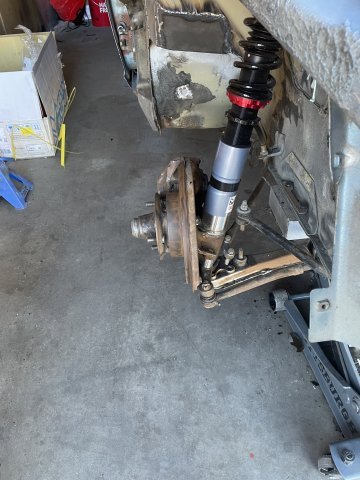
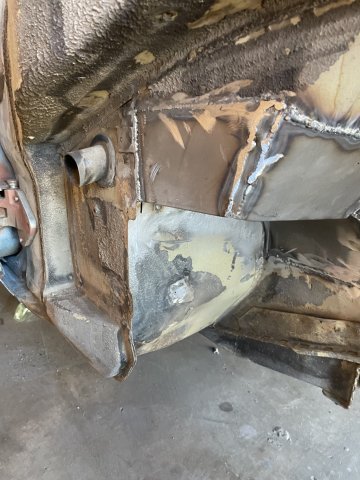
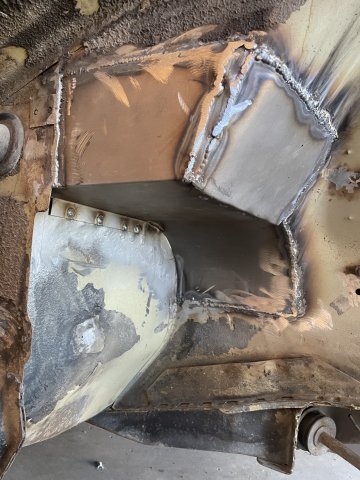
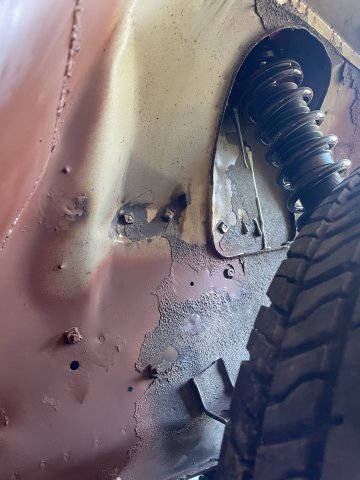
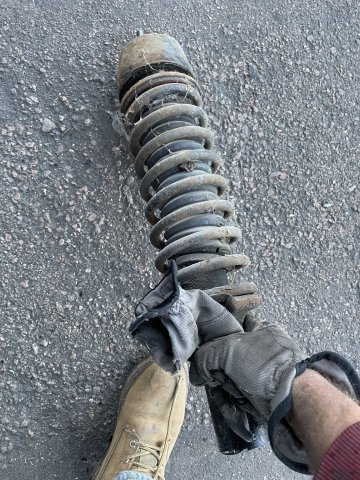
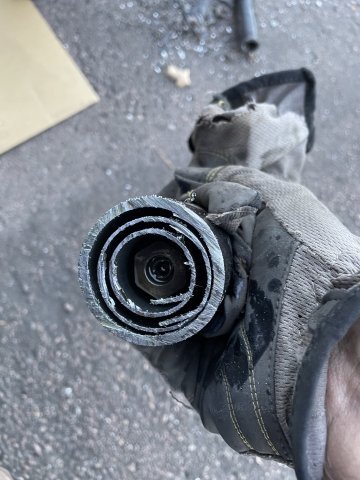
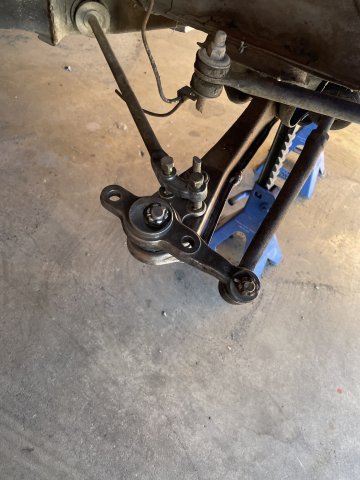
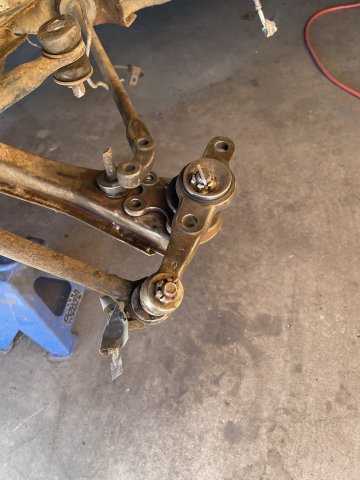
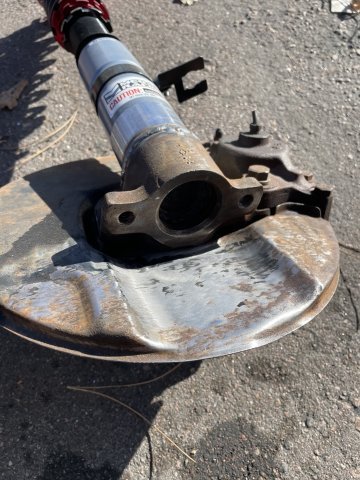
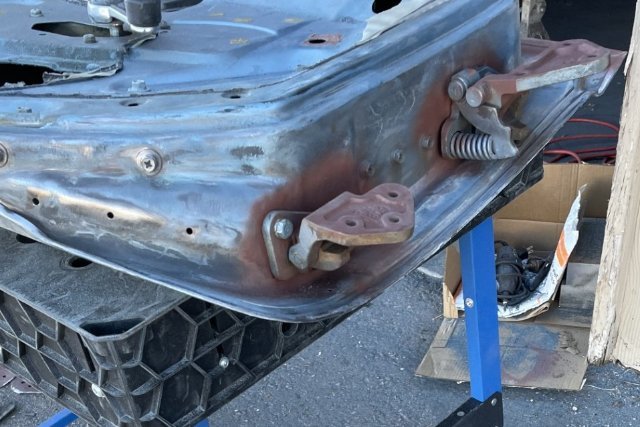
11-22-2025: Today I finished getting the front end together, as least enough to roll it around. The shims between the frame and rails are really aluminum blocks. I started with a 2 inch thick block, minus the factory plate I removed so they give about a 1 7/8" drop to the crossmember and engine. This is to get a starting point. With the front end together, I have 2 3/4" worth of adjustment left in the front struts to lower the nose down further with these plates in there. I have at least 4 inches if not more of clearance between the bottom of the cross member and the concrete. I installed some 1" thick bumpsteer spacers, and from the pics you can see the bottom arm is level, so pretty good for a starting point. I will now work on modifying the motor mounts to drop the engine 1-1.5 inches and see how it goes. With the block in there, and lowering the motor mounts, I believe the engine will fit completely under the stock hood. However, it will be necessary to get longer bolts and put spacers between the TC rod and arm to get the TC rods to bolt back up, and the sway bar end links were shot anyway, so they need replacement. I found that with the bump steer spacers, the factory wheels hit the steering rack end links. With the factory wheels, you would have to run wheel spacers for clearance, as even after grinding the ends down, they were still hitting.......will my 16" wheels clear? will be interesting to see. After this I removed some of the remaining factory undercoating that was peeling off and spot painted some spots with rustoleum primer to keep things from getting rusty. the pale yellow you see in the pics is actually the factory metal primer!! I then jacked up the rear, and removed the wheels, the 3 nuts on the top of each strut and then stood on each drum dropping and pulling out the rear struts. Because of their length, I had to go ahead and chop them in two in the car to finish getting them out. hydraulic fluid leaked and made a mess, but I got them out and after a cleanup with some shop rags and g@s, we are back to making progress. I have a mobile welder coming soon to weld on the collars in the rear and then I can put the rear suspension back together and get the car back up on 4 wheels. At that point, it will be time to pull the windshield and remove what's left of the paint and start prepping the Sheetmetal for the body and paint guy. PICS:
-
got my shims in today. that is VERY hard to do with the engine in, etc. Got a real nice drop on everything. I will also mod my motor mounts for some drop there also.
-
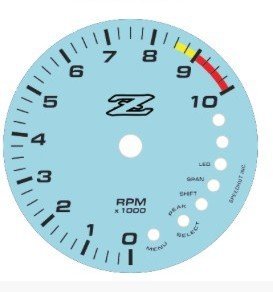
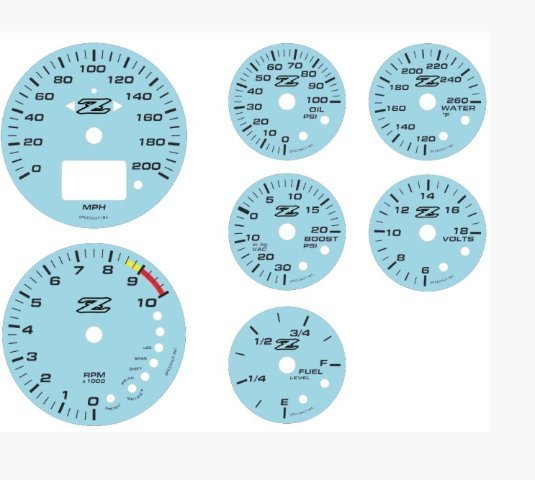
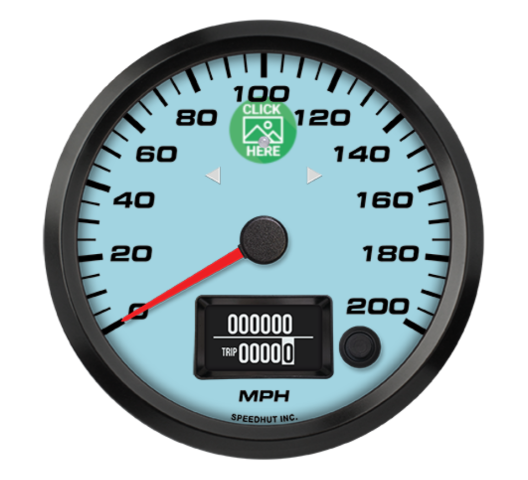
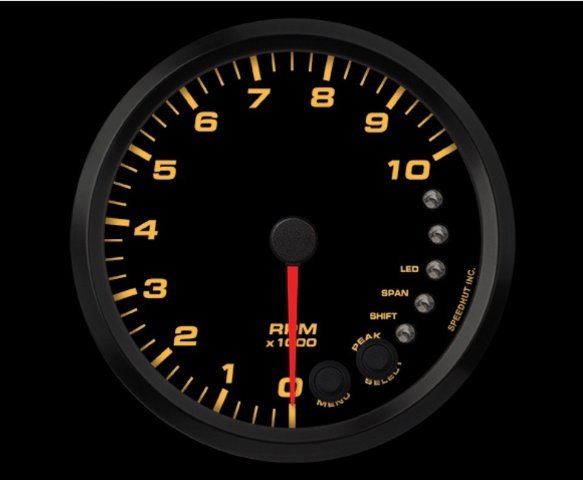
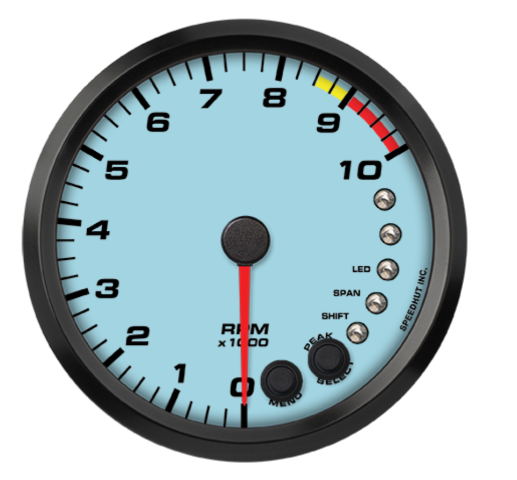
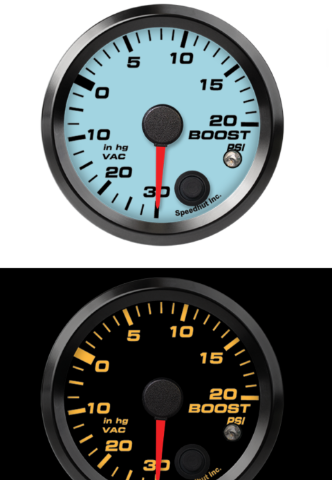
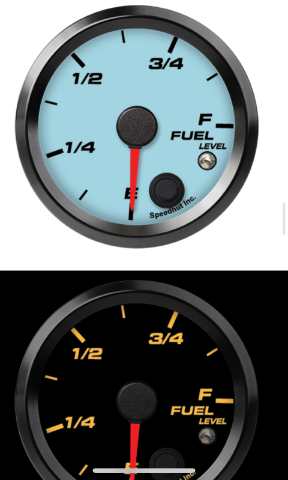
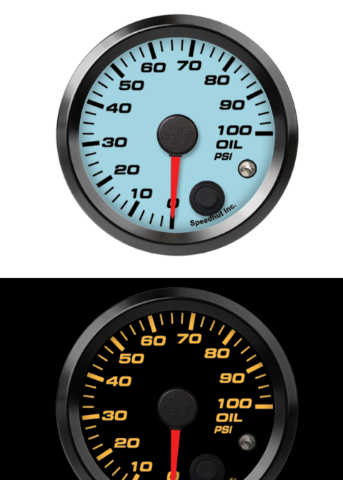
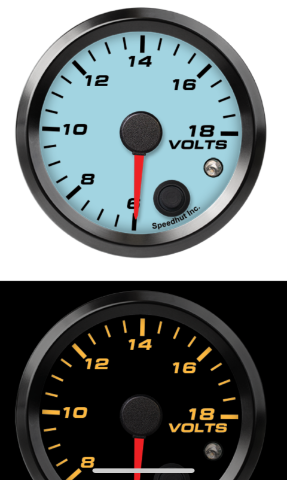
11-20-2025. Well on the 260, interior, especially dash is a LONG way down the road, but all these black Friday deals going, and talking to speedhut they cut me a great deal, I went ahead and got the gauges I wanted for this car. They will go in my dash with a full cap, and the center section will be a blocked off plate and will house 2 gauges from speedhut along with some switches. At any rate, The gauges are going to be "Gulf Racing Blue", in modern script, and show black with orange lit numbers at night. I have some pics here but they don't show the "z" script I am having added to the faces. it is just the thin black outline of the original "Z" badge. Anyway, here is what they will look like, without the Z, there is a pic of the script at the end. These things are crazy expensive. I love that the speedo is GPS. Pics:
-
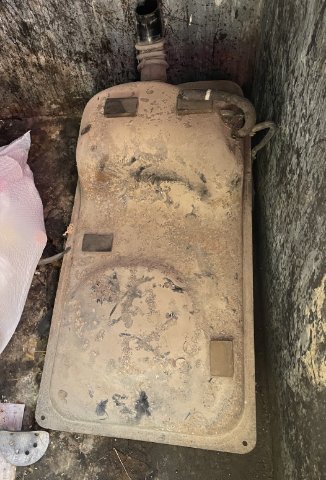
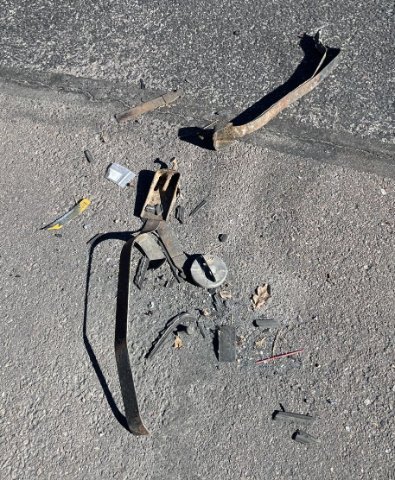
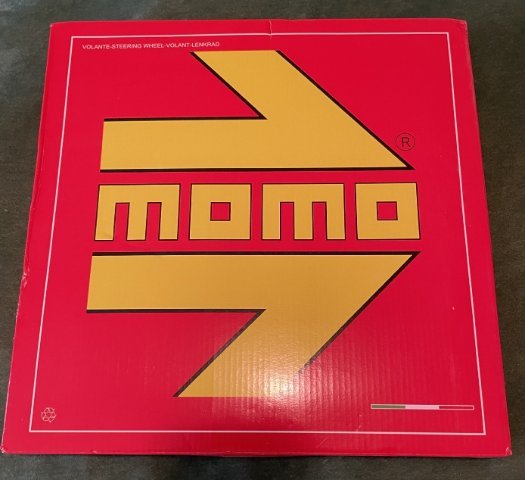
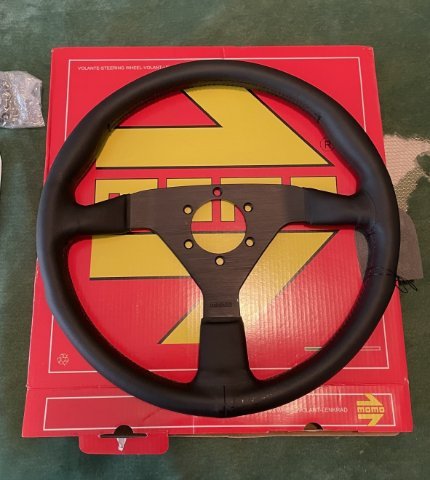
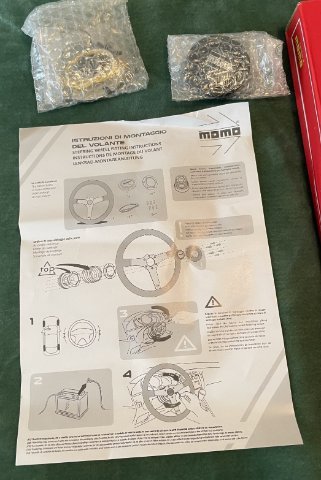
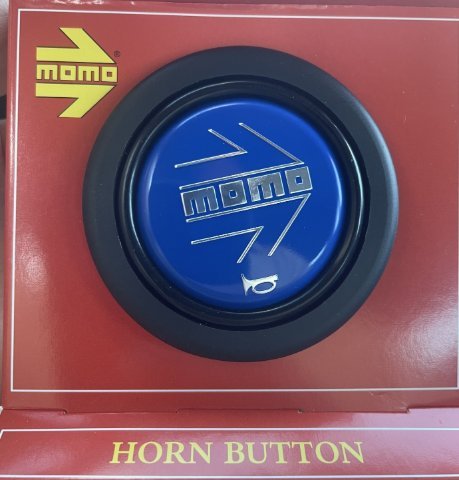
11-19-2025: I dropped the fuel tank and got rid of it. I also did some prep to get ready to install the shims under the crossmember and put the front suspension back together. My MOMO steering wheel, adaptor and a few other bits also arrived. Pretty cool.
-
Today I picked up some sandblasting and powder coating from R&S Powdercoating here in Colorado Springs: And......you seem to always find hidden damage once everything is stripped off, huh?
-
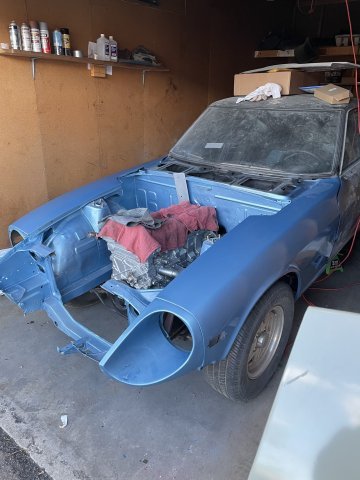
Got out there this morning to gather some stuff to take to the powder coaters. It was also a good time to clean up the front suspension bits so I can put the front end back together. It was a dirt/oil glob on both sides, so with cleaner (g@s) and a toothbrush, a rag, a screwdriver, and a wire wheel attachment in my drill I got everything cleaned up enough to put together in my effort to get this hulk to the body shop for some block sanding and a coat of blue and clear, color sanded and buffed.
-
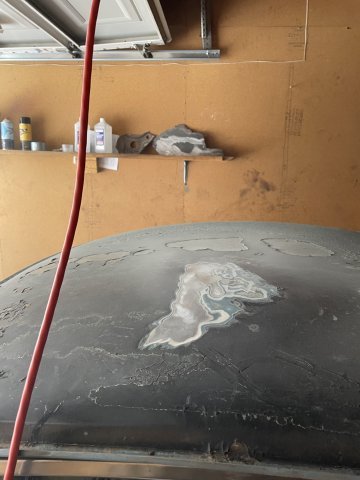
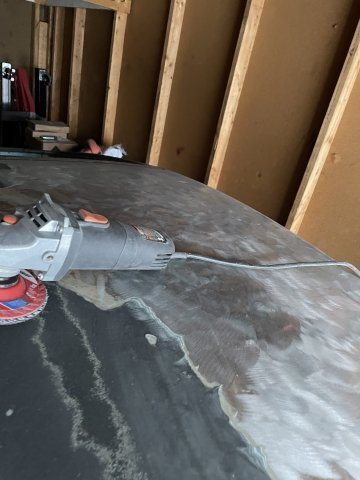
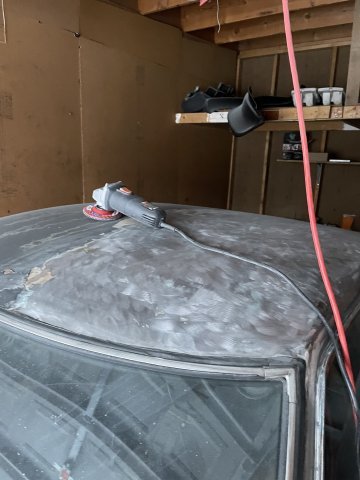
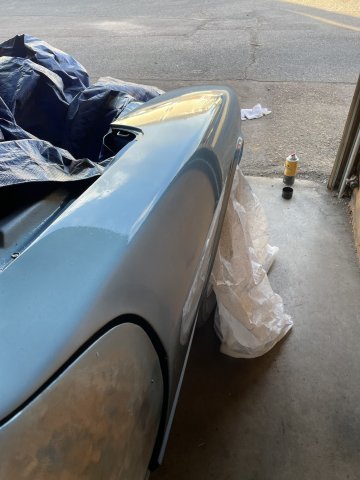
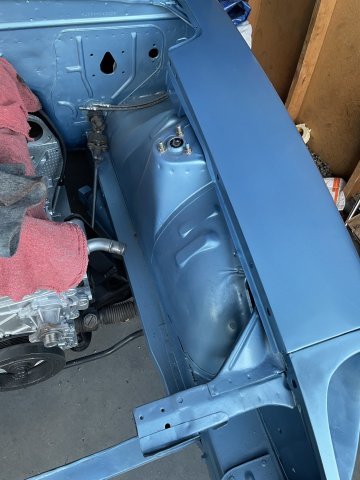
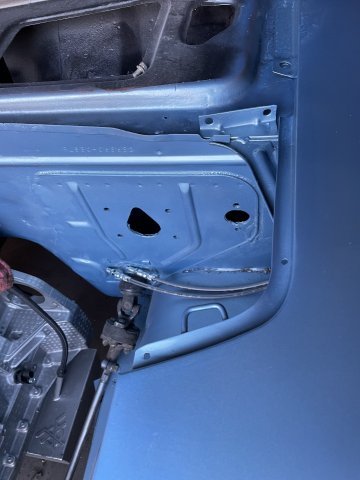
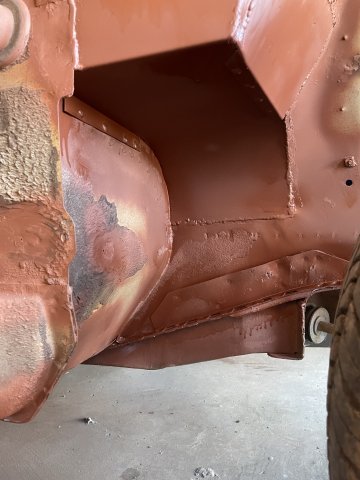
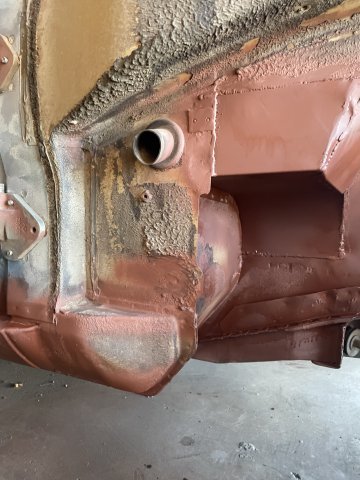
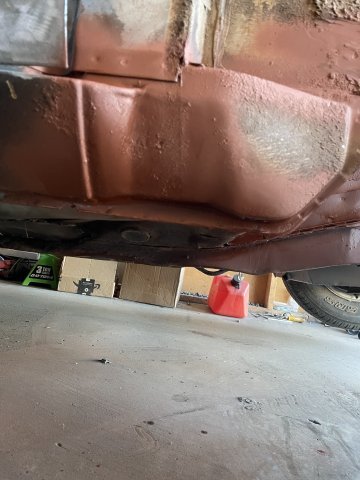
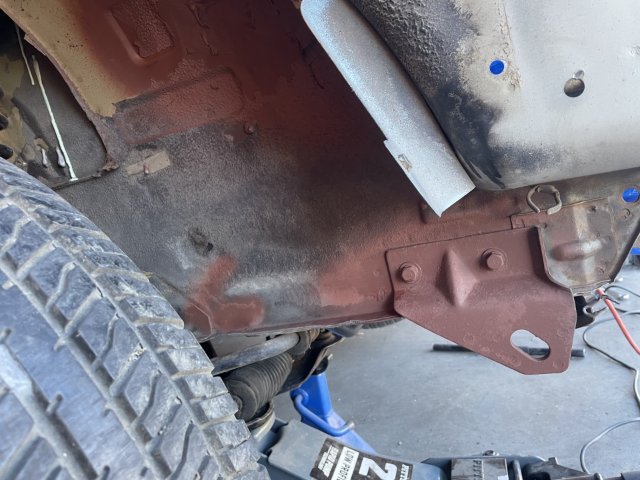
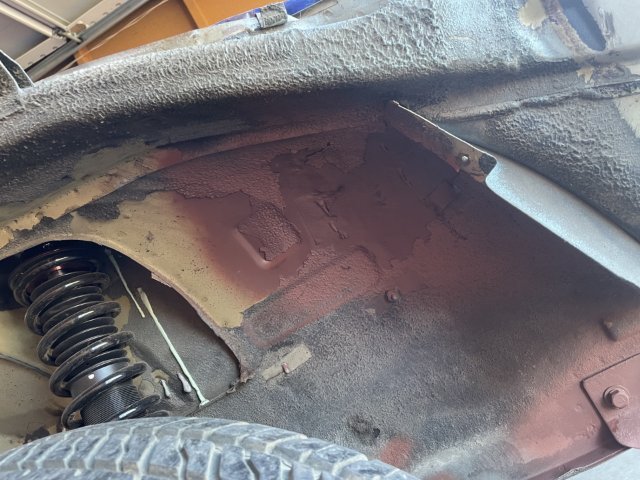
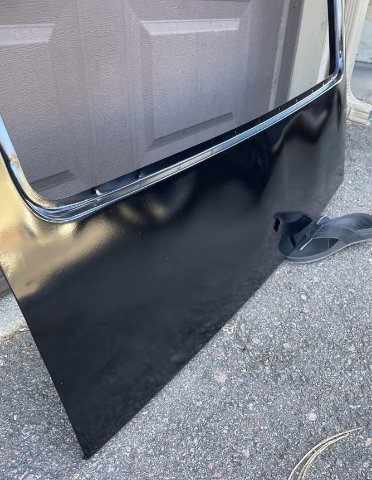
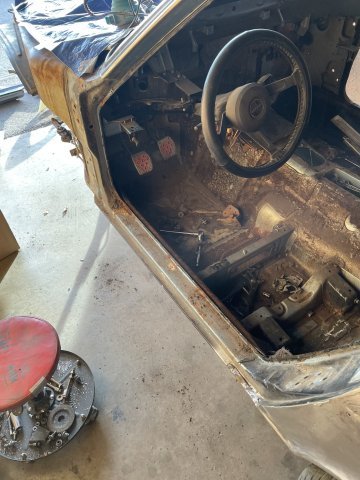
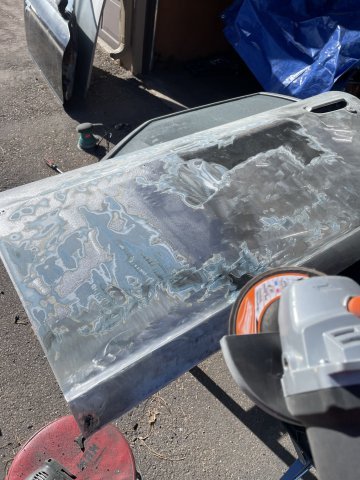
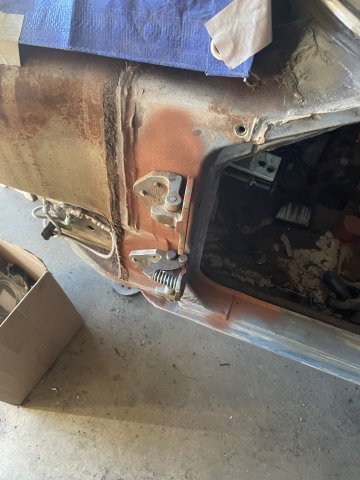
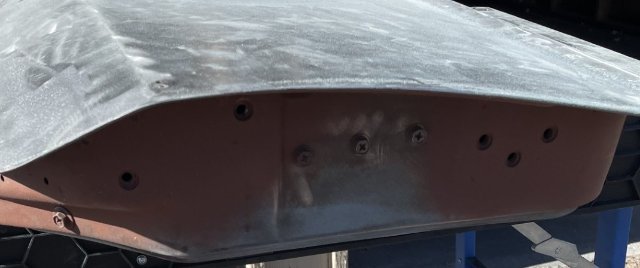
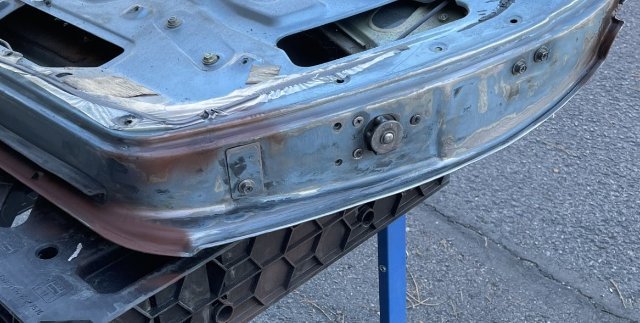
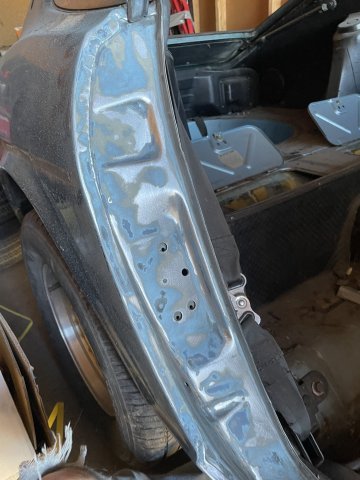
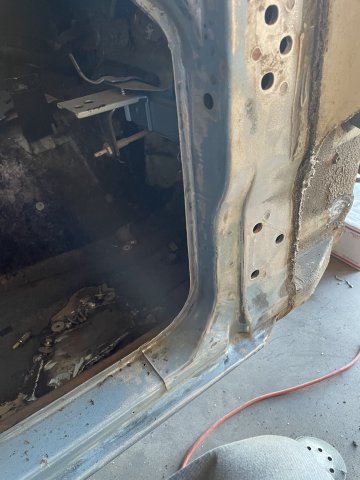
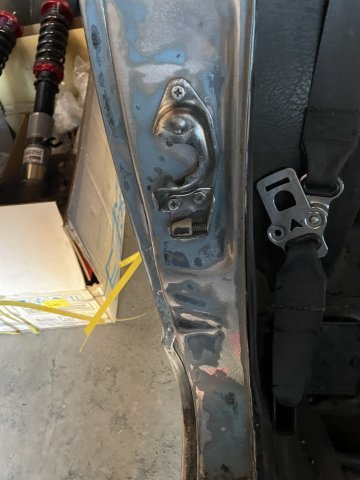
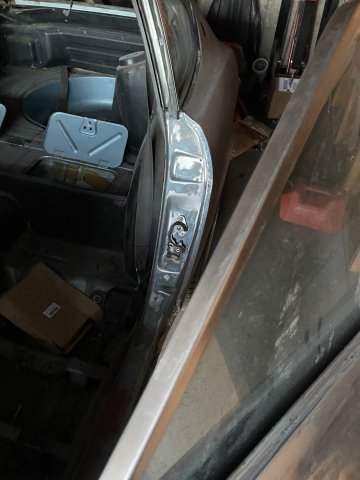
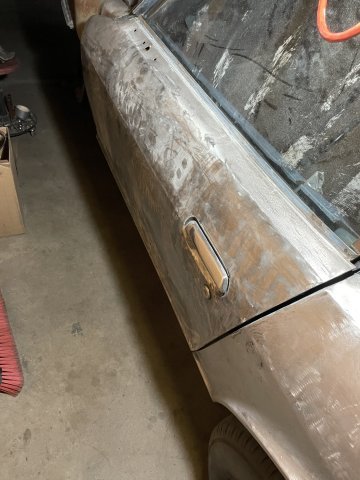
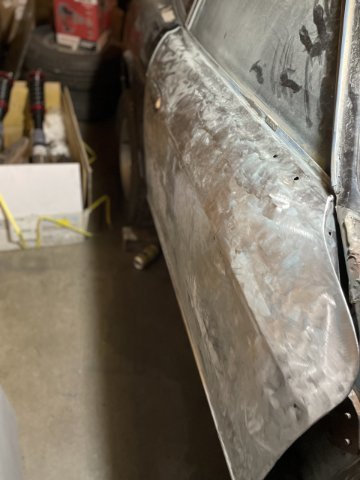
Well, it took all day, but I got the door jambs and inner doors all done and ready for the body shop. The paint on this car is incredible. I have never seen anything like it, it only comes off with a flapper wheel on an angle grinder....I tried 40 grit on my orbital sander, didn't touch it. So, I have continued to use a flapper wheel, and will then go over each panel with finer and finer sandpaper to get it all smooth before handing it over to bodywork and paint. I am finding areas that were slicked with filler and sanded out, with THICK layers of paint and all. I remvoed the hinges and coated both sides with rustoleum and re-assembled. Man, It really worked me today! Pics.
-
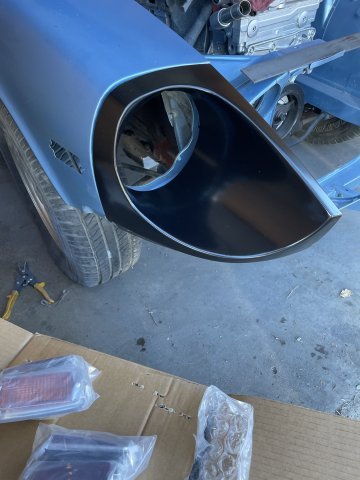
My rollpan is almost ready to ship as well. I got it from Chop Suey Hot Rod Shop, he is filling in the exhaust cut out for me. It bolts on to the rear.
-
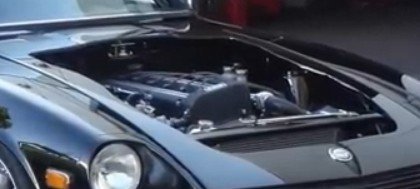
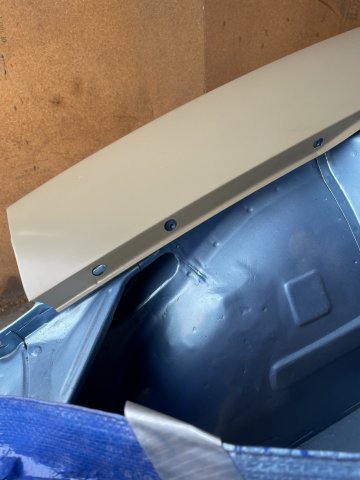
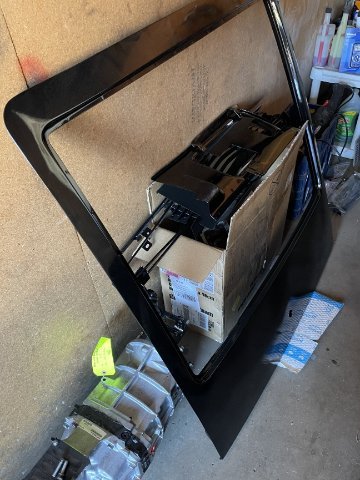
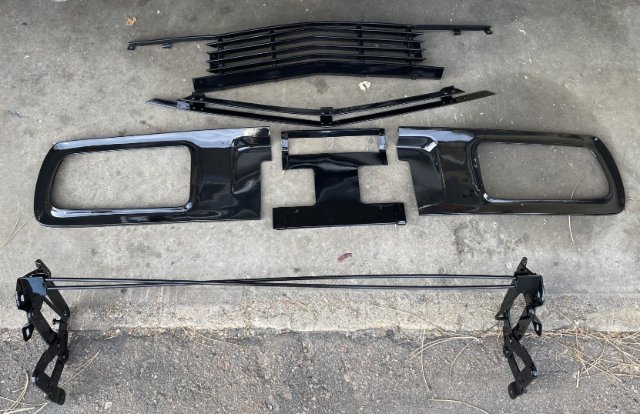
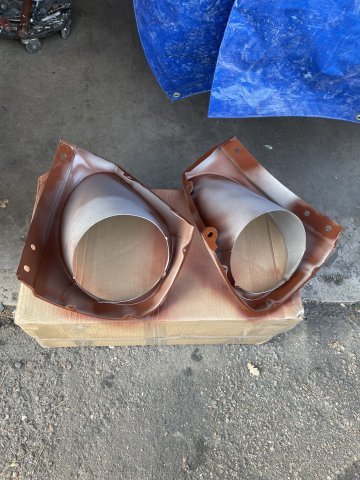
dropped off my new hatch from resurrected classics, my grille, and my 240 taillight outer panels at R&S Powdercoating for a coat of gloss black powdercoat. I had the hood sandblasted and found damage, so I ordered a new hood for Resurrect Classics, and will make my cut out and then have it powder coated gloss black as well. The car will be light metallic blue, with black hood, hatch, flares and rear spoiler/Air Dam. here is the inspiration for my change in direction: (Just picture the light metallic blue instead of red)
-
Yep that is there forever home. I can cover them if needed, but this is an around town hotrod only. no wipers, my version of a cooler AC Cobra.
-
stock brakes Sir. of the two "blocks" I assume you are talking about the one with the electrical probe on there. Rather than try to figure it out, I knew I was going to run stock brakes so just copied how Nissan built it. (shrug)