

A to Z
-
Posts
891 -
Joined
-
Last visited
-
Days Won
14
Content Type
Profiles
Forums
Blogs
Events
Gallery
Downloads
Store
Posts posted by A to Z
-
-
Thanks Ken and Chuck. It's been a busy year on her! This will be the last one. No more car or bike builds. She is the keeper. I will continue to work and fiddle with her forever, so it never ends I suppose.
")
-
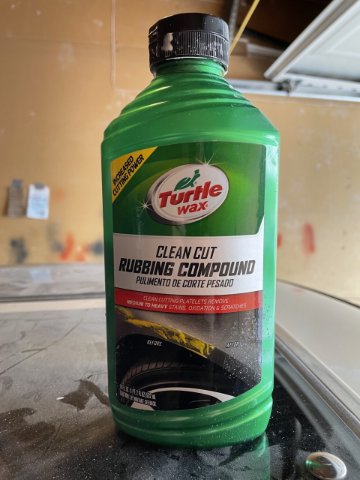
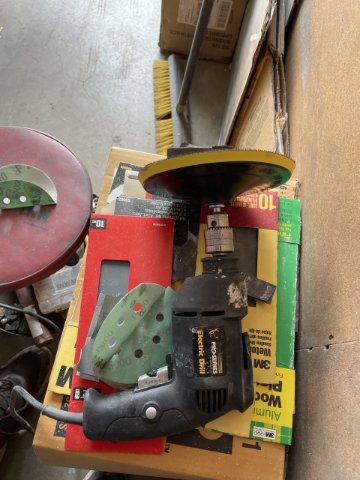
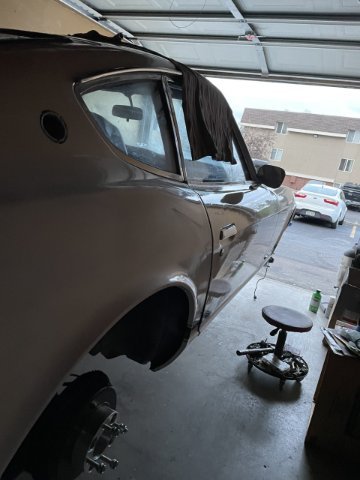
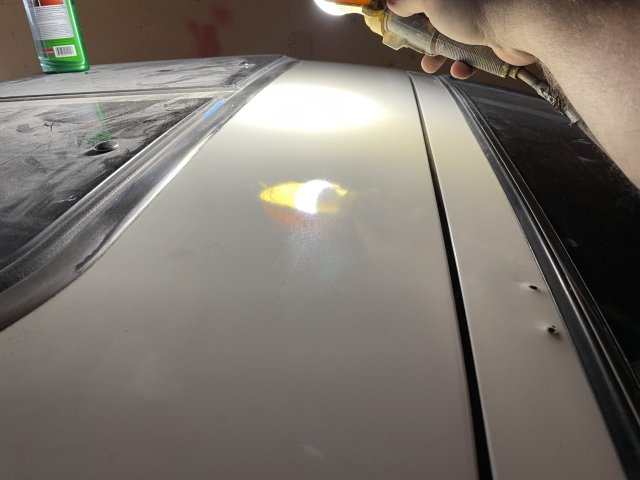
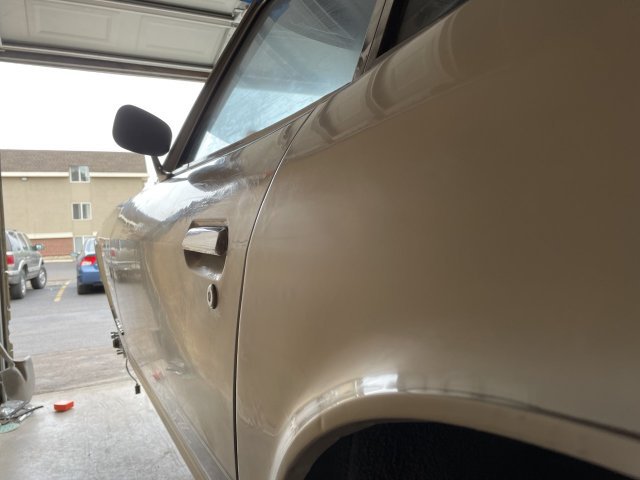
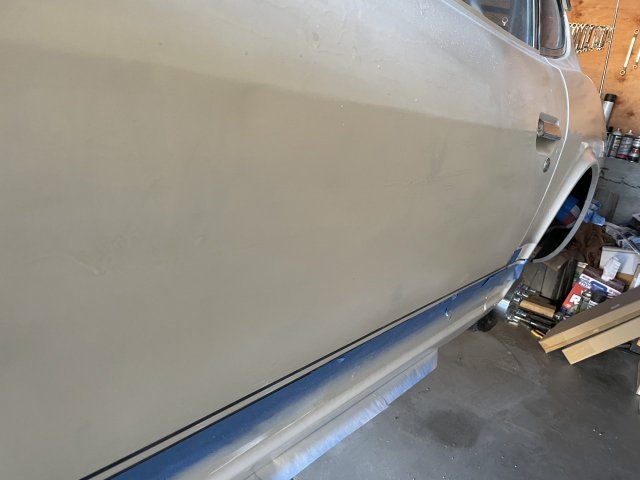
6-26-2022 UPDATE. Buff.....Buff....Buff! The right hand side or passenger side got the attention today, to include the upper sail panel behind the quarter window. Buffing, then stopping and wet sanding, and some dry sanding, then back to the buffer...back and forth, and using a lot of compound. Still using the Turtle Wax stuff...I took a pic so you can see what I'm using so far. As I mentioned earlier, I will use the McGuires after this on final buffing with the red foam pad, which is for final buffing. The purple is the stiffest foam pad, and it is for REALLY cutting, and it WILL....you have to be careful! The orange pad is a middle of the road one, for "mild cutting"....it does the job ok. All of these are on an attachment that is used in my electric drill, and it causes enough drag, that I have to stop from time to time to let the drill cool down. Teaching yourself to do this, means learning, and that means going back and fixing areas, where you learn how to not push TOO hard, how to hold it against the panel.....how much throttle to use, to control the RPM's. etc. That said, I AM making progress. Still 2 steps forward, 1 step back, and yes, body and paint work is getting old now.... ready to get this done and move on to other things. Takes a long time when you are teaching yourself. And that brings to mind my beef with these shows and videos that show how to do this stuff. They give you the false sense of believing it is all easy and straight forward. It is not. It takes a "feel"...and that can't be gained by watching a video, it takes experience. That goes from beginning bodywork, all the way to buffing. Off the soapbox. Whew! And yes, you are seeing the end results of doing a rattle can paint job with enamel paint. (Rustoleum Enamel~ if it doesn't say "ENAMEL" then it isn't. It's lacquer. Do NOT use that stuff! At any rate, here are some pics and a video at the end to go with coffee. Take care.
Click under here for video. It won't let me load it on here, so this link takes you to facebook. Click on the pictures in the writeup....the last one is the video. I think the video is too long for here, I tried 3-4 times and gave up.

-
6-25-2022 UPDATE. Well........OK. Started buffing. As I go, when I have a spot that isn't quite shiny, I grab a piece of 2000 grit wet it, and sand it, then polish, repeat until shiny, then keep on going. I got the rear hatch good, most of the roof, and most of the hood. Once I am done, I will go over the areas again with the fine foam pad and McQuire's. Right now I am using the middle pad with The Turtle Wax compound. I have tried the hardest pad on a couple of rough spots and now have a feel for when it can be used in tough spots as well. Couple spots I had to paint when the color sanding went through. Here are pics so far.

-
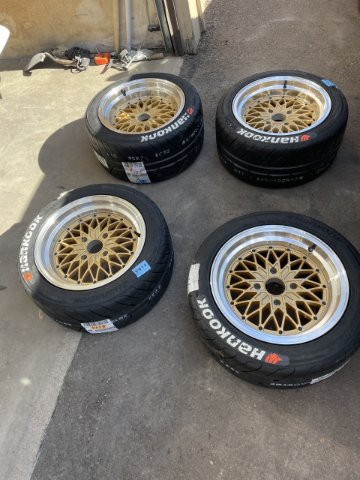
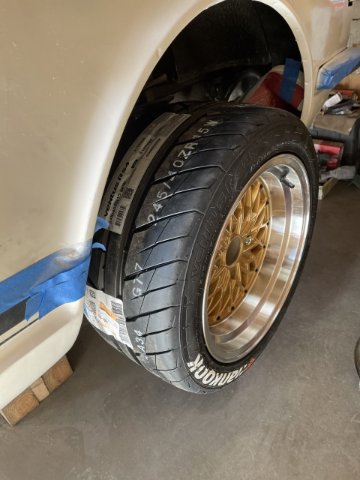
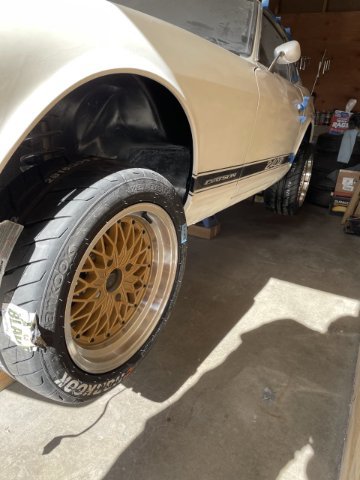
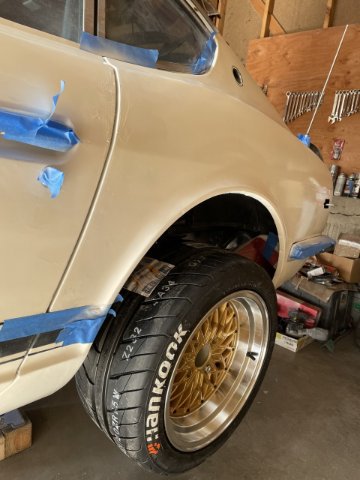
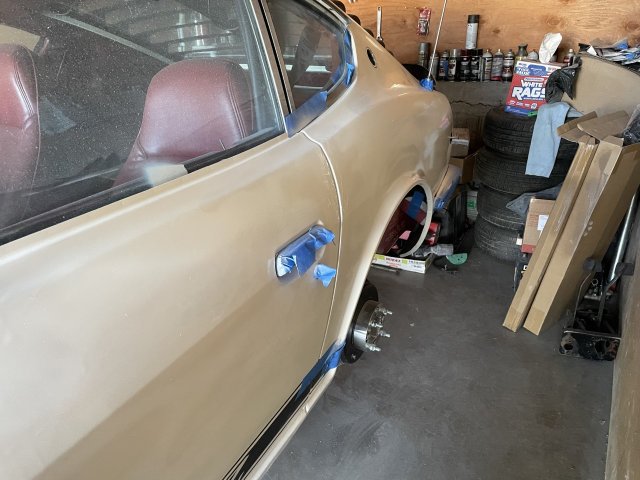
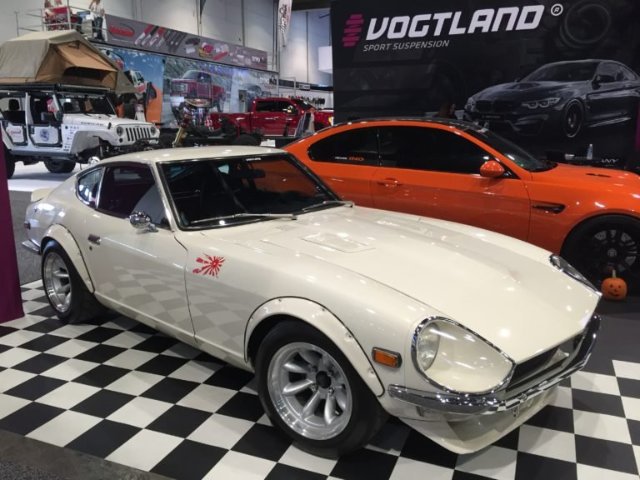
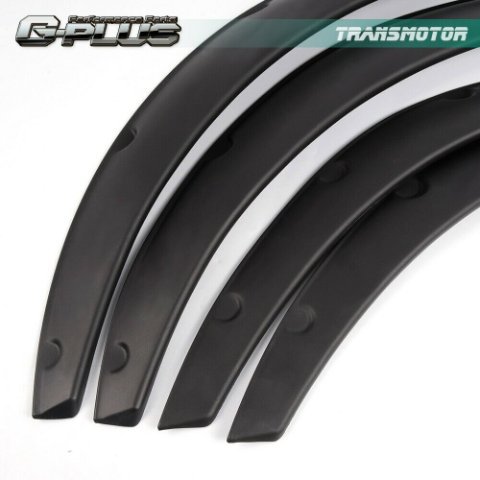
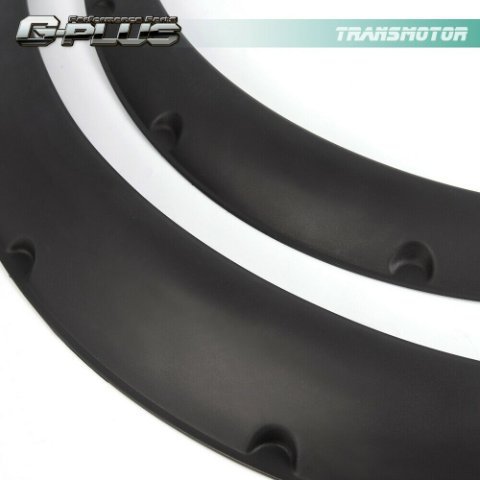
I put looks over functionality this time. 15X8 -25 front, 15X9 -38 rear, (wheels at are 0...final negative is with with spacers) to restore my backspacing for my stock spring perches AND get the "poke out" I wanted. I will be adding my flares later on....ZG type, but flexible, ao I can make them contour to the original wheel well edge. Then I can back off the screws enough to mask off around them, and mask the bolts, paint them, and put my fender welting in, then tighten screws down once dry. Welting is old VW bettle welting on a roll. Flares will be matching white. Tires, 225/45ZR15 front, rear 245/40ZR15 Hankook Ventus R-S4 dry weather tires. It's a weekend cruiser/toy. Once car is back up, it will go in for alignment. Ever since I was young, I always dreamed of having a Z that was flared with spoilers.....so I decided that life is short enough, I should do it the way I want, without later regret.
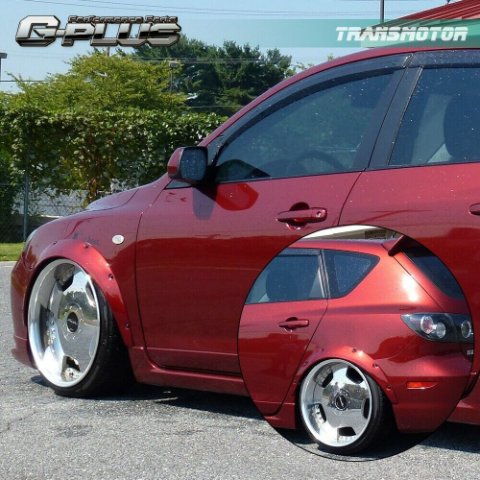
here is a pic to show my desired look:
-
6-24-2022 UPDATE: I got the tires mounted on the new Mesh wheels. put 2 wheels on to mock it up real quick......obviously need to take all the stickers and stuff off the sidewalls. These tires are directional....and becasue I am running a Staggered tire setup, there is no tire rotation! Here are a few pics.
-
From the reading I have been doing, it appears that given a certain torque converter, that if you put it into a more powerful engine, that torque converter will actually stall HIGHER. Not sure how that works, but if that holds to be true....then a stall converter from a 510 that had the factory stall of 2200 RPM, will stall about 2500 or more approximately in a L24/240Z ! I was able to get a used converter today form a guy who pulled it from a 1972 510 wagon for a good deal. I will clean it up and see what happens. Of course the Stage III shifter will go in as before. Results to follow!
-
I did some part number cross referencing.
The part number for a PL510 torque converter is 31100-X0301
The part number for 240Z torque converter is 31100-X0500
So, there IS a difference! That means that a PL510 torque converter will flare higher, or stall quite a bit higher than the stock 6 cylinder one.
The part number for the Z is 1970-1978. So 240, 260, 280 used the same one. The big differnce is in the 1981-1983 TURBO cars. They stall a bit higher than the naturally aspirated ZX cars. Naturally aspirated 2200 RPM or so, Turbo 2700 RPM or so.
-
Ok, well, I have found more information to post. Comes fromt eh Ratsun forum, in particular the Admin over there, "datzunmike". cool info:
Quote: "JATCOs were installed on April '71 and on 510s at about the time they switch from column to floor shift so you're ok there.
The Z and ZX did use the same converter and it's a different part number than the 510 but also used in most 4 cylinder 710/610 A10 S10 even the 620 truck so probably all the same. The biggest difference would be the number of clutches and plates inside.
However!!! The 280zx turbo automatic was much different. It had extra plates and clutches and a modified vacuum diaphragm for firmer shifts to contain the turbo power. (I think the internal line pressure relief spring was also stiffer for higher pressure) The internal first and second gears were also different and lower.
Regular 3N71B
2.456
1.458
1.000
280zx turbo 3N71B
2.841
1.542
1.000.... this gets the engine and turbo spooling faster.
Here's the kicker. The stall speeds is increased on the zx converter from 2,200-2,300 to 2,400- 2,700. Again to spool the turbo faster at a lower vehicle speed." /UNQOUTE
-
R_3.....update?
-
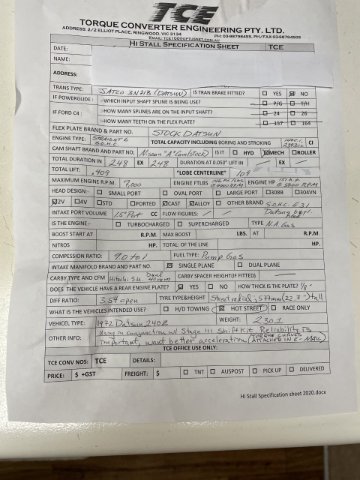
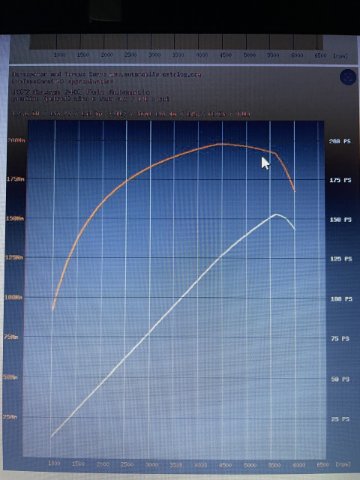
Here is a copy of the sheet I filled out for TCE to come up with a good torque converter.
The specs are stock L24 with an E31 head.
-
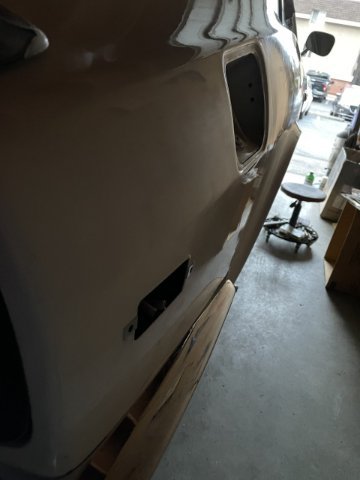
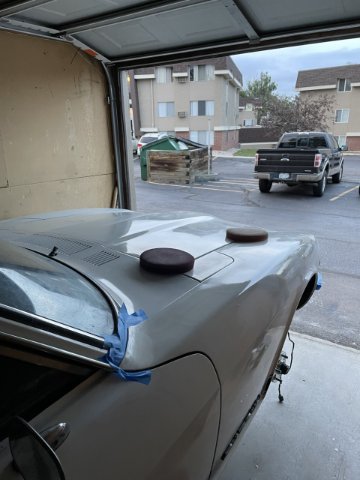
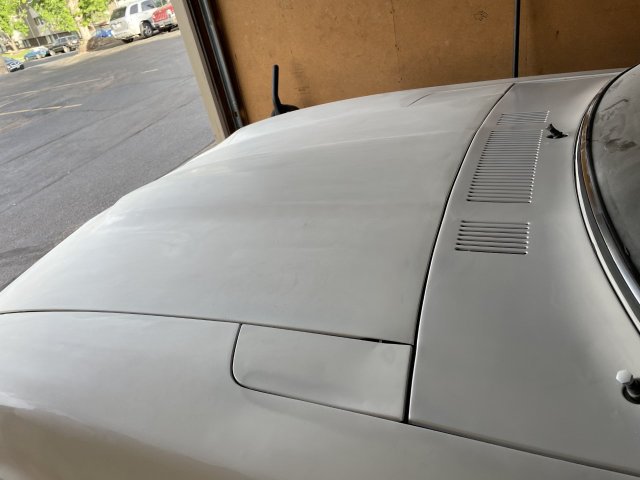
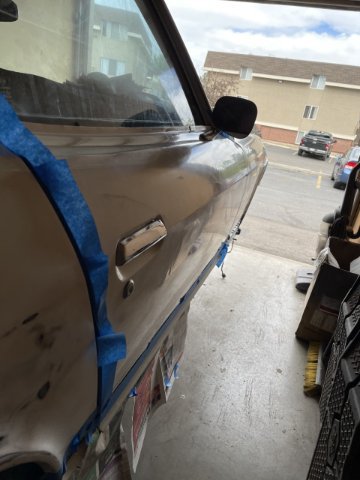
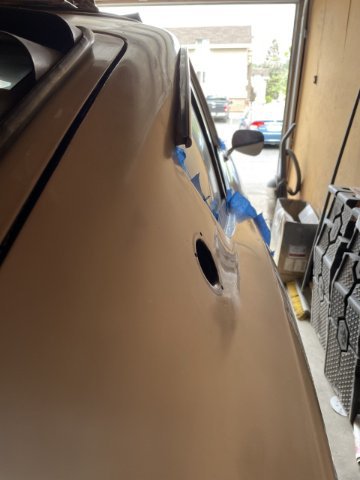
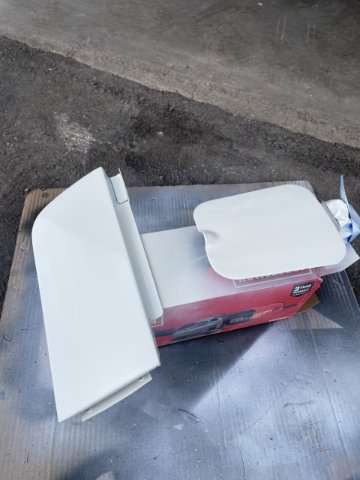
6-21-2022 UDATE. Further progress on getting the paint ready for final buffing, passenger side ready, driver's side 99% ready, hood ready, cowl painted, will be ready in a week, give the paint time to harden. The dented access door is already addressed, it's repalcement is awaiting a quick color sand and buff as is the gas door. Making progress. Here are some more "in progress" pics.
-
I did a writeup on Automatic Transmission performance for Z cars. Feel free to check it out. Here is a link:
-
Since my car is a 1972 240Z with the Automatic transmission, I have developed a keen interest in how to increase performance using or rather keeping this transmission.
The JATCO 3N71B. Used by both Datsun and Mazda in the early days.....early 1970's. While Datsun owners have done next to nothing with them, Mazda owners HAVE. In fact they are still used in Mazda Drag racing circles, and Australia seems to be the place where all levels of performance upgrades are to be found.
Being a street car, I was interested in a shift kit to get rid of sloppy shifts and the possibility of a higher stall torque converter to get the car accelerating off the line comparable with a manual trans car fitted with 3:54 gears.
So, the Automatic cars in 1972 came with 3:54 gears, and "drive" is a 1:1 ratio, so in Drive it is the same as a manual car in 4th on the interstate.
"RB30X, a member on here I found, has been making and selling a "Stgae III shift kit" for these transmissions. You get a heaver duty spring to go inside the valve body and a CD with instructions on the modifications that are necessary to make it work like it really should. He does however note, that he also sells a Stage II kit with a tad bit weaker spring, for those who don't want it to shift "too hard". Hestates that teh modifications actually INCREASE the life of the transmission, as there is less drag!
The next point in street car JATCO performance seemed to be Torque Converters. Even in Australia, that is a bit of a challenge. I found a shop, called TCE in Victoria, Australia that will custom make torque converters for our transmission. When I contacted them, they sent me a PDF file fo me to fill out and return to them, so they could look into what I would need for my individual setup.
My thought process as of right now, is to use the 3:54 gears in the rear, because If I go with a lower gear set such as 3:90 or 4:11, the cruising RPM's in Drive are going to be awful. The one option is to find the rare 1984 year model only MAXIMA Automatic the "4"N71B. The trans is the same but has an overdrive for the highway. 1985 and onward, are electronic, not old school juice box controlled, and for an old Z car, you can't use the electronic ones, so, you have to find the trans, and also use the engine flex plate for that transmission and the crankshaft spacers. In short, A LOT of work and money. The 240Z at least is light enough, that 3:54's I believe will work, and acceleration with the shfit kit and torque converter may be the way to go.
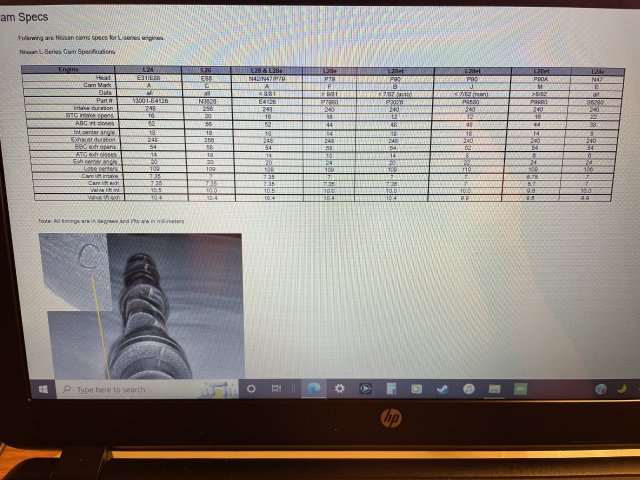
TCE asks for information on the car. One of the things they need are the came specs.
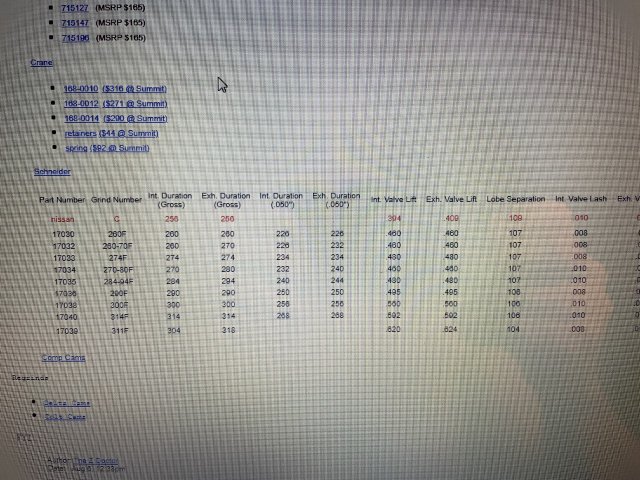
Stock cam spec's? Welll they change from car to car 1970-1973 used a Nissan A cam. A google search got me this cool page that breaks it down and compares to aftermarket grinds:
www.atlanticz.ca/zclub/techtips/cam/index.htm
1970-1973 "A" cam= .409 lift, 248 Duration, 109 degrees lobe separation, BTW.
I will get a quote back from TCE I hope soon, and will add that to this writeup. You CAN make the auto work with the L series engine without going to a Chevy Turbo 350 with the adaptor kit! I will post a copy of the sheet I filled out which gives some of the critical info ont he car they ask for.
Here is a link to get the shift kit if needed. If it doesn't work, go find him, "BR30X" on HybridZ.
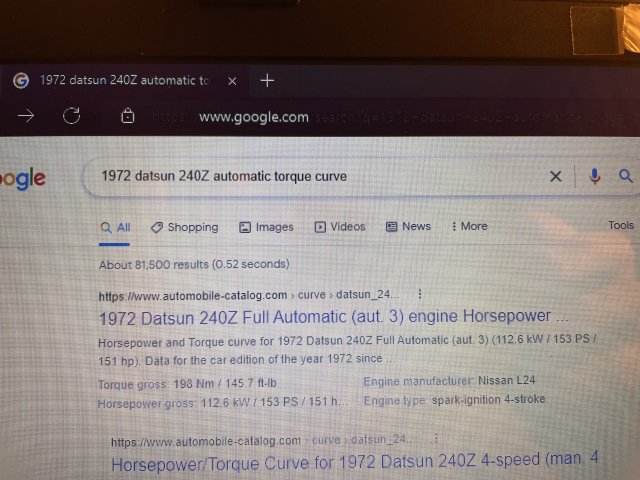
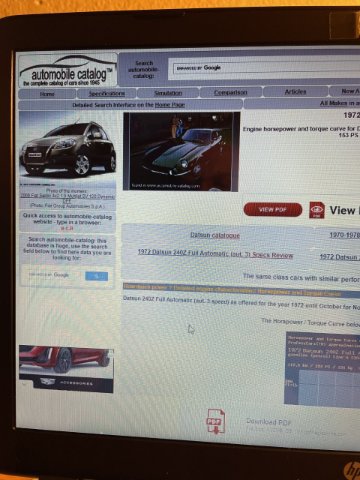
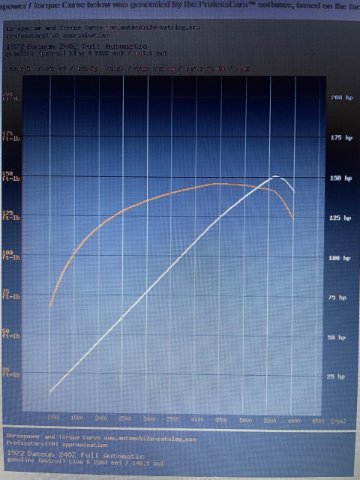
Also, I have attached some relevant pics. The torque curves are useful in that TCE and the owner need to be able to see where is the optimum RPM for stall speeds etc. These are for my car, a stock L24 Automatic, in a 1972 240Z. To check your cars torque curve, if still stock, go to Google, type in your car, i.e. "1972 240Z Automatic Torque Curve" and the first site, it's the one to select ..."Automobile-Catalog".
Cheers!
-
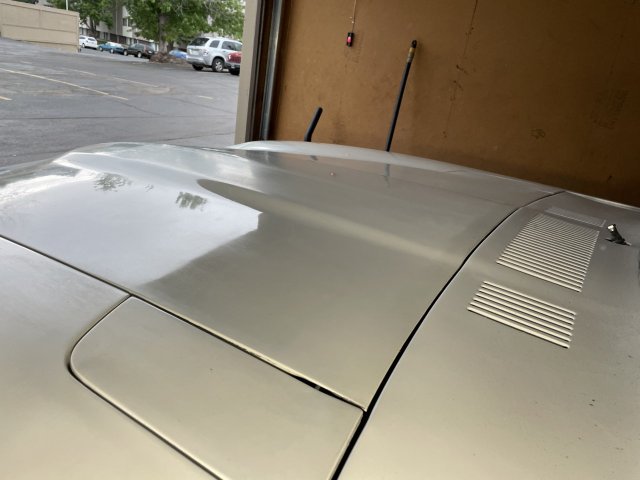
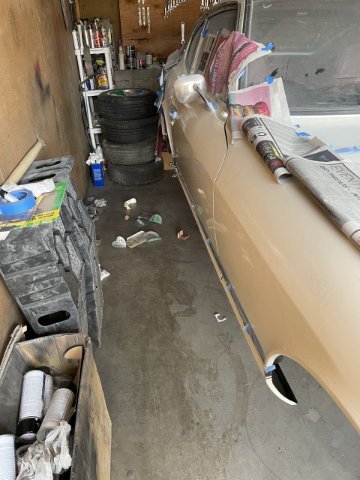
6-20-2022 UPDATE. Passenger side (or right side) paint work. I got the right side ready for final buffing. I finsihed some painting, and got the rest sanded and hand rubbed out. It is ready for final buffing on that side. Here are some pics, the big side picture is a not quite finished pic. If time allows, tomorrow I will get the other side, the left side done and ready for final buffing. The top is really close to done, and the hood needs to be color sanded out and buffed. Once done I will use some stronger cutting polishing compound by Turtle wax I got at Walmart with the blue pad, then use the final black pad with the Meguires compound to make it glisten! Then wax with Meguires Gold paste wax. I am so ready to get the paint and body done! Finished the day with some garage cleaning to get back some working room! Cheers!
-
Tim,
Do you have any place that sells or will modify a torque convert for a higher stall?
If not, I am wondering if a torque converter out of a 510, being a 4 cylinder.... would be smaller, and thus give me a higher stall in my 1972 240Z.
Please respond.
Thanks.
-
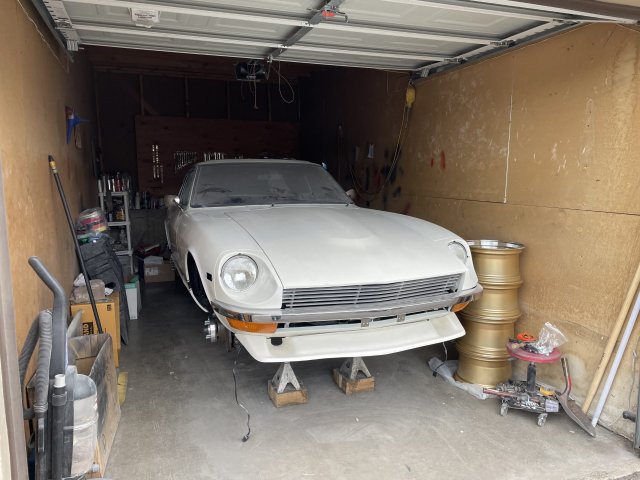
6-18-2022. Wheels showed up today from Malaysia:
TIres on order. HankookVentus R-S4..... 225/45ZR15 in the front; 245/40ZR15 in the rear.
The car is REALLY starting to come together. Just past a year on this project. This one is a keeper!
-
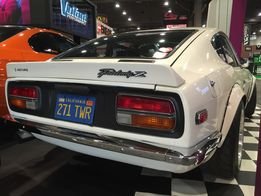
After I laid plans, I found this Z car online, which is extremely clsoe to mine. You can see the painted flares with the black welting between the flares and the body. This is what I am doing.
-
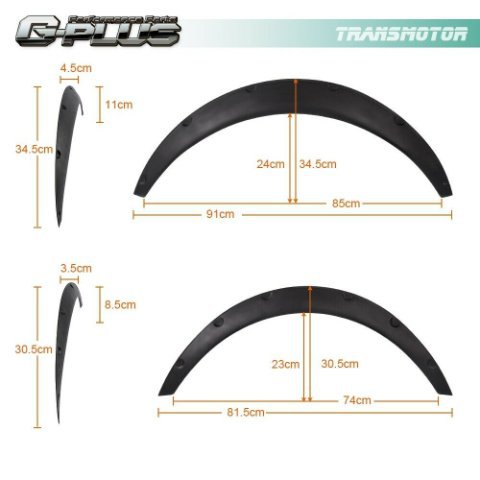
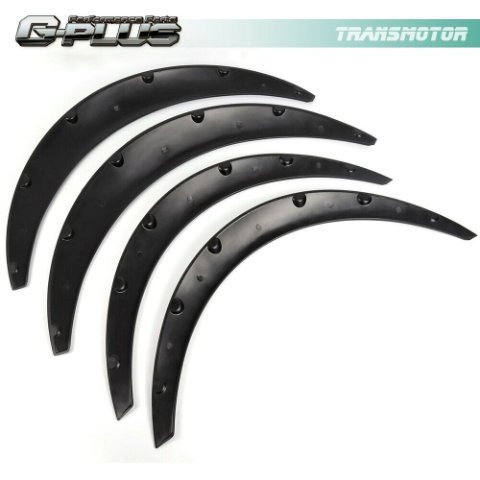
I have given the car a couple of baths, and then used a broom to push the water out. The wheels will stick out 1 inch in the front, and 2 inches in the rear. I have bolt on "ZG" flares for the car, and I got VW Beetle rubber welting to go between the flares and the body. The flares I will paint white. I also have stainless screws to attach them!
-
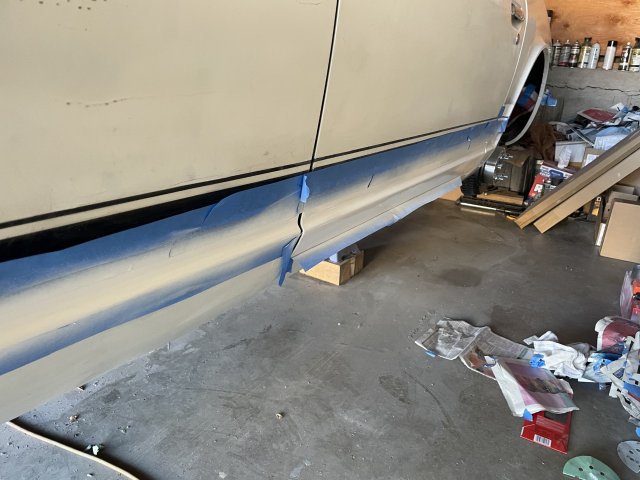
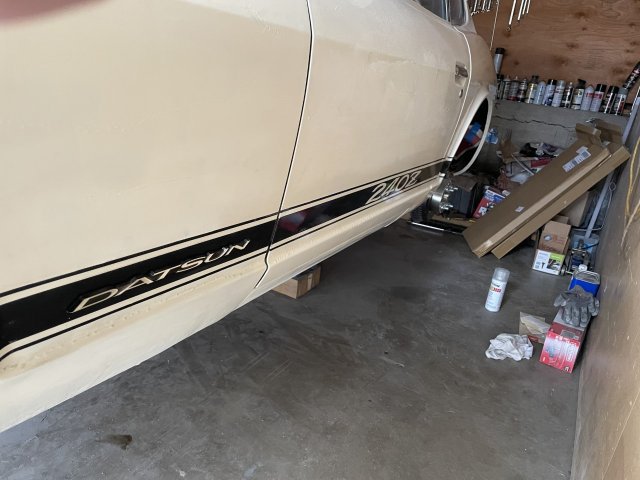
6-12-2022 UPDATE: So, I spent the day working on the side stripes, rockers, and doors. The lower rockers on both sides are color sanded out and are awaiting buffing. The stripes I finished up, color sanded out the clear over the stripes on the left side and sanded out the part under the stripe where all the drips went. Found it was easier to sand it back down and respray, the right side stripe still needs to be cleared. I then color sanded out the doors. almost done on both...the razor blade trick helps a lot on runs. The first pic is me taking a bit of poishing compound and rubbing a spot on the right door.....shiny, but has swirls....which will come right out on final buff. Here are some pics.

-
1 minute ago, Dat73z said:
Are you worried at all about compromising the structural integrity of those spacers? It looks like you ground it pretty close to at least one of the bolt holes which is likely where a fracture or failure would occur.
In person, it is fine, it is a spot where trying the die grinder left a knick. Thanks for the concern, but in person it's fine.
-
6-6-2022 UPDATE. Continuing saga of finishing up the paint work. I worked on both rockers and the rally stripe on both sides, made some progress.....I also preppred and finished the painting on the driver's side (left) upper quarter panel, and then color sanded out the other side, save for 2 spots that need a tad bit of white and clear. I have finally figured out the way to sand out runs, so I am really happy about that....as my clear really looks great and is tough, but is RUNNY when wet.....you have to master very quick moving shots, and even then, you may still get 1 or 2. At any rate, the left rocker is in clear now, emblem included.....but will need a tad bit further sanding under the rally stripe, as the paint just ran down the vinyl.....put the vinyl stripe on the left side is now buried in clear....YEA!! next week, God willing, I will finally finish the painting, leaving only finishing out the color sanding and then buffing/polishing. Cheers!
-
6-5-2022 UPDATE. I had some time today so back to the garage. I clearanced my front wheel spacers so that they would sit flush all the way on....and then painted the right side of the car. Only a portion of both quarter panels remains and the rockers, and the paint work will be done. Polish it out and move forward!
-
Since I made this thread things have changed, I changed the order to Gold mesh 15X8's and 15X9's at 0 offset. I will be using 225/45ZR15 and 245/40ZR15 tires from Hankook. Spacers are going to give me the offset I want and the poke out I desire.
Thanks for the replies.
-
 1
1
-
-
Ah, cool! thanks for sharing!


Joe's 1972 240Z adventure. // 16 JUN 21 - 13 Jul 24 // 3 years 27 days build
in S30 Series - 240z, 260z, 280z
Posted
Thanks for the tips.
No....I didn't know about not using excessive compound, nor about mater making it cut harder....I do now!