

A to Z
-
Posts
680 -
Joined
-
Last visited
-
Days Won
6
Content Type
Profiles
Forums
Blogs
Events
Gallery
Downloads
Store
Posts posted by A to Z
-
-
Sure, no problem. What I did was I bought a stack of 1000 grit and now 2000 grit paper that fits on my 5 inch orbital sander, hook and loop. When I polish, I lay down a small soft towel, and put the orbital on it, then put some Turtle Wax polishing compound on it and run that towel over it. It really makes it pop! the orbital will do it!
50PCS 400-2000 Grit 5 in Wet Dry Sanding Disc 8-Hole Orbital Sandpaper Discs | eBay
this link above, it has a drop down where you select the grit of paper you want. 2000 is what really makes it shine!
Click below for a quick video
-
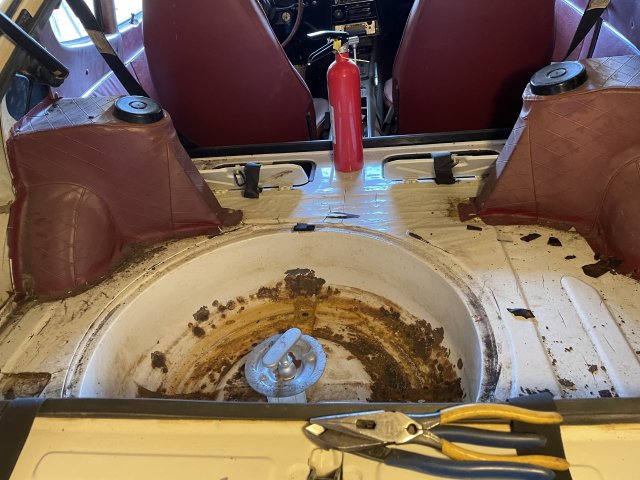
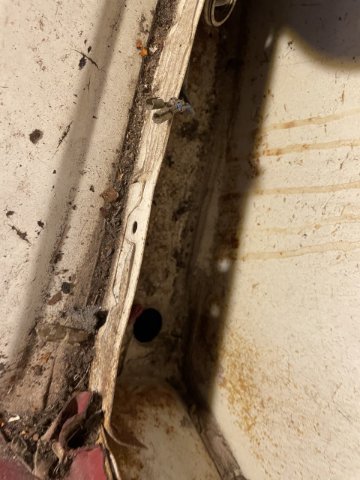
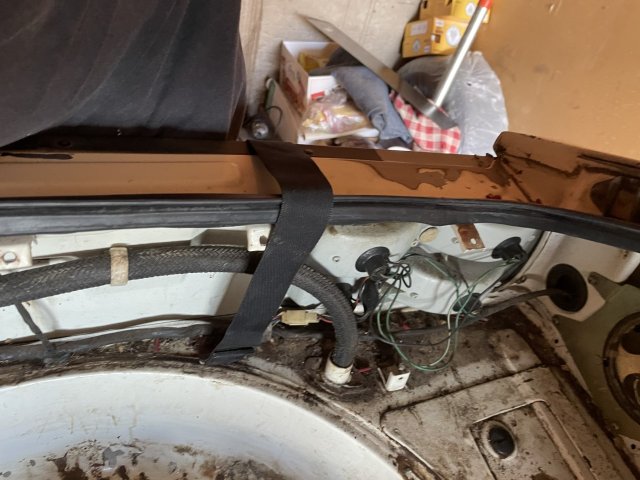
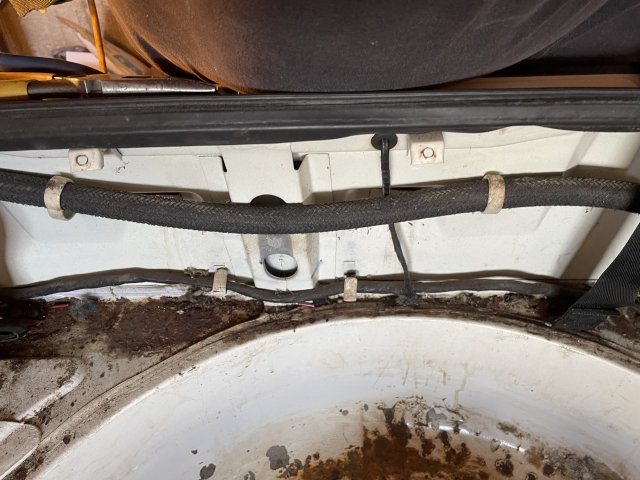
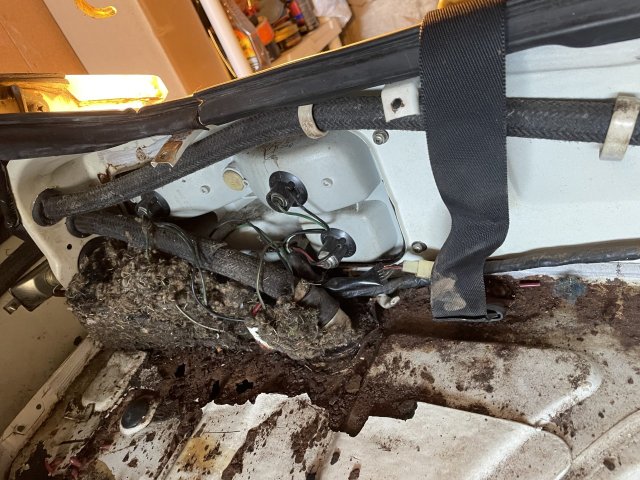
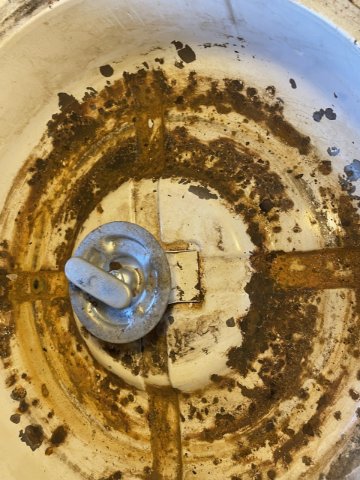
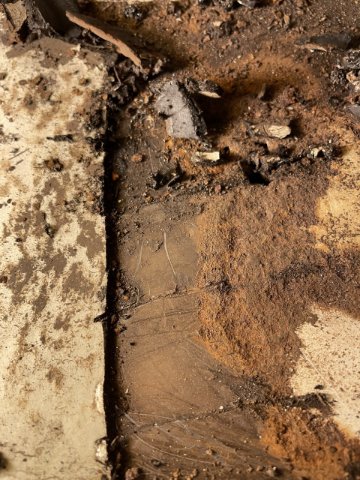
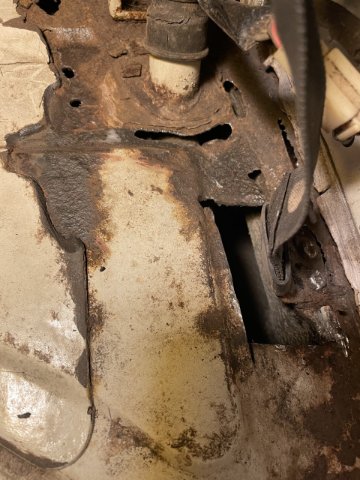
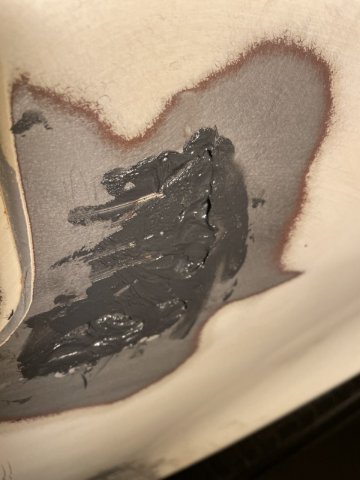
9-27-2021. More work on the 240Z today. (NOTE: I don't own a welder, and rust repair to structural areas will be done the old fashioned way with a MIG welder) I tackled the trunk floor. Here are some pics. Cut the rust out, decided to put the sheet metal cut out a tad bigger than the holes, and used Tek screws to hold it down, then went around the edges with JB weld to bond it down. I also used All Metal filler and then used it in smaller places where I had ground out the rust holes to good metal again. In the pics it looks sloppy, but once dry, I will use the Dremel grinder and sander to smooth it up and make it look great. The Tek screw can be removed tomorrow after it is fully cured, or I can leave them in. If I take them out, I can just quickly fill the holes with All Metal. I also redid the holes around the gas door. I cut and fitted some sheet metal behind the holes and bonded it down with JB weld to the factory sheet metal on the inside. I used Duct tape to hold it tight while it cures. To get to the spot, I had to removed that big evaporator gas fumes tank. The spare tire well looked much worse than it was.....I went ahead and wire wheeled it and then ran my orbital sander with 60 grit over it.....then the die grinder. I ended up with 4-5 small little holes. I opened each up a tad with the Dremel stone attachment and filled with all metal filler. then I realized the rest of the surface had a lot of dimples....good metal, but thin. I applied some all metal with my finger in a real thin coating, and once cured can be sanded and look great. Here's are some pics to go with coffee.

-
Wow, thanks for the heads up!
-
It's an option. I hadn't decided one way or the other yet.
-
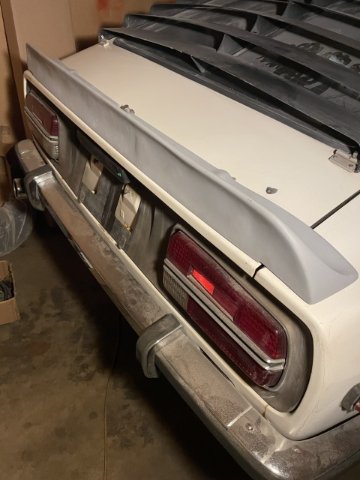
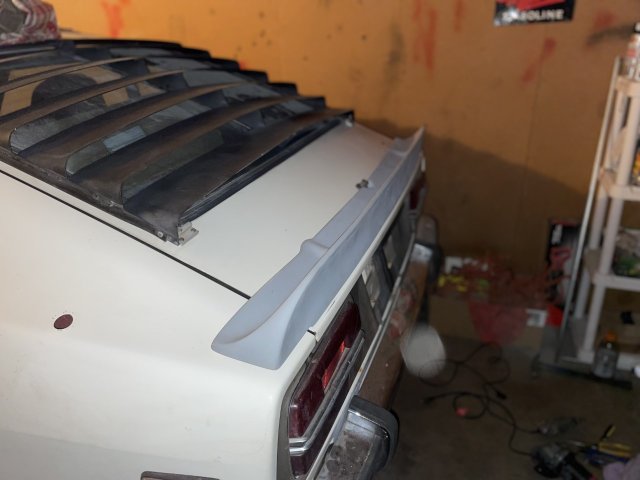
9-20-2021. I managed to get the rear spoiler on today. Also cleaned up and prepped the rear hatch inside and the hatch frame. Took a lot longer than I anticipated, but it's clean now, a bit of sanding and painting in a coupe spots then move on to the doors and door frames.

-
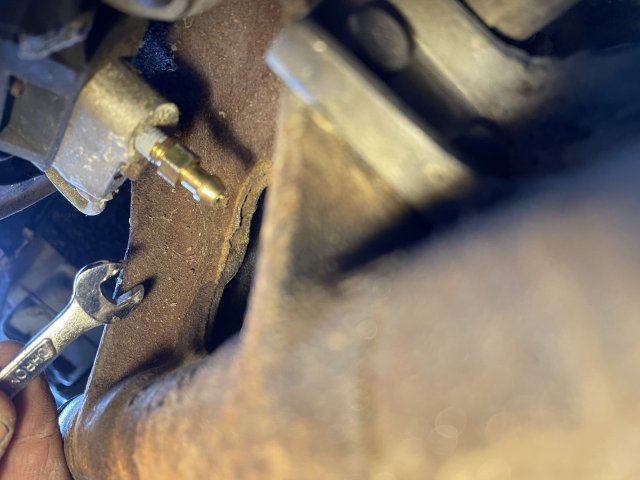
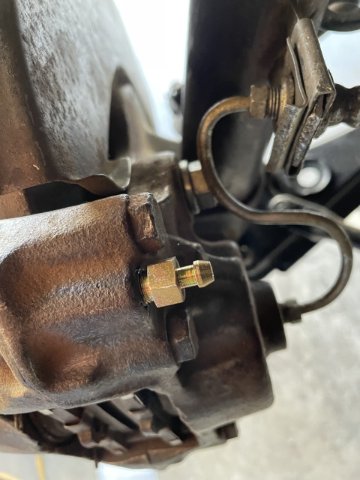
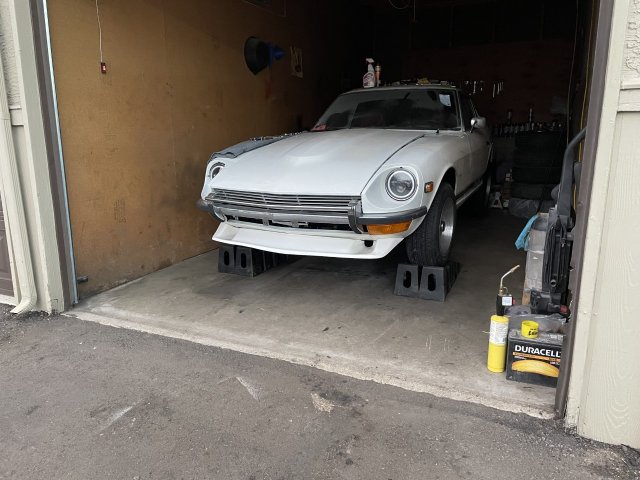
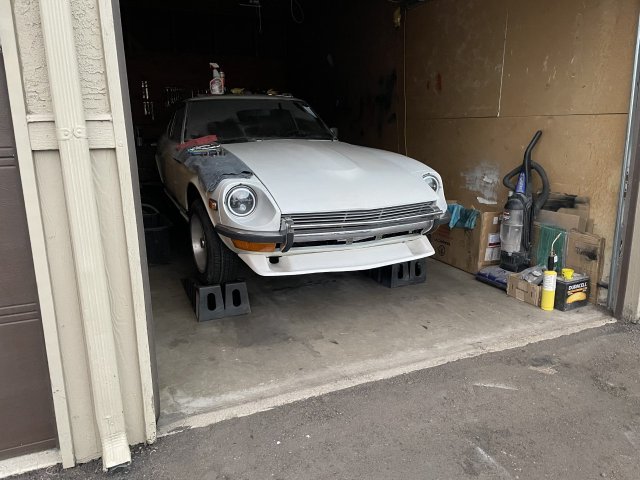
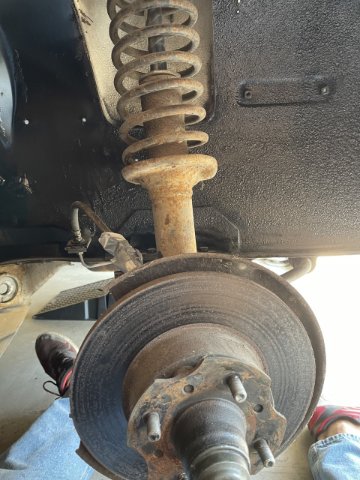
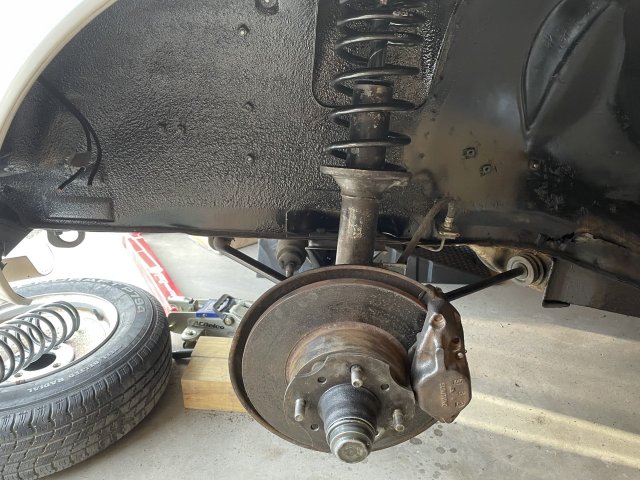
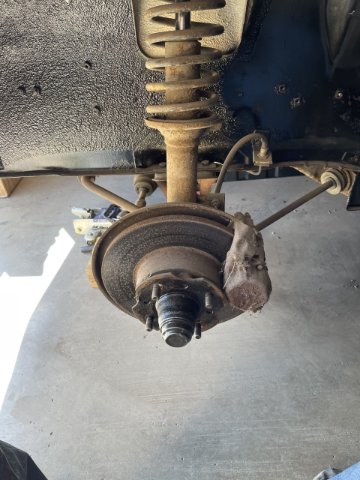
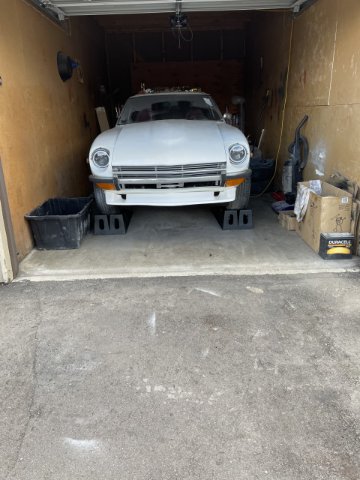
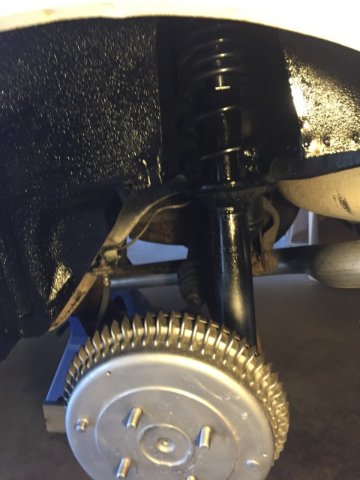
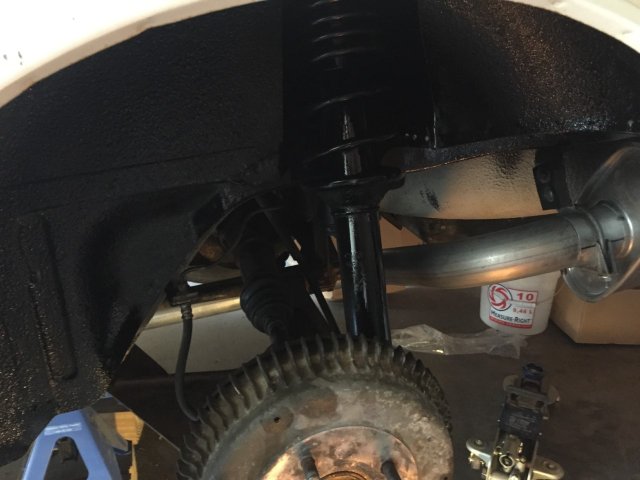
9-14-2021. More progress today. My replacement strut housing arrived, and so I went ahead and finished getting the suspension together. I then installed my brake "Speed Bleeders", and they work fantastic! I made sure to use the synthetic DOT 3 stuff I got at O'Reilleys. Also took a couple pics of my Z car....it's coming together! Monday was 3 months of having her. I put in A LOT of effort on this one. A LOT done in those 3 short months.
-
I bought a replacement strut housing on eBay. it is enroute.
-
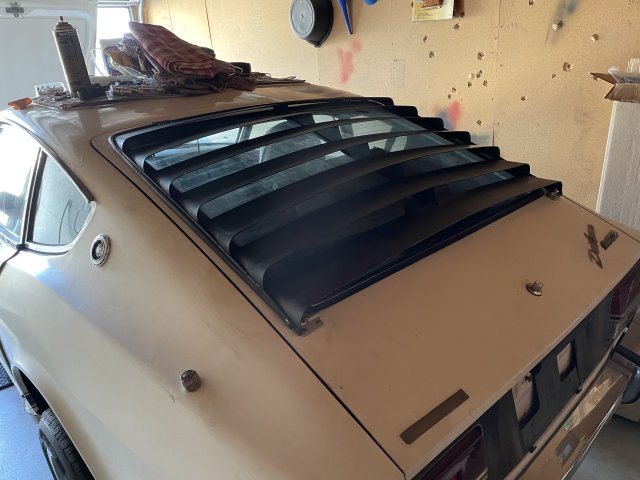
My car originally had the factory optional rear window louvers. By the time it came up for sale to me though, they were gone, just the brackets remained. Thanks to Glenn Delos Santos out in California. He gave me a great deal on them! Now she is back to where she is supposed to be. Nice initial fitting. Now I have to put my BRE rear spoiler on.
")
-
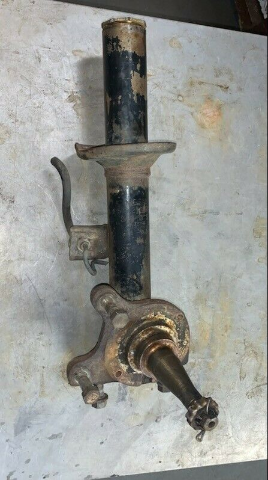
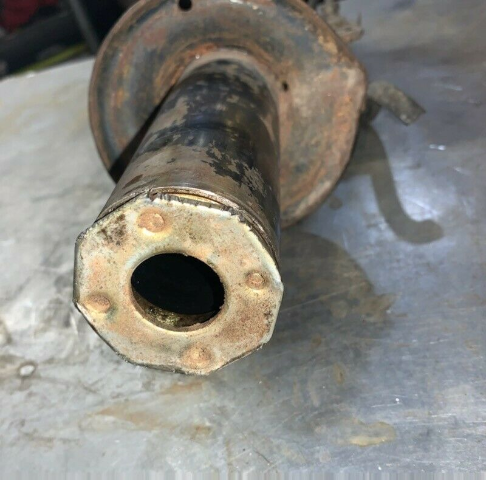
9-9-2021. Continued work on front end. I got the drivers front done except for going around torqueing everything on that side. Jumped on the passenger/ right side. The strut insert is rusted in so tight it won't come out! I tried heat....heat and tapping on it to loosen it up, several bouts with PB Blaster and letting it soak in....nothing.
So I will unfortunately have to get a different strut housing. All of the other stuff that I did on the other side I readied and prepped, bolts cleaned up painted here and there. the locknut for the right side end link on the steering, I had to use a monkey wrench to get it loose....I also had some time so I went ahead a mounted my rear louvers as an initial fit. Here are a few pics:
-
here is a pic of it almost back together, and still needing some more paint .
-
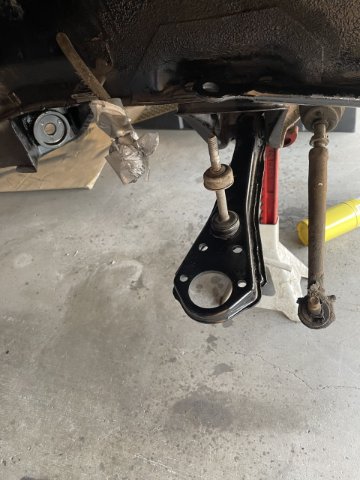
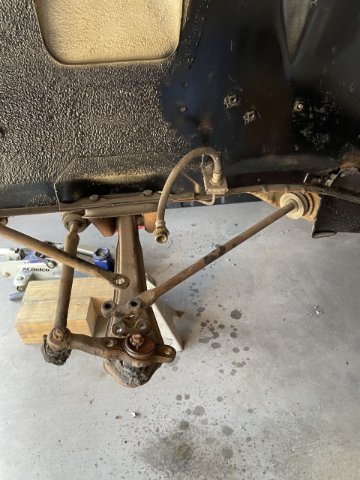
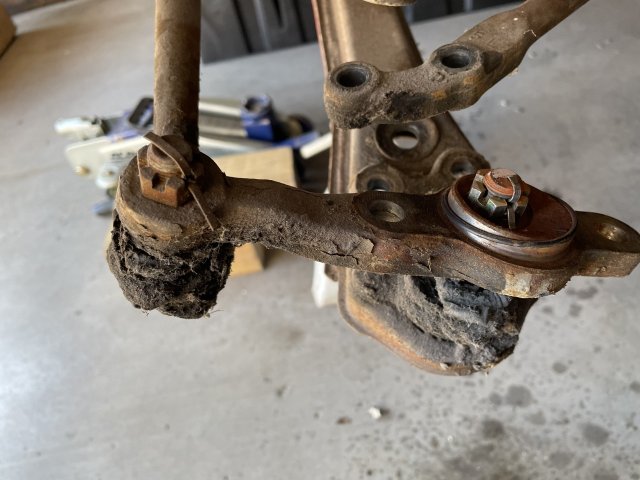
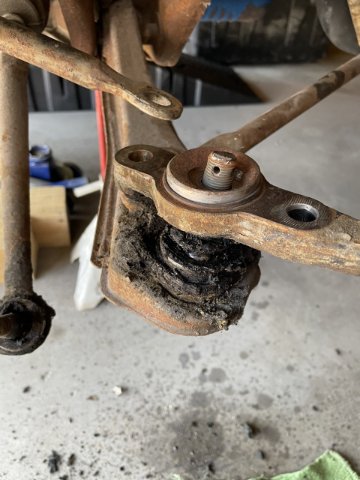
9-6-2021.....Started work on my front end today. It takes me a long time, as I don't do just the basics and call it good. I want to clean everything up, go over everything and check things out.
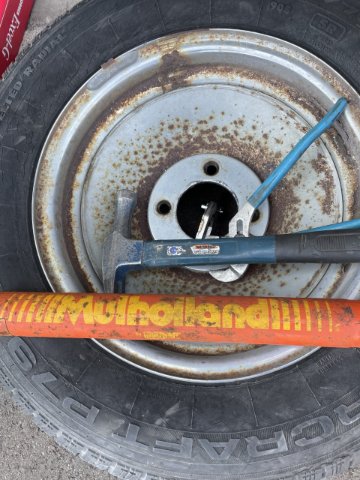
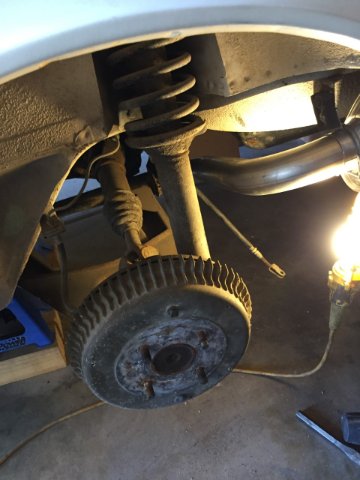
I think it's part of the experience of doing all of this. I kind of like the way they put the car together, with the exception of the the metal clips they put in there to hold the brake lines on there. I can tell you they sure don't like going back in!!! Today I managed to get the driver's front strut out, and changed out the strut insert.....it was a "Mullholland by Interpart"....and it was STUCK in there! Cool 1970's stuff....how did it get in there? Why was the rear not changed?? Questions of the past with no answers...... where the rears were originals in their factory oil, this was bone dry. I got it out and dropped in my new KYB. Torqued in at 75 ft. lbs just like the rear. Finally figured out how to get my cheap spring compressors to work, and I finally got that darn Eibach front spring in. I debated whether I should cut a coil off...a lot of guys say they did it, but I have seen some that didn't cut and it worked well. So, If I cut it, and it is too low, you can't put it back on....so I left it be. While apart, a lot of things got changed out. The strut bearing is a moog, pre-greased .....new ball joint, made my "ISG"....got it in....new rack end link (ISG made)....having issues getting that bolt to loosen at 49 years in place. I will add some pics....but it has been a learning issue. Why hire it out when I can learn?? I have the strut back in, things are mostly back together, still need to swap out the TC bushings, and do some painting. Let me get some pics. This is good stuff to go with coffee.
-
Jeez, I sure hope not. I love these OHC straight sixes!
-
-
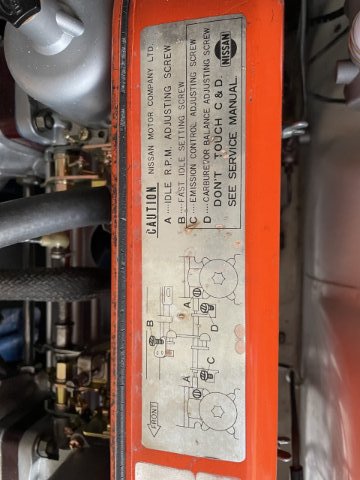
240Z SU's. The instructions on how to tune them make ZERO sense. First of all the mixture "screw*". It isn't a screw* at all, it is a wheel with 5 to 6 detents in it. So telling me to turn it 2 full turns out is impossible. Next, the Carburetor Balancing Adjustment Screws*. They tell you to turn both out then back into 1.5 turns. You CAN'T. You only have ONE Balancing screw*. The screw on the front carb is an Emissions Control Adjusting Screw. It has NO adjustability at all! The remaining 2 screws*, which are near the flange where the carbs bolt to the manifold are called "Idle R.P.M. Adjusting Screws*".....can't use those for sync'ing the carbs. So, if all the information out there asks you to make adjustments you can't.....then what??
-
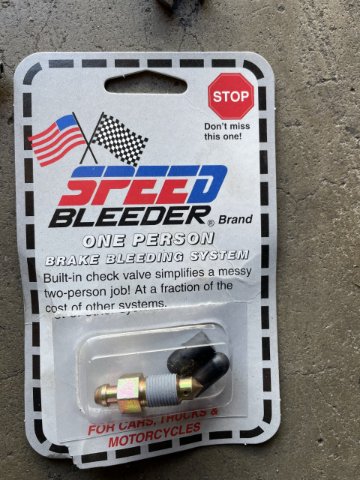
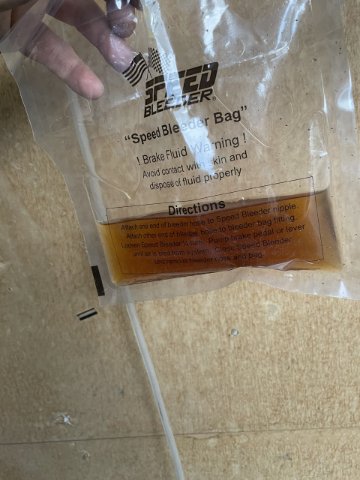
Wondering and asking questions about bleeding the brakes myself, I was pointed towards "Speed Bleeders". I love the way you can do it yourself! The check valve allows me to open them up a half turn, and then pump and add fluid, and when that wheel is bled, close the vavle and go to the next one. Can also bleed the new Master Cylinder this way!
Well, I ordered them last night. #SB1010 for the front discs, 2 each....#SB7100 for the rear drums, 2 each.....#SB7100S for the master cylinder, 2 each. Also got their dust covers, and their kit, which comes with the tubing and a RE-USABLE bag. Now I can do it myself.
www.speedbleeder.com
-
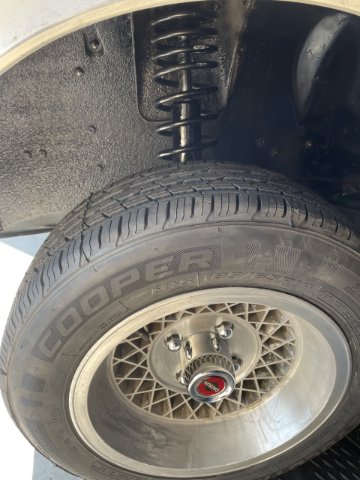
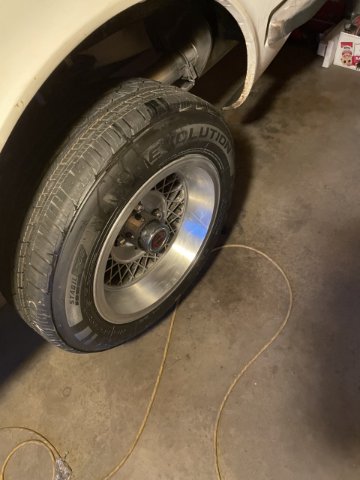
The wheels will need some work. The black paint in between the mesh needs to be redone, and the surface and lip will be polished with one of those Mother's "Ball" polishers
-
-
got offset?
-
I went ahead and got some wheel ramps. A bit safer than what I was doing. They don't make them out of steel anymore...but Nylon.
-
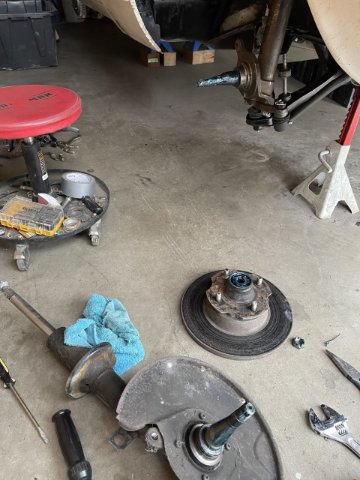
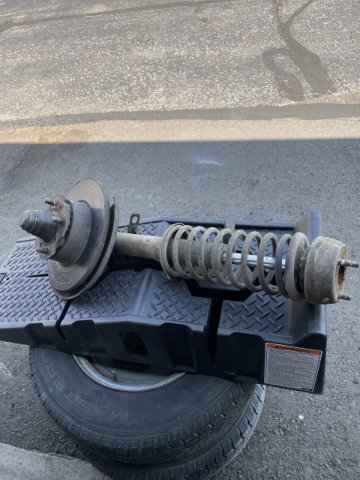
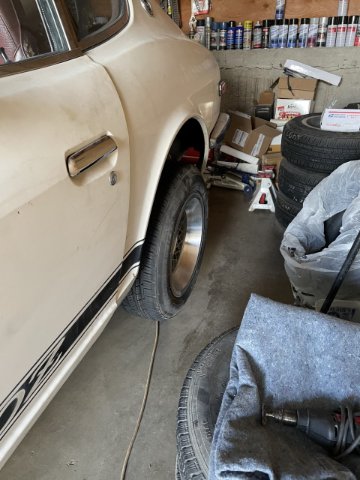
Had a little time in the garage today after swapping out the rotors on my daily driver. When the wear surface is thinner than the edge, leaving a ridge around the edge....it's time to swap them out.Used the die grinder to take the ridge off and I was able to get the calipers off. My ceramic pads still have 1/8" of wear left. So anyway, after that I finished my rear strut job by painting out the passenger rear wheel well, so now I just need to bleed the brakes and the rear is good to go! Anyone done the gravity bleed before? I also went ahead and put a wheel on. Granted the car is still up in the air but it gives an idea what I have. Last pic has the vintage Datsun center badges. 14X7 wheels with some negative offset. Vintage Appliance "Wire mag" wheels, with custom center caps and Cooper 185/70R14 tires. They had to custom stretch to get the tires on! Here are a couple pics to go with coffee gents.
-
put a little silver on the drum to make it look at least a bit prettier. Man, the passenger side rear drum does NOT want to come off! Anyway, just thought I'd share my day.
-
painted the place up a bit. more to do later. Popped the drum off and the previous owner told the truth! New brake shoes and the surface looked great!
-
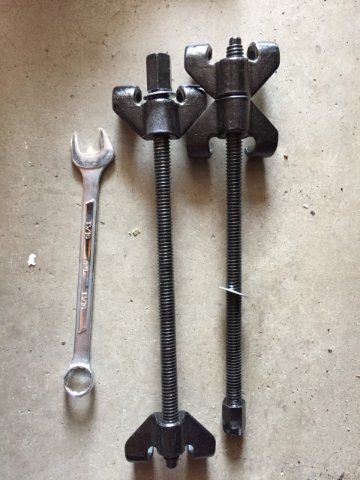
17 dollar spring compressors in eBay. I really want to tell you they work great, but they don't. Yeah, I got the job done, but they are a pain to keep on the coils. They like to fall off. When I took the spring off and laid it on the ground one time....before I could loosen them, they came off and the spring shot them across the floor! That will wake you up! Very dangerous, I made darn sure I stayed out of the path of travel while using them. I guess you get what you pay for.
-
So, here are a couple pics of install, KYB struts, Eibach Pro Kit springs. Nice to have the Gland nut wrench. I was able to torque them correctly. KYB says not to put oil in the strut housing. Well for many years everybody said to......I left the oil in, and put the new struts in. Oil isn't going to hurt anything, and will help maintain heat levels. The struts I took out were the originals, and when I put the new struts in oil came out! So, be ready with a towel or 2 and some brake cleaner to clean it up !


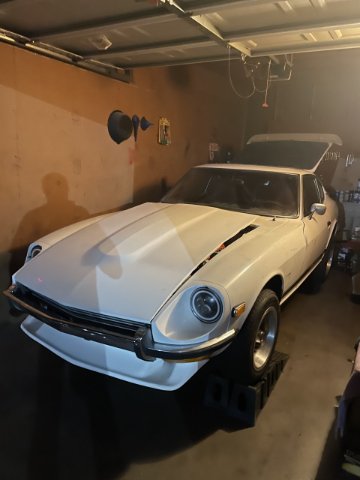


Joe's 1972 240Z adventure
in S30 Series - 240z, 260z, 280z
Posted
9-30-2021. I got the trunk finished up, except for the towers need to be painted. The SEM paint is enroute. The taillight surrounds.....well I painted them with a satin black, but it still looks glossy. Not good enough. I will have to lightly sand, possibly filler primer and re-shoot.