

A to Z
-
Posts
686 -
Joined
-
Last visited
-
Days Won
6
Content Type
Profiles
Forums
Blogs
Events
Gallery
Downloads
Store
Posts posted by A to Z
-
-
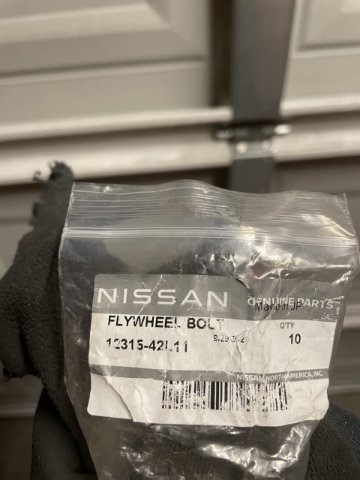
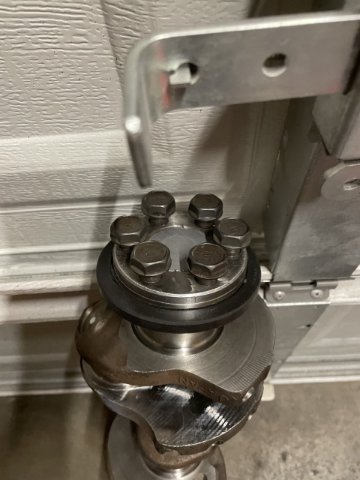
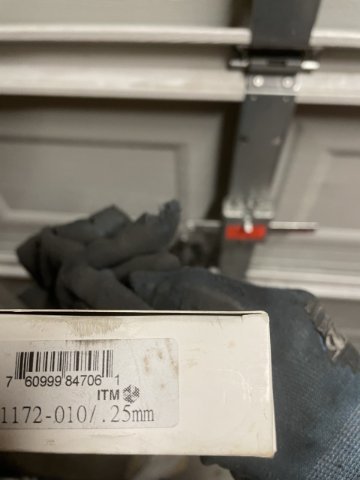
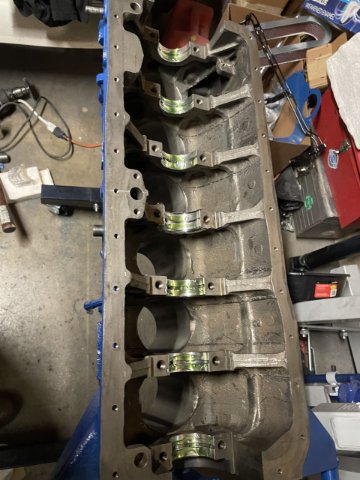
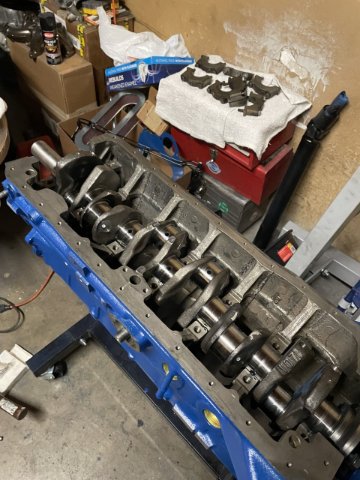
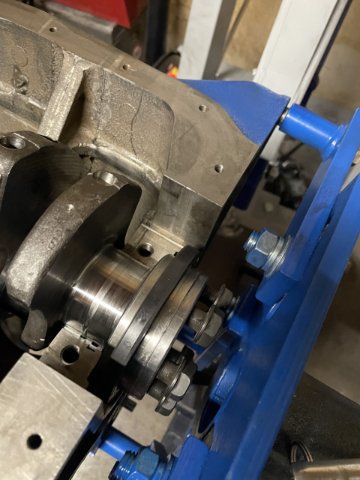
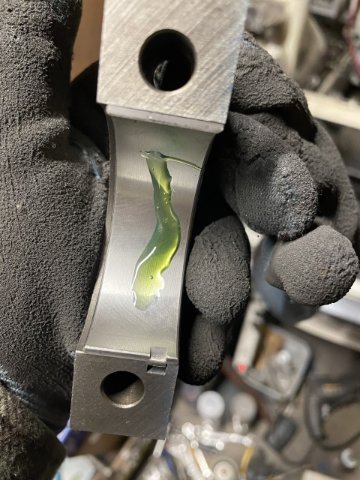
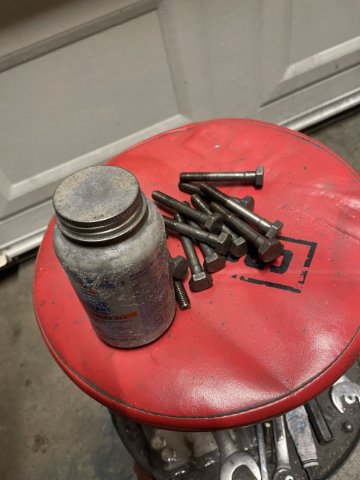
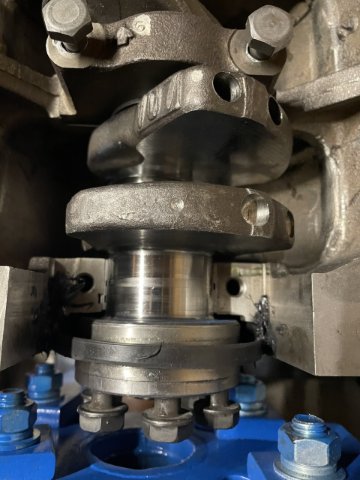
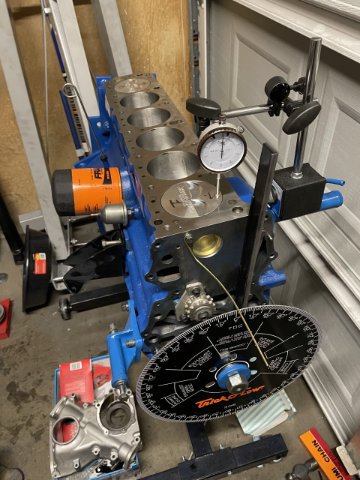
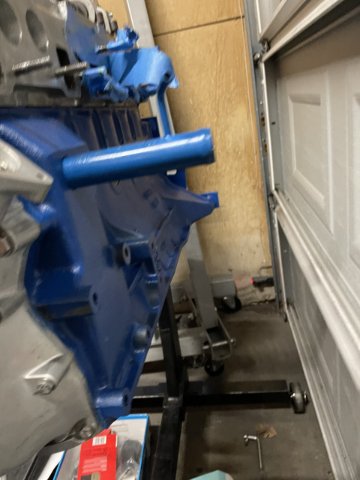
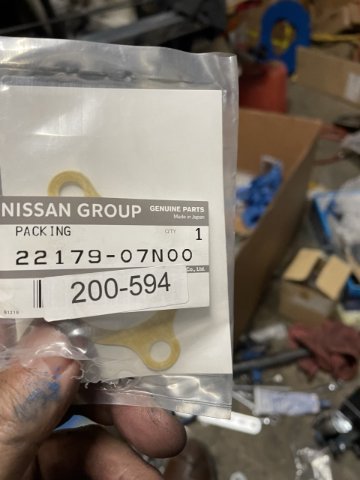
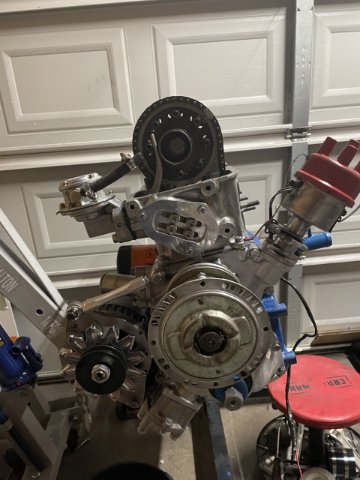
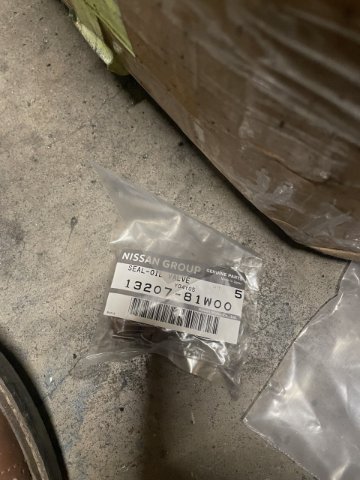
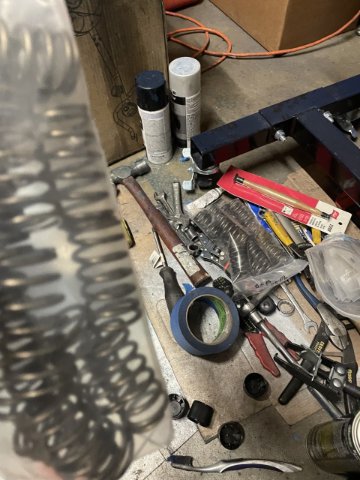
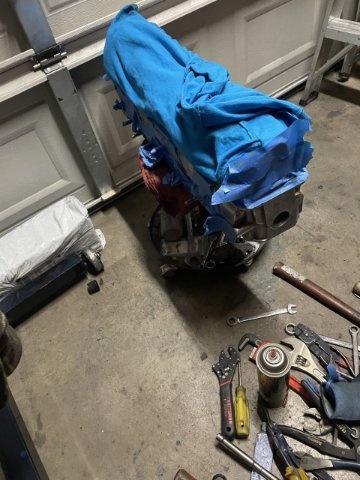
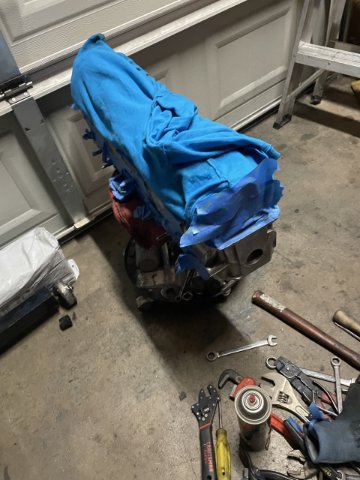
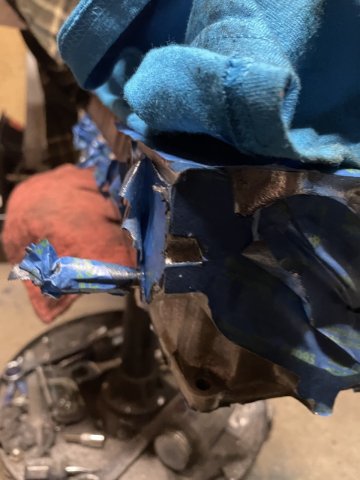
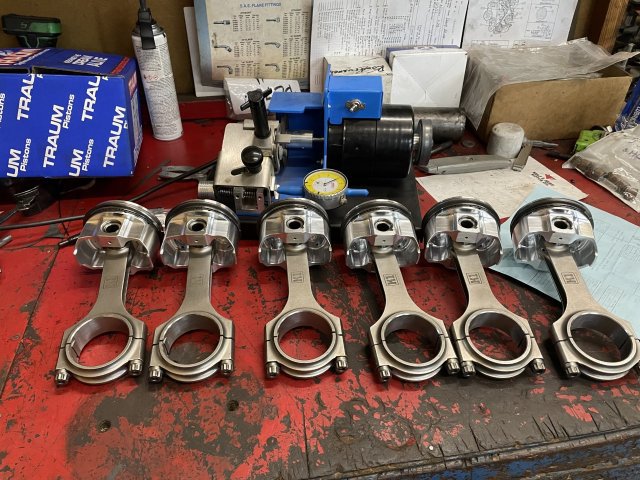
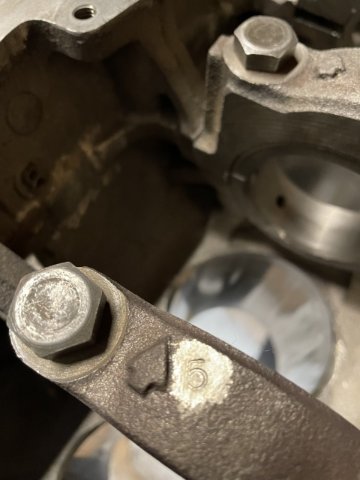
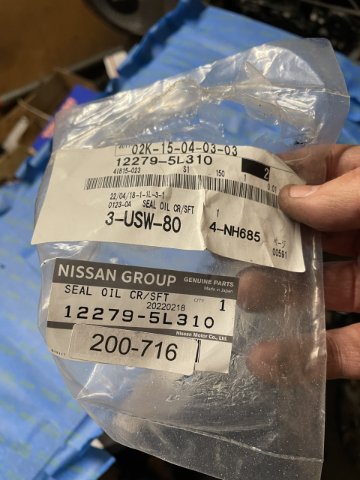
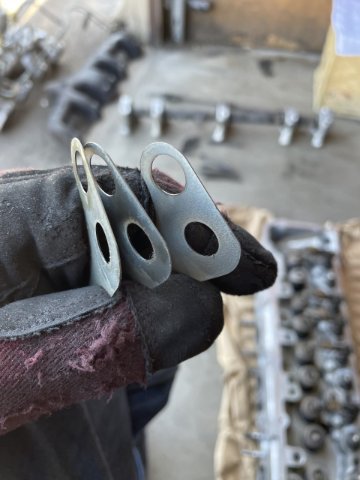
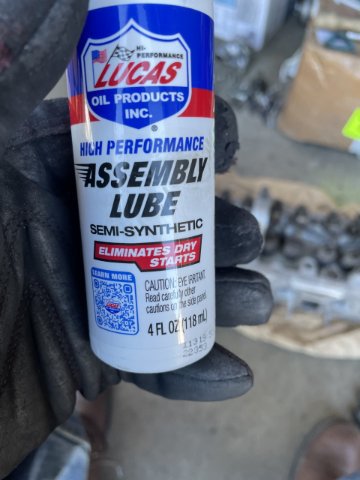
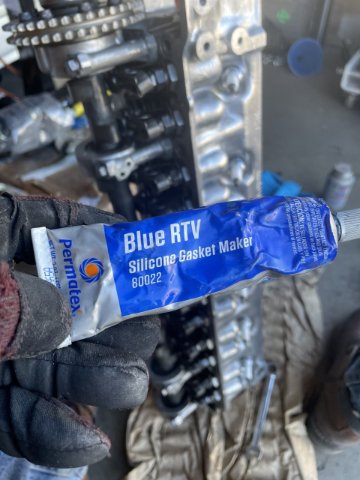
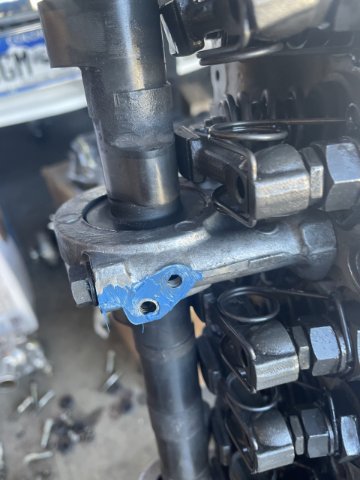
03-31-2023 UPDATE; Engine Assembly. Today I had a 13 hour marathon to get the engine together. I ran out of some parts I thought I had, so I ordered them, but it is almost complwetely together. Ran out of head bolts (the short ones) , and can't find my engine oil pickup, so I had to buy another one on eBay, and my rear main, the side seals that you push down in on the sides to get a tight seal. Some places sell just the seals, others sell the seals and the metal strips that go beside them in there. I don't know if you need the metal strips or not, so I went ahead and got the metal strips along with the side seals. I had put RTV selalant in the grooves a bit and along the cap bottom edge like the manual says....so when I put these strips in there, the RTV will already be hard.
 I had some issues.....just part of the game I suppose.. Pic heavy, enjoy.
 ")

-
03-27-2023 UPDATE. Well, I got my Engine parts back from J&S Polishing today.
-
03-27-2023 UPDATE. Well, I got my Engine parts back from J&S Polishing today.
-
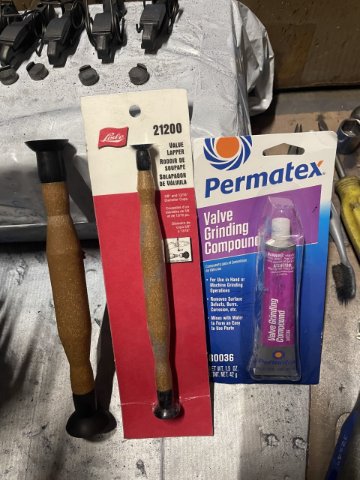
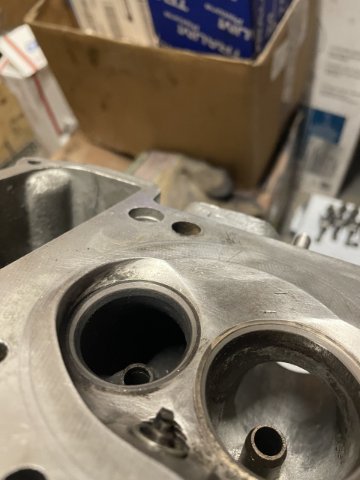
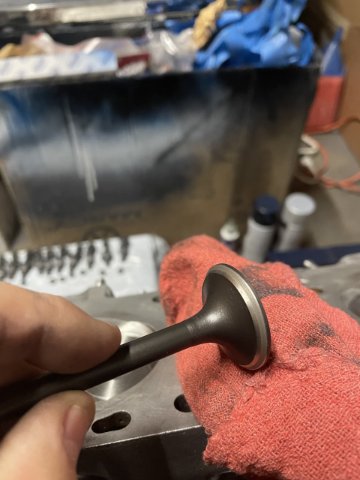
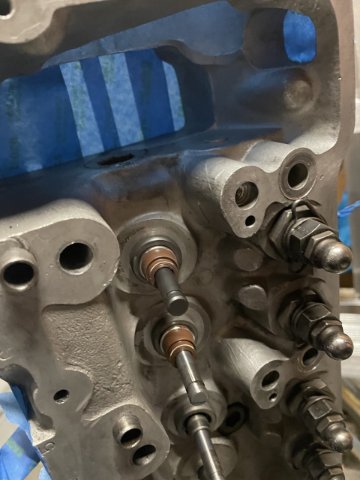
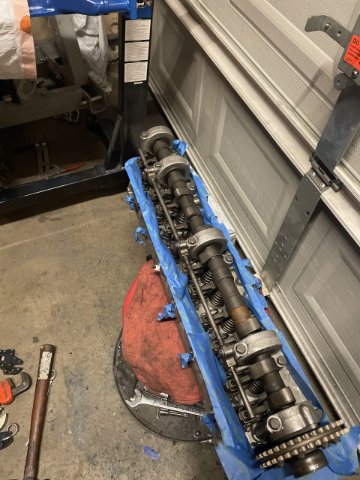
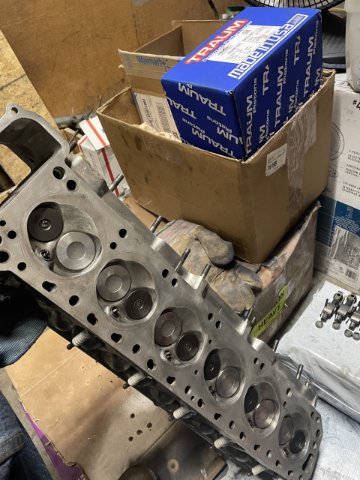
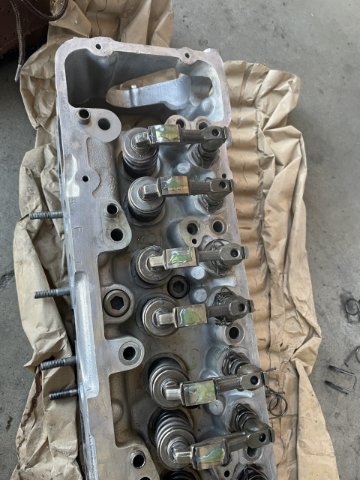
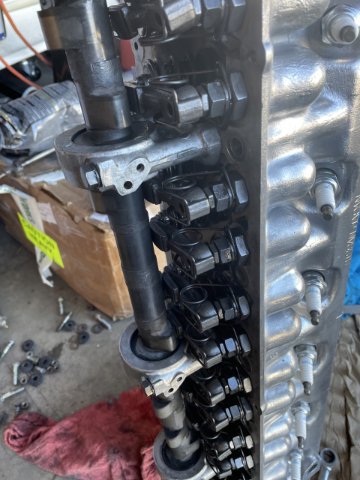
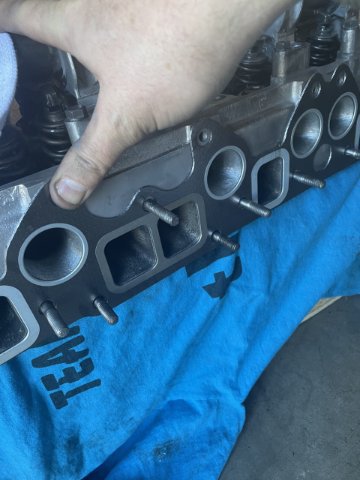
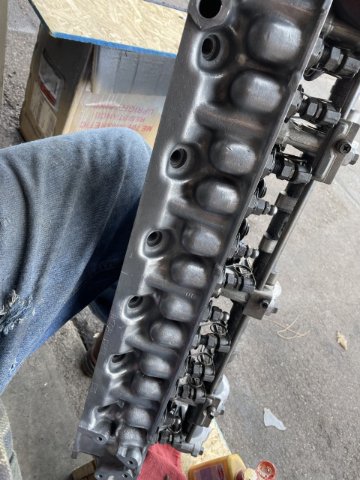
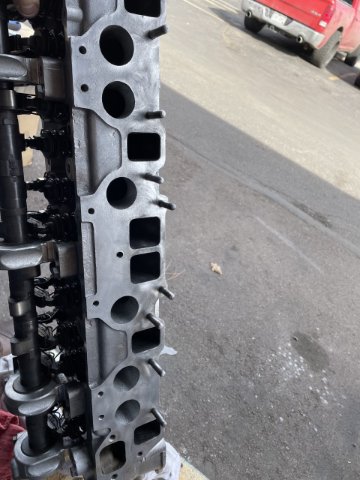
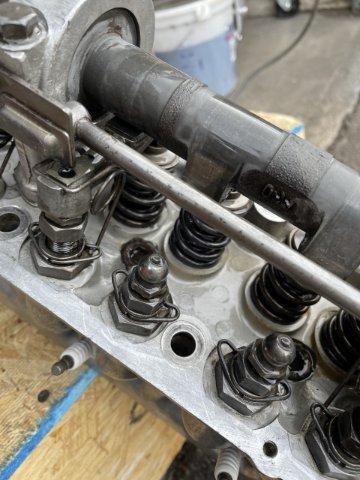
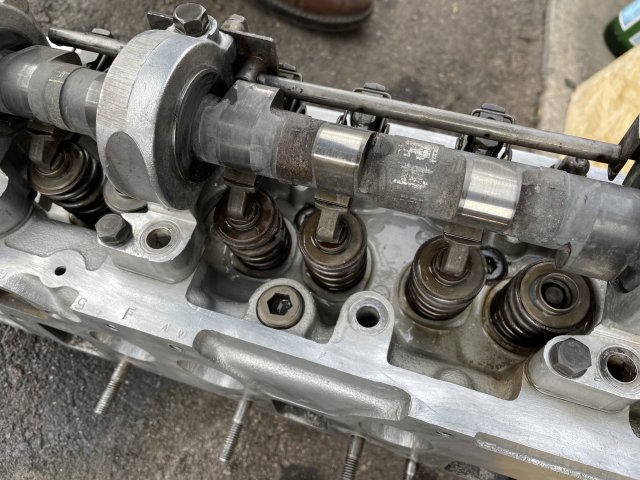
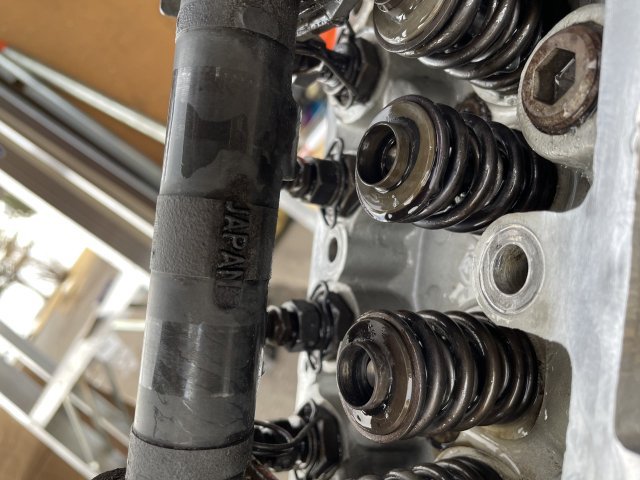
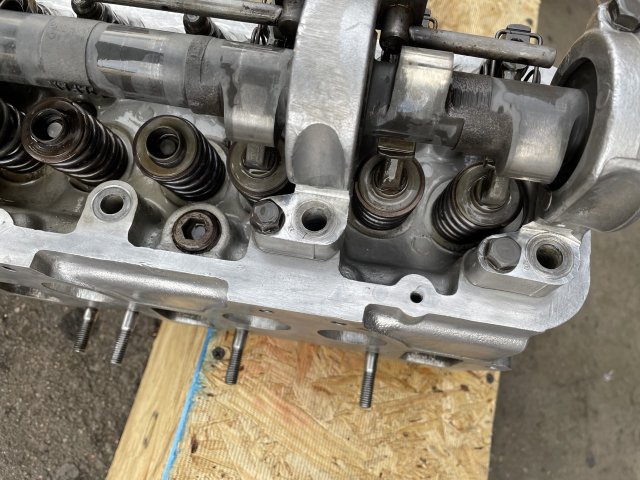
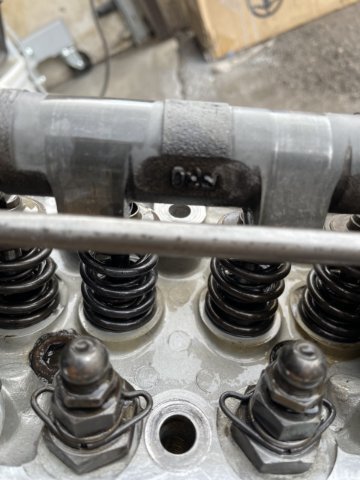
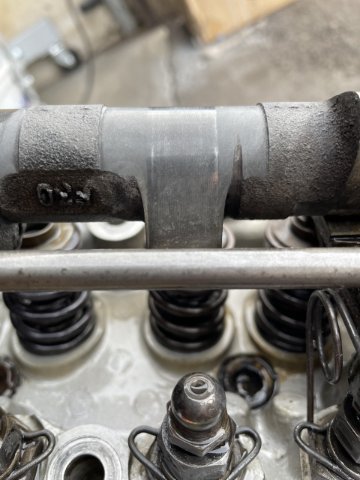
03-25-2023 UPDATE. Cylinder head day. It took all day.....really gave me grief.:( BUT....I got it all done. I started by installing my new valves and then using some lapping compound and a lapping tool, and l got all the valves and the seats "used to each other". I then removed the valves in the same order, and then began the process of cleaning the whole head up.......this was a chore.....old toothbrush, a shop cloth and several cans of brake cleaner, but it eventually came clean. I then installed the cam towers and cam, and began putting both inner and out valvesprings on with new hardware. I used the spring compressor tool from Z car depot. At 99 bucks it wasn't cheap, but it worked! Not having a bench or a vice, I had to set the head on the ground. I had to use one foot to hold the head steady, and then use the tool to compress the springs, and move the tool around as it was compressed so I could push the keepers in. The key was to put the keepers into the retainer, then put my finger over them as I compressed the springs, and push with my finger, as I was moving the tool and pushing on it to compress as far as possible, and then it worked. When you watch the video it looks easy.....and half of them went easy, but the other half......it was as if it was telling me it didn't want to do it or something, but I persevered.
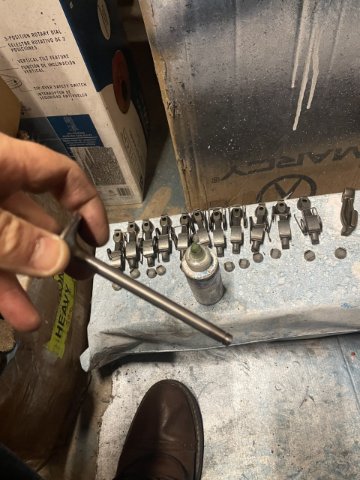
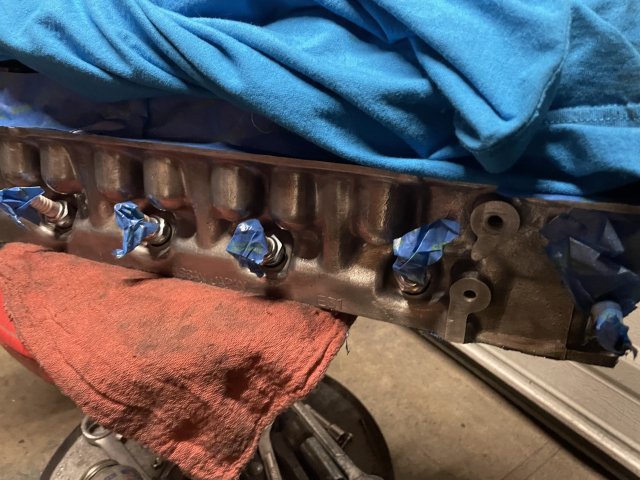
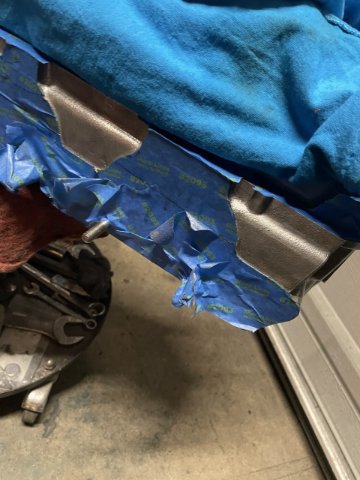
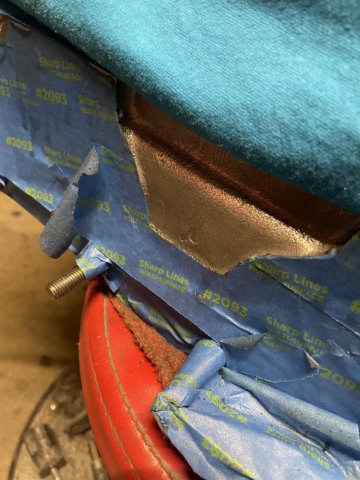
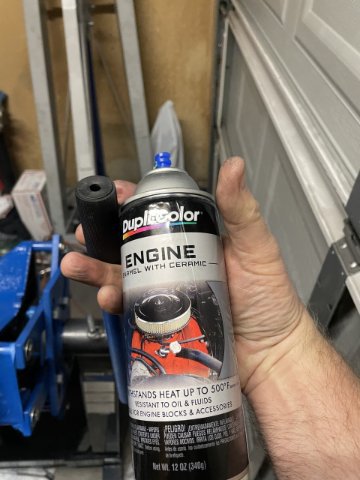
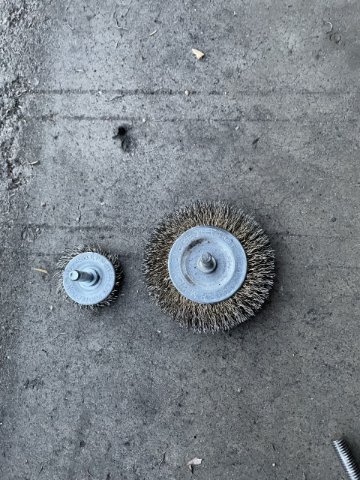
I then installed the rockers, but took the time to swap out a few rocker studs with the ones from my original head so I had the best ones in the head I am using. As I was installing the stuff, I was spraying it off with brake cleaner. Then once all assembled, I sprayed out the valley again really good. Lastly, I taped off everything, and then wiped off the outside with a wet wipe, then gave it a coat or two of my Duplicolor Clear Engine Paint. When I cleaned the head exterior with a wire brush a week or so ago, it gave it a nice shine, and I wanted to keep that. The clear will hopefully do that. So tomorrow, I will strip off the tape and wrap the head up in a garbage bag and go for it on the block. time to get this thing rolling! Pics

-
03-25-2023 UPDATE. Cylinder head day. It took all day.....really gave me grief.:( BUT....I got it all done. I started by installing my new valves and then using some lapping compound and a lapping tool, and l got all the valves and the seats "used to each other". I then removed the valves in the same order, and then began the process of cleaning the whole head up.......this was a chore.....old toothbrush, a shop cloth and several cans of brake cleaner, but it eventually came clean. I then installed the cam towers and cam, and began putting both inner and out valvesprings on with new hardware. I used the spring compressor tool from Z car depot. At 99 bucks it wasn't cheap, but it worked! Not having a bench or a vice, I had to set the head on the ground. I had to use one foot to hold the head steady, and then use the tool to compress the springs, and move the tool around as it was compressed so I could push the keepers in. The key was to put the keepers into the retainer, then put my figner over them as I compressed the springs, and push with my finger, as I was moving the tool and pushing on it to compress as far aas possible, and then it worked. When you watch the video it looks easy.....and half of them went easy, but the other half......it was as if it was telling me it didn't want to do it or something, but I persevered.
I then installed the rockers, but took the time to swap out a few rocker studs with the ones from my original head so I had the best ones in the head I am using. As I was installing the stuff, I was spraying it off with brake cleaner. Then once all assembled, I sprayed out the valley again really good. Lastly, I taped off everything, and then wiped off the outside with a wet wipe, then gave it a coat or two of my Duplicolor Clear Engine Paint. When I cleaned the head exterior with a wire brush a week or so ago, it gave it a nice shine, and I wanted to keep that. The clear will hopefully do that. So tomorrow, I will strip off the tape and wrap the head up in a garbage bag and go for it on the block. time to get this thing rolling! Pics
-
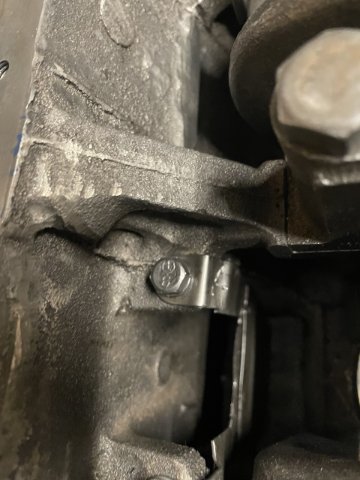
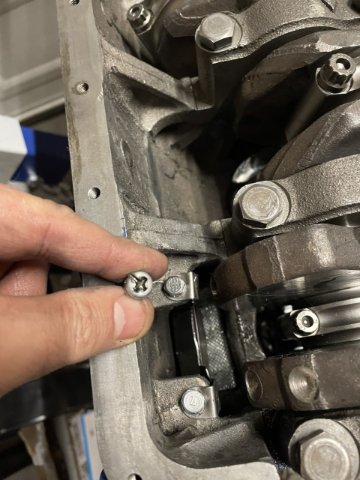
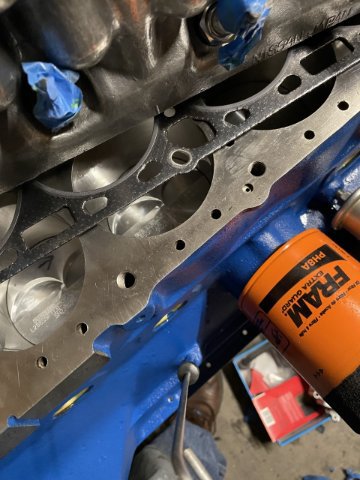
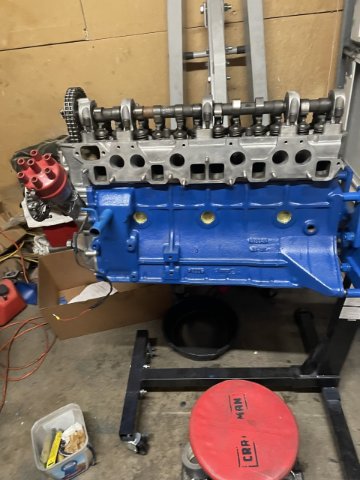
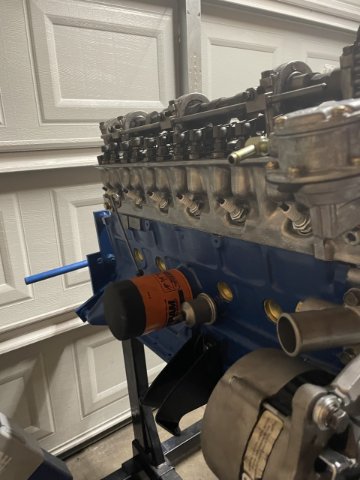
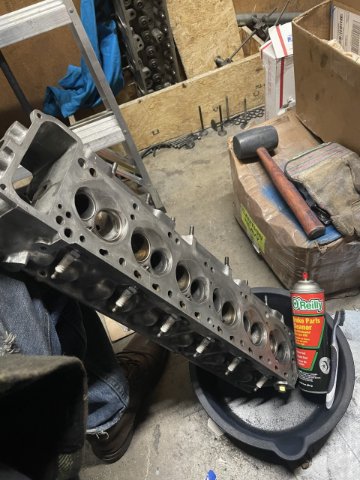
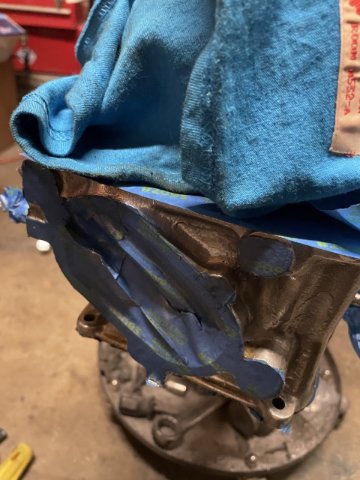
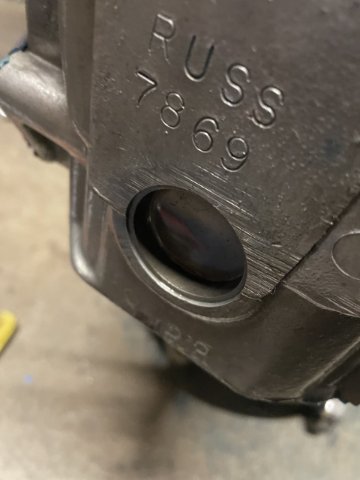
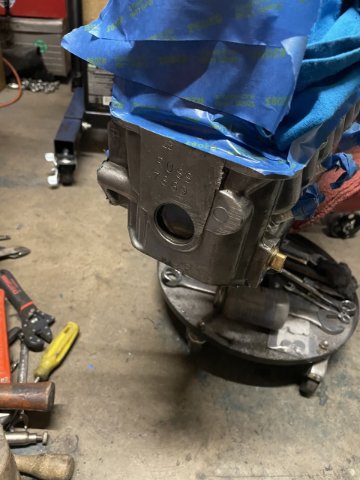
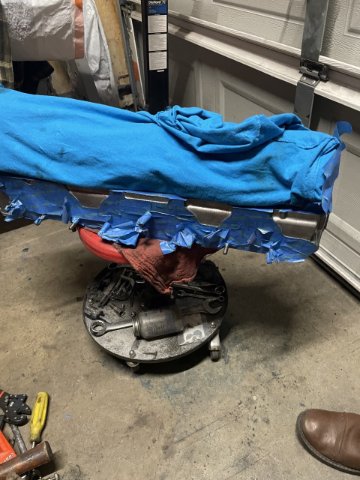
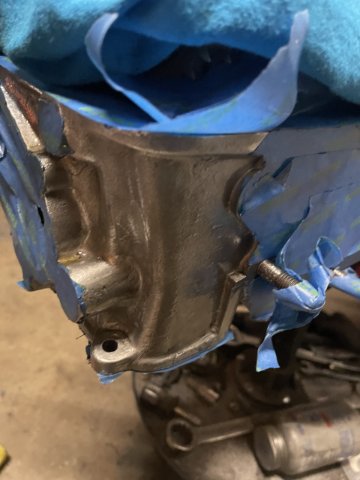
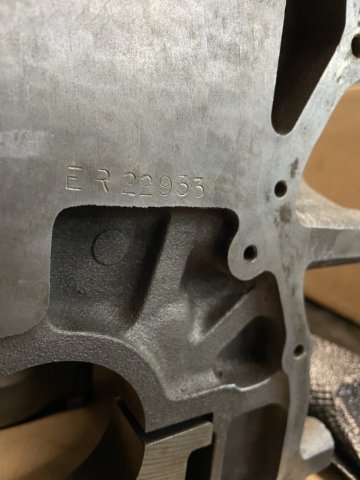
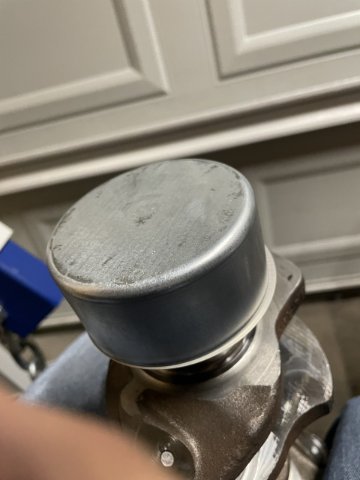
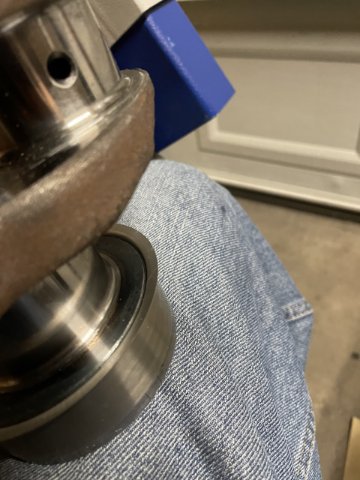
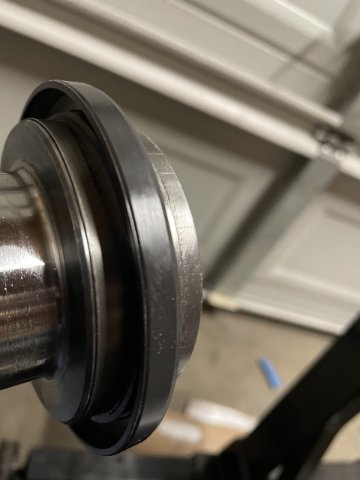
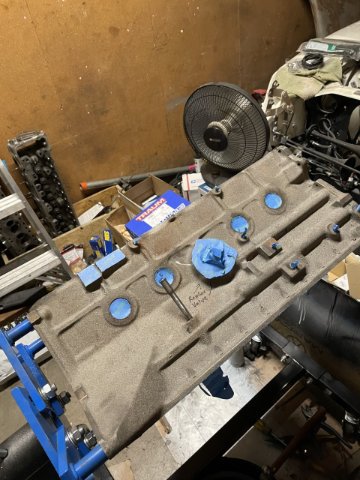
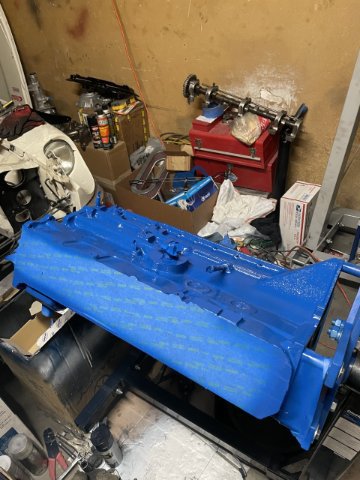
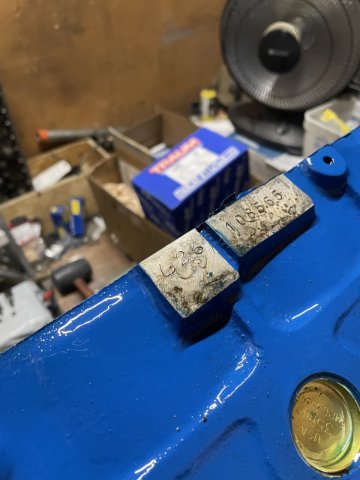
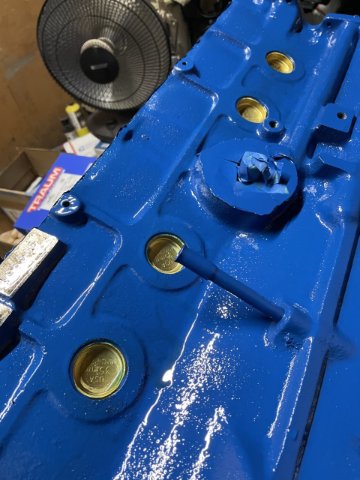
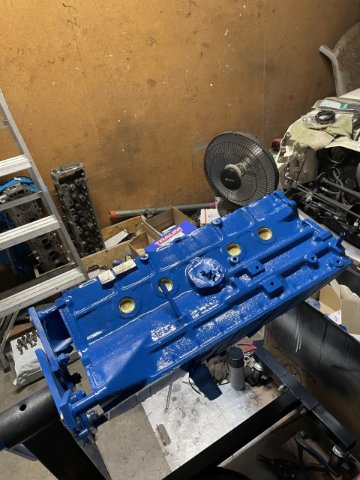
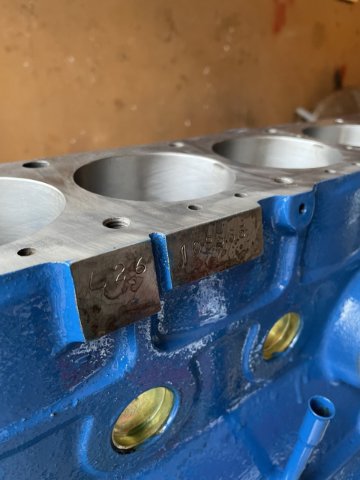
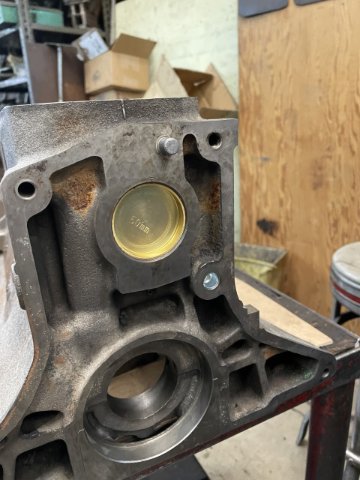
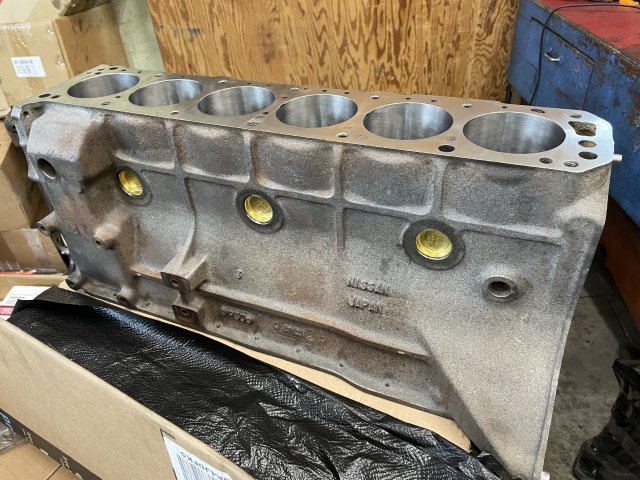
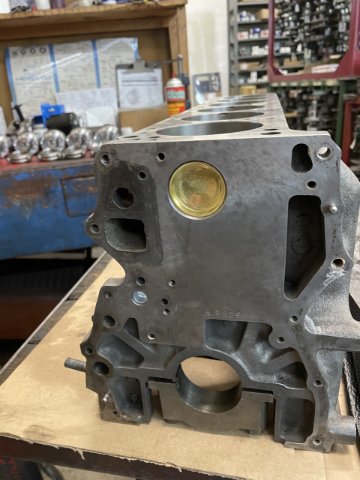
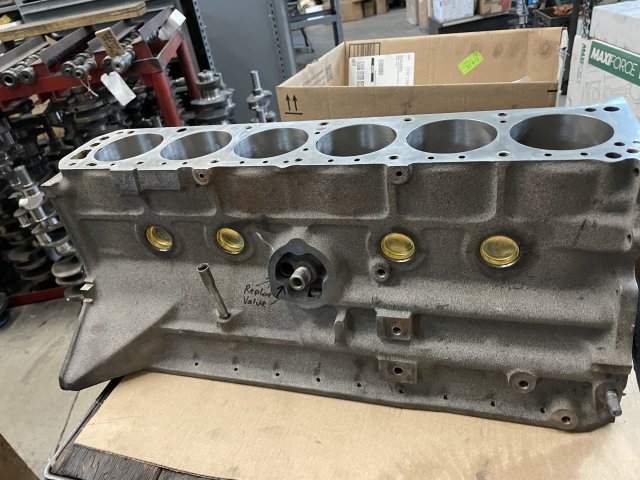
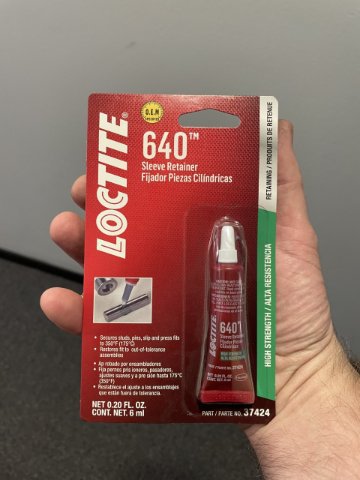
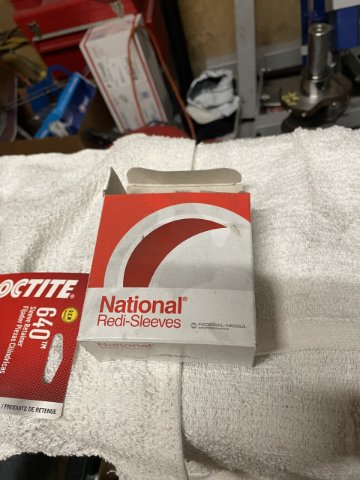
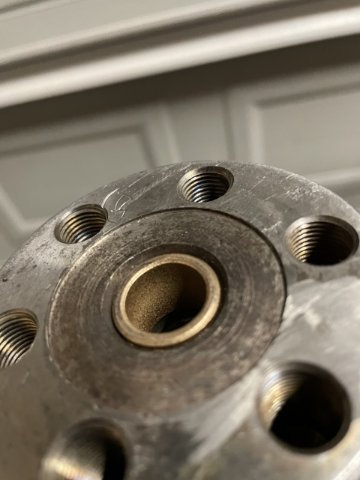
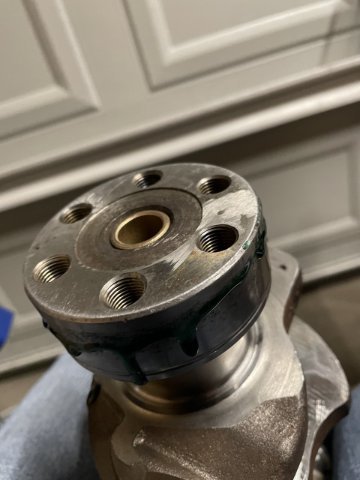
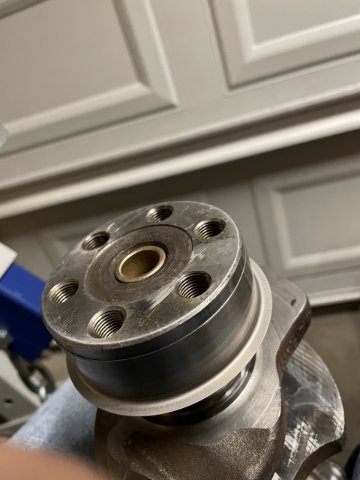
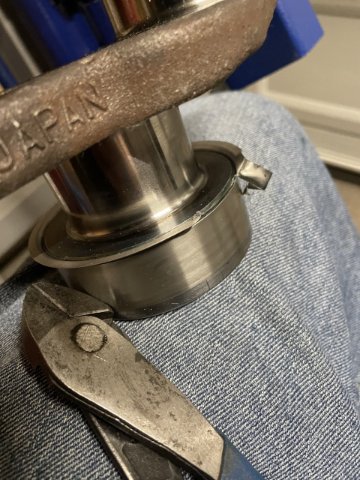
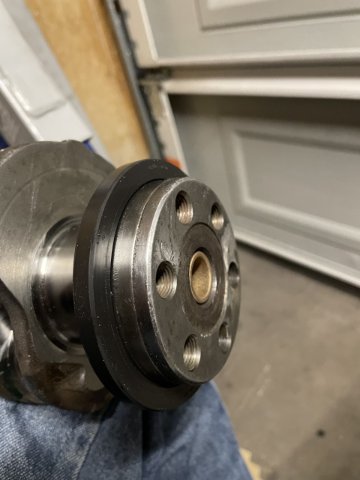
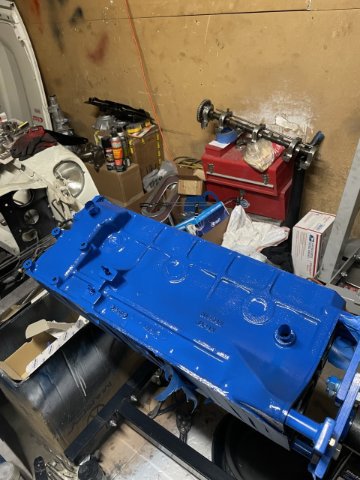
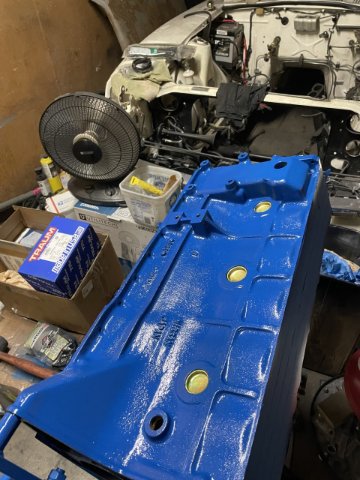
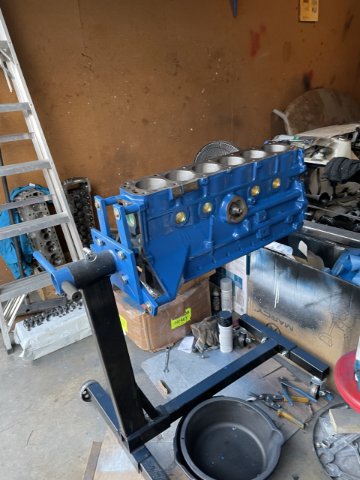
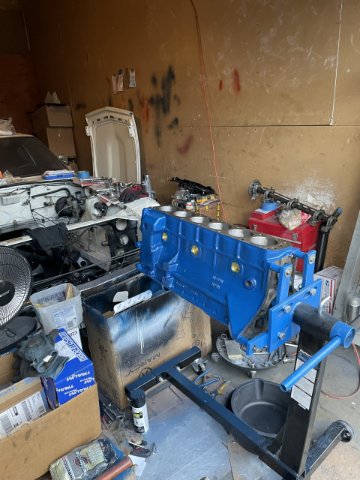
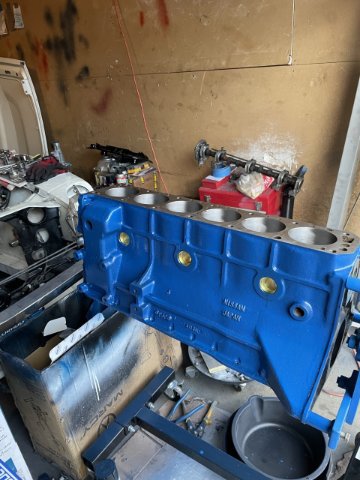
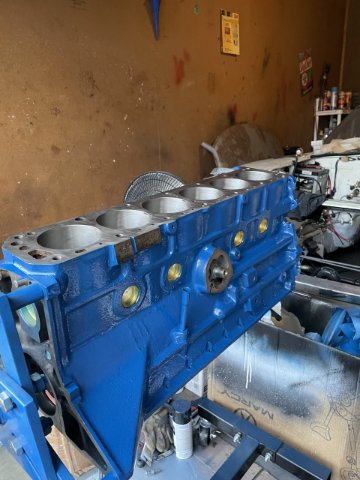
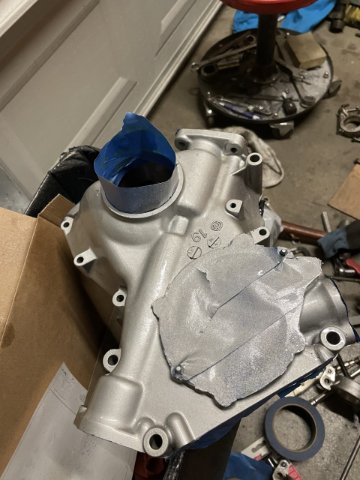
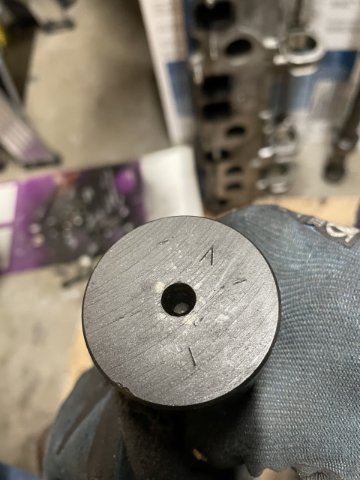
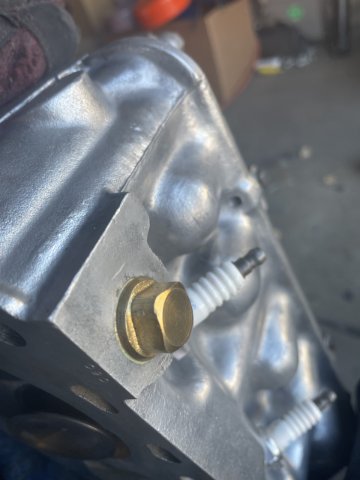
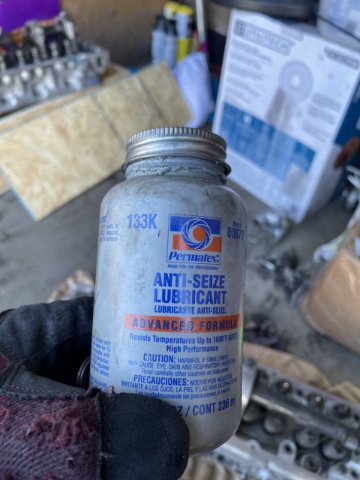
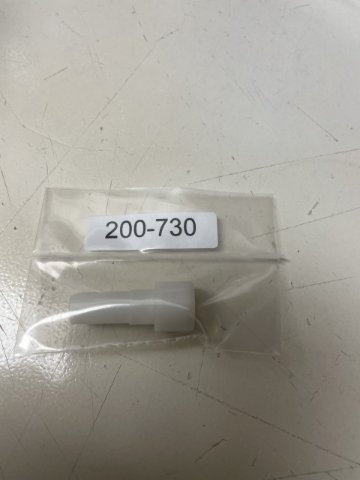
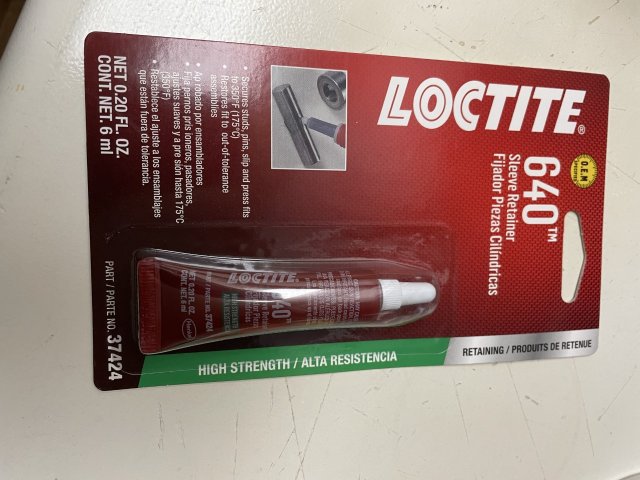
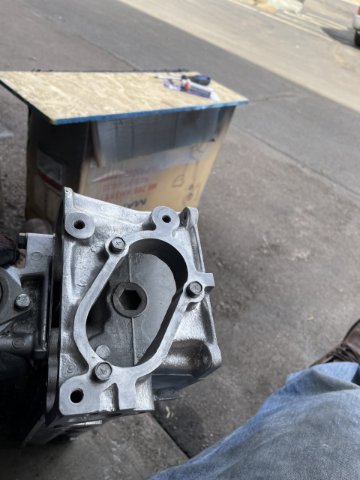
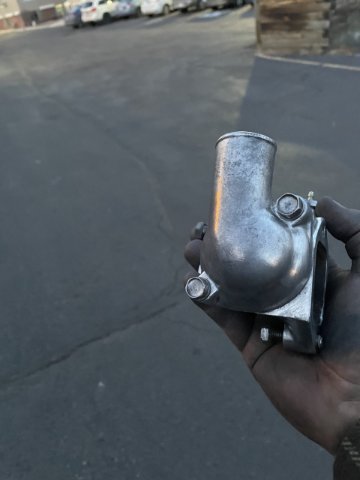
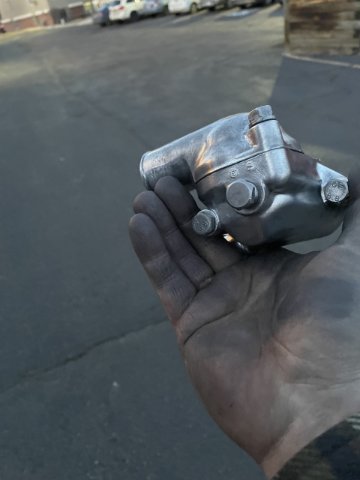
3-24-2023 UPDATE: Today was the day to pick up all my stuff at the machinist. I took a couple photos at the shop then brought it home and got it back on the engine stand. I then went ahead and tapped the new pilot bearing in, and installed my Redi-Sleeve with Loctite 640. I then removed the excess with some diagonal pliers and the carefully went over the edges with a hammer....light taps.....then I installed the rear seal. USE A FACTORY SEAL. It is really nice quality and pre lubed. Still having some time, I masked off the block and painted it with "Old Ford Blue" duplicolor engine paint. Then after I removed the masking tape I painted over the core plugs and engine ID plate with duplicolor clear engine paint. Pics heavy, but here are some.
-
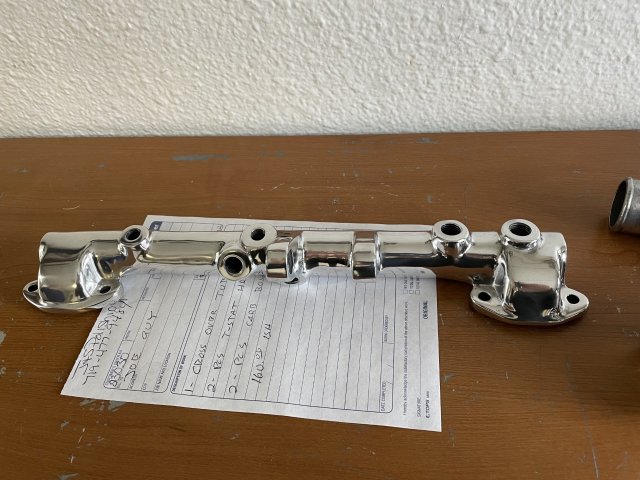
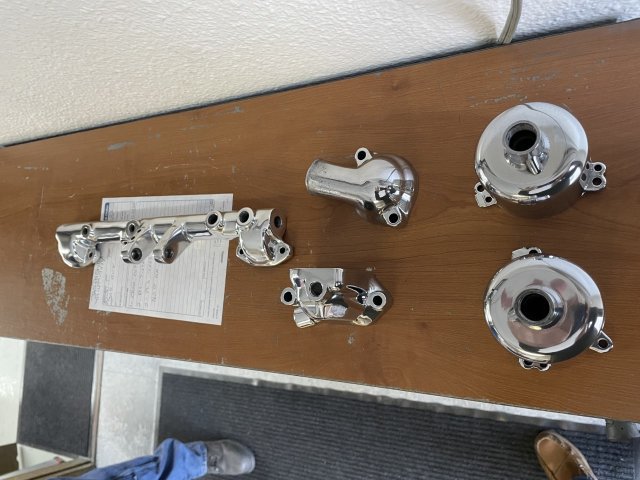
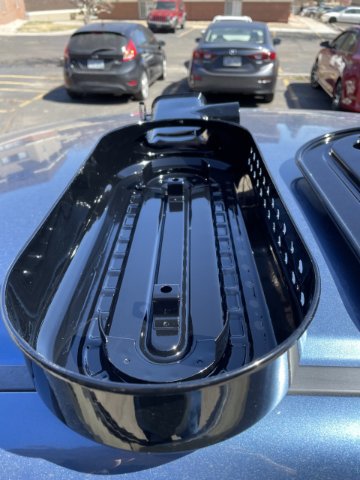
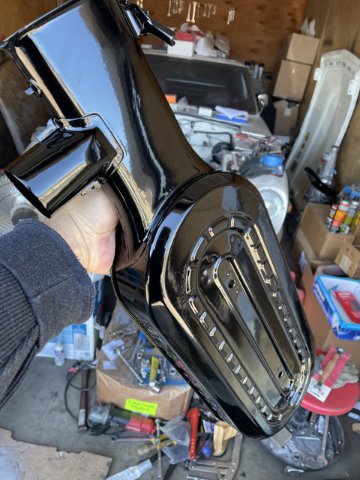
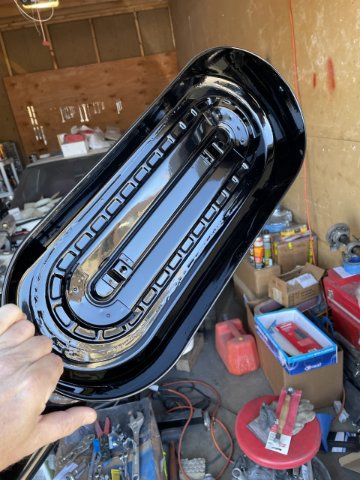
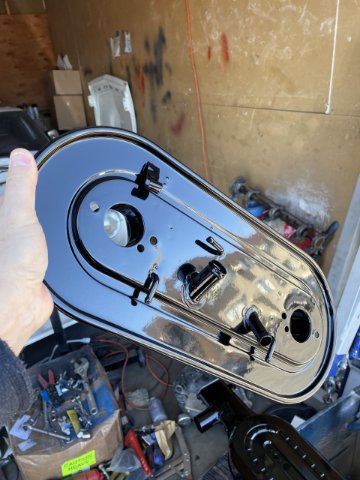
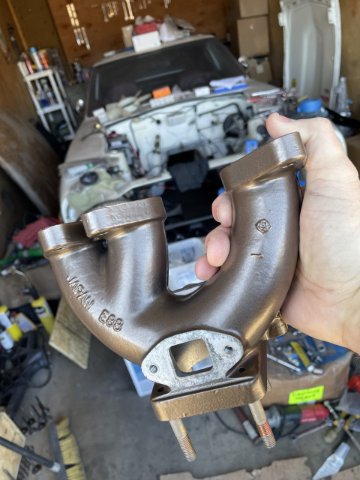
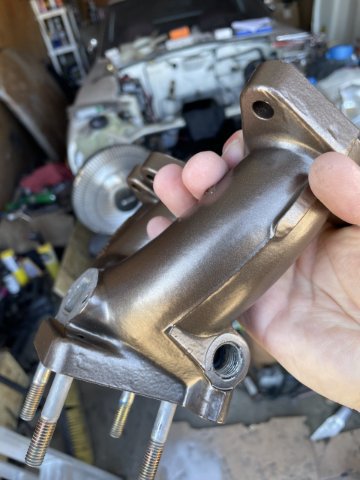
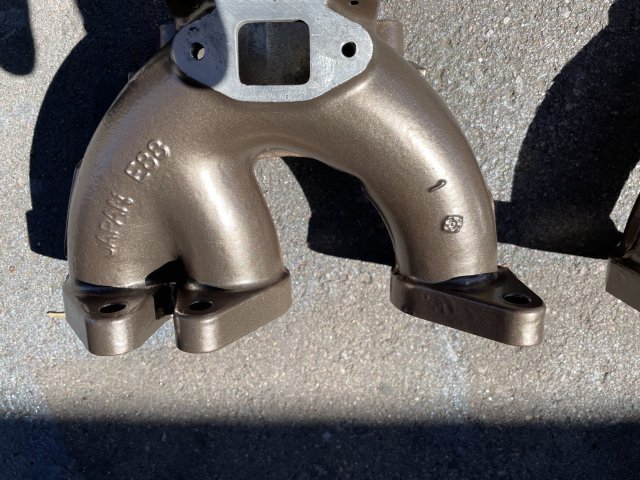
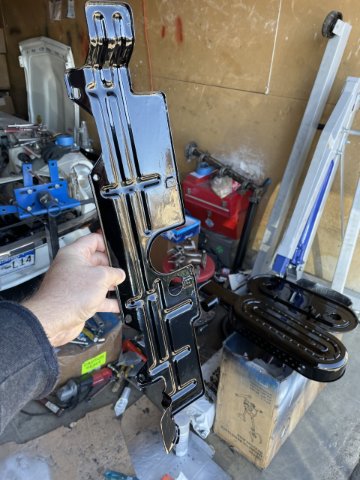
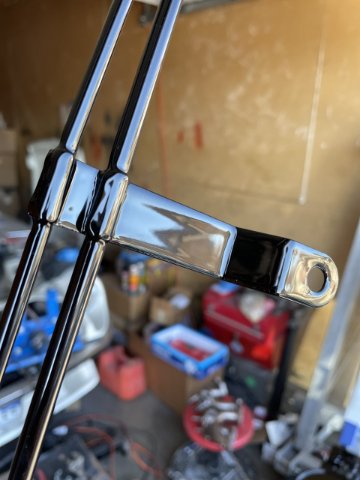
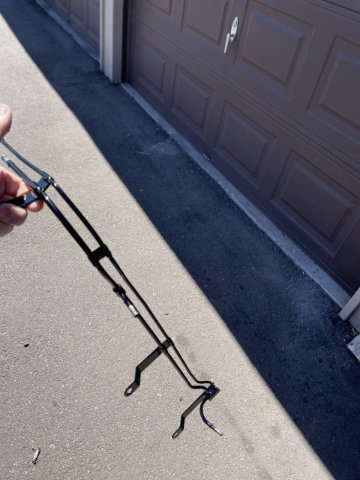
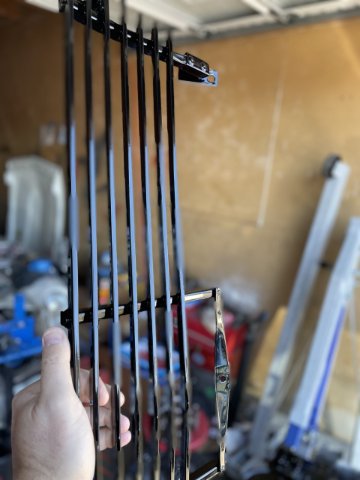
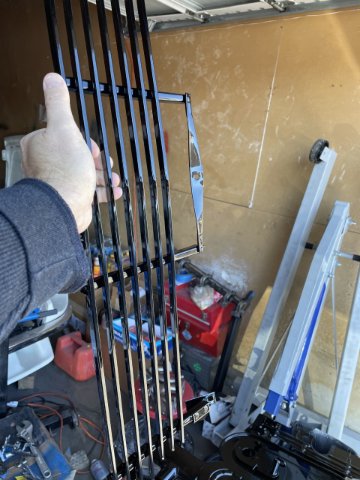
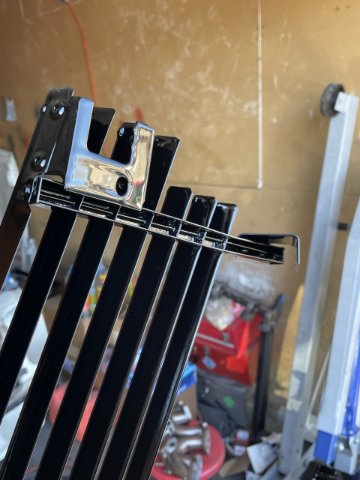
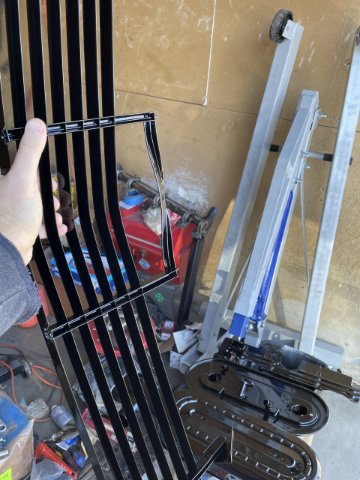
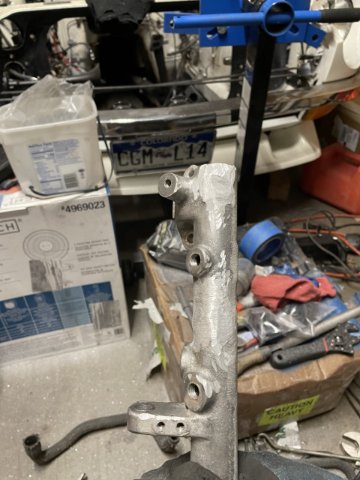
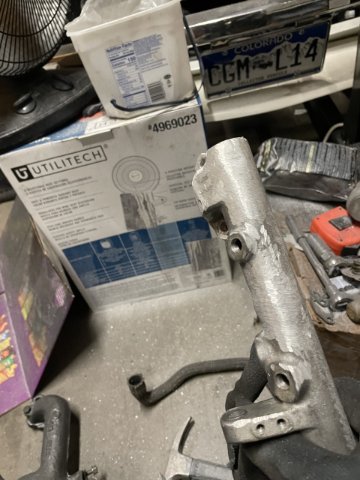
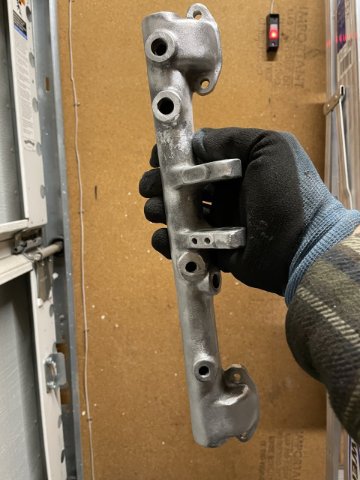
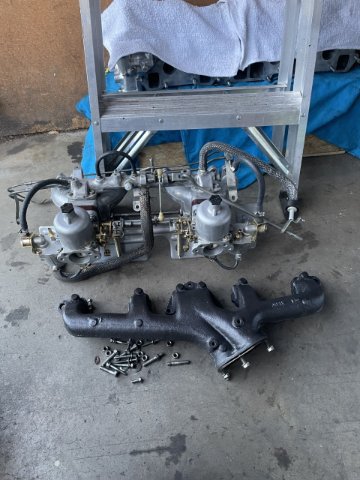
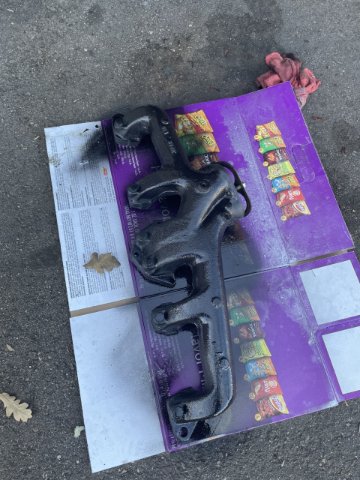
03-23-2023 UPDATE: Today I picked up some items I had sent for powdercoating. Intakes in Bronze, Gloss black on the Carb heat shield, metal fuel lines, Air cleaner (both pieces) and brackets for the fuel lines. Oh, and the grill in Gloss Black. Now awaiting my SU carb tops and the balancing tube at the polishers. PICS.
-
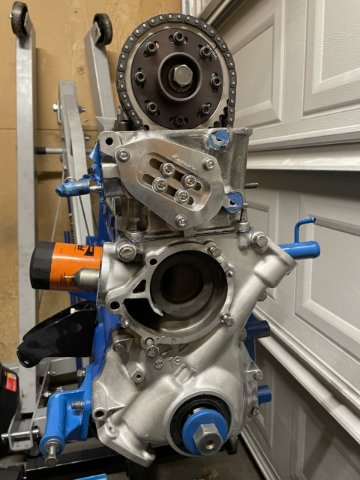
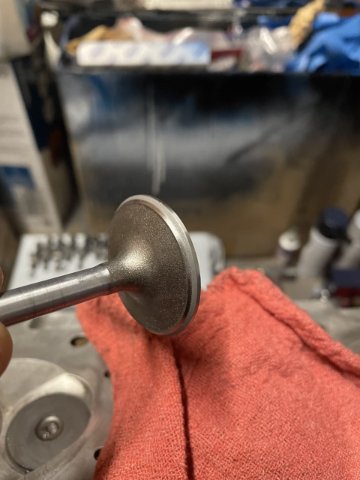
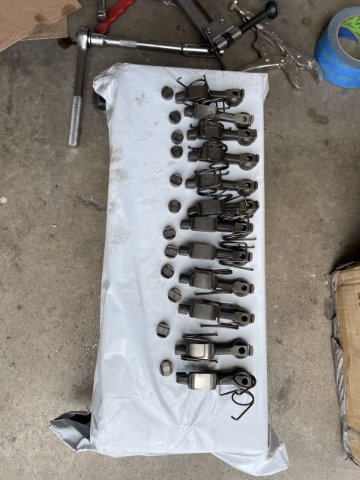
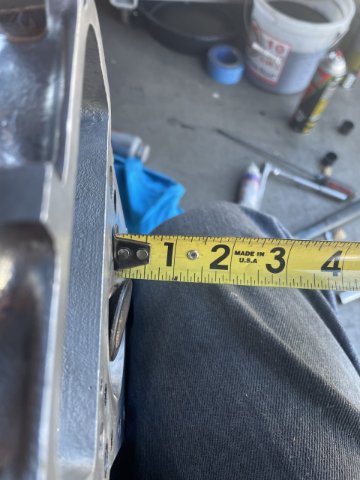
3-17-2023 UPDATE: I went ahead and painted the timing cover silver and then top coated it with clear...then worked on the head some more. I finally managed to get the valves out. They measured a 1 5/8 (42mm) on the intake and 1 3/8 (35mm) on the exhaust. Weird. So, It doesn't have 280Z intake valves....the story I was told onthis head when I bought it gets stranger and stranger. The exhaust valves ARE bigger than stock though. Well, you can see the porting done in person. I went ahead and decided to just get all new valves and and inner springs, to go with the new outer srings I had, and new keeper and retainers as well. I kept the rockers and lashpads etc. in the exact same order, so the cam will have the surfaces it is already used to.
pics:
-
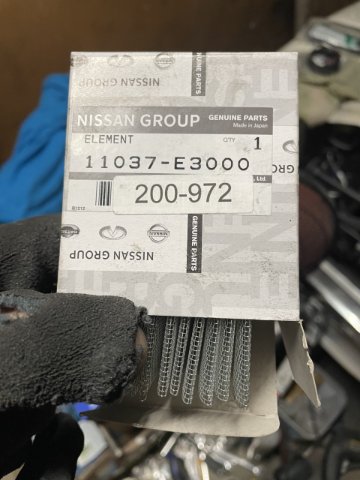
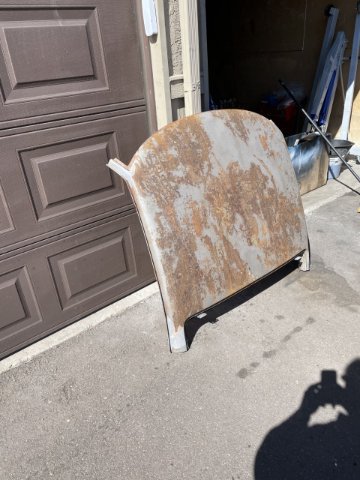
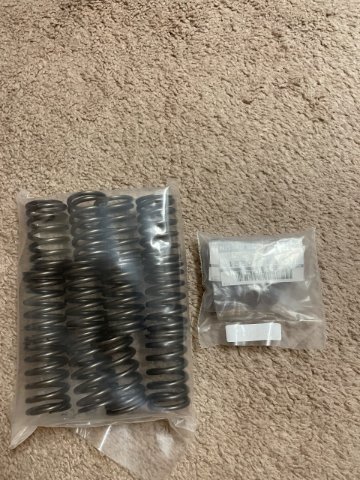
03-13-2023 UPDATE. Several things going on today. My new valvesprings and NOS Nissan valve stem seals arrived, so I can now finish up my head. I bought a valve lap kit, and will go over the valves lap them in just to make them completely fresh, then install the "A" cam I have with the matching rockers for each lobe and lashpads, and use my YOST oil spray bar. I also dropped off the items I had prepped for either powdercoating or polishing. The SU carb tops, the crossover pipe and the thermostat top and bracket are at the polishers. I dropped off my intakes, the grill and carb heat shield at the powdercoaters. I believe I will drop off my air box tomorrow as well. I debated replacing the air box, or painting it myself back to orange, or going with a nice glossy black powdercoat. Gloss black has won out. I like the factory air box the best. So, the grill, heat shield, and air box will be powdercoated gloss black, and the Intakes will be a light bronze in a satin finish to give it the "magnesium look". The front cover and fuel lines will be painted by myself instead of powdercoating. I can get them the way I want and save the money. Everything is expensive now! I also spun by Whistler machine here in town to pick up an assortment of screw in plugs for the intakes as I removed the heat pipe, and a couple in the crossover pipe and still some that I didn't care for the look of. And as I mentioned, I picked up the roof today from Junkyard Jenny's in Ft. Lupton, Colorado. It came off of a 260Z that was actually way too nice to have been parted out....breaks the heart. Also found out the machine shop is done with the block except clearancing....so very soon, the engine will come together and we can get it all back to running again.
-
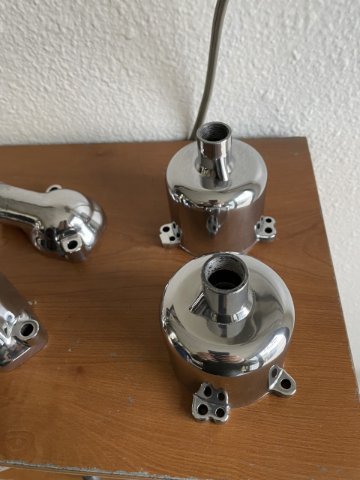
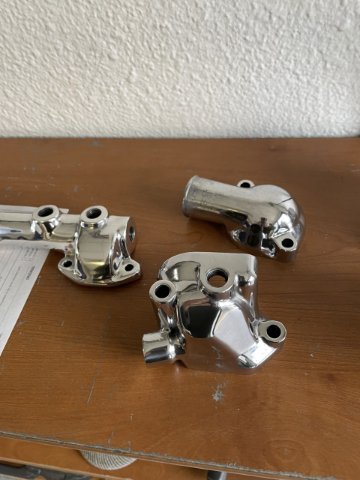
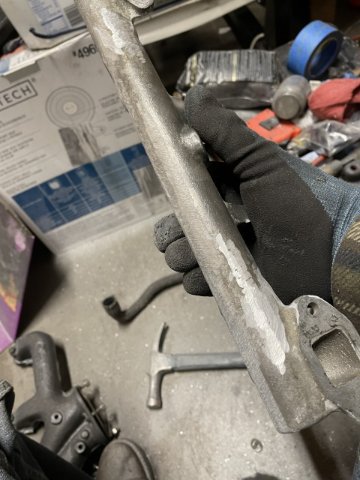
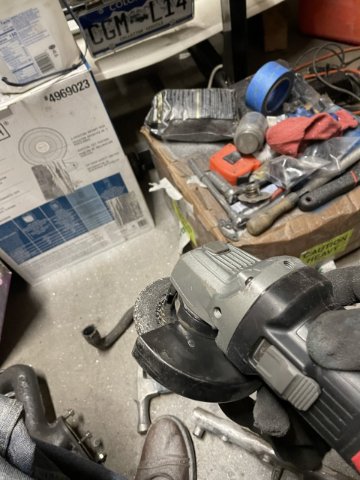
3-11-2023 UPDATE: I took the day to pull apart my intake manifold, as I am going to powder coat the intake in a satin light bronze. It will give it the Magnesium look. So I took the carbs off, and the cross over tube, then removed the heat tube between the carbs.....one of thsoe bolts was so hard I had to put it in a vise , use a pipe wrench AND my cheater pipe pulled out to the max to get it off! Thanks to the guys at my nearby O'Reilleys for letting me use their vise and one of the guys helping me get it out. The other one I merely had to stand on the wrench on the garage to get it loose!
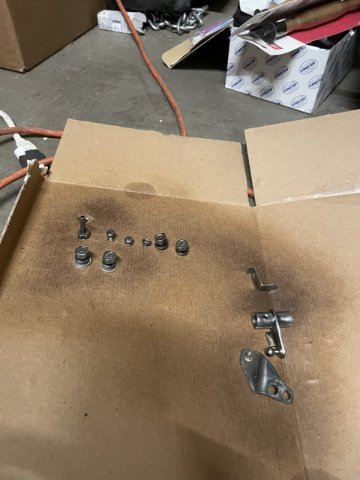
SO....I will plug those holes. I additionally will be having my air cleaner box powdercoated, not sure on the color yet. Maybe a transparent candy orange? The heat shield for the carbs will be getting powedercoated (color? not sure yet) and the bottom part of the thermostat bracket will be getting powdercoated in lght satin bronze as well. The top will be getting polished along with my SU tops and the cross over tube. Front cover to be either polished or powercoated, still deciding. So in the pics you will see my pile. OH! and the fuel piping I am also going to get powdercoated.....possibly chrome powdercoat, or a candy yellow that mimcks the zinc coating they had new. I did spend the majority of the time on the cross over tibe. Using my die grinder and file, I chopped off the unneeded brackets (smog stuff) and then went over the flash and casting marks, then used the file to smooth it out good enough for the polisher to be able to make it straighter with his sanding and then polishing. I also wire wheeled up the bolts, and pushed them through cardboard and painted the heads, 3 silver then clear... all engine paint, 1 washer for the exhaust manifold that I forgot to paint in flat black exhaust temp paint, and the others in clear. So, my head work waits until next time. Here are some pics. Cheers! 
-
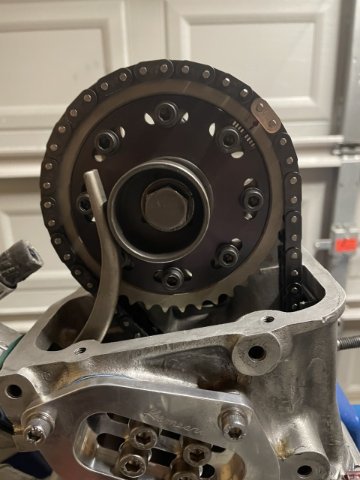
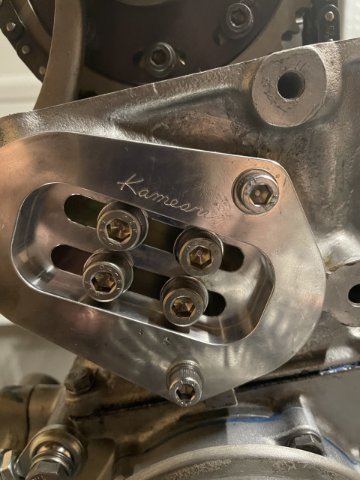
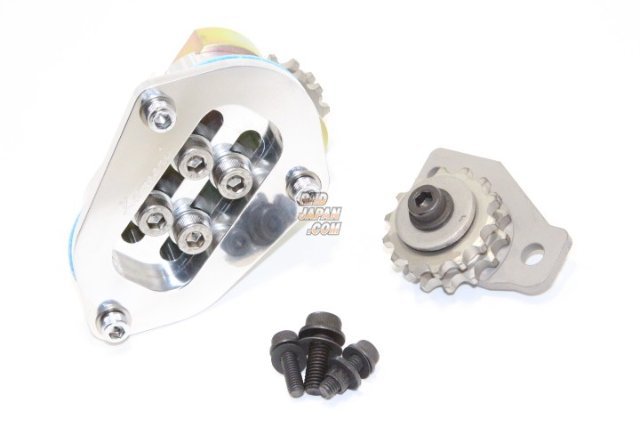
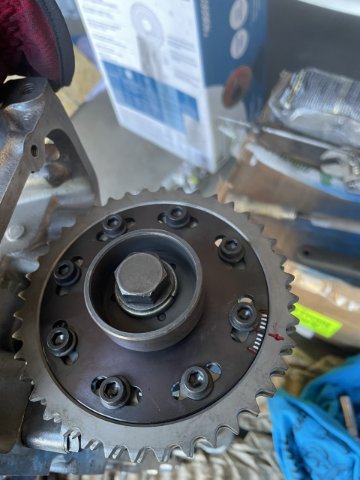
Oh, By the way, I went ahead and ordered a Kameari Dual Idler cam chain adjsuter. JDM-PARTS has a few in stock, I chose the polished one.
-
-
03-05-2023 UPDATE:
Initially I had concerns that my stock cam would be too small....and that as a consequence the Pressures in the cylinder would be too high......
Well this cam I got with my head....it's actually a RACE cam.....to get it to work, I would have to carve up my pistons' valve reliefs a ton deeper and STILL have to put a thicker head gasket on just to get the valves at max lift to clear......So I went online and figured out the Static Compression, and Dynamic Compression, which is the real world compression the engine has with the cam opening and closing acording to its degrees. So when I put all my stuff in the calculator, the stock cam turned out to be fine (WOW).....so I am going to install it in my ported head with the big intake valves, and then I can use the adjustable cam sprocket I have to fine tune it. So at any rate, today I went out to the garage and got some things done.......I took the cam towers off the head, removed the shims, 3 under each tower, which is .060 making up for the milling of the head at .060. Using some assembly lube I put it all back together, turned all the lash adjusters down, put the Kameari adjustable sprocket on and with a pipe wrench tuned the cam over to get some rough measurements. It is these measurements that I have been fighting with, doing the math, etc., and that is when I ran the numbers with my existing "A" cam......Dynamic cylinder pressure of 183 which is good. At sea level it would be 219, but because I am at 6400 feet elevation it is only 183. Dynamic compression is 10.03 to 1.......still quite a drop from the static compression ratio of 11.54.....so no problem with the pump gas and I should be able to run full timing.
After this I cleaned up my intake and carbs, and then the exhuast manifold....and then just went ahead and gave it another coat of hi heat paint.. The reminaing bolts that were dirty I went ahead and wire wheeled them up, then decided to check the mail and go in. Also have my Loctite 640 for keeping my redi-sleeve on the rear seal journal. Yes, my Electramotive L4-02 cam with 500-1000 miles on it is for sale. A little pic heavy, but as I have said, it is a recording of the work performed. Enjoy.
-
I have a Kameari Adjustable cam gear. The lines on it, do any of you know how many degrees each line is? Thanks.
-
Oh yeah. I had it almost done, then decided to tear it apart and convert to manual trans, change to a 4:11 rear end, and build a bigger engine.
03-05-2023 UPDATE:
Initially I had concerns that my stock cam would be too small....and that as a consequence the Pressures in the cylinder would be too high......
Well this cam I got with my head....it's actually a RACE cam.....to get it to work, I would have to carve up my pistons' valve reliefs a ton deeper and STILL have to put a thicker head gasket on just to get the valves at max lift to clear......So I went online and figured out the Static Compression, and Dynamic Compression, which is the real world compression the engine has with the cam opening and closing acording to its degrees. So when I put all my stuff in the calculator, the stock cam turned out to be fine (WOW).....so I am going to install it in my ported head with the big intake valves, and then I can use the adjustable cam sprocket I have to fine tune it. So at any rate, today I went out to the garage and got some things done.......I took the cam towers off the head, removed the shims, 3 under each tower, which is .060 making up for the milling of the head at .060. Using some assembly lube I put it all back together, turned all the lash adjusters down, put the Kameari adjustable sprocket on and with a pipe wrench tuned the cam over to get some rough measurements. It is these measurements that I have been fighting with, doing the math, etc., and that is when I ran the numbers with my existing "A" cam......Dynamic cylinder pressure of 183 which is good. At sea level it would be 219, but because I am at 6400 feet elevation it is only 183. Dynamic compression is 10.03 to 1.......still quite a drop from the static compression ratio of 11.54.....so no problem with the pump gas and I should be able to run full timing.
After this I cleaned up my intake and carbs, and then the exhuast manifold....and then just went ahead and gave it another coat of hi heat paint.. The reminaing bolts that were dirty I went ahead and wire wheeled them up, then decided to check the mail and go in. In the mail was my new Transmission vent tube. The old vent tube was loose and could be pulled out. This one you have to tap in. The Z Car Depot has them for about 8-9 bucks. Also have my Loctite 640 for keeping my redi-sleeve on the rear seal journal. Yes, my Electramotive L4-02 cam with 500-1000 miles on it is for sale. A little pic heavy, but as I have said, it is a recording of the work performed. Enjoy.
-
moderator pls delete
-
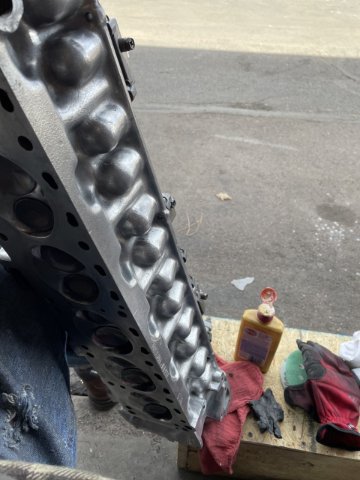
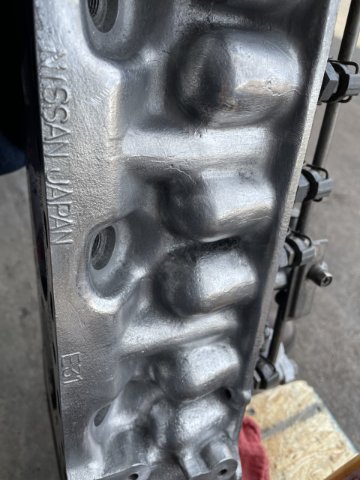
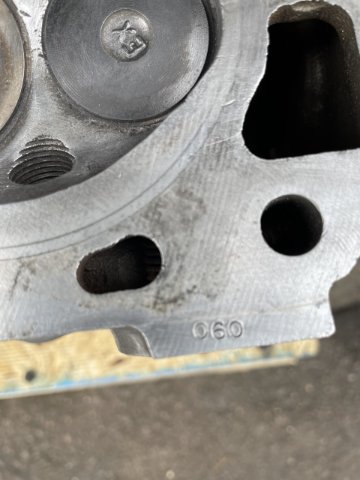
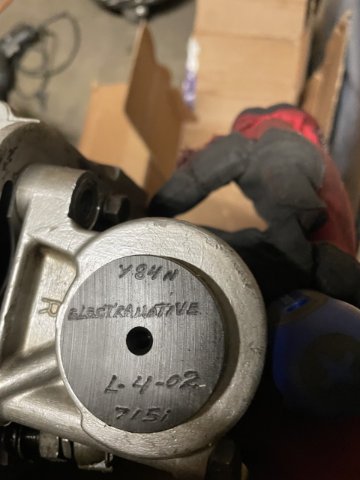
Time for an update. The short block is still at the machinists,:( and I got the chance to buy an E31 head that is ported, with L28 intake valves, Electramotive L4 cam, springs all the good stuff, 500-1000 miles on it. Well, the head arrived and I took some time today to clean it all up. Using a brass wire wheel attachment in the drill I cleaned the whole thing, and then CC'd a chamber. The head was shaved, and the machinist left .060 stamped in the corner....it's a lot huh? It cc'd at 37.5cc and stock would be 42.4, so 5 cc less. I used some brake cleaner and a toothbrush and I got it all clean and ready to go. In the pics to follow you can see how clean the valley around the valves, look how clean I got it. Here are the cam specs. I found these on here, from May 26, 2006, member: Phred
Electramotive L4-02; Y84N; 7151. Ground by Ron Iskanderian at Isky cams a LONG time ago.
Intake Lift .562 Exhaust Lift .552
I.O. 22 btdc Duration 247 Degrees E.O. 46 bbdc Duration 246 Degrees
I.C. 45 abdc Intake lobe center 101.5 E.C. 20 atdc Exaust lobe center 103
This is at a .050 Valve Lift
Lash (cold) .008 intake, .010 exhasut
-
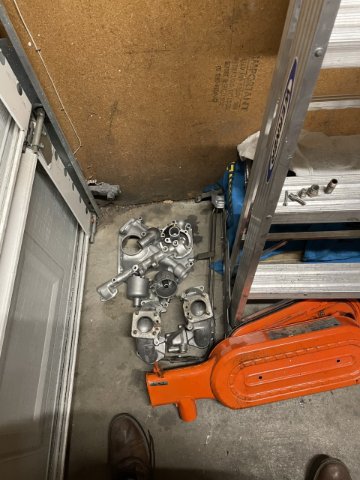
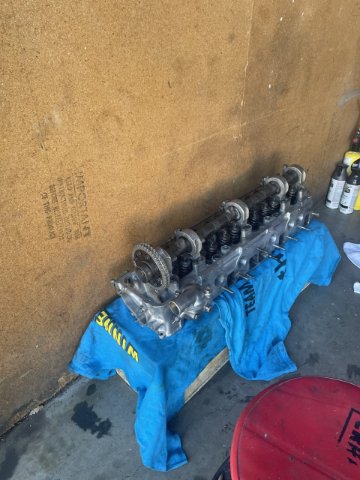
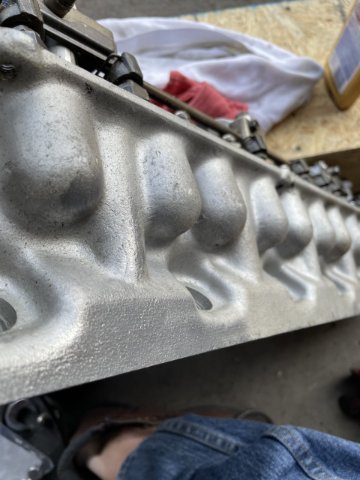
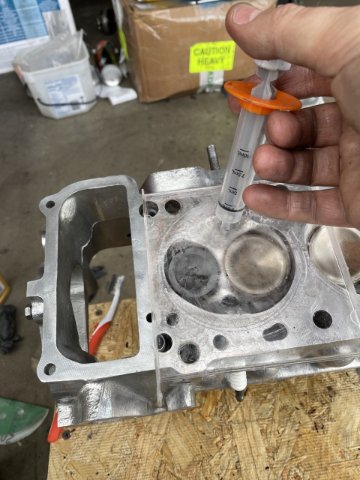
02-25-2023 UPDATE: A busy day, and today was cylinder head day. I started by using a wire wheel attachemnt in my drill and cleaned out the chambers and a couple spots that had material built up on the mating surface. After that I then went over the outside surfaces of the head, then going over it in a few spots with some fine sandpaper and then buffed it to a shine. Then with brake cleaner and a toothbrush I cleaned the whole head up. In the pics you can see how clean I was able to get the valley inside the head. Next was to cc a chamber. I found that the machinist marked the head .060 after he shaved it.....quit a bit huh? Well, it explains the 3 shims under each cam tower. I used a CD case cover and drilled a hole in it, and then got some vaseline and rubbing alcohol and a syringe. Reading, I found out that Milli Liters (mL) the same as cc. So, I went ahead to cc'd a chamber. 37.5cc. Stock was 42.4, so 5 cc lost in the milling. In the pics you will notice the cam is dry....brake cleaner does that! You can tell the cam was ground on a factory blank, and you can see how the lobe is even maybe even a little lower that the cam shaft itself. At this point, I set it to the side and began stripping everything off my factory head. I was at this time I noticed my head is actually an E88!! I don't know how I have read it wrong for almost 2 years, but off the car, in the light, I found out I didn't have an E31 head after all! What a shock! Well, next was cleaning up the thermostat housing. It's not completely done, but form the pic you can see it getting close. Took a while, but I like the direction it is going. Kind of pic heavy, sorry.
-
20 hours ago, JagoBlitz said:
I already have the turbo pump, but I just found out that also the oil jet sizes are different and I would like to know how the Nissan engineers modified them as well. Are there any other changes I should be aware of?
Give Godzilla Raceworks a call. The are into Turbo builds
-
here is the cam I have. Now to search and find out the specifics so it can be degreed in.
-
I found the cheapest and fastest way to get your head ported, is to go on to a lot of forums and start asking if anyone has a ported head they would sell? You wouldn't believe how many guys have one, that has just been sitting. I grabbed one with the cam, lifters, correct lash pads, proper valve springs ..... everything. 500 miles on it, sitting for years and got it for half of what it would cost just for the work, not including the price of the head. And it has an AWESOME cam! Never hurts to just ask around!
-
would make a big improvement if it works as advertised or envisioned.
-
Since I started this thread, I have learned a lot about this. The basic idea is that when you increse the size of an engine, you need to incresae the size of the cam as well. Adding stroke changes the STATIC compression, and too high of a static compression becomes an issue for several factors, one of which is pump gas will be harder to run......timing has to be pulled back, etc. you have to find a fine line on what your usage is.....pump gas? 93? 91? elevation? carburetion adequate to feed the beast? compression adjustments if necessary with a thicker cometic head gasket?....but you can't go too thick before quench becomes too much and affects the cylinders ability to burn the mixture efficiently. When all is said and done, richening the mixture or even going 1 step or 2 stewps with a colder spark plug can help you live with pump gas with a higher compression ratio.


Joe's 1972 240Z adventure
in S30 Series - 240z, 260z, 280z
Posted
Thanks. I hope she is back up soon as well.")