

A to Z
-
Posts
709 -
Joined
-
Last visited
-
Days Won
9
Content Type
Profiles
Forums
Blogs
Events
Gallery
Downloads
Store
Posts posted by A to Z
-
-
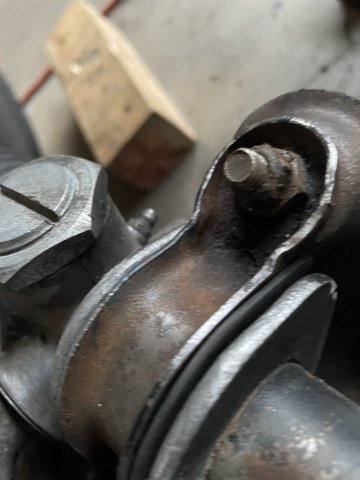
The cam I have for my stroker is here. I got as a part of a ported E31 head setup I bought. It is an Electramotive L4-02. Presently I do not have a cam card to get it degreed in correctly. Do any of you have a cam card? Do you have any info you would share with me? Id like to know all there is to know about it......thanks in advance. Here is a pic of the end of the cam.

-
There are a lot more options than you will hear about.
Dave Rebello has built several big bore engines from L24 and L26 blocks. Some racing classes in England require it, so it has to say it on the side of the block. Both blocks carry a "P30" casting, and have an 83mm stock bore. Also most guys see an L26 block as a throwaway....so get it for next to nothing, and if it passes Maganaflux its good to go.
From Dave, I learned that you can safely take one out 2.5mm to 85.5mm on the bore. That's .020 under stock L28 bore.
Sleeving the block. YES it can be done. An L26 block can have all 6 bores sleeved, and costwise it can be done for about $150 per cylinder INSTALLED. Sleeves can be custom made if necessary to meet the need. Melling makes sleeves in 3/32 or 1/8" wall thickness AFTER final bore size. So you order 90mm internal bore sizing with a 1/8" wall. It IS possible that at some point, the sides of the bores may need to be milled flat so they can sit next to each other properly in the block.
Granted, some sleeves have a larger diameter stepped neck to support them, but it isn't necessary in an L6. What the machinist has to do is simply bore it out for the sleeve but stop short....say 3/8's of an inch or 1/2 of an inch. This leaves a "step" for the sleeve to sit on. If needed they can simply machine off the length off the sleeve but leave it a tad long, so that once inserted, the block can receive a quick clean up mill. Once done, you can't even tell it's been done. If necessary the boring maching can then be taken back in and machine the step flush with the internal bore of the sleeve.....although it should be noted the pistons doesn't come down that far. So the step and the head hold the sleeve in tight. If someone wanted to be anal, they could weld the bottom of the sleeve in, but the press fit should be strong enough to hold it. You could always bore the step almost flush, weld the sleeve, and then bore the step flush with the weld making it one piece.
In short, if the block has been magnafluxed and is free of racks....use it. YES F54 280ZX blocks are said to have more ribbing between the bores, but they are also more common than not to be too thin to do any boring much past stock. The sleeve gives you the thickness for good ring seal. Whether the larger sleeve affects cooling to a degree that would be conerning, I do not know. F54 is more expensive, and if you are going to sleeve it, is it still worth it? I suppose if the extra webbing it still there after boring for the sleeve, then it would be nice....but I am a street car guy, and so, I would go with the P30 and feel great about it..
My L26 block, I took to 85.5. I would not hesitate personally to sleeve all 6 and go with a 90mm pistons if I did it over again. Just make sure you have the head gasket that will accept the bore you go with.
Peace.
-
thanks!
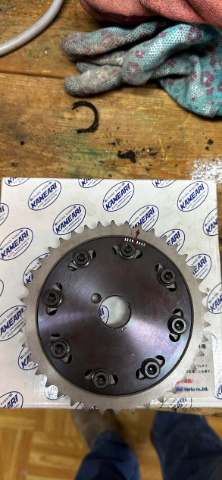
2-22-2023 UPDATE: Kind of in a holding pattern right now. Short block is being finished up....have to wait in line. The Ported Head I bought from Dan Carroll has been shipped....the Electromotive cam in there is shrouded in mystery....On Steve Ehlers advice, I called Isky cams and talked to Ron, who was the one who ground these cams. As soon as the cam is here I will write down all the info on the back of the cam and get back with him to see if he can get me the cam card to degree the cam just right. Mark FL helped me out with a new and unused .080 Cometic headgasket and a Kameari adjustable cam gear sprocket. And since my coil died a while back, I went through MSA and got a FAST PS20 coil and a chrome bracket. It really wouldn't have killed the people at FAST to put the sticker on straight!:)

-
old topic.....but it would seem a thicker head gasket from Cometic would have eliminated the valve to piston interference. I dont know how you had valve interference with 525 lift. Guys run a lot more lift than that with much higher compression.
-
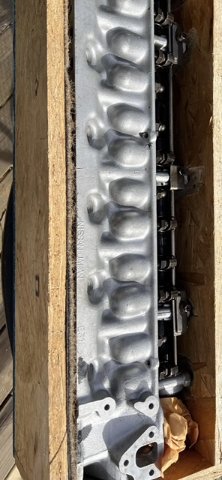
Interested in a L6 head already ported.
-
Here's a bit of a complicated question. My L6 has a diesel crank and H beam 240Z rods, and Rebello custom pistons set at 10.0 to 1 compression at zero deck height with my E31 head. The cam is the stock "A" cam. Because I am adding basically 1/2 inch of stroke, how will the stock cam act? I am thinking the cylinder pressures will be higher and port velocity will probably go up, but wondering what to expect.......will the timing have to be backed off? Opinions/comments please.
-
-
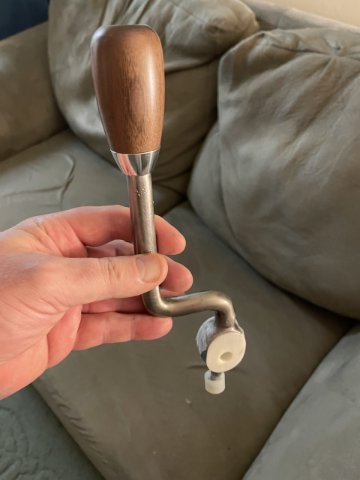
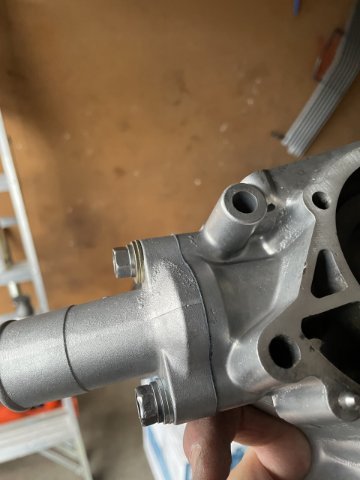
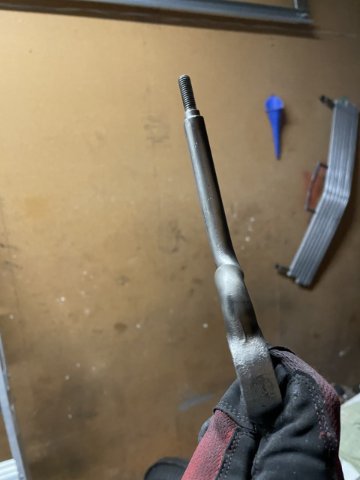
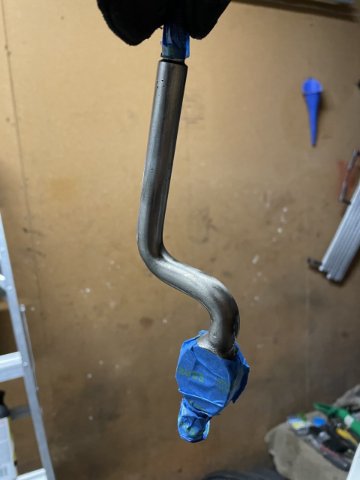
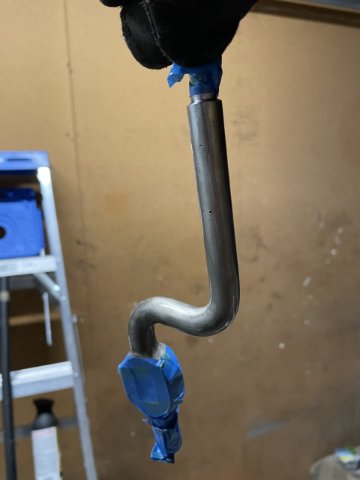
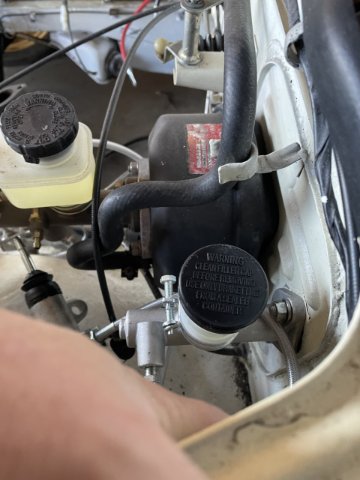
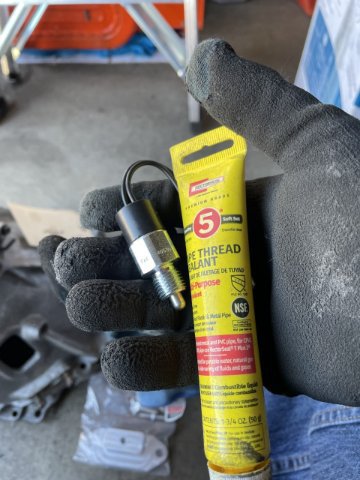
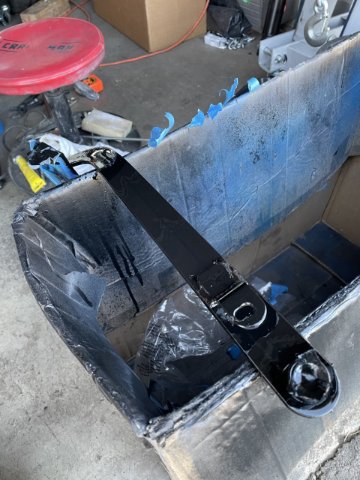
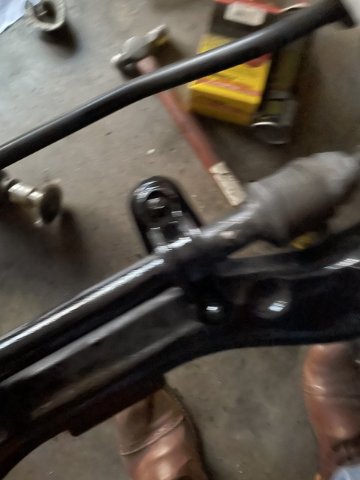
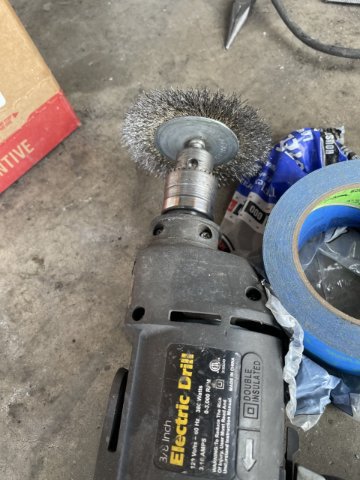
02-11-2023 UPDATE: I started with the foot peddles. I removed the brake pedal for the auto trans, and installed the manual peddles. THIS IS INCREDIBLY HARD! A lot of contortion....6'1 and 240 lbs makes it ROUGH. I put it off for a long time, and now I am SO glad it is done. After this I decided to put the lower radiator hose fitting on to the timing chain. As always I like to put a very thin coat of gasket maker on each surface then use the gasket. This way the gasket maker can fill any imperfections in the surfaces and you get a great seal. For the plug, my stainless plugs came in and would not go in.....So I decided heck with it.....gooped up the brass plug with some pipe sealer and ran it in. I was able to enlist the help of my neighbor and his buddy and I put my shifter into his vice, and with a MAPP gas torch I heated and bent my shifter into an "S" so it will clear everything. In doing this job, the surface of the chrome, etc was all burned and looked awful. With a file and with my wire wheel attachment in a drill I was able to clean it up to a nice brushed finish. I decided to tape off the ends, and give it a few coats of clear paint. I used the Clear Engine paint. It is tough....thick, and VERY glossy. Duplicolor engine clear with ceramic added. Here are some pics of the day.
-
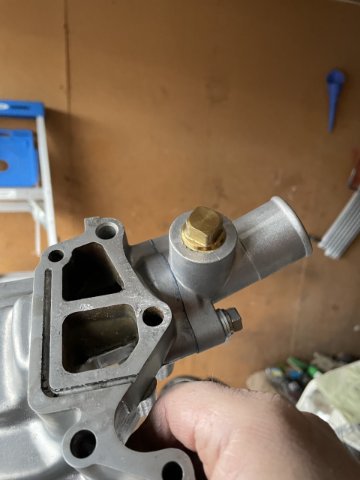
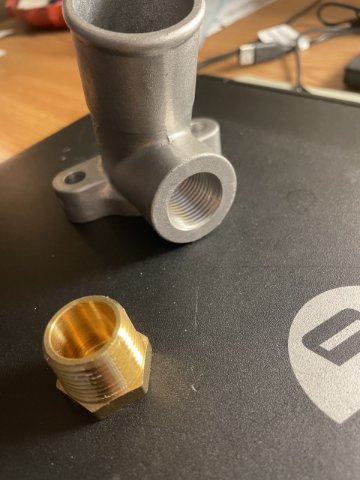
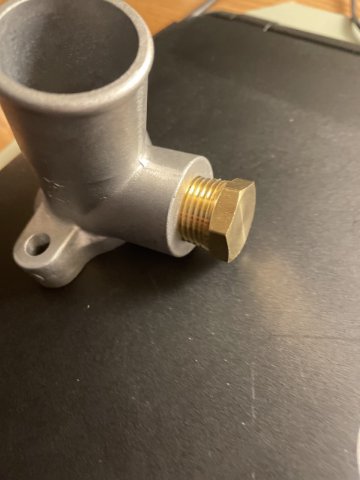
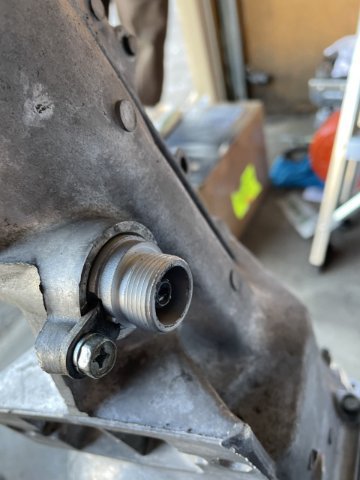
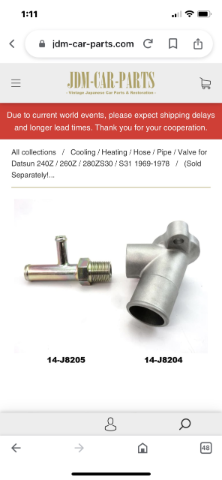
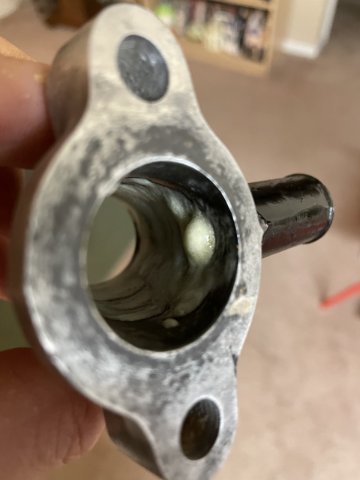
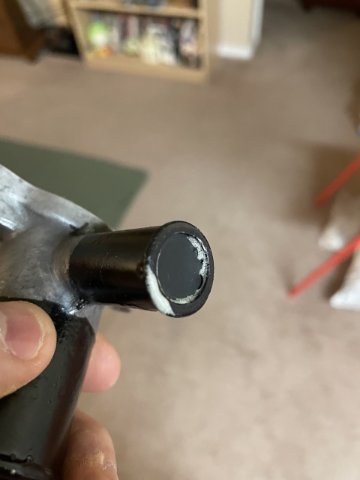
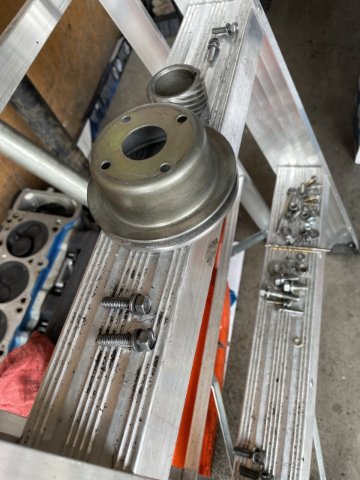
02-06-2023 UPDATE. Ok, so my lower radiator fitting arrived. Nissan part # 14-J8204. This is the L28 fitting. I found that a 1/2" brass plug workes perfect. It goes halfway in by hand, just need to run it back and worth to get it to set all the way in, and I will goop the threads with pipe dope. Couple pics:
-
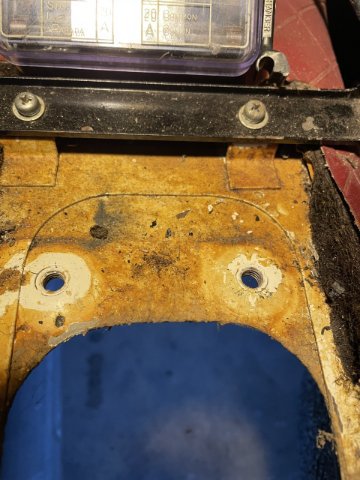
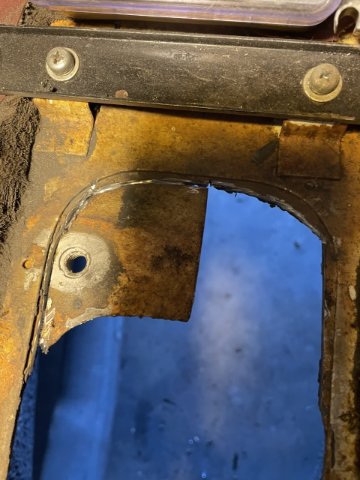
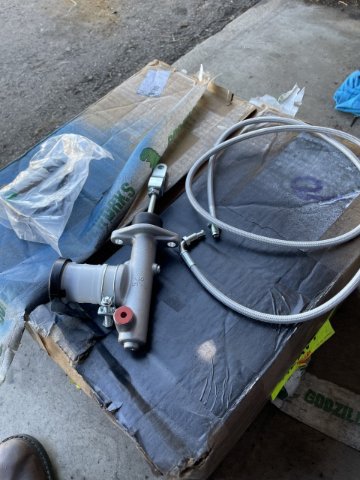
02-04-2023 UPDATE: Hit the work today, nice decent temperature, so I went ahead and pulled the center console and started opening up the shifter hole. You can see the outline of where it needs to be cut out. So using my Dremel and cutting wheels I cut it to the point where I could grab the pieces with some pliers and remove it. Then I used both my die grinder and hand held file to clean it all up. Then, you can see the the holes that need to be drilled are also marked for you, So I drilled the holes open, and that part was done. After that I took my clutch master cylinder, the braided line and Clutch Slave cylinder and bolted them all together, and then I bled the whole system. Nice to get it done while it is out.
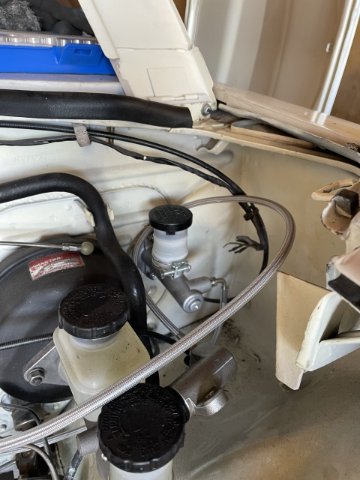
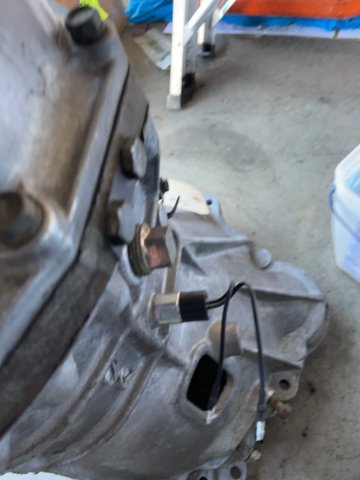
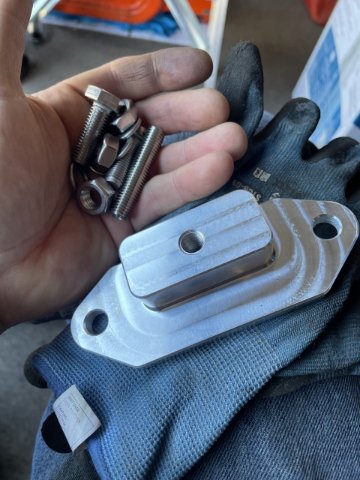
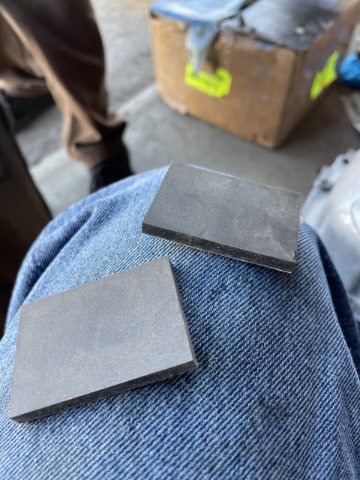
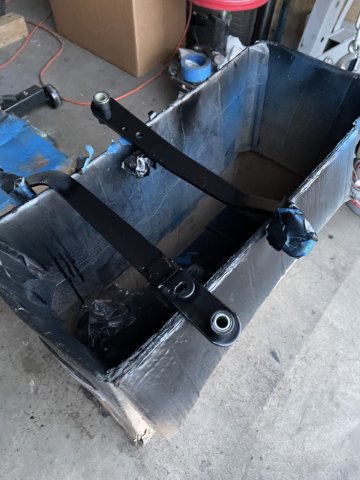
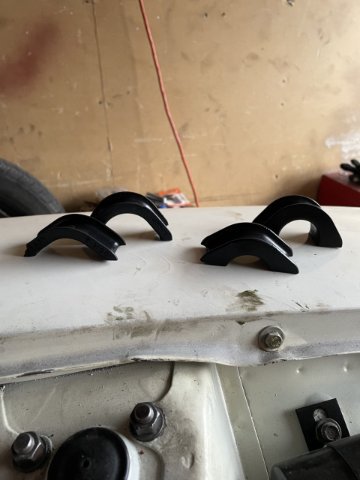
") I kept going and installed the master cylinder, and then grabbed the transmission and went ahead and installed the Backup light switch , and the speedo gear piece. Then the bracket for the transmission mount. Since the rubber ones are so expensive, I took advantage of the chance to get a solid aluminum mount for about half the price. My neighbor mentioned it would be good to put a bit of rubber in there to give it some give, since the engine motor mounts are still rubber, and gave me 2 thin strips of rubber. As you can see in the pics below, I put them in there behind the mount and then bolted it down. Becasue the mount isn't centered, I need to figure out if I have it correctly or if I need to rotate the mount 180 degrees. So....next is the clutch and brake pedals. I pulled them off my pare set, and wire wheeled them up, then masked and painted them. A lot done today. Getting her all ready for the new engine and trans to go back in. Here are some pics.
I kept going and installed the master cylinder, and then grabbed the transmission and went ahead and installed the Backup light switch , and the speedo gear piece. Then the bracket for the transmission mount. Since the rubber ones are so expensive, I took advantage of the chance to get a solid aluminum mount for about half the price. My neighbor mentioned it would be good to put a bit of rubber in there to give it some give, since the engine motor mounts are still rubber, and gave me 2 thin strips of rubber. As you can see in the pics below, I put them in there behind the mount and then bolted it down. Becasue the mount isn't centered, I need to figure out if I have it correctly or if I need to rotate the mount 180 degrees. So....next is the clutch and brake pedals. I pulled them off my pare set, and wire wheeled them up, then masked and painted them. A lot done today. Getting her all ready for the new engine and trans to go back in. Here are some pics.
-
Anyone offhand know the size of the threads in there for a flush plug?

-
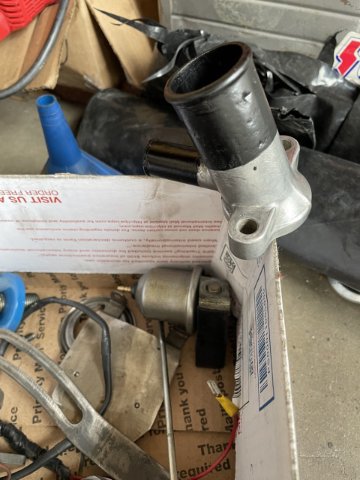
Thanks. I have received several responses that all, like yours, made too much sense to take the chance. So, I went ahead and got a lower coolant piece from an L28. Since I am going heater delete, this one allows me to put a flush threaded plug in the end, looks much better. No longer available through Nissan, so I found them at JDM-Parts.com. Not cheap, but.....
-
I went ahead and got a lower coolant piece from an L28. Since I am going heater delete, this one allows me to put a flush threaded plug in the end, looks much better. No longer available through Nissan, so I found them at JDM-Parts.com. Not cheap, but.....
-
1-28-2023 UPDATE: Crank is done. cut .010 under on all journals and no has ZERO runout. Block was tanked and magnafluxed, came out great. Is awaiting boring now.
-
 1
1
-
-
Thanks to everyone who helped me.....I bought a K case R180 with a 4:11 gear set in it, all cleaned up and ready to go, including the bolt in sides. So good to go!
-
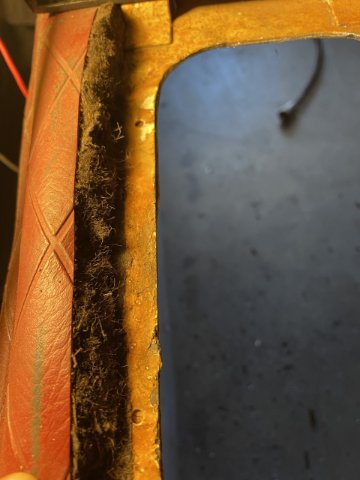
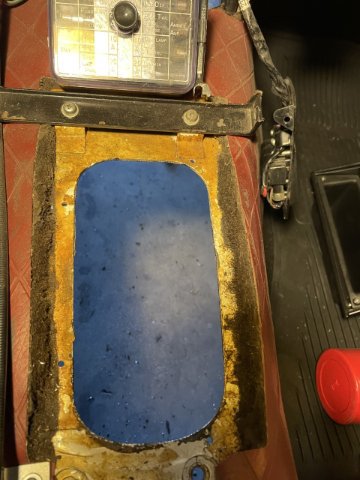
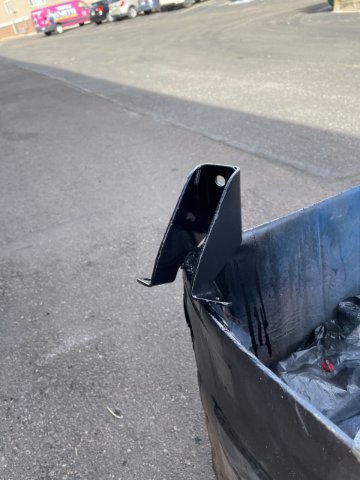
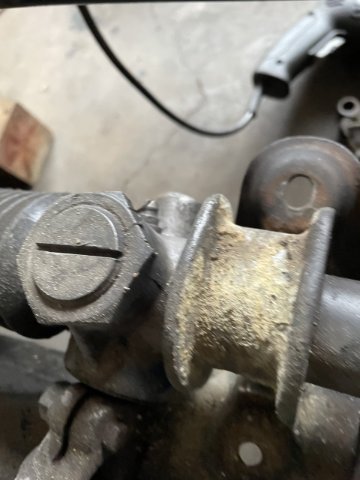
01-28-2023 UPDATE: I have been working on my water neck that splits off to the heater. Since I am heater deleting my 240Z I decided to look into blocking off the port in a nicer way. So, I went to Lowes and bought a rubber plug that was tapered, and got one that fit right in. Then I coated it with Gorilla glue and pushed it in. After a couple hours, I checked it and it was permanently in there. So I held it up and poured water from the inside which actives the gorilla glue and then filled it up with gorilla glue from the inside. Now, because this stuff expands, I had to keep wiping it smooth. This will all be sanded up inside and cleaned up, but once this is done, it will look much cheaner than a piece of tubing with a bolt in it to block it off. So, more to come on this. Also an update on the block, it is all cleaned up, was magnafluxed and all is well, and is going to be bored shortly. Its been so cold you have to enjoy ANY progress. Heres a couple of pics in mid finished state. Cheers.
-
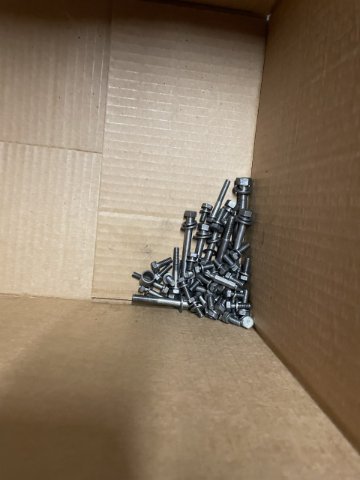
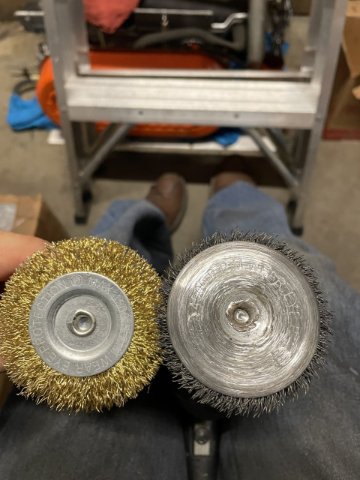
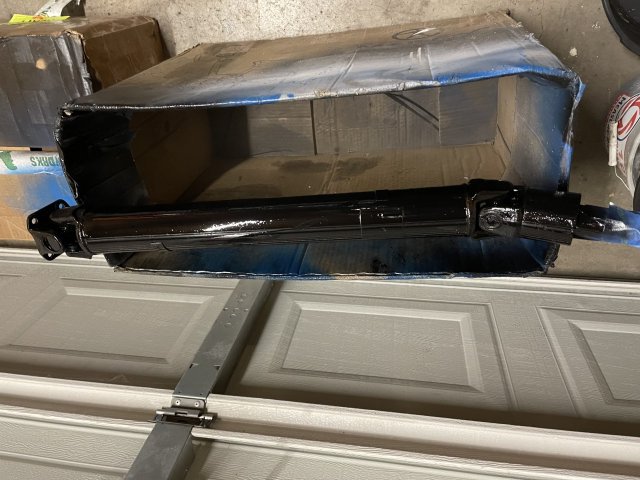
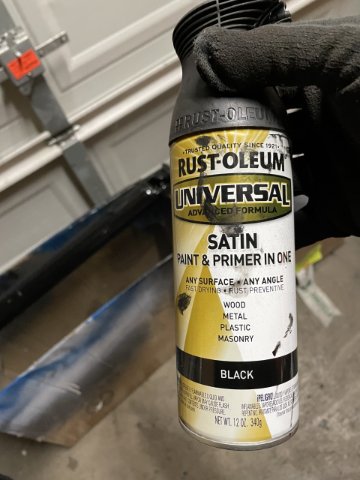
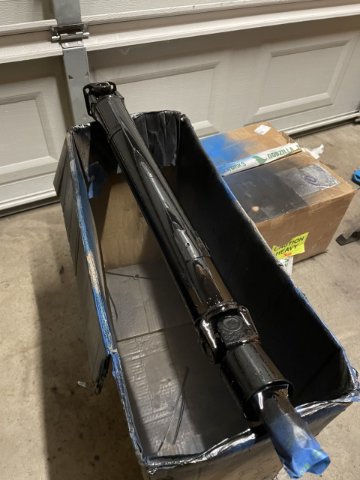
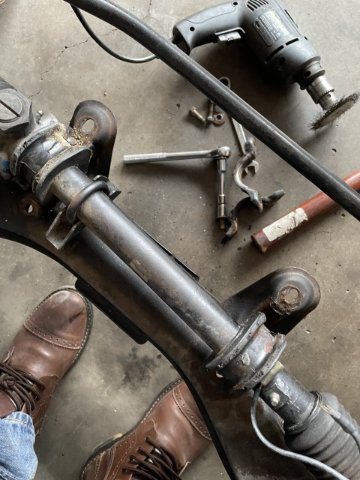
01-22-2023 UPDATE. I finally finished up the engine bolt cleaning!. All cleaned up and ready for the block when it gets back from the shop. Crank is done....010 under all the way across, ZERO run out, nice and straight. I also wire wheeled up the driveshaft then cleaned it up. Then before I went in for the day, I got one side painted. Once dry I will flip it over and paint the other side. Look at the pic, this is the 2nd wire wheel I have completely wore out on this car......but hey it's Progress. Hey it's cold! I have heater in the pics, and it's keeping it manageable. But a one car garage is rough.
-
Thanks for the kind words.
-
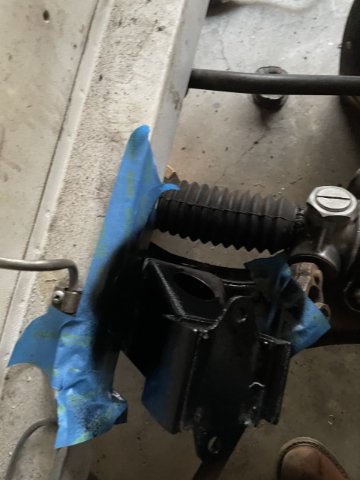
a pic of the rack painted. crummy pic, but.....
-
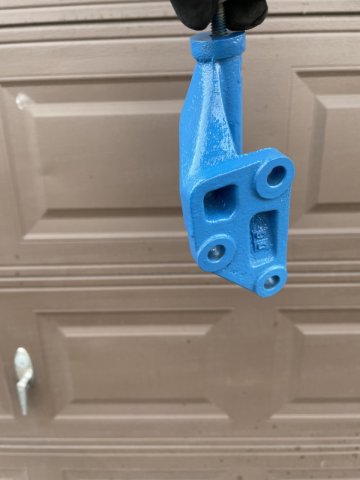
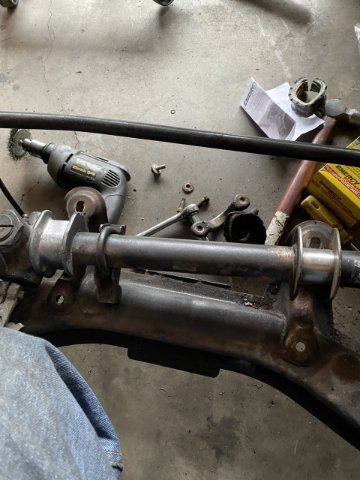
01-14-2021 UPDATE: More progress......cleaning bolts up with the wire wheel in the drill and a pair of pliers to hold them. Then painting of more parts, and replaced the steering rack mounting bushings......went with urethane this time, and painted the K memberr. Lastly I spent some time cleaning uo the compartment before calling it a day. Pics follow. :)
-
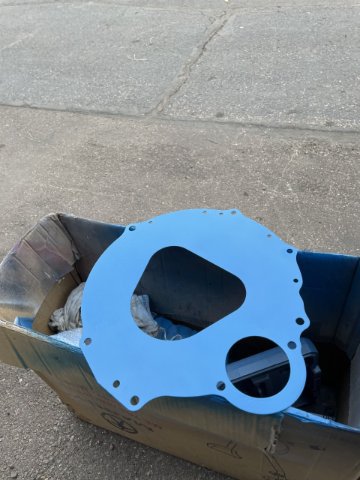
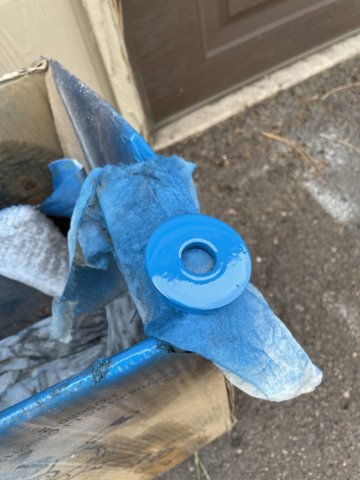
01-09-2023 UPDATE: Well I got the block, rods and pistons down to the machine shop, and the crank should be done tomorrow. They ended up going .010 under on all the journals and got the runout completely out of it. So after all of that, I went ahead and began the process of cleaning up and prepping all the stuff to be put back on when the block gets back. I painted the engine plate and washer for the harmonic balancer in the Same "Old Ford Blue" I will paint the block with. It's a Duplicolor engine paint. Distributor, misc bolts, etc all cleaned up and buffed out with steel wool, I just need to paint the motor mounts and transmission mount......I still have a few more engine bolts to clean, then it is on to getting the crossmember, etc. painted in the car, that I couldn't really get to before when the engine was in. Pics
-
Yeah, it definitely takes time.
-
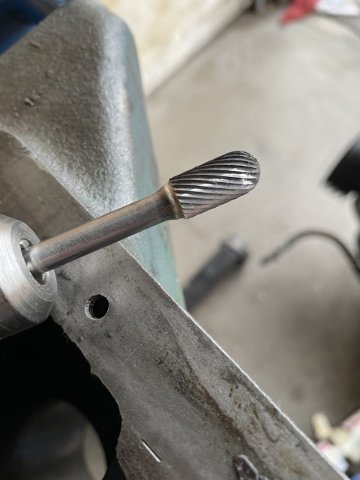
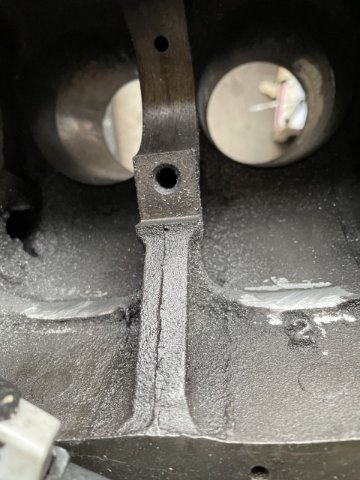
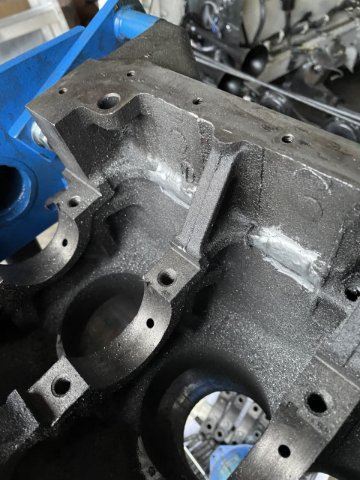
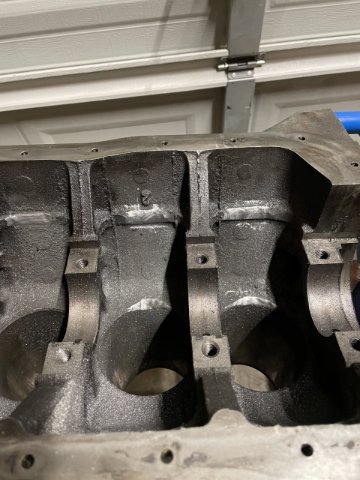
01-01-2023 UPDATE. Happy New Year! I was able to use my new carbide burr bit, and get closer to having the block ready to go to the machine shop. Clearancing, clearancing, clearancing. Because I am boring so much, I can't fully clearance the bottoms of the bores until it is back, but I was able to finish the sides. Pics follow.
-
K1 Forged H beam Rods with ARP 2000 bolts I got from Steve Bonk.


Looking for bore size of L28ET oil jets
in Nissan L6 Forum
Posted
The little bit I do know about this, is that you need to upgrade your oil pump to a 280ZX turbo pump to handle the excess oil flow.