Search the Community
Showing results for tags 'LS2'.
-
Was able to attend a local roll race event. Here are a couple of passes of my ls7 280z!!! Enjoy!!! https://www.youtube.com/watch?v=IkqF5j8-Kjs https://www.youtube.com/watch?v=xMkUFN4t0ms
-
I've never seen a thread where someone documented how hawks mounts actually mount up and are installed. So I took a bunch of pics when I did mine for all to enjoy. Chassis Mounts Here's how the mounts look in your hand. I'll explain what each location really does as we move along. And here is the back of the plate that you must weld onto the frame. As you can see, you must clearance the frame in order for the plate to site flush again your frame rails. But before we get into that, lets see how we locate the bracket (front to back). So here is the mount just resting on the frame rail, without the backing plate, You can see now that the lower location of the bracket lines up perfectly with the lower control arm bolt. Now all you have to do is loosen the LCA bolt, remove the nut, and thread the bolt into the bracket (yeah its threaded down there). Once you have it threaded in and snugged (not tight), you've got it located front to back. So then I attached the backing plate to the bracket and swung it back into place on the frame rail. Obviously the backing plate wont sit flush until you clearance the frame. So now, mark the front and back of the backing plate on the frame like so. Now remove the backing plate from the main bracket, also remove the main bracket from the LCA bolt. Place the backing plate on the frame and mark the hole locations. Note that they will be off because you still cant set the bracket flush. So here are my marks. Let me save you some time and suggest that you cut the frame like the pic below. I tried counterboring the holes to make room for the tacked on nuts, but its harder to get the position correct. Notching the frame is easier and much faster. Now you can check to see if the bracket will sit flush. It might not sit perfectly flush, but pretty close. Heres how mine looked. If its good enough for your taste, put the main bracket on the LCA bolt and bolt it back to the backing plate. This will ensure that when you weld it, it is in fact correctly positioned. You probably want to go ahead and grind off the paint on the frame as well, I dont have a pic of that but you get the idea. Now your ready to weld. Just for reference, the side of the frame rail is twice as thick as the top. So you can get a little more heat into that side. Here's my ugly flux core madness, but it will get the job done. The second one turned out much prettier after I found a rhythm. And here is the finished product. Engine Mounts The mounts on the motor are fairly straightforward but I figured I'd show them for documentation purposes. Here is where the original mount goes. And here is the backing plate for the new Hawks mount. Dont put that lower right bolt in though, that comes later with the actual mount. And here is it all bolted together. At this point, I dropped the motor in to position the trans mount. I'll write more on that in the Trans Mount section. Here, its just to show you how the motor sits in the bay.
- 51 replies
-
- swap
- motor mounts
- (and 8 more)
-
OK this is my first post here; I guess I should introduce myself. My name is Cody Green. I am a car builder. I work at a Hot Rod Shop, and a Junkyard. I love all things mechanical. I’m a family man, and a Christian. That about sums things up quickly. Anyways, I'm always looking to educate myself and find good reads. I have owned many cars in my life, but the one that taught me the most was my 1990 300zx Twin Turbo. I got it when I was 18. It was a lemon. It was the kind of car you had to fix something on every weekend. I finally gave up on it and sold it to another guy. It left a hole in me. I tried to fill it with a 2006 Chevy Cobalt SS/SC. But FWD FTL. Then I bought a 1992 Nissan 240zx. It was a great little car. Fun, but there are a million of them everywhere, and they are not the most respected car. After I was done with school I began to look for another Z. I wanted a beater. I wanted a cancer free body but the rest didn’t matter. I wanted to do a full restoration. And a beater I felt would be a great starting point for something that will go under the knife. I landed on a red 1990 NA with 176,000 miles for $1500. This is the first NA I have ever driven. It’s definitely much slower than a TT but that is a no brainer. I love the LSX engine. It’s a fantastic base for a build. Good oiling system, Good structural rigidity, Heads that move air, yet keep velocity, and a massive aftermarket. So it’s also is no brainer for a replacement to the Vg30de. I have searched and searched and found very few Completed builds. I get this is not the easiest chassis to swap engines into. This is probably due to the fact that the z32 was one of the first cars to be designed with CAD. I watched a Japanese film years ago on Nissans build of the z32. If my memory serves me right they designed, built, and tested the engine first. And then they literally built the car around the Engine. This is the reason engine swaps are sooooo difficult on the z32. And also why the Engine bay is so cramped. This is why so many try and so many give up. Well I’m done giving up. I say CHALLENGE ACCEPTED! But before i started my build, i need to compile as much information as i can about others builds. I realized this would not only be a great help to myself but many many others. The route i would like to take is to not cut the firewall or tranny tunnel. Much like many others. I instead would like lower the K member. Not by hacking it up, but by building a jig that i can then build a new k member that will better fit a factory or aftermarket pan. Which brings me to my next point. Oil Pans... Guys i know im just one guy saying this but lets use some common sense for a moment. You gotta have a rear sump pan, on any project you got that is going to be used for any kind of racing. I know the S Chassis (240sx) guys use those front sump pans all the time. But for anyone who takes racing seriously. And anyone who is going to use there cars in a performance environment. You just gotta have a rear sump pan. Maybe you think im crazy, but a lot of really smart people, and great racers agree with me. Here is a real easy test you can do if you want to know why you need one. Get a front sump pan and fill it with the ammount of oil it would hold when installed. Now get in your buddys fast car, and bring lots of dry soak and shop towels as well as a change of clothes. Now you sit shotgun and hold the pan in relation to how it would sit in the car. now have your buddy floor the car. You can have all the baffles and trap doors you want. But when you hit the gas. That oil is goin to the back. If your just on the street and daily driving a front sump is just fine. but if you are ever gonna do any kind of racing with your car, get a rear sump. Or get a dry sump and never worry! Whew... Im done ranting. I would like the help of everyone to compile a list of links to successful LS swapped z32 builds. There are so many incomplete builds out there. Let’s do ourselves a favor and make a list of completed builds we can all use as a reference. I'll start. This one is really only a good picture reference... but atleast it was completed http://www.aussiev8.com.au/conversions-rebuilds-project-cars/53583-300zx-ls1-build.html This one has some decent pictures, and some info. But the car got hacked up a little more than i would like mine to be. http://ls1tech.com/forums/conversions-hybrids/1499444-my-build-pics-1990-300zx-ls1-t56.html This one is not finished but holy cow does he have a ton of pics! http://ls1tech.com/forums/conversions-hybrids/1636133-1990-300zx-lsz-pic-heavy-180-a.html Another near finished one, but its TURBO'D http://ls1tech.com/forums/conversions-hybrids/1605916-91-300zx-ls-t56-swap-2.html I'd Like to thank anyone in advance for any help.
-
Hi all, In progress of building out an LS1 for my 240z. Currently: LS9 Cam + LS2 front cover + holley carb + intake Using JCI mounts for the swap. (yet to arrive) Electric water pump and no other accessories. Has anyone mounted an alternator low passenger side? If not, anyone run a mini alternator as the only accessory on the driver side? What mount & alternator did you use? Here is my current setup - I fear the alternator sticks out too far: Threads I've already looked into: http://forums.hybridz.org/topic/72741-whats-wrong-with-this-bracket/ http://forums.hybridz.org/topic/49579-mini-alternator-with-6-rib-pulley/?hl=alternator
-
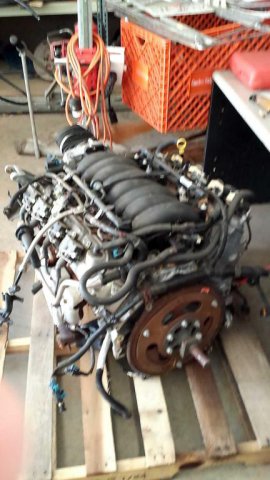
So I've had my eyes on a ls1 engine and a bunch of parts I couldn't identify at my cousins shop. I've just about got my dad sold on the idea of swapping a Chevy V8 into my 260Z and he actually seems really interested. (probably because it's GM) AAnyway I was wondering about your rear end setups on your V8 swapped Z's I know the common option is a R200 LSD or welding a R180 but I'm still kinda anxious about putting close to 350 hp to the wheels on a 40 year old car. Also I need help IDing the engine its self. It's an aluminum block LS1 so I know it's a car engine but I'm unsure about the displacement. I remember somebody at a family reunion saying something about a 5.3l at their shop but I thought the 5.3's were truck engines? My dad swears my cousin got the engine out of a Corvette a few years back but I'm not sure. Thank you guys! PS; I know many people will get the exhaust manifolds off of a Vortec truck to modify into a turbo manifold and I was wondering what the most common truck you can get the manifolds off of is?
