-
Member Statistics
33191
Total Members5167
Most Online
All Activity
- Today
-
Need a set of 77 78 seat rails
-

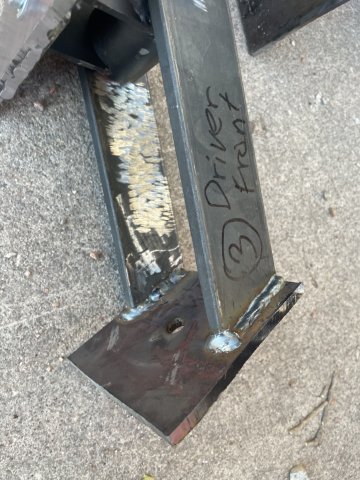
Heavy Duty frame rails and connectors
Apex Engineered replied to toolman's topic in Gen III & IV Chevy V8Z Tech Board
Hello, we will not be there but there will be 2 (that we know of) Zs running our full line up at SEMA, A green 2+2 and a wrapped 240z! Feel free to check them out, ask questions and let us know if you have any questions -
Got the title transferred. all legit now
-
This is the only picture that I could find of the car with the 16x8 wheels and stock bodywork:
-
I'm currently running 15x10 wheels with a 5.25" backspace on all four corners. I use 23.0x10.5-15 Avon Slicks or Hoosier 275/35-15 tires on all four corners. I run a 1/4" spacer on the front and it just barely clears my coilovers. No spacer on rear, and I have at least a 1/2 clearance to the strut. I have a modified version of the SubtleZ body on my car which provides an extra 1.5 of clearance at all four corners. Below are some pictures with the 15x10s and SubtleZ kit.

-
thanks. God willing I will continue to. I got very lucky, buying a car looked over due to the rough paint, but clean....rails, doors everything clean no rust. 2 spots int he floors and a couple other spots, that's it. Still love my 240Z best, but this is a nice home for my ATLAS engine.
-
Ditto what @74_5.0L_Z said....same experience for me, but in a 4" backspace vs 5" (i.e. 0et). The 245/45-16 fit front and rear with my standard-size ZG flares, which I believe are similar to your setup? What tires/treadwear rating are you thinking of running? I've actually found a *slightly* better selection of tires in 15", especially at the performance end of the spectrum; but then you start running into interference issues with brake and steering/suspension components.
-
CrazyThinker63 joined the community
-
When I was running the stock bodywork I used to run 16x8 with a 5" backspace. I could fit 245/45-16 under the rear and 225/45-16 under the front without rubbing. Availability of 16 inch is an issue these days. Research tire availability before committing to running 16" wheels.
-

Heavy Duty frame rails and connectors
Mitchel0407 replied to toolman's topic in Gen III & IV Chevy V8Z Tech Board
I don’t know if they attend or what can be found at SEMA but I’m interested If Apex Engineered will be there. I just saw that they dropped a new line of suspension upgrades this weekend called the Retro Mod line of suspension. The Retro line allows you to keep the stock R180 or R200 diff and looks a lot like there I guess existing suspension (non track attack) line that seems to be renamed to the Pro Touring line. -

Heavy Duty frame rails and connectors
toolman replied to toolman's topic in Gen III & IV Chevy V8Z Tech Board
SEMA SHOW 2025-LAS VEGAS NOV. 3-7 I know that many HybridZ forum members are unable to attend this show so I will try to look for any product at this show for you. Please list your request as detailed as possible( manufacturer name and description of the item). I will, of course, look for items related to Z cars but there are thousands of vendors and it is easy to miss items. Toolman - Yesterday
-

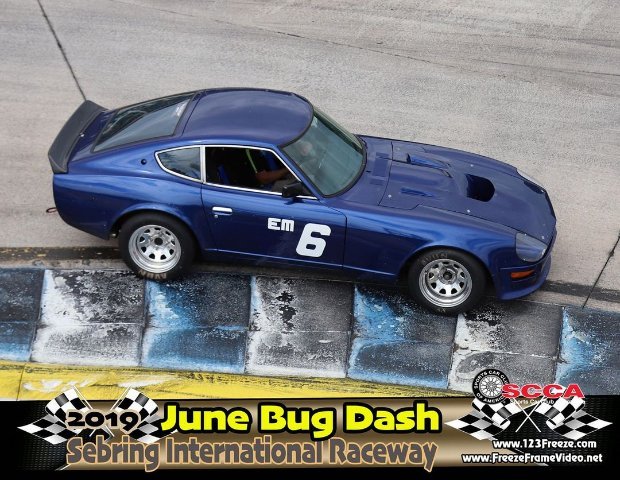
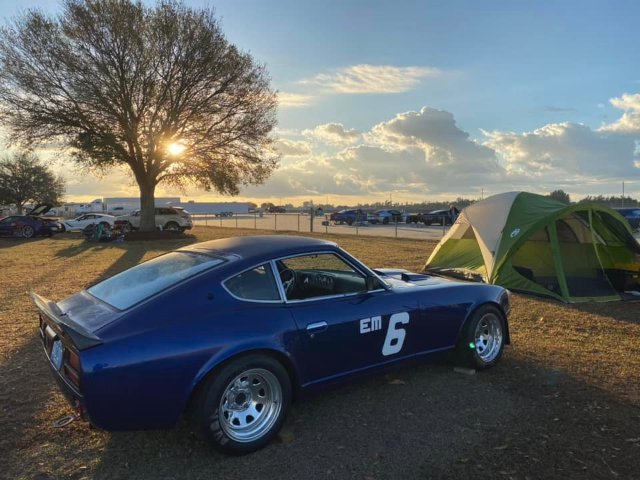
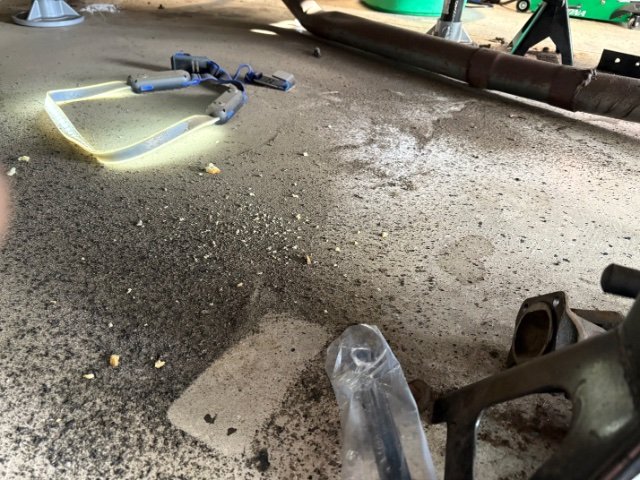
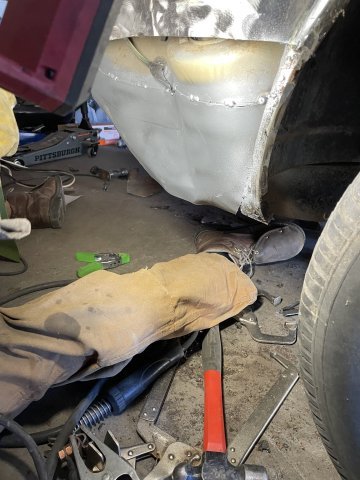
Fast Floridian's 240Z Track Build
FastFloridian replied to FastFloridian's topic in S30 Series - 240z, 260z, 280z
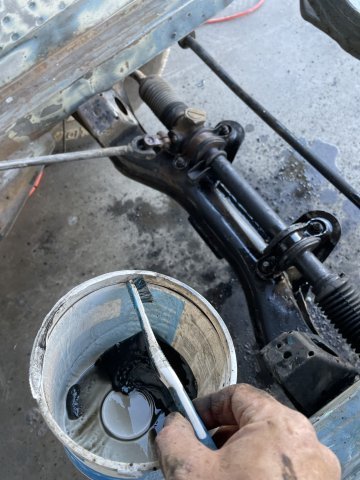
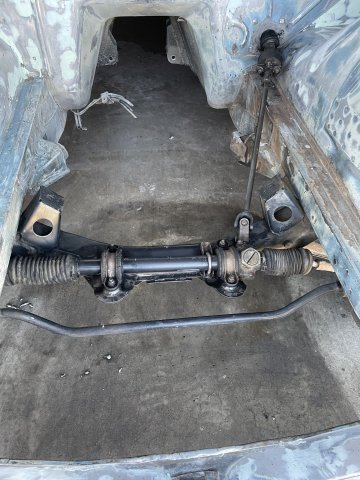
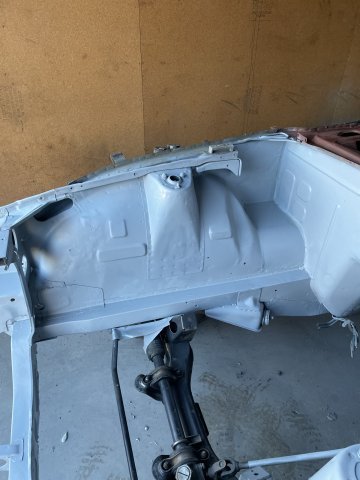
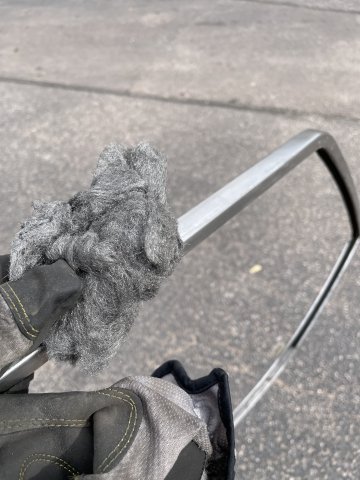
Went to town with a wire wheel and got the complete underside cleaned and painted today. Ready to start working on the rear suspension, hopefully it arrives soon. Can you tell where my phone was sitting, 😅 Didn’t take some pics but here’s a vid of before and after I posted.
-
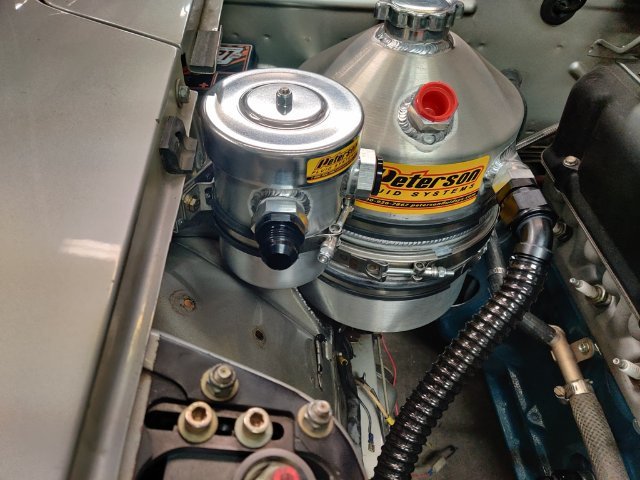
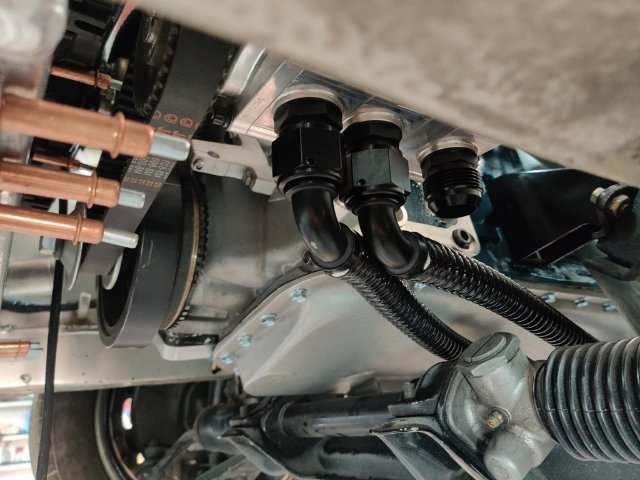
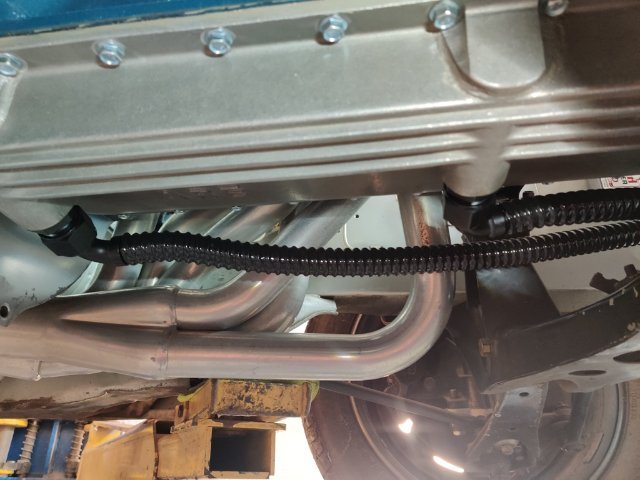
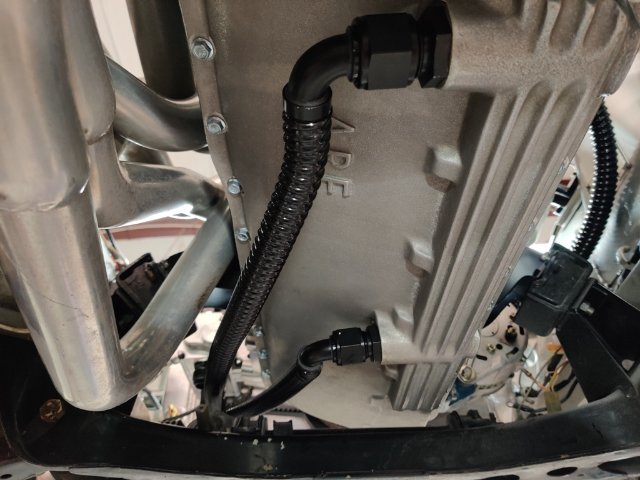
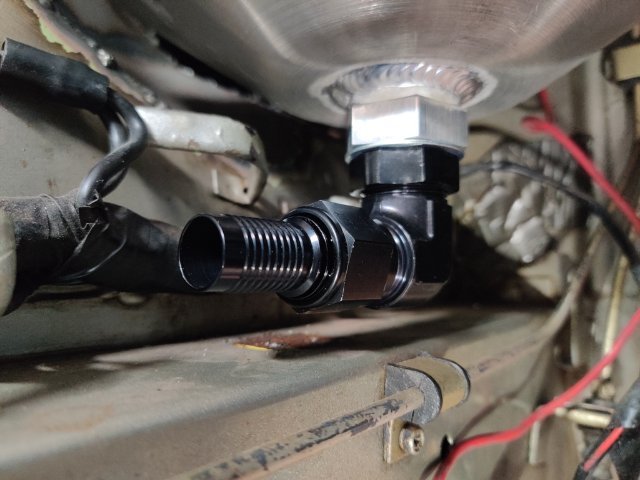
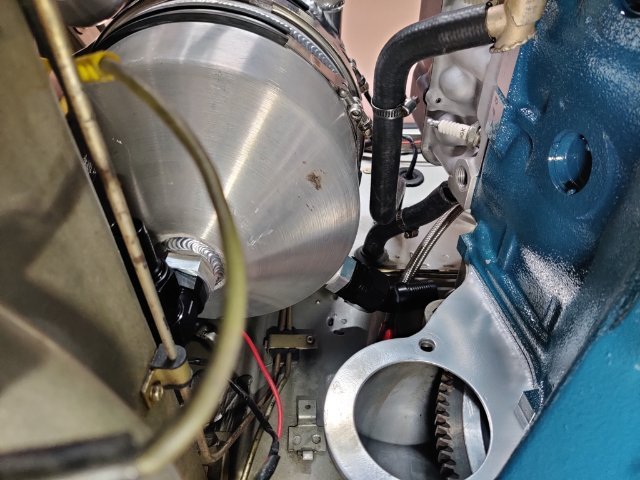
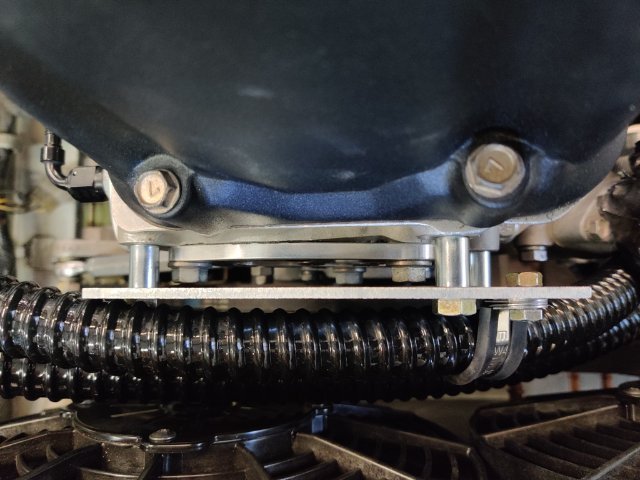
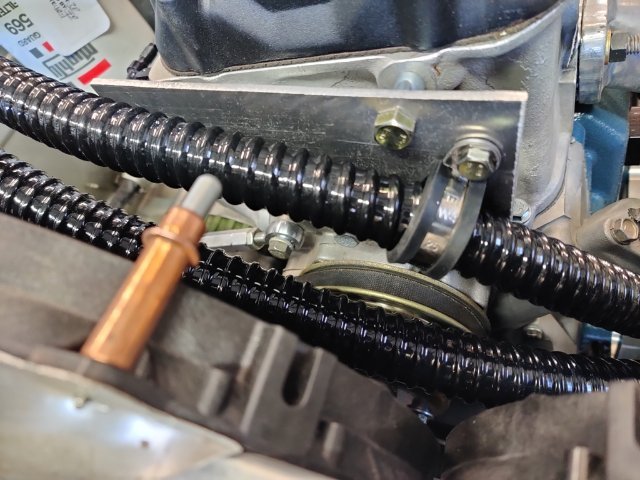
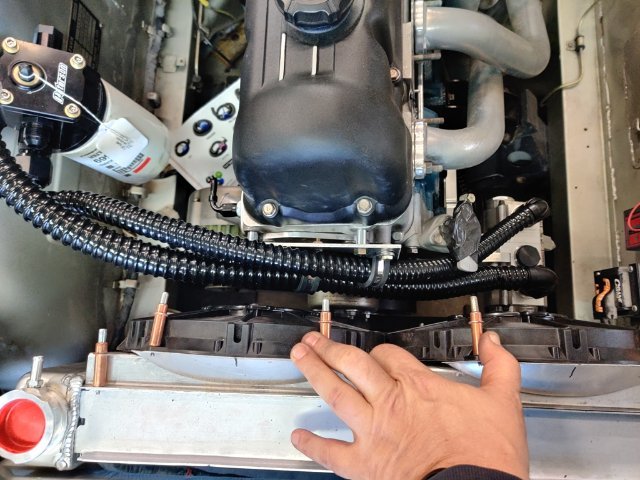
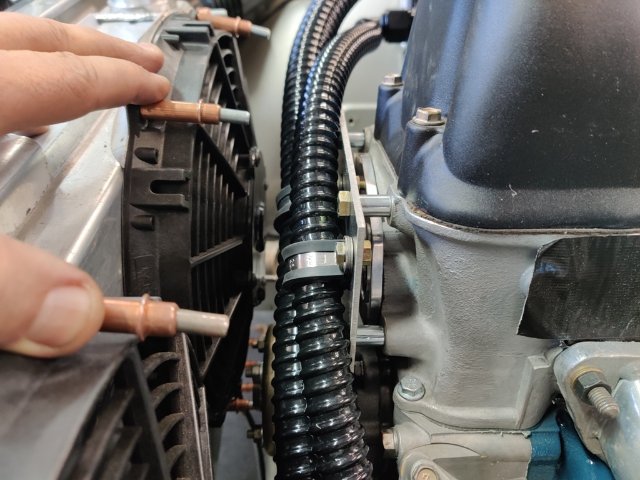
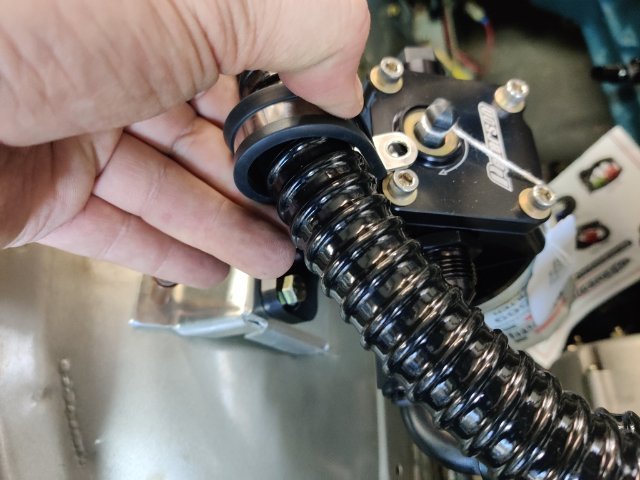
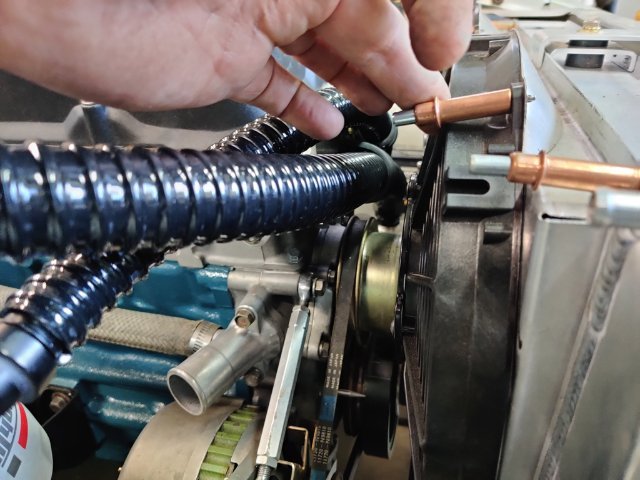
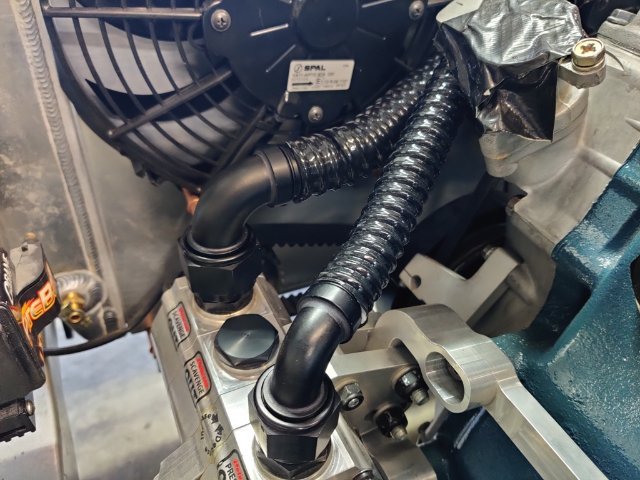
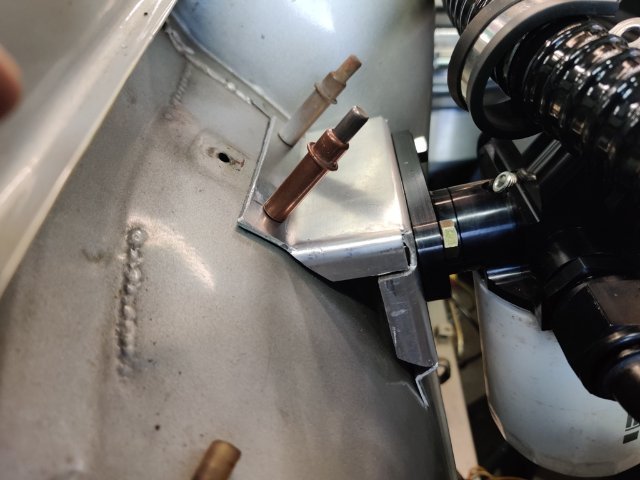
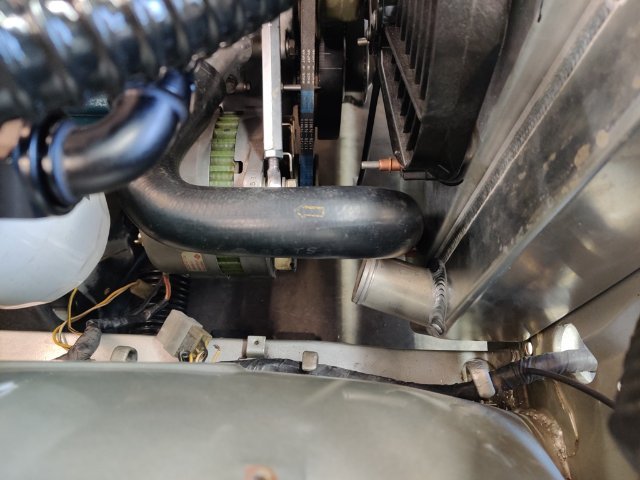
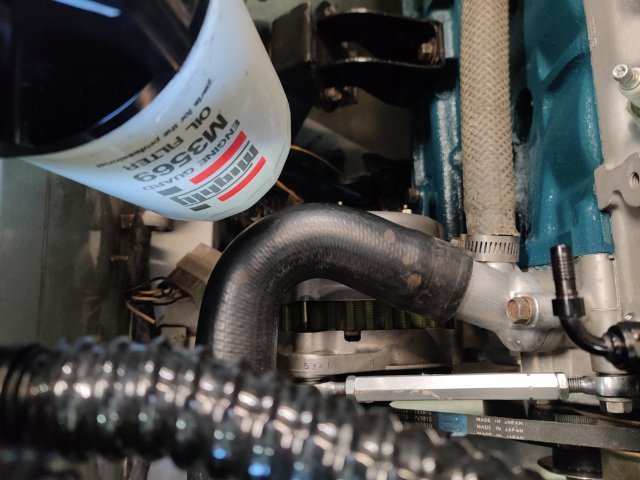
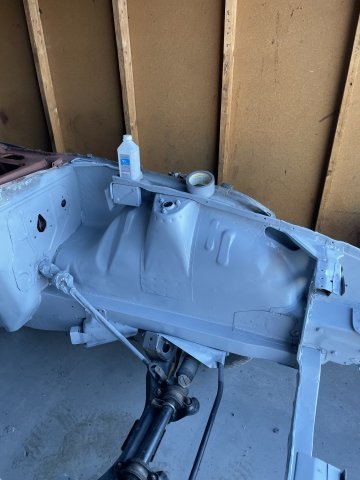
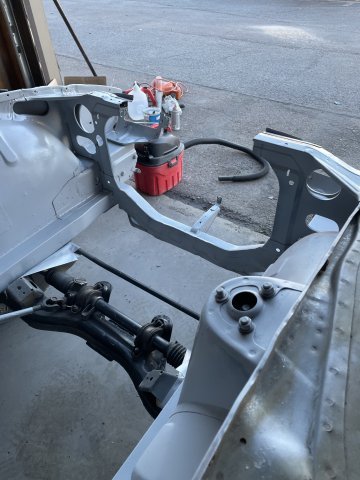
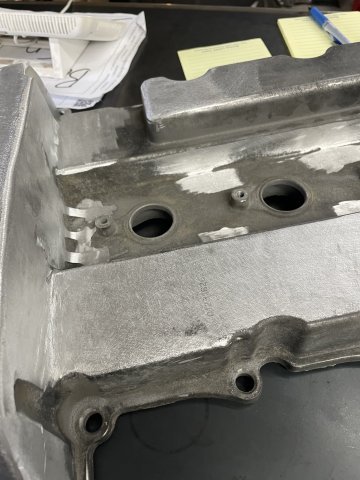
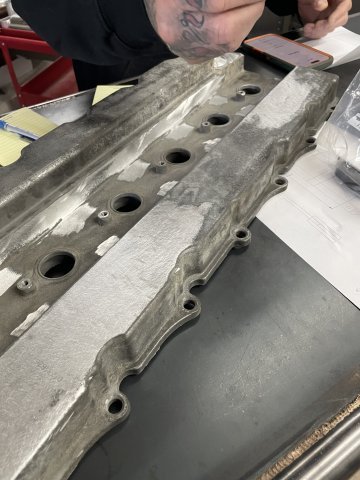
Final oil breather tank location and clocking. I will route a short hose from the tank vent out (red cap) to the black male AN fitting on the breather. The other fitting opening on the breather will be routed to the valve cover later. The hose in the picture is some kind of "pool" related hose. It is made out of plastic/vinyl with one coil wire in it. The ID is about the same as the AN fittings. I have one for -12 AN and one for -16 AN. I just heat the end up a bit with a heat gun and quickly push it into place on the fitting. It is working nicely to create "mock-up" lines. Two scavenge lines from the ARE pan to the pump: A special short 90 degree -12 AN was needed at the bottom of the tank. Tank clearance with all of it's surroundings is tight. Routing of two lines across the front of the engine... it took a while, but I finally thought up the idea to fabricate a plate for use as a securing point for P clamps to hold the lines securely. I used some dowels to space the plate away from the head and Kameari chain tensioner. I may shorten these a bit. The routing of the lines (one is -16 AN size and one is -12 AN) across the front of the engine - the lines are safely out of the way of the water pump pulley. I need to buy a longer bolt for the corner of the remote filter to secure another P clamp here (first pic). You may have noticed that I fabricated another remote filter mounting bracket. This one changes the angle of the oil filter so it is more vertical than the prior one. I did this when I realized that the -12 AN outlet doesn't need to pass close by the strut tower - instead, it goes directly to the original filter mounting location on the engine block. I previously was thinking it needed to go to the tank and was planning to secure the line with a P clamp to the tower. I put a stock lower radiator hose in place to check the situation out. Removal of the filter will not be difficult. As you can see in the last picture, I will have to modify the radiator coolant outlet somewhat. I won't be able to use the stock hose as is either. So, I need to figure out how to proceed to resolve this issue. I likely will remove the pipe outlet from the radiator, and modify it (or buy another) and weld it back to the radiator, changing the angle in the process. An "L" shaped tube with the same diameter as the stock hose would be a good solution here.
-
 Nav10 joined the community
 -
Looks good, you’re making some fast progress.
-
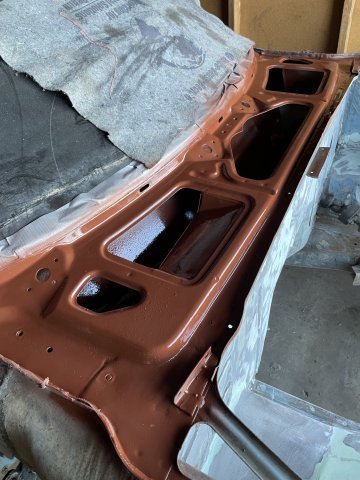
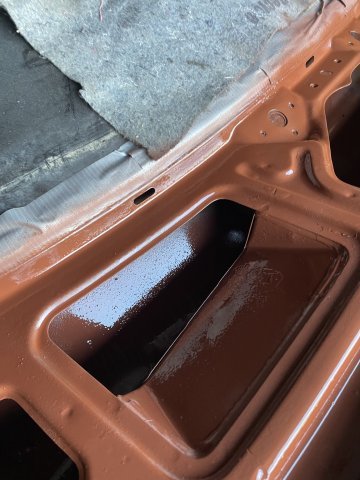
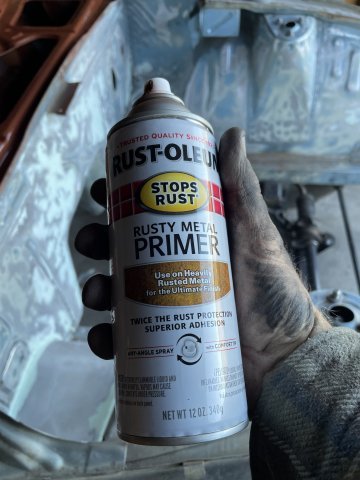
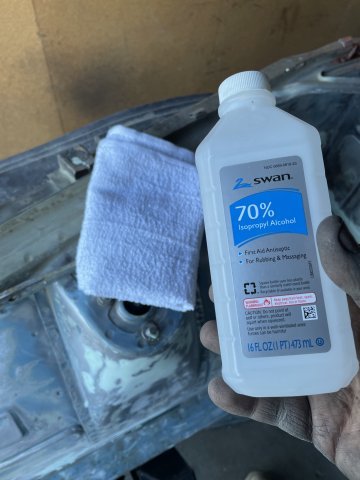
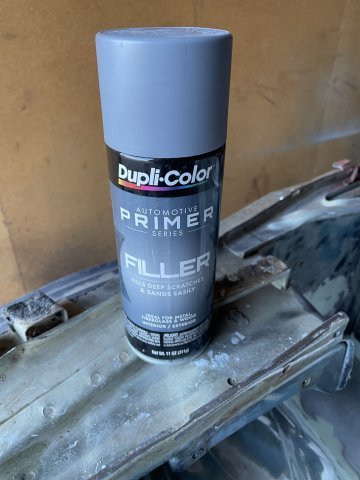
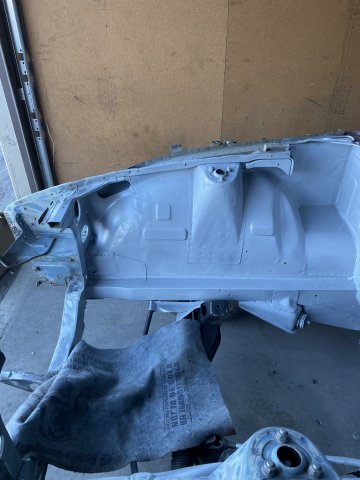
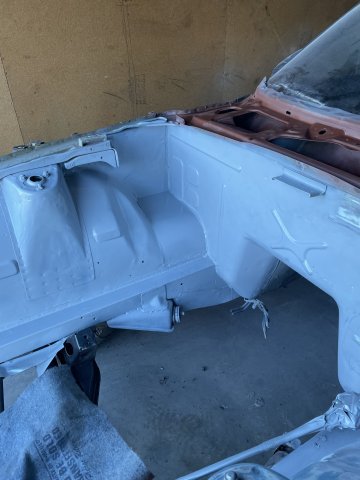
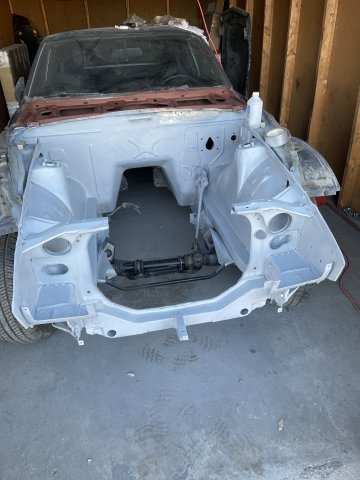
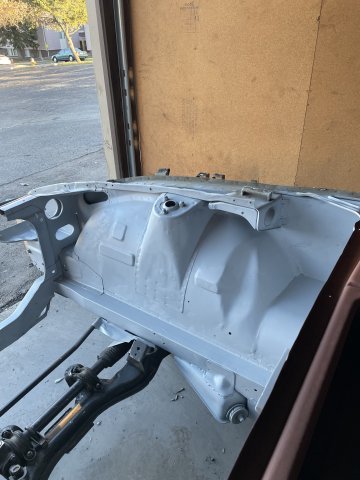
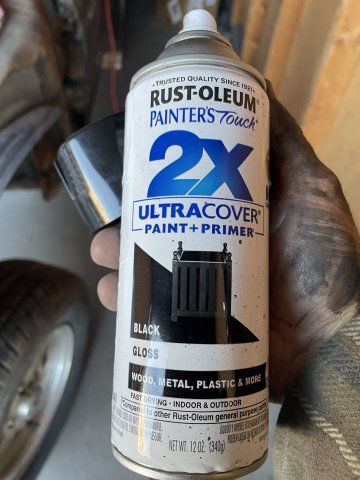
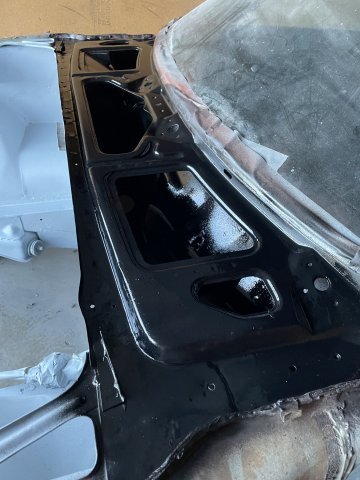
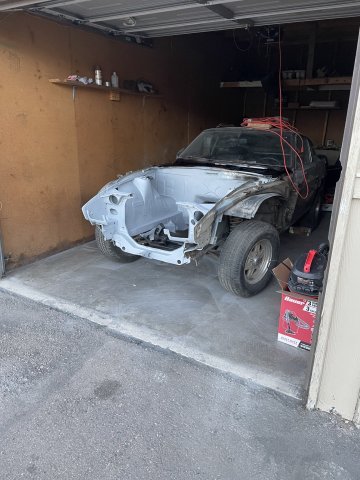
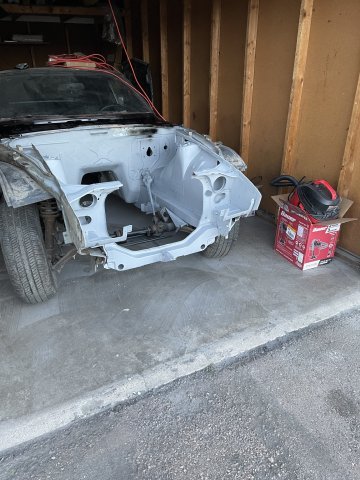
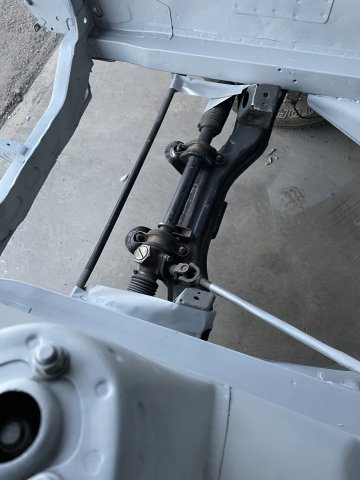
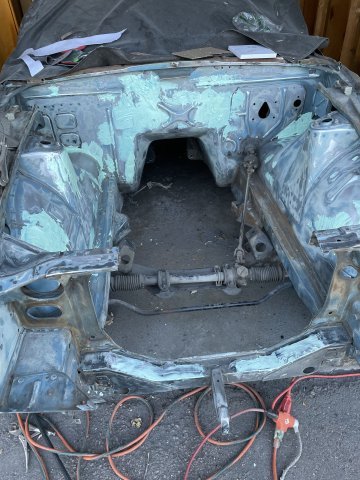
11-01-2025. 260Z work. I got the engine compartment sanded down after the glaze and then cleaned up the crossmember and rack with cleaning solution "g@s" and a toothbrush, and then steel wool, etc. Then I vacuumed out the cowl and primed it with rustoleum rust primerand top coated it with gloss black paint, then painted the engine bay with filler primer. Once dry I will use some spot putty I picked up on the areas that need it, hand sand it smooth and filler primer over that. Once it is good, then I will progress to color and then clear. Busy day! Pics:
- Last week
-
 Concumber joined the community
 -
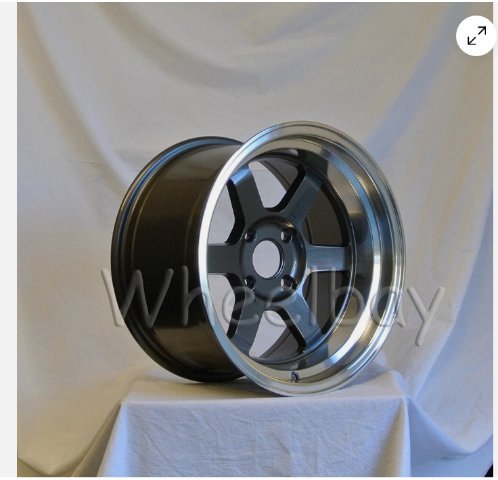
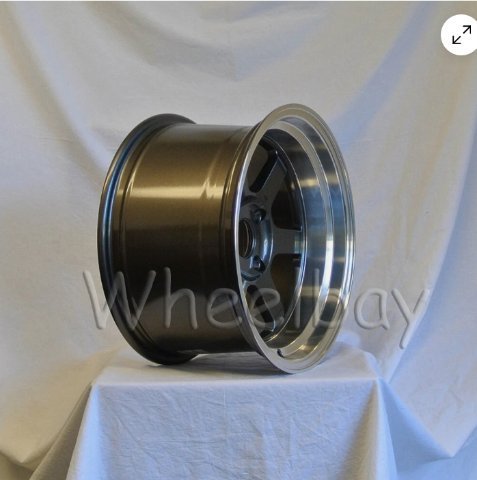
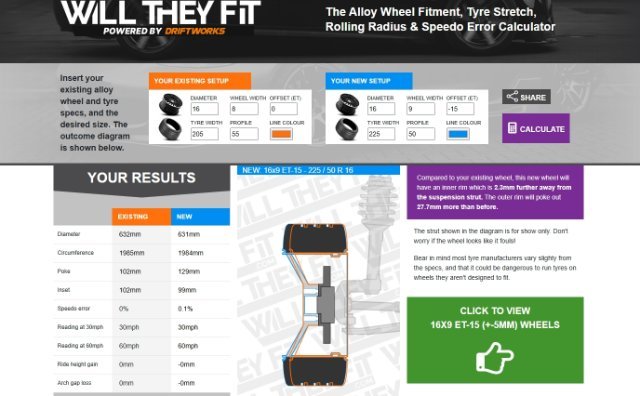
I went ahead and snagged the wheels I really wanted for my 260Z. I will make the factory flares work, mod a tad in the rear but I decided instead of making the wheels fit the car, get what I want and then mod the car a tad to make them work. 18X8 0 offset for the front, and 16X9 -15 offset for the rear. Tires will be 205/55R16 in the front, and 225/50R16 in the rear. So, Gunmetal grey ROTA V's.
-
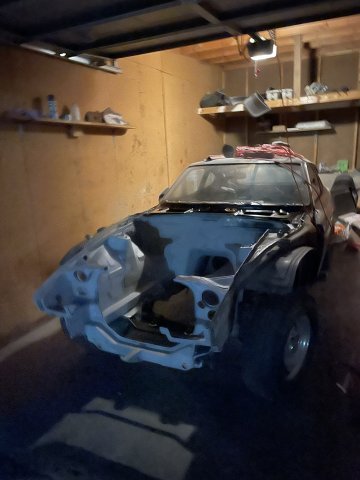
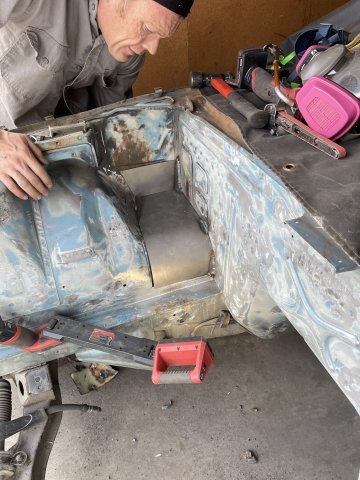
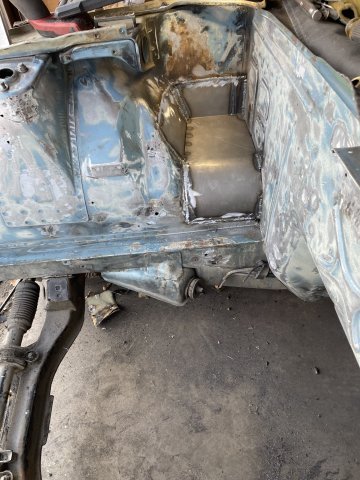
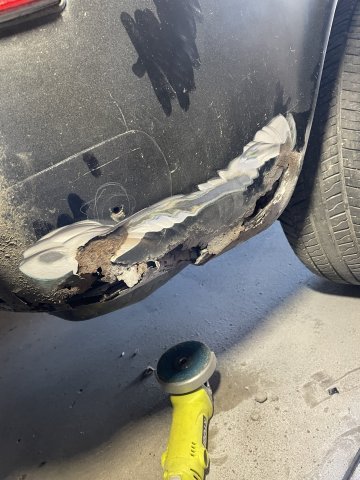
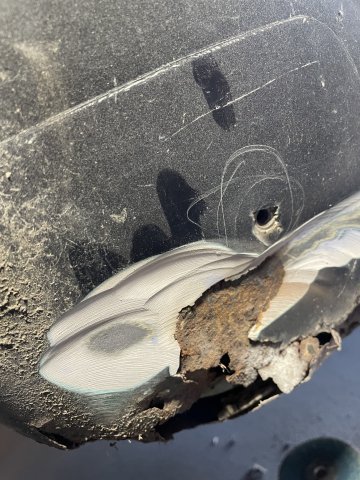
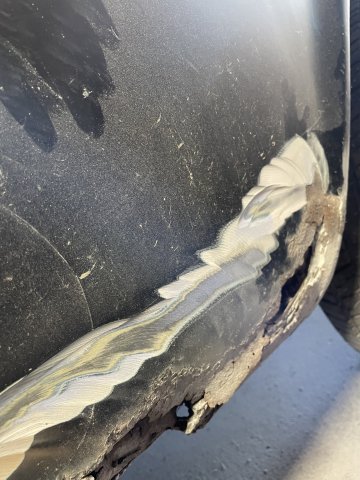
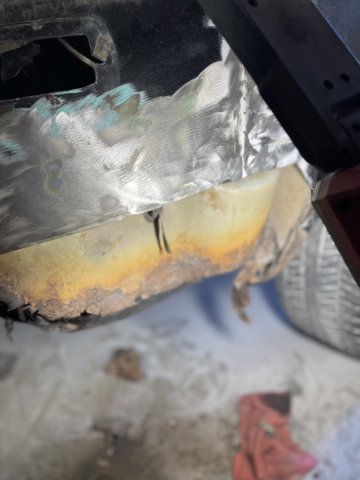
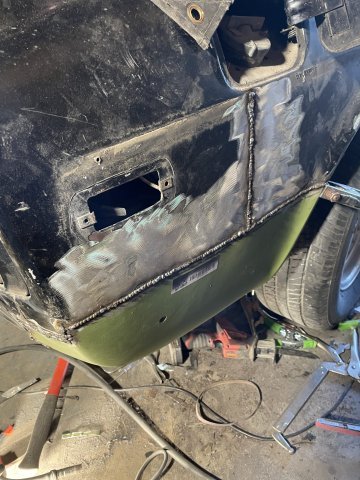
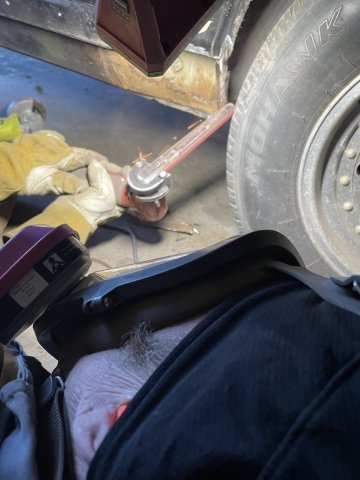
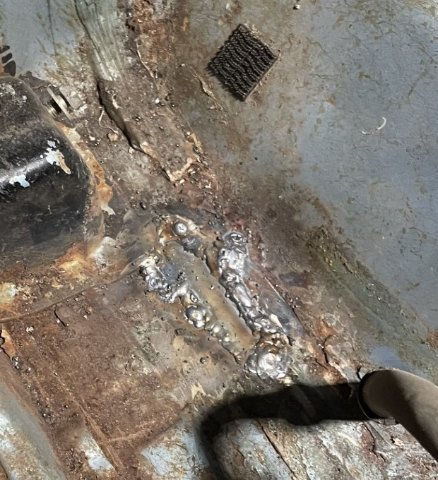
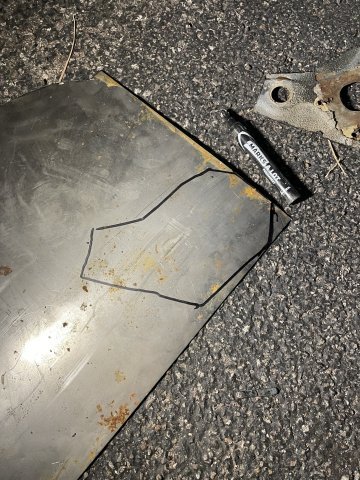
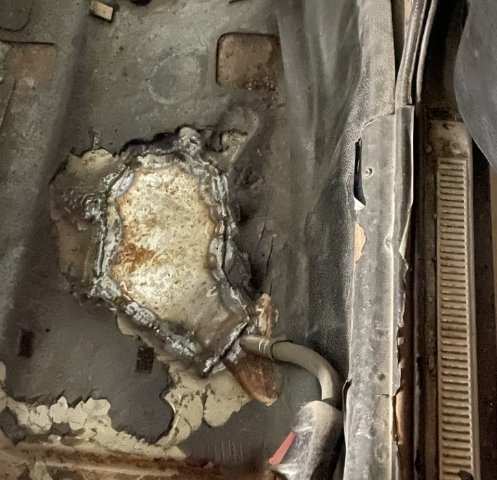
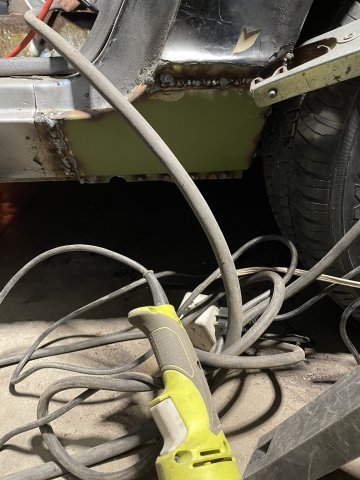
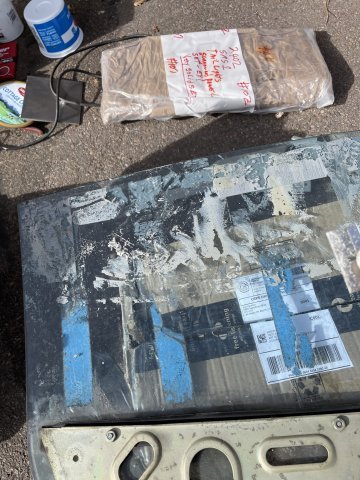
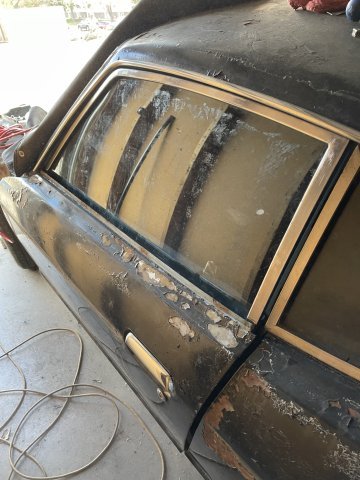
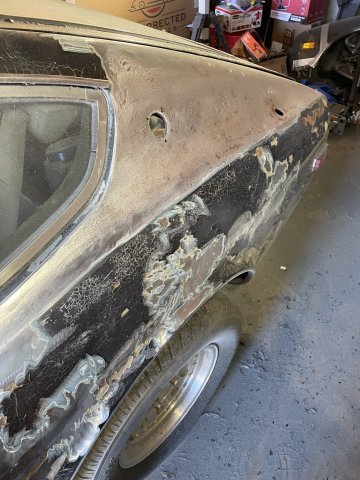
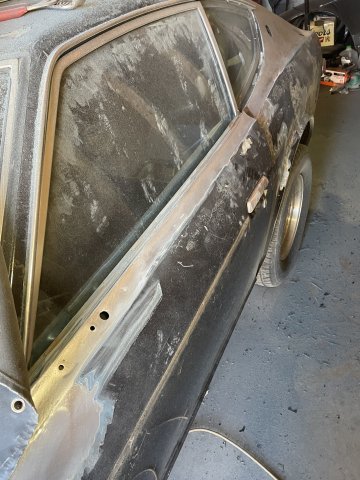
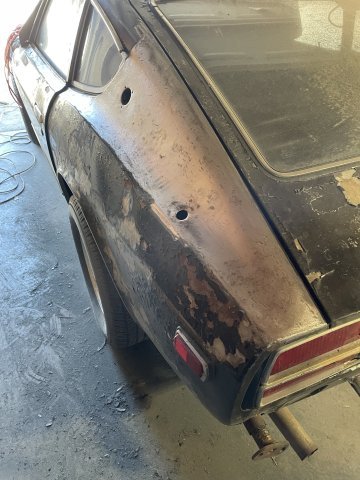
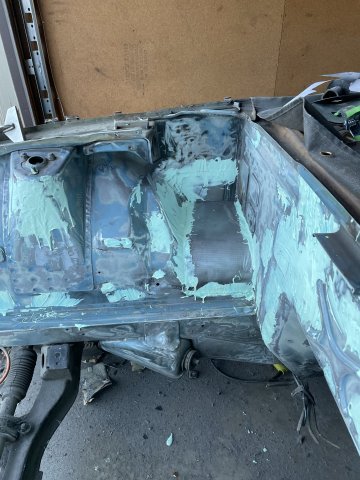
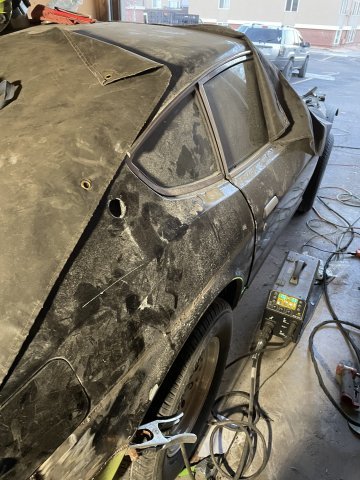
260Z Rust Repair Day. I had "The Floor Pan Man" from Denver come over and got all the rust cut out and welded up. In the process of doing that we found damage and THICK Bondo in the rusty area behind the passenger rear wheel. Through sheer luck the Klassic Fab Vintage JDM patch panel was high.....high enough to remove all the thick bondo, and the rust. Once removed, we found a vertical welded section that the original body man had made to straighten everything out. So, Corey was able to cut that open again, and get it all straightened out correctly AND replace the inner panel that was rotted away also. While he was doing that I tore drivers door window and mechanism out, and replaced it with a refurbished part from Adam Sylvester at Datsun Rescue. The window had been held up with duct tape for over 10 years, and getting that "goo" off the window frame took quite a long time with steel wool....the glass I was able to use a razor blade to get it 90% done.....more will have to be done later.....but the PITA job I was dreading is now finished. When the bondo was found, I took my angle grinder and flap wheel and started looking for other areas it might be hiding.....luckily their isn't any.....but the thick paint on the car is in such a condition, that I need to use the flap wheel to remove it all, and then step it out with finer and finer paper to remedy it. I also put the glaze on the places needed in the engine compartment....doesn't look good. Why? Because the Dolphin Glaze I decided to use is "self leveling"....on vertical surfaces it "self levels" it's self down the panels! Not a biggie, it will sand smooth, but I don't want any more self leveling glaze! LONG DAY! Pics.
-
Yes. That's the set up I have now. But as I'm hearing from different folks in my Datsun world since I posted this, replacing the inlet/ring to something else is extremely pricey.
-
I have seen some folks add a Ferrrari-style "pop-up" gas cap and filler; but it's not a trivial mod cost- or work-wise. And it's usually done for asthetics vs functionality, IME. I'm curious....are you using this style cap? It's what I use; and have no problem with spillage/leakage at the track, even when the tank is fairly full. https://www.zeddsaver.com/collections/gas-caps/products/240z-280z-gas-cap-with-retainer-ring I'm interested to see what other folks have to say -- following. Hope you find a solution that works for you!!
-
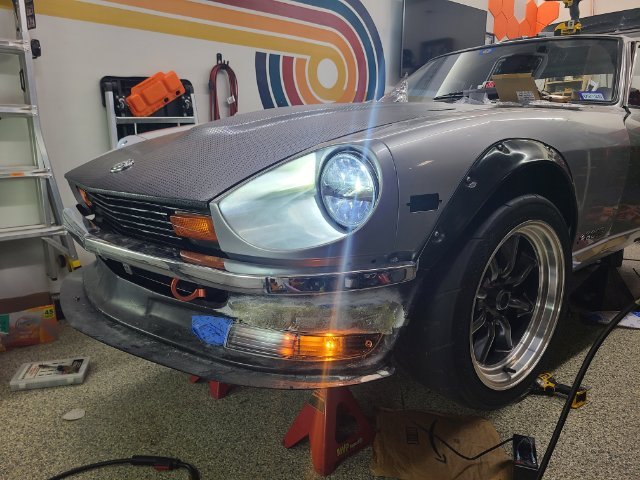
Well... its been almost a decade... better get restarted... Started messing with a new front turn signal. Cutting up airdam brake ducts and integrating a turn signal from a late 90's integra. I flipped the turn signal to better match the contours at the bottom of the airdam. What else is done or in the works... New interior - dash, center console, door panels, seat, carpet, gauges, sound deadening Vintage air HVAC control panel upgrade Coolant and heater hose upgrades Hydrualic hood hinge setup Silvermine Power steering Apex rear strut bar Subframe connectors Passenger seat - corbeau fx1 pro Vinyl wrapped hood Sanded/polished exterior light lens Exhaust work.... again and still Mfactory lsd T3 front sturt bar T3 harness bar Honda wiper upgrade LED headlights Skillard front lip More posts to come soon.
-

T-connection for Valve cover and crank case hose to balance tube?
BluDestiny replied to BluDestiny's topic in Nissan L6 Forum
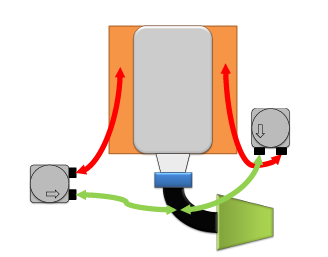
After reading the Arrington CCV Bible it looks like I actually want a dual catch can setup, with both the crank and valve cover returning through a filters catch can to the intake plenum, or somewhere before the throttle plate. This eliminates foul air modes at WOT and in either direction will still function. The PCV valve itself can be a choke point specifically at WOT due to increased blow by. The difficult part is that I have dual SU carbs that have no "plenum" and are essentially open to atmospheric.
- 1 reply
-
- 1
-

-
 Dkapp joined the community
 -
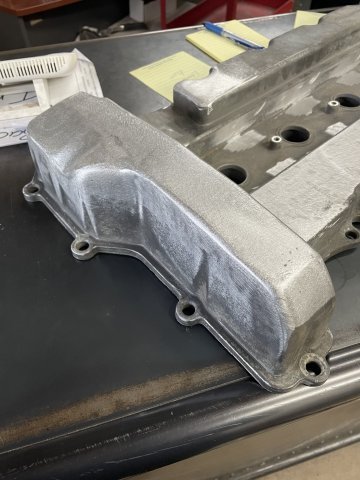
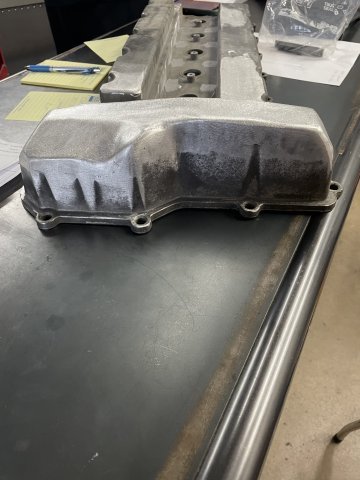
My valve cover, intake and motor mounts are done. Valve cover and intake are at J&S Polishing now.
-
My valve cover, intake and motor mounts are done. Valve cover and intake are at J&S Polishing now.
-
Where did you locate the Chrome “decal” material?
-
Hello, I'm trying to install a catch can on my 240z with an L28 with SU carbs with individual carb filters. Right now, the crank case vent runs to the balance tube through a PCV valve just like oem. No issue there. The valve cover however has one of those tiny filters, since the stock airbox for the carbs is gone. My understanding of the system is that the crankcase is used to draw air out through vacuum through the intake. The valve cover is designed to draw in fresh air at idle to the engine, but under WOT would not be pulling air. I want to run a single catch can to tie together the crank and valve cover hoses together, and run the outlet of my catch can back to the PCV on the balance tube. I'm wondering if that's correct, or if I have to run the valve cover vent separately to a location in front of the carbs to pull fresh air or if I can connect it without a PCV to the intake. I found this picture on here, but the outlet going to intake does not indicate the PCV valve. which is what has me questioning my idea.
-
Have been driving my 1970 240Z on the street and track for 12+ years. I've replaced the seal and stock gas cap over the years. But getting the cap 100% screwed down is always a challenge. And there have been times I was sure it was fully closed but it wasn't and had fuel leakage down the rear fender during time trials. To that end, anyone out there installed a more modern/aircraft style fuel cap with a new fuel filler opening? Thanks.


-
Who's Online 3 Members, 0 Anonymous, 687 Guests (See full list)