-
Member Statistics
33187
Total Members5167
Most Online
All Activity
- Today
-
My valve cover, intake and motor mounts are done. Valve cover and intake are at J&S Polishing now.

-
My valve cover, intake and motor mounts are done. Valve cover and intake are at J&S Polishing now.
-
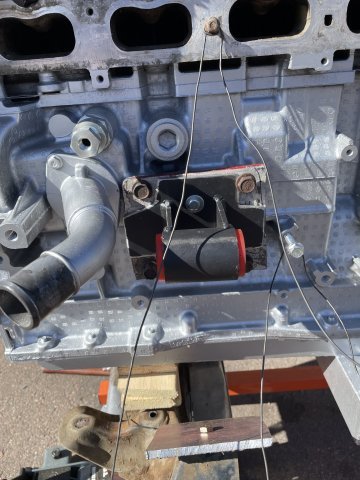
 Hello, I'm trying to install a catch can on my 240z with an L28 with SU carbs with individual carb filters. Right now, the crank case vent runs to the balance tube through a PCV valve just like oem. No issue there. The valve cover however has one of those tiny filters, since the stock airbox for the carbs is gone. My understanding of the system is that the crankcase is used to draw air out through vacuum through the intake. The valve cover is designed to draw in fresh air at idle to the engine, but under WOT would not be pulling air. I want to run a single catch can to tie together the crank and valve cover hoses together, and run the outlet of my catch can back to the PCV on the balance tube. I'm wondering if that's correct, or if I have to run the valve cover vent separately to a location in front of the carbs to pull fresh air or if I can connect it without a PCV to the intake. I found this picture on here, but the outlet going to intake does not indicate the PCV valve. which is what has me questioning my idea.
 -
Have been driving my 1970 240Z on the street and track for 12+ years. I've replaced the seal and stock gas cap over the years. But getting the cap 100% screwed down is always a challenge. And there have been times I was sure it was fully closed but it wasn't and had fuel leakage down the rear fender during time trials. To that end, anyone out there installed a more modern/aircraft style fuel cap with a new fuel filler opening? Thanks.
-
Welcome back to the forum!
-
I had not been on in a few years and just signed in for the first time today and saw this. I don’t know if you’re still in the group. Unfortunately not, I’m active duty military and shortly after I started I got sent overseas. I just recently got back stateside and will be starting again soon. I don’t have this Z anymore so I’ll be using my 260z.
- 13 replies
-
- 1
-

-
- tubular
- ford cobra
- (and 3 more)
- Yesterday
-
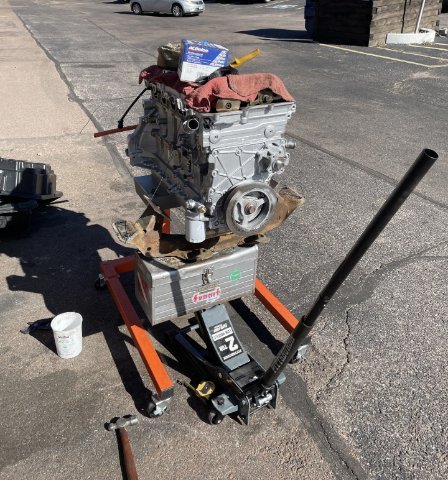
Today I began making my own alternator relocation bracket.
-
today I began making an alternator bracket to put it where I want it.
-
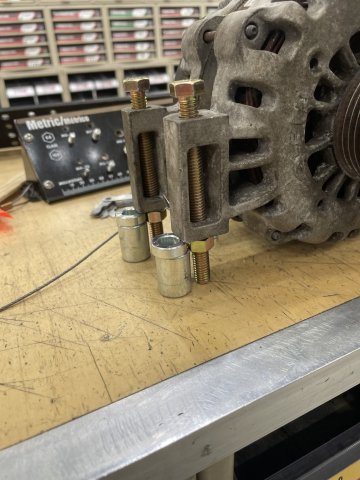
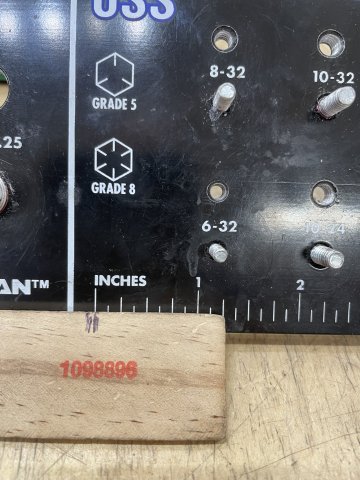
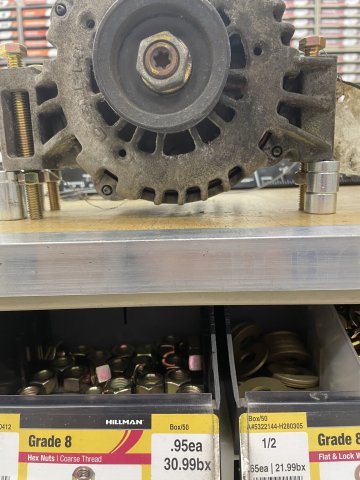
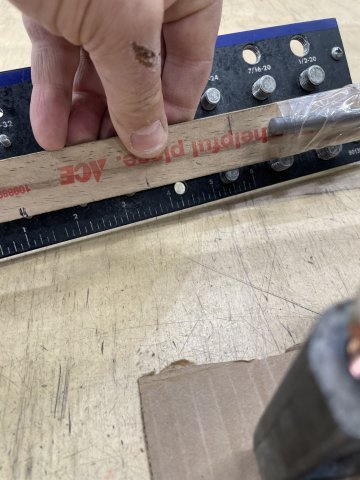
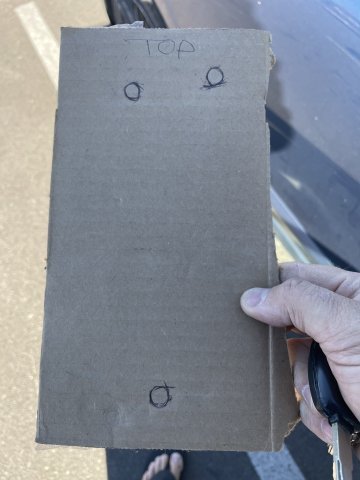
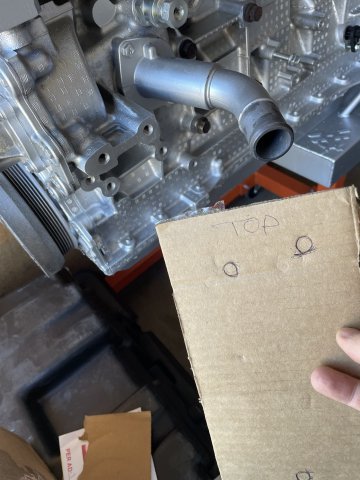
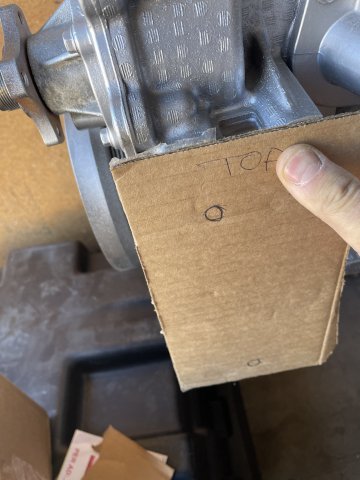
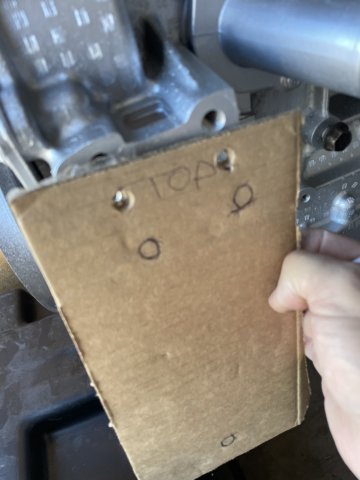
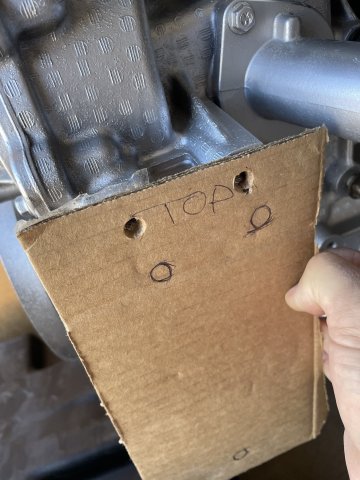
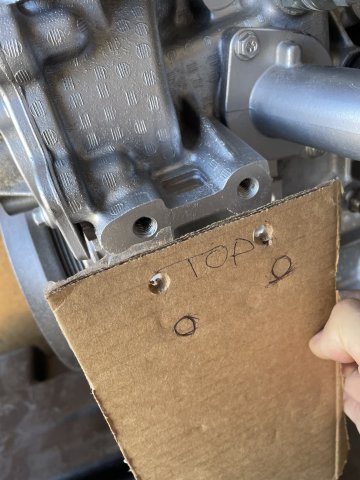
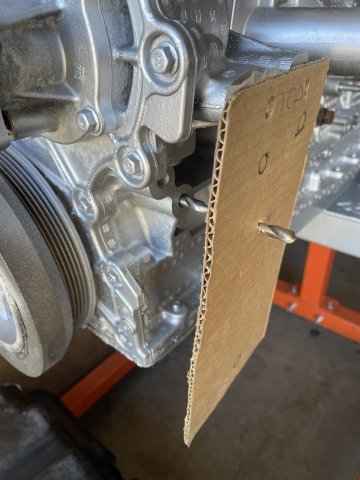
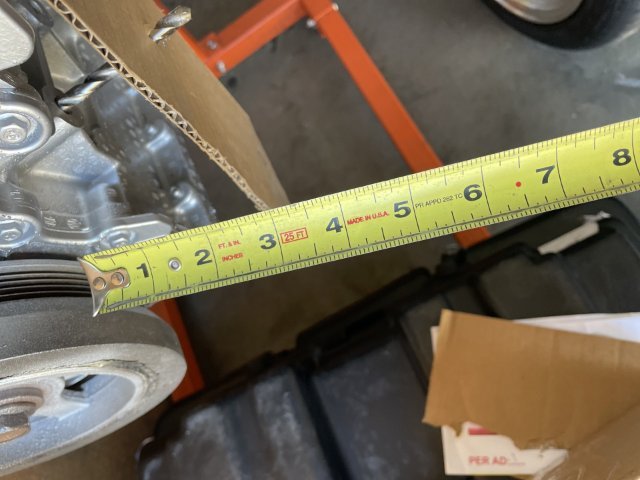
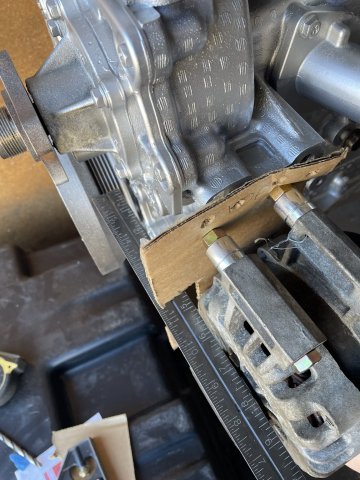
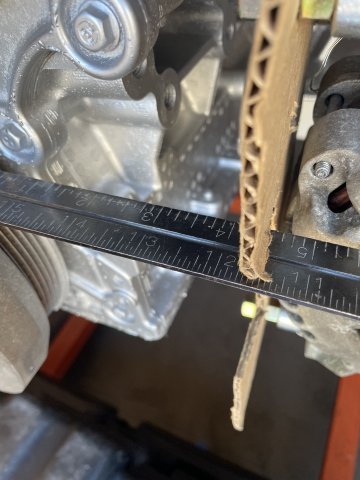
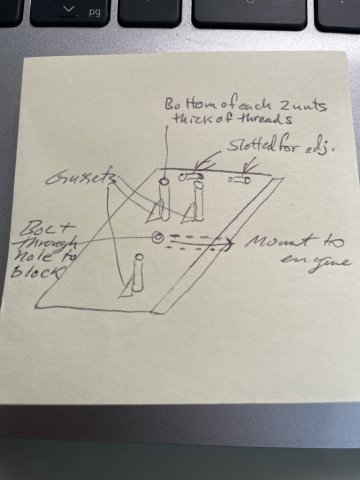
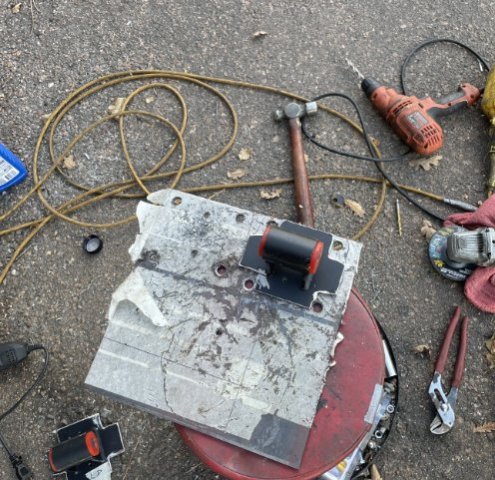
 One way to make your own alternator bracket for an ATLAS 4.2 / Vortec 4200, part 1: Ok, so to make a bracket, I took my alternator down to the hardware store, and found that 3/8 bolts fit in the holes just fine, I took three 4 inch long 3/8 grade 8 bolts what were all thread and dropped them in each hole and then used nuts to adjust and get the alternator sitting level and off the ground. Then I played with spacers and nuts to come up with a height that was level and off the plate It will need 2 nuts back to back welded together to give plenty of threads to hold the alternator on the bracket. I stuck the spacers and nuts stacked together under each corner to ensure the height was sufficient to keep the housing off of the plate. After that I centered it on a piece of cardboard and used a pen to draw around each bolt. then I removed the alternator, and made sure the piece of cardboard was cut in straight lines so I could get measurements later. once I got back to the garage, I then took the cardboard and held it up in the area I wanted the alternator to sit. After determining that, I used a pen to push holes in the cardboard where the bolts go through and then held it up and used the pen to push holes where the bracket will bolt to the engine. Lastly, I took a straightedge, and lined up the alternator pulley with the crank pulley and used the pen again to punch holes through the cardboard into where the mounting holes are. I now have the template. the bolts I bought and put through the alternator brackets will hold he spacers and nuts and they will be welded together and welded to the spots on the metal plate. The hole I punched through the cardboard into the engine block holes will be drilled out. once welded there will be 3 2-3" tall "towers" sticking up. I will cut gusset "triangles" out of steel and have them welded to the plate on the bottom and backed up to each tower for reinforcement. As I get further I will continue to show the progress, and will give all the specifics so that the next guy, free of charge, can get his alternator on there.
-
sizes avaialble: 16x8 16x9 or 16x9 -15.
-
I am thinking I can run a 16X8 0 offset in the front on my 260Z without flares, and the wheel should sit inside the wheel well. I am sure tire width will come into play, but the idea is to not lose any steering....I want to be able to turn lock to lock, no rubbing and possible lowering the lip down to the tire. Opinions please? 16X8 or 9 in the rear not to exceed the outer lip edge with a lowering just to eliminate wheel gap. definitely like to have some dish to the wheel and a lip. Thanks.
-
Long5907 joined the community
- Last week
-
 jayntguru joined the community
 -
 SybertsGarage joined the community
 -
 lhowls joined the community
 -
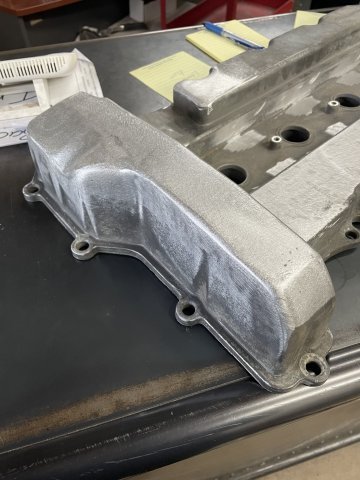
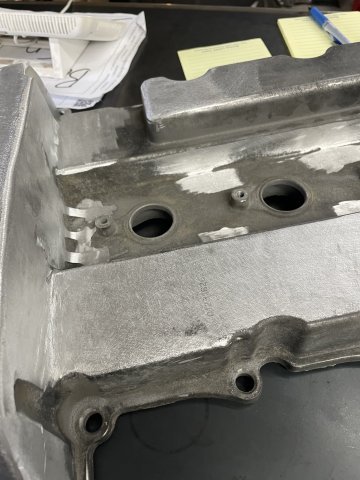
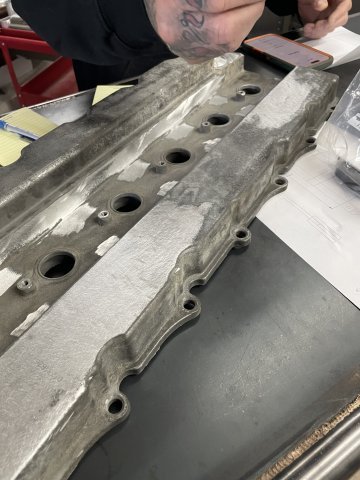
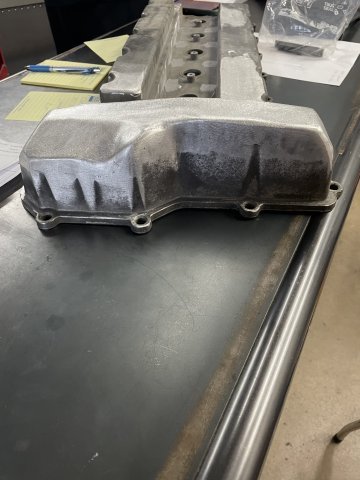
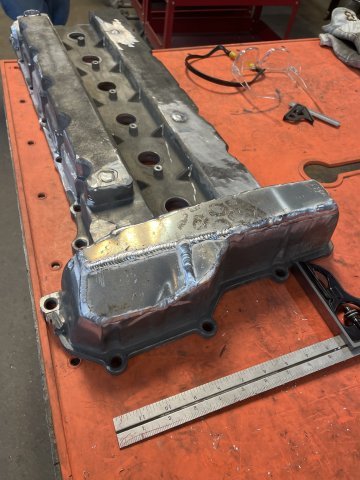
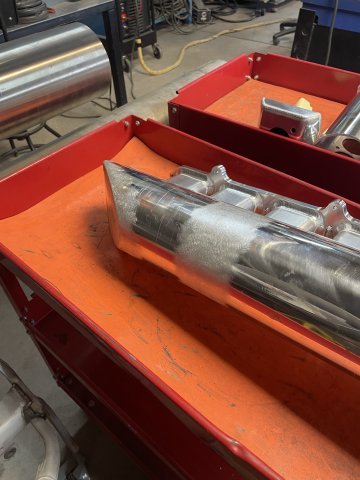
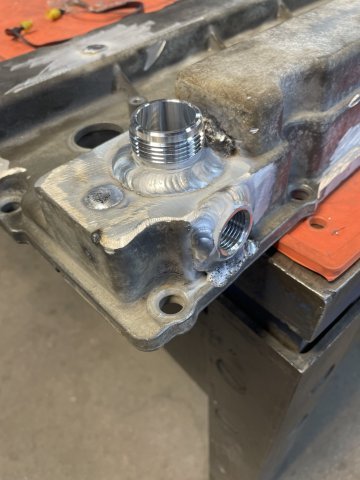
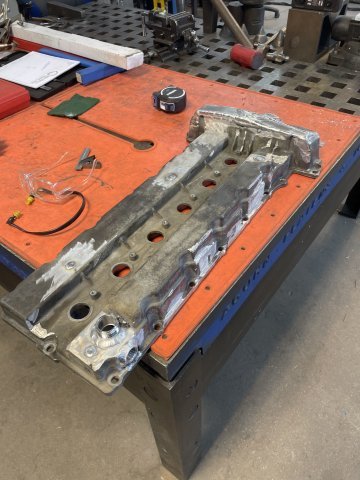
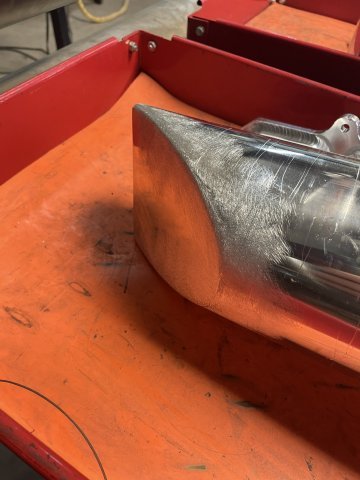
Progress pics on the valve cover and 2 pics of the intake. getting ready to go to the polisher! all the welds on the valvecover will be sanded smooth.
-
Progress pics on the valve cover and 2 pics of the intake. getting ready to go to the polisher! all the welds on the valvecover will be sanded smooth.
-
Thanks. I think it will.
-
Wow, sounds like a lot of work, but will look so good.
-
The Goal in shaving my engine compartment . To be most as nice as this shaved engine compartment. Turbo Tom's old car (someone took the turbo rotary out ).
-
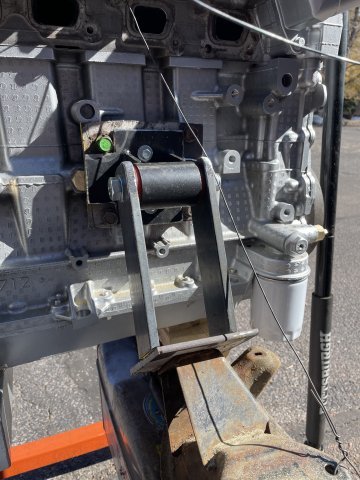
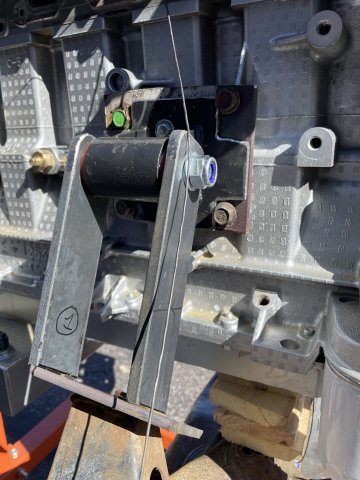
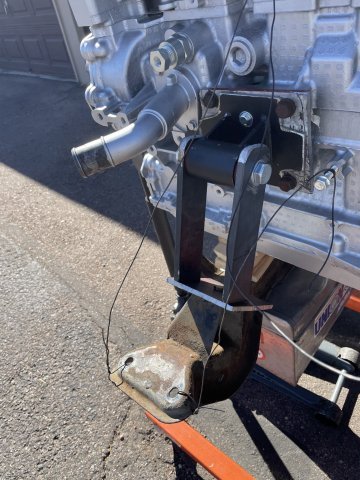
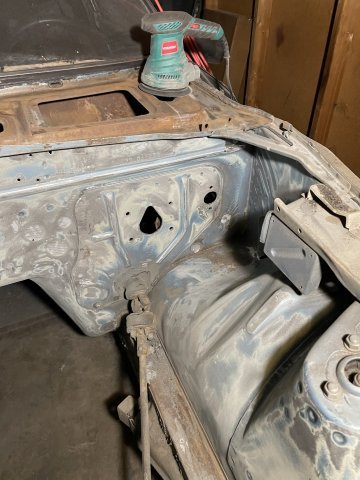
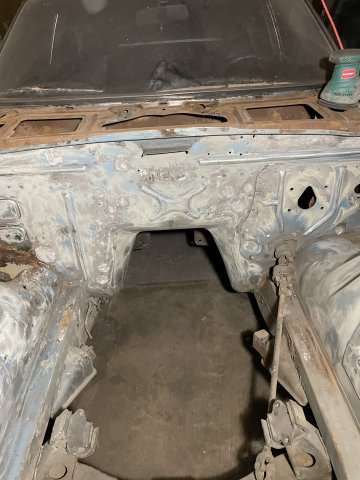
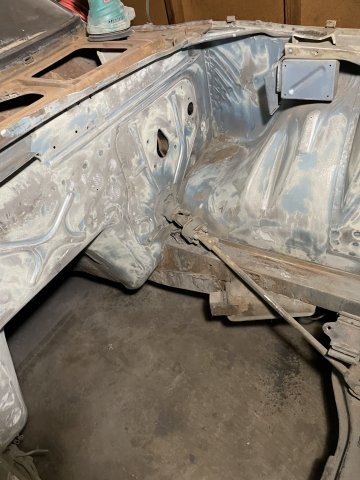
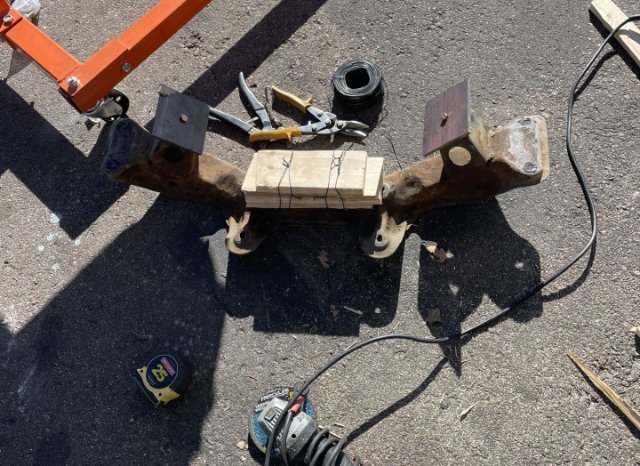
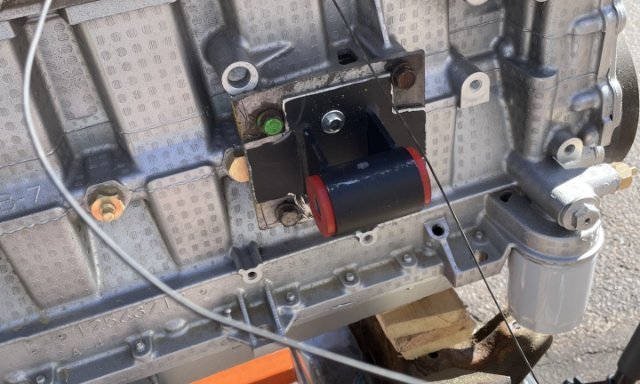
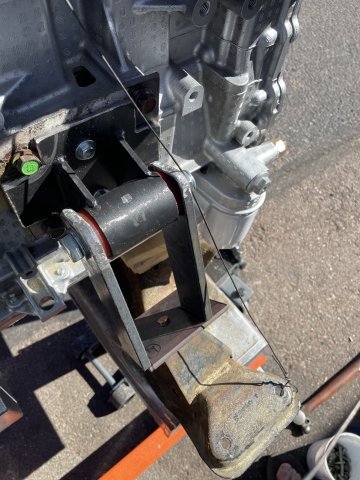
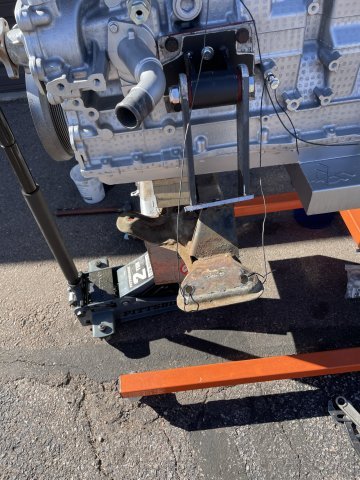
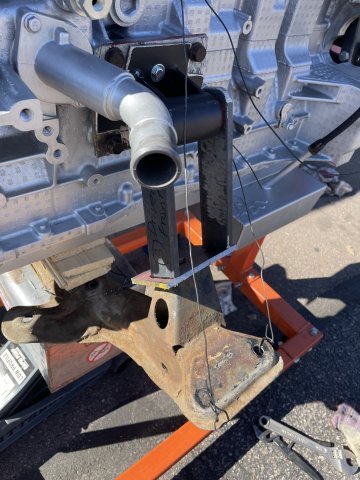
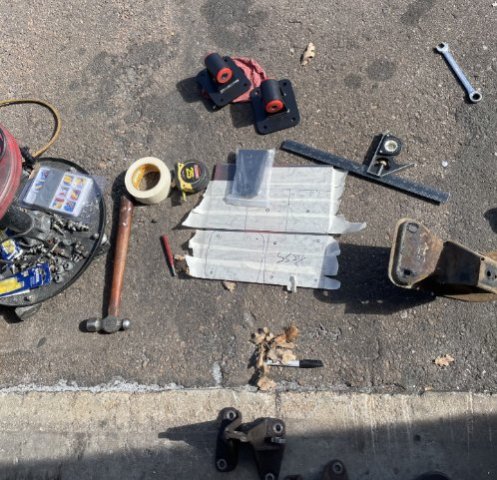
Today I got the motor mounts all done. I used my idea of holding a spare crossmember with spacers under the engine to make the mounts. 3 inches clears the steering rack with a hair of space. I used LS mounts I found on ebay for 32 bucks, and had to chop them up a bit to make them so they would weld over 1.4" steel plate that was cut and drilled to fit the 4200 block. The metal spans that it came with were too short, so I used a length of 3/16 steel bar and cut and drilled them. Then using the bolt, one at a time I pushed them up to the plate and used a sharpie to draw the angle then removed them and cut them down. You have to remember to mark everything so when apart, you don't get pieces mixed up, as the sides are not identical. After that, I boxed up my core transmission and then cleaned up a bit and headed to the other garage for 260 work. I ground off remaining brackets and other pieces that still needed to be removed in the engine compartment, then used a DA sander to get it all sanded down. The old paint etc....well 80 grit wouldn't even phase it, so I had to use 60 grit. I was able to get everything sanded down except for the corners and tight spaces. I have an elliptical sander I bought that I will use next to get all the corners sanded out with 150 grit, then go over what I finished today to let that 150 grit smooth out any sanding marks. After that, I will then slick all the panels with Dolphin glaze, and sand the entire deal in 220 grit. Then 3-4 coats of sandable filler primer to fill in any imperfections, then color, then 2-3 coats of clear. A lot of work, very dirty, but progress was made. Pics:
-
Motor mounts finished today. Fought me all the way. Now they go to be welded, then cleanup and repaint. Pics:
-
There is still a few around (I’m not one of them). I’ve gotten some good advice. At least this site is still up, the 370Z site just went down a few weeks ago, ugh.
-

Fast Floridian's 240Z Track Build
FastFloridian replied to FastFloridian's topic in S30 Series - 240z, 260z, 280z
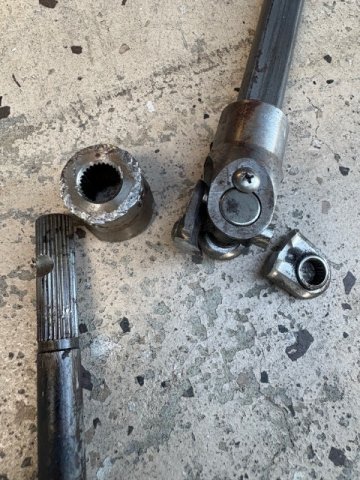
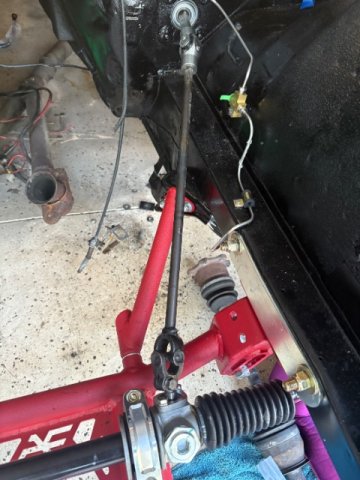
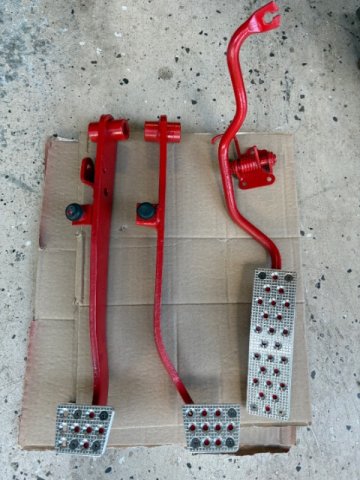
Got the u-joints sorted. I could not get it off, ended up cutting it off and buying a new U-joint. Quadruple checked they were in phase before attaching this time 😅. Also got pedals finished, should put them in tomorrow.
-
Oh I know, I just meant that most people only speak when they've got a good answer, and there are fewer people around now, so you're going to get fewer answers. It does suck how little activity there is these days. A lot of the experts aren't around anymore.
-
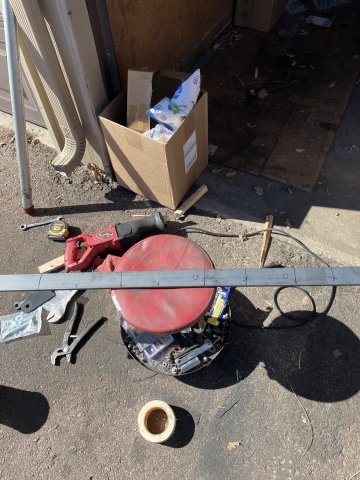
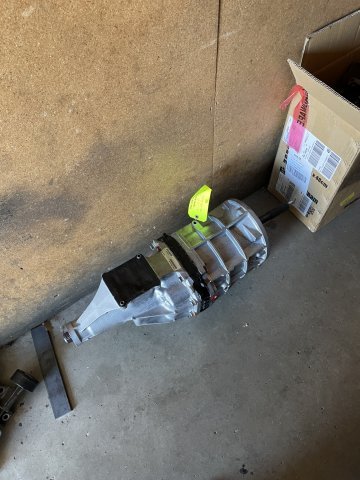
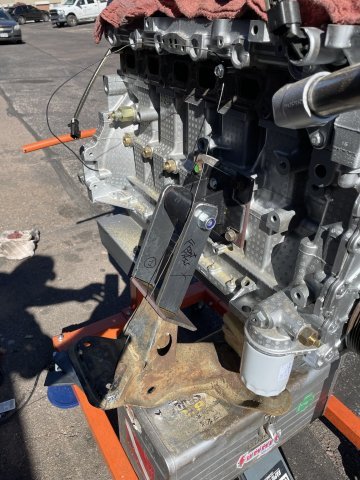
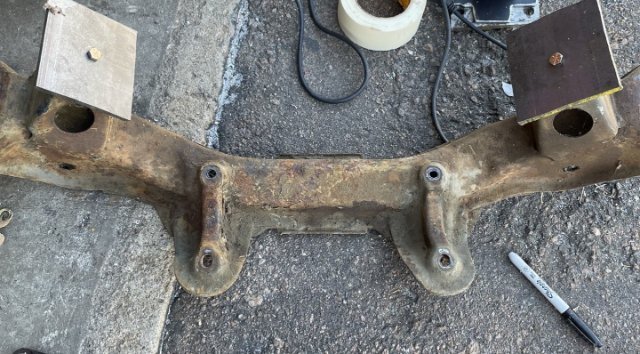
Started work on the motor mounts for the Atlas Z car swap. I bought the motor mounts online for a tad over 30 bucks, apparently made for an LS, then I had to chop on them ( doesn't look good )and then made 1/4" thick steel plates for them to bolt to and then plates for the K member. It is all being bolted togther, and will then be welded when done. Next is taking the spare K member and strapping it to the engine in place, and cutting the remaining pieces and marking everything so I can take it to a shop and have it all welded. After that, sI will be doing a lot of cleanup on them to make them look pretty and then the Atlas will be ready to drop in! Once it's in, then everything will be bolted on to it. My remanufactured AR5 5 speed also arrived today, looks brand new.....no bellhousing, so I have to swap the old bellhousing on, and box up the old tranny to send back for the core charge....they are paying the shipping! Pics:
-
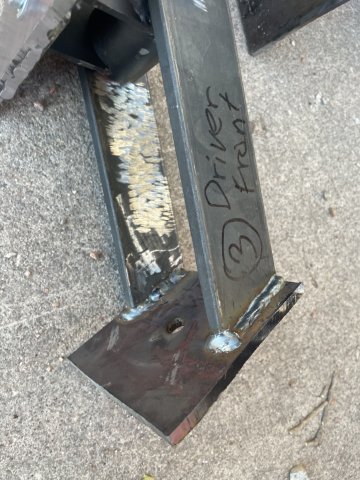
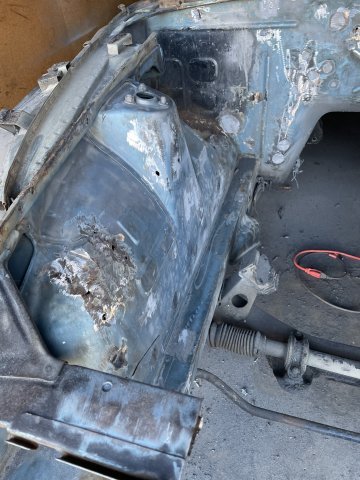
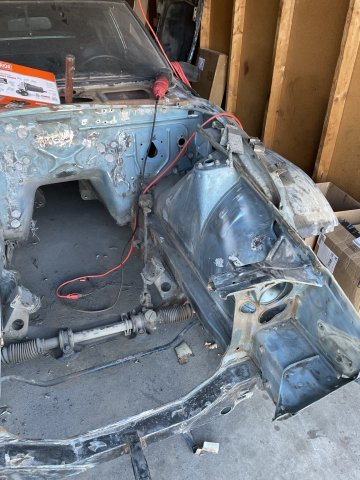
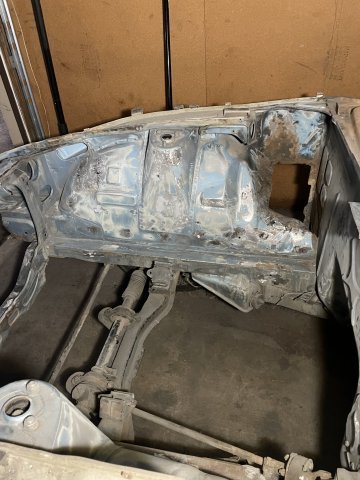
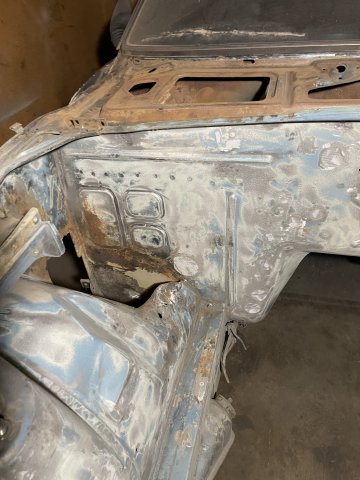
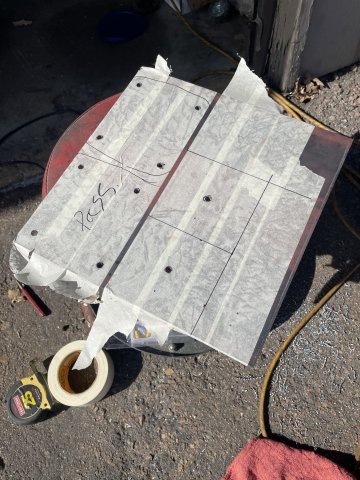
 The frame rails are nothing special except folded metal. You could make a pattern from heavy card stock and have them created locally and save a lot of money. Those would fit your car exactly. That will save you the tarrifs and the shipping. 1,5 mm thick rails should be more than enough. The other option is to split structural square tube and if you can't find a sheet metal shop. That will probably be more expensive, but is an option. The fender brace is a very simple item you could save money having made locally too. I helped a friend with a street car project and rather than weld items to the unibody and increase the potential for rust we opted to use some of the structural adhesives that new cars get built with. It's been on the car for 15 years and seems to be holding up well. Hope this helps, Cary
 -
 I am planning to do it the right way but finding a body shop that can straighten the car is a bit difficult. I was always planning to fully strip, repair, straighten and repaint the car at some point but if it’s possible I would like to at least be able to drive the car on the road. Seeing as I don’t have a car trailer and “officially” my daily driver isn’t allowed to tow more then 1400kg it would be a lot easier to transport the car to body shops under its own power. And for that I need an valid inspection…. Instead of diving head first into an full restauration, which will take years and tens of thousands of euro’s in one go, I’m just trying to spread out the costs and take it on piece by piece. I would like to at least enjoy the car for a bit and attend some meetings in my 280z instead of my Opel Astra diesel estate. Seeing as most parts come from the US it’s a big hurdle to buy. Shipping is very expensive, there is a 4,5% import cost and then a 21% tax on the total amount. In all I pay 50% more than someone from the US for parts. This also gives me time to calm down the misses a bit as she only sees the dollar signs flying away. I have seen this spiral before and I don’t want to end up with a stranded project. I want to keep my Z for life and I will take care of her.


-
Who's Online 1 Member, 0 Anonymous, 472 Guests (See full list)