-
Member Statistics
33272
Total Members5167
Most Online
All Activity
- Today
-
I agree, keep the fuel injection for drivability but if it’s in your budget I would look at aftermarket options if the current stock system gives you too much trouble. If you just want a simple plug and drive solution then the Fast EFI might be the simplest option that keeps the car closest to stock. But if you have a bit more to spend then I would suggest going for an ECU that capable of sequential injectors instead of batch fire like the Haltech Elite 750. If the stock EFI starts to fail and you just want the car to run and drive good on a “budget” then I would suggest looking for some second hand triple Webber carburetors. It would just be a case of removing all the stock EFI components and intake and slapping the Webbers on (with ideally some slight dyno tuning to dial it in). The stock fuel injection system and ECM are nearing 50 years old now and most are slowly starting to fail. I believe mine is also on the way out as the idle is very rich in fuel (10,3 to 1) and no matter what I do it just won’t change, it looks like it’s stuck on the WOT fuel setting (yes I checked the TPS and everything else in the EFI bible). The car runs good enough for now (13,0 to 1 when driving) and once the frame rails have been repaired the car will pass inspection but the next step will be an new Haltech EFI system with properly some ITB’s from EFI Hardware.
-
I would keep the fuel injection for better driveability reasons. You may consider going to aftermarket EFI if the stock isn't up to snuff, but a good workshop manual should make it easier to troubleshoot. Going aftermarket can clean up the engine compartment though ...
-
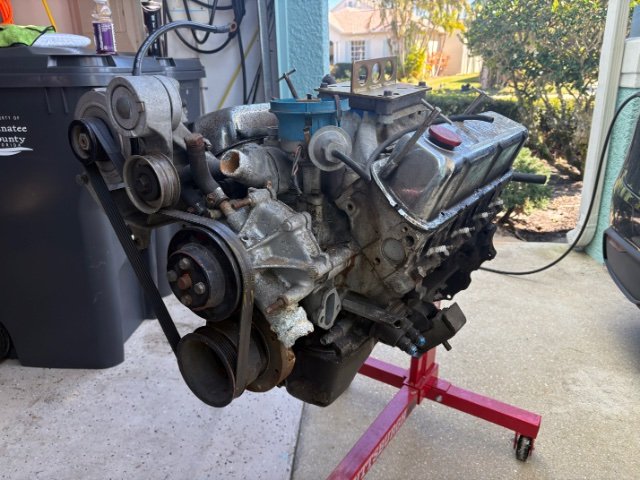
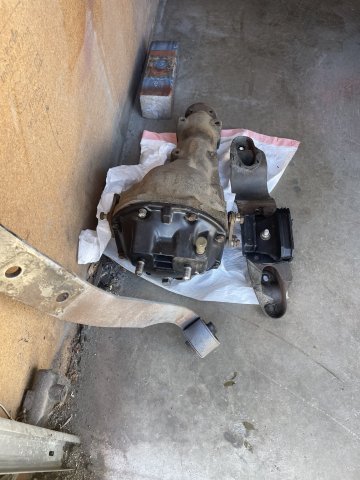
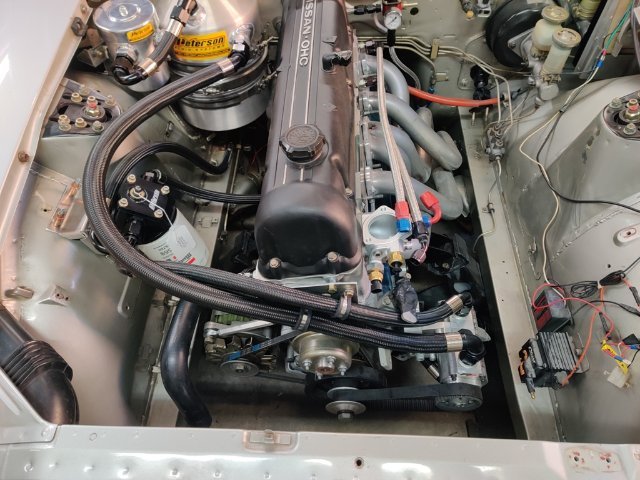
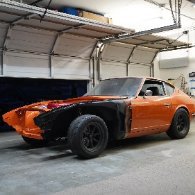
Hi all, I'm new to HybridZ. I'm looking for information on the best parts to pull from a donor car I just picked up. My 240z and the 1982 280zx donor are in the pics. The donor car is complete and the odometer shows 71k. My plan was to pull the full drive train and swap it into my '72. I will save all the parts from the '72. I want to keep the car all Nissan. So, for the motor, is it worth keeping the fuel injection? I have also seen something about using custom brackets for the rear disk brakes. After I have picked what I want the rest will be parted out. Thanks for looking and good info. Bill

- Yesterday
-

280z 1jz track build from a pile of parts
luigi replied to flatout's topic in S30 Series - 240z, 260z, 280z
The heater hose block is really elegant!! I'd like to buy a master cylinder adapter plate (if you sell them). -

280z 1jz track build from a pile of parts
jhm replied to flatout's topic in S30 Series - 240z, 260z, 280z
Have to agree with you there. Living in a climate with winter weather, I'll never build another car without heater/defroster (even a dedicated track car). The car's looking great...I love the custom machining. 👍👍 -
glad to help, contact me anytime...turbo240z@yahoo.com
-

280z 1jz track build from a pile of parts
flatout replied to flatout's topic in S30 Series - 240z, 260z, 280z
Got a few more things done last week. Made a driveshaft adapter to switch from the 1310 ujoint to a 1330 ujoint flange. now to order a custom driveshaft. The technotoys rear parts allow for some placement adjustment of the SN R200 so I made a spacer to slightly move it forward to align the axles better with the hubs. For some reason the diff itself is slightly crooked with their front mount so i'll be remaking that at some point but not a priority at the moment. havent ordered yet but got a good idea what seats im going to run so took some measurements and got the most of the cage tacked in. Harness bar height "should" be good but I wont fully weld anything until i have seats incase it needs to move up or down.
-
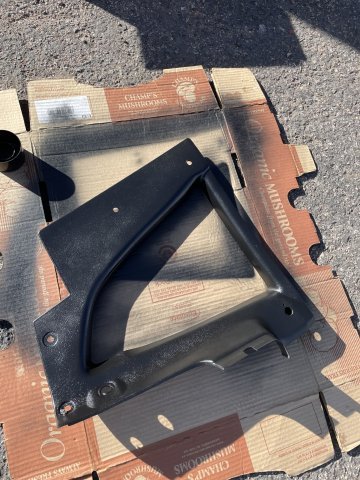
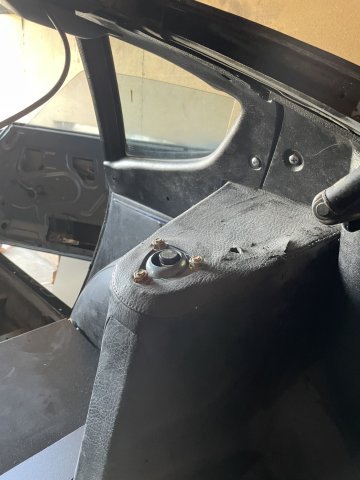
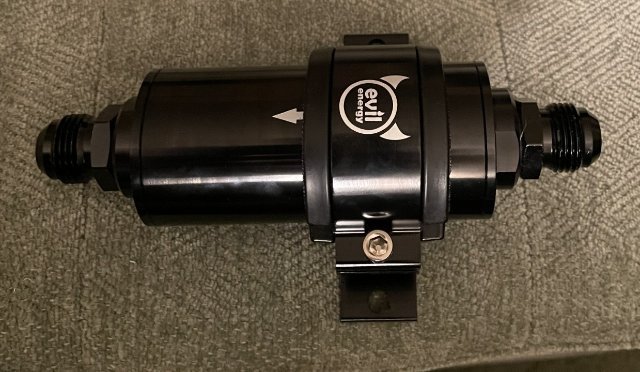
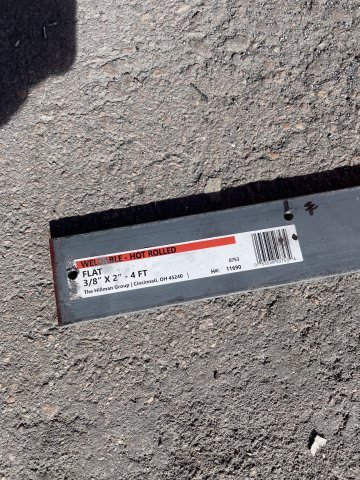
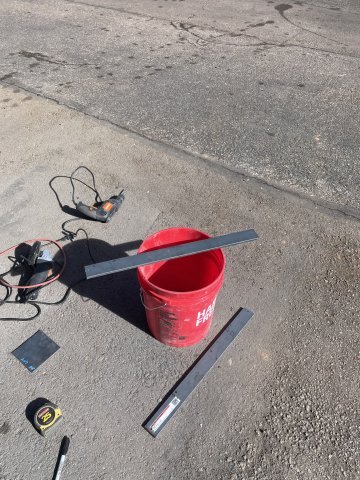
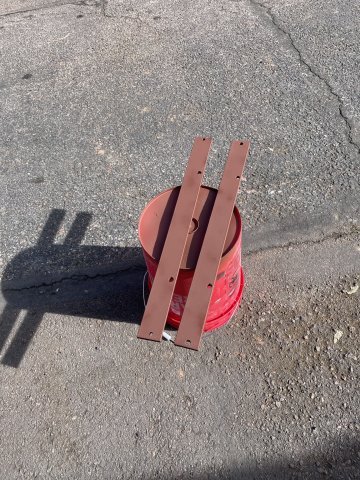
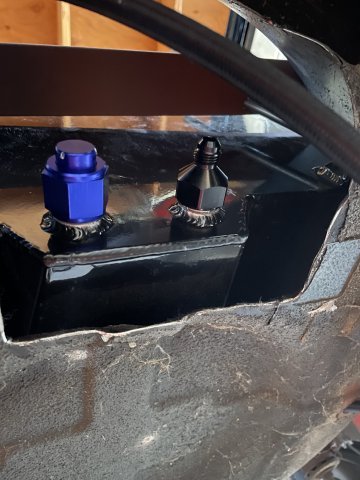
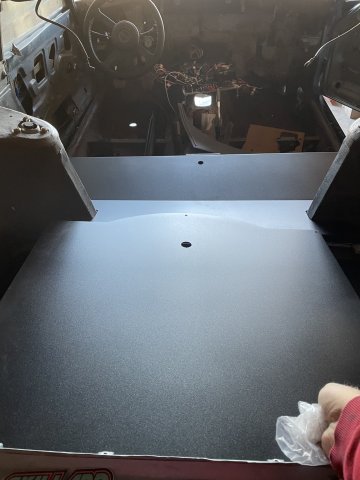
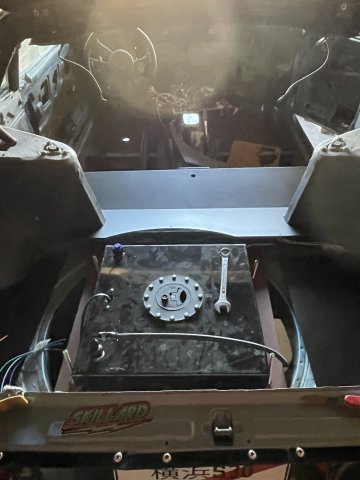
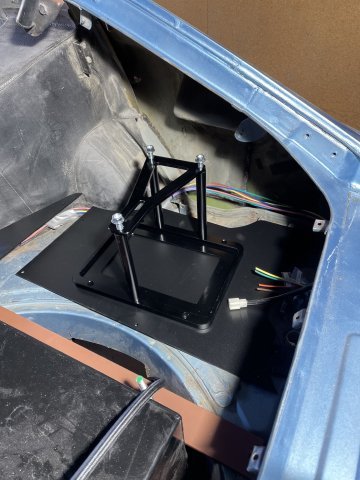
02-08-2026 UPDATE. Today I completed further work on the fuel system. It is on a sheet of metal that will be hung from the ceiling down on all thread to where the pumps are horizontal facing the floor and a tad bit lower that the fuel cell outlet so gravity flow will be good. I then took all of my interior panels I have out except he center console, and cleaned them up and painted them with SEM interior paint....Landau Black....which was referred to me years ago and really is a perfect shade and everything for these old Z cars. After they had dried, I quickly installed them a little bit, not fully, but enough for them to be in place, and then finished leveling up my fuel cell and bolted it all down. I am having some problems with the pilot bearing for the trans.....it appears I will need a sleeve or perhaps a bearing with a larger O.D. as the ATLAS, never came with a manual trans, and the well for the pilot bearing is roughly twice that of the bearing I have here that I strangely was told to use. So, I am working that problem out. I also went and installed the door handles and door locks, a bit more work in the doors, and they will be ready to be sealed up. Also got the lock mechanism into the hatch lid, but none of the rest of it. I painted the seat brackets on the floor in anticipation of a rather soon to come re-entry of the seats, which are fully reupholstered. PICS:
-
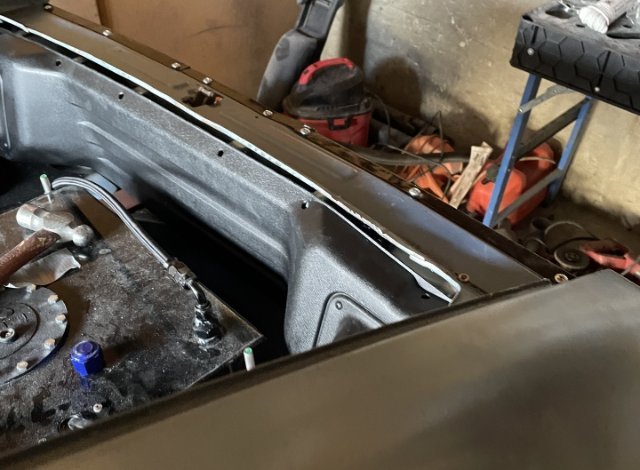
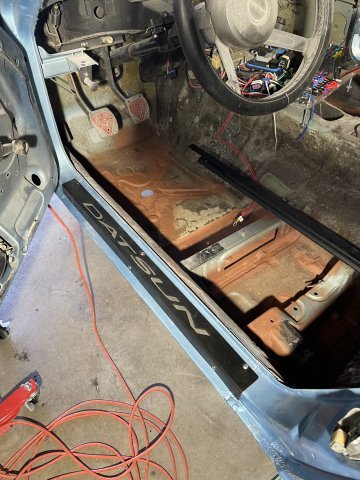
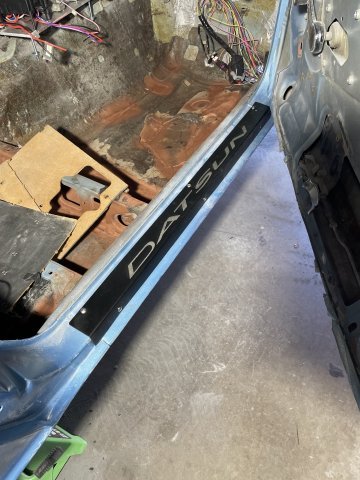
I started stripping the car today so I can put it on my rotisserie for few unibody sheet metal repairs... mostly the floor and the rear portion of the frame rails. I removed the heater core box, the engine and transmission, the front struts and the rear axles. I still need to remove the rear differential and the gas tank. I have a 2006 Chevrolet Corvette Z06, and one day I was looking at the brake vents and thought they would be good for the 240Z. And so they are! I installed these before I went to Road Atlanta in 2016 (I think)... this car has been off of the road for so dang long now! Anyway, they worked very nicely to cool my brakes. I made a custom fiberglass piece to adapt from the Xenon front spoiler to the round inlet of the Z06 vent, and used one screw and washer to secure the back of the vent to the inner wheel house sheet metal. The front brake rotors are Z31 vented units. I still have the unmodified backing plates on them, which is a mistake. It prevents air from getting to the back side of the rotors. Something else to address added to my list! Rear rotors are Z31 units. Calipers are 240SX. Axles are Z31 (with custom shafts). I bought parts from Ross back in the day (Modern Motorsports) for the brake and axle conversions. I bought the R200 differential from an eBay seller probably about 20 years ago. It was a NOS 200SX unit with a 4.11 ring and pinion. I removed the factory carrier and replaced it with a Nismo clutch type limited slip. I bought a high capacity finned differential rear cover and a billet transverse link from Protunerz.com during the recent Black Friday sale. So, I will be installing those when I put the differential back in the car. For now though, everything has to come off the car so I can make it light enough to put on the rotisserie for the floor repairs.
- Last week
-
Gearjamer joined the community
-

SEMA 2025 Chinese Version of Assembled Toyota A806 examined
toolman replied to toolman's topic in Body Kits & Paint
Second Owner of the SEMA SHOW Toyota A86 Body The First Owner of the SEMA SHOW Chinese Made Copy of the Toyota A86 Body decided to sell the body. The real question is why? The next Owner bought it with the idea of attempting to assemble the body and create a drivable car. As the body has No VIN Number and No Manufacturer ID Number, they knew that car registration in most states would not be possible. They intended to use this body as a Race Car as no registration would be necessary. As the video demonstrate that most mounting holes that not align with OEM parts. Also, they discovered a lack of sufficient welds on the body panels. Mounting brackets were missing or mislocated. So even if it was going to used as a Race Car, major welding and reinforcement of the vehicle would be necessary. So far, there has no one that I know who purchased a 240Z body from this same manufacturer. So far, we could not get a firsr hand through inspection of the Zbody and find if that body is manufactured better or not. -
Here is the plate I made to assist with routing the dry sump hoses across the front of the engine: Here is the -16 AN hose that runs from the outlet of the tank to the inlet of the pump. It has a heat shield sleeve over it to protect it from getting overly hot from its proximity to the header. I put the intake manifold and carbs in place so I can determine how to route the coolant hoses from above the #4 and #6 exhaust ports to the thermostat housing.
-

Fast Floridian's 240Z Track Build
FastFloridian replied to FastFloridian's topic in S30 Series - 240z, 260z, 280z
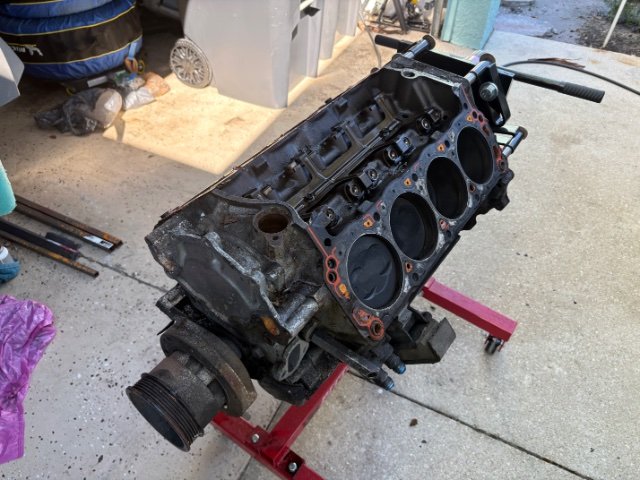
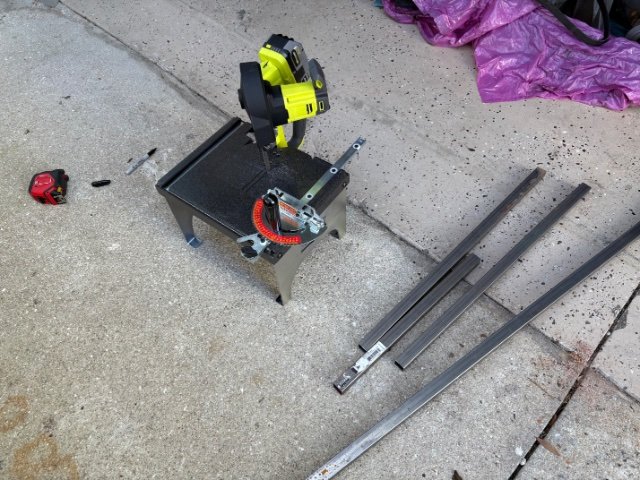
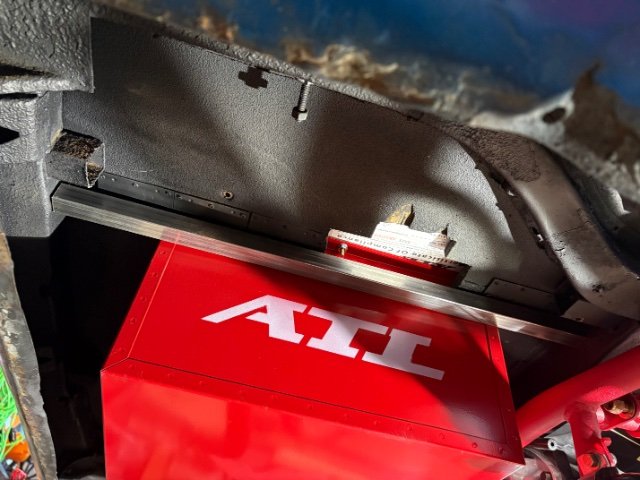
I started tearing down the motor today. I’ll probably work on it some more tomorrow, would like to be painting it this month. Also starting to design and fab the fuel cell supports. Going with some 1” square tubing. Got this table to attach my portable band saw, works great
-
 Airclaw joined the community
 -
02-06-2026. ATLAS Z update: my FabBot 4 inch back relocated shifter for my AR5 came in today. Very nice billet construction. Doesn't appear to need a gasket and it came with nice socket head bolts. Also got my RAM clutch pedal adjuster. This allows you to adjust where your clutch pedal takes up or if it takes up too high, this will allow you to adjust it so it takes up where you want it to. This is for hydraulic throw out bearing setups that are in the bellhousing. PICS:
-
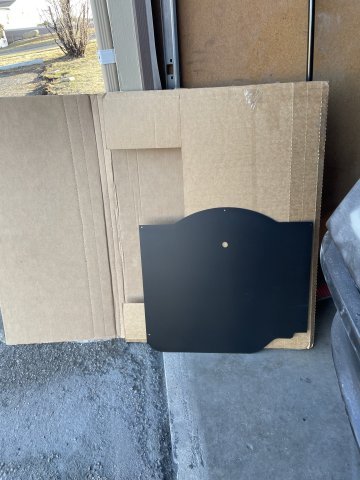
I got their tail panel, the first one had manufacturing defects. I reached out, they replaced it free of charge. I have since bought fenders. While they certainly aren't NOS quality, they are good quality and will take less fitment that most used fenders and it's new metal. The stamping on both the fenders and the tail panel were all quite crisp. Again, not 100 point concourse quality but a good starting point for reasonable money.
-
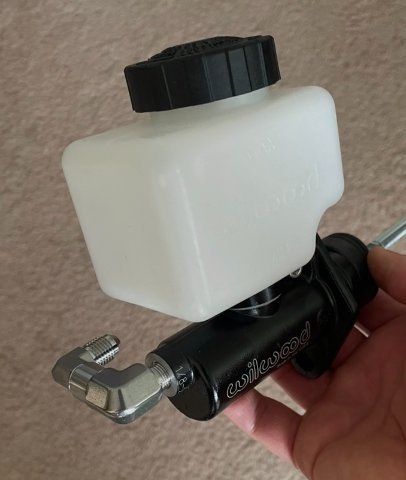
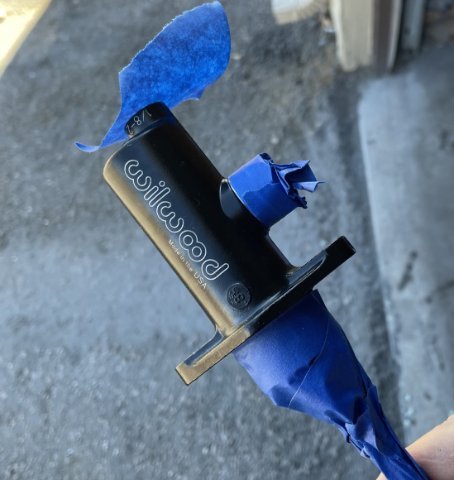
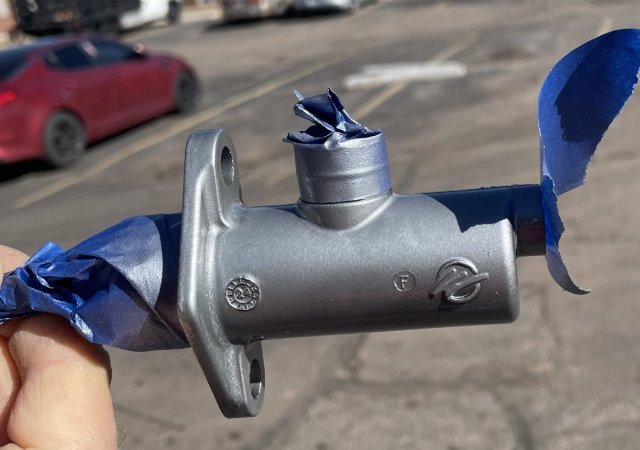
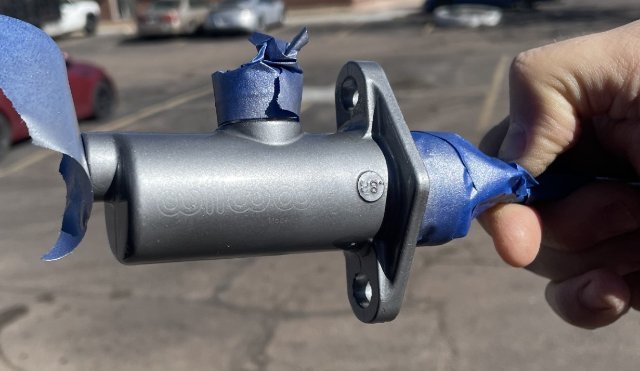
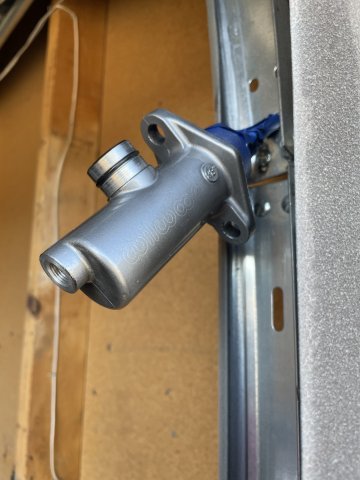
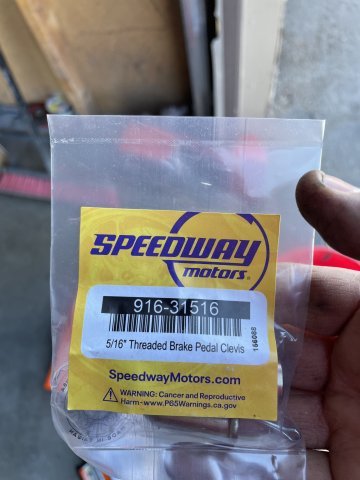
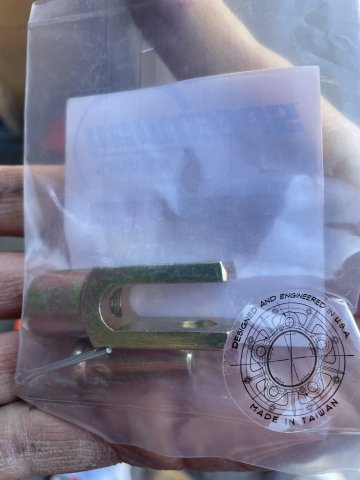
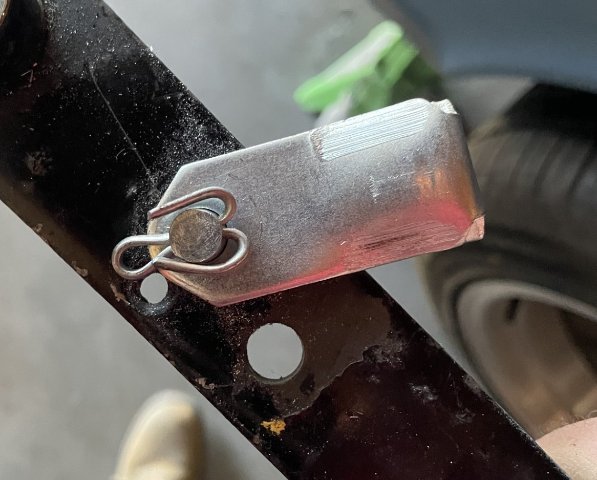
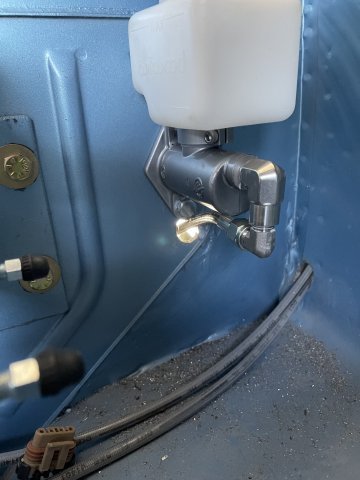
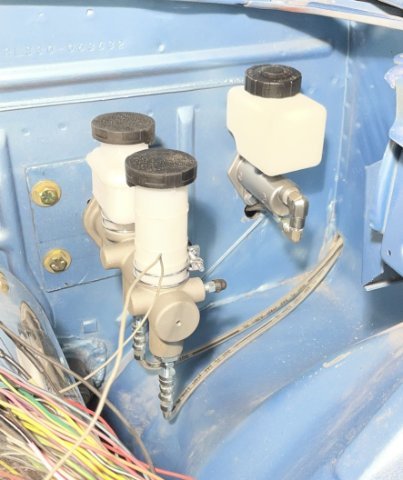
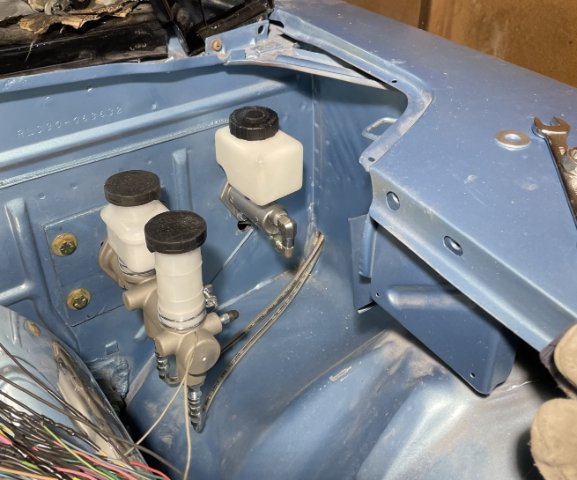
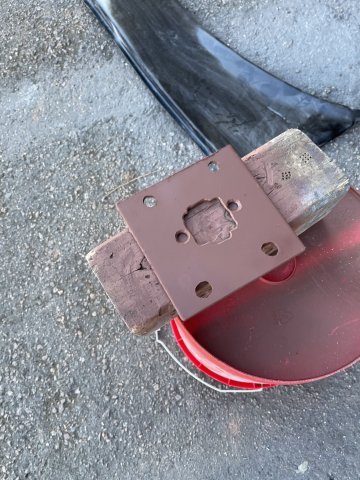
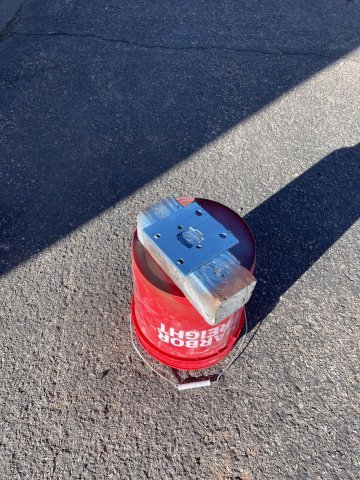
02-05-2026. ATLAS Z UPDATE. I got up early and got on the road. I went to Junkyard Jenny's in Ft. Lupton, about 110 miles one way and bought a R200 rear out of a 1978 280Z manual trans that she got in. Less than 100K original miles and she inspected it and said it is VERY nice inside. So, I got the diff, the mustache bar, and the front mounting parts. I ordered a new gasket rom Eric at Z Car Depot, and will paint it up and install later....after the trans is in. then teh driveshaft . It's an open diff with 3:54 gears! Exactly what I wanted. I ASSUMED my late 74 came with an R200, but when I looked under there, a greasy R180 stared back at me! . If you are in the Colorado springs area and want a free R180 let me know. I took my Wilwood clutch master.....I got from Godzilla Raceworks, and masked it off, wiped it down with alcohol and applied several thin coats of silver engine paint. Why? to match the brake master and the color palette in the engine bay. You will also notice I used stainless fittings to get the hookup for the clutch line that I brought in from the cabin to the master nice and clean. On the brake side, I got the Master mounted up to my adaptor plate I finished yesterday and mounted it up requiring me to remove the clutch and brake pedals, move the clevis point on the brakes up 1 inch for a better pedal ratio as I eliminated the brake booster (I did this on my 240Z, so it was quick and easy). Once I got everything bolted up, I was able to adjust my brake pedal height, but ran out of time and daylight for the clutch side. I need to get a replacement locknut for the clutch master rod as I cant find the one it had.....and then use the Speedway threaded clevis and pin, which is larger diameter, and that is why I pulled the pedal and drilled it out. In the pics, you can see I achieved the clean install I wanted. I loosened the clamps holding the master cylinders and moved them, etc. little things to make it look even cleaner. I will plug the remaining "slop" in the holes drilled and paint with a Q tip to finish it off, but I have kept the shaved firewall. Yeah, I am happy. Not too bad for a big bumper 260Z.
-
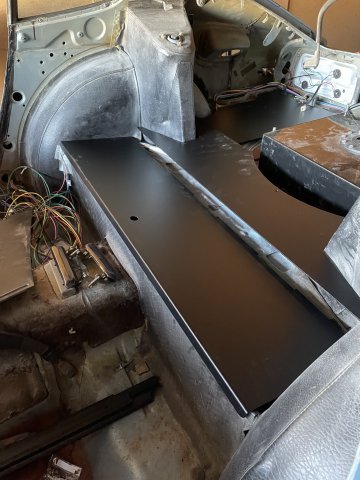
02-04-2026 more work on the ATLAS Z. I got the adaptor plate for the brake master done, more progress on the fuel cell, and unpacked some stuff. Pics follow:
-
A 2026 SEMA SHOW 260Z Build all the way from Great Britain
toolman replied to toolman's topic in Body Kits & Paint
Part 5-Major Problems in the build -time may run out before the car is finished. https://www.youtube.com/watch?v=DcXWWiwmGSI - Earlier
-
A 2026 SEMA SHOW 260Z Build all the way from Great Britain
toolman replied to toolman's topic in Body Kits & Paint
Part 4-Fixing the Gull Wing Doors and create special Interior design work Finding a mistake costs a lot of correction time but when you doing a one of a kind project that is to be expected. Go to---https://www.youtube.com/watch?v=itN99F8VKbQ -
A 2026 SEMA SHOW 260Z Build all the way from Great Britain
toolman replied to toolman's topic in Body Kits & Paint
Part-3 The Whole Plan is explained in this Video, Liberty Walk Body Kit and other exterior modifications are exposed. But Time is the greatest enemy as the Sema Show is now less than a year away. go to ======https://www.youtube.com/watch?v=Merq9wrCZns -
A 2026 SEMA SHOW 260Z Build all the way from Great Britain
toolman replied to toolman's topic in Body Kits & Paint
PART 2- Working on Gull Wing Doors Demonstrating the process of converting old door shell into the Gull Wing Door. Fabricating new door frame from scratch is something to be hold. The craftsmanship is excellent. Their equipment is First Class and expensive. Most body shops don"t have access to scuh expensive equipment but work can duplicate by regular metal working tools but taking more labor and time. Go to https://www.youtube.com/watch?v=LGEWDhsnRoE for video -
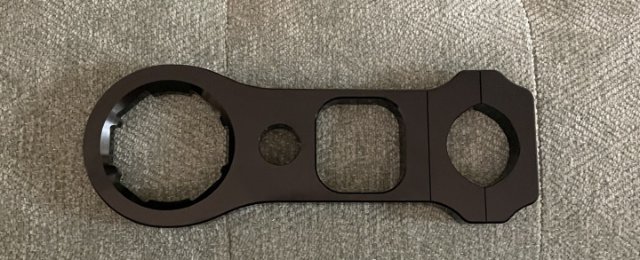
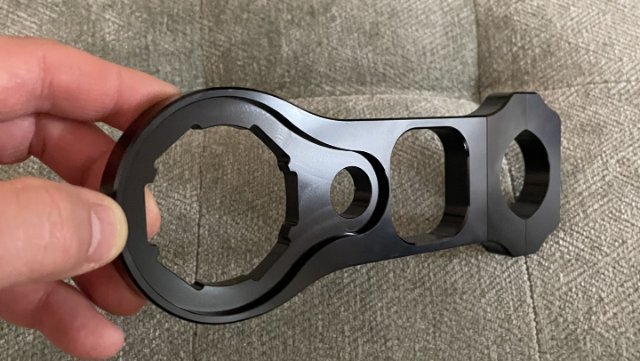
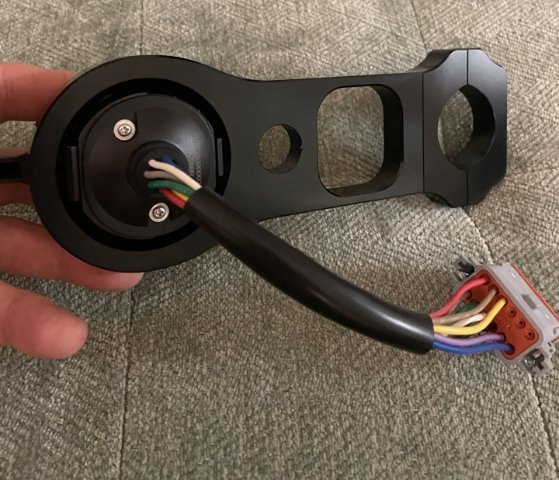
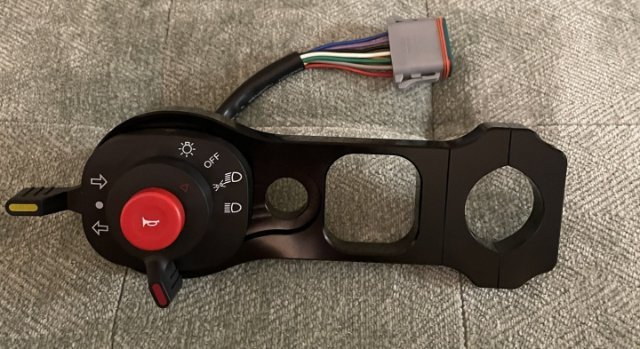
I got my billet column adaptor for my raceware turn signal lighting and horn control. Not too shabby.
-
 miguel angel joined the community
 -
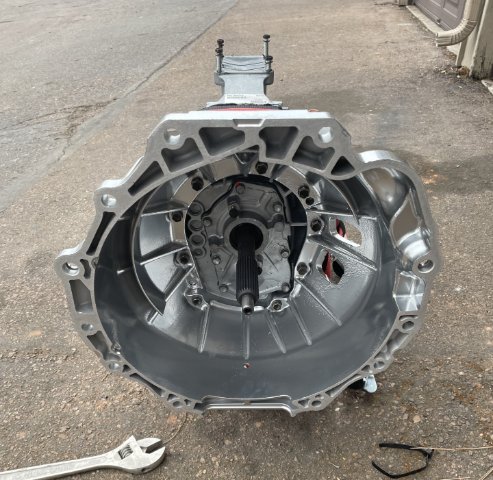
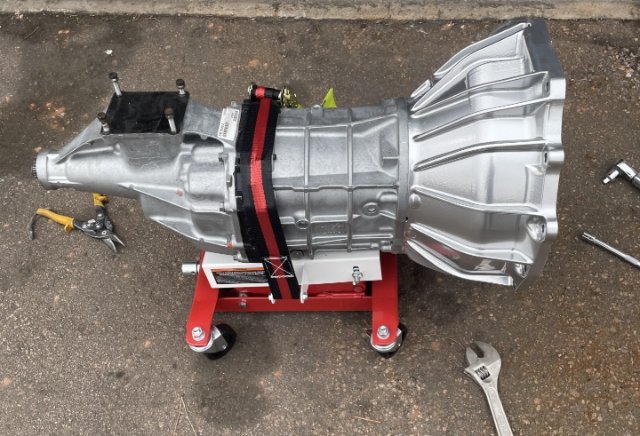
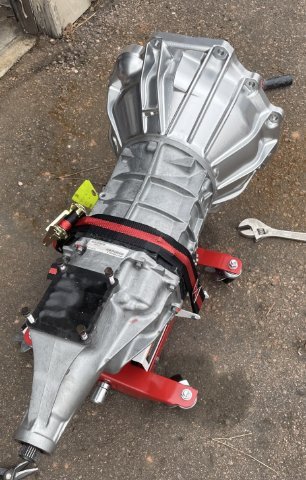
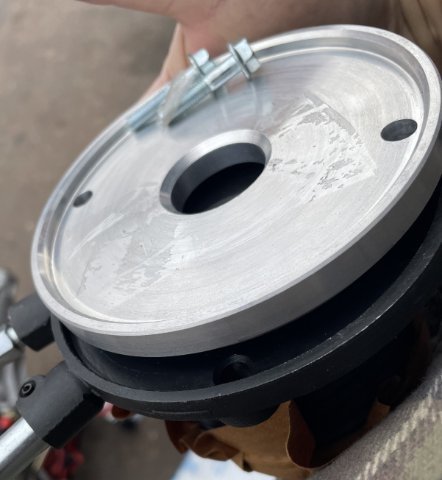
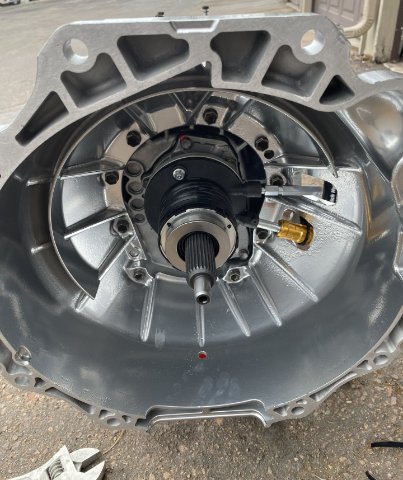
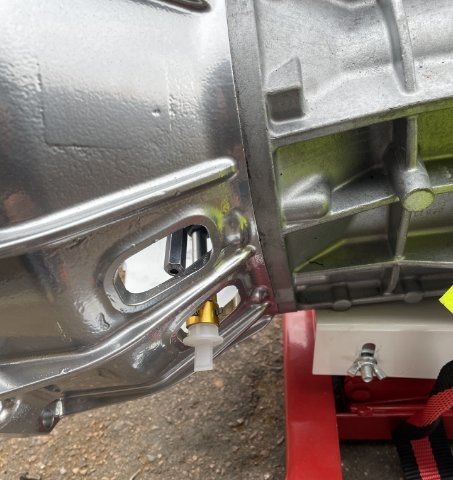
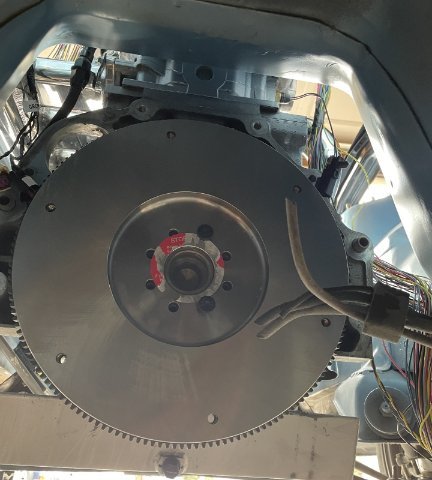
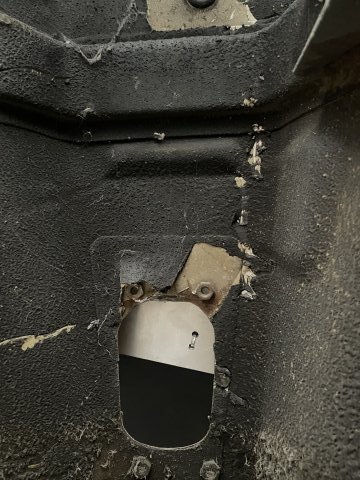
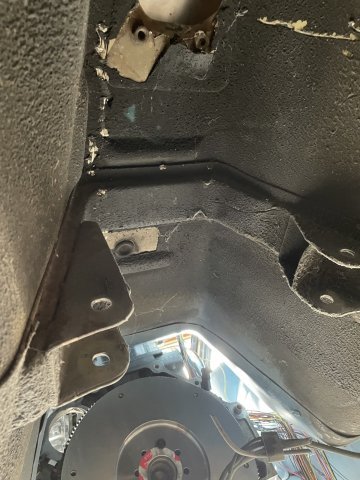
02-02-2026 UPDATE. Happy Groundhog Day! Well, it's time to get that transmission in! It is a completely remanufactured GM / Aisin AR5 for a 2003-2009 Chevy Colorado 2WD pickup. These are TOUGH and the bonus is, it bolts right up to the ATLAS engine without an adaptor plate. The 6 cylinders never came with a manual trans, and so I am doing this. I got my powder coated bellhousing on and torqued down, installed a new Hydraulic throw-out bearing with the spacer from Emtech, which is needed with their flywheel. Then I took the flywheel, which comes from Emtech, but are made for them by RAM and held it up and used a couple bolts to hold it on. 29.1 lbs., so pretty heavy, but the ridge in the center of the crank helped hold it up while I got the 2 bolts started. Thanks to RAM for putting a sticker on the flywheel that does NOT want to come off! next is install my Pilot bearing, torque the flywheel on at 70 lb/ft with the blue install fluid on the threads, which is considered necessary by ARP hardware for their fittings. I added 2 pics that show where I will have to make a new hole for my shifter, as this trans is 4-5 inches shorter, and a pic showing the factory trans mount ears in the trans tunnel I have to chop off and grind smooth. not bad for 2 hours work. BIG jump forward.
-
 Ahazel01 joined the community
 -
I sat in those tillet seats at PRI this year and was very impressed with the hold and comfort despite not looking like it would be either.
-
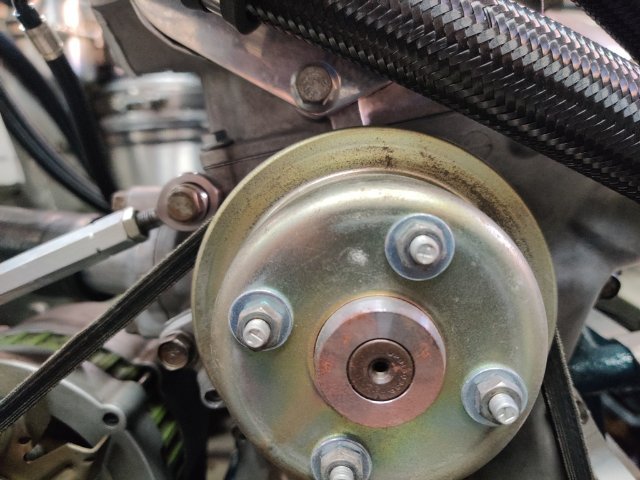
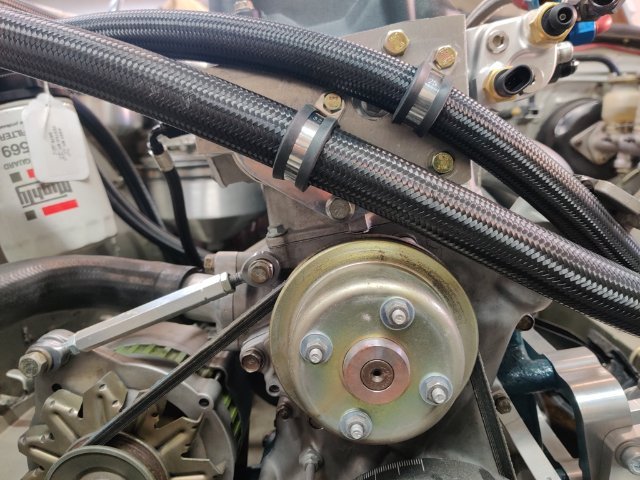
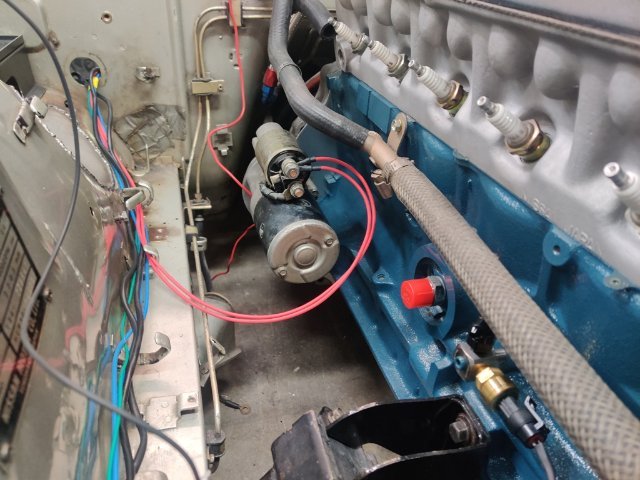
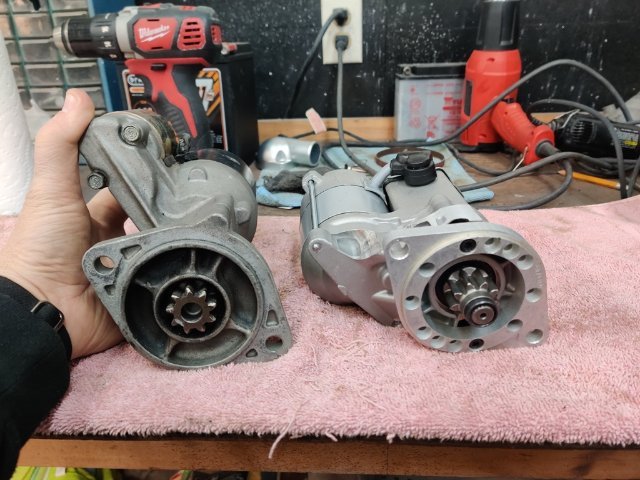
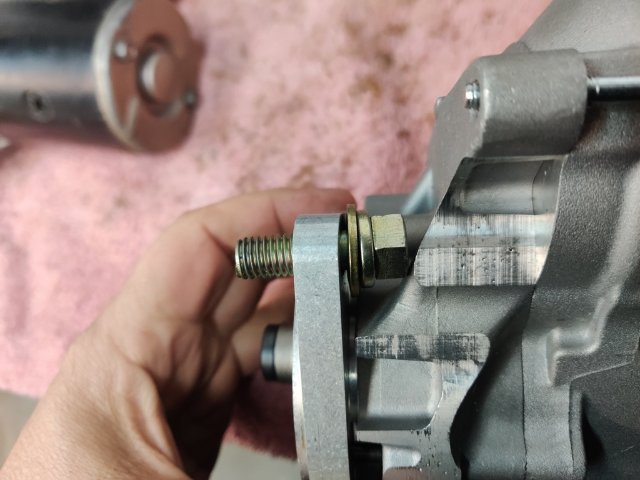
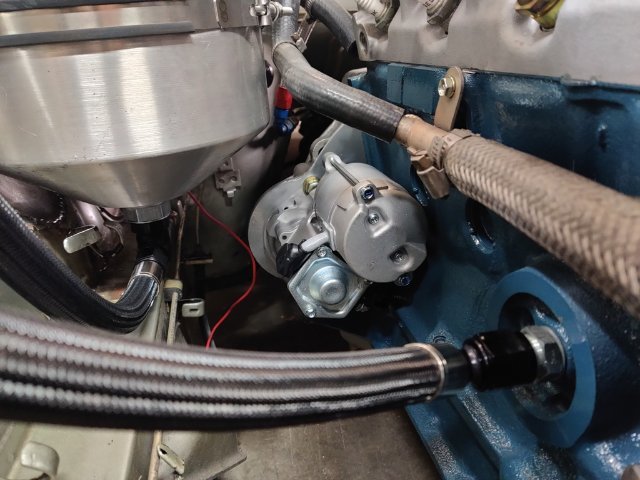
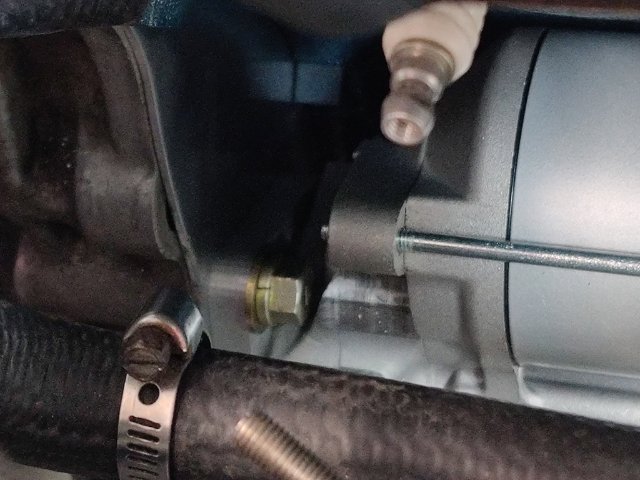
While working on modifying the engine compartment wiring harness, I bolted up the factory Nissan gear reduction starter that I have been using. While it cleared the dry sump oil tank, I was not happy with the location of the solenoid. It was quite close to the oil tank. I didn't recall it being that far away from the block. I looked for other versions of the gear reduction online, specifically hoping to find one with the solenoid located closer to the block. However, I was not able to find a factory one that was different. I was able to find this one however: https://www.classiccarperformance.com/products/datsun-240z-260z-280z-high-torque-starter?srsltid=AfmBOopbvBP16wSs5tvniJbqMb9CK2Kds63KS8RAjuCAWd7ZupU4Lbwm Because it features the ability to change the "clocking", I went ahead with buying one. After receiving it, I compared it to the one I already had: As you can see, the solenoid is in a very different location. In fact, out of the box, the solenoid bumped up against the block and the starter would not bolt up as it was delivered. I moved the mounting plate one hole location counter clockwise (referencing the picture above). In this position, the solenoid no longer interfered with the block. However, one of the mounting bolts had to be placed into position before re-attaching the mounting plate, as there was not clearance to put the bolt in after clocking to this position. That made installing the starter to the transmission MUCH more difficult. It was possible, however. Another issue that isn't great is that the positive terminal, where you bolt the positive battery cable, as well as some of the other items that have to be powered by this terminal (radiator fans), is on the underside of the solenoid, quite close to the engine block. It is just another inconvenience. So, I was able to achieve the overall objective - improving the clearance between the starter and the oil tank, but it was with some sacrifice of convenience in mounting and bolting up main power cables. In other news, I received the real oil lines that I had made. These are XRP Pro Plus hoses. I spent a lot of time and effort figuring out the routing, making "mock up" lines from pool hose, and waiting for them to be crimped and sent back to me. Yesterday and today, I worked on routing the two that cross just at the front of the engine. I have fabricated a plate out of 6061 T6 that mounts with some spacers at the front of the cylinder head. I have drilled holes and bolted rubber insulated P clamps to locate the lines precisely so that they do not rub against each other or anything else. The tank return line runs quite close to the water pump pulley. But, it is well located to eliminate interference. I also have little clearance between the studs in the water pump (holding the fan pulley one) and the Spal electric fans. Today, I removed the studs, and switched to the use of bolts instead to gain a bit more clearance there. It was super cold here on Saturday, and I wasn't feeling 100%, so not much time in the garage this weekend. In coming weeks, I plan to do some floor pan repairs. I will likely be pulling out the engine and transmission and differential... and mounting the car body on a rotisserie to facilitate that effort. I have a couple of patch panels (due to prior rust) that I'd like to redo, and I need to install mounts or anti-submarine straps (for the 6 point safety harnesses). Plus, I need to finish welding in the custom brackets I made to mount the Tillet carbon fiber seats.
-
Awesome! This validates what I was thinking, and also what ChatGPT said (lol) Thank you soo much.. I'm going through your thread as we speak.. Have a great day, Thank you.


-
Who's Online 1 Member, 0 Anonymous, 1113 Guests (See full list)