kj280z
-
Posts
539 -
Joined
-
Last visited
-
Days Won
1
Content Type
Profiles
Forums
Blogs
Events
Gallery
Downloads
Store
Everything posted by kj280z
-
JTR LSx Header Installation Questions...
kj280z replied to Cable's topic in Gen III & IV Chevy V8Z Tech Board
I'd like to see a picture of how much you had to bend them, would you mind posting one? I bought the LS2 plug wires and have not installed them yet - maybe i'll get out there and do it today -
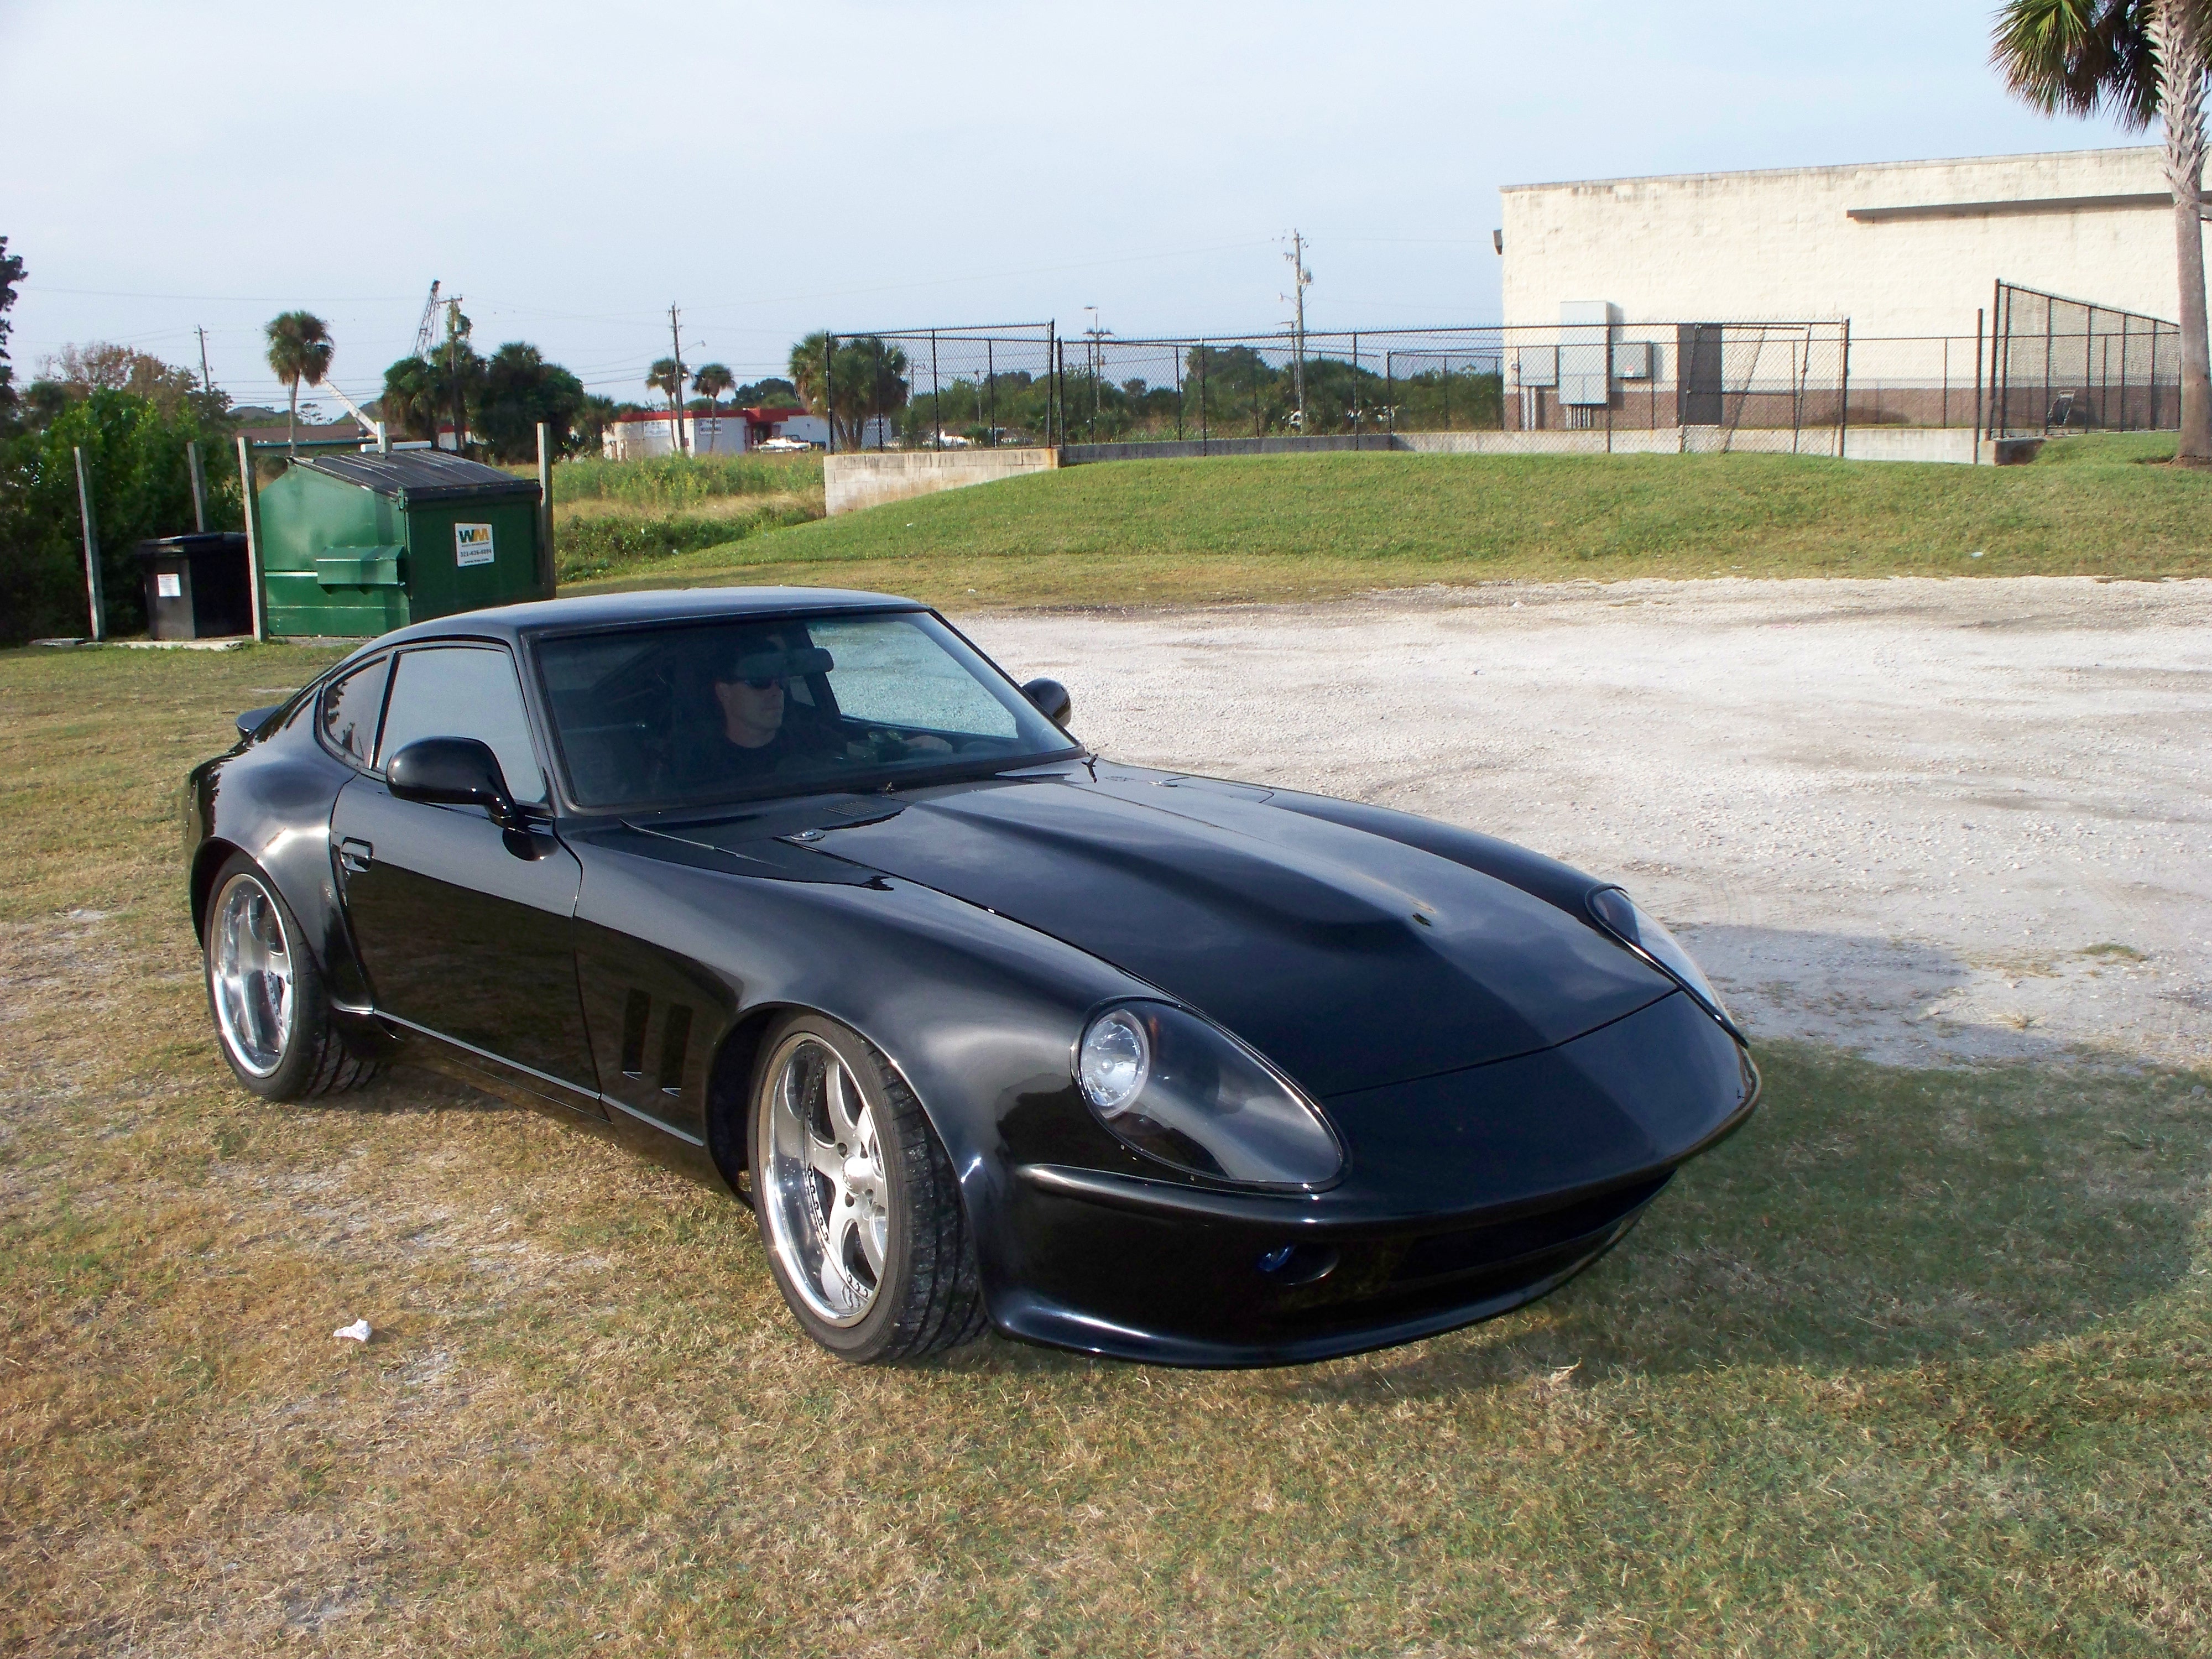
Here's a car that we recently finished with 19's

-
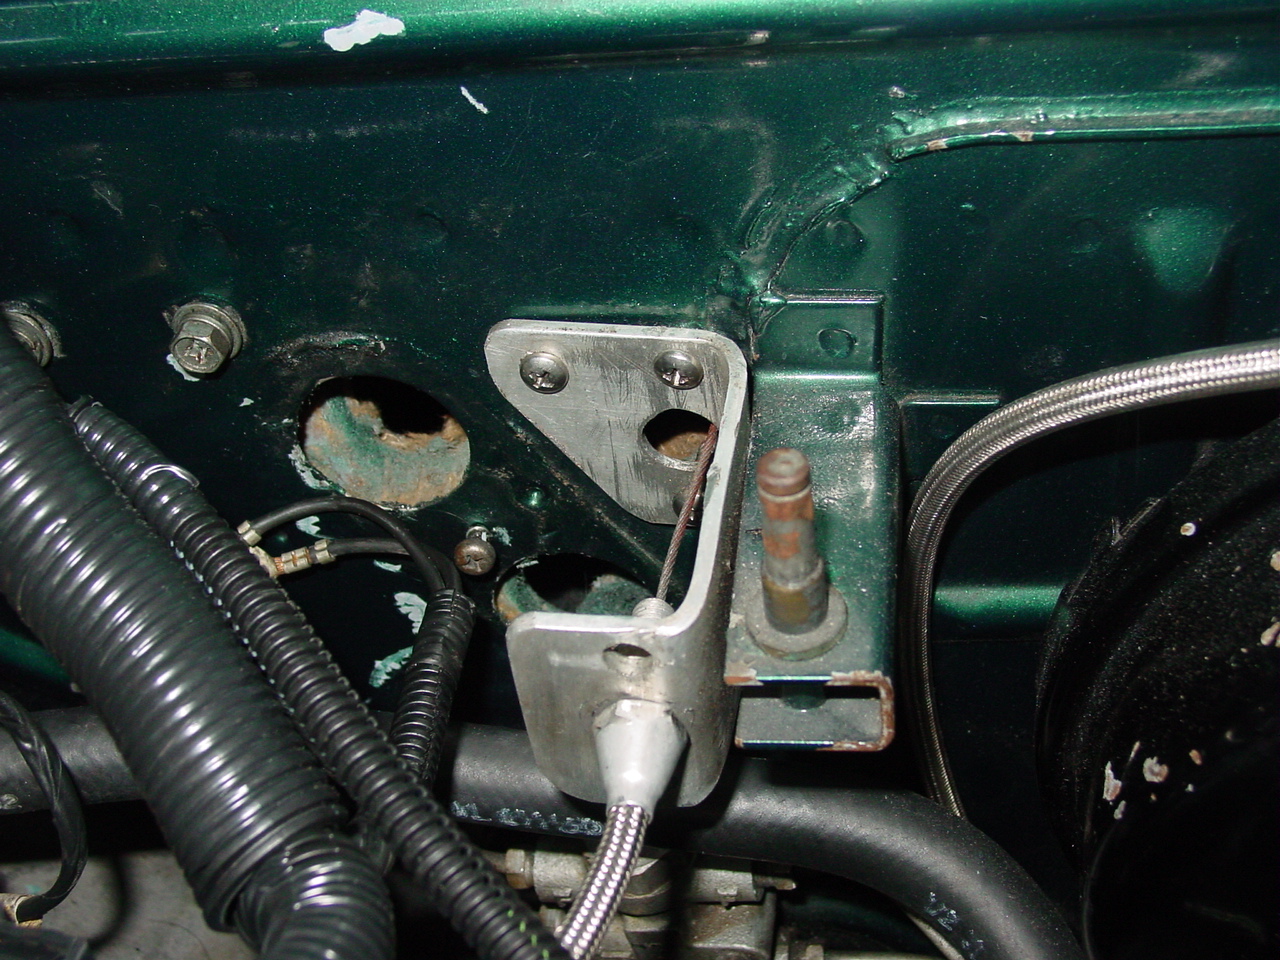
Why not eliminate the brackets altogether and just install the cable in the firewall? I'm probably going to convert to that method...
-
-
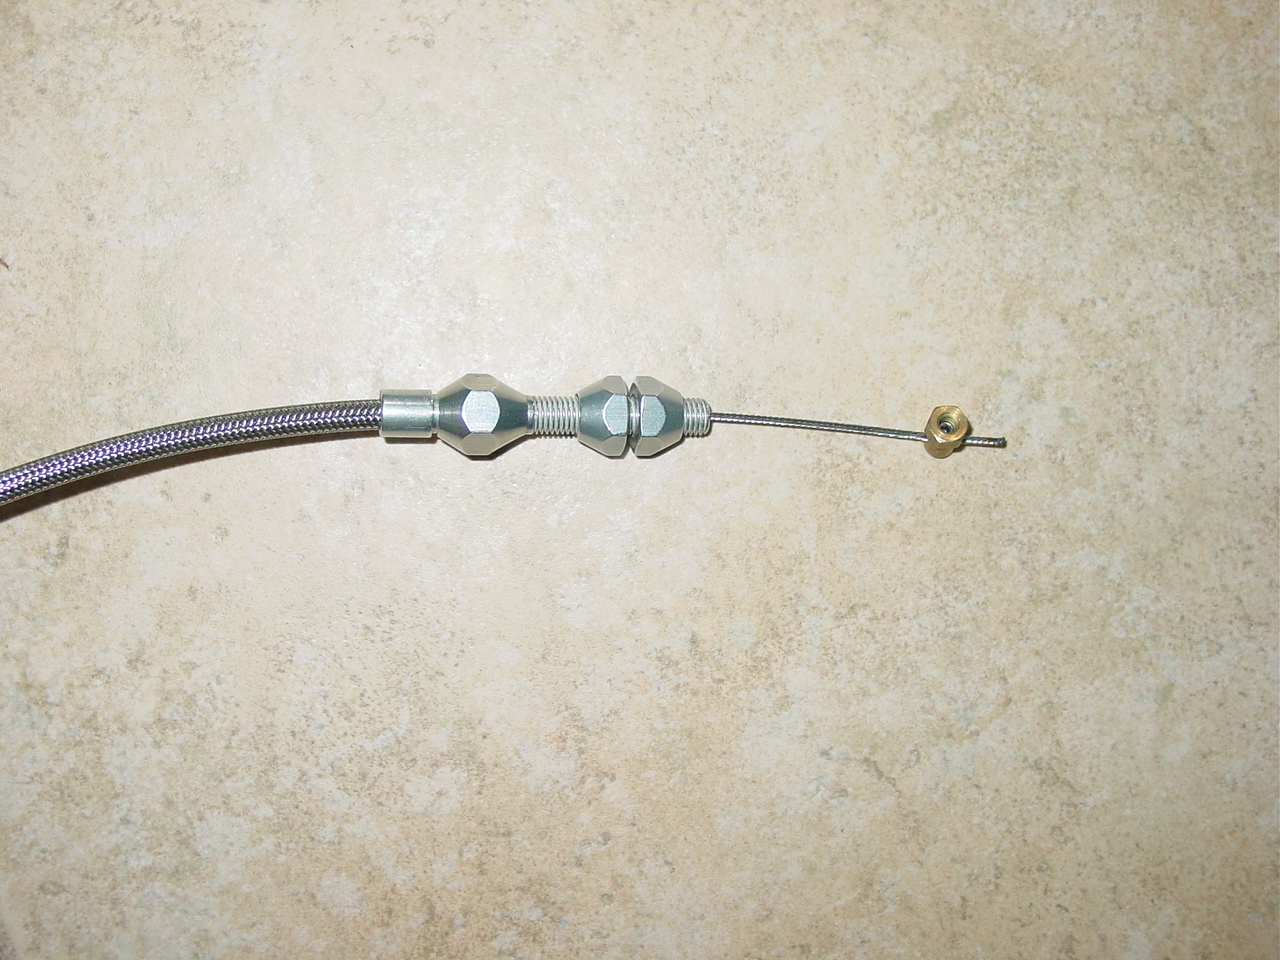
Janaka I have this throttle cable in hand - It has an end on it (pictured), but it requires a special tool to remove the small brass fitting that connects to the TB. Did yours come with a fitting like this? I am having trouble sliding the cable through the hole on the TB and it would be better to remove this piece, slide it through then reconnect, plus I want to shorten the cable for a custom fit so I have to remove that piece either way. I have also included a picture of my bracket that is fitted to the firewall in case it helps others with their ideas...
-
Here's what I did to resolve it... hope it works! If anyone thinks it'll be an issue please share your opinion
-
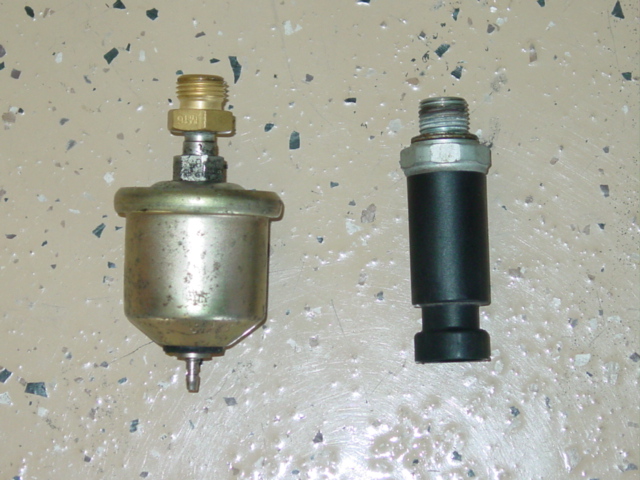
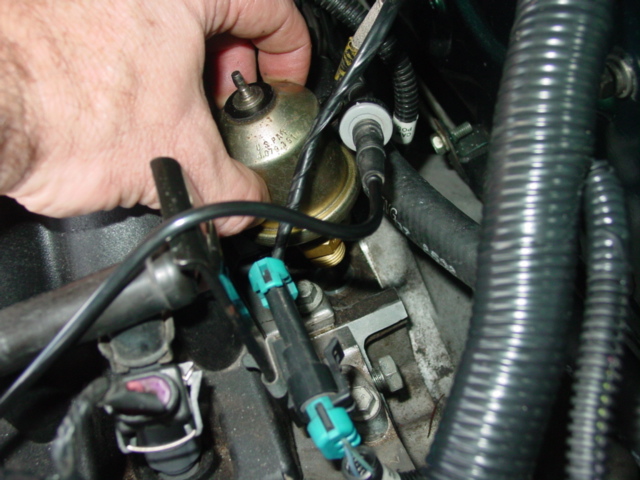
Hey all Please see the attached pictures. I am running the Sanderson shorty headers and as a result cannot use the JCI oil pressure sending conversion stuff included in John's kit that would mount the sender on the lower driver side on top of the oil filter assembly. Some have stated that they have instead mounted their Datsun oil pressure sending unit in place of the LS1 oil pressure sender on the top rear of the LS1 motor on the driver side (see pic) I bought the adapter (pictured) but there's no way to install the Datsun Oil Pressure switch there without putting another adapter on it with a 45 degree or 90 degree turn on it (I have yet to find one) Would like to hear some feedback on how others have done this... Maybe my intake manifold is slightly different? ect Another side question - has anyone tried to use the LS1 oil pressure sensor to drive the Datsun oil pressure gauge?
-
Links to the info are included in the classified ad - I believe it will work fine but verify with Abbott by calling them...
-
Since I'm convinced that I'm gonna like this GPS Speedo SO much along with all the other nifty features in it, I have decided to sell my Speedo converter and the stock Speedometer with the Speedhut gauge faces! I'm committed!! Anyway - check out the classifieds if you're interested in the other unit since some of you have already asked...
-
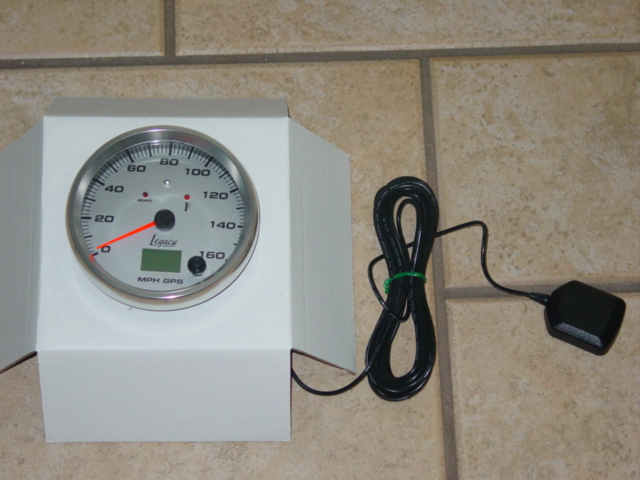
I got around to mounting the GPS Speedo in the bezel tonight and will install in the dash tomorrow - It will be about a week before I install the whole dash - depending on when my new heater core and other parts arrive, but here's a look... I might actually hook it up temporarily in my daily driver since it only requires power and ground and do some testing prior to final install in my Z. Also, notice the 3 lights that were added, Bright light indicator, Brake and Temp
-
JTR LSx Header Installation Questions...
kj280z replied to Cable's topic in Gen III & IV Chevy V8Z Tech Board
Anyone have a part number or source for these elusive plug wires? Everywhere I look they have a 45 degree bend vs a 90 degree -
My current Garmin GPS has a separate screen for speed and trip time, ect... I keep an eye on it all the time and it has never not matched my speedo in the car. Based on my conversations with the guys at speedhut related to all your concerns I am very confident this is going to be a great solution... And I'll never have to worry about changing the speedo gear in the tranny or any re-calibrations ever again! If it doesn't work in a tunnel (there aren't any around here anyway) who cares?!
-
Give them a call! They may exchange it for you - I have found them to be awesome in that regard...
-
Here is a picture of mine - You'll notice it is the newest from Speedhut in the larger 4.25" configuration. I think I'm one of the first to get one... I also had them customize it for a blue light in the center for the high beam indicator, the left red light is to replace the brake light, and I had them put in a temp light. It's about as simple an installation as you can imagine - power and ground to the gauge, running the GPS antenna (can't be stuck to a metal surface), then run the wires to the lights from the old guage (except for the custom wire for the temp light which I have wired separately). The greatest part about all of this is that their Tach is also a work of art and EASY to wire in replacement of any of the old Z tachs and the mounting on the old bezel is really easy. My tach also has custom lights for the blinkers and a check engine light which turns on off of my LS1 PCM... All the indiglo stuff matches the guage faces for my other guages so everything will match perfectly. I also had Speedhut change my Amp Meter face to a Volt Meter and I got a volt meter from a later 280z to replace my old gauge... I will post more pics when it's all done, but this whole setup certainly has my endorsement.
-
I have just received mine from Speedhut and will provide feedback as soon as it is installed
-
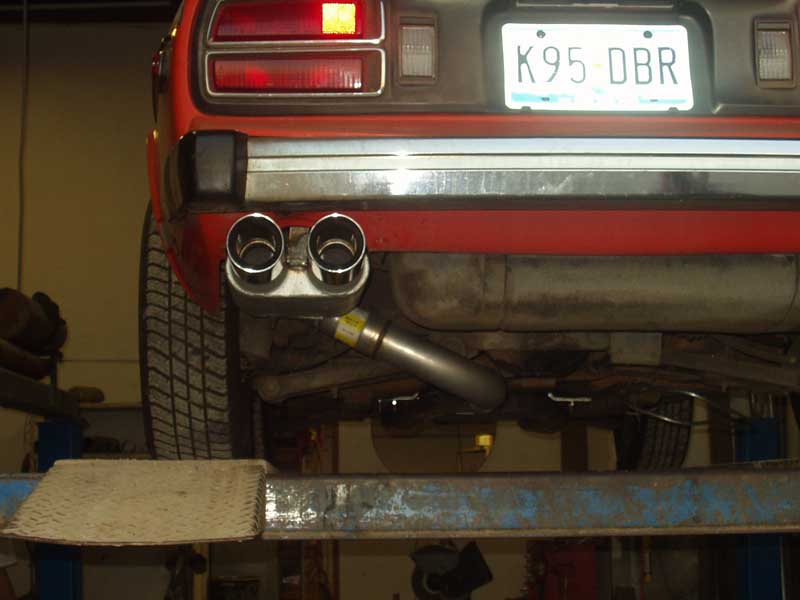
David, I did some measuring - On my 280z (which has a stock indentation for a resonator in the tranny tunnel) it will fit up high enough that it will not create any clearance issues (hopefully). I think the 240Z has less clearance in that spot. I will crawl under my 240Z later in the week to verify... those pics that I posted appear to all be 240's - I'm liking the idea of the x-pipe muffler since it accomplishes the same as a regular x-pipe but also will quiet things down. Now that I have that part settled i'm trying to figure out what to do with the rear muffler - basically a few choices - 1. buy a single muffler will dual inlets and a single 3" outlet and run both pipes to it 2. try to fit 2 mufflers in the stock location as previously discussed (still working on those possibilities but fitment will be tough) - may have to modify the spare tire well to pull it off 3. Another possibility which I haven't put much thought into is to run a dual in/out and lay it flat in the stock location like this: Some other pics to check out downloaded from who knows where pertaining to number 2:
-
I had a long conversation with the guys at Borla today - discussing my goals and trying to find a perfect solution... They suggested eliminating the X-Pipe and putting an X-Pipe muffler in it's place... Their part number is 400286 and the dimensions are 19" x 9 1/2" x 4" - they said it would work much better than dual resonators and not sacrifice flow... Also, they said I should consider going with 2 1/4" (equal to a 3" inch single pipe) pipes instead of 2 1/2" as many have said a 3" pipe after their y pipe configurations is supporting 405 rwhp in some cases - if 2 1/4" will work it will solve additional clearance issues and be quieter - the x-pipe muffler along with 2 1/4" pipes and the 2 Borla turbo mufflers in the back they say would definitely meet my goals Similar to this except the pipes would continue to the rear into 2 Borla turbo mufflers:
-
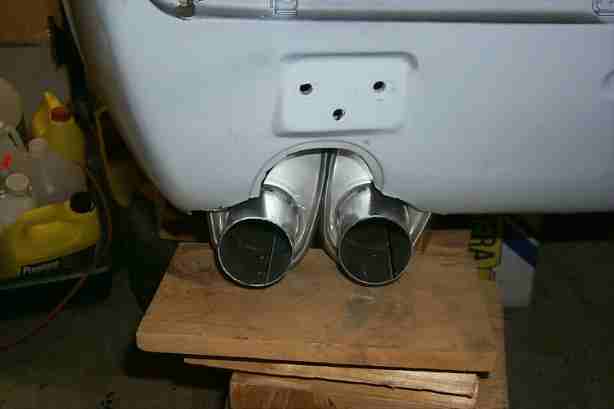
I posted this on a real old thread but thought I would add it here as well... Looking at the pics of these 2 mufflers side by side in the stock location (but this pic appears not to have the stock fuel tank), I'd like to "try" to fit 2 Borla mufflers in that same space with minimal mods... They seem much smaller than the ones in the picture - The ones I'm looking at are 13 1/4" x 4" x 9 1/2" and come in any combination of offset or centered inlet/outlet. I haven't found a post where anyone has tried 2 mufflers that small in that area and so far my rough measurements seem to indicate that it "might" work... I would be running dual 2 1/2" pipes and have a stock fuel tank... Would love to hear any feedback on whether it could be done and if a combination of mixing mufflers with different offsets would help with pipe routing and clearance
-
Tim - I think it's the icon the looks like the sun to the right of the search box... which takes you to this link - give it a shot, but it's not returning results as expected http://forums.hybridz.org/index.php?app=core&module=search&search_in=core
-
Reviving an old post - Looking at the pics of the 2 mufflers side by side in the stock location, I'd like to "try" to fit 2 Borla mufflers in that same space with minimal mods... They seem much smaller than the ones in the picture - The ones I'm looking at are 13 1/4" x 4" x 9 1/2" and come in any combination of offset or centered inlet/outlet. I haven't found a post where anyone has tried 2 mufflers that small in that area and so far my rough measurements seem to indicate that it "might" work... I would be running dual 2 1/2" pipes and have a stock fuel tank... Would love to hear any feedback on whether it could be done and if a combination of mixing mufflers with different offsets would help with pipe routing and clearance
-
Let's try to get those pics to show up in this thread: I wonder if I could do the same and enlarge the rear valance to allow dual pipes to exit side by side and squeeze 2 mufflers in the stock location? If I can pull that off I "think" it would work real nice - thoughts comments/ideas/feedback?
-
Hey David! I REALLY plan on driving mine everyday, so I want it to be real quiet... I'm thinking I might try running 2.5 inch pipes off the headers into a X pipe then 2.5" pipes back to 2 Borla mufflers if I can fit them side by side on the drivers side in the stock location - These mufflers have proven to be the best flowing and quietest that I can find - http://www.borla.com...x?cat=2&type=43 If that is too loud I can add resonators (hopefully) Would love to hear thoughts/feedback/opinions on this option... Ken
-
Zgeezer - I'm about it do the final install on those headers so I will check out the tool you're talking about (can you post a pic yet?) Also, do you have info on the adapter for the oil pressure sensor relocation to the stock GM location (top rear drivers side)
-
Well, the answer was so obvious I feel silly... Take all the old lights out of the guages, find the beginning of the daisy chain for power, and power up the speedhut transformer off of the former wires that went to one of the lights... easy!
-
I have just finished installing these gauge faces... I had Speedhut send me an identical Tach (font, face color and indigo) so that it looks like a factory unit... It has shift lights in it and I also had them add a check engine light (I have an LS1 so it's one wire to the PCM) and also they added LEDs for the blinkers! Looks awesome! I will post pics soon.... Has anyone wired this into the stock dimmer? From what I understand, these lights will dim if wired that way... I'd love to hear how you guys wired it into the dimmer if you've done that, otherwise, let's figure it out together! I will be starting tomorrow on the wiring