jkgts1
-
Posts
208 -
Joined
-
Last visited
Content Type
Profiles
Forums
Blogs
Events
Gallery
Downloads
Store
Everything posted by jkgts1
-
Don't smack the bolt too much if it doesnt move, it will just mess the bolt up. I have a press at home and I just pressed one side out, but the other side I had to drill out.
-
When I did mine I did 1 inch long welds every 2 inches, of course alternating areas to keep heat down.
-
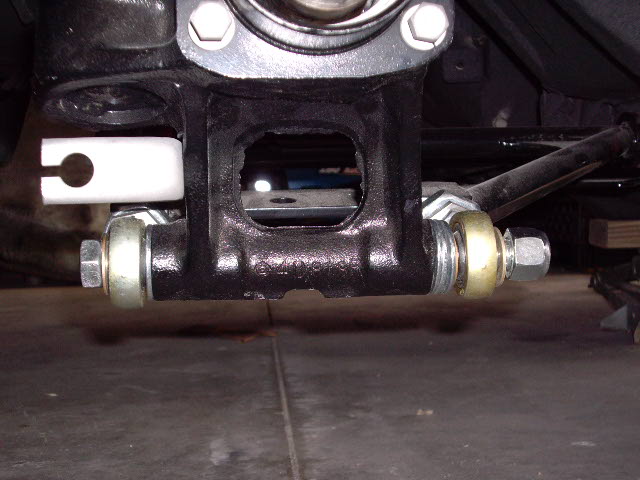
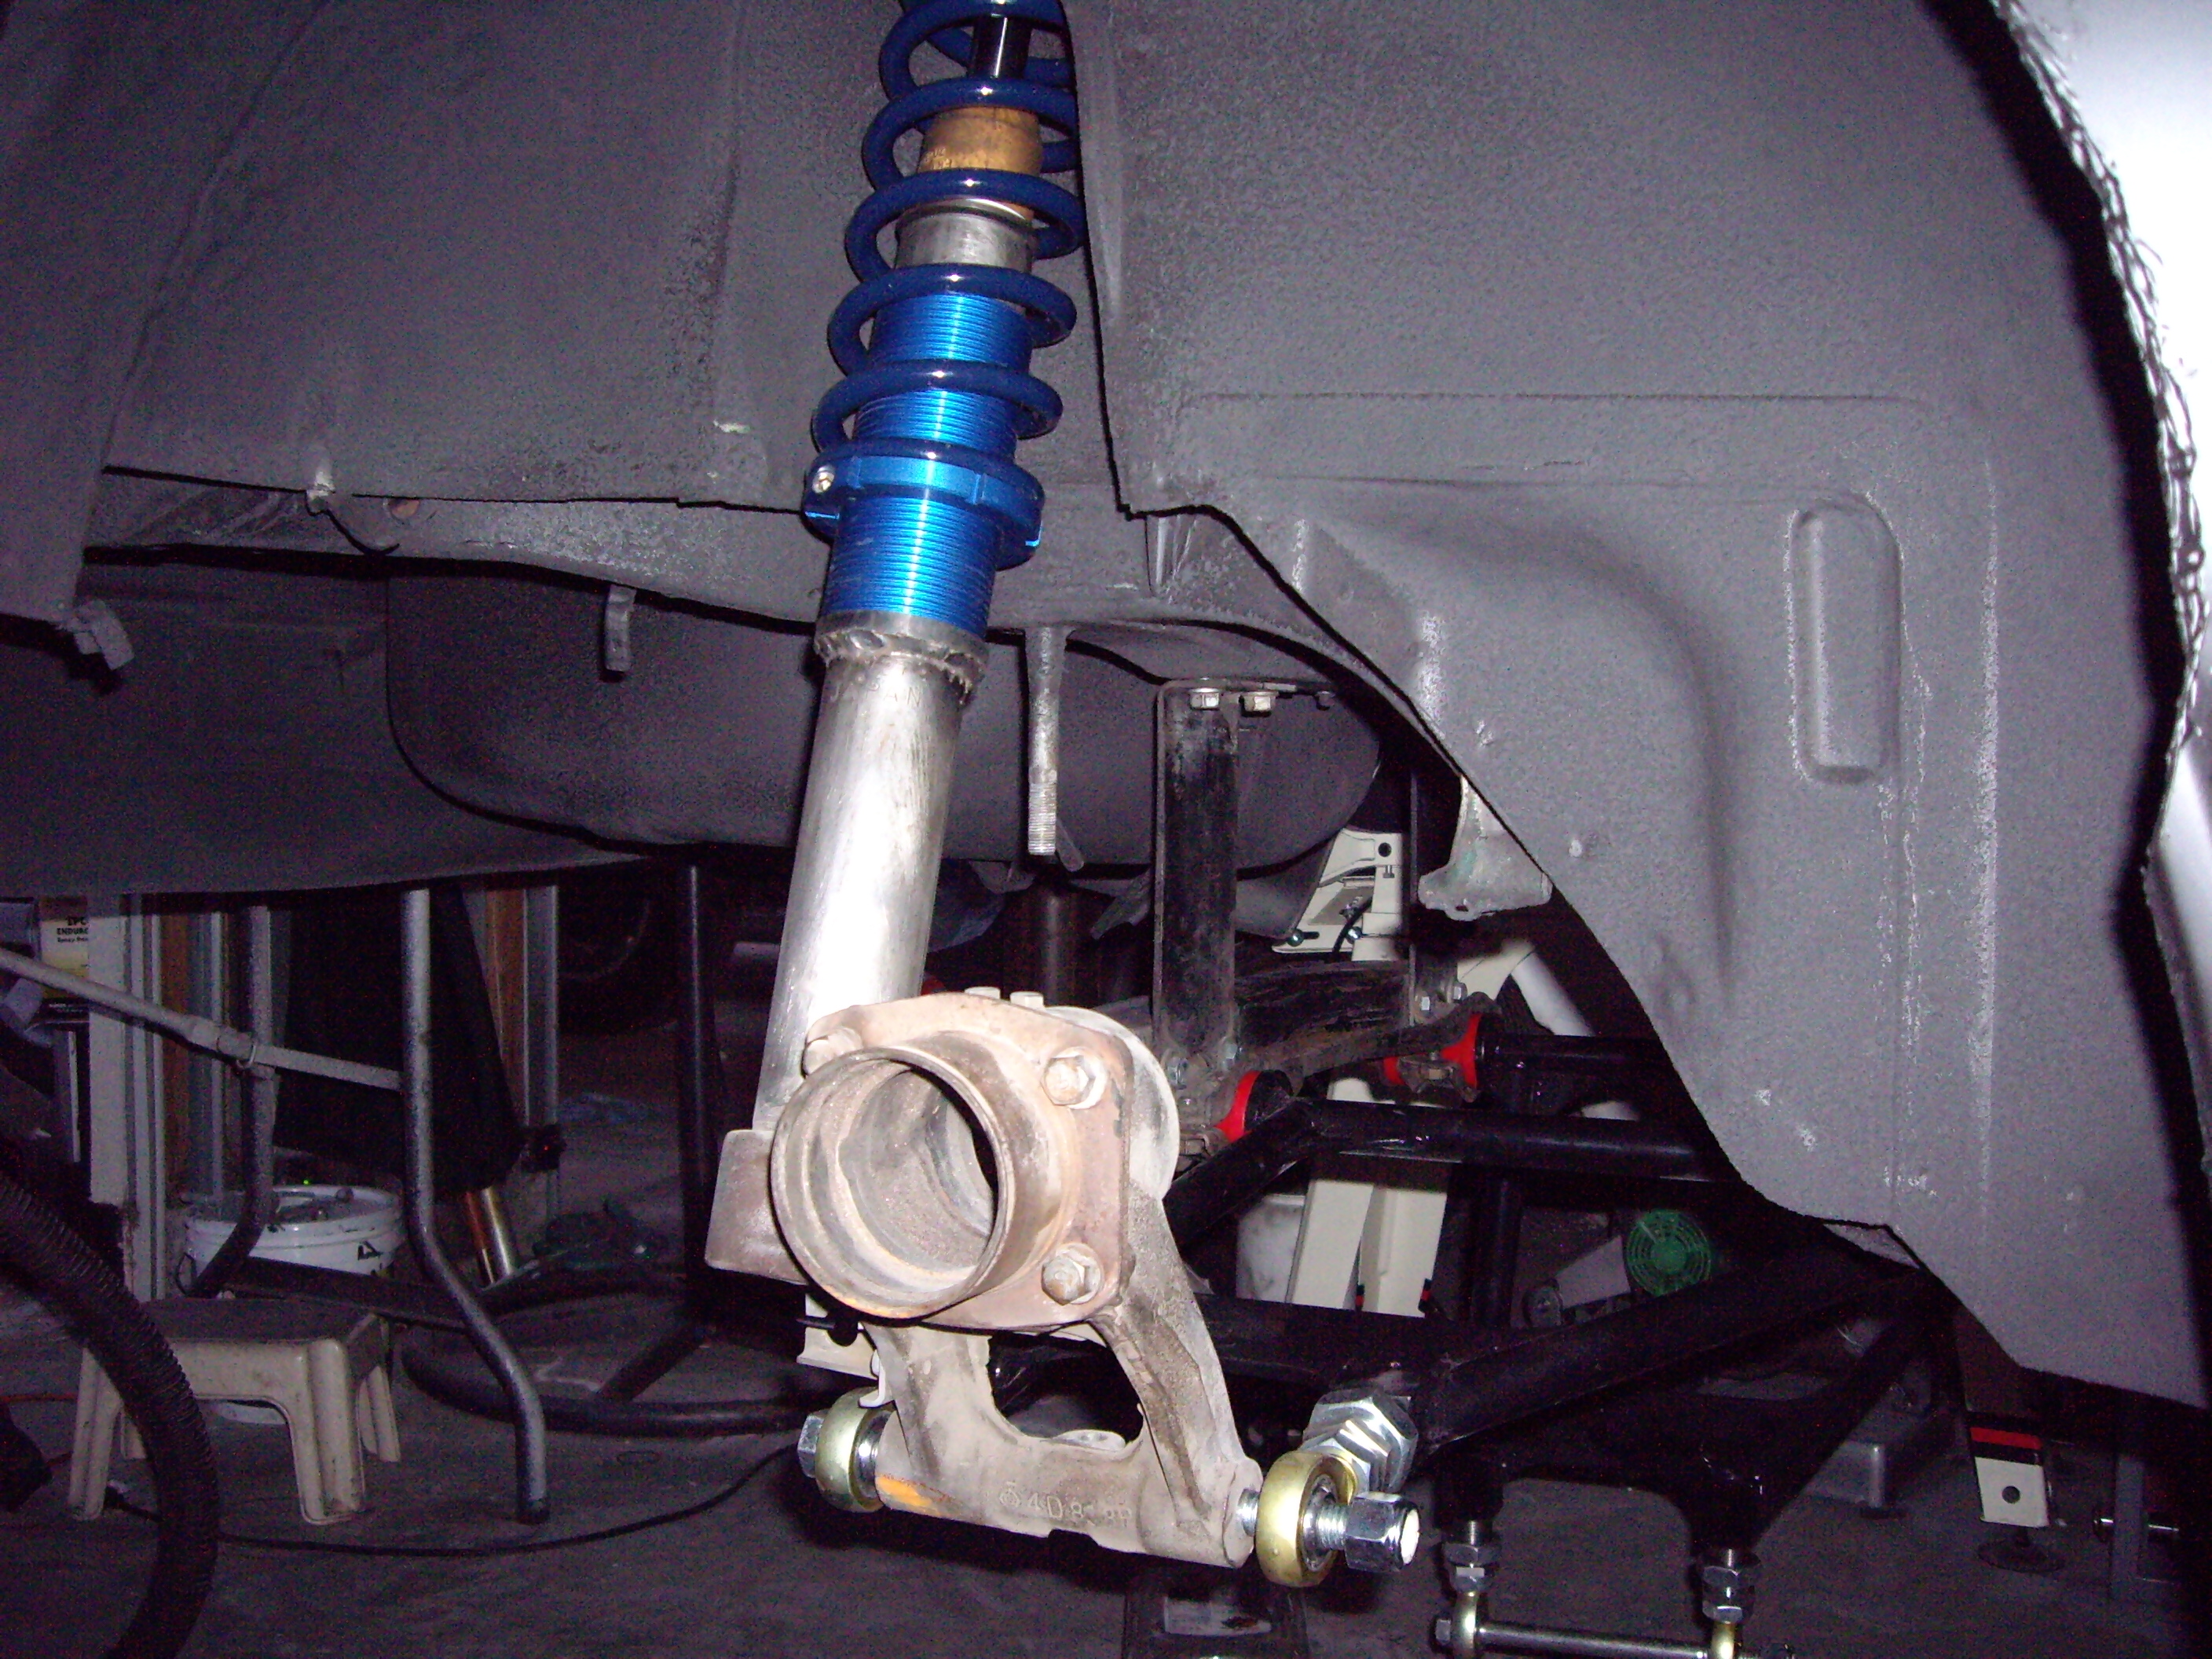
Hi, for those that are more knowledgable than me, probably most of you, I am installing adjustable rear control arms from T3 (Gabe). I noticed that there is quite a bit of space at the spindle pin pivot point. The arms cam with a set of washers, but even with all the washers used I still have alot of forward and aft movement. Should I just make some spacers to take up the space? It is kind of hard to see in the pic but there is at least a 1/4 inch that is not being filled by the washers. Here is a picture.

-
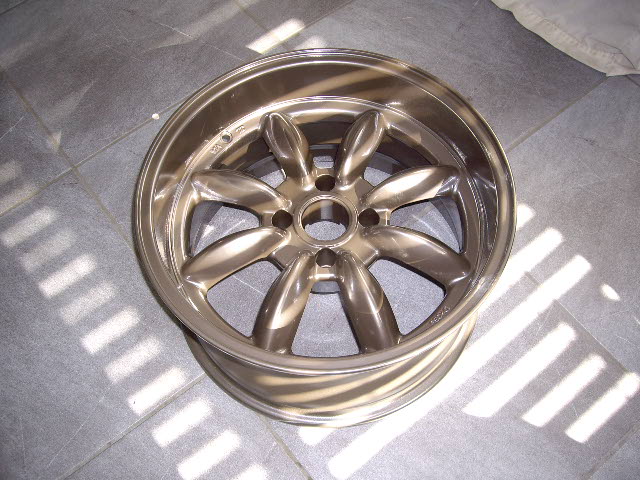
Got my wheels back from powdercoat, metallic bronze with a matte clear, but the clear looks a bit glossy. Oh well good enough. Now I need to get these mounted with tires.
-
No I haven't tried to touch it up yet. But this is the 5th practice flare I have made, being extra carefull each time, but they all look the same. I just would hate to plumb everything and have everything leak, that would suck. Is there really a way to test these without it being all hooked up? Probably not huh. Thanks
-
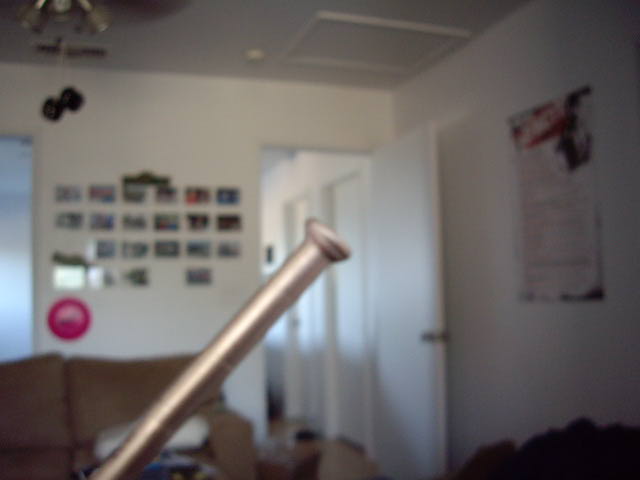
Here is another pic with the fitting against the flare.
-
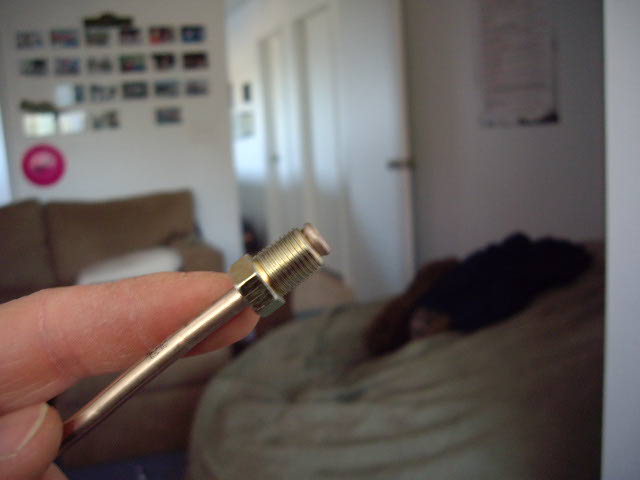
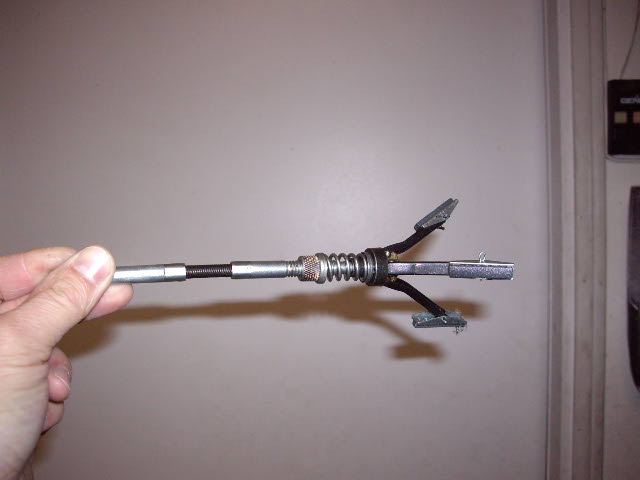
Okay, so I'm just going to plumb everything as stock and I'll just run the adjustable proportioning valve inline on the way back to the rear brakes. I do have another question. I have an easwood flaring tool, which is supposed to be pretty good. This is what the flare looks like when I finish, image below. There is a little ridge on the back of the flare, do you think this will cause leaks? The ridge is the little shadow on the flare. It is very hard to get my camera to focus on something this small. I am using Cunifer alloy brake line, and I put a little anti-seize before flaring like the instructions say. I cut the tubing with typical mini tube cutter, got rid of inside and outside burrs. Any thoughts?
-
You can get a wide variety of painless wire harnesses at summitracing or jegs.
-
Cool thanks for the replies. Not quite there yet just looking.
-
Hello, I'm looking at exhaust manifolds for the 2jzgte. I kind of like the manifolds that put two turbos slanted forward, parallel to each other. I know people usually do the single big turbos for this motor but I don't want the lag, so I want to stick with 2 smaller turbos. The stock setup seams very cluttered, and you have to take everything off to get to one thing. Does anyone feel me on this? Anyway I was wondering where to get these manifolds? All the ones I see are for single turbo setups. Any advice? Thanks
-
PM sent
-
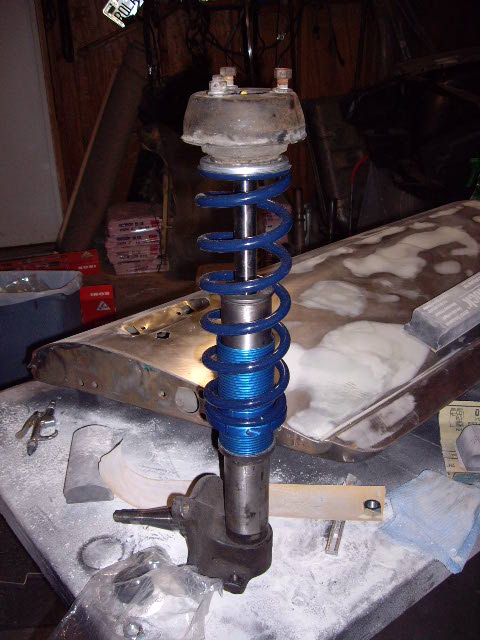
I don't think you need the factory spring seat, just the insolator, if you are not using some kind of camber plate. This is what I did with mine.
-
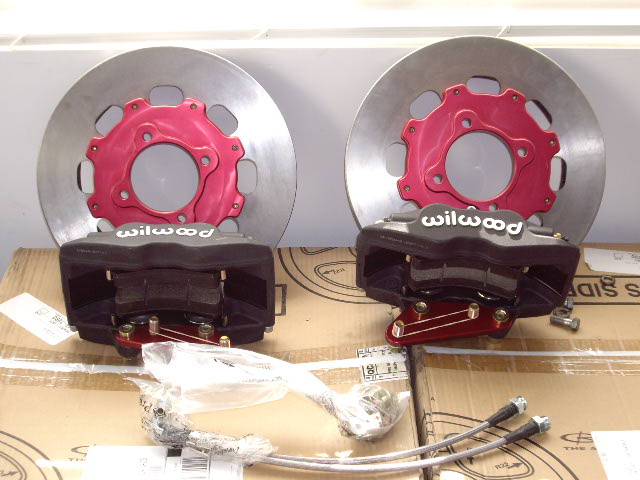
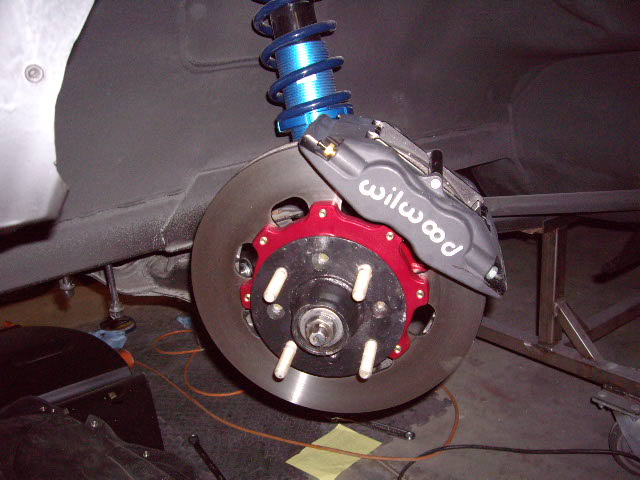
Front brakes are mounted withe new wheel bearings next is to plumb the brake lines. I tried using the standard flaring tools, to double flare the lines but they turned out like crap. I am even using Fedhill lines which are supposed to be easier to flare. So, I'm getting a better flaring tool. Hopefully this will work and not leak. Seems like I spend just as much money on tools as I do on parts.
-
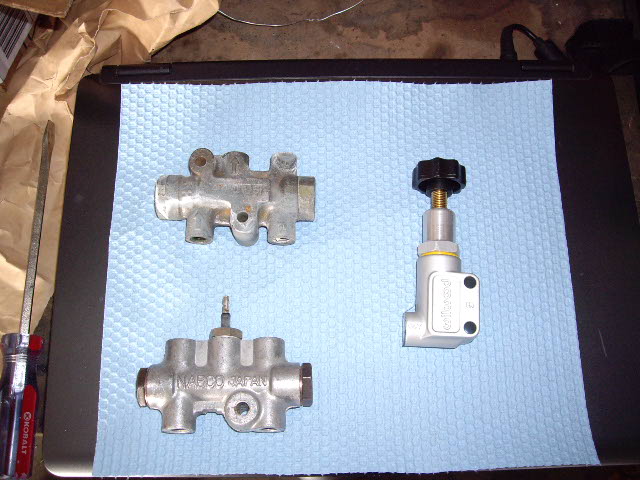
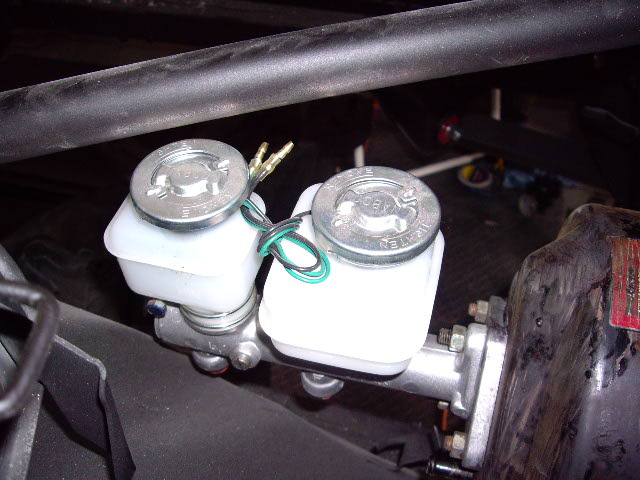
Hey guys I'm at the point of plumbing the brake system and had some questions. I am running a 15/16" master with disc brakes front and rear, and planning on using a Wilwood adjustable proportioning valve. #1 do I need to run the stock brake light indicator, I think that is what the manual calls it, I guess it just tells you when your fluid is low? Its the second item on the left in the picture. #2 the new master has two wires coming from the resevoir caps, are these for the indicator lights? #3 I don't need to reinstall the stock PV if I am using the adjustable Wilwood, do I?
-
Thanks
-
I am going to be running Arizona Z front brakes (4 pot), 240sx rear discs, and 15/16 master cylinder on my 260z. Will 3/16 hard lines be too small? If so, what size is good? Thanks
-
Well picked this up on friday for $80 and started to powercoat.
-
Do you mean in your area or on this board? I know there are some inexpensive aluminum ones on ebay. A member here bought one and said he was satisfied with it.
-
Metalmeet is a great site with a lot of info, but they are more likely to give you advise on making your own out of metal, which is difficult without experience and tools. There was a member on here, can't remember his name though, that had some guy custom make a set for him for cheap. Try searching "fender flares" and see if it comes up. I wanted to do the metal flares too, but just discouraged and bought CF ones. Good luck.
-
How did you get the wheels in Bronze? I bought the RB's and the guy sayed they did not come in Bronze. Did they offer different colors for RBR's and RB's? Thanks
-
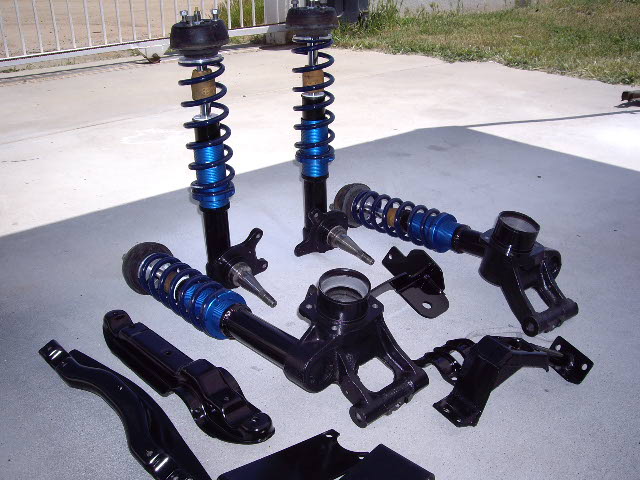
Well threw on the control arms and coilovers on this weekend. I am just fitting them on to see how it is going to sit. I still have to powdercoat the strut housings.
-
Hi, I am looking for rear driver's side strut/ spindle assembly for my early 260z. Thanks
-
What tool for honing 240Z strut tubes?
jkgts1 replied to burninator's topic in Brakes, Wheels, Suspension and Chassis
It is the 1 1/8" one. It pretty much kept me from taking the paint of the cartridge, but it makes the inside nice and smooth. -
What tool for honing 240Z strut tubes?
jkgts1 replied to burninator's topic in Brakes, Wheels, Suspension and Chassis
Hey bro I just got done doing this. I used a brake cylinder hone. It is like a engine block piston hone, three arms with stones on the end, except it is smaller and will fit in the strut tube. I got it from harborfreight. It just goes on a drill. Depending on how much material you need to take off, it should not take long. Took me about 3 min of work. The stones do wear out and HF sells replacement stones too. Good luck.
-
I bought the wide Carbon fiber ZG flares frome Zforce (Justin) about a year ago. They were not excelent quality or anything, but good enough for my purposes. I live near him so I just picked them up no issues. You just have to buy from him when he has it in hand or else you will wait the better part of your life for the part. Anyway don't want to get into that discussion again, but if you are interested in what they look like, I have pictures of them in the projects forum.